
DIY: Best Route for Amp Power


Thread Starter
Registered User
Joined: Oct 2003
Posts: 298
Likes: 2
From: Houston, TX
Best Route for Power
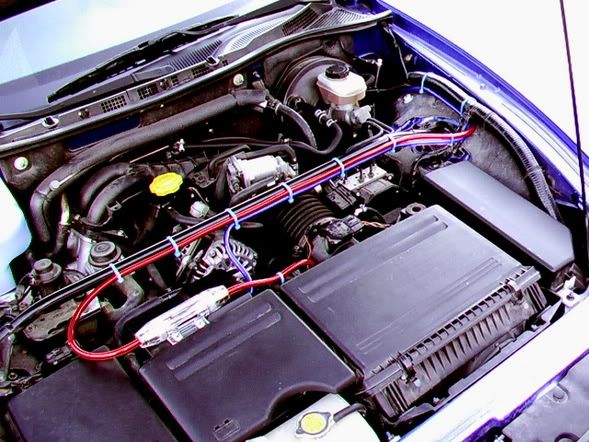
Rotarygod and I feel we have determined the most prime route for amplifier power wire in the RX8. I�m attaching images of how we went about it. This is a 4 GA setup running 1000 watts and so far it sounds great. This route is perfect for a 17-foot wiring kit or longer.
If you would like to follow the entire audio build from start to finish, you can visit this thread .
eXe
If you would like to follow the entire audio build from start to finish, you can visit this thread .
eXe
Last edited by eXentric; Dec 8, 2003 at 04:01 PM.
Thread Starter
Registered User
Joined: Oct 2003
Posts: 298
Likes: 2
From: Houston, TX
The place we chose is behind the washer fluid reservoir where the steering column would be for European vehicles. I don�t know if the other side could be used for a European car, but I would assume so. The A/C unit is directly on the other side of the firewall, but there is still plenty of room. Just be extra cautious when drilling this hole.
Thread Starter
Registered User
Joined: Oct 2003
Posts: 298
Likes: 2
From: Houston, TX
The wire must go into the car at a downward angle away from the driver. We had a pull rod inserted in the angle we needed and you can see it in the picture coming down at the firewall.
Thread Starter
Registered User
Joined: Oct 2003
Posts: 298
Likes: 2
From: Houston, TX
Next was the remote wire. We chose the easy way out here and simply tapped onto the back side of the 12V accessory plug. This plug is switched with the ignition.
There are two sets of wires here. One is for the amp, the other is for my neon kit (see the thread link at the beginning of this thread).
As a side note here, we did try and find any kind of trigger on the stock amplifier. It doesn't appear that there is one. All voltages are constant, so we're assuming that the amp is a signal-sensing one.
Last edited by eXentric; Dec 8, 2003 at 03:53 PM.

Hyper Space RX-8 _,.-^'`
Joined: Aug 2003
Posts: 529
Likes: 0
From: Motor City
Is it just how this looks, but did you run the ground for the amp back to the chassis in the trunk, or the Bose ground line?
I would tend to go for the two line approach to bring power and ground together to the trunk. In fact, I've already got some 4-gauge wire ready for this. I just need to find a good time to do it.
When I drill through the firewall, I'd probably also want to use a fairly large size hole, and use a rubber grommet to prevent the wire from chafing on the wire (Since I don't have reinforced braided wire).
Looks very good, That's helpful info for when I wire up my system.
OverLOAD

Registered
Joined: Apr 2003
Posts: 9,134
Likes: 26
From: Houston
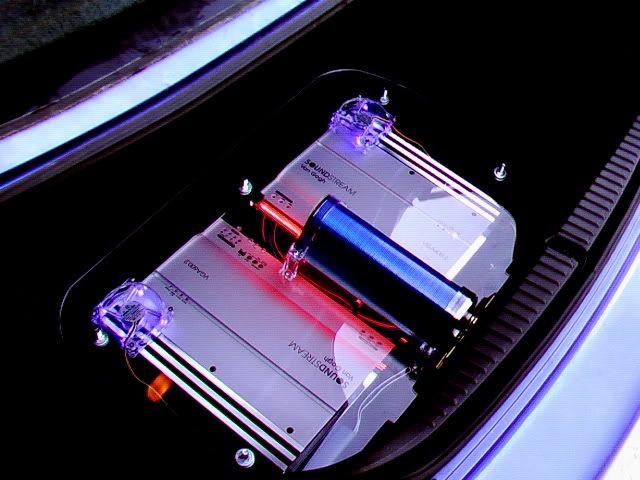
I've run a power and ground on my competition cars in the past. There is no such thing as overkill but it isn't really needed as long as you get a good ground in the trunk. Pick a good bolt to the chassis. Do not attach ground to the Bose ground or the rear deck. It will be very hard to run both wires exactly as I did since there were spots under the frame rail that one barely fit. You can always drill small holes through them too and use more grommets. I've done that too. Just run the wires near the edge. You don't want to see bulges in the carpet where the wires are run. If you decide to do it, drill 2 holes and use 2 grommets. You'll get a much tighter seal from moisture and it will just look more professional. I don't want to drill any larger than possible.
 !
!

Attracts tree branches
Joined: Jun 2004
Posts: 5,940
Likes: 3
one run 4 gauge line in the wiring bundle (there is room...just open up those white plastic rectangular holders)...
if you are running two 4 gauge then run the other under the rubber molding of the doorframe...kind of hidden...this allow room for the plastic clips with lock into little metal slits which are located next to the wiring bundles below the inner scuff plate
I'll take some pics with the wiring installed...that is pre install
and I'm running the wire to the trunk

Xbox hacker
Joined: Aug 2005
Posts: 48
Likes: 1
From: Austin, TX
I was too lazy to drill a hole in the firewall, I found a nice place to run my two 4 gauge wires though: where the main wiring bundle goes through!!!
On the driver's side, next to the brake master cylinder, there is a large wiring bundle that runs through the firewall, with an even larger rubber grommit.
Up under the dash, you can push this grommit out of it's hole, into the engine compartment.
Then, with a sharp knife, cut a slit along the top of the grommit to allow your power cables to slip through. You want the cut to be high enough that it won't interfere with the main bundle going through there, but not so high that the power cables will chafe on the sharp edge of the firewall.
Then, you can start feeding your cable through (it's really tough it helps if you lubricate the cables with grease or something). Then run the cables behind the fuse panel, and under the door trim piece, behind the back seat, into the trunk.
Once you have all the cable fed through, pop the grommit back into place.
Sorry I don't have a close-up of the firewall area but you get the idea:
Xbox hacker
Joined: Aug 2005
Posts: 48
Likes: 1
From: Austin, TX
I just used some high quality gold plated ring terminals to connect the power cables to the battery, with the stock blocks. I had some upgraded ones, but it would've been a lot of work to get them to fit since the ring terminals for the stock power hookups were too wide to fit on the new blocks. I had to remove a washer on each battery block to get another ring terminal on there with enough thread to still tighten the nut and not risk stripping the threads.

I love red
Joined: Dec 2005
Posts: 25
Likes: 0
From: Aurora, Illinois
Remote wire help
Originally Posted by eXentric
Rotarygod and I feel we have determined the most prime route for amplifier power wire in the RX8. I�m attaching images of how we went about it. This is a 4 GA setup running 1000 watts and so far it sounds great. This route is perfect for a 17-foot wiring kit or longer.
If you would like to follow the entire audio build from start to finish, you can visit this thread .
eXe
If you would like to follow the entire audio build from start to finish, you can visit this thread .
eXe
I am inquiring about the thread titled, "DIY: Best Route for Amp Power."
You stated that:
"We chose the easy way out here and simply tapped onto the back side of the 12V accessory plug. This plug is switched with the ignition."
Now, theres a black and a greenish wire back there, which of the two did you tap into??? Also, did the neon kit wiring go to the same connection as the remote wire?
I also cannot access the build thread at the top?
Thanks,
Redmaz8
(evolv chicago)

I used an easier way thru the firewall - about six inches inboard from where you drilled is a big grommet for the heater tubes.
A slit in the rubber, a coathanger thru it, then pull the wire thru - no drilling.
Don't even need to unbolt the washer bottle!
S
A slit in the rubber, a coathanger thru it, then pull the wire thru - no drilling.
Don't even need to unbolt the washer bottle!
S