When you click on links to various merchants on this site and make a purchase, this can result in this site earning a commission. Affiliate programs and affiliations include, but are not limited to, the eBay Partner Network.
Yup so... mystery solved.... hate saying this but i was wrong. This builder is one to avoid for sure. DO NOT goto SMGracing in warwick ri for you 8 needs. He reused side seals and corner seals from the motor. Before the process, i asked if he used precut side seals or handcut, he said he hand cuts them. Thats not what he said this time around.... all said and done. FORGET this guy and his terrible business model. I'm not bothering with him or his services ANY longer, when the car does have serious hot start problems, i will get it rebuilt.... Maybe next time i can afford a PR build! hahaha. Oh and pictures of the finished gauges will be up soon!!
Sucks man, I'm not glad I was right, the rotary world is full of scum bag vendors for some reason. Make sure you post up in any local rotary FB groups, etc. Sorry for the bad experience.
Don't feel too discouraged. 2k miles after my rebuild (by a top rotary rebuild) my engine was failing according to Mazda's standards. It was at 90psi or 5.9s-6.3s per rotor face. 5k miles after the rebuild it is now at 7.1-7.3s per rotor face and over 100psi (it improved greatly as time allowed it to wear the new parts in together). IT IS NORMAL to see "lower than optimal" compression on a rebuild that utilizes used housings. Please don't give the builder a bad name yet. It takes time for the rebuild to set. Unless you are having real world performance issues, I would NOT worry about this at all. Also many builders will reuse some parts that are in good enough shape to reuse, this is also not abnormal (unless you paid for/specified otherwise).
Seriously, drive the car a few thousand miles and do the comp test again, I bet you the compression increases as the build sets. Here is a quote from my thread with my findings on my rebuild (I had used "B" housings). I tested just out of curiosity.
Also to add even tho rebuild numbers will be lower than a brand new engine, it should NOT be compared to an aged/worn engine with the same numbers..
Originally Posted by Jazer
A friend came over yesterday to do a brief tune on the 8 (Lowered fan temp for engagement/increased oil injection by 10%, etc) as well as running a compression test check up. While I have zero concerns over this engine's current health (6kish miles on it's rebuild done by Rotary Resurrection and perfect performance in the real world).. he had a tester and I was curious
These are improved over the readings I was given when I purchased the car. A variation of 5.9-6.3 per rotor face (other photo attached) which was within 2k miles after rebuild. Now, after 6k miles the engine components had a bit more time to "set". These numbers are excellent considering it is a rebuild that utilized it's used housings.
I had been curious to see if the numbers had improved over a longer period of time, or if they were still around the same level. Many people told me to avoid this car like the plague when I was given the original numbers and was contemplating buying it (The only people that didn't were 2 different rotary builders who explained compression numbers/rebuilds to me).. so it really must be reminded this was a rebuild that utilized "B" graded housings. Those numbers need to be considered differently.. Real world behavior is most important.. so with that said, it clearly takes longer than 2k miles for a rebuild to build optimum compression as the seals seat, etc.
Glad to have a solid baseline now that it is in my ownership. This baby is going to be around for a long time.
Yesterdays readings (Again top is front rotor, bottom is rear rotor).
The only numbers I had given to me prior to purchase, from the PO. He said the other rotor had basically the same readings.
I just reread some of your build details. I see you actually have new housings.. Even still, I would give it longer to break in for optimum compression readings. A rebuild will never be the same as a brand new engine, but you do have a lot of significant brand new parts. I do hope you see improved numbers in more time. Like i said, mine took a good few thousand miles before I saw optimum compression (and for all I know its continued to improve since then, lol). Just give it some more time.
As for the misfire is it possible it's your fuel delivery? Hows the pump /filter?
Also when you did the comp test, did you go WOT (pedal to the floor). I've see people forget to do that alot. This will affect your readings.
Sucks man, I'm not glad I was right, the rotary world is full of scum bag vendors for some reason. Make sure you post up in any local rotary FB groups, etc. Sorry for the bad experience.
It's sad how true that is, but this was just another learning experience, i would have loved to take my time and do it myself, but just wasn't possible this time around. I will definitely post in the local form warning 8 owners to steer clear of this guy! For now.... i will just enjoy the drive
I just reread some of your build details. I see you actually have new housings.. Even still, I would give it longer to break in for optimum compression readings. A rebuild will never be the same as a brand new engine, but you do have a lot of significant brand new parts. I do hope you see improved numbers in more time. Like i said, mine took a good few thousand miles before I saw optimum compression (and for all I know its continued to improve since then, lol). Just give it some more time.
As for the misfire is it possible it's your fuel delivery? Hows the pump /filter?
Also when you did the comp test, did you go WOT (pedal to the floor). I've see people forget to do that alot. This will affect your readings.
Not sure how much longer it will need but i will just drive it an enjoy it for now.. it's been stressing me out because this was a large financial investment for me, but in the end of the day.... money is money, and i'd rather just enjoy it while i can and just be happy!
A properly rebuilt engine should start and have good compression from the get go. It is common for home built engines using varying degrees of used parts to get better with time but they rarely last very long in my experience and even though i have a friend with a good reputation of rebuilding Renesis engines and the fact that I have rebuilt several piston engines myself successfully, I still chose a professional builder due to the unique nature of the Renesis. And no qualified builder reuses seals.
and Jazer, 7.1-7.3 is a borderline failing engine so I'm not sure why you think those numbers are good.
Two respected engine builders both said the same thing in regards to my post. You can not compare an older worn engine with X compression, to a fresh rebuild of similar numbers (specifically talking rebuilds with used housings). One has worn down to that point (worn seals and worn housings). One has fresh seals that can make up for the wear that's already taken place in the housing before the seal starts to diminish itself. You have MUCH more time on that rebuild than you do with that worn engine.
You also can't compare a rebuild to a brand new engine. Its going to last awhile, but typically not quite as long as brand new (or a rebuild that has brand new housings even) As for the OP having used brand new housings, which I had initially missed with my first post there.. thats' a bit more concerning.
You may think my numbers are close to failing, but my car will hot start after beating on it, after heat soaking idling, etc within 1 second. Consistently. It performs perfectly. Real world behavior is the important thing. You can disagree with me if you'd like to, Im basing my information on what those 2 different engine builders specifically told me when I inquired for advice before buying this car. One being Kevin at Rotary Resurrection (who is the one who built my engine) and I trust that it was done right, and my car certainly behaves as such.
Im merely stating that there is more than JUST compression numbers... and wanted to show the OP that a build can take time to seat the new parts together and it will likely rise further.
I'm sorry but you are just misinformed. I have seen an engine with a cracked apex seal hot start with no problem because it had a new S2 starter in it. It had almost no compression on the front housing.
It's not about what I think because it's mechanics and compression numbers are compression numbers, regardless of who says what and yours are borderline failing, simple as that.
My engine has 40k on it and was still in the low 8's as of not too long ago and no new major hard parts were used when it was built.
Wishful thinking won't help the OP, and sadly people still don't learn, when you take risks to save a few dollars, it usually bites you in the ***, especially in the Renesis world.
I'm not going to argue about it. Just giving the OP some info that is less talked about, but is common knowledge among builders in regards to rebuilds that have used housings.. as I thought his were reused initially.
Yeah, that is also true, building these is much more of a skill than just following steps like a normal piston engine. I've rebuilt a few myself but it wasn't much involved when i really look back at it. Ultimately, i should have just waited a little longer and saved for a PR build
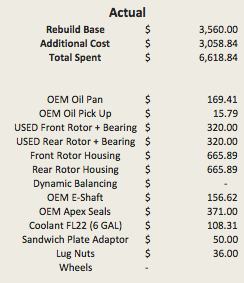
Just wanted to post up what I paid for this summer to get the car back on the road. Only engine work was done, and keep in mind, the engine was removed and reinstalled by builder, along with all the other parts, such as coolant tank, hoses, mounts, midpipe, gauge sensors, water pump, ac & serp belts.
^^ Well said, no need to dwell on it etc.
ANYWAYS! I know a few posts earlier i mentioned the tester that i received was faulty etc. Please do not take this as an attack or poor review of Twisted Rotors product, it's the exact opposite. His Customer service has been exceptional. The test of a small company such as this, is not how little their products fail... to me, it's how they handle the situation and go about to fix it, because in reality, every product will see a failure. TRT Is not only fixing this but will also upgrade to the latest firmware model which has an automatic barometric correction! This is the great customer service the rotary community needs!
So far so good, enjoying the car every time i drive her! Little issues im trying to address is a random misfire that occurs only at partial load from 4-5k RPM. Will be looking at the tables I have adjusted in my tune, i suspect either my ignition dwell or an inconsistent OMP table. Also, at times, a loud whirring noise, like a spun bearing? (best i can describe it) occurs and the clutch pedal vibrates significantly, maybe the TOB wasn't installed properly? I am looking for OEM wheels badly!! I do not want to balance these ugly wheels, and will need to replace these lugs too, money i don't want to waste if i will be replacing these wheels as soon as i can! Also, just extended the overflo w hose just to be safe than sorry!
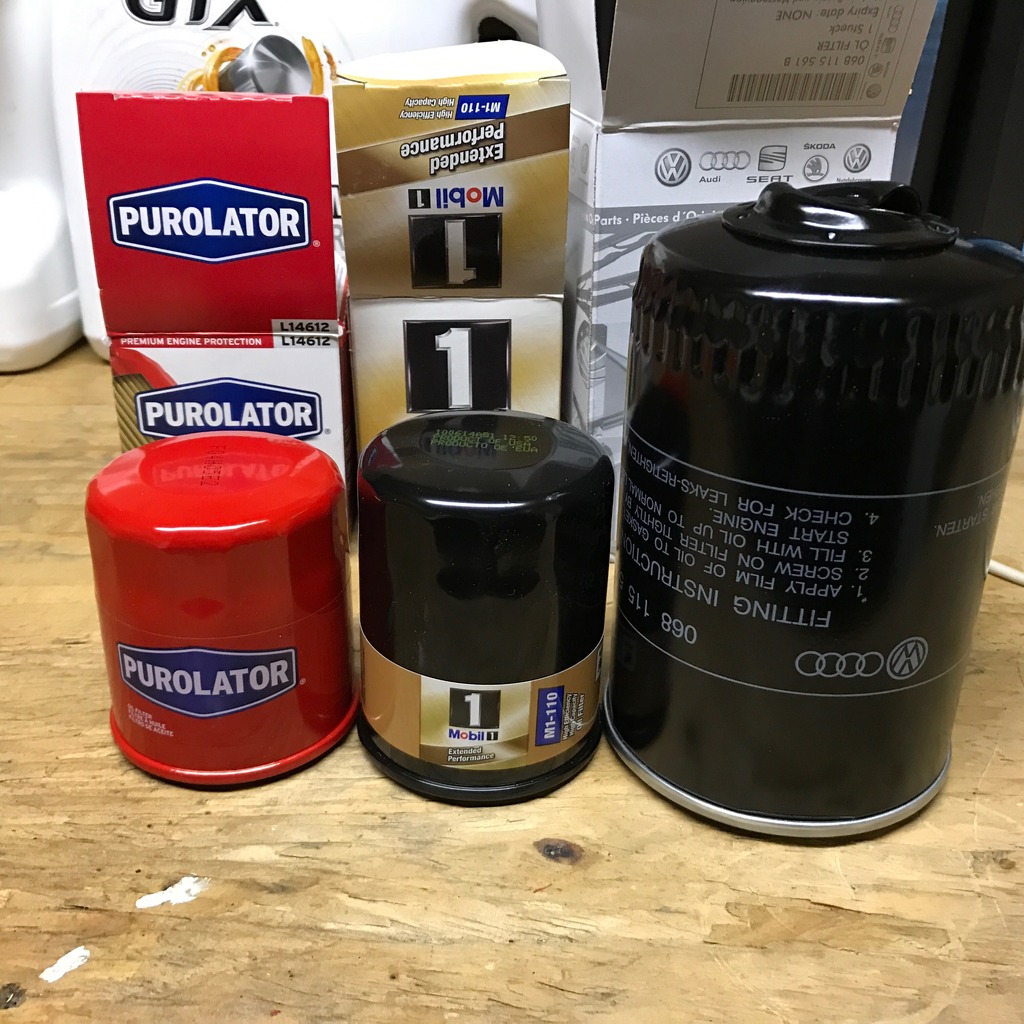
Something I thought was a little funny, the OEM large filter from my GTI could fit two RX8 filters lol!
RX8 OE Replacement filter/RX8 Larger Mobil Filter/ GTI 1.8T Filter
Looks like it's time for a filter relocation so you can run the same filter.
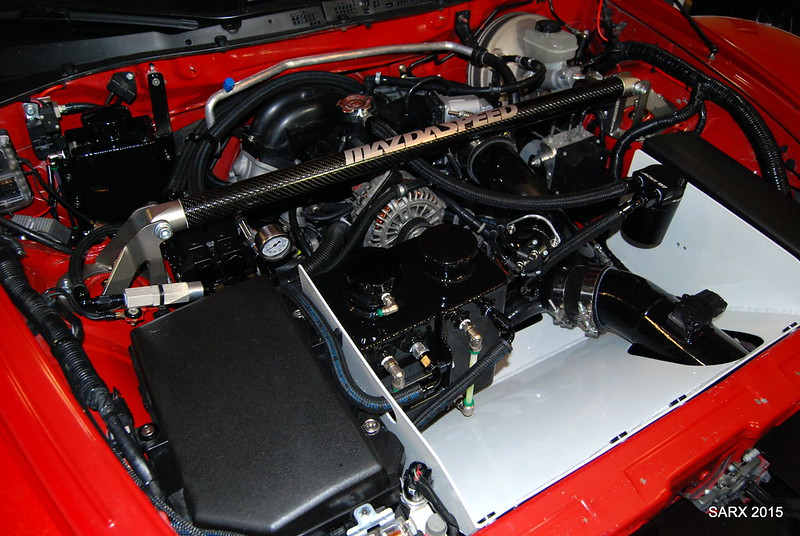
I've been thinking about an oil filter relocation, not only to run a larger filter but so it doesnt make a huge mess, although with the oil sandwich plate adapter, after the car sits for five minutes there isn't much of a mess. But also for ease of access!!
Damn, removing the SAI system really clears up some space huh? Looks like a real clean product. Does the opposing end thread up to the oil pedestal directly? I've read majority of your build thread, huge fan of the car, nice and clean. The way it should be done with these 8's.
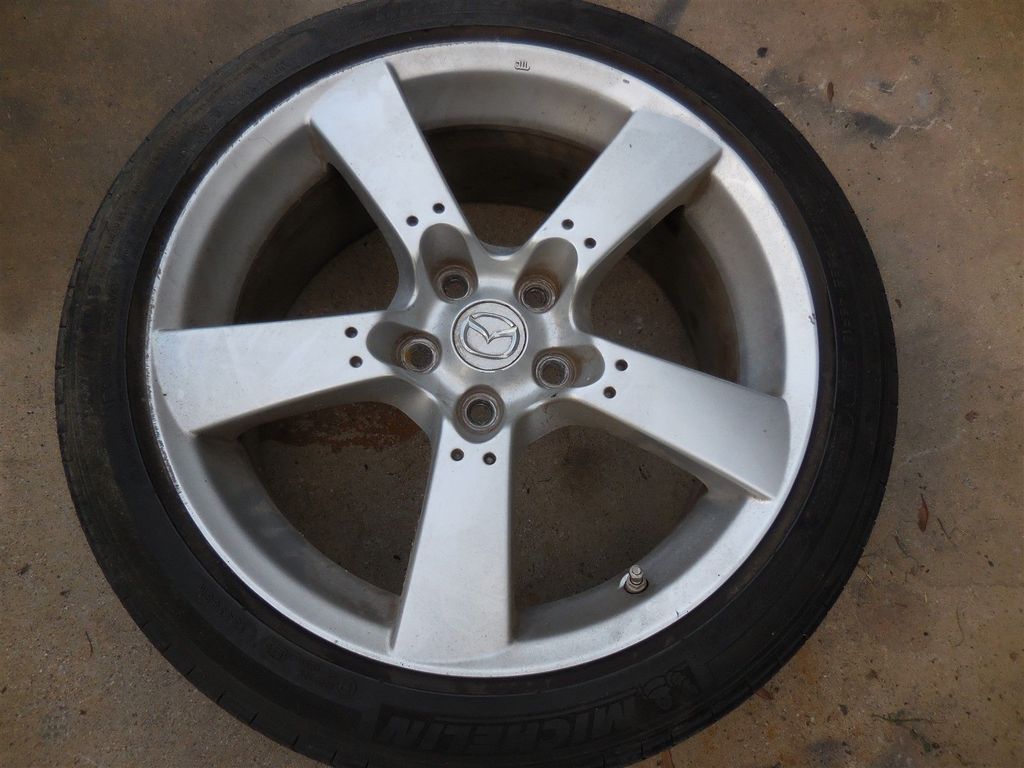
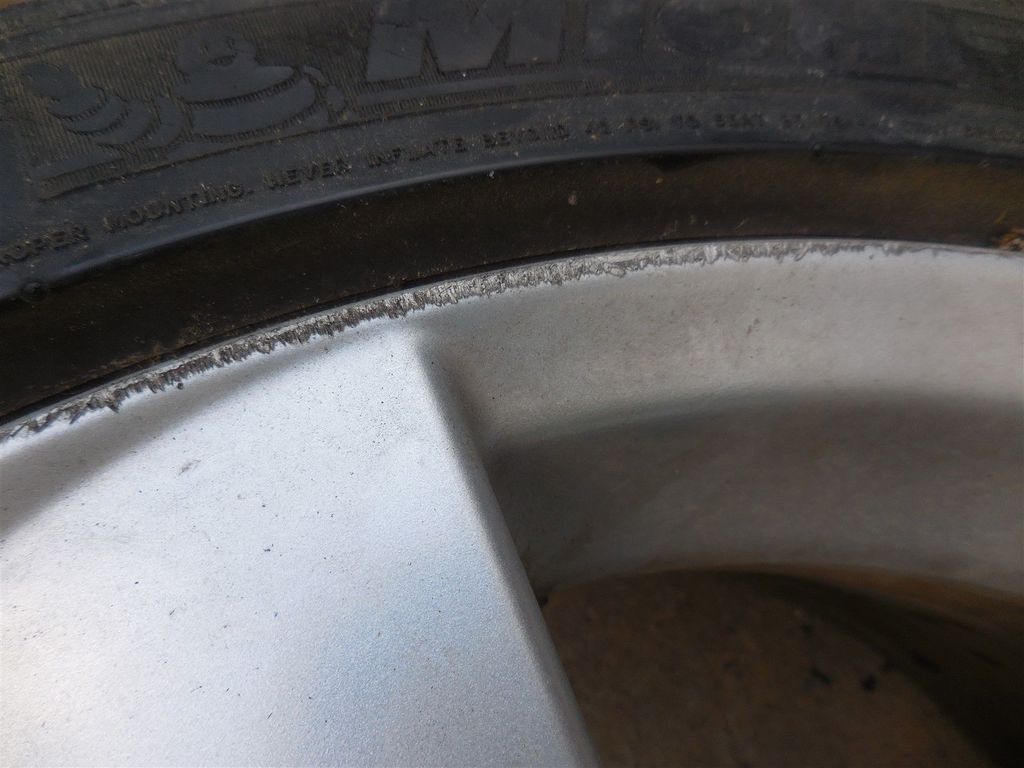
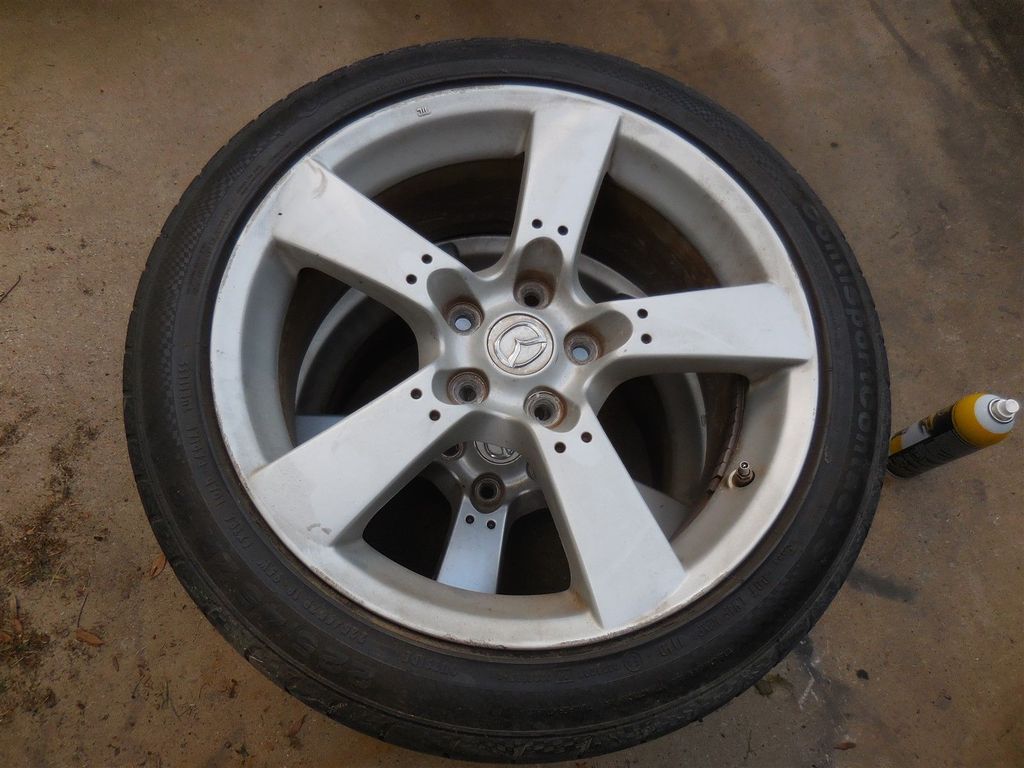
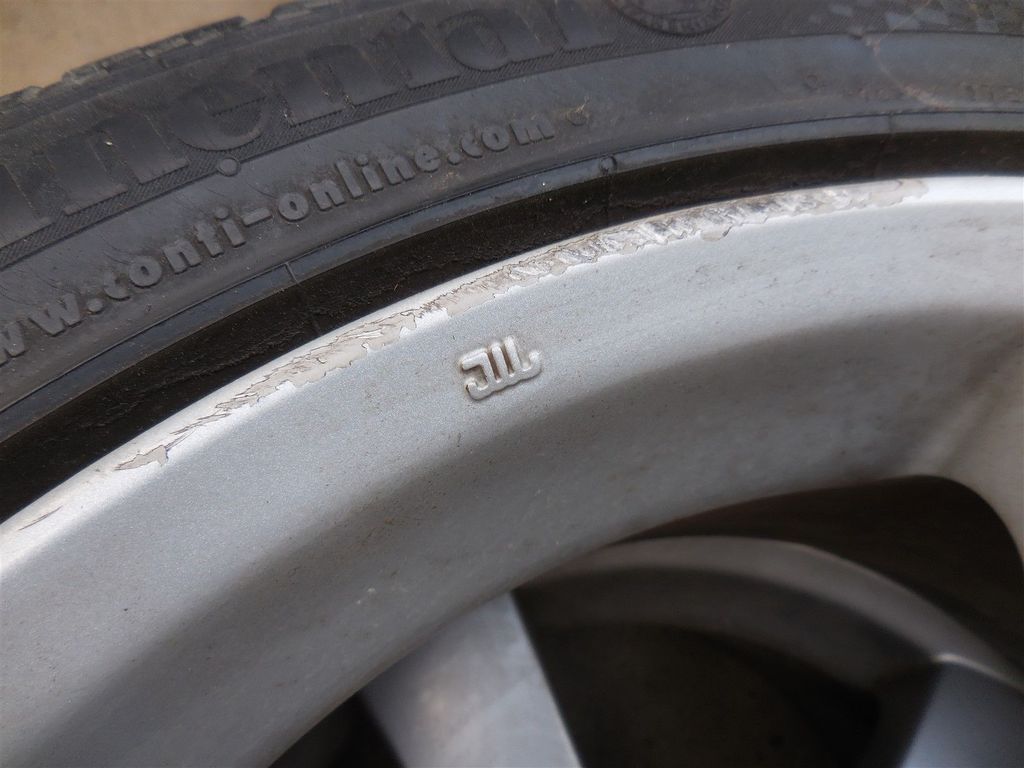
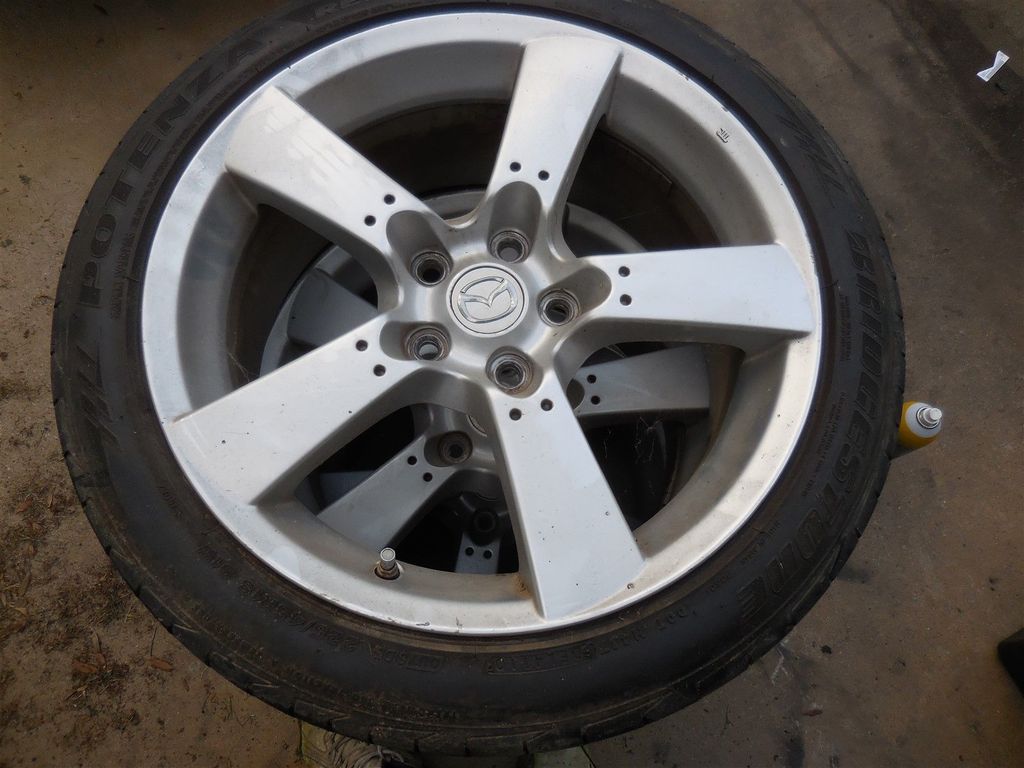
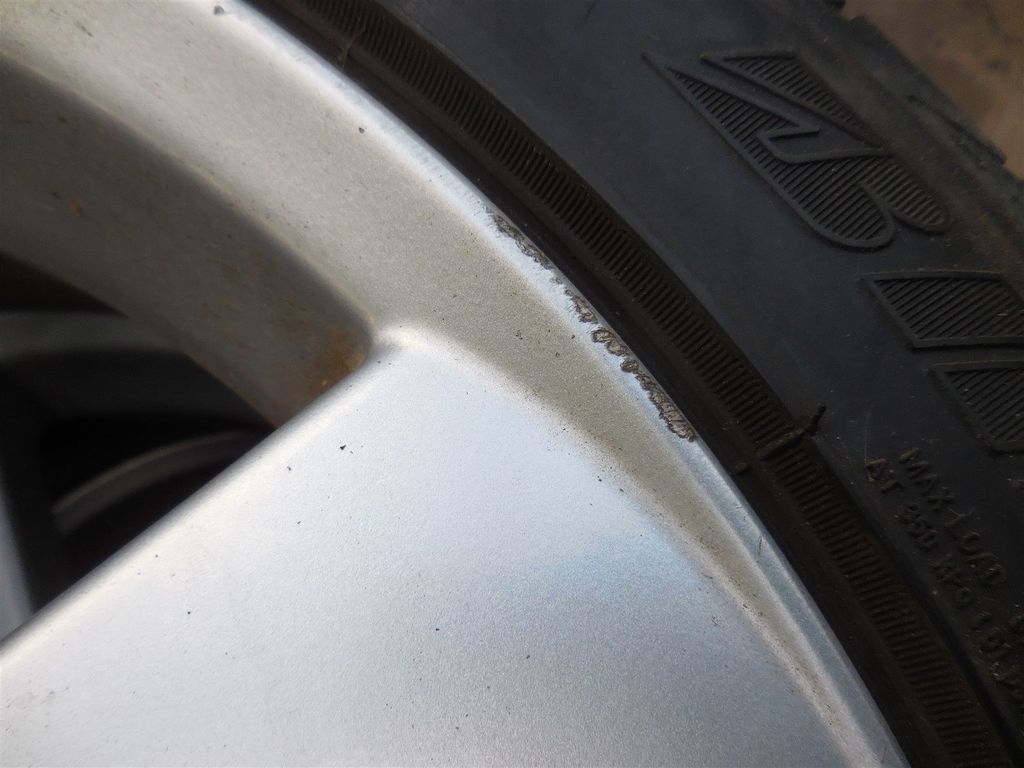
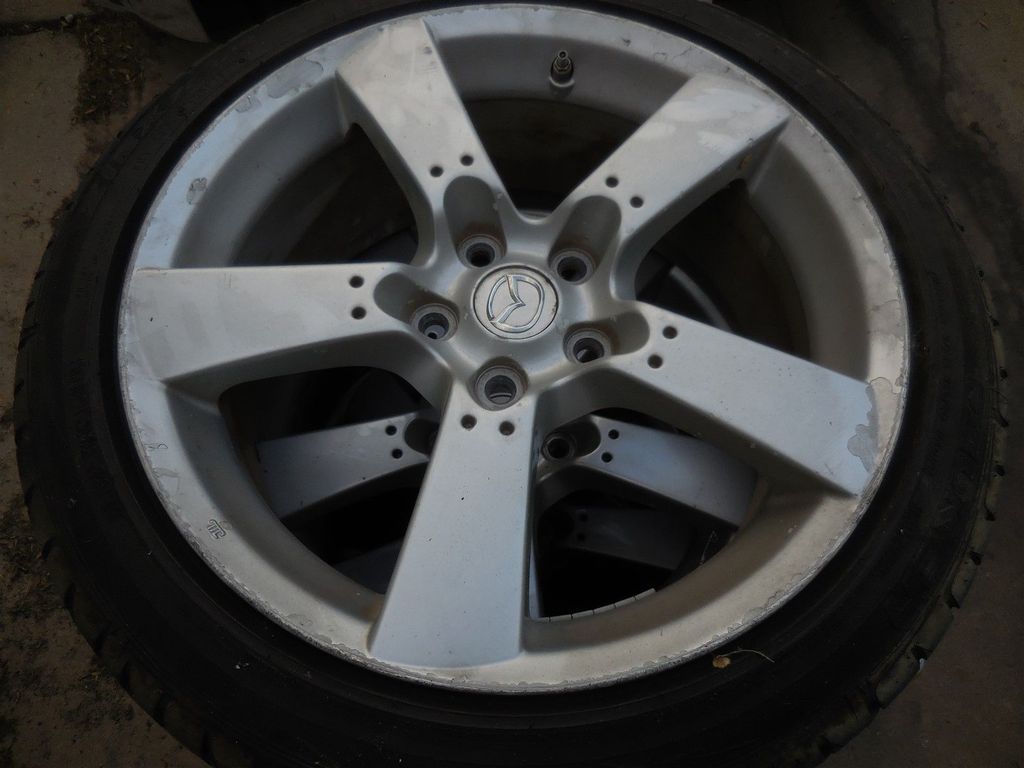
Just bought some OEM wheels. $85/each wheels with unknown condition tires. +$100 shipping for a total of $440, little more than i wanted to pay, wanted to be at 350 shipped but I need to balancing existing wheels bad, but don't wanna buy new lug nuts either if im getting rid of wheels. Lugs are cheap AAP lugs and rusted, so i figure some will get destroyed. Figured I will restore these wheels rash and everything and then swap my existing tires and TPMS if they're still functional.
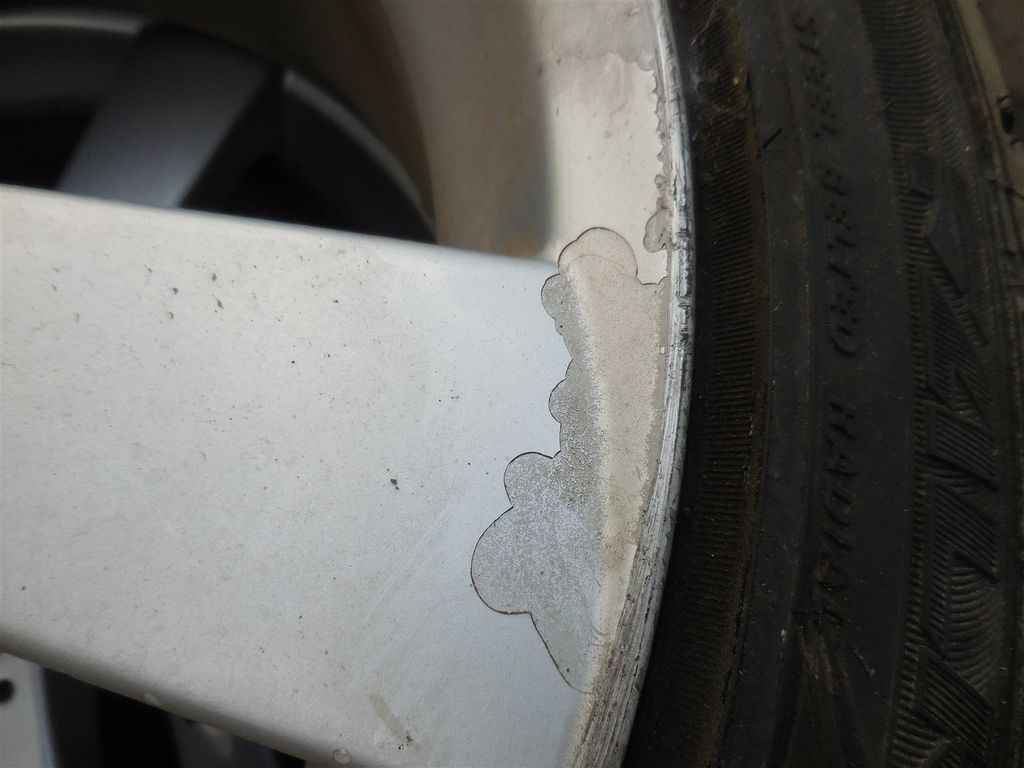
One wheel is really rough but i figure for time being, JB Weld the major rash for temporary filler and then I have plasti-dip with aluminum metalizer to make it look similar to OEM color.
Most use regular body filler to smooth out rash and such. JB weld could work for limited/deep scratch areas... but I can't imagine it being very friendly to work with for large surface area. Your best bet is to sand down what you can than use filler. For the most part the filler will hold up in the same way that the painted surface holds up. Remember your car's body is metal where filler is used anyways. Also note that getting tires mounted after can be a bit sketchy for painted wheels.

 11-15-2016, 08:11 PM