When you click on links to various merchants on this site and make a purchase, this can result in this site earning a commission. Affiliate programs and affiliations include, but are not limited to, the eBay Partner Network.
Well, I never meant that BHR was a bad company, or that any of their parts/kits were anything other than the absolute best available. I don't expect, or even want anyone to stop buying their stuff, more than likely I'll buy something from them at some point too.
Going into all of this (specifically the ignition) I was fully aware of three reputable the kits available, and I knew that I would run into many more issues if I built any of these things myself. I chose to because I wanted to. I'll admit that cost was a minor concern, however I would not have hesitated to buy a premade part if I was not fully confident in my ability to do anything that I have done thus far, or that I hope to do in the future. Part of it is for fun, but the main thing is that I'm trying to learn.
I'm sorry that it seems like I'm ignoring what you're telling me, but I've already considered all of it prior to starting. My approach to seemingly simple things like the ignition is to make it as complicated as possible for myself, and solving the individual problems one at a time, before beginning any of their implementations.
The random misfires (finally got a P0300 cel) are continuing, and coolant temperature is climbing way top fast to be considered normal.
The misfires are very minor and consistently kick in right at 5600 rpm under moderate load. I can still rev to redline without much difficulty, but it definitely takes longer than it should. I suspect that my cat is on the brink of total failure.
I'm currently waiting on a second hand Rotary Performance resonated midpipe to swap for my catpipe.
For any of you paying attention to the water pump thread that's gone pretty silent, I didn't quit! The mazmart impeller simulation has just been running non-stop for the past week, it's coming up on the last few hundred steps though!
So I've been getting random misfires for a few weeks, and I suspected the cat had gone (especially after the ignition failure incident), but I didn't want to look at it until I had a viable replacement immediately available, so I went ahead and got a Rotary Performance midpipe (the uncatted one they sell at rx7store.com) and installed it with great success! One of the spring bolt holes had to be rethreaded, but since the threads on the original bolt had bonded to the hole it was really easy. Unfortunately the sound is freaking loud. It's a lovely "Oh my gosh the car coming down the street does not have a normal engine" type of noise, but it's too loud for my taste, I'm more into subtle sounds. I bought it from a member here who was turbo, so I'd assume that brought the noise level way down.
So my not-at-all scientific review: It's a great sound, at everything but dead on ~4k RPM. It's very loud, and I'd only use it on a dedicated race car (sounds very race car), or on a car being used as a dedicated air raid siren. It does have some great "pops" on deceleration though.
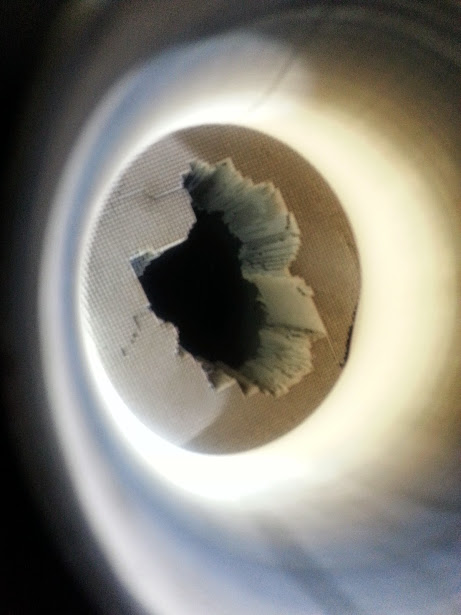
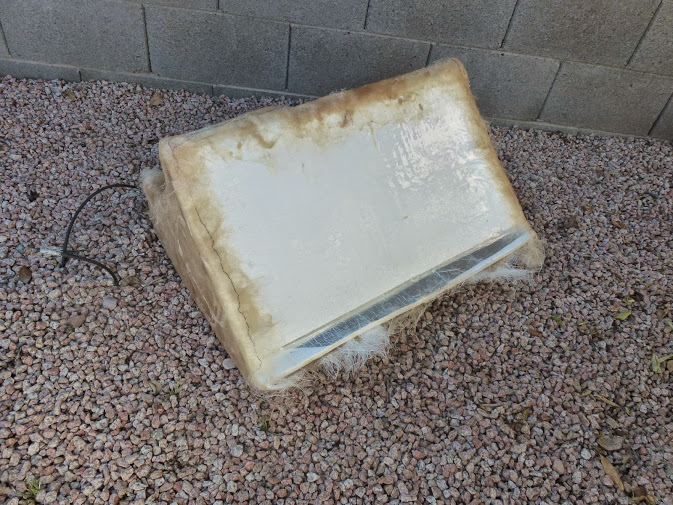
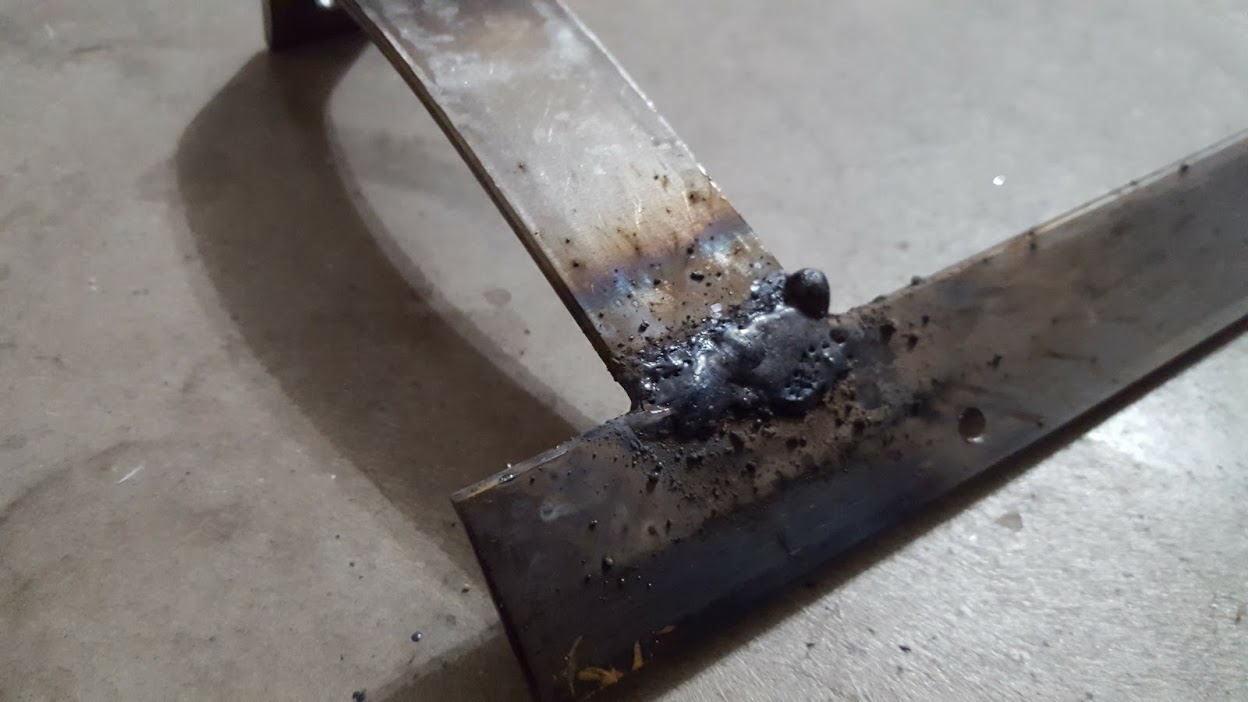
As for the old cat, it's being gutted and going back on. One problem is the catback. This is what was left of my cat.
There are supposed to be two layers of material, and one is completely missing. The other layer has this massive hole in it. My catback is almost definitely clogged, but when pulled only a few pebbles of the honeycomb came out. I'm still getting the missfires but I can't think of a non-invasive way of cleaning out the catback.
In search of the cause of my random missfires I wasn't able to find any issues with the catback other than maybe a thimble-full of melted catalyst material. There were no sounds coming from inside of it, and I couldn't even find anything using a rather long borescope through the pipes. Naturally, finding nothing wrong, I gave up!
The next thing to check were vacuum leaks. I couldn't hear anything, but the MAF readings seemed a little low, and the LTFT was up at 10.11. After compltely smoking out the engine bay for a weekend with a fog machine, some duct tape, and a garden hose, I was unable to find any other indicators of a leak.
With the ignition, catalyst, catback, and intake all problem free there were only two other possible suspects: Compression failure and fuel delivery. Since my last passable compression test was only a few months ago (and my car starts slightly faster hot than cold) engine failure probably wasn't the cause. Knowing that fuel pump failure is pretty common, and seeing the nasty state of the fuel pump housing, the conclusion was that the fuel pump was on it's way out. Rather than go with an S2 assembly or a stock pump I elected to go with a DW200 and a melted siphon pop off.
After two days of trying to get that retainer ring off with an array of homebuilt tools, hammers, and screwdrivers, the pump was in. The OEM fuel filter doesn't fit correctly on the DW200, but the assembly will go back together with the included Deatsch Werks filter (it is an extremely tight fit though). Now that it's installed and the memories have been reset the missfire CEL hasn't come back in any conditions. It's a little too soon to tell if it 100% fixed the issue, but I'm feeling very good about it.
The pump came with a sticker. I'm going to put it in the bay.
So it's been a solid month and a half of the car working perfectly, even with the gutted cat there are still no CELs or fault codes! I was even able to relocate the battery early last month, and it's working well so far.
Since it's going so well it's obviously time to do some things that will cause problems! (Note that I'm only doing this stuff for fun, and I don't expect any significant performance gains or losses.)
That being said there are still a few issues:
Suspension sagging on the rear right corner
Actual temperatures aren't on the dash
The OEM LCD screen doesn't do anything useful
Horrible cheap tires
TPMS batteries are dead
Cooling will be a serious concern in the summer
Radiator duct is a little bent
I have a plan to fix most of these things, but it's going to take some time. The suspension issue isn't that bad but at some point I'd like to get Tokico D's and Tein S-Tech's as a replacement.
I'm working on getting the OEM LCD to show something other than what it's being fed by the Metra module, and I'm able to read from it but writing to it is giving me issues. Pieter3d was kind enough to give me a solid start and allot of useful information, but I'm completely new to communicating over SPI so it's tricky. Once I have that done I'd like to have it show basic CAN info and I may (almost definitely if I can get this one to work) have the same uC display temperature information on two OLED displays that will be replacing the water temp and "oil pressure" gauges.
I got an oil filter relocation kit and oil pressure sensor for Christmas. Neither the kit nor the sensor are installed, but the gauge is installed very neatly inside the flip open ashtray and it replaces the 12v outlet.
I can actually go for a while without new tires and the TPMS light is only a minor annoyance, but whenever I get new tires I'll just get a new set of TPMS sensors and powdercoat the wheels (orange maybe?).
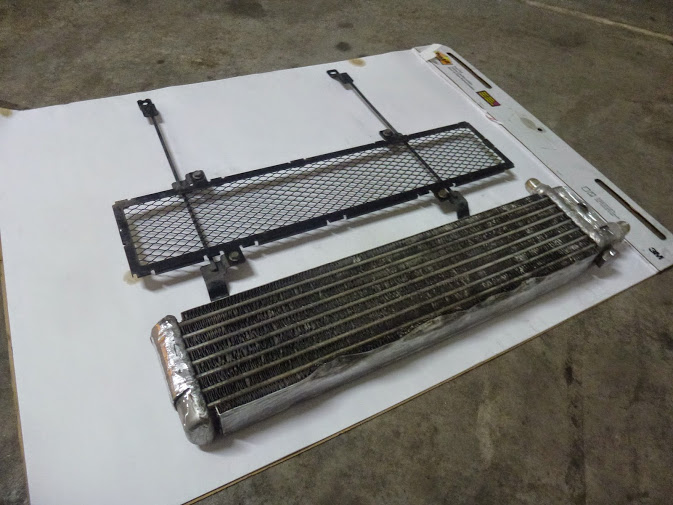
As far as cooling goes I'll be making a new fiberglass radiator duct in the coming weeks. It will be two pieces with one as the intake and the second as the outlet. At some point a rectangular hole will be cut in the hood and the hot air will go directly out of that. There's much more complexity to it than a simple duct (and I don't want to type that much), but it will be awesome and very adjustable once its done. Along with the new duct I will be changing oil coolers for the stock RX7 FC single cooler. I've been researching the issues that it could cause and I think that it would be much better suited to the setup that I will be running than the stock dual coolers.
Sometime soon I have to get a flash tool, and I'm going to go with MazdaEdit since it has the potential to be far more versatile as far as car models go. The Tactrix programmer even has a free tool to tune Mitsubishis and Subarus which is pretty cool!
The stock dual coolers are very good, don't waste your time with the FC cooler. My Single Fluidyne unit was much larger and more efficient than an FC cooler and was a great improvement but you won't see an improvement with the FC cooler. There is a reason why the FD R2 and the RX-8's have the dual coolers in the setup they are in. I only changed my setup due to packaging when I added the secondary radiator. Now I run a large BEHR unit and stock drivers side cooler and it works well.
Yeah, he gave me some of what he used to get it working. I'm trying something similar to see if I can actually do it.
9k, you'll see! It's better thought out than it sounds. I'm not really trying to get it to run cooler, it's more to change the temperature control from thermostat based to airflow based (with the thermostat as a backup). Temps will be about the same and it will be a fun project.
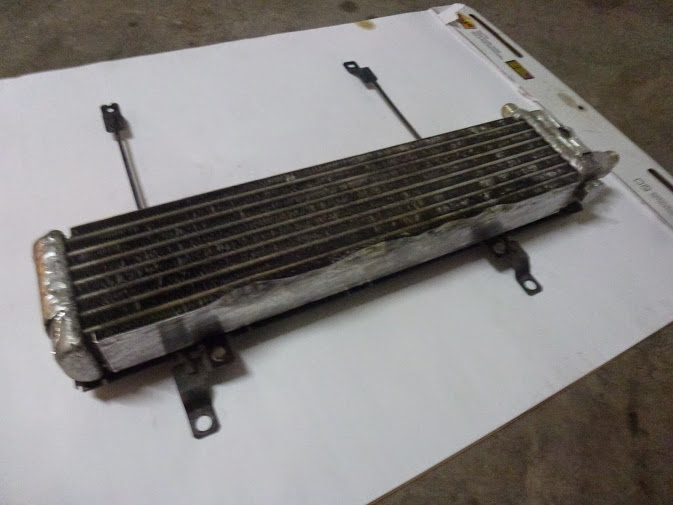
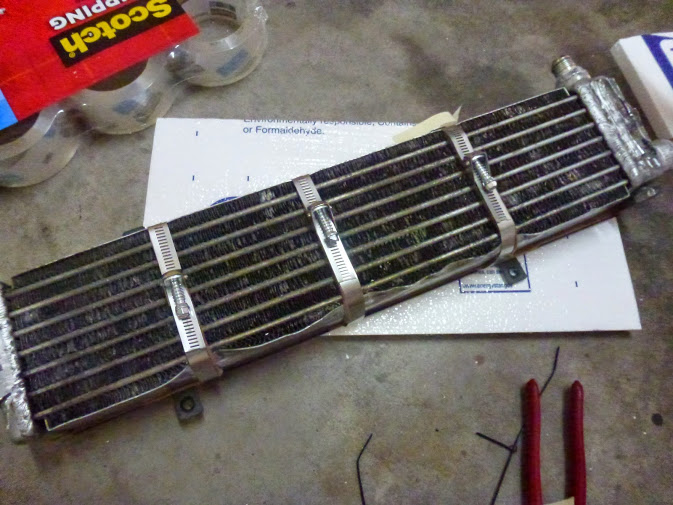
Wow, I haven't updated this in a while. Well I've been running a new duct and oil cooler since February. It's the FC oil cooler, I just didn't like the placement of the dual ones and the much lower thermostat temp gets them to flow earlier. Its just mounted to the OE condenser screen (they're the perfect size for each other) with some foam to seal it to the condenser.
It's working well enough, but I still don't have an oil temp gauge set up so I have no idea if it's doing any good. The issue I was trying to fix was the temp creep while sitting still at idle during the summer.
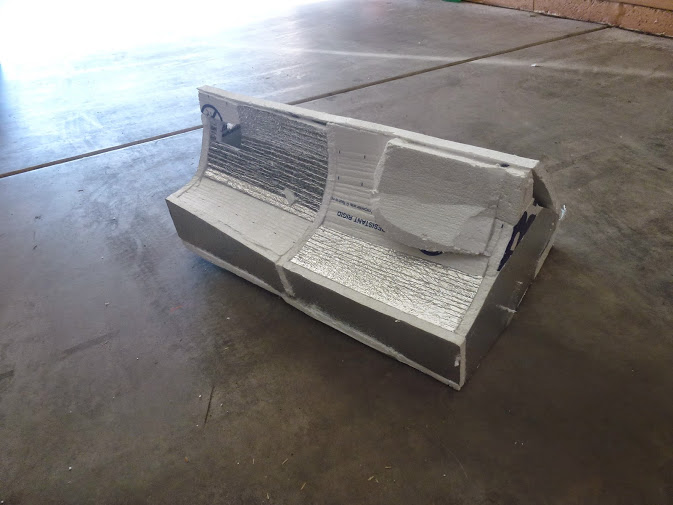
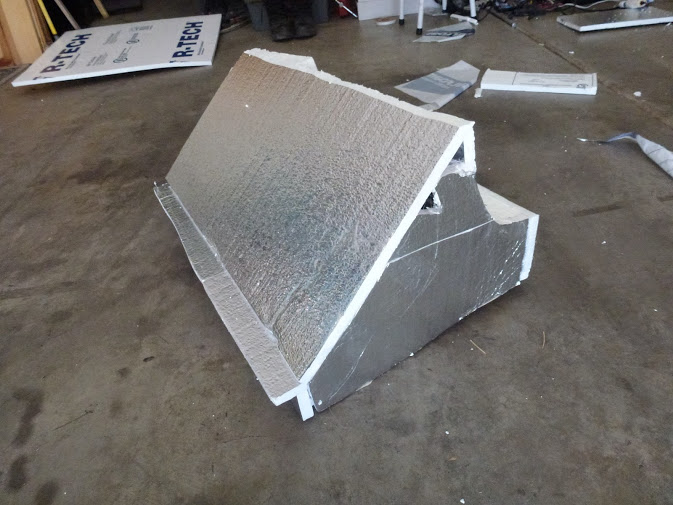
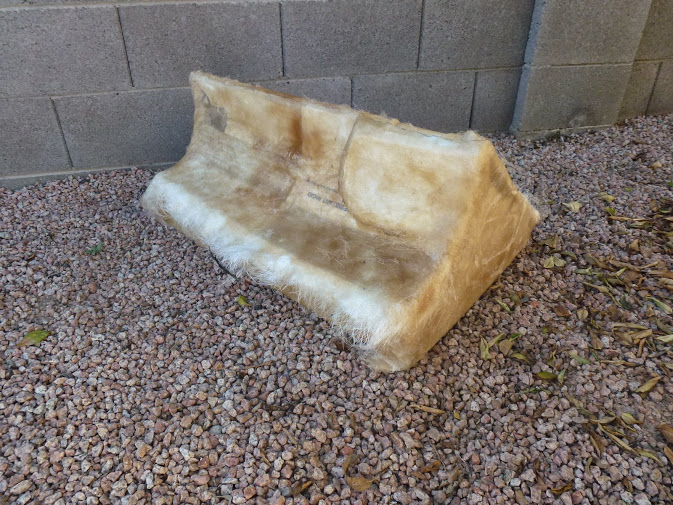
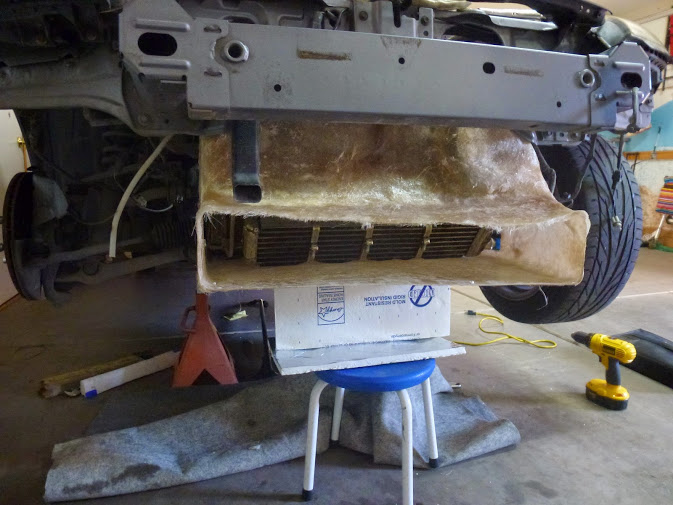
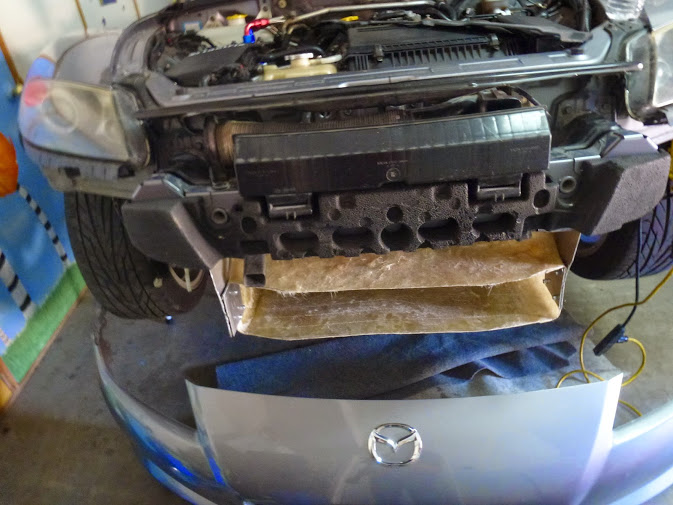
The new duct is working nicely. You'll notice that the opening is actually significantly smaller than stock. It's a good 12" less wide and 8" shorter since it cuts out the grill portion. I made it out of foam first, covered it in tape, then used a heavy fiberglass mat over that since it doesn't need to look good. The foam and tape plug was then cut and torn out of the part.
The flat piece on the back was just to keep melting foam to a minimum (I couldn't use epoxy with the mat I wanted to use).
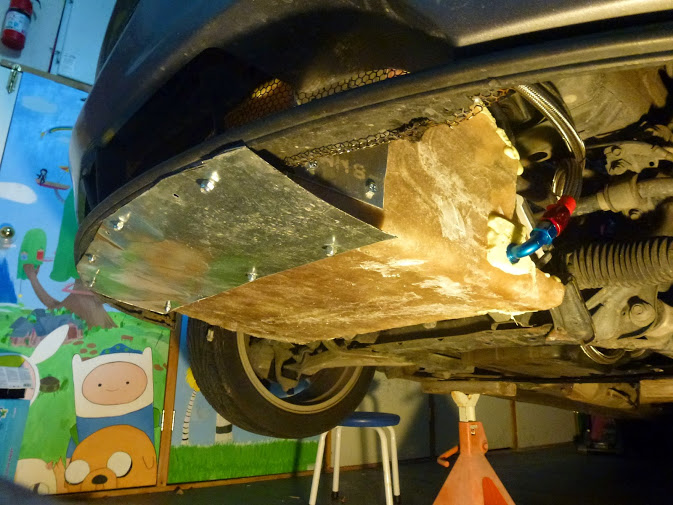
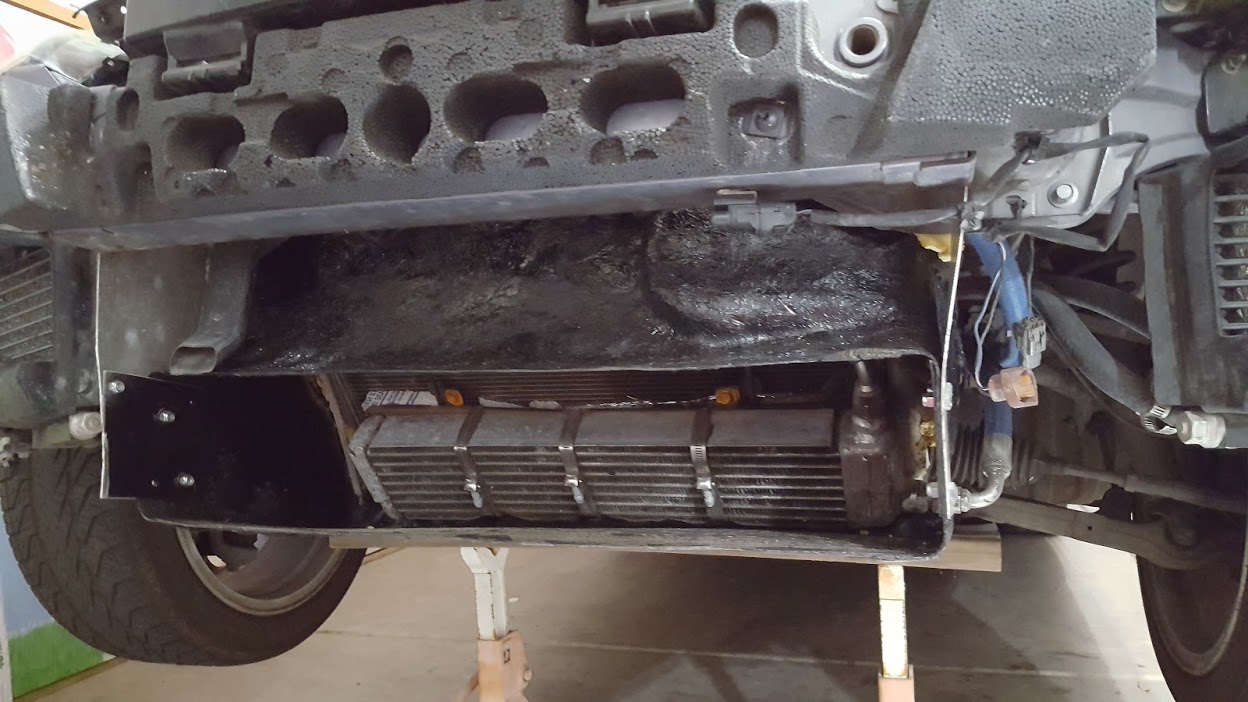
Metal plate cut from the old metal duct to prevent scraping up the fiberglass.
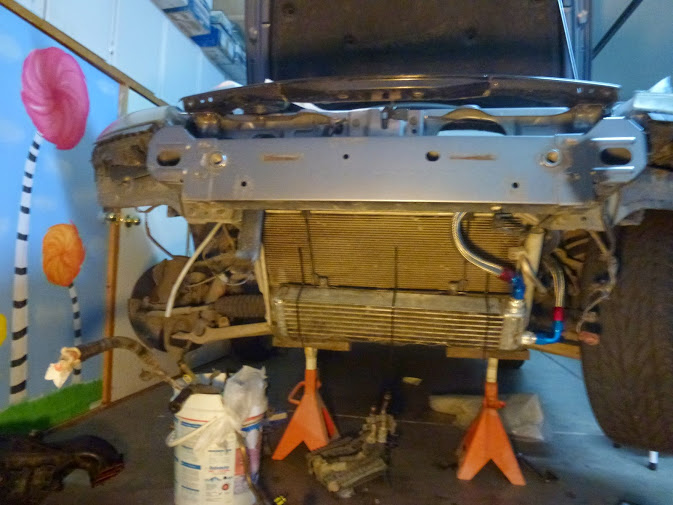
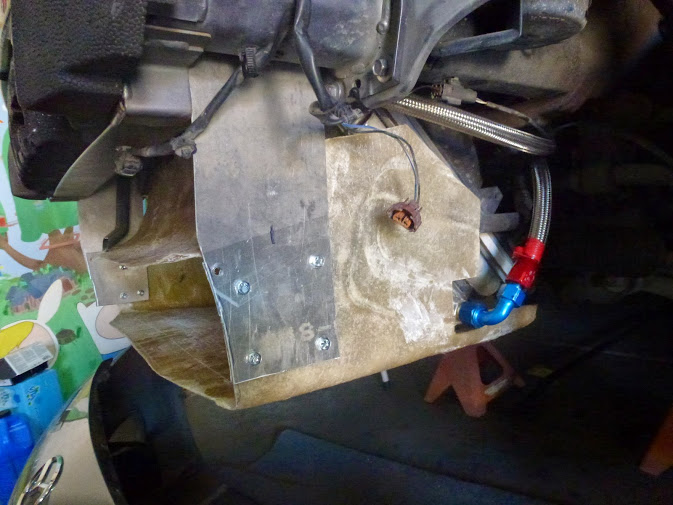
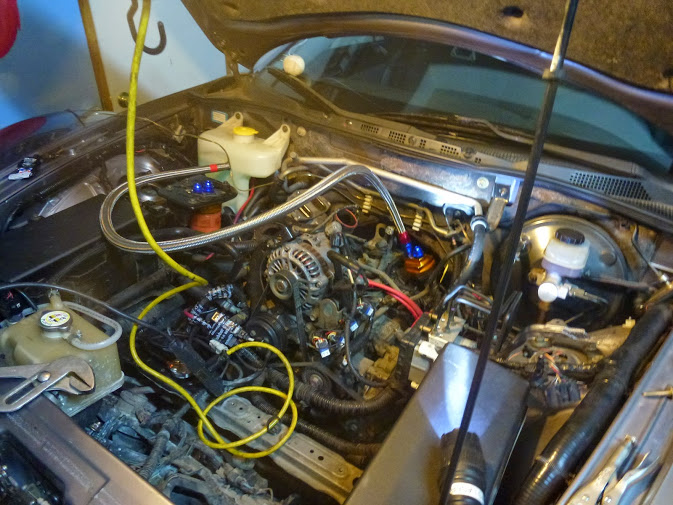
The oil filter was relocated to the stock air pump mount at the same time. All of the AN fittings and lines in these pictures were replaced with steel crimped JIC fittings because I couldn't get the AN lines to stop leaking.
I also ended up changing out the passenger side fan because it wasn't working as well as it should have been. Now I'm working on the steering because that started having some issues exactly one year after I got the car.
Wow, it's been a long time since I updated this. Well fight after the above post I ended up changing out the AN lines for the JIC steel fittings and crimped lines. None of them have leaked yet.
More recently I've replaced the OEM washer fluid bottle with a smaller water bottle, and relocated the coolant bottle to that corner of the engine bay. The the factory oil coolers were just reinstalled into their original positions and are now being used as auxiliary radiators (the stock radiator couldn't quite keep up well enough on the freeway with the AC on full when it's 125F outside).
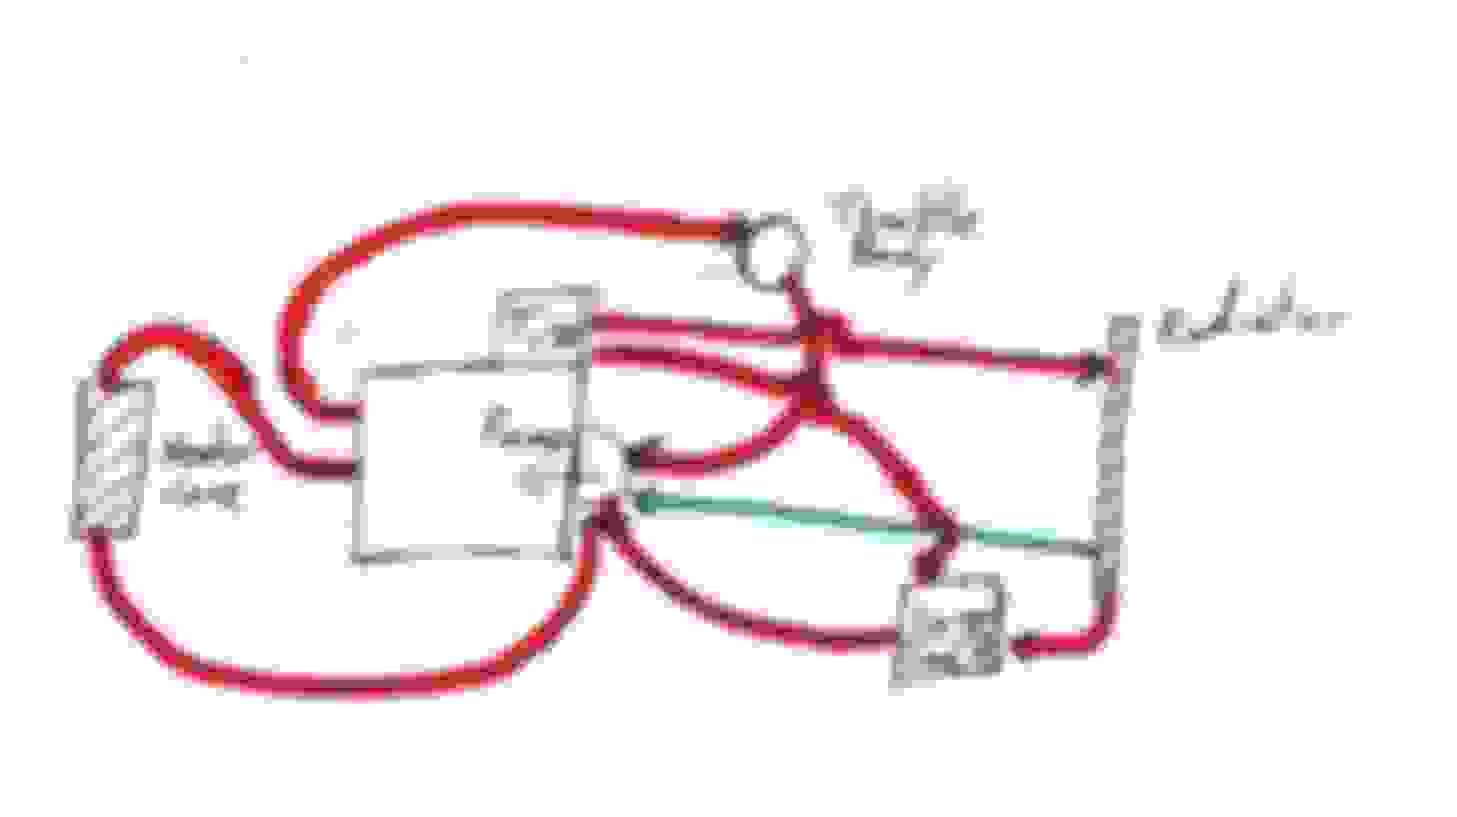
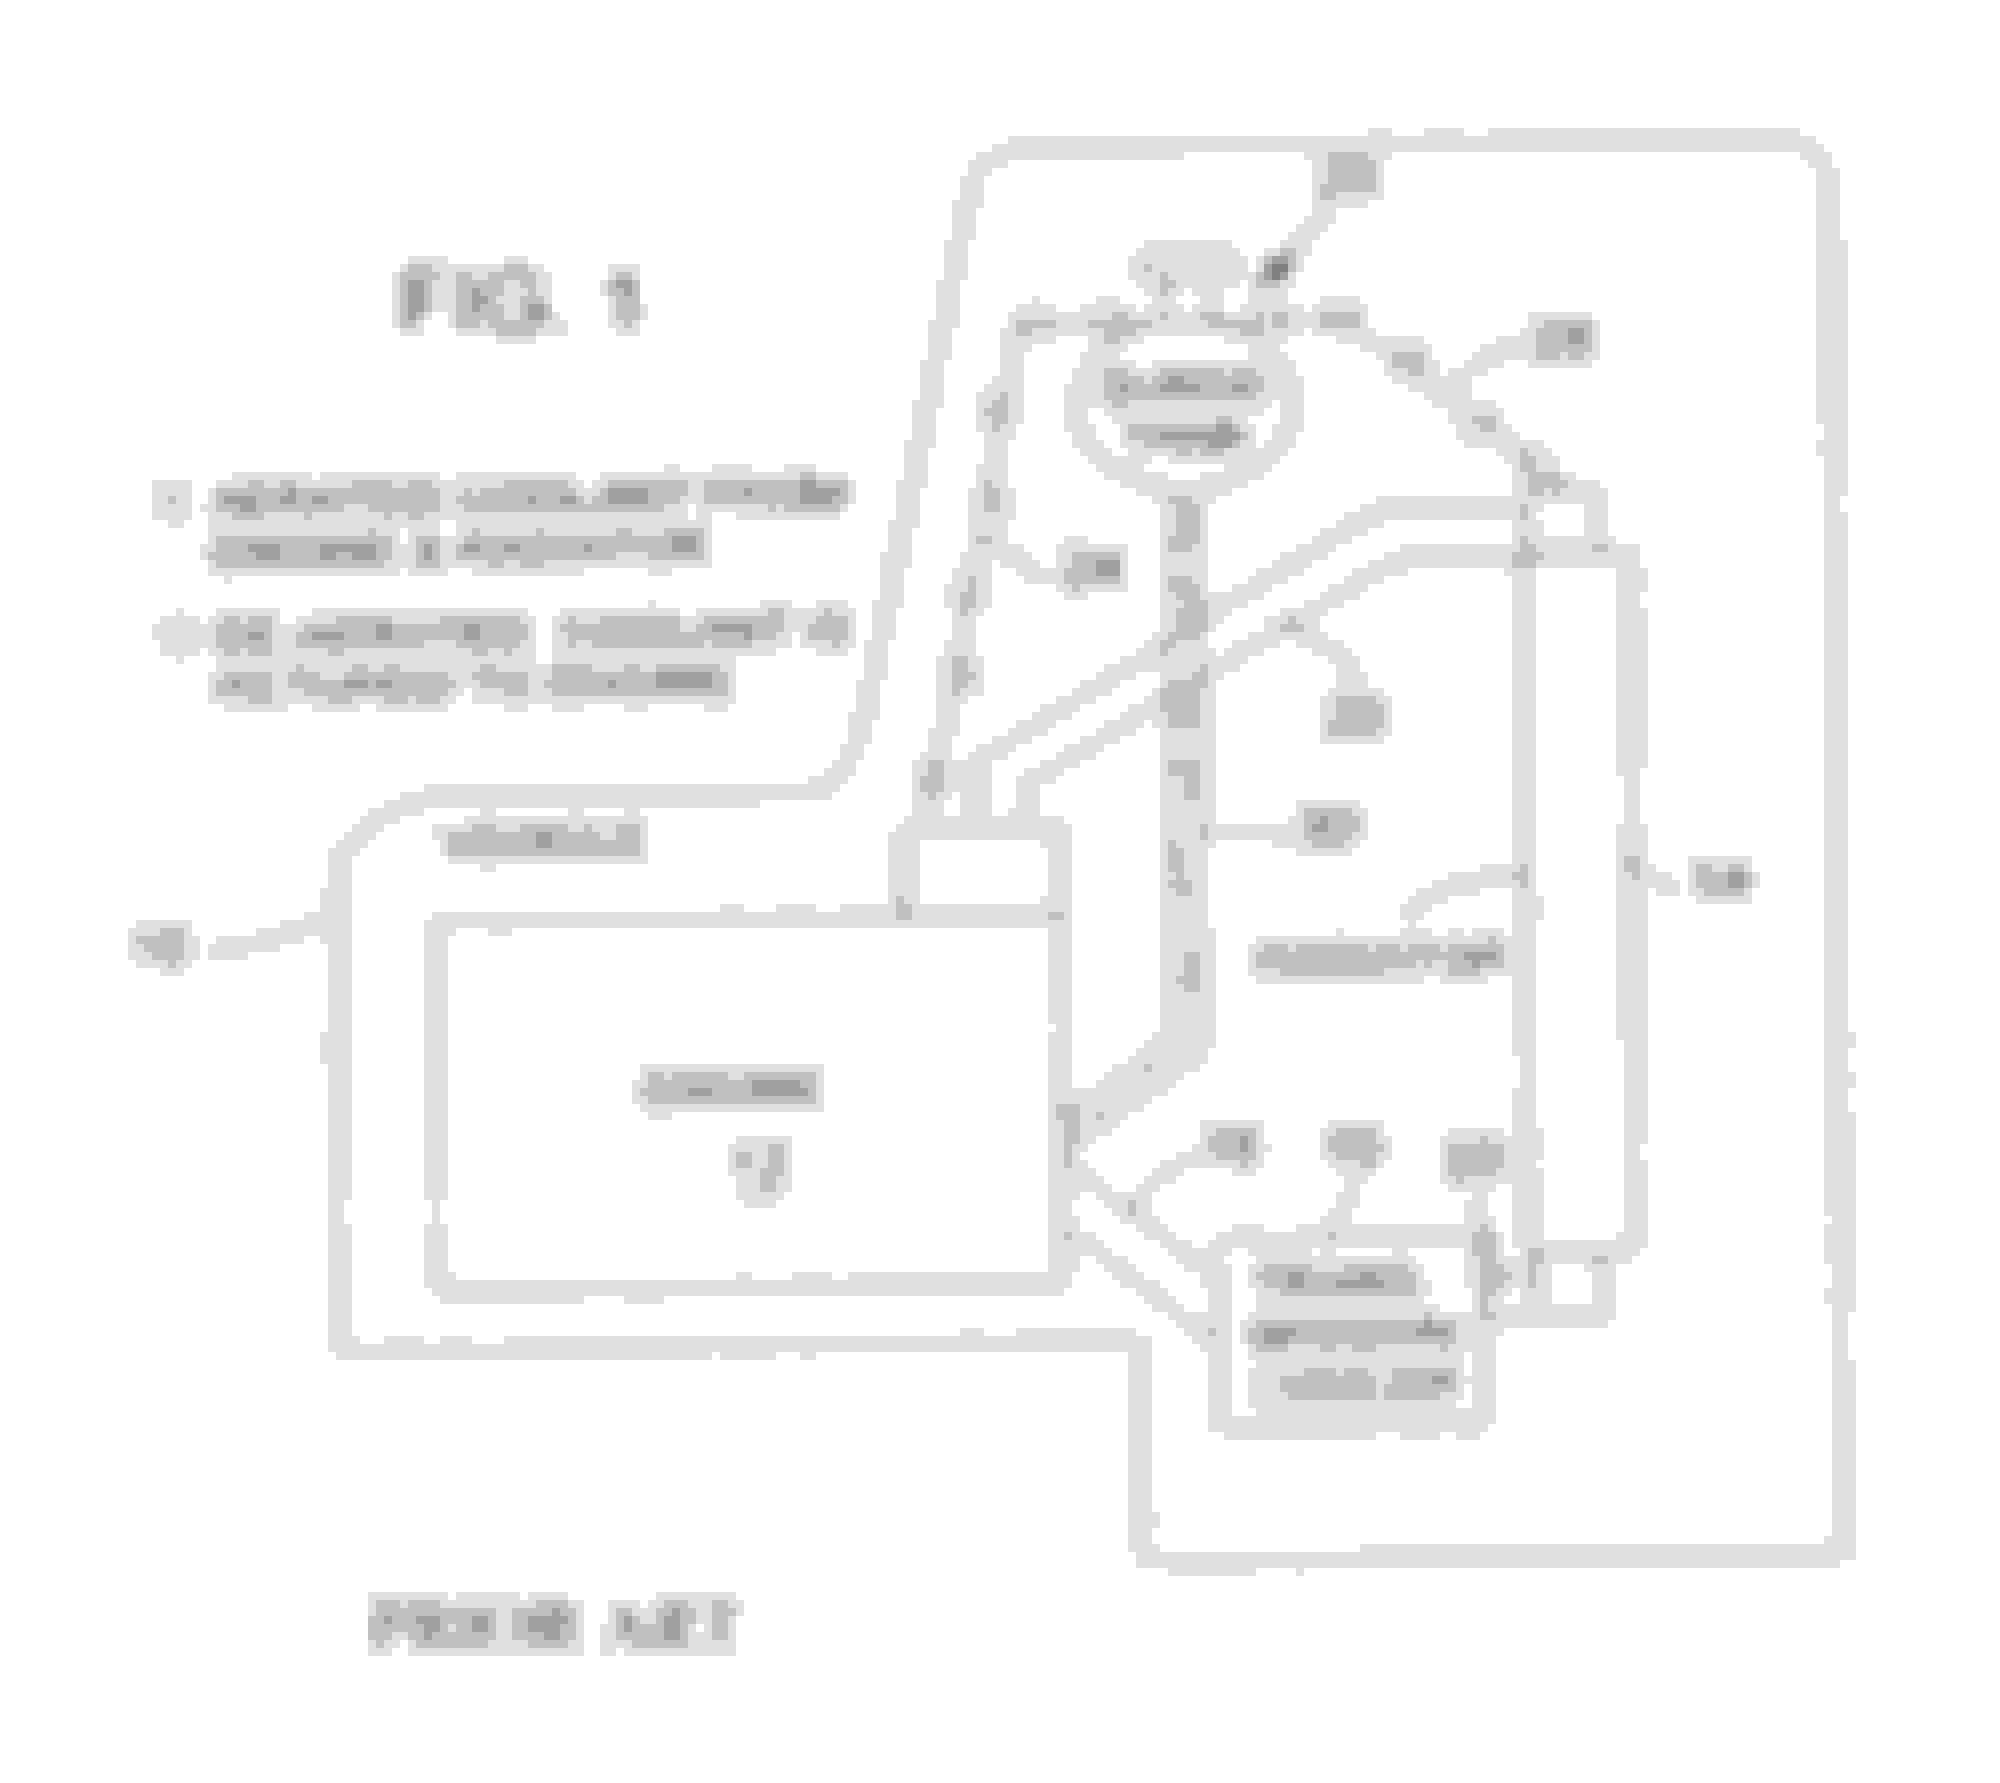
To get the stock oil coolers to work well as aux radiators the first issue was to get plumbing figured out. The stock coolant flow looks like this.
As you can see, there are three paths for coolant to go either directly from the back of the engine (~75% of the ECT sensor reading) or from the thermostat housing (just above 100% of the ECT sensor reading) that feed directly into the cold side of the water pump. One from the throttle body, one from the heater core, and one special one from the coolant resevoir.
I could have saved some time and just run the coolers as-is, with the integrated 194F thermostats, however the coolant temperature from the heater core will always be under 180F since it comes from the back of the engine. Because of that I just made up a little bypass plug, which plugs the bypass hole of the thermostat, so those coolers are always running at full flow. I doubt that this will be a problem since the main radiator still handles the bulk of the cooling and should be able to regulate temperature weather or not there are auxiliary coolers.
Since I run a radiator from an AT car, I originally had the throttle body bypass going through the fluid-fluid heat exchanger built into the radiator (normally for transmission fluid), now the hose from the back of the engine, and the inlet to the water pump are just capped off. The heater core lines were simple, so I just have one aux rad in series directly after the core.
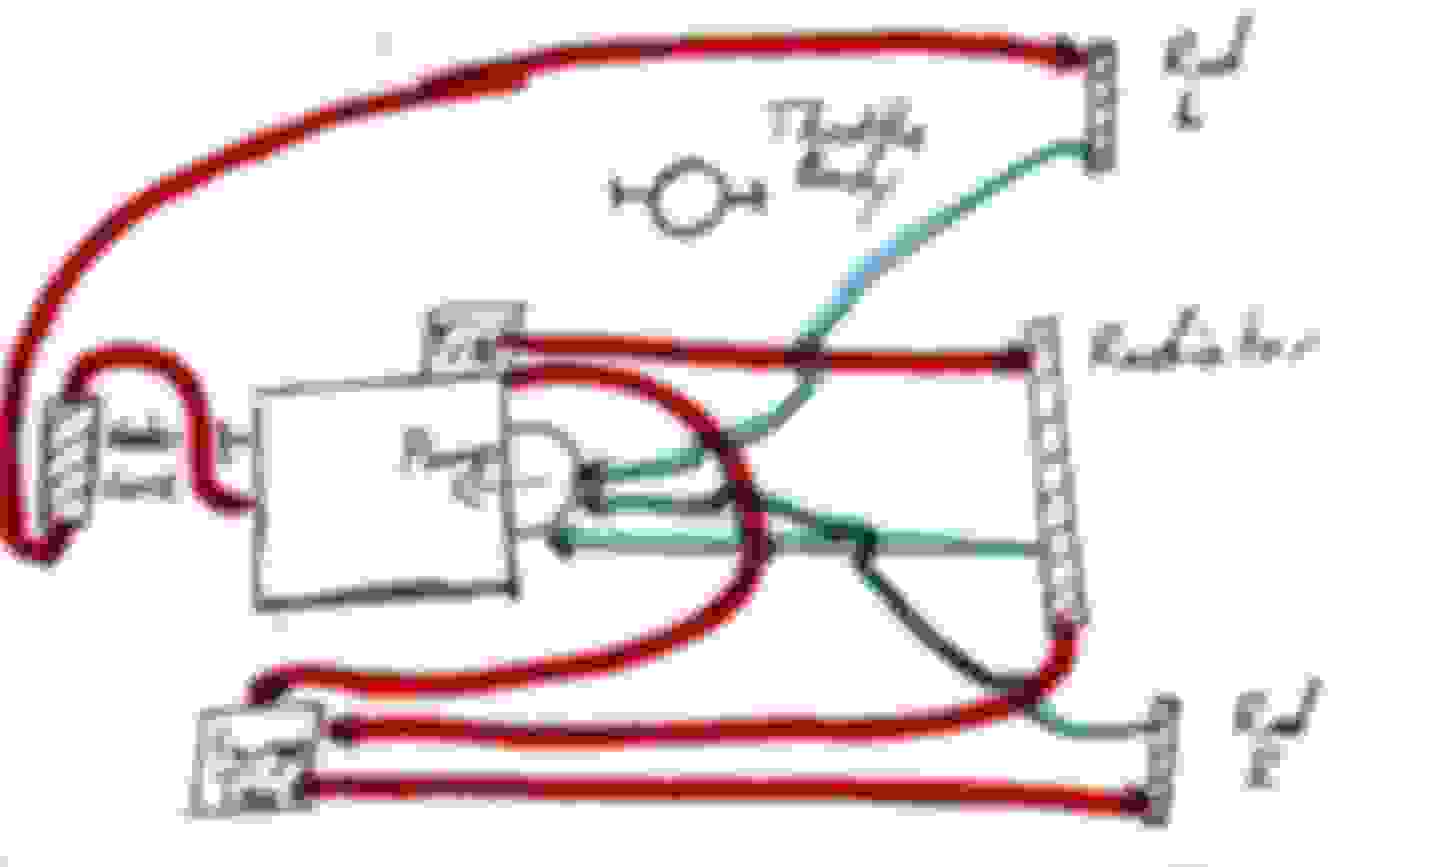
The other connection was a little tricky to understand, and it goes from the coolant tank to the other aux rad. Our coolant systems operate in a "surge tank" configuration, which is different from an overflow tank in that it is completely closed. In this configuration there is one line from the water pump outlet (hot side) to the coolant tank, one line from the hot end (topside) of the radiator, and one line to the water pump inlet (cold side). The two hot lines aren't actually for coolant in the way that every other line in the car is, they're actually for aerated coolant, which tends to accumulate at the high point of the radiator and water pump. We have this system to replace the clunky coolant-air separator (AST) from the Rx7. Here's a diagram from that patent.
And the system in place on the FD.
At some point I'm going to make a custom surge tank that re-incorporates the throttle body line into the tank because the flow into that particular cooler is pretty low and it really isn't helping much. Most of the additional cooling is coming from the Heater/aux rad loop. I honestly don't think that doing all this was completely necessary but I wanted to do it so I did.
Yeah when I had a front mount single cooler on the stock engine I saw an increase in OP as well. Right now I have a center mount oil cooler, drivers side oil cooler, and a secondary radiator where the stock passenger side oil cooler was. And I have a cooler for my turbo coolant circuit center mounted as well. It all works well.
So here's the car as of a couple weeks ago. I finally got my hood vents!
Used a jigsaw to cut them, and they're Trackspec vents that I first found out about at Sevenstock on this Rx3.
The side vents are their Small Universal Angular vents, and the center pair is a set of side vents for a BMW E36.
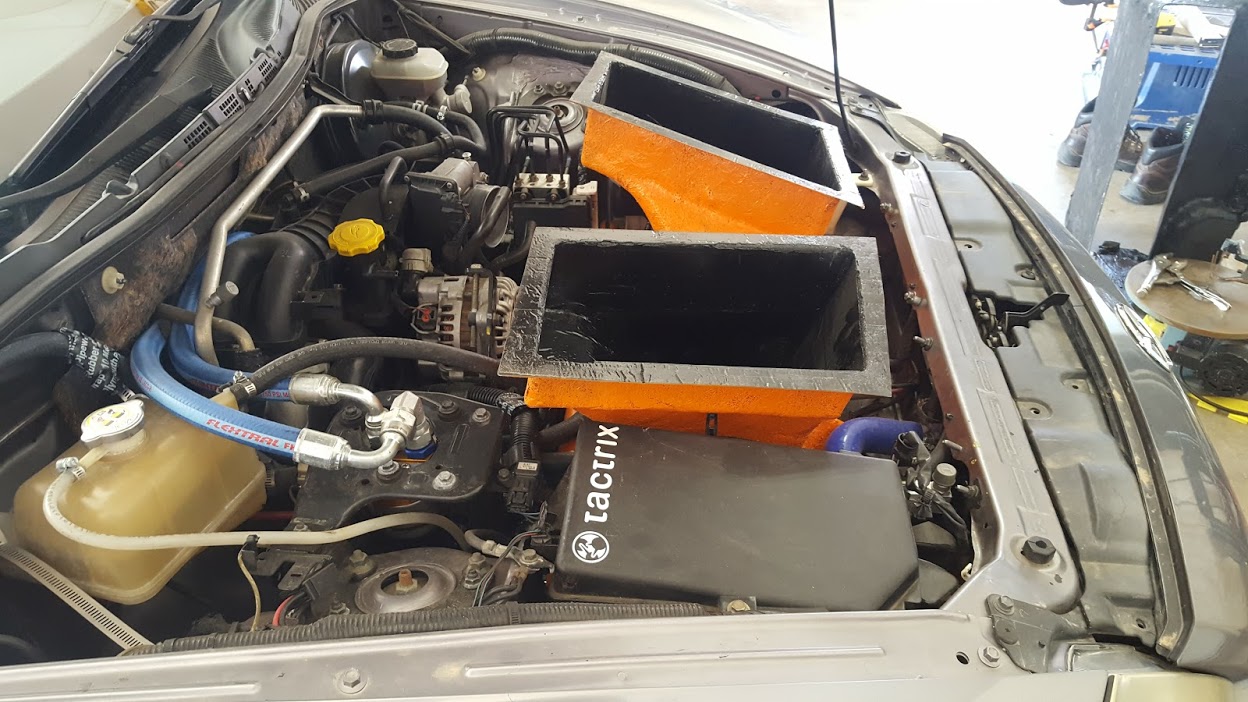
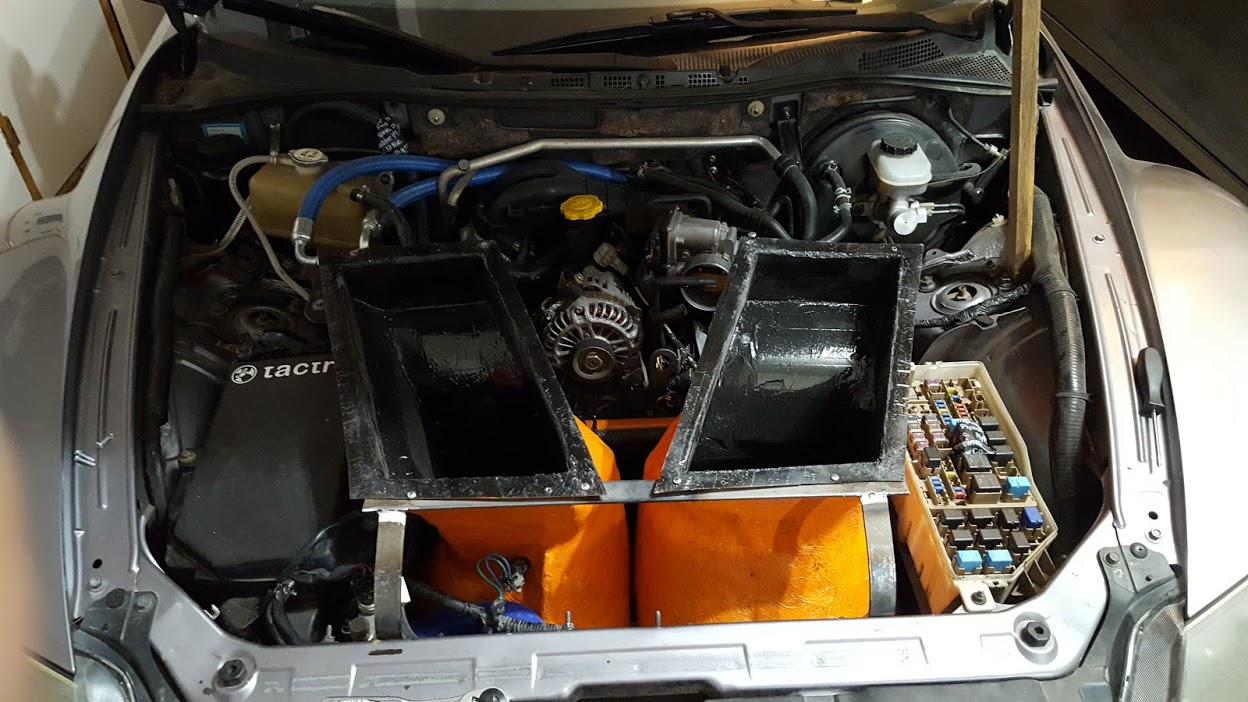
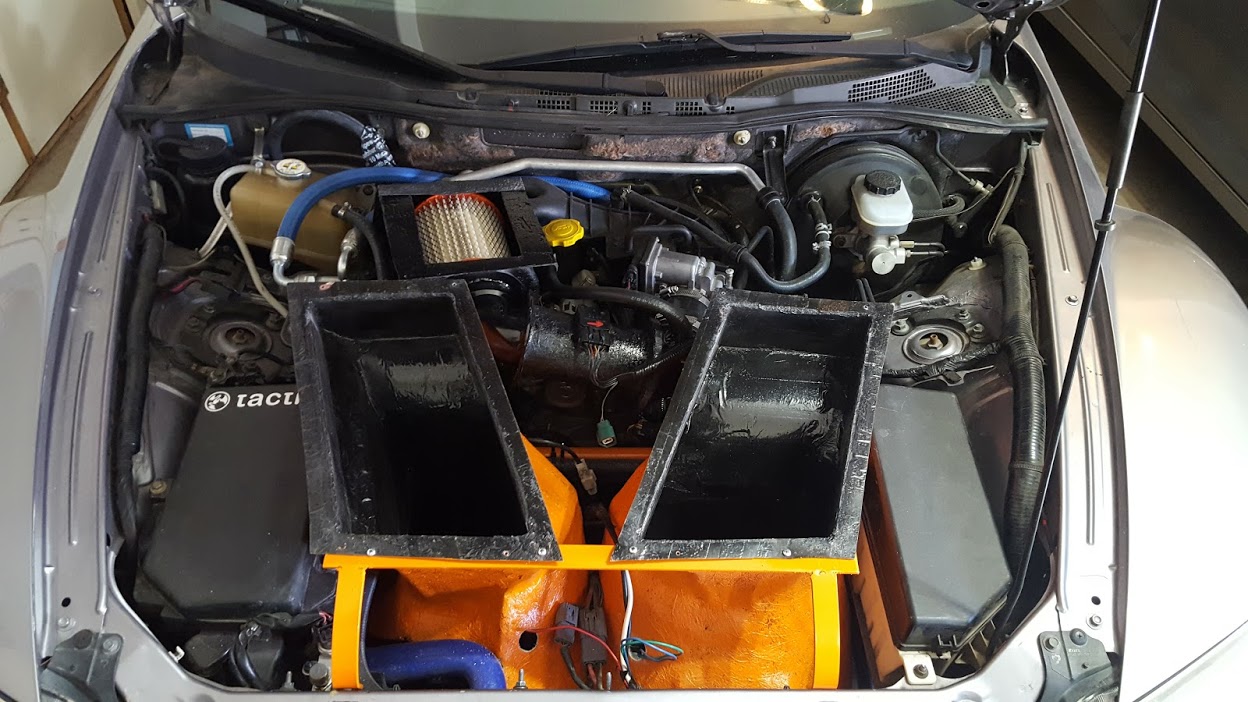
In this picture the top passenger vent is actually facing the wrong way, it is now facing forward to draw air into the new intake (it won't actually help that much, but it will get the airbox out of the way).
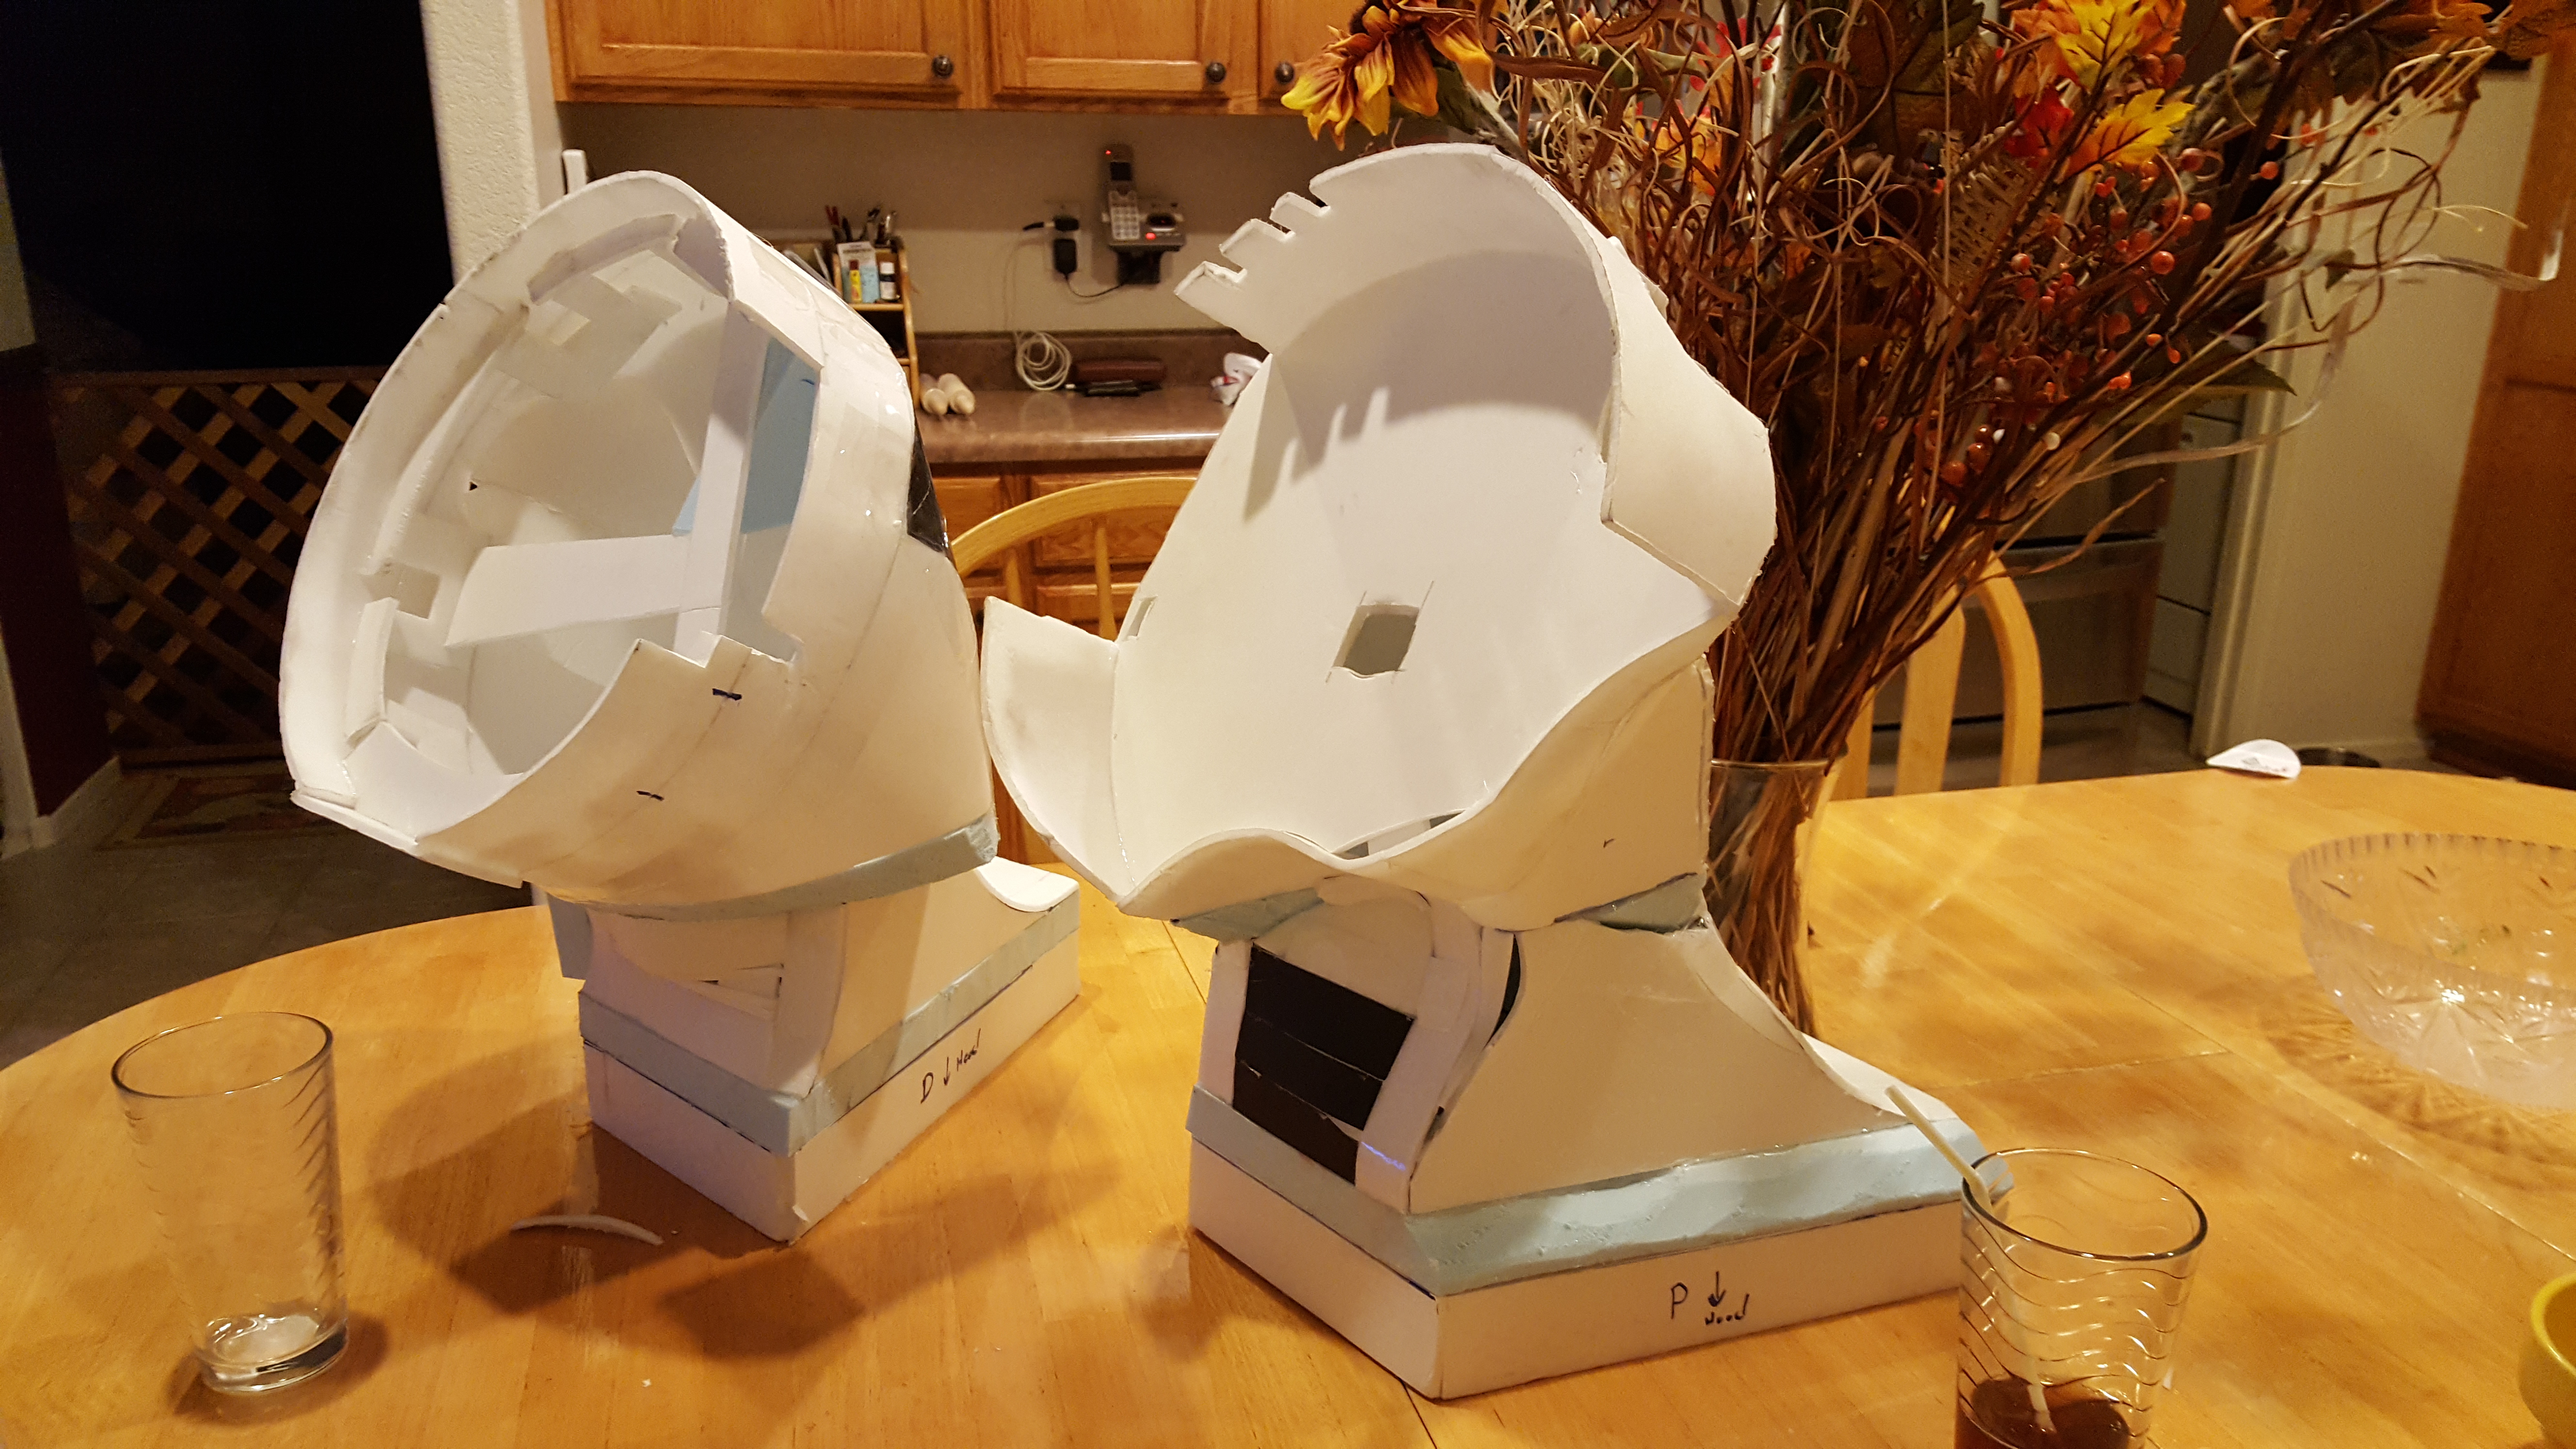
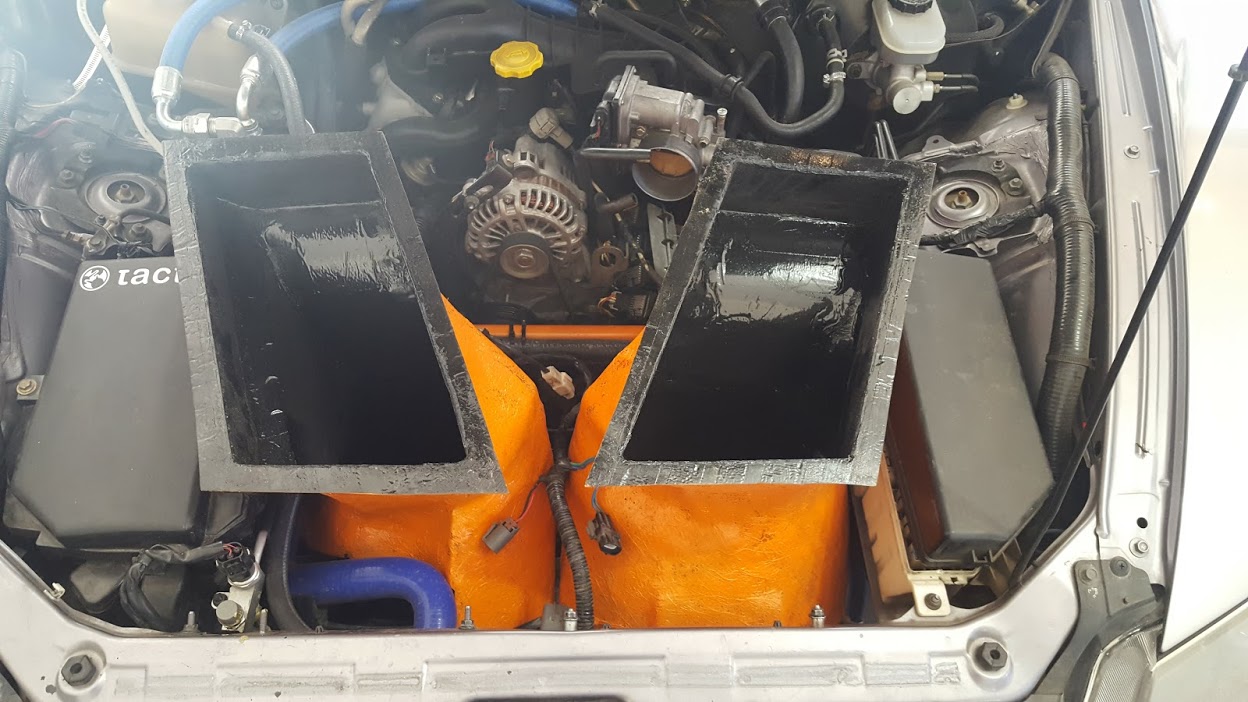
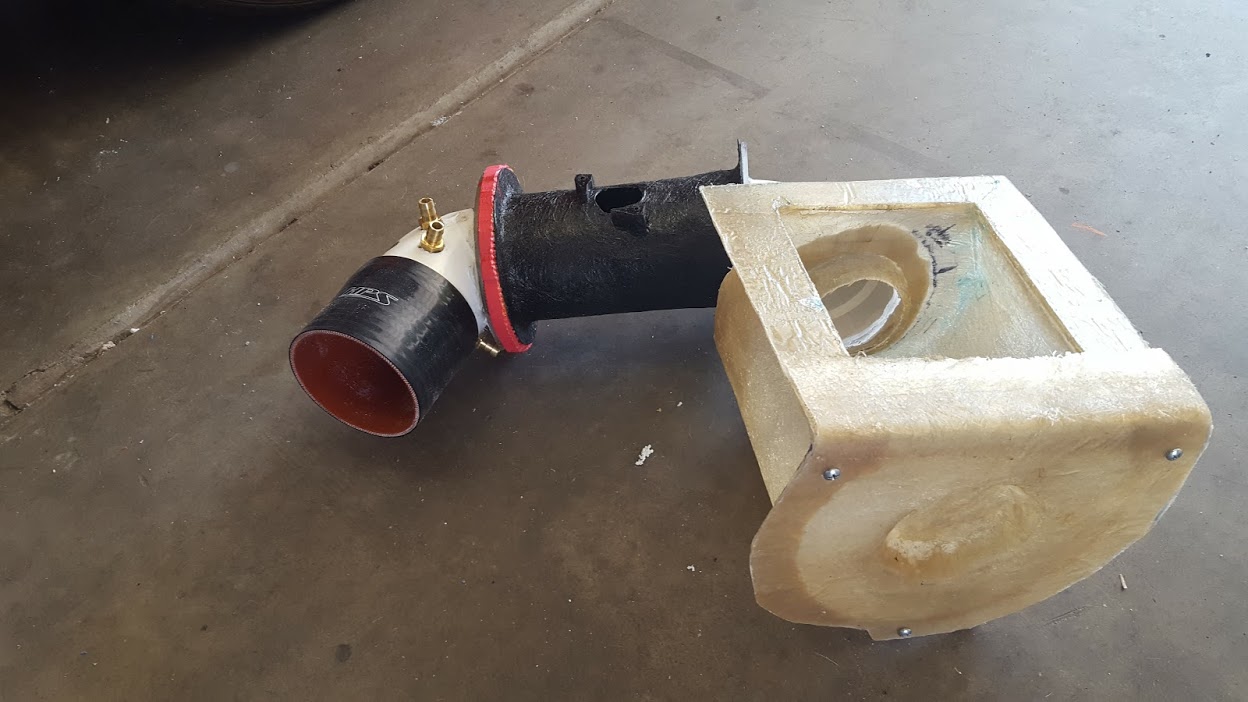
I made an airbox/intake out of foam then fiberglassed it, but it's not good enough. The one piece design doesn't make it easy to align anything inside properly, so it's being remade in 3 or 4 pieces so that I can avoid air leaking past the new filter or MAF screening.
I've gotten much better at making fiberglass parts since I made that radiator duct, I think it will get remade sometime this winter as well.
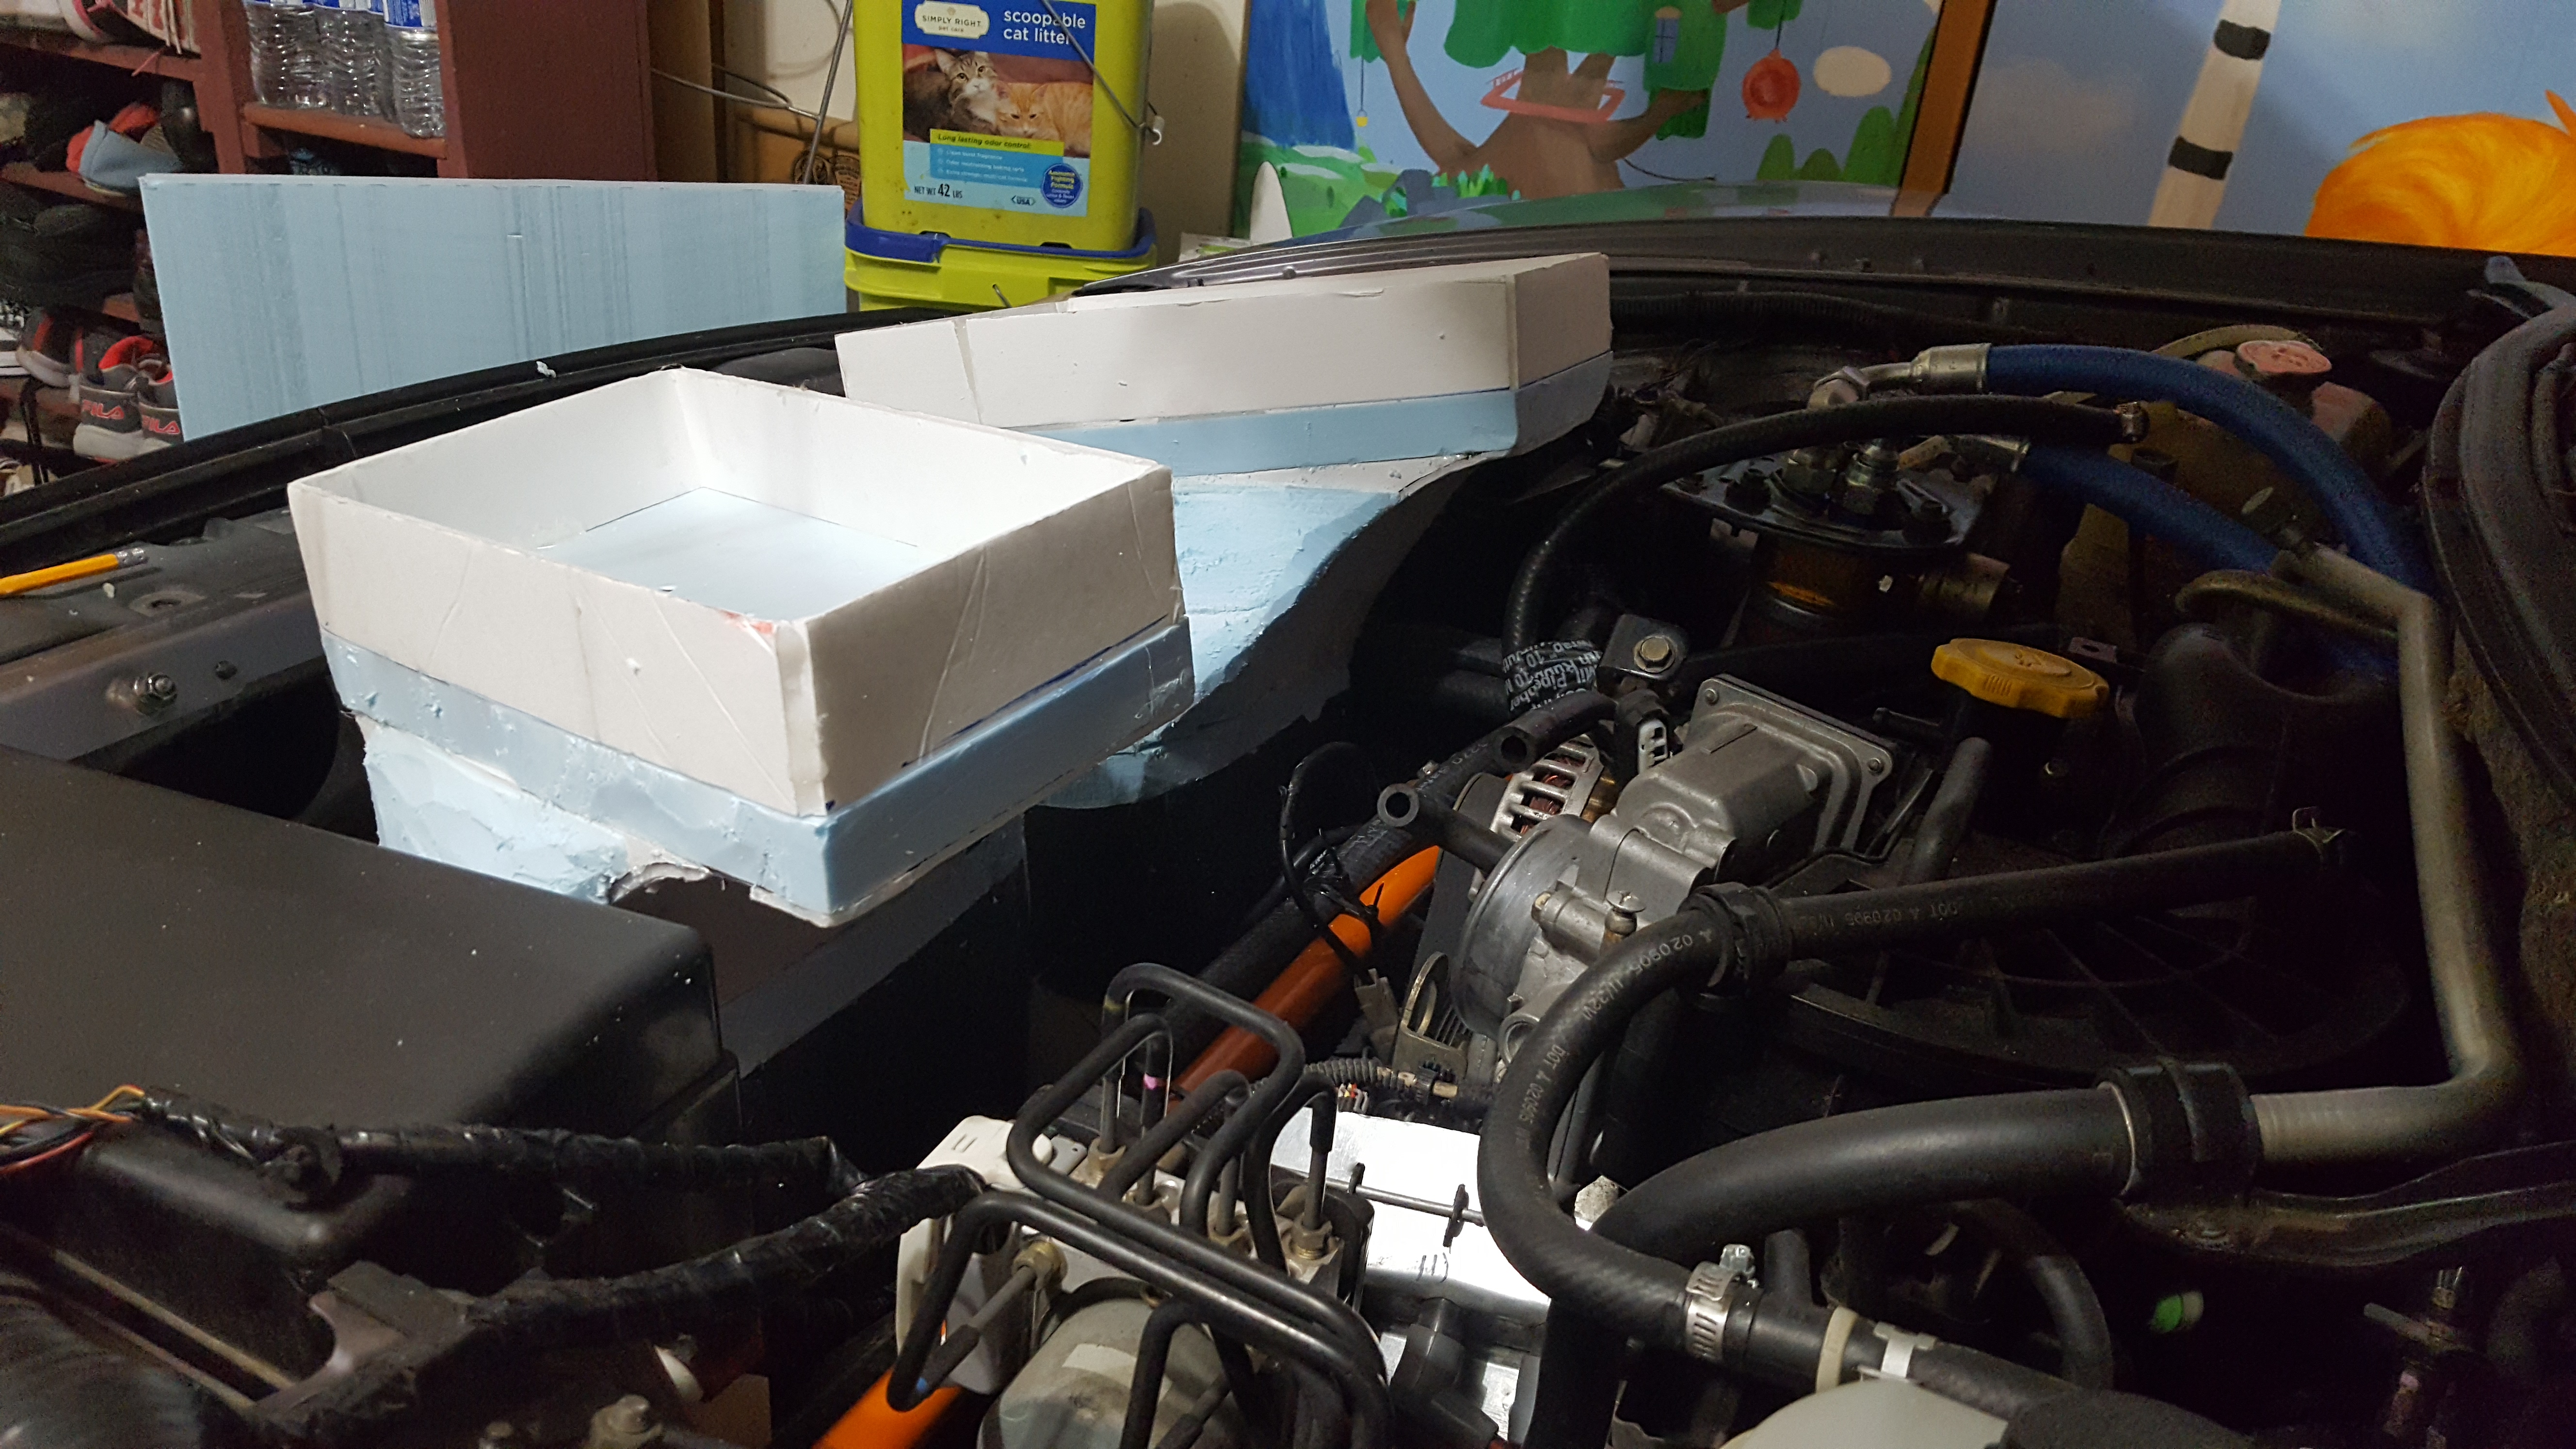
Now you might be asking, "Why do you need to replace the intake when the stock one is sooooooo good?" The answer is, because it's in the way of my vents. I'm currently making the foam plugs for the radiator exit ducting so that all that heat can go directly out of the hood. I'm not trying to make a better intake, I'm trying to make an intake that doesn't take up 93% of the engine bay.
An interesting technicality that showed up in trying to make the plugs for the radiator was that that stupid crossmember was in the way. So I cut it out. Now I don't think that it will hurt lateral stability too much because most of that stress is already getting taken up by the front subframe and the strut tower bar (which is also being remade), and I believe that it was mostly there for mounting the battery and airbox, both of which are no longer there. I did need a place to mount the grounding block, part of the wiring harness, and two of the auxilary coolant lines, so that they doesn't get eaten by the pulleys so a steel tube was bolted between the frame rails abit further back.
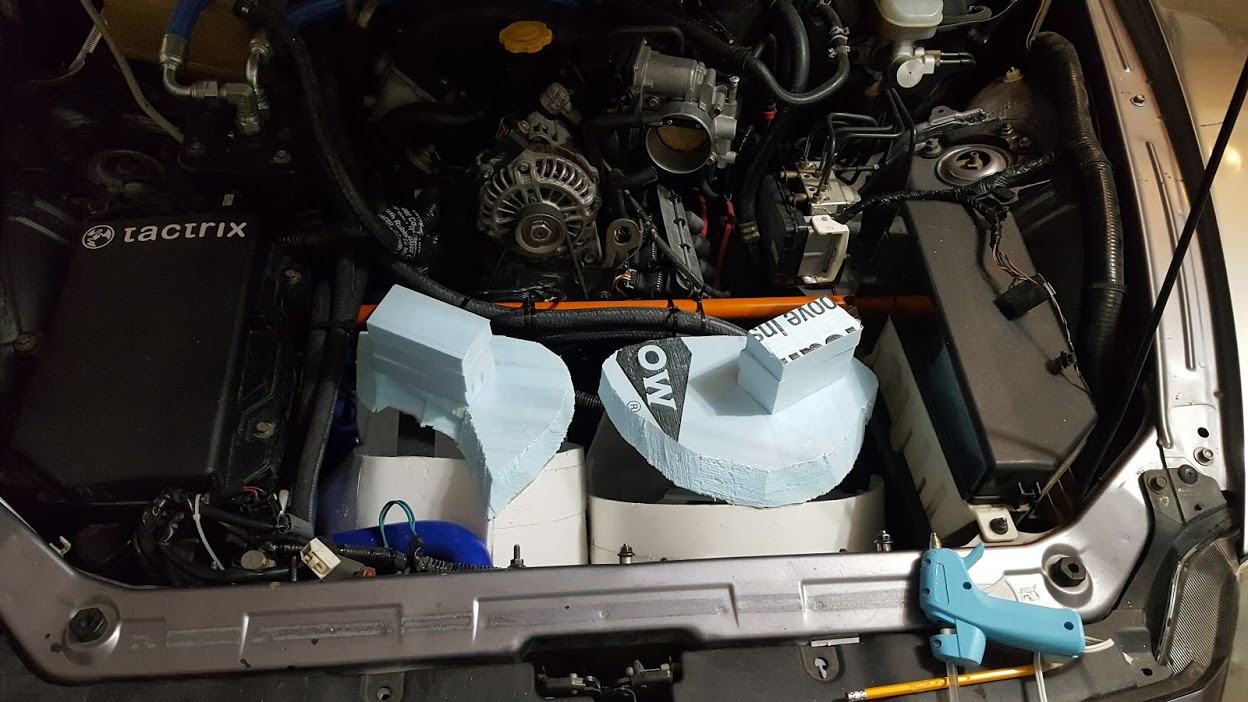
And there it is with the beginnings of the foam plugs.
That's it until the duct up to the hood is complete.
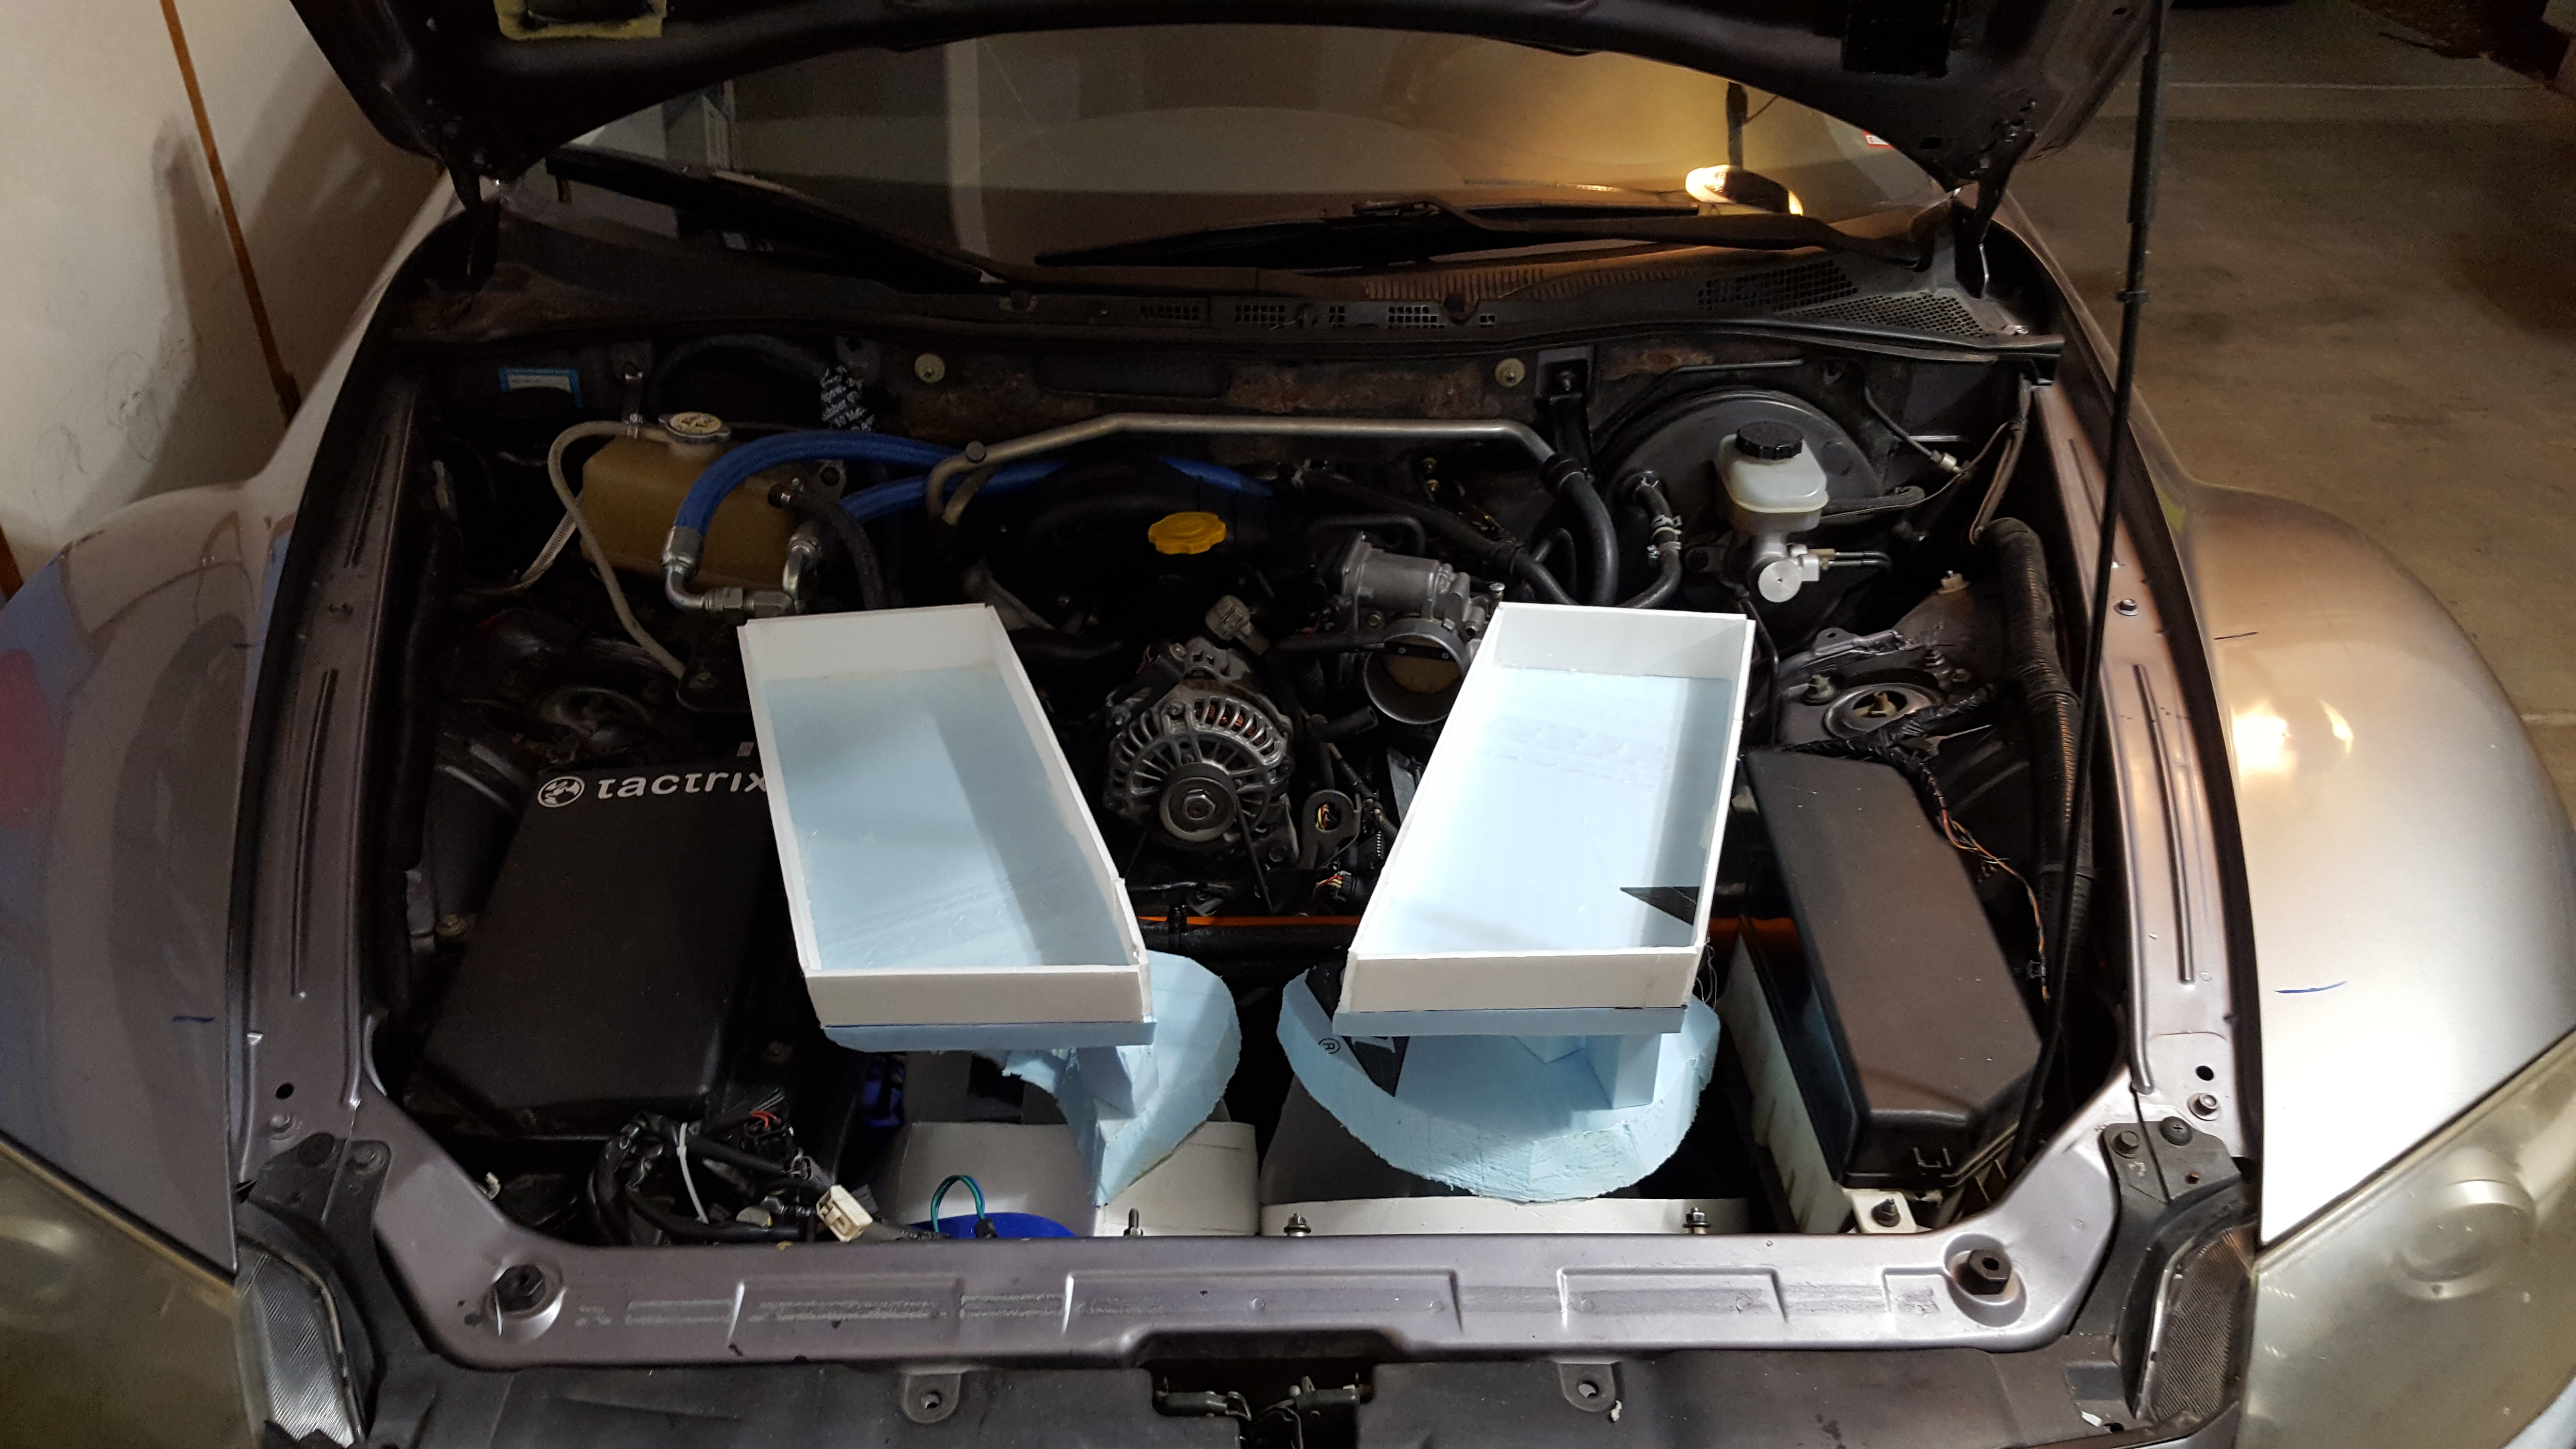
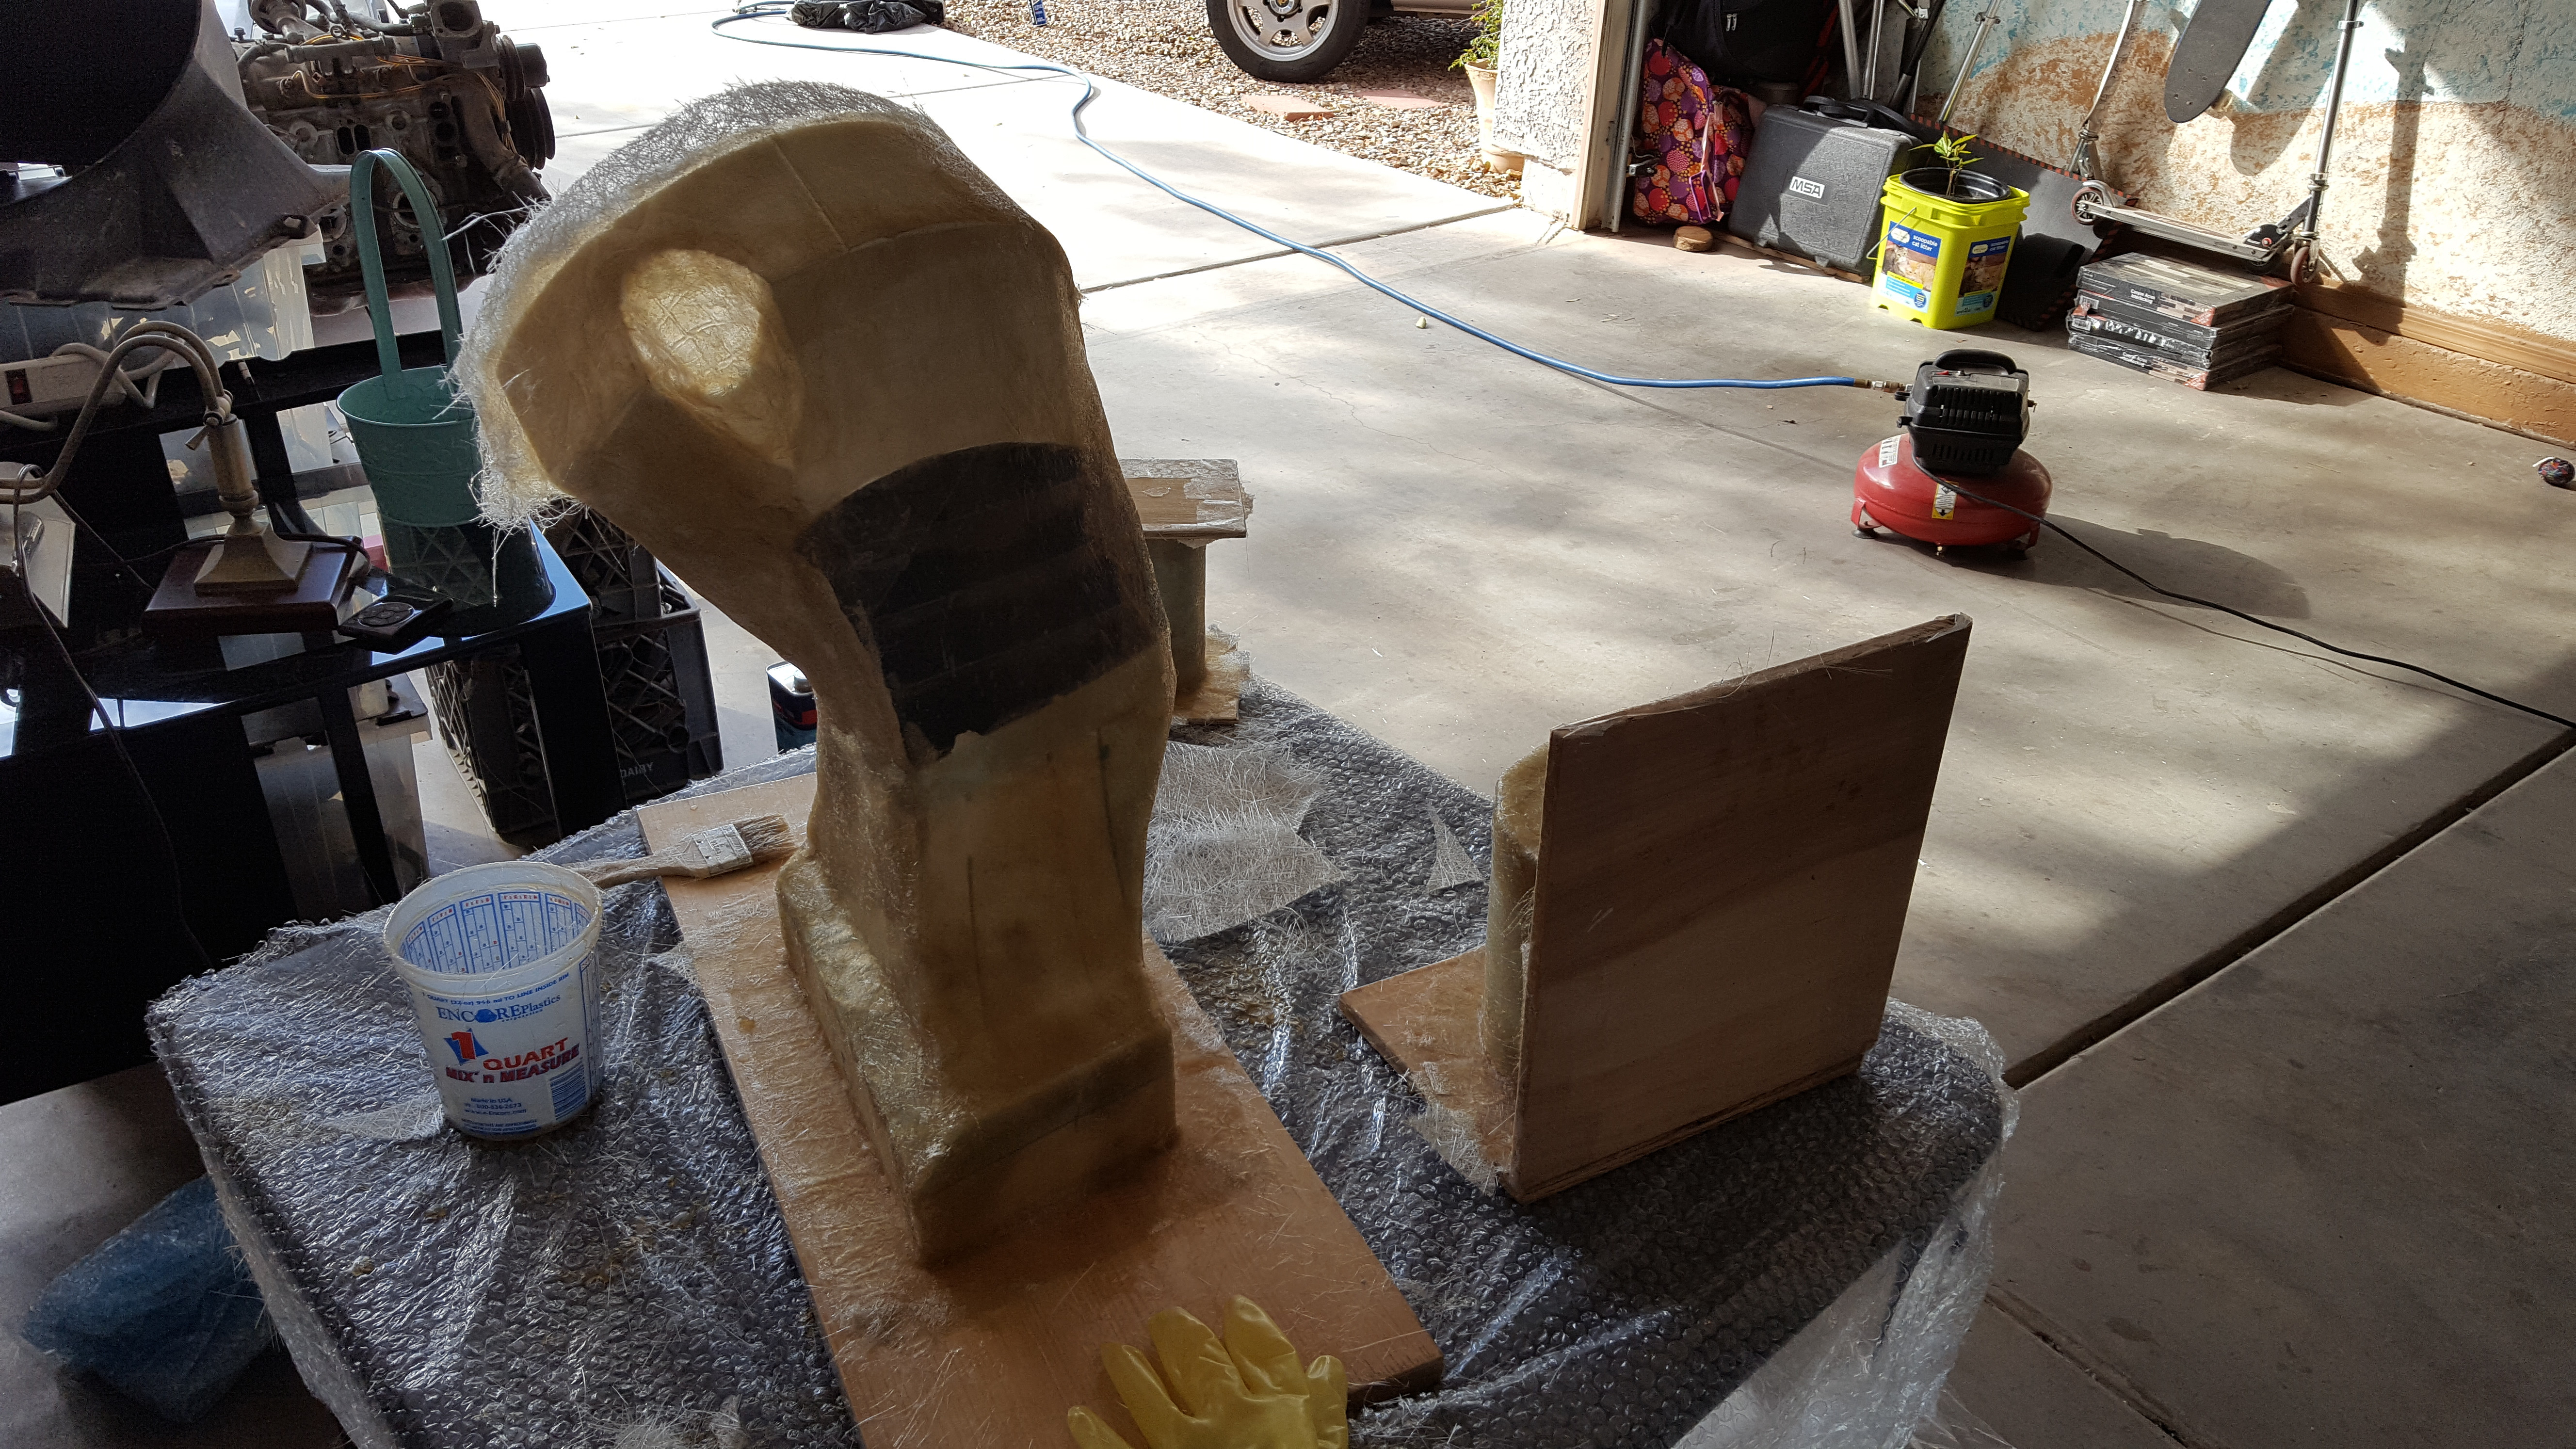
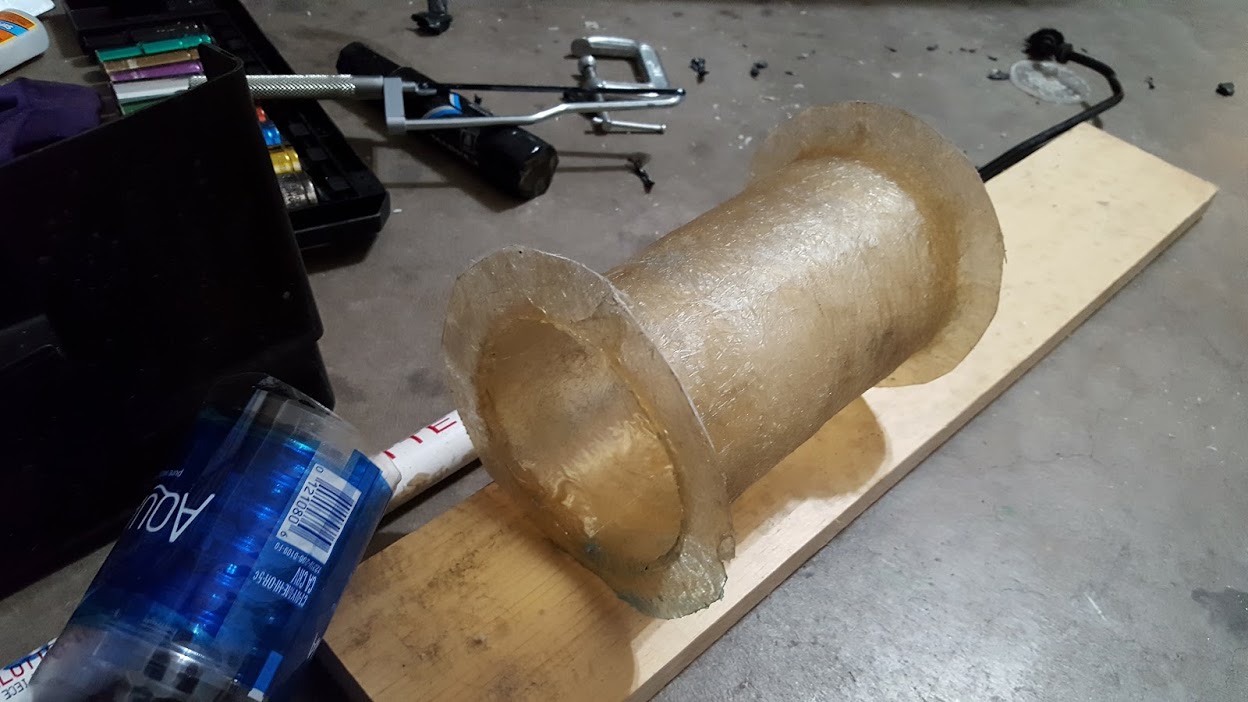
I got the foam plugs done, then I fiberglassed the passenger side of the duct and demolded it.
To get these to line up I made the top plug to fit the flange, then I piled clay on the lower plug and closed the hood. Simple perfect alignment.
Some filling and trimming
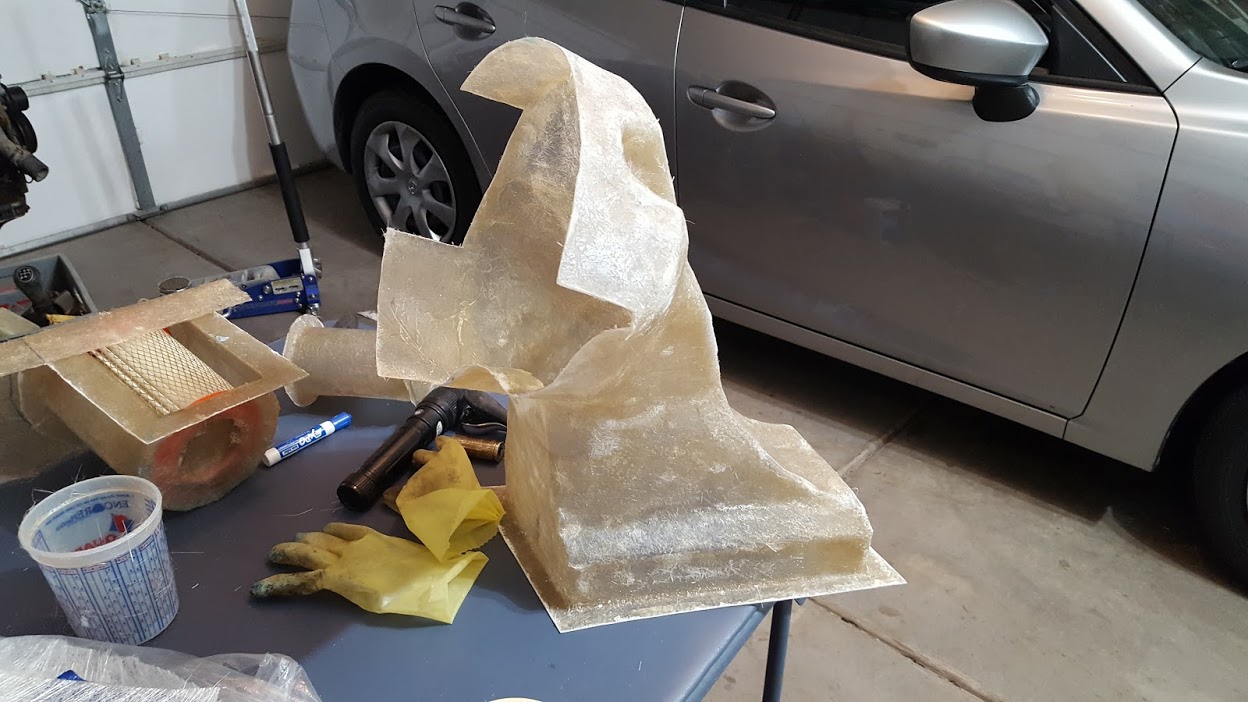
After covering it in packing tape to avoid the resin melting the foam it was fiberglassed. I'm using polyester resin with chopped strand mat to conform more easily to the more complicated curves.
And there's the first of the two. This is for the passenger side fan.
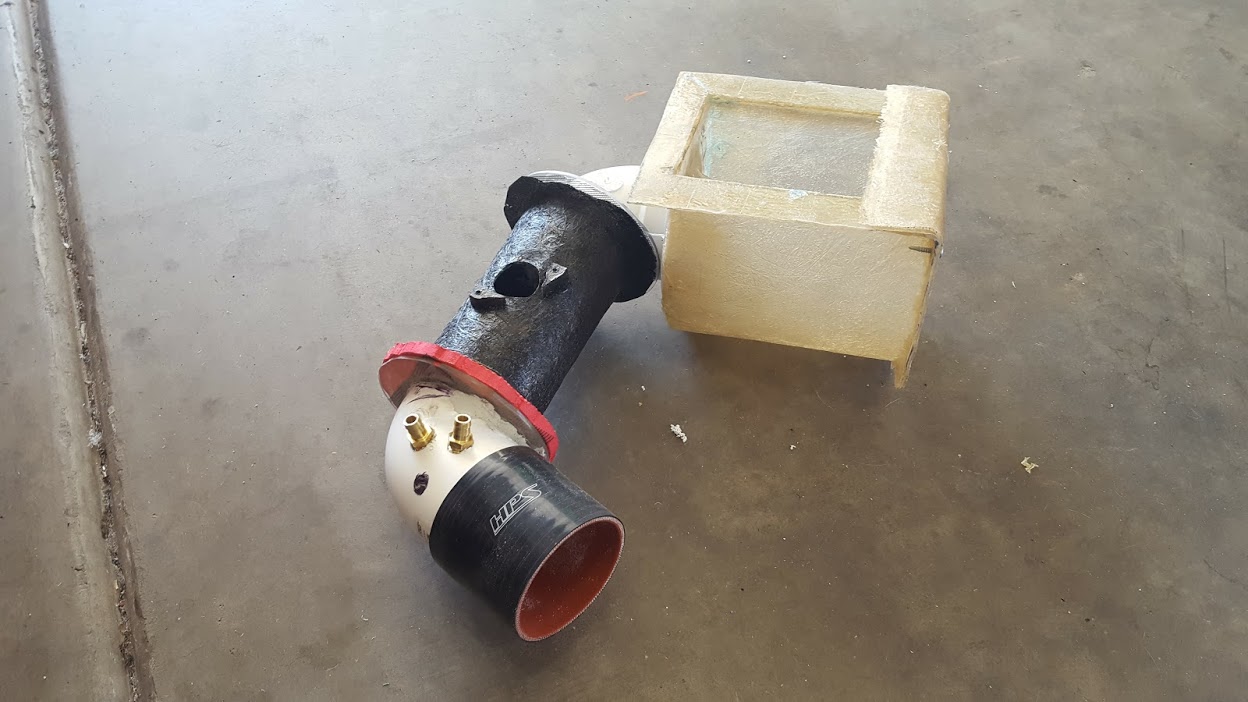
Also on the table is the new air filter housing and the new MAF tube, but we'll get to those later.
Oh, and I bought an engine from a 1989 FC to play with.
It weighs a freaking ton, and I don't own a hoist. The plan is to tear it down, replace the front cover and pump housing with the one Charles R. Hill gave me, maybe peripheral port it, get it running, and finish optimizing the Renesis water pump. Depending on the condition of the housings I might end up trying to build a single rotor but before any of that I have to get the eccentric shaft bolt out. It's really in there...
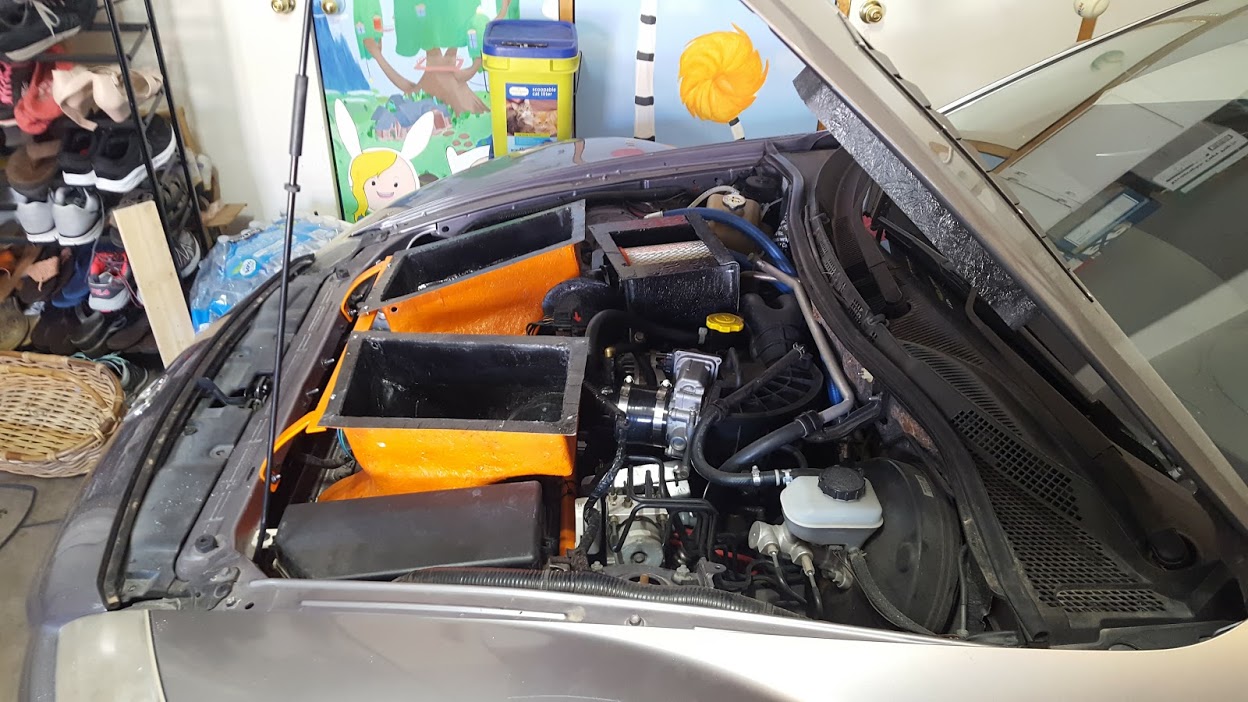
Finally got these ducts installed and the intake fitted last weekend! They fit, but it's a little tight, still a whole lot more space than stock though. Looking at IATs I'm still getting near ambient intake air, despite not having a duct directly from the passenger side inlet to the intake. I'm going to attribute this to the cross flow from the passenger side inlet to the driver's side outlet vent.
Painted and test fitted.
I also finally painted the radiator inlet duct.
Look at that!
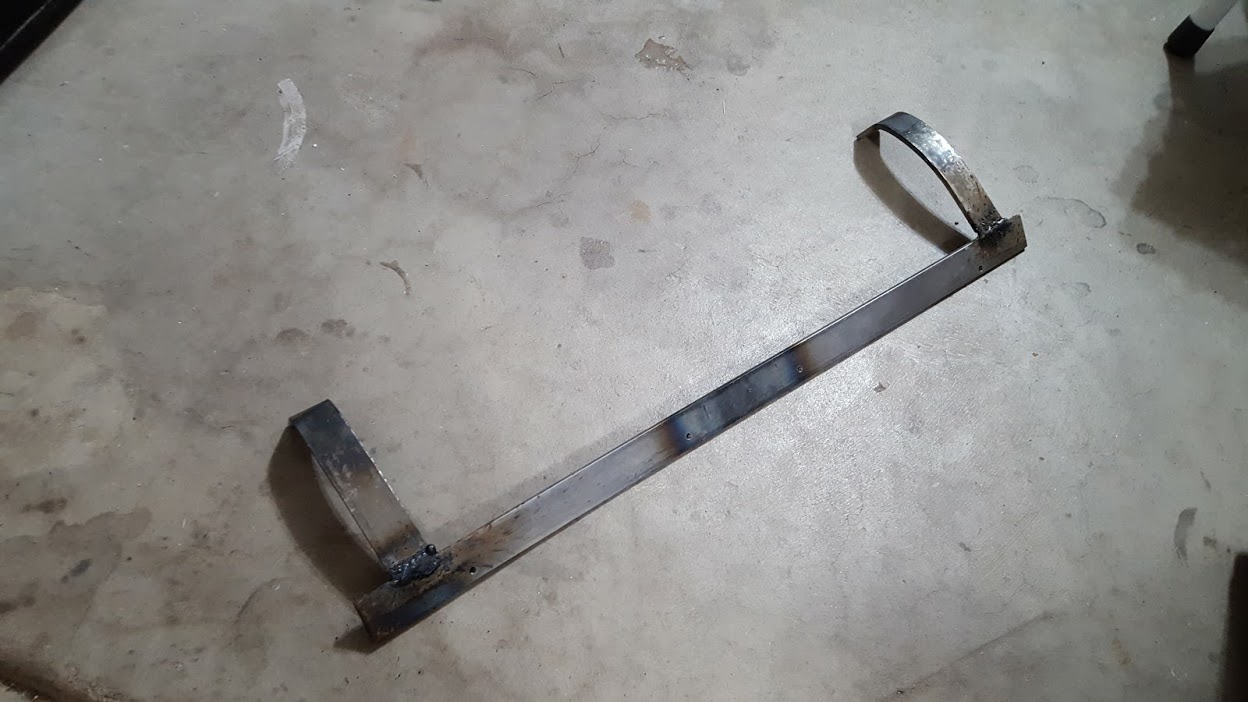
To get the outlet ducts mounted I made a bracket, it took some effort to get it to hold both in place properly, but in the end it turned out perfect.
I am the best welder.
Next up was the intake, I already had the airbox and MAF tube fiberglassed (went with fiberglass since they need to be pretty dimensionally accurate), but the elbows are both 3" Schedule 20 PVC, which match up to the throttle diameter beyond perfectly.
The silicone coupler came from Amazon, and the elbows are both flanged so that they could be sealed to the intake screens (one on either side of the MAF) and the airbox.
And there it is.
The outlet ducts mate up perfectly with the fiberglass flanges on the underside of the hood, and the transition is practically seamless. The intake sound has definitely changed, but only from 2-4k RPM and only under load, it is the best thing ever. I think the engine spools up a tiny bit faster from those low RPMs, but I can't be sure. I still need to re-tune the MAF values, just to get that tiny bit of precision back (the new MAF tube is the exact same diameter as the stock one, just a different material).
Anyway, I suppose the next step is to finish the passenger side intake duct. Other than that I'm doing a design study on the water pump (again) to see if I can optimize something.
Excellent work - any ideas on how you will smooth out the air coming in with the mounting of the MAF sensor?
Of course, sandwiched between the flanges on the MAF tube there are diffuser screens (like the two metal mesh screens on the stock airbox). There is 4ish inches in front of the MAF and one 4ish inches behind it.
So far the readings are stable, so it seems like the screens are doing their job, even after that really tight bend.
Nothing fun for the moment. The other day my Ignition Switch fuse blew as I got into the garage, and I had to push it about three feet to get home.
After a bit of non-conclusive research and troubleshooting it turns out that my reverse switch failed, and was shorting to ground when going into reverse (it's supposed to be open in neutral, and have greater than 0 ohms in reverse).
I have to switch to reverse to get into the garage, and that's exactly when it went. I unplugged it and now it's fine, I just don't have reverse lights for the time being.
I got a 07 GT 6 speed auto on purpose to feel these renesis smoothness without scratching gears.
I noticed you put a auto type radiator in your car, and fabricated like mad to lower temps.
Why don't you USE THAT cooler that's already inside it?
You could put a tube and fin 18,800 BTU cooler like I did, and run FL 22 with an accessory pump through it or even Auto trans fluid.
You might even plumb other oil coolers into it.
My cooler makes a 14 deg f difference from inlet to outlet.
On a less than 70 deg day after engine above 180 deg f I can ease it around, and coolant temps will go back down to 170's if I want it to.
That's some serious cooling.
Why would I go through the trouble of cooling coolant indirectly with that internal heat exchanger and another external, when I could cool it directly by running it through an external?
I haven't measured each auxiliary radiator independently, but with both uncovered (I cover them up when it's cold out to avoid over-cooling) I sit dead on 180F on a 110F day no matter how hard I drive.
Let me get your setup straight, you're using an Air-Fluid exchanger before (or after?) your ATF and that's lowering your coolant temps by 14F? Wouldn't that mean that your ATF is waaaaaay under its design temperature?