
SR20 Drift Build


Thread Starter
Project Addict
Joined: Nov 2011
Posts: 154
Likes: 0
From: Ireland
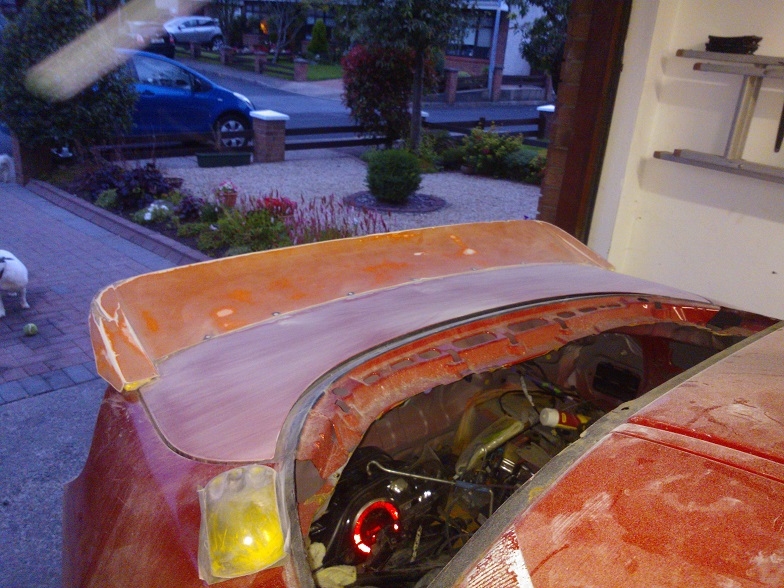
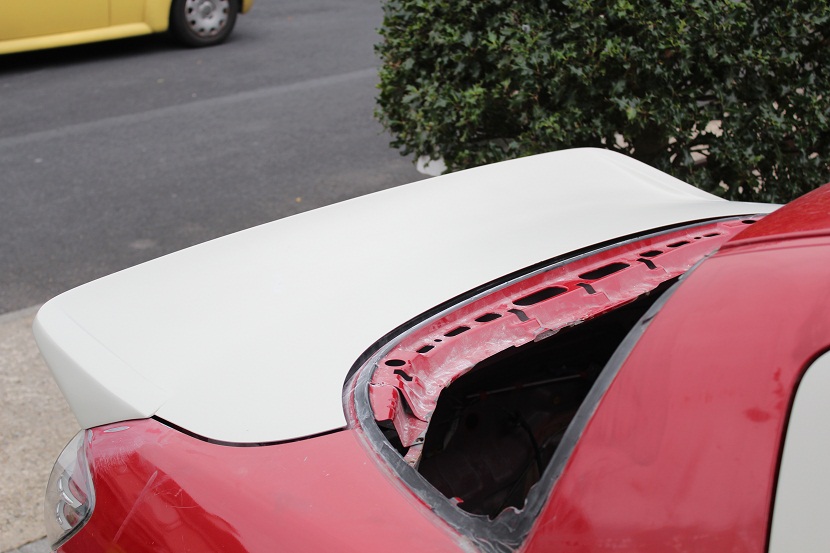
So I've been tipping away on the AE86 spoiler the past few evenings, although matt black looks cool as f**k it is an absolute f**k to sand off, it eats pads and time but got it off anyways, chopped the spoiler a bit more so it was closer to the boot and cut two lines into the rear so as to give more of a vertical rise while keeping a clean line on top.

Some bonding agent and pop rivets later she was stuck down.
To keep maximum strength in the joint I had pre sunk the rivets into the spoiler so they could be left in, add the bonding agent and some fibreglass matting this sucker should never crack.
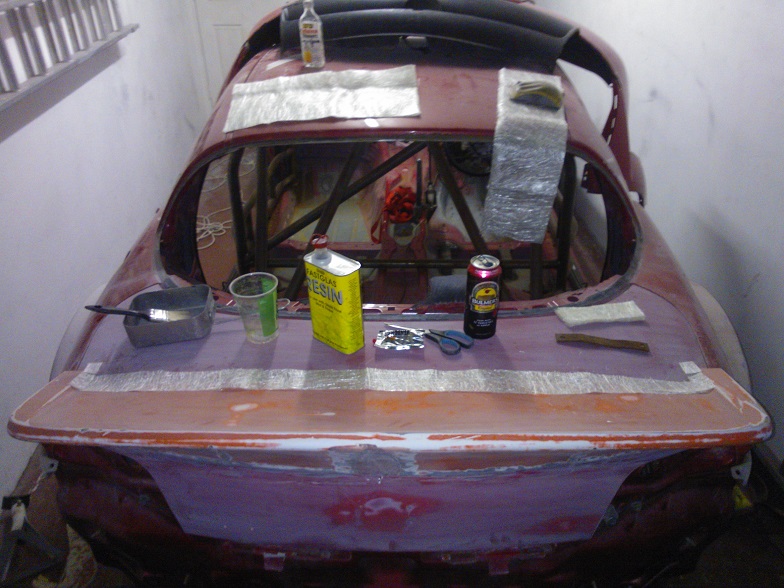
Over that I then used a 50/50 mix of filler/fibreglass for more strength leaving the two corners till last as I had little or no idea how they would work out.
Using fibreglass matting and tin fibreglass to keep weight down rather than filler I built up a skin from the boot edge to the spoiler that flowed with the line of lights without loosing the lines of the spoiler, there is a 2mm gap between the base of spoiler that sits on the quarter so closing wont cause any cracking issues, also the spoiler looks flushed on the top front edges however its just the camera angle, I was able to keep the flat lines of the edges and carry them through to the boot and quarter. Should be back on this Monday evening again.


Thread Starter
Project Addict
Joined: Nov 2011
Posts: 154
Likes: 0
From: Ireland
Cheers fella...
Love your car dude, its sick !
Grrrr...... Ireland, not the UK, different country, not English, I'm Irish ! But welcome to the thread
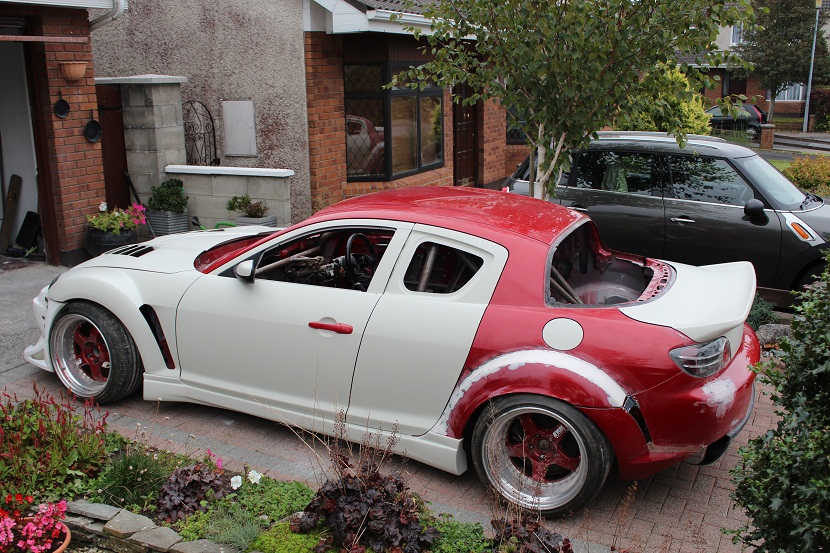
So I collected the wings and 4 doors from the panel beater last weekend, didn't wanna squeeze in the bonnet in chase I damaged it, I have to say I'm very happy, there are 3 good layers of DeBeers 2pac primer on so the panels will just need to blocked and painted. As the car wont be going for paint for a while this will give me a good idea of th end result rather than a load of colours mixed / mashed together.
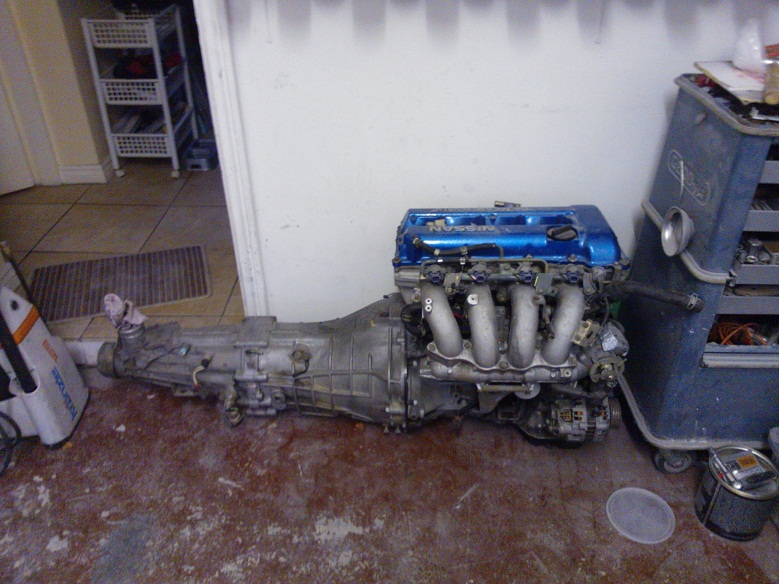
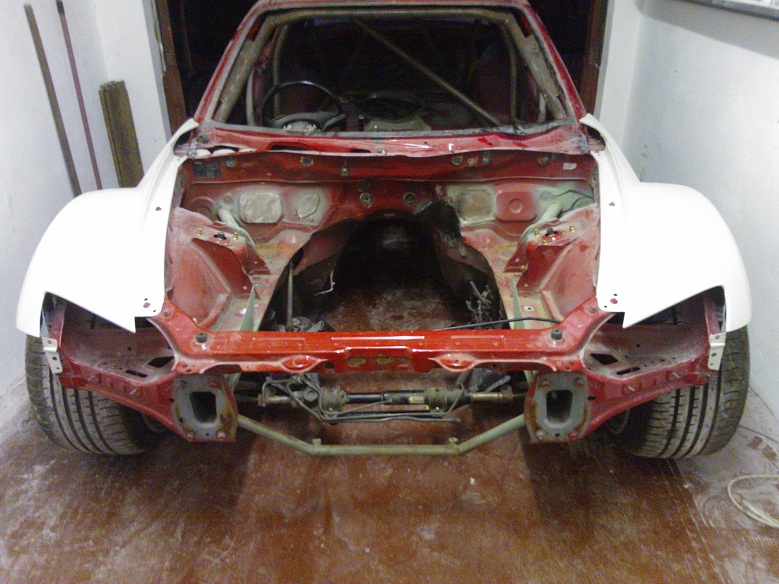
Took out the engine last night as I'm pretty much sick of filler / fibreglass atm. I want to prep the engine bay and interior for primer/paint.
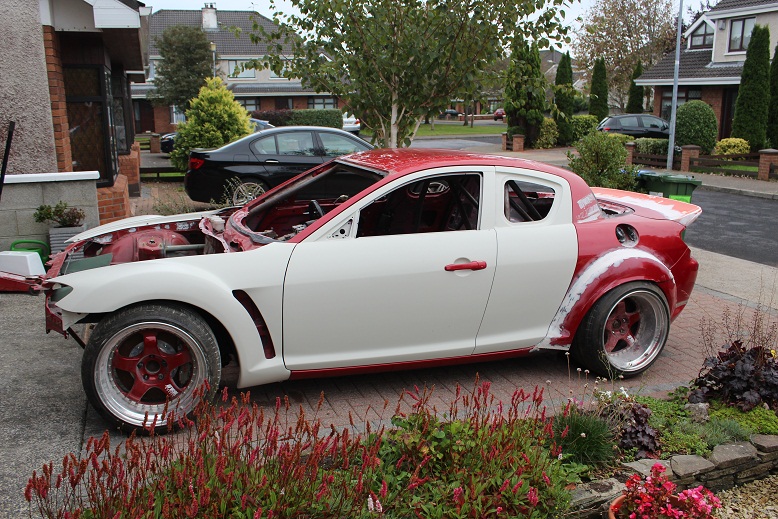
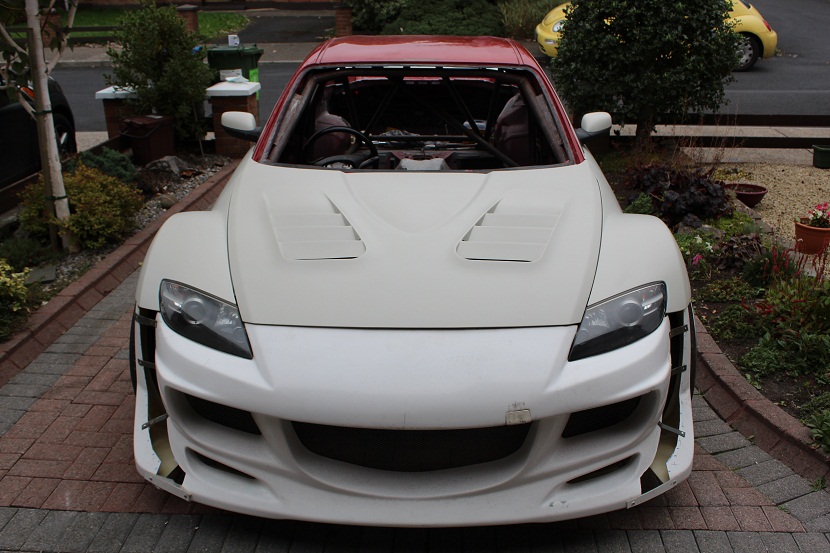
So before I wrapped up last night I fitted the wings to get a proper idea of how wide she was, all I could think was "Beast Mode : On"
Rolling Arches tonight and setting suspension on a mates car so it will probably be next Monday before I'm at it again
Love your car dude, its sick !
Grrrr...... Ireland, not the UK, different country, not English, I'm Irish ! But welcome to the thread
So I collected the wings and 4 doors from the panel beater last weekend, didn't wanna squeeze in the bonnet in chase I damaged it, I have to say I'm very happy, there are 3 good layers of DeBeers 2pac primer on so the panels will just need to blocked and painted. As the car wont be going for paint for a while this will give me a good idea of th end result rather than a load of colours mixed / mashed together.
Took out the engine last night as I'm pretty much sick of filler / fibreglass atm. I want to prep the engine bay and interior for primer/paint.
So before I wrapped up last night I fitted the wings to get a proper idea of how wide she was, all I could think was "Beast Mode : On"
Rolling Arches tonight and setting suspension on a mates car so it will probably be next Monday before I'm at it again
Thread Starter
Project Addict
Joined: Nov 2011
Posts: 154
Likes: 0
From: Ireland

Registered
Joined: Mar 2010
Posts: 44
Likes: 0
From: West Kentucky
I really appreciate that you're sharing this while you work on it. 
I don't subscribe to the "engine purity doctrine." Engine swaps, to me, are about taking a good chassis and doing something different or fun with it. Each person has different goals in mind and values things differently.
I don't subscribe to the "engine purity doctrine." Engine swaps, to me, are about taking a good chassis and doing something different or fun with it. Each person has different goals in mind and values things differently.

Thread Starter
Project Addict
Joined: Nov 2011
Posts: 154
Likes: 0
From: Ireland
Maybe, might just go all white to keep it simple...
No worries fella, its slow to take shape so may as well.
Not much tbh
No not as yet mate but I will throw some up once placed...
Decided to get off my lazy hole and fit the primed panels back to the car, next up is the boot door, still have to collect the bonnet.
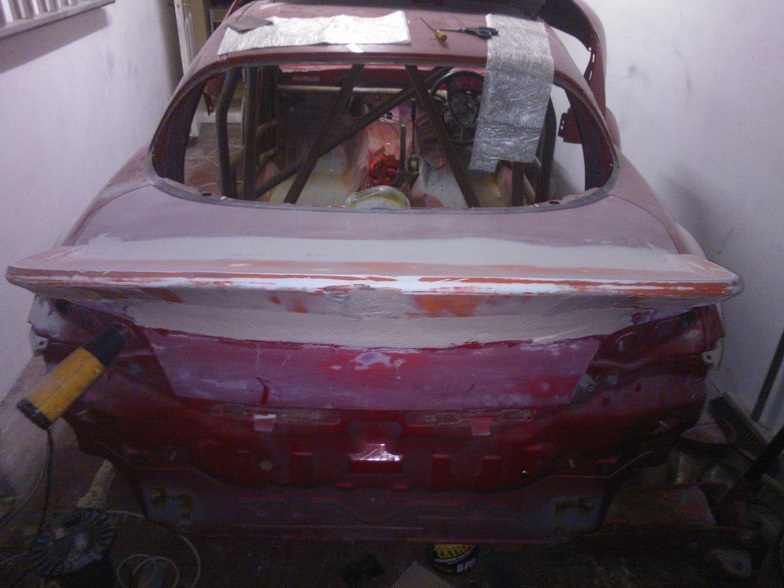
Spoiler shut line is working well with the original shut line of the boot.
Fat **** on her.
Caesar having a sniff in the background.

I really appreciate that you're sharing this while you work on it.
I don't subscribe to the "engine purity doctrine." Engine swaps, to me, are about taking a good chassis and doing something different or fun with it. Each person has different goals in mind and values things differently.
I don't subscribe to the "engine purity doctrine." Engine swaps, to me, are about taking a good chassis and doing something different or fun with it. Each person has different goals in mind and values things differently.
Not much tbh
Decided to get off my lazy hole and fit the primed panels back to the car, next up is the boot door, still have to collect the bonnet.
Spoiler shut line is working well with the original shut line of the boot.
Fat **** on her.
Caesar having a sniff in the background.
Thread Starter
Project Addict
Joined: Nov 2011
Posts: 154
Likes: 0
From: Ireland
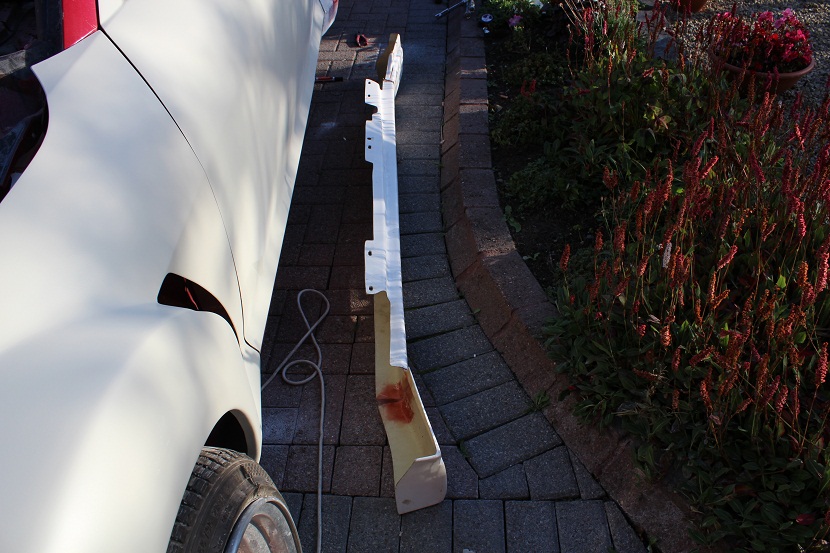
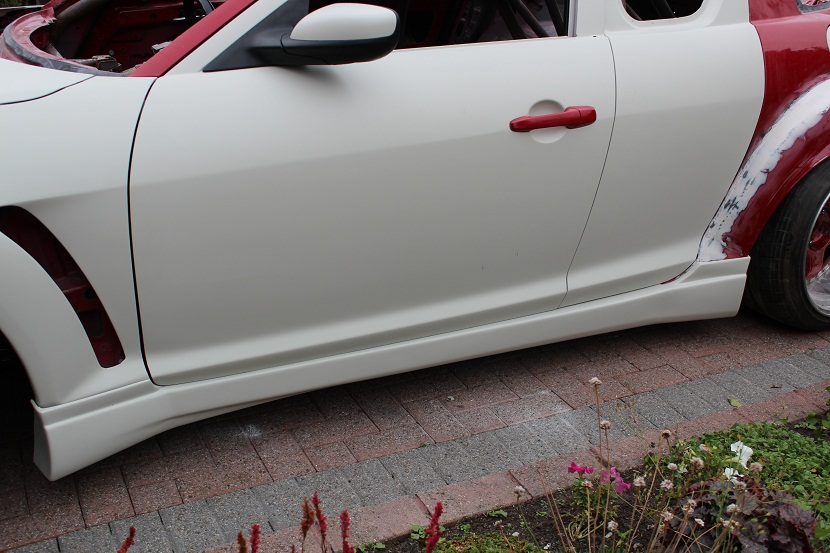
So finished off the boot door and tackled the sideskirts, they were straight so they needed to be twisted to match up with the new arches, after some chopping and fibreglassing I got there in the end, threw a few more bits on like the mirrors and petrol cap and I think she is starting to come together slowly
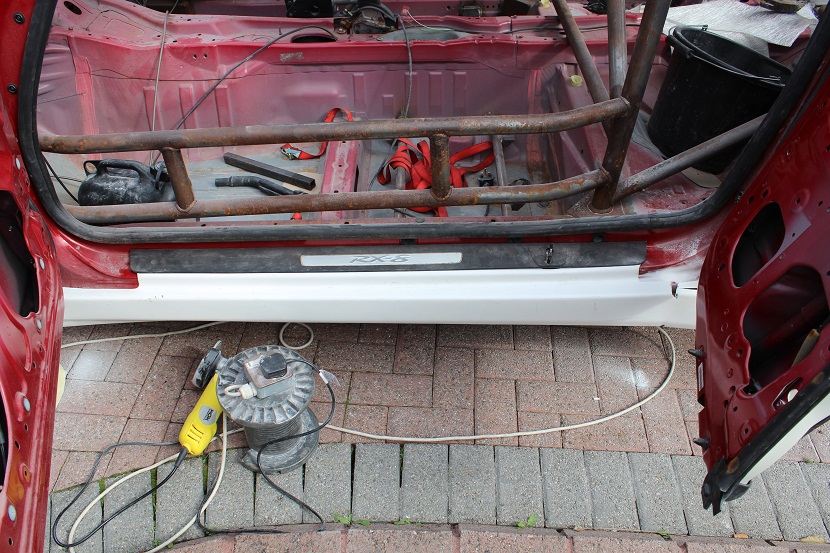
So the boot, bonnet and skirts should be back from the bodyshop Sunday or Monday
So the boot, bonnet and skirts should be back from the bodyshop Sunday or Monday

Thread Starter
Project Addict
Joined: Nov 2011
Posts: 154
Likes: 0
From: Ireland
Nope all good in the hood, we're Irish, we are used to the cold
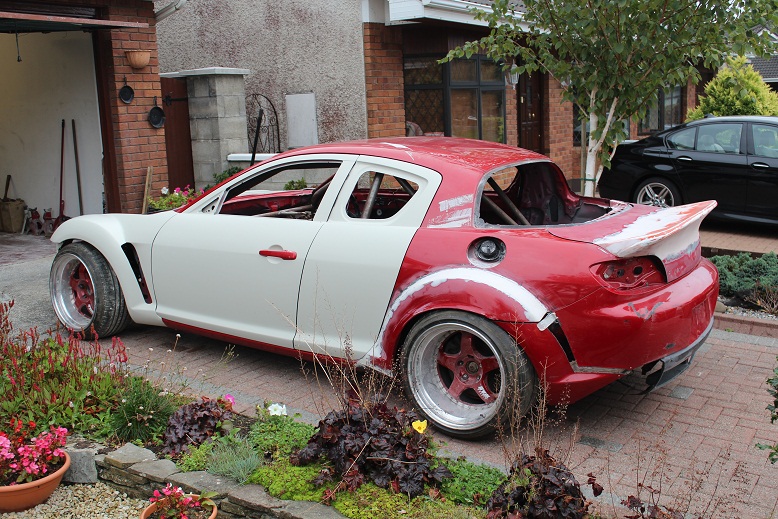
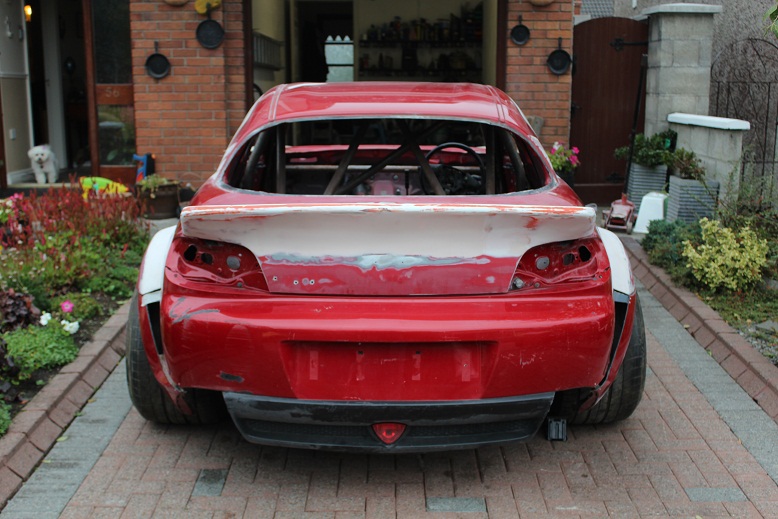
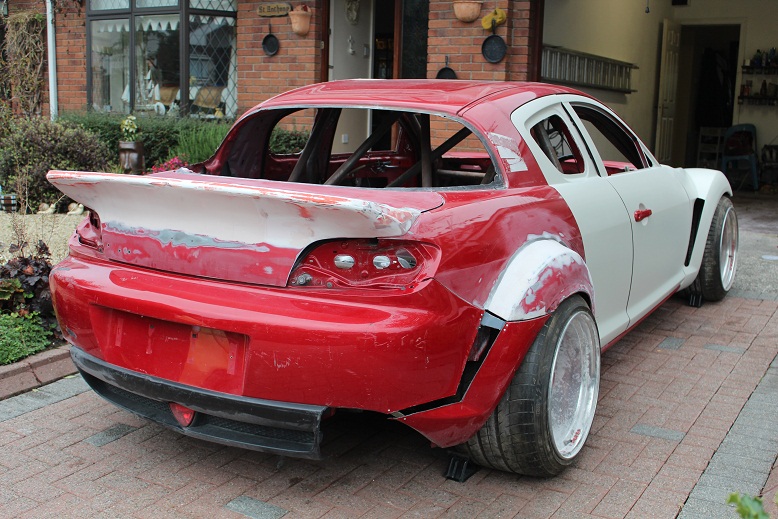
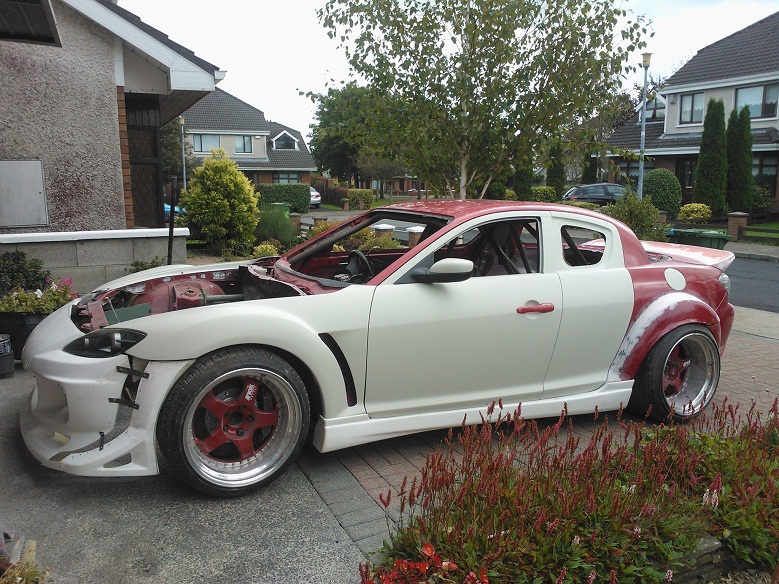
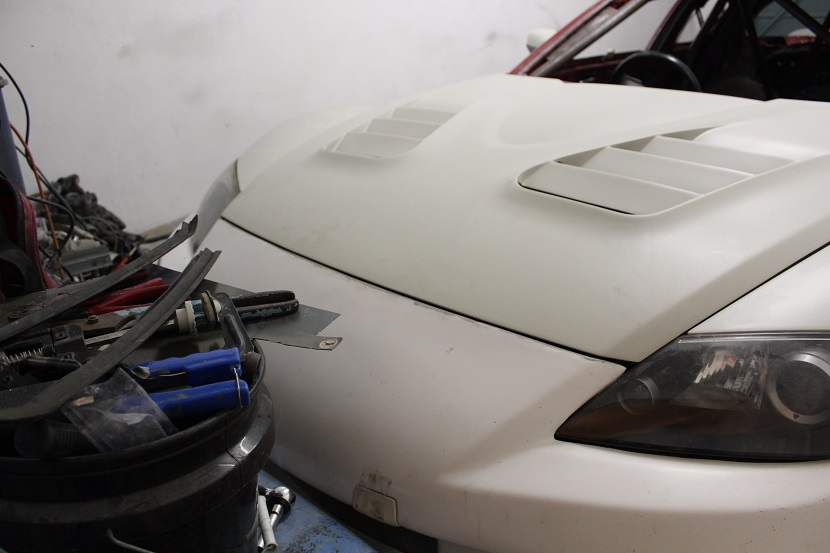
So I got the bonnet, boot and sideskirts back from the bodyshop, all are primed now so there is only the two bumpers that are left to do from a bolt off / bolt on point of view. Happy with how the skirts turned out, the fit turned out well as nothing is holding them on front or rear, just in the middle. Enough words, more pic's :
Got enough vents ?
Looks good...
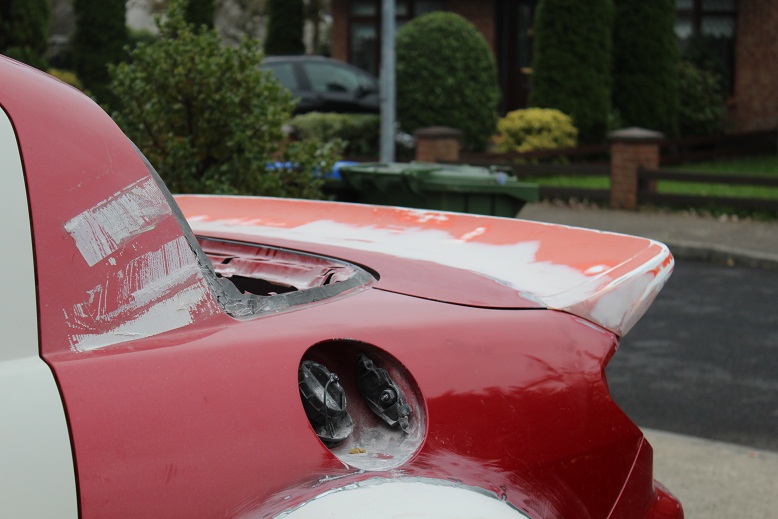
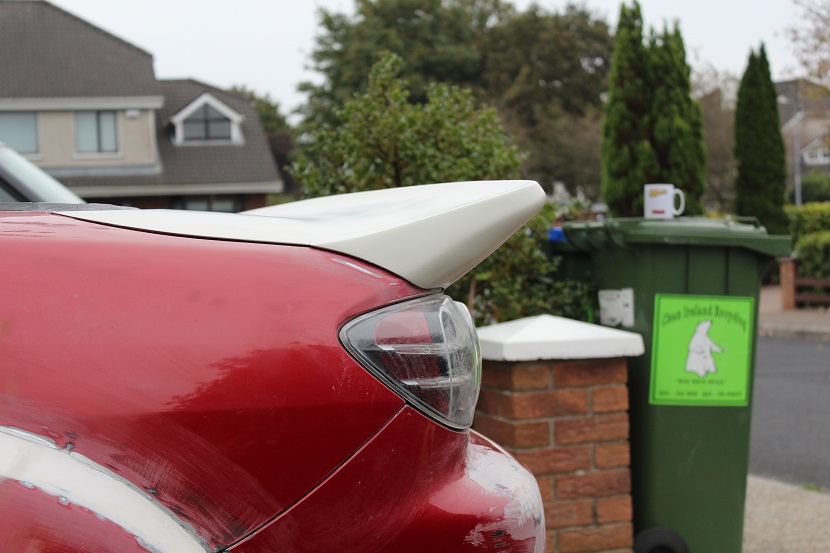
AE86 spoiler :
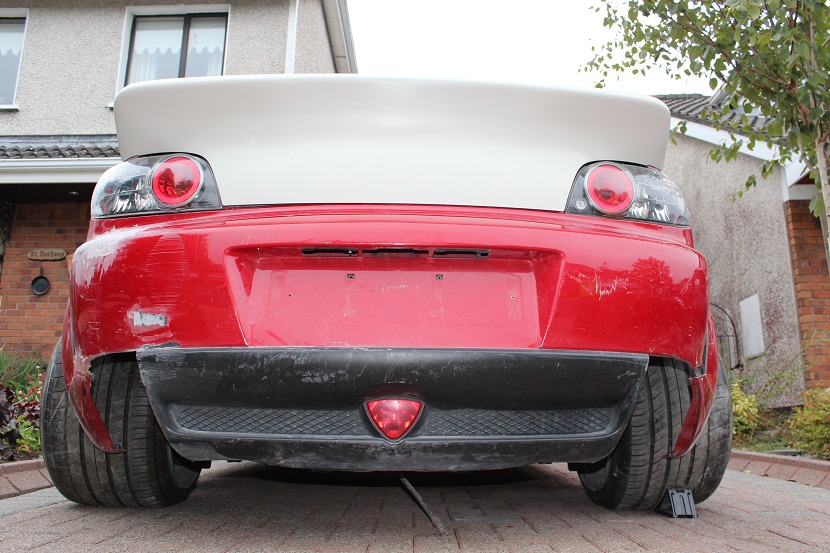
Next up, the rear bumper :
Thread Starter
Project Addict
Joined: Nov 2011
Posts: 154
Likes: 0
From: Ireland
If I had the interest or patience I would have made mine removable dude...
Cheers dude...
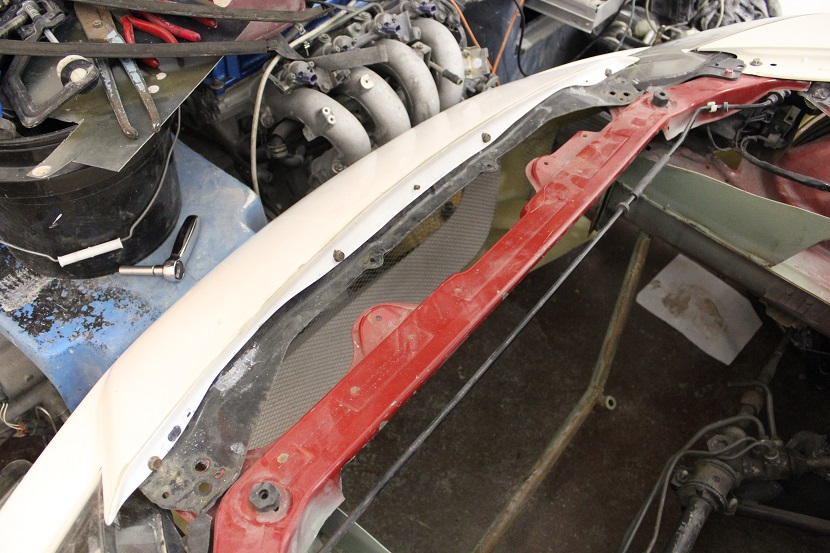
So with the day job being so busy atm I don't have a lot of time to give to the RX8 however I can squeeze an hour or two here and there. I decided I wanted rid of the licence plate recess so rather than use that expanding foam crap which is so bloody messy I went a different route.
I started off by paying a trip to Flowers Forever where I normal get herself something but this time it was for my other lady in the form of the oasis blocks that are used for displays. These blocks can be sanded with very little effort and weigh nothing. So with some impact adhesive I glued in three blocks and a bit of masking tape for 15mins until it set.
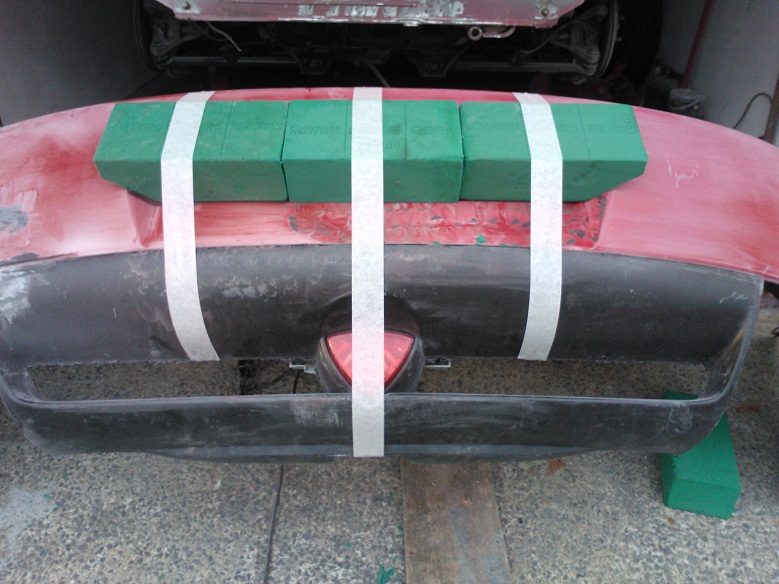
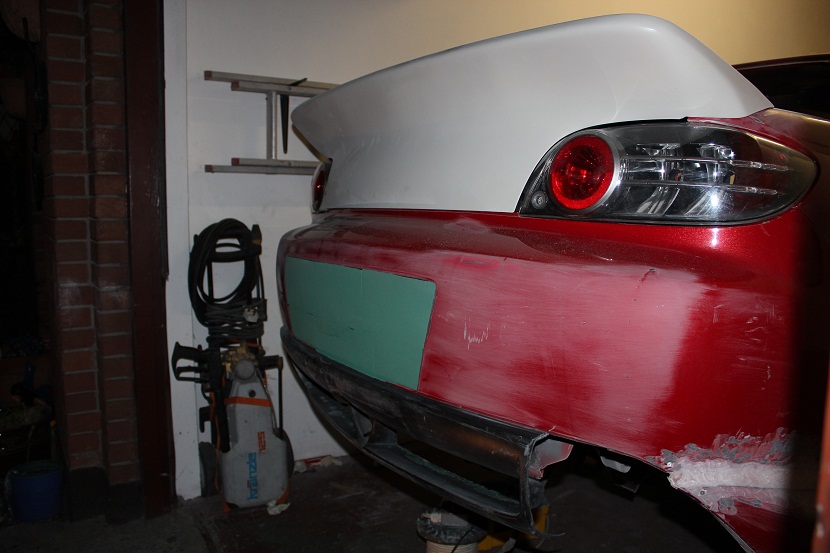
Using a steel ruler I gentle sawed my way along the tlop line of the bumper to keep the natural curve and from there used the waste to fill underneath as I only used 2/3's of the width of the block and the gradual slope meant that was more than enough, end results was this. I think the lights look like eyes with a green mouth underneath LoL
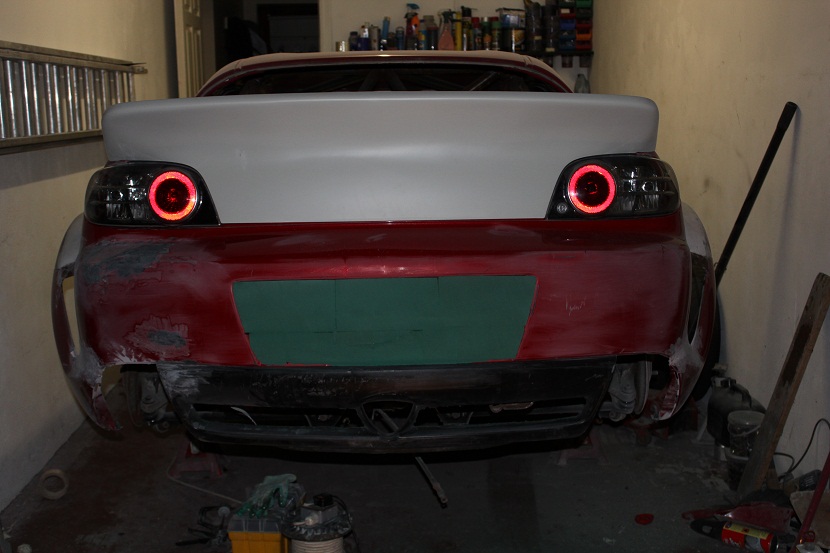
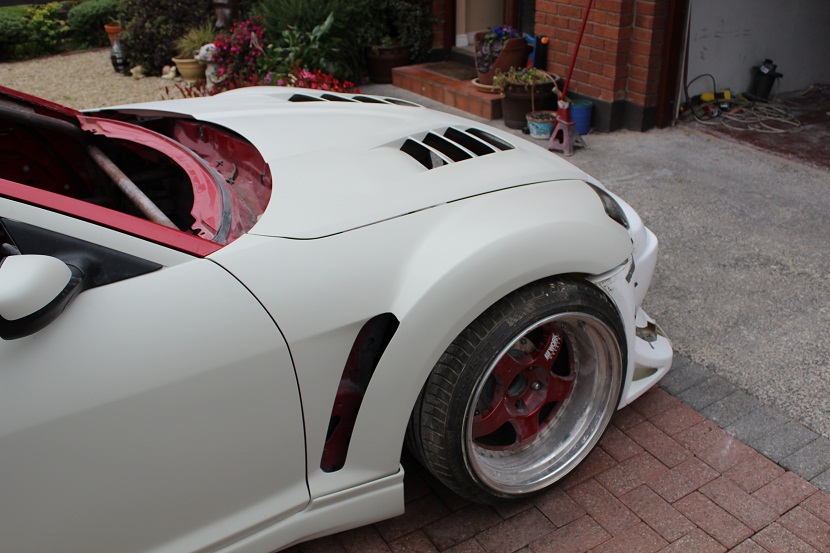
Next up I will grind the edges of the recess down so I can apply a layer of fibreglass matting with a sudden rise. While all that was going I decided to keep some rear vents much like the front wings, using fibreglass matting again I reinforced space at the back and a resin at the front and left the metal plates that were original popriveted there for strength. So here is the first pass at how the rear vent looks.
Obviously still a lot more to do so will keep you posted as I go.
So with the day job being so busy atm I don't have a lot of time to give to the RX8 however I can squeeze an hour or two here and there. I decided I wanted rid of the licence plate recess so rather than use that expanding foam crap which is so bloody messy I went a different route.
I started off by paying a trip to Flowers Forever where I normal get herself something but this time it was for my other lady
in the form of the oasis blocks that are used for displays. These blocks can be sanded with very little effort and weigh nothing. So with some impact adhesive I glued in three blocks and a bit of masking tape for 15mins until it set.Using a steel ruler I gentle sawed my way along the tlop line of the bumper to keep the natural curve and from there used the waste to fill underneath as I only used 2/3's of the width of the block and the gradual slope meant that was more than enough, end results was this. I think the lights look like eyes with a green mouth underneath LoL
Next up I will grind the edges of the recess down so I can apply a layer of fibreglass matting with a sudden rise. While all that was going I decided to keep some rear vents much like the front wings, using fibreglass matting again I reinforced space at the back and a resin at the front and left the metal plates that were original popriveted there for strength. So here is the first pass at how the rear vent looks.
Obviously still a lot more to do so will keep you posted as I go.


Thread Starter
Project Addict
Joined: Nov 2011
Posts: 154
Likes: 0
From: Ireland
Cheers dude, whatever works easiest
Dam straight dude and cheers for the support...
I get stickers made up from time to time and send them out fella
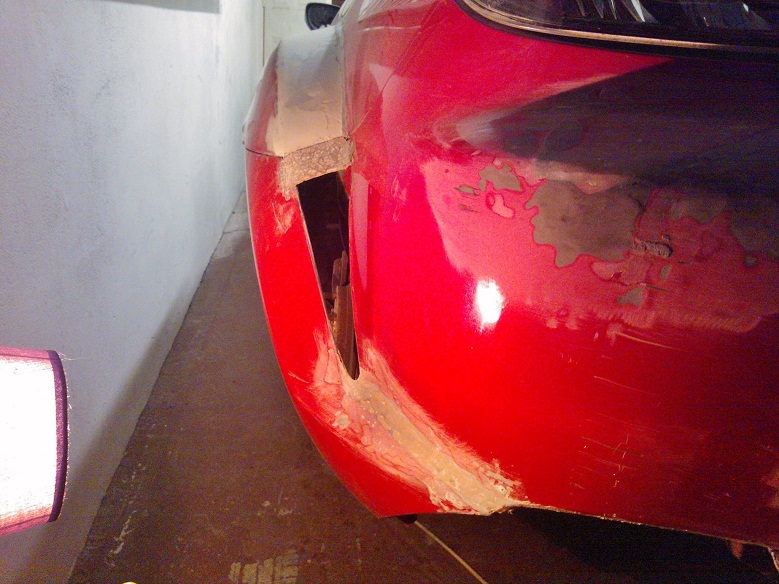
Rear bumper has been fibreglassed now and getting ready for filler :

Thankfully I had the old front bumper and was able to rob the bracket off it as all the supports have been cut away :
Shut line is alot better now, I can focus on fibreglassing :
Rest of the car will be going for primer at the end of the month, more focused on the RX7 atm
Dam straight dude and cheers for the support...
I get stickers made up from time to time and send them out fella
Rear bumper has been fibreglassed now and getting ready for filler :
Thankfully I had the old front bumper and was able to rob the bracket off it as all the supports have been cut away :
Shut line is alot better now, I can focus on fibreglassing :
Rest of the car will be going for primer at the end of the month, more focused on the RX7 atm

