
The I don't know what the fork I'm doing swap

Thread Starter
Registered
Joined: Dec 2016
Posts: 111
Likes: 1
From: Trackside
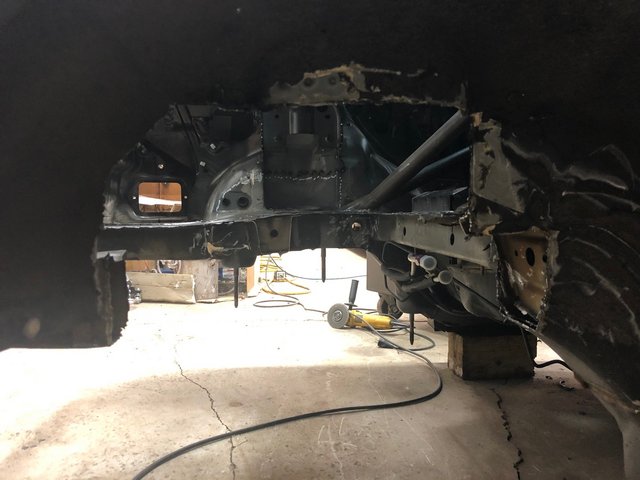
No problem at all. I think the only way to fit either without modifying the crossmember and/or firewall would be to put a cowl hood.
On Steve's RX8 they modified the firewall and crossmember pretty heavily.
On Steve's RX8 they modified the firewall and crossmember pretty heavily.

Thread Starter
Registered
Joined: Dec 2016
Posts: 111
Likes: 1
From: Trackside

 Oh my god what a car!
Thread Starter
Registered
Joined: Dec 2016
Posts: 111
Likes: 1
From: Trackside
After some HPDE, Open Lapping, and Time Trials...I think it is time to have something more race car. Talking to Trevor at HMS (Awesome ppl btw) it dawned on me that I am at that fork in the road, modify the Cayman, or track only car....
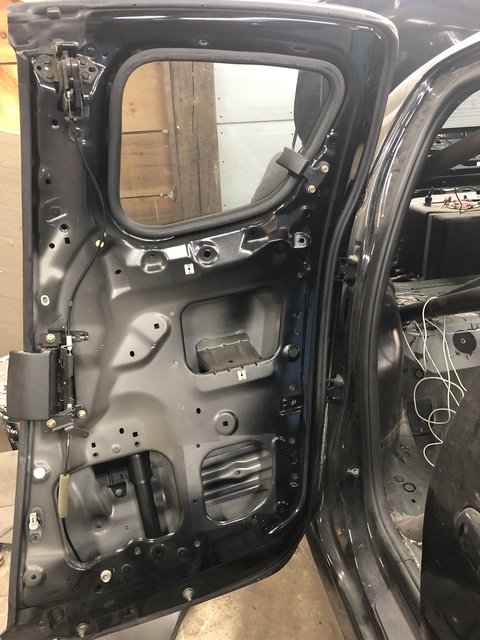
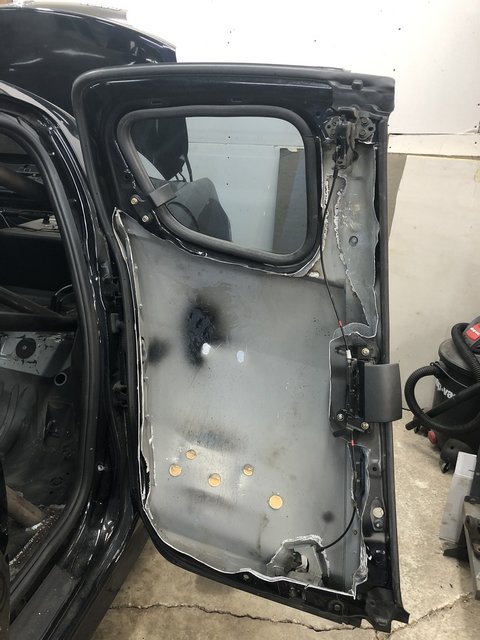
I definitely like the HPDE and TT setup so I decided to just modify the crossmember and firewall. I am going to doghouse the firewall like they do on vans so in case I have to do some work back there I can.
Some K24-S2000 action

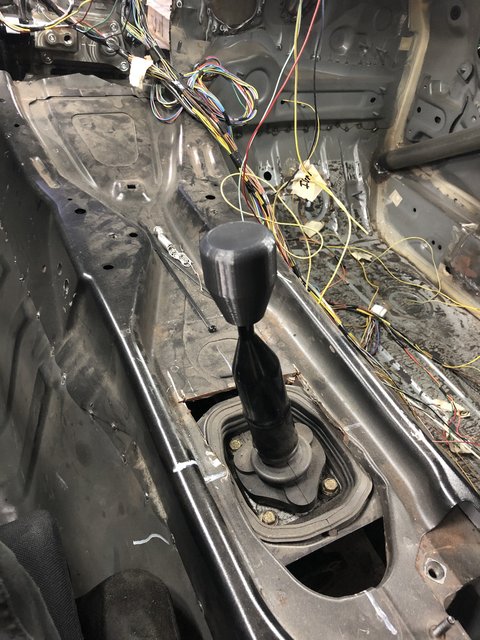
I should of opened the door, but in this crappy picture you can see the s2000 shifter.
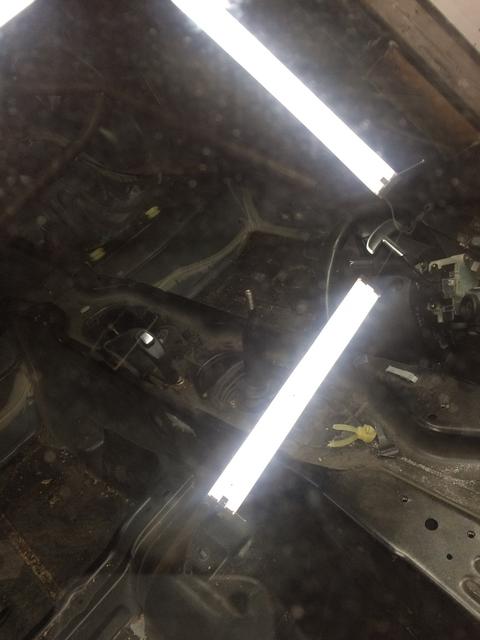
Tire storage for the winter...asking why? Watch the Grassroots video with Peter Calhoun from BFG. Also, lost a set of Pirellis to cracking from the cold, didn't know 40-45 was too low for storage! In this heap is mostly A7s, P Zeros, and Cup 2s.
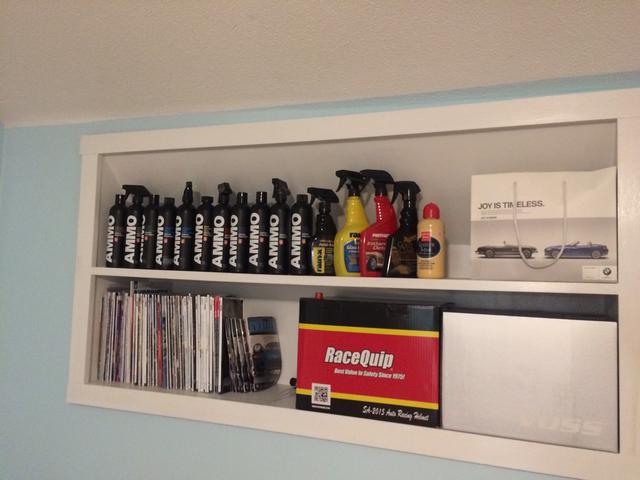
Also had to store the car care stuff, damn you winter.
I definitely like the HPDE and TT setup so I decided to just modify the crossmember and firewall. I am going to doghouse the firewall like they do on vans so in case I have to do some work back there I can.
Some K24-S2000 action
I should of opened the door, but in this crappy picture you can see the s2000 shifter.
Tire storage for the winter...asking why? Watch the Grassroots video with Peter Calhoun from BFG. Also, lost a set of Pirellis to cracking from the cold, didn't know 40-45 was too low for storage! In this heap is mostly A7s, P Zeros, and Cup 2s.
Also had to store the car care stuff, damn you winter.
Thread Starter
Registered
Joined: Dec 2016
Posts: 111
Likes: 1
From: Trackside
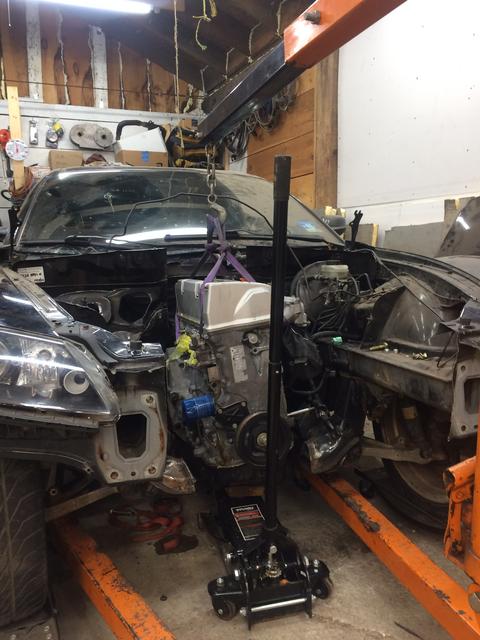
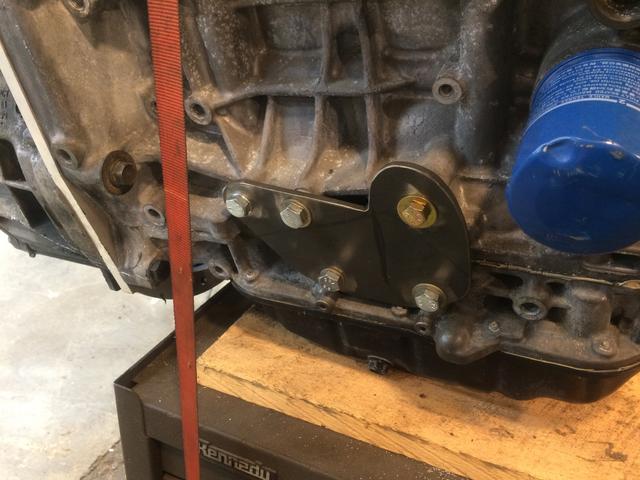
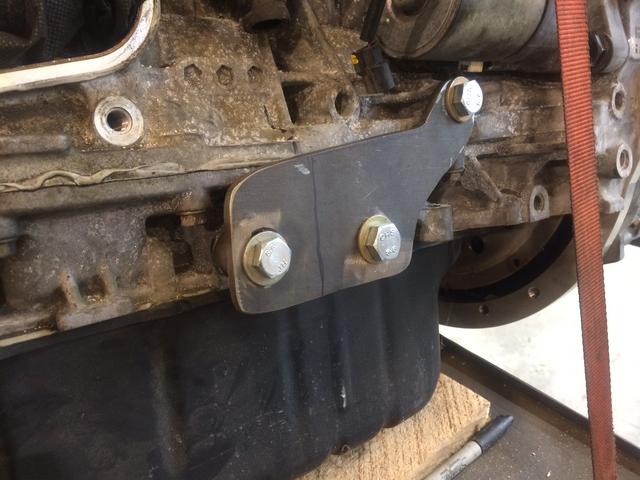
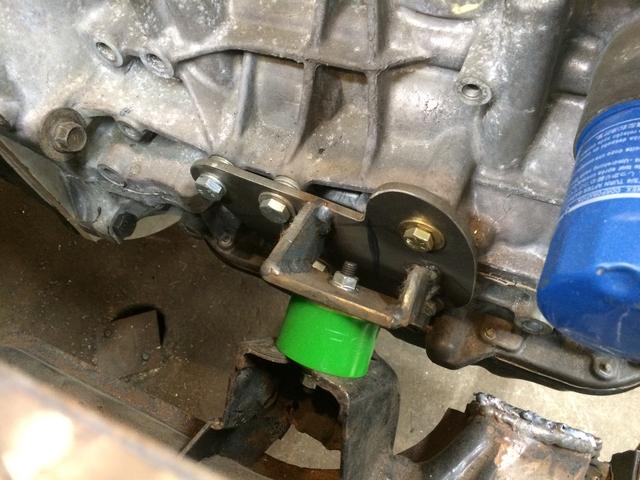
Made up some motor mount plates, ignore the non-metric bolt on the oil filter side bracket....the original threads were unhappy. May end up tying in the bolt above the bracket on the starter side, but should be more than enough for this little pea shooter.
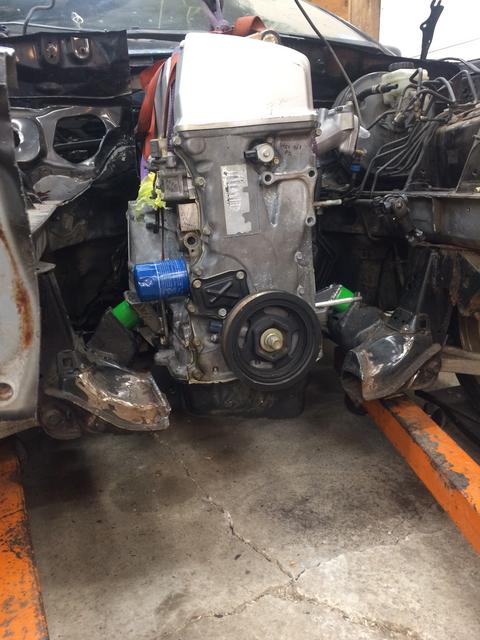
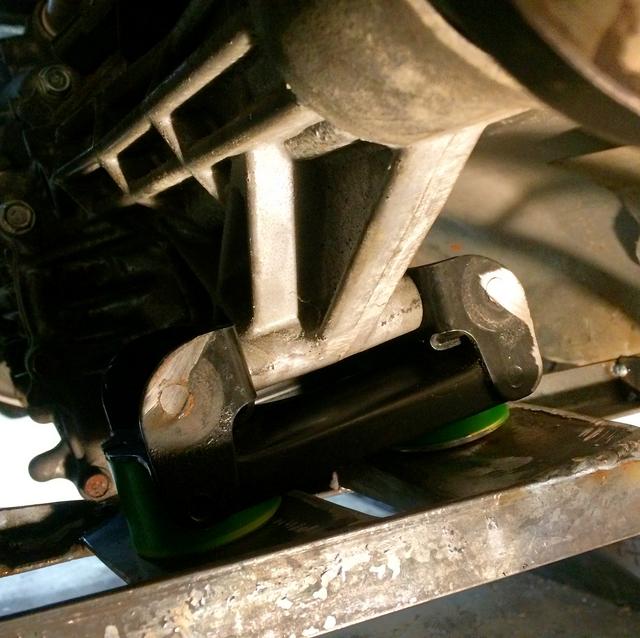
Going to use E46 95A durometer transmission mounts as my motor and transmission mounts. PO welded in Supra motor mounts so the E46 should work mint, plus they are a nice compact simple mount. Also, since my off road days, I found it best to use the same bushing material on the transmission as I would on the motor.
Going to use E46 95A durometer transmission mounts as my motor and transmission mounts. PO welded in Supra motor mounts so the E46 should work mint, plus they are a nice compact simple mount. Also, since my off road days, I found it best to use the same bushing material on the transmission as I would on the motor.
Thread Starter
Registered
Joined: Dec 2016
Posts: 111
Likes: 1
From: Trackside
Put together some motor mounts and such, next will be the transmission crossmember, but the place I bought the mounts from can't count and only sent me two. Offset it a little to accommodate the future install of a supercharger. Going to have to reimagine the steering rack placement again.

Thread Starter
Registered
Joined: Dec 2016
Posts: 111
Likes: 1
From: Trackside
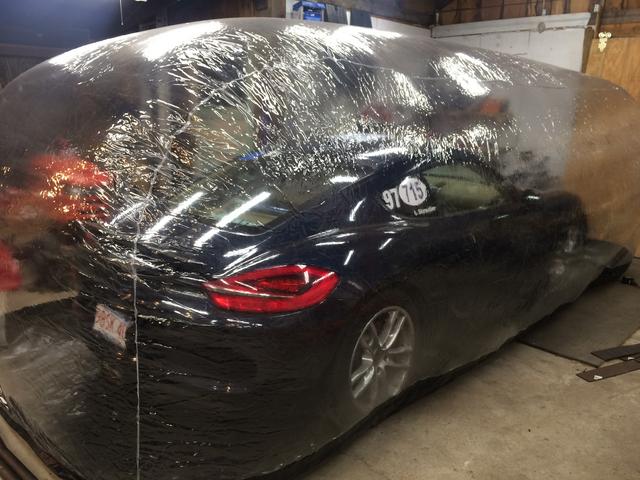
Got the damn Escape out of the garage and got the bubble set up, one of the best investments I have ever made!
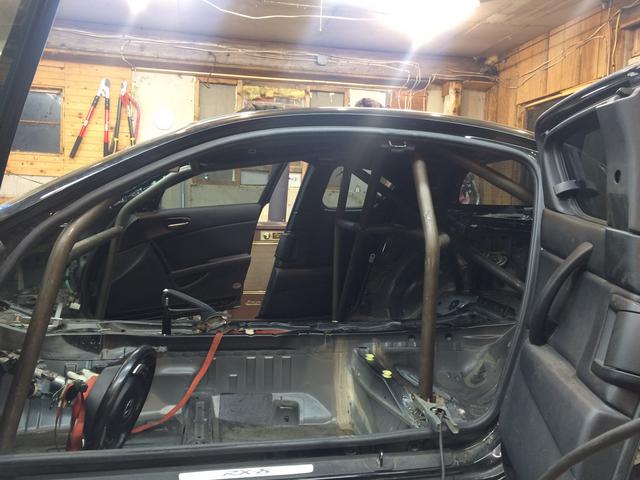
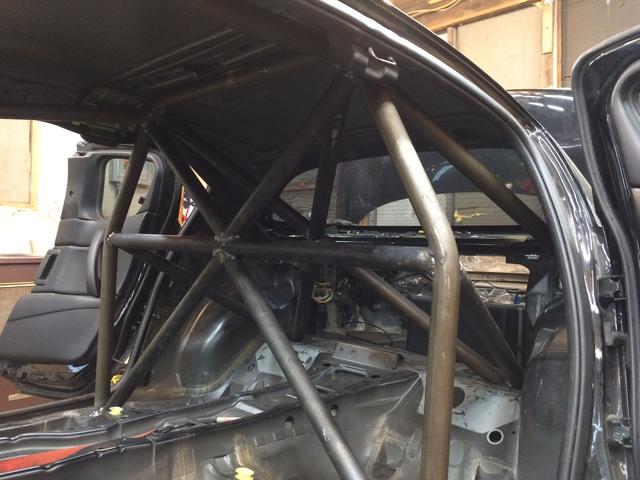
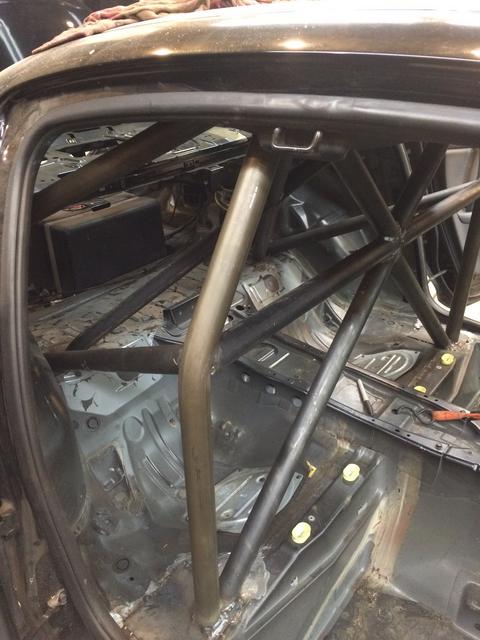
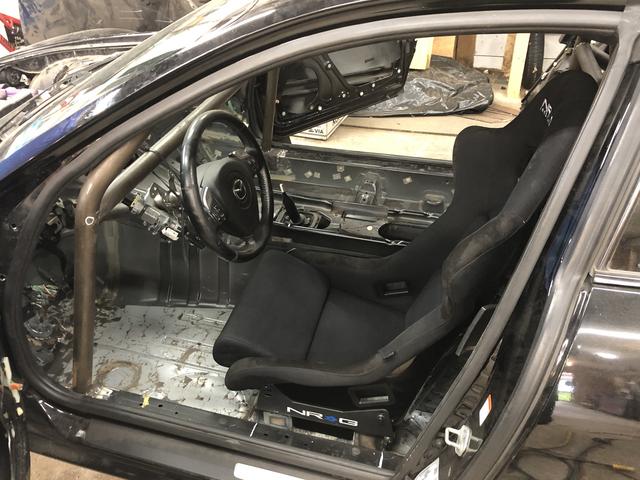
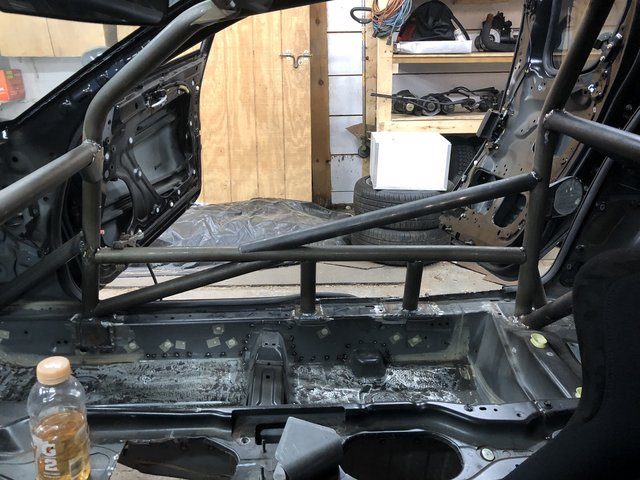
This is part of the Autopower Industries weld in cage....ps huge waste of money. I changed where it mounts the b pillar, I don't care how big of a plate there is, floor pans are not a good spot. Going to add bracing to the B-Pillar mount so it displaces the potential force along the rails and cross support. Changed the A-Pillar mount too so that it sits on the rails, and the "C"-Pillar mount. Adding cross bracing, feet protection and some roof protection, but the roof will come post seats, as will the door bars (which came with the kit and seem to fit nicely). I am not the best fabricator by any means, but I have tested my own cages numerous times...rock racing and rock crawling you are gonna crash and roll....and one thing Edwin knows is cross bracing is super important. On another note, a$$ over tea-kettle as they say is my least favorite.
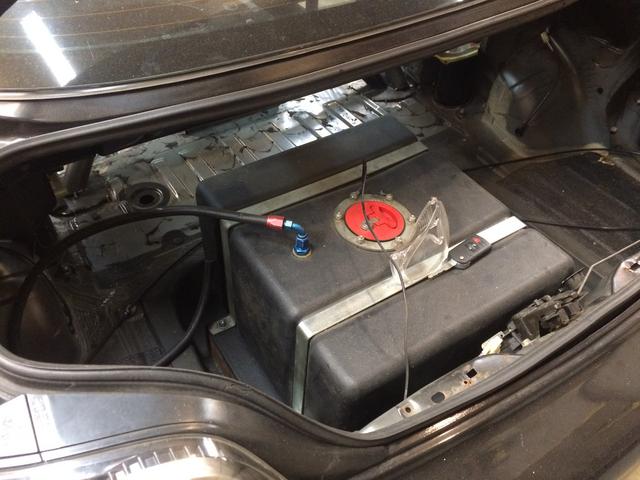
Rans outtas tubes....luckily I found some this morning from my buggy. Fuel cell in the background is mounted too. Zip ties are semi permanent.
Something like that.

This is part of the Autopower Industries weld in cage....ps huge waste of money. I changed where it mounts the b pillar, I don't care how big of a plate there is, floor pans are not a good spot. Going to add bracing to the B-Pillar mount so it displaces the potential force along the rails and cross support. Changed the A-Pillar mount too so that it sits on the rails, and the "C"-Pillar mount. Adding cross bracing, feet protection and some roof protection, but the roof will come post seats, as will the door bars (which came with the kit and seem to fit nicely). I am not the best fabricator by any means, but I have tested my own cages numerous times...rock racing and rock crawling you are gonna crash and roll....and one thing Edwin knows is cross bracing is super important. On another note, a$$ over tea-kettle as they say is my least favorite.
Rans outtas tubes....luckily I found some this morning from my buggy. Fuel cell in the background is mounted too. Zip ties are semi permanent.
Something like that.
Thread Starter
Registered
Joined: Dec 2016
Posts: 111
Likes: 1
From: Trackside

Thread Starter
Registered
Joined: Dec 2016
Posts: 111
Likes: 1
From: Trackside
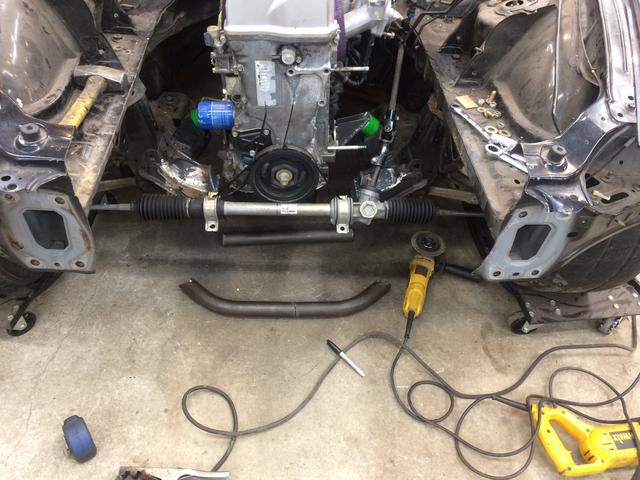
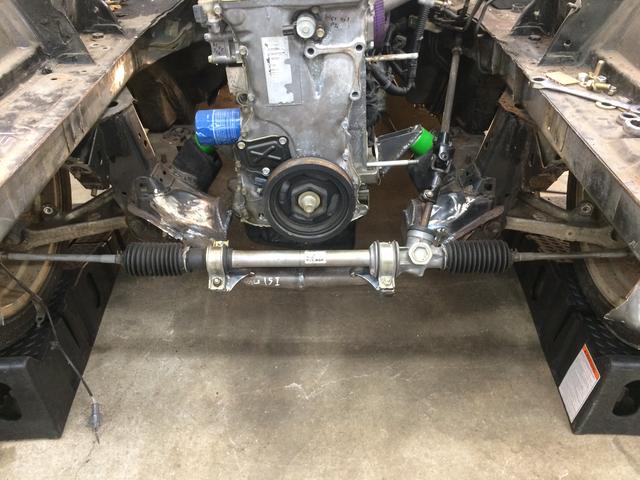
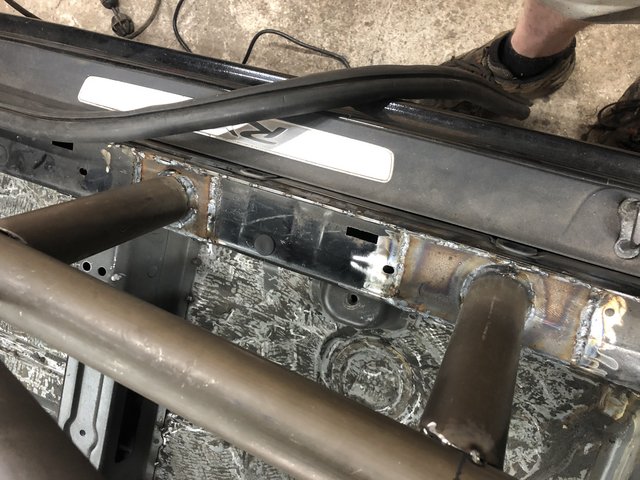
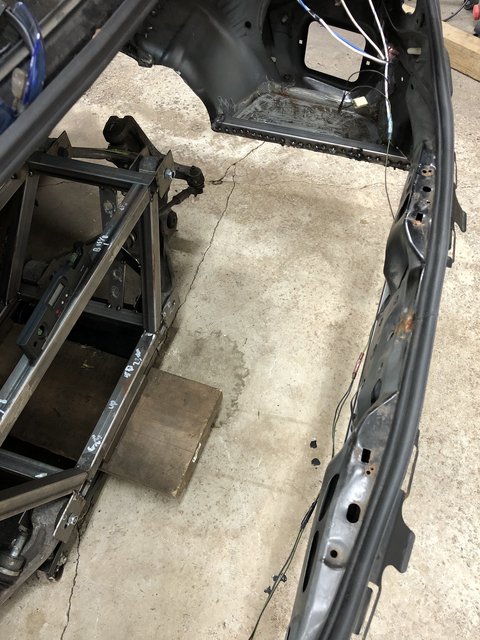
Cut the harness loop out of the cage and going to use that for my front crossmember/steering mount. Ran out of welding wire and nearly out of gas so had to call it quits early. Going to notch it to the front of RX8 crossmembers, cut the extra length out, square tube for the steering rack mounts, and then a bunch of nifty braces. Its a manual Miata rack so my turning radius will suck, but I can live with that. Tonight I might get the cage cross bracing done?

Thread Starter
Registered
Joined: Dec 2016
Posts: 111
Likes: 1
From: Trackside
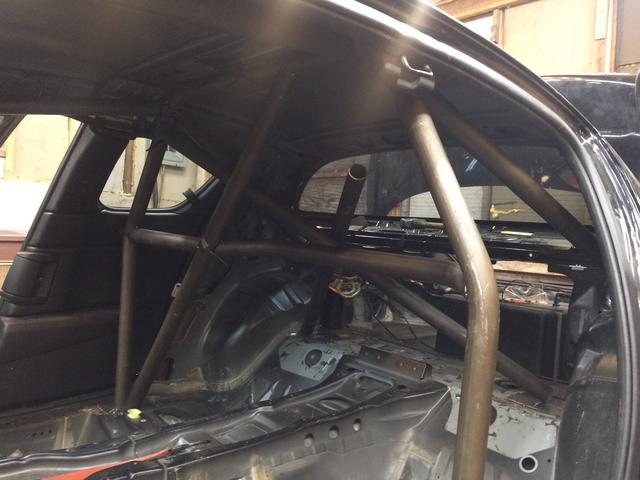
Got the back part of the cage all set, just need to finish weld most of it. Cant do the door bars until I get the seats.
Manual Miata rack is in, so is new crossmember just need to add a couple braces to where I cut the OEM crossmember out and a couple to the joint up front where the two pipes meet. Really worked my a$$ off to get this thing as level and straight as I could.
What a pain this thing was, but I got it super rigid yet lightweight and everything is fully accessible.
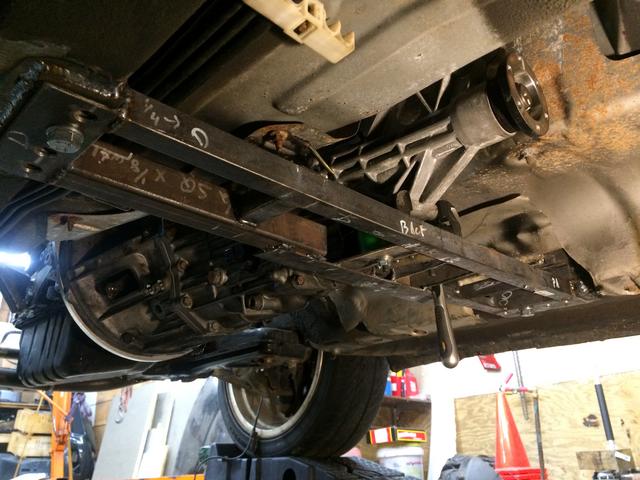
Only one bolt on each side, went to Lowes to get a bunch of M12x1.25, but the M12 drawer I grabbed from they put in M10s, damn it! At least they got the washers right.

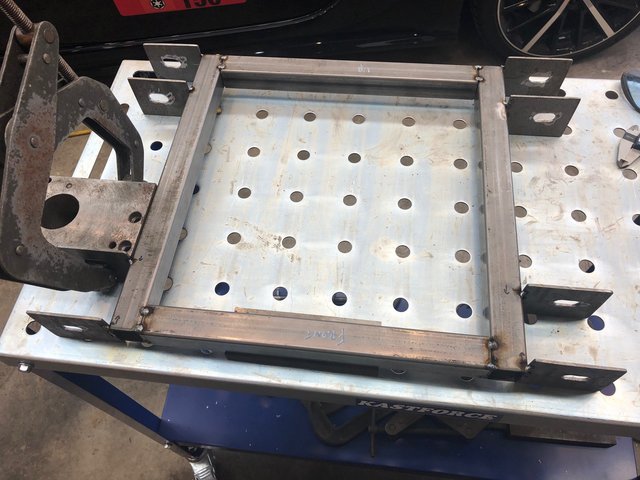
One of the mounts I did up front on the motor.
View from the Passenger Side. Going to add some feet to the b-pillar mount.
Fuel cell for now, will eventually get a nice one cut in and protected.
Digging the new wire.
Tough to tell, but those things are not nice and parallel.
Manual Miata rack is in, so is new crossmember just need to add a couple braces to where I cut the OEM crossmember out and a couple to the joint up front where the two pipes meet. Really worked my a$$ off to get this thing as level and straight as I could.
What a pain this thing was, but I got it super rigid yet lightweight and everything is fully accessible.
Only one bolt on each side, went to Lowes to get a bunch of M12x1.25, but the M12 drawer I grabbed from they put in M10s, damn it! At least they got the washers right.
One of the mounts I did up front on the motor.
View from the Passenger Side. Going to add some feet to the b-pillar mount.
Fuel cell for now, will eventually get a nice one cut in and protected.
Digging the new wire.
Tough to tell, but those things are not nice and parallel.
Thread Starter
Registered
Joined: Dec 2016
Posts: 111
Likes: 1
From: Trackside
I haven't made much progress, work is just getting busier and busier, plus I am designing/programming a machine on the side....
Went to HMS for some seat testing and settled on these OMP seats, and it ended up being a reunion of track friends, so that was pretty cool. Looking at getting a stock RX8 this spring to be my test car of sorts while I build this one. Test drove one the other day for a bit and definitely a fan.
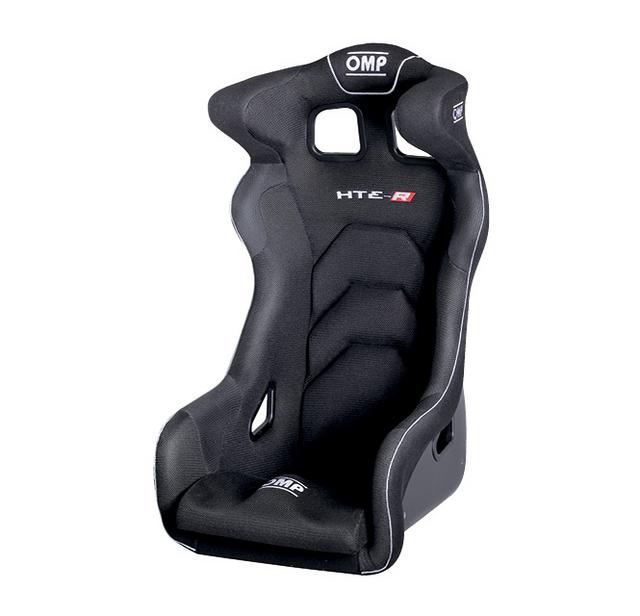
Went to HMS for some seat testing and settled on these OMP seats, and it ended up being a reunion of track friends, so that was pretty cool. Looking at getting a stock RX8 this spring to be my test car of sorts while I build this one. Test drove one the other day for a bit and definitely a fan.
Thread Starter
Registered
Joined: Dec 2016
Posts: 111
Likes: 1
From: Trackside
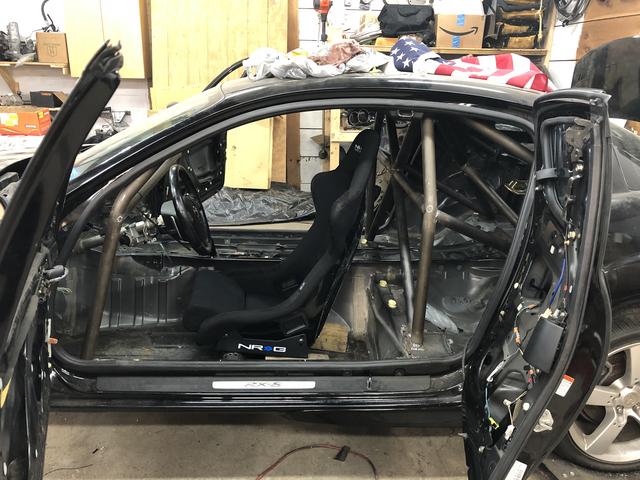
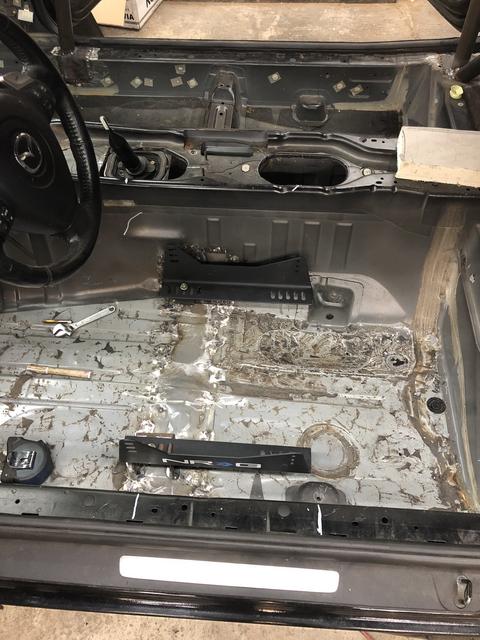
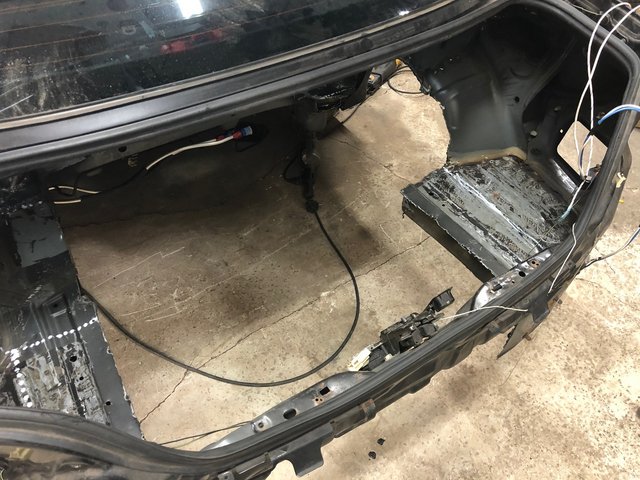
So almost a year has passed and I finally started working on this again, got all the sound insulation removed minus the passenger floor pan. Got the old seat crossmember out, new mockup seat in, and started doing some chassis welding.
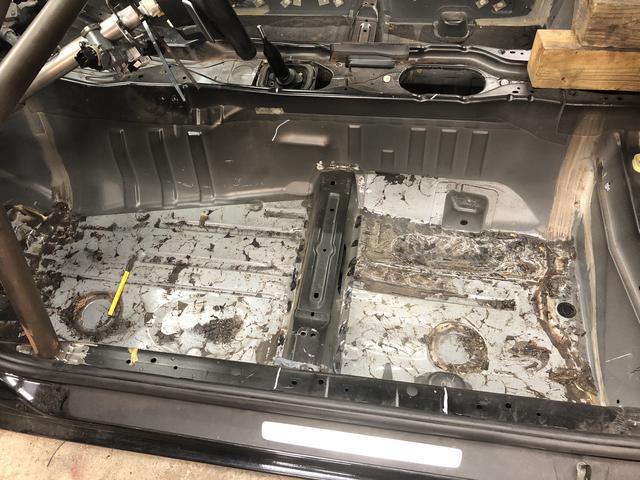
Going to add some braces to the floor mounts...just not now.
Going to add some braces to the floor mounts...just not now.
Thread Starter
Registered
Joined: Dec 2016
Posts: 111
Likes: 1
From: Trackside
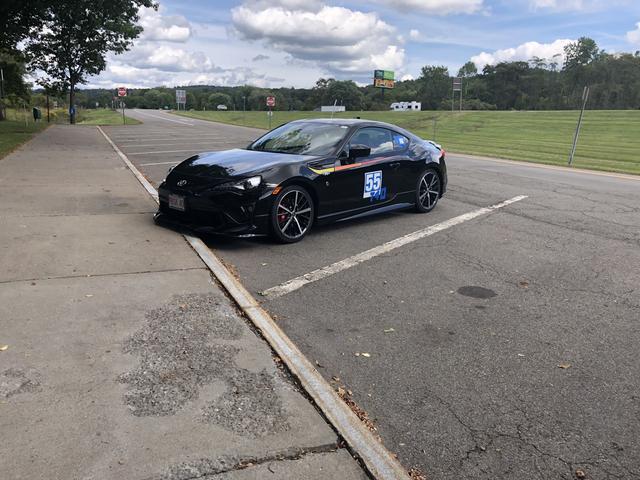
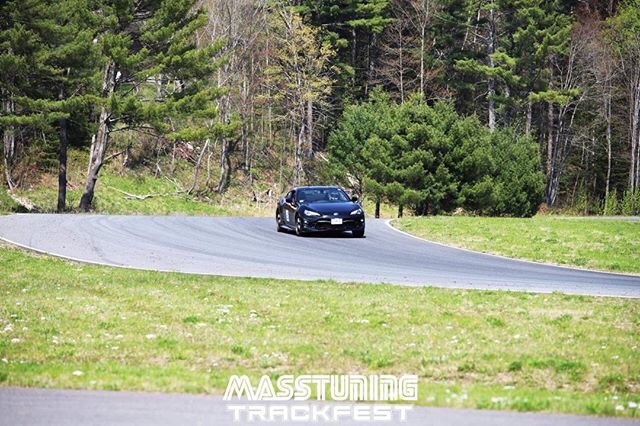
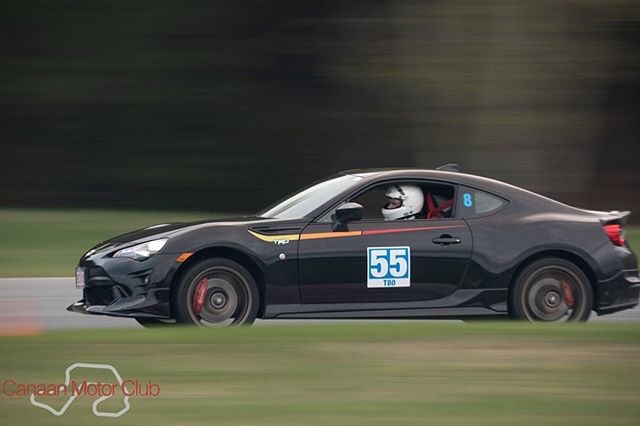
So I bought a new track toy 2019 Toyota 86 TRD...took it to the track with 600 miles (so I could put some wear on the rotors before changing out the TRD pads) This is me on my way to a Time Trial at Watkins Glen where I came in 4th, first time there what a phenomenal track! Average speed of 87mph was so fun.
Got licensed with my TT club and got moved to instructor in one of the HPDE groups I run with.
Damn GT cars in the way haha
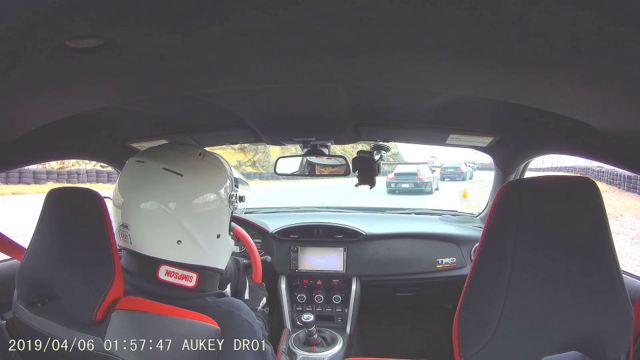
Got a lot of use out of the 225 Cup 2s

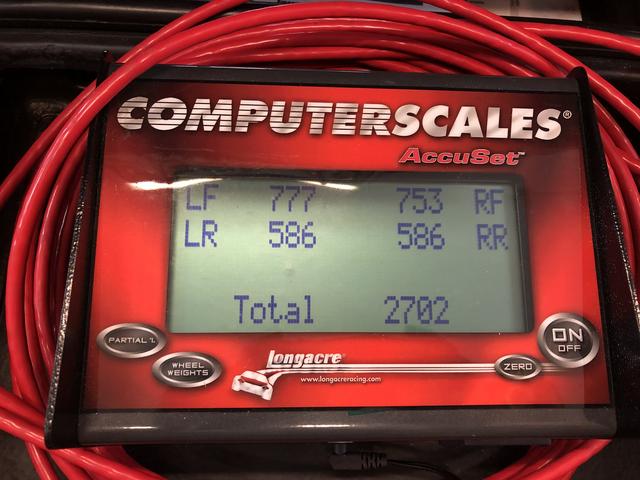
1/2 Tank bare bones
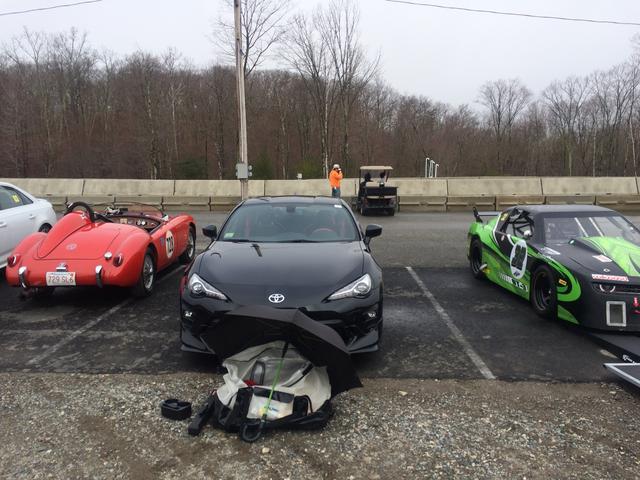
First event ever with it, had a wide range of neighbors
Some work on the 2500HD....as you can tell it didn't go well. I barely drive the truck and being in New England the rust found it.
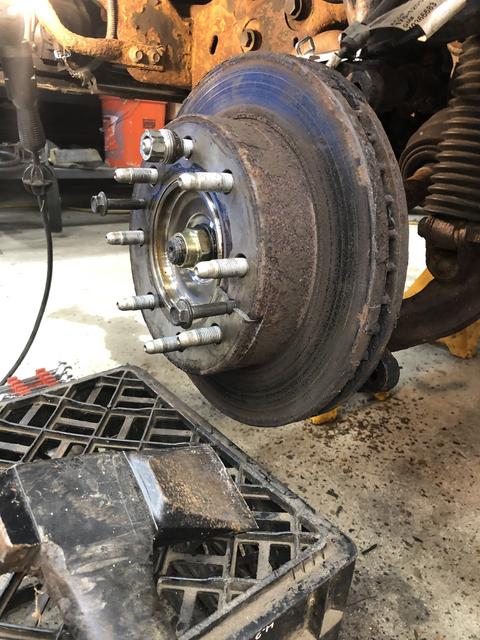
Shiny new calipers, rotors, hoses, and SS lines everywhere
Getting there, I ended up cutting it off with an angle grinder
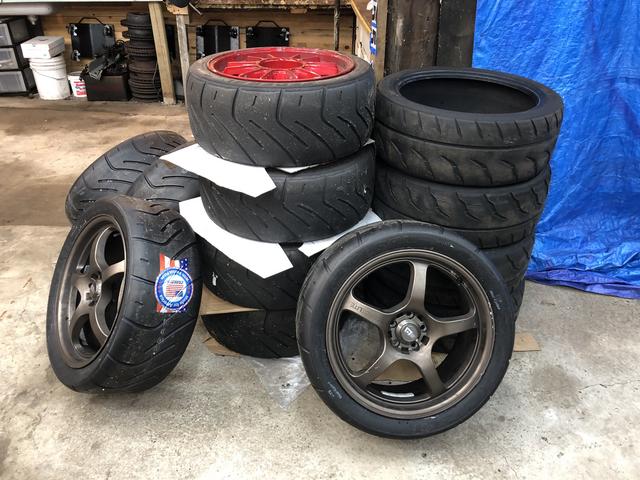
Starting to accumulate tires....this isn't even half of them.
Got into Mountain Biking...crashed...cracked some ribs

At Canaan, fun track with a fun club. The 600+hp Audi was upset that he couldnt catch me while I was on street tires bwahaha.
Got licensed with my TT club and got moved to instructor in one of the HPDE groups I run with.
Damn GT cars in the way haha
Got a lot of use out of the 225 Cup 2s
1/2 Tank bare bones
First event ever with it, had a wide range of neighbors
Some work on the 2500HD....as you can tell it didn't go well. I barely drive the truck and being in New England the rust found it.
Shiny new calipers, rotors, hoses, and SS lines everywhere
Getting there, I ended up cutting it off with an angle grinder
Starting to accumulate tires....this isn't even half of them.
Got into Mountain Biking...crashed...cracked some ribs
At Canaan, fun track with a fun club. The 600+hp Audi was upset that he couldnt catch me while I was on street tires bwahaha.
Thread Starter
Registered
Joined: Dec 2016
Posts: 111
Likes: 1
From: Trackside
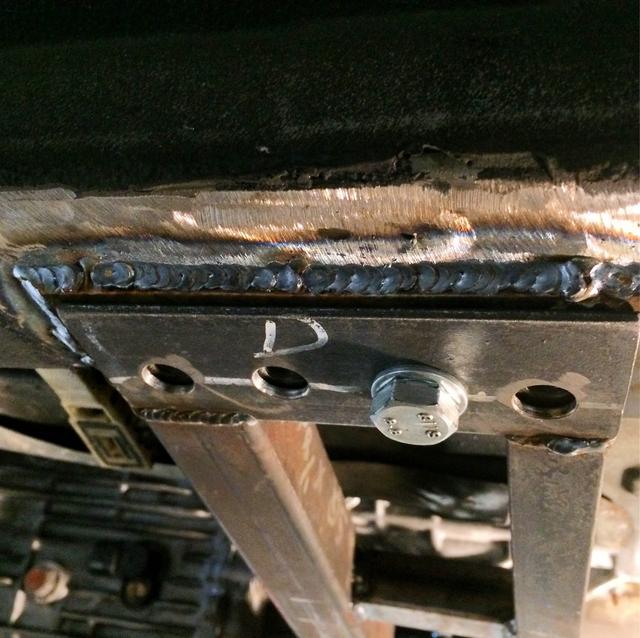
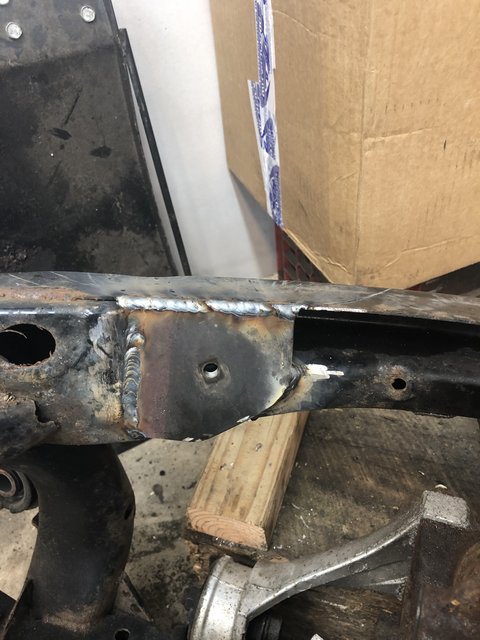
Support bracket on the subframe
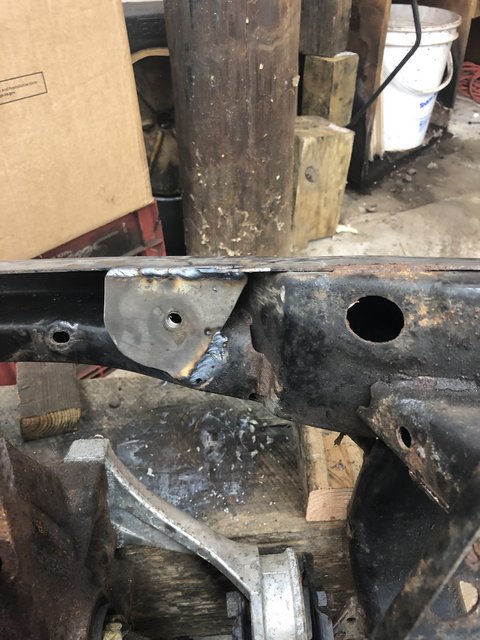
Support bracket on the sub frame
A quick set of mounts made up, will be swapping to an 8.8 sooner than later
Tried a different door bar setup for the passenger side. Its unattractive, but function is more important to me. I don't like the typical X style that leaves basically a single tube in the most vulnerable part of the door bars, the middle.
L brackets tied into the rails and pinch weld
Boxed in the upper shock mounts. Have some cool brackets to make up to replace the alternator bracket for example, but need to get the machine first

Totally stock

Air through the front -> radiator -> out the hood
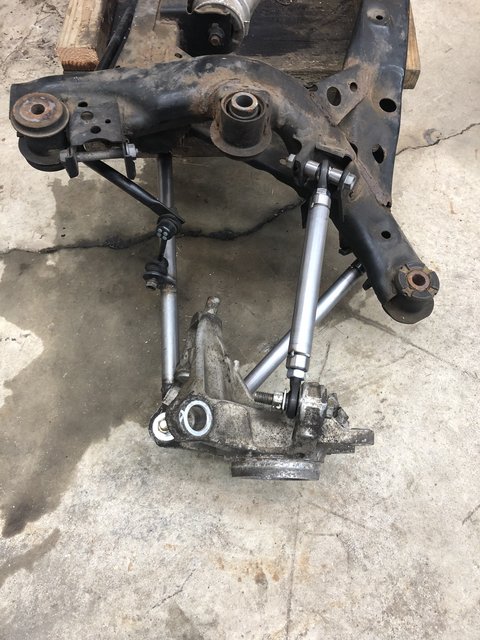
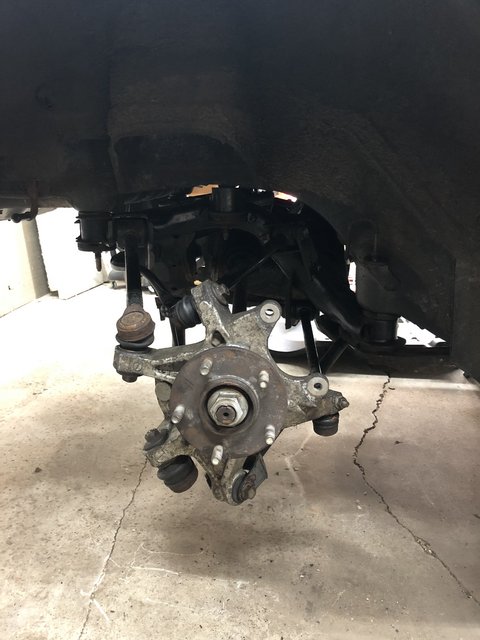
Making up some control arms for later. The lateral arms with the sway bar mount are sleeved with solid 6061 pressed in. My department is getting a new lathe and bridgeport and my boss said I can use it for race car stuff if I want....so going to make the custom bushings to press into the knuckles and convert tie rods into heims.
Just for mock ups here

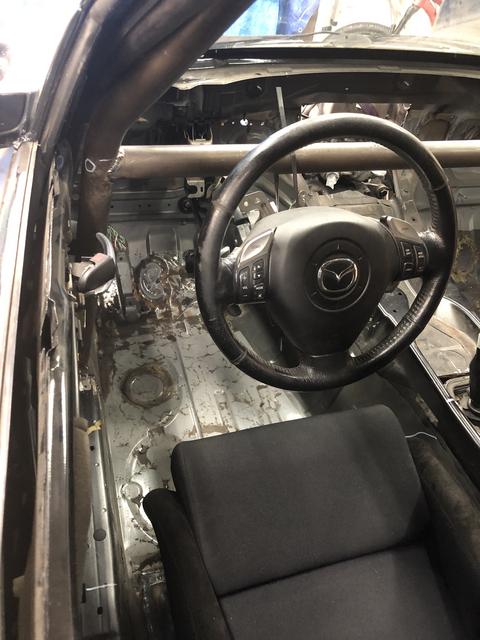
S2000 clutch pedal and accelerator pedal assembly. RX8 automatic brake pedal cut down. Have a new pad on the brake now. Really like the placement, ideal for me to heel-toe.

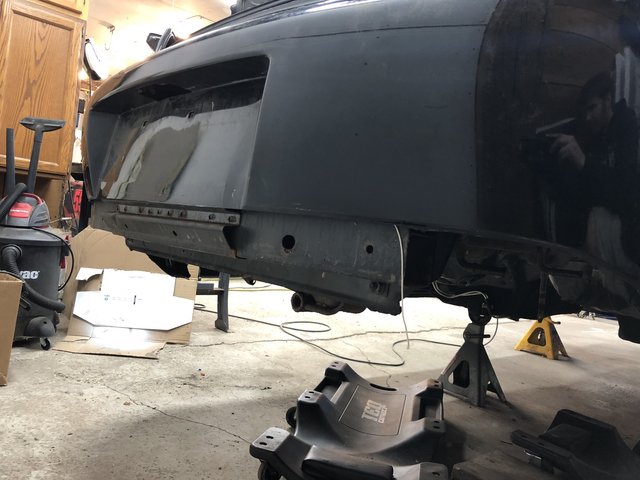
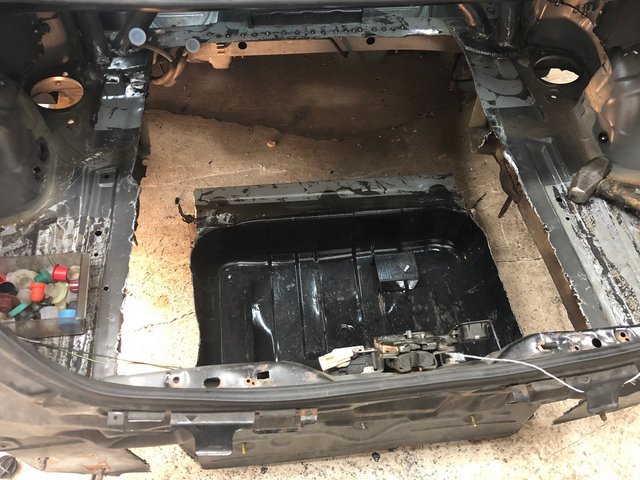
Cut the rear bumper plastic for the future diffuser and flush mounted fuel cell.
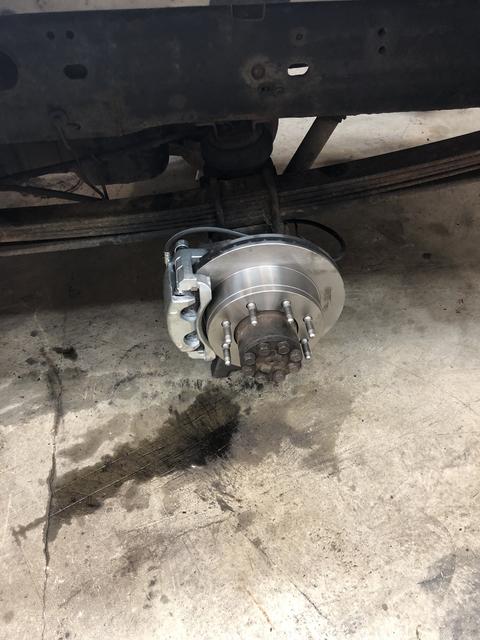
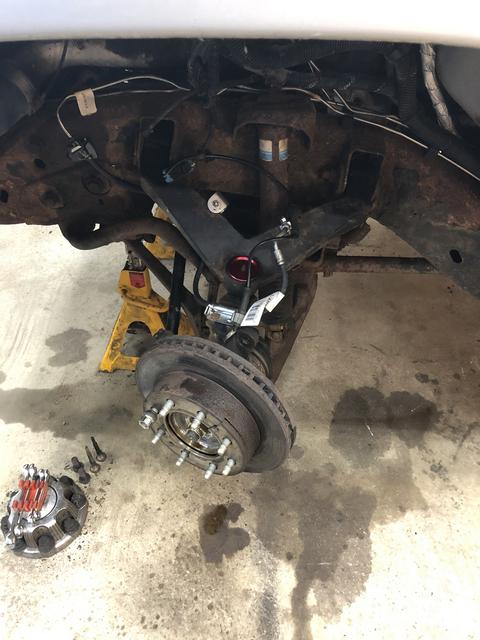
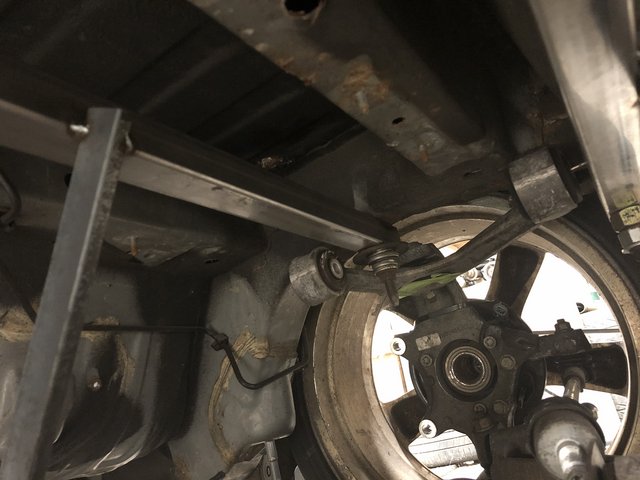
New Bearings in the hubs, made some fixtures so I can remove and install them easily while on the car.

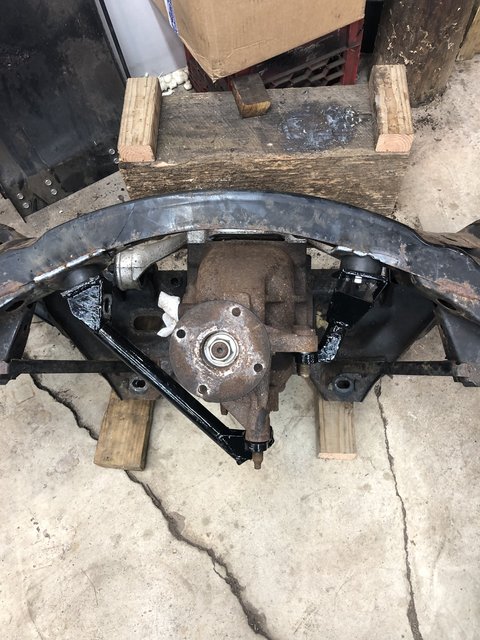
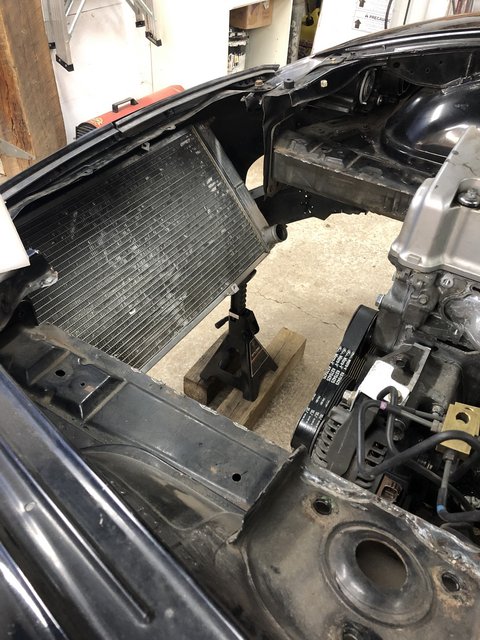
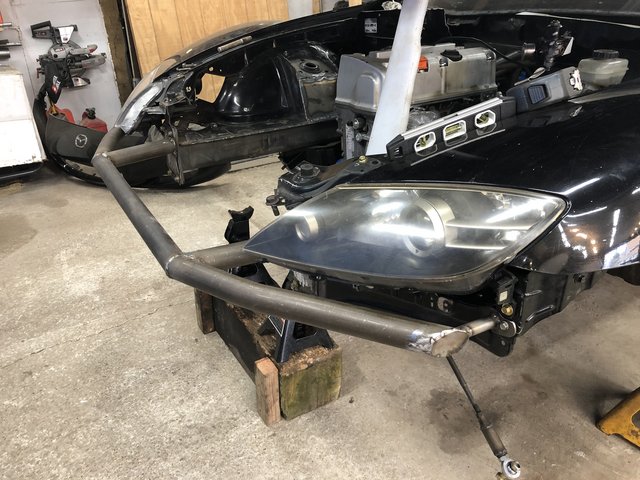
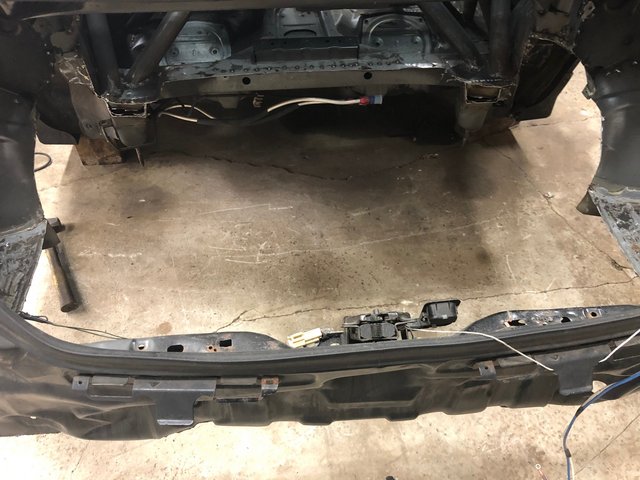
Not a bumper, merely a radiator support. Waiting on another piece of machinery to make up some additional supports for it.
Passenger side is now in as well.
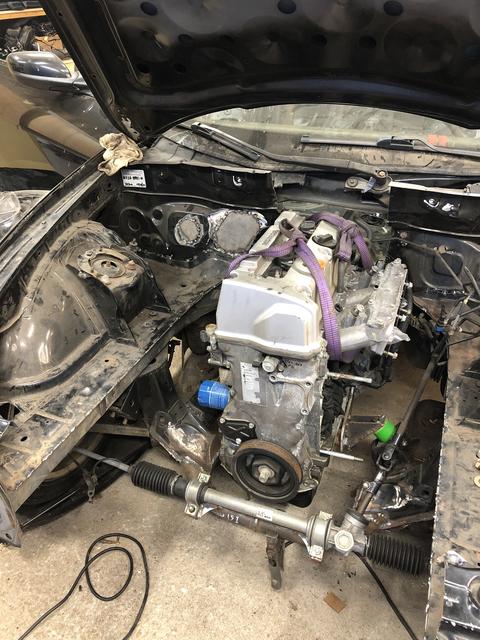
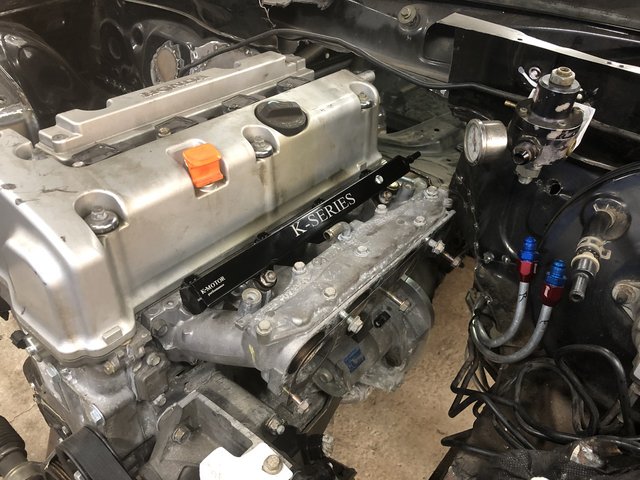
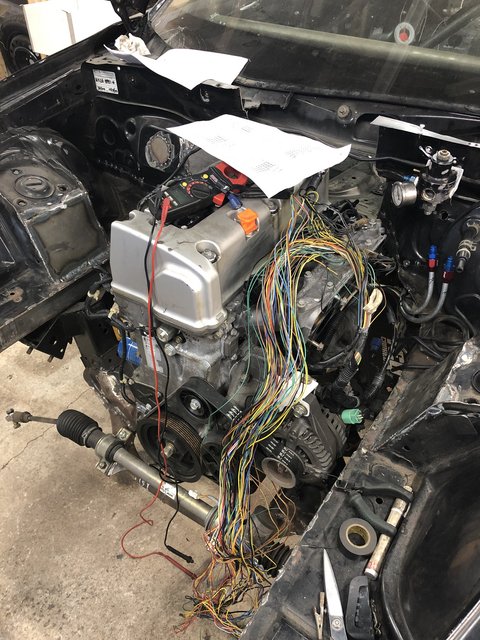
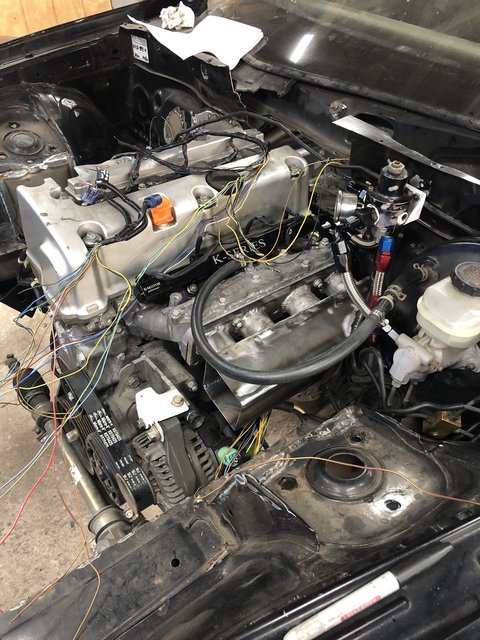
In process of making my own intake manifold.
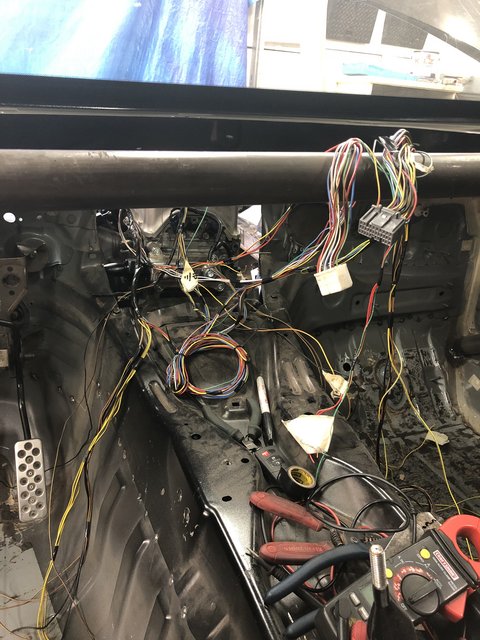
Stripping out unnecessary wiring and making it compatible with Kpro ecu...might run a Kmiata ecu for initial test purposes as my modifications are exactly what Kmiata does.

S2000 master cylinder

Support bracket on the sub frame
A quick set of mounts made up, will be swapping to an 8.8 sooner than later
Tried a different door bar setup for the passenger side. Its unattractive, but function is more important to me. I don't like the typical X style that leaves basically a single tube in the most vulnerable part of the door bars, the middle.
L brackets tied into the rails and pinch weld
Boxed in the upper shock mounts. Have some cool brackets to make up to replace the alternator bracket for example, but need to get the machine first
Totally stock
Air through the front -> radiator -> out the hood
Making up some control arms for later. The lateral arms with the sway bar mount are sleeved with solid 6061 pressed in. My department is getting a new lathe and bridgeport and my boss said I can use it for race car stuff if I want....so going to make the custom bushings to press into the knuckles and convert tie rods into heims.
Just for mock ups here
S2000 clutch pedal and accelerator pedal assembly. RX8 automatic brake pedal cut down. Have a new pad on the brake now. Really like the placement, ideal for me to heel-toe.
Cut the rear bumper plastic for the future diffuser and flush mounted fuel cell.
New Bearings in the hubs, made some fixtures so I can remove and install them easily while on the car.
Not a bumper, merely a radiator support. Waiting on another piece of machinery to make up some additional supports for it.
Passenger side is now in as well.
In process of making my own intake manifold.
Stripping out unnecessary wiring and making it compatible with Kpro ecu...might run a Kmiata ecu for initial test purposes as my modifications are exactly what Kmiata does.
S2000 master cylinder
Thread Starter
Registered
Joined: Dec 2016
Posts: 111
Likes: 1
From: Trackside
Initial plasma cut...worth removing the support spars?
Had to do an emergency road side pickup. A friends truck was being delivered from Texas that he bought, but it died at the toll booth in NY. So went and picked it up, but had to remove the 1-ton dually frame sections, and Dana 80 axles from the trailer with an engine hoist, put them in the bed of my truck, and winch the dead Ford on his trailer.

Making some progress
Going to make a buss connection for the ignition and grounds, same as on the LS swaps...except LS swaps are kind enough to use Pink wire for basically every ignition wire.
You guys were right, these things suck!!
Very much not fun...have some more to touch up...or just leave it?
Bent my truck's hitch again, so bought a new Curt hitch.

Had to do an emergency road side pickup. A friends truck was being delivered from Texas that he bought, but it died at the toll booth in NY. So went and picked it up, but had to remove the 1-ton dually frame sections, and Dana 80 axles from the trailer with an engine hoist, put them in the bed of my truck, and winch the dead Ford on his trailer.
Making some progress
Going to make a buss connection for the ignition and grounds, same as on the LS swaps...except LS swaps are kind enough to use Pink wire for basically every ignition wire.
You guys were right, these things suck!!
Very much not fun...have some more to touch up...or just leave it?
Bent my truck's hitch again, so bought a new Curt hitch.
Thread Starter
Registered
Joined: Dec 2016
Posts: 111
Likes: 1
From: Trackside
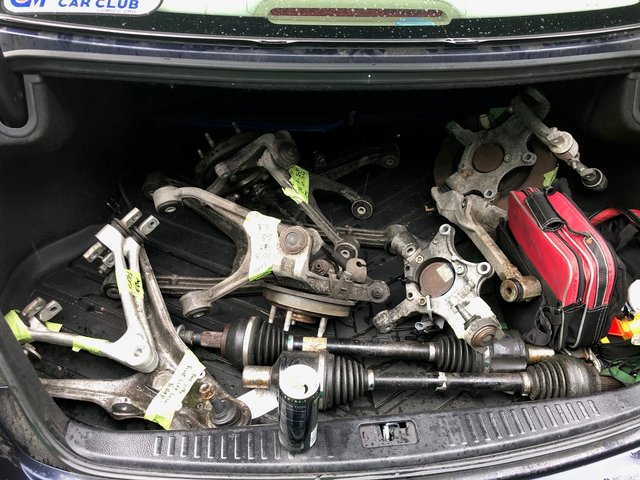
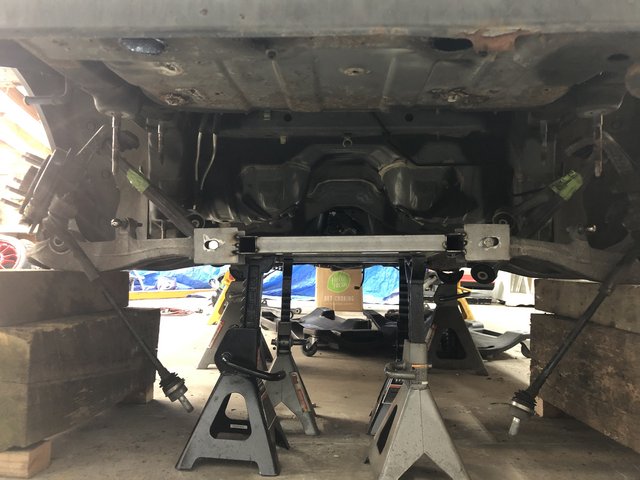
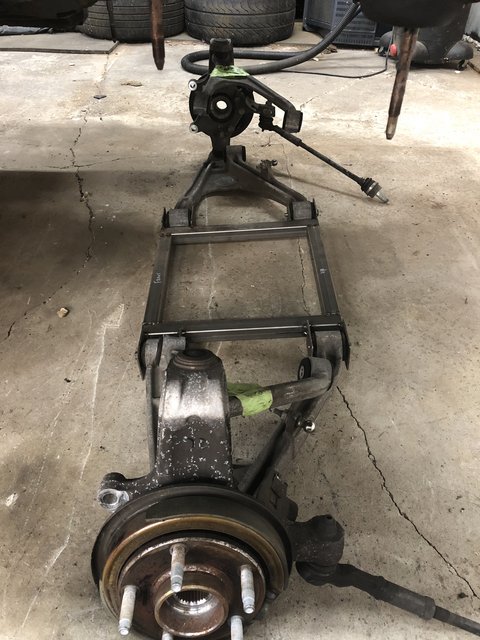
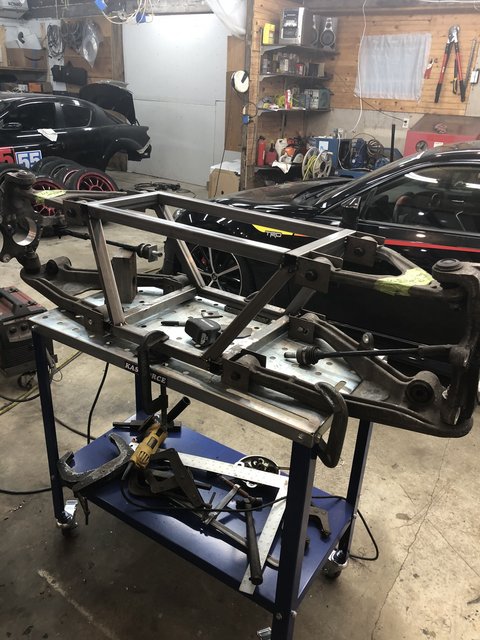
So this being my very long term project, and after countless hours of research...I decided I wanted double wishbones front and rear. Long story short, I apparently know a local business who disassembles Corvettes and Camaros. Get a great deal on a complete suspension front and rear.
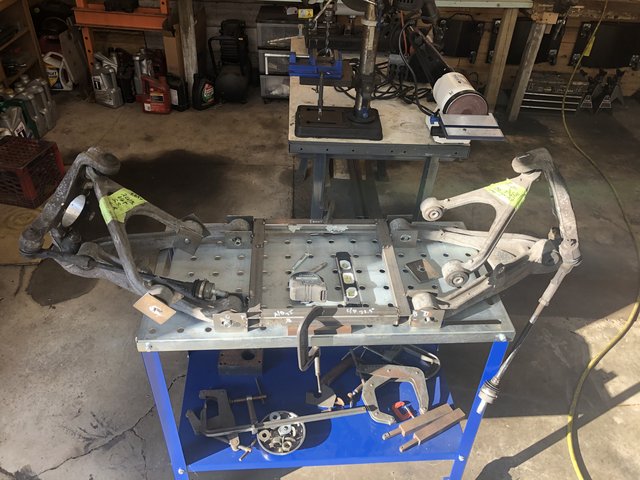
Do an initial mock up, and draw up a quick sketch to determine the relationship between the Corvette GS suspension and the RX8 subframe pick up points. Pretty quickly I saw that the upper control arm locations were going to be an issue. But, I decided to charge ahead as I am a very visual person and wanted to see it firsthand. Well massive interference basically everywhere, and although it could be done, I did not want to create something I would loathe working on down the road. So....
(Yes I know my jackstands are recalled, and the subframe is crooked...ended up having to zip tie it down to the jack stand so it would stay in place and level.)
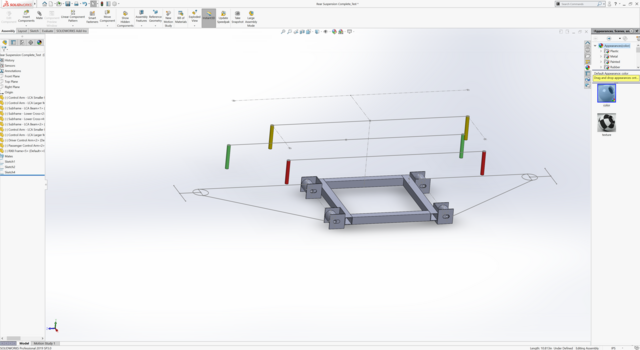


Thread Starter
Registered
Joined: Dec 2016
Posts: 111
Likes: 1
From: Trackside
My ziptied in place mockup tire spaced approximately around where 275s would reside at my approximated ride height. 3D printed myself a shift ****.
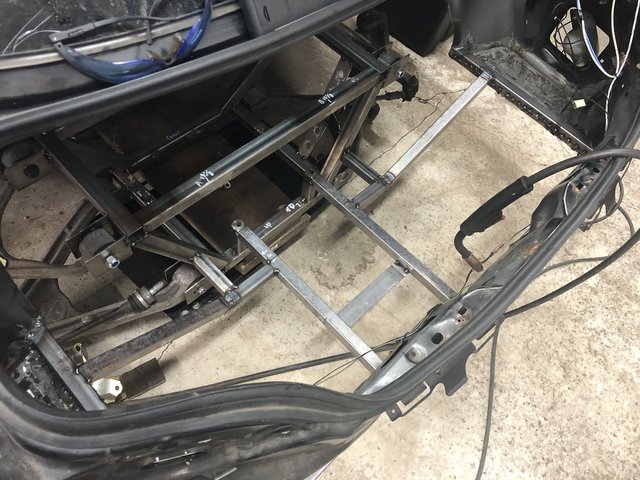
Tack welded some supports into place here. The rear spoiler will eventually come through the trunk attaching to these components, which will also tie into the body above it (just out of picture).
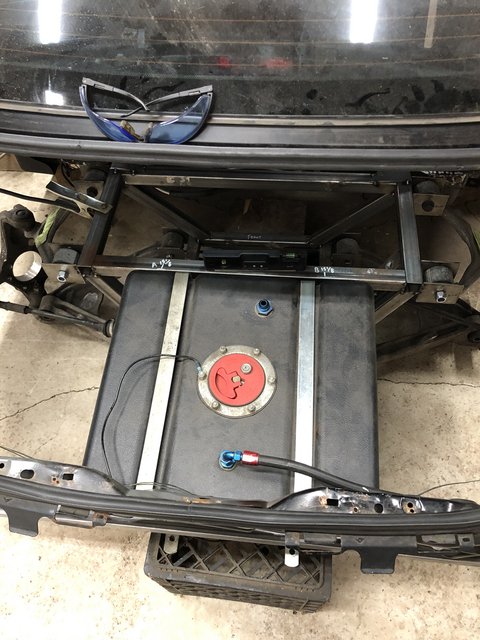
Fuel Cell mock up, it still fits! Going to attach the subframe and shocks to a brace running between the factory upper shock mounts (reinforced of course), then that will attach to the rear deck in what will look like how bridges are reinforced. Through my calculations and analysis, it should be as stiff as the factory subframe (without rubber bushings) and half the weight!
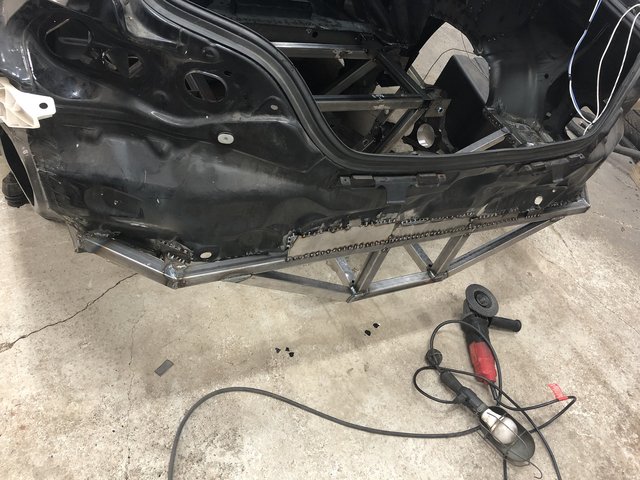
Yeah the left fuel cell arm is a bit crooked...I suck, but not enough for me to tear it down and redo it.


The fuel cell mounts will be tied to each other with the heavily braced Camaro differential mount in between, which then the fuel cell mounts will tie into the subframe's vertical bars, which ties into the toe bar mounts. When cutting the back off with the plasma I went a little off on my cut so the reinforcement plates aren't the same, but was able to capture the contours of the sheet metal which greatly increased the rigidity of the system. The brace above the rear most lower control arm bracket to the fuel cell mount doesn't add a lot of support, but I was in the area so in they went.

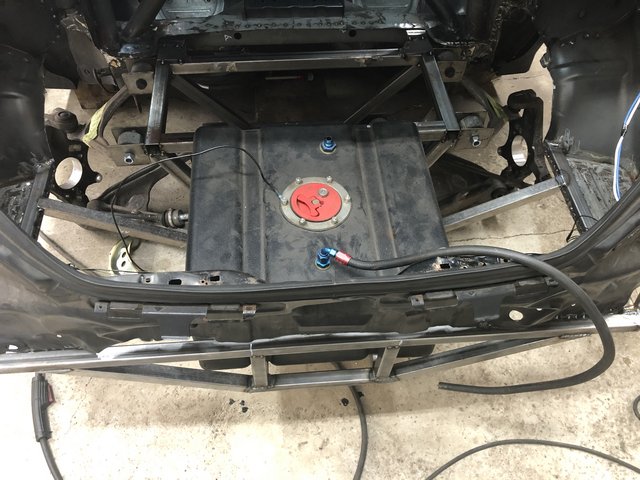
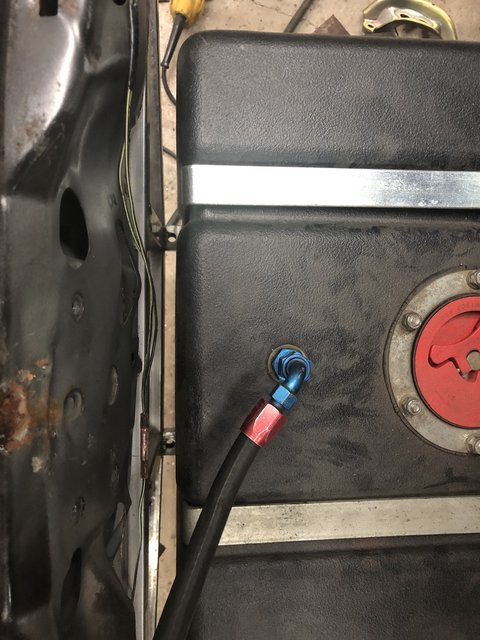
Fuel cell in and mounting holes line up!
Tack welded some supports into place here. The rear spoiler will eventually come through the trunk attaching to these components, which will also tie into the body above it (just out of picture).
Fuel Cell mock up, it still fits! Going to attach the subframe and shocks to a brace running between the factory upper shock mounts (reinforced of course), then that will attach to the rear deck in what will look like how bridges are reinforced. Through my calculations and analysis, it should be as stiff as the factory subframe (without rubber bushings) and half the weight!
Yeah the left fuel cell arm is a bit crooked...I suck, but not enough for me to tear it down and redo it.
The fuel cell mounts will be tied to each other with the heavily braced Camaro differential mount in between, which then the fuel cell mounts will tie into the subframe's vertical bars, which ties into the toe bar mounts. When cutting the back off with the plasma I went a little off on my cut so the reinforcement plates aren't the same, but was able to capture the contours of the sheet metal which greatly increased the rigidity of the system. The brace above the rear most lower control arm bracket to the fuel cell mount doesn't add a lot of support, but I was in the area so in they went.
Fuel cell in and mounting holes line up!

Registered
Joined: Oct 2017
Posts: 612
Likes: 61
From: South Central PA