
DIY: Remove SSV (beta/teaser video)


Thread Starter
Grasshopper
iTrader: (1)
Joined: Dec 2006
Posts: 6,779
Likes: 50
From: Streetsboro, OH
Once you remove the thermostat, all that's left is to disconnect the SSV impact switch and the two bolts securing the valve.
What specifically are you trying to remove?
I've learned some tricks with almost every bolt and nut to get the valve out, so I may be able to give you some advise if I know what you're trying to get at.
What specifically are you trying to remove?
I've learned some tricks with almost every bolt and nut to get the valve out, so I may be able to give you some advise if I know what you're trying to get at.

Registered
Joined: Oct 2007
Posts: 1,574
Likes: 2
From: Boosted...
The bolt is a bitch 
I've used a combination of extensions and u-joints to get it off.
I've also used a combination wrench to give it a few turn until I could turn it by hand.
Wish there was a simple trick, but it usually ends up in a few curse words.
You do not have to remove the oil filler neck.
But once you get the bolts removed from the UIM, you might remove the oil cap to make lifting the UIM out easier.

Registered
Joined: Mar 2003
Posts: 229
Likes: 0
From: Austin,Tx
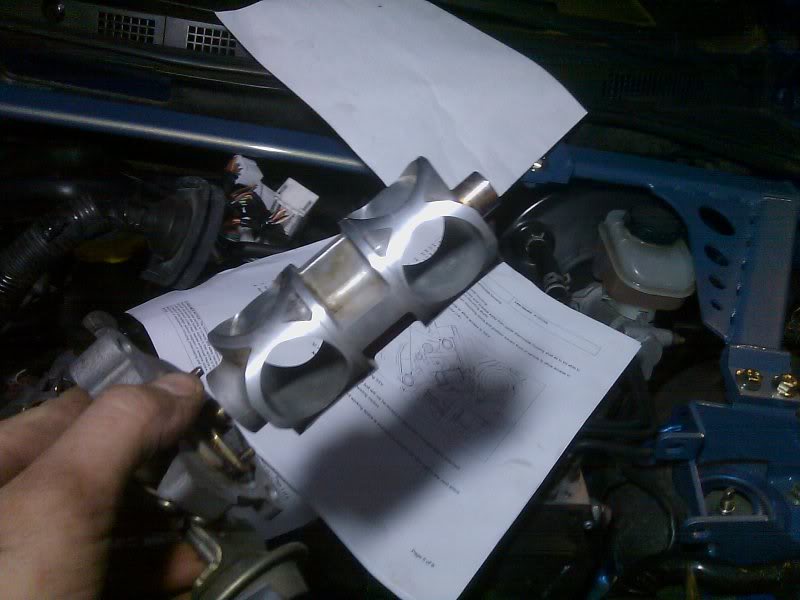
Finally got the UIM out. I got a universal adapter and attached it to the socket. I had to take the oil filler neck section out also. There are two bolts that attaches to both sections and one of the two was hard to reach.
The UIM has some shiny layer to it. Oil was found in the accordian section in front of the throttle valve. The LIM has light brown layer that I can't wipe off. Is this carbon build up that needs to be removed and how?
I moved the actuator links and it moves without problem. I haven't tested (vacuum controller?) with the vacuum pump to see it's functional or not. Any suggestions on why the P2070 code is appearing?
Thread Starter
Grasshopper
iTrader: (1)
Joined: Dec 2006
Posts: 6,779
Likes: 50
From: Streetsboro, OH
If you were able to move the valve by hand without feeling resistance and the valve closed on its own without binding, then the valve itself isn't the problem.
But since you have the UIM off you can do a couple things...
First, spray carb cleaner right onto the SSV valve.
It is ideal to remove the whole valve and clean it since spraying through the opening of the LIM only covers a small percentage of the valve.
But since your valve isn't sticking... I wouldn't go through the trouble of removing it unless you want to (for preventative maintenance purposes).
While you have the UIM off, might as well give it a good soaking to get what you can.
If you felt the valve sticking... then I would suggest removing the valve instead of spraying down the LIM.
Second, I would swap the SSV and AIR solenoids.
Its possible that the SSV solenoid is sticking and causing your CEL.
Look at post 19 in this thread... I have a diagram of the solenoid locations.
And with the UIM removed, its VERY easy to reach.
Also, clean the wire connectors to the solenoids when you swap them.
Dirty contacts can cause electrical problems to the solenoids.
Another possibility (but unlikely) is the SSV impact switch.
The switch senses when the valve is open/closed.
But I have yet to see this fail so that is why I doubt its that... but its possible.

Registered
Joined: May 2006
Posts: 107
Likes: 0
From: South Carolina
Great thread and great video!
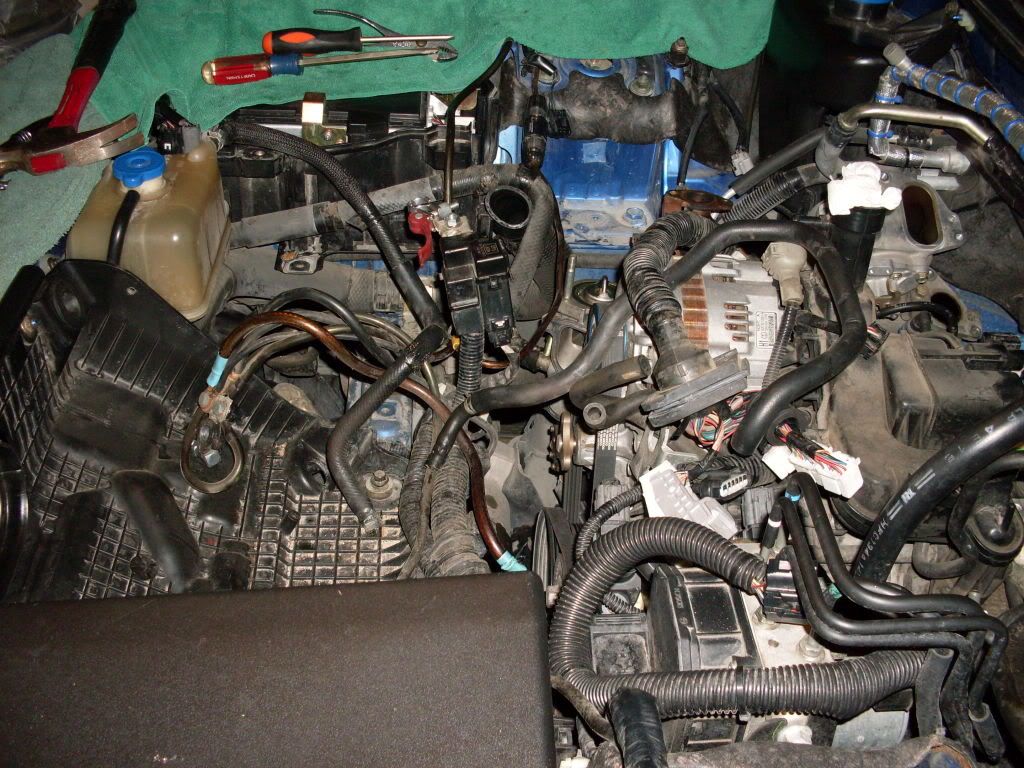
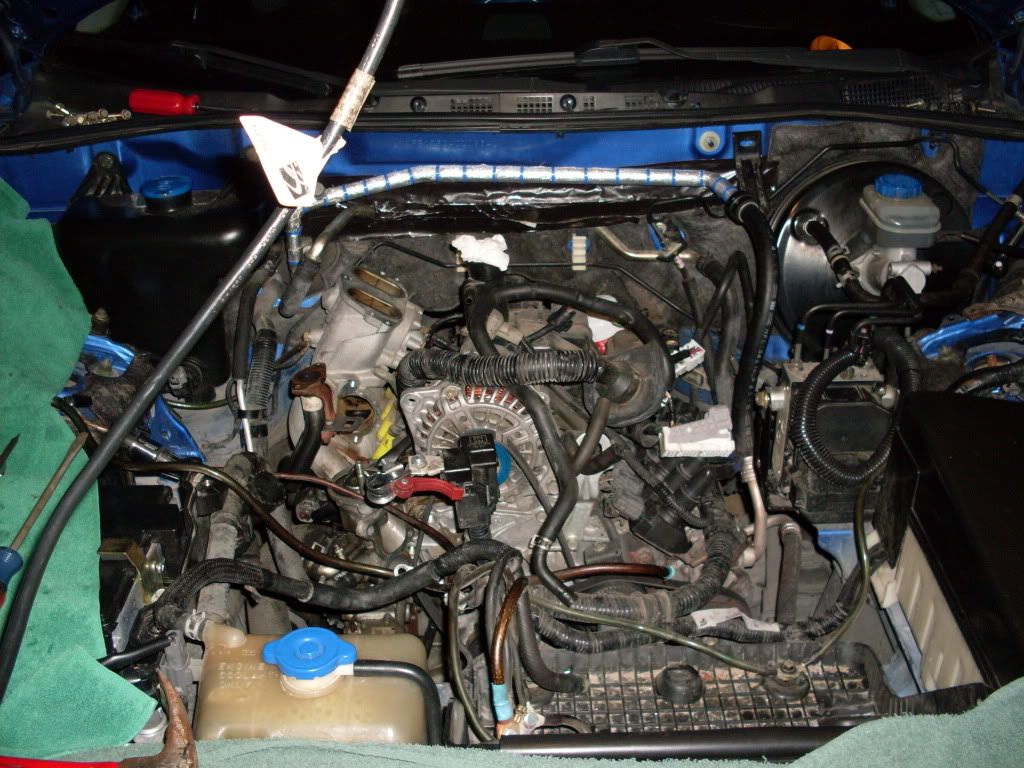
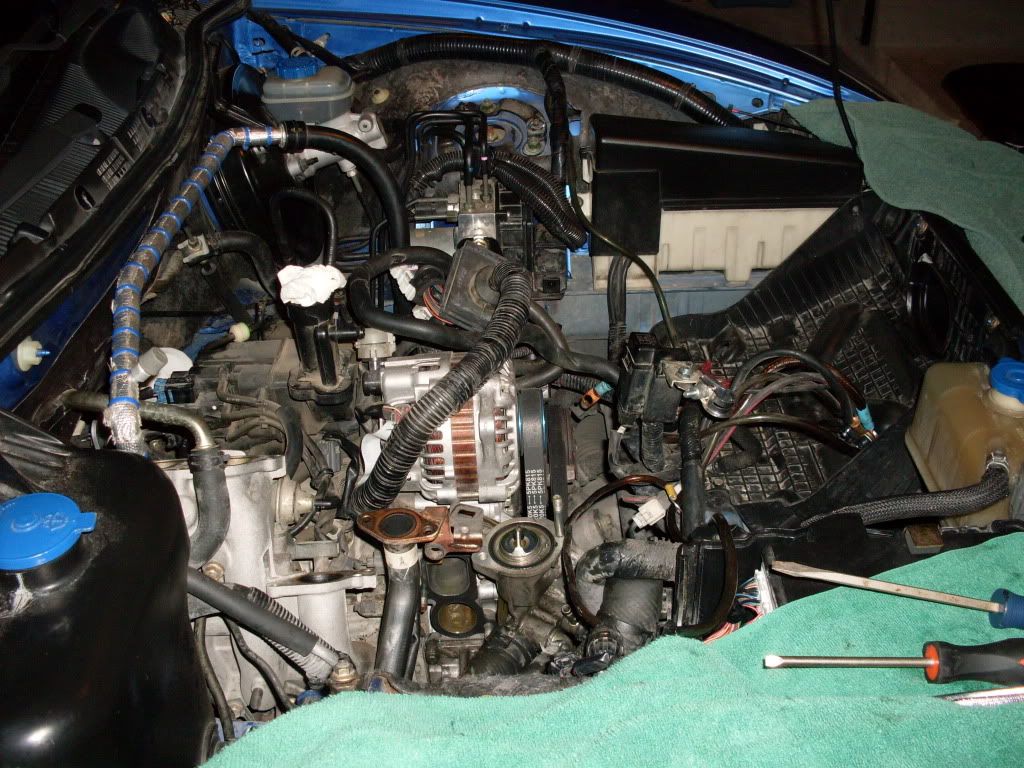
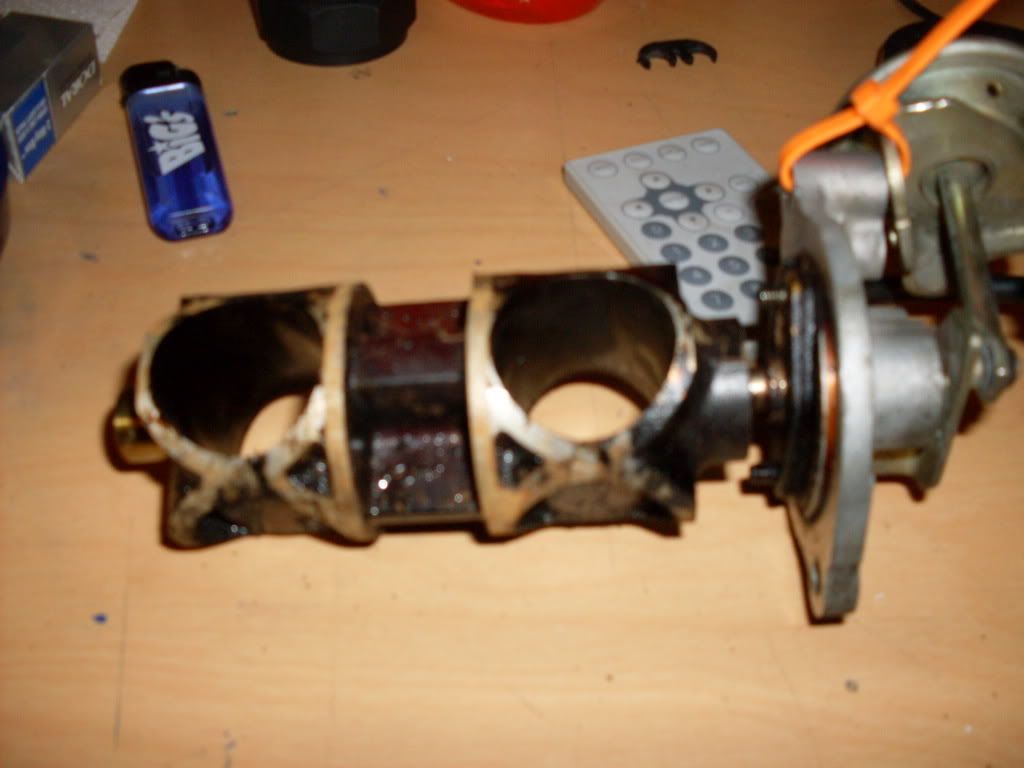
I pulled & cleaned my SSV this weekend, see pictures of before and after below.
Trouble is I did not check the solenoid or the valve, so I am still throwing the P2070. I erased the codes with a scanner and they are coming back. Word to the wise�..check it all before you put it back together.
Not sure if any one else has tried this or not as I did not remove the UIM�..I wrapped a new shop rag (fat) onto a screw driver and soaked it with Carb cleaner. I twisted it in a circular motion about 10 times and then removed it to find a clean area on the rag along with soaking it down with Carb cleaner again. I continued soaking the rag many times and used 3 shop rags to keep it as clean as possible. I actually got the chamber completely clean and did not spray any Carb cleaner into the chamber. I used a shop mirror to get a good visual and to make sure I got it all, especially at the end of the chamber around the perimeter. This also prohibited too much junk from going down into the manifold and into the engine. I did not foul any plugs and the engine started up without much fuss.
Thread Starter
Grasshopper
iTrader: (1)
Joined: Dec 2006
Posts: 6,779
Likes: 50
From: Streetsboro, OH
Good job Rodlucci.
Next time I do this I'll try what you did and soak a few rags with carb cleaner to clean the housing.
I think that'll be easier than having people remove the UIM to stuff rags down the runners.
If you decide to check the solenoid, I wrote a DIY for that too:
https://www.rx8club.com/series-i-do-yourself-forum-73/diy-test-solenoid-190364/
If the valve, actuator, and solenoid turn out to be OK, then the impact switch is likely whats causing your CEL.
Registered
Joined: May 2006
Posts: 107
Likes: 0
From: South Carolina
Good job Rodlucci.
Next time I do this I'll try what you did and soak a few rags with carb cleaner to clean the housing.
I think that'll be easier than having people remove the UIM to stuff rags down the runners.
If you decide to check the solenoid, I wrote a DIY for that too:
https://www.rx8club.com/showthread.php?t=190364
If the valve, actuator, and solenoid turn out to be OK, then the impact switch is likely whats causing your CEL.
I actually used a screw driver that has the retractable prongs on the end of it to grab the screw, this was very helpful in grabing the shop rag.
I will do the checks on the solenoid, valve and actuator to see what gives next weekend. Thanks again for your DIY work!

Rotary Gr8tness
Joined: May 2008
Posts: 19
Likes: 0
From: san antonio tx
well for the last week my car had starting bogging down around 4500 rpm. I checked the coils and wires and the plugs are only a month old. So I checked the SSV valve acuator and the valve is frozen solid.
thanks for the video jon..
took me about 8 hours altogether but my car now runs like a beast unleashed...
thanks for the video jon..
took me about 8 hours altogether but my car now runs like a beast unleashed...
Thread Starter
Grasshopper
iTrader: (1)
Joined: Dec 2006
Posts: 6,779
Likes: 50
From: Streetsboro, OH
All it does is confirm to the PCM that the valve is open or close.
Of course, people who have mid-pipes (and don't have an AccessPORT) deal with this anyway!
Registered
Joined: May 2006
Posts: 107
Likes: 0
From: South Carolina
The SSV can still operate normally without the switch.
All it does is confirm to the PCM that the valve is open or close.
With the CEL always on you won't have the ability to know if another system failed and generated a CEL unless you constantly monitor the codes by reviewing them with an OBD-II scanner.
Of course, people who have mid-pipes (and don't have an AccessPORT) deal with this anyway!
Have I done enough to determine that the contact switch is the issue?
Mazda tells me the switch itself is not available, you must purchase the entire assembly @ $280, how can this be?
Thanks Jon!
Last edited by Rodlucci; Mar 4, 2010 at 10:24 AM.

RX8 & RX7 owner
Joined: Mar 2008
Posts: 5,172
Likes: 3
From: So. California
the message I got when clicky on the linky....
Please pardon our appearance. We are phasing out support for your browser (Internet Explorer 6). Please try one of these more modern browsers:
LOL... maybe its because I am on my PS3?
Please pardon our appearance. We are phasing out support for your browser (Internet Explorer 6). Please try one of these more modern browsers:
LOL... maybe its because I am on my PS3?
Thread Starter
Grasshopper
iTrader: (1)
Joined: Dec 2006
Posts: 6,779
Likes: 50
From: Streetsboro, OH
Yeah... sounds like everything electrically and pneumatically works.
You can purchase the switch separately... the Mazda p/n is N3H4-18-9B1
Before you get another switch, lets check the switch itself and see if its bad.
You'll need to disconnected the harness which is near the switch.
Then use a meter to test the resistance across the two terminals in the connector.
The switch is N/O (normally open) so you shouldn't read anything at first, then when you press the switch you should see between 2-3ohms.
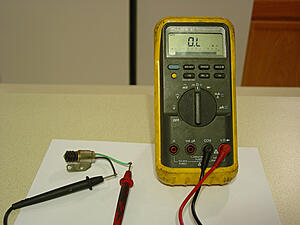
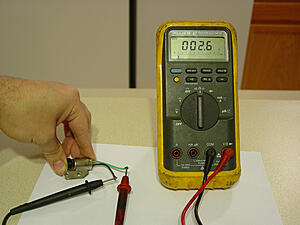
Now if you press the switch and it still reads open, you know for sure the switch itself is bad.
Here is a site to purchase the switch. Still a little pricey:

But I would post in the Buy/Sell section of this forum and see if you can get one used for a much cheaper price.
Hopefully this helps.
Registered
Joined: May 2006
Posts: 107
Likes: 0
From: South Carolina
Jon,
I will test the switch before I install the new one. I have one on the way from Mazmart, paid $45 for the N3H4-18-9B1. The Mazda dealer I spoke with today said there was not a switch available, but when I called Mazmart it is in stock. Go figure! Thanks again for the help and support!
I will test the switch before I install the new one. I have one on the way from Mazmart, paid $45 for the N3H4-18-9B1. The Mazda dealer I spoke with today said there was not a switch available, but when I called Mazmart it is in stock. Go figure! Thanks again for the help and support!
Registered
Joined: May 2006
Posts: 107
Likes: 0
From: South Carolina
I learned something worth passing along........when I tested the switch while it was still mounted on the car, if I moved the valve lever with my hand the reading was correct. If I let the valve lever swing into the switch on its own, it would not trigger the switch in the closed position. The switch had worn in that spot only near the end of its stroke.
I changed out the switch and no more CEL! However, I recommend checking the switch when you have the assembly apart. It was very difficult to get those little screws in and out. As it was I removed the battery, battery box, Alternator bracket, APV assembly by removing the passenger wheel and disconnected the CPU wiring. Oh yeah, I lost my temper many times and lost one of the screws. Fortunately, the local hardware store had the 4mm size needed. I should have drained the coolant and removed the thermostat housing.
I changed out the switch and no more CEL! However, I recommend checking the switch when you have the assembly apart. It was very difficult to get those little screws in and out. As it was I removed the battery, battery box, Alternator bracket, APV assembly by removing the passenger wheel and disconnected the CPU wiring. Oh yeah, I lost my temper many times and lost one of the screws. Fortunately, the local hardware store had the 4mm size needed. I should have drained the coolant and removed the thermostat housing.
Thread Starter
Grasshopper
iTrader: (1)
Joined: Dec 2006
Posts: 6,779
Likes: 50
From: Streetsboro, OH
Thanks for sharing Rodlucci... good to have an actual story of the switch being the culprit instead of my assumptions of it being a possibility.
As you know, those two tiny screws are a pain... would almost be easier to remove the whole valve just to get to those screws easier.
And its a good idea to test the switch with the valve instead of just pressing in the switch with your finger.
That way you get a more realistic occurrence during operation.

Alright I will attempt this this weekend. I can't view the video at work though. I'm going to try and clean everything from the SSV to the throttle body. I have a feeling I have oil cholesterol,  , clogging my intake system.
Getting the Tstat off was a PITA when i upgraded mine...I can't wait to do that again.
, clogging my intake system.Getting the Tstat off was a PITA when i upgraded mine...I can't wait to do that again
.

Wowie, that was a brutal PIA...but it was REALLY worth it.
73,000mi of gunk

I used CNC Intake/Throttle Body cleaner. That stuff ate through all the gunk.
TY again for the video, I ran into a few snags and w/o that video...well my car would still be in pieces.
73,000mi of gunk
I used CNC Intake/Throttle Body cleaner. That stuff ate through all the gunk.
TY again for the video, I ran into a few snags and w/o that video...well my car would still be in pieces.
Last edited by L337fpc; Mar 27, 2010 at 11:37 AM.
Yeah... its really one of the flaws in a "de-carbon" procedure because the SSV is completely looked over with the location of the maintenance ports.
But this shouldn't be a very big issue if you install a catch can. . . I had my intake apart 25k miles after I installed the catch can and it was spotless... it felt so good!
But this shouldn't be a very big issue if you install a catch can. . . I had my intake apart 25k miles after I installed the catch can and it was spotless... it felt so good!