
DIY: Blinder X-treme Laser Jammer Install


Thread Starter
Attracts tree branches
Joined: Jun 2004
Posts: 5,940
Likes: 3
DIY: Blinder X-treme Laser Jammer Install
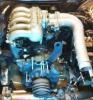
This install guide is for the Blinder Xtreme M-20 Laser Jammer on an RX-8. It has been hosted in a pdf format for easy viewing and printing. Directions for the two extra transmitters of the Blinder Xtreme M-40 may be added at a later time.
If you have any questions whatsoever feel free to contact me, I appreciate your input.
Enjoy!
Click here to download (please inform me if the link is not working)
BTW the group buy for this item is still in effect but may end at anytime here is the link for that:
https://www.rx8club.com/mazdaparts-com-90/ended-laser-jammer-group-buy-blinder-m-20-m-40-x-treme-free-shipping-73659/
Last edited by truemagellen; Oct 20, 2005 at 12:06 PM.


Registered
Joined: Oct 2005
Posts: 77
Likes: 0
thank you for a very well done DIY... it was worth the wait. one question though... in the beginning of the DIY you show the plugs for the Blinder with some sort of large cylindrical things shaped kind of like a cigarette lighter handle near the plugs... later, when you're poking the plugs thru the firewall, they're no longer shown.... what are those things for, and are they easily removed? do they need to be re-installed?
also, i wish the Blinder had some waterproof connectors at the transponder end of the cable... in the event that the car ever needs to be disassembled at the dealership; knowing how mechanics there can be, they'd probably cut the wires and then splice them back together with some electrical tape. (sorry, i don't mean to offend anyone that works at a dealership, but i had the drier for my air conditioner on another vehicle replaced at a dealership, and in the process, they cut some wires for my handsfree phone adapter and spliced them back together- if they would have looked a bit closer, they would have noticed a connector 12" away that they could have disconnected... and broke the hang-up cup for my cell phone... and charged me an hour for labor for doing the splices!)
i'm still thinking about your install and would appreciate your thoughts on this... i might be more inclined to take some extra time and fabricate some brackets that attach to the front body of the car, and attach the transponders to them. that way they could be carefully leveled in both the horizontal and vertical axis. i guess i would have to take the bumper off, cut the holes in the grille and mount one long bracket or two smaller ones, with ample space to mount the transponders on the face of the bracket(s), put the bumper back on and mark the bracket through the holes in the grille to locate the transponders, remove the bumper and mount everything and level / true the transponders up and re-assemble. maybe cut a gasket out of some heavy black poly sheeting and put it around the transponder so if the holes in the grille aren't perfectly matched, the black poly gasket would make any gaps unnoticeable. more work, but it would take the guesswork out of aiming and leveling the transponders. any thoughts? since you've had your bumper off (my cherry hasn't been popped on this one yet) you know better than i what the space behind it looks like.
also, no matter which way i routed the cables in the engine compartment i would enclose them in wire conduit for some extra protection and just to make the install look more neat and factory-like. you can buy it in many different sizes from partsexpress.com for a lot less than what they charge in an auto parts store... they call it 'cable loom'... btw, if you've never heard of them, partsexpress is a great source for lots of automotive audio and dc connector stuff and there prices are reasonable.
as for the audio mute output from the blinder, i am waiting on some harness connectors and as soon as they arrive, i will provide some info on how to mute the stereo... i started this project when i installed my bluetooth handsfree adapter (a necessity if you drive a 6m); i found that the necessary parts (with some modification) are available from both scoshe and metra (although you wouldn't know it from their catalogs or websites- it took numerous phone calls to them to come up with the part numbers and availability) and will most likely be a special order item from a dealer, or a distributor if you can find one that will deal directly with you... the mute outputs from both my handsfree adapter and the blinder are 'open collector transistor', which means you can 'wire-or' them together (tie two mute outputs from the handsfree adapter and blinder together to control the mute input on the stereo)... more on this when my connectors come in.
once again, nice job truemagellen... thank you for blazing a trail in unexplored territory...
Last edited by Shinka in MD; Oct 20, 2005 at 04:43 AM.
Thread Starter
Attracts tree branches
Joined: Jun 2004
Posts: 5,940
Likes: 3
Originally Posted by Shinka in MD
thank you for a very well done DIY... it was worth the wait. one question though... in the beginning of the DIY you show the plugs for the Blinder with some sort of large cylindrical things shaped kind of like a cigarette lighter handle near the plugs... later, when you're poking the plugs thru the firewall, they're no longer shown.... what are those things for, and are they easily removed? do they need to be re-installed?
Feel free to use the rubber grommets as intended by drilling two holes for the cables and inserting the grommet in the hole
 .
.
Thread Starter
Attracts tree branches
Joined: Jun 2004
Posts: 5,940
Likes: 3
Originally Posted by Shinka in MD
also, i wish the Blinder had some waterproof connectors at the transponder end of the cable... in the event that the car ever needs to be disassembled at the dealership; knowing how mechanics there can be, they'd probably cut the wires and then splice them back together with some electrical tape. (sorry, i don't mean to offend anyone that works at a dealership, but i had the drier for my air conditioner on another vehicle replaced at a dealership, and in the process, they cut some wires for my handsfree phone adapter and spliced them back together- if they would have looked a bit closer, they would have noticed a connector 12" away that they could have disconnected... and broke the hang-up cup for my cell phone... and charged me an hour for labor for doing the splices!)
i'm still thinking about your install and would appreciate your thoughts on this... i might be more inclined to take some extra time and fabricate some brackets that attach to the front body of the car, and attach the transponders to them. that way they could be carefully leveled in both the horizontal and vertical axis. i guess i would have to take the bumper off, cut the holes in the grille and mount one long bracket or two smaller ones ample space to mount the transponder, put the bumper back on and mark the bracket through the holes in the grille to locate the transponders, remove the bumper and mount everything and level / true the transponders up and re-assemble. maybe cut a gasket out of some heavy black poly sheeting and put it around the transponder so if the holes in the grille aren't perfectly matched, the black poly gasket would make any gaps unnoticeable. more work, but it would take the guesswork out of aiming and leveling the transponders. any thoughts? since you've had your bumper off (my cherry hasn't been popped on this one yet) you know better than i what the space behind it looks like.
As for space well once the foam is removed there is a LOT of space behind the grill to work with. If you want to tinker with mouting you should have the freedom do so with that space
also, no matter which way i routed the cables in the engine compartment i would enclose them in wire conduit for some extra protection and just to make the install look more neat and factory-like.
as for the audio mute output from the blinder, i am waiting on some harness connectors and as soon as they arrive, i will provide some info on how to mute the stereo... i started this project when i installed my bluetooth handsfree adapter (a necessity if you drive a 6m); i found that the necessary parts are available from both scoshe and metra (although you wouldn't know it from their catalogs or websites- it took numerous phone calls to them to come up with the part numbers and availablity) and will most likely be a special order item from a dealer, or a distributor if you can find one that will deal directly with you... the mute outputs from both my handsfree adapter and the blinder are 'open collector transistor', which means you can 'wire-or' them together (tie two mute outputs from the handsfree adapter and blinder together to control the mute input on the stereo)... more on this when my connectors come in.
once again, nice job truemagellen... thank you for blazing a trail in unexplored territory...
once again, nice job truemagellen... thank you for blazing a trail in unexplored territory...
the beeper is very loud as if you are hit by laser it is critical you slow down and shut off the blinder so the officer does not become suspicious...
I would like to cover up the beeper so it is not as loud or replace it with a quieter tone or alert voice. Anyway it is done a mute would be great so that I wouldn't miss it
Fortunately usually the scenario is you drive by the officer without turning the blinder off and the cop is shaking his laser gun saying to himself what the hell?
 D
D

After making the holes in my grille I decided I am going to attempt to attach the transponding units to the bumper behind the grilles. That way if the front nose has to come off the transponders stay in place. The way Truemagellan has his they sit nestled very nicely. Metal bumper is almost touching the transponder behind it and it rests on the platform that was cut in the foam. It will take more time to attach it to the metal bumper but like the previous posts said if the nose cone is removed by a technician they may not appreciate the effort we put into our install if the nose is attached by wires.
If a person cuts the holes and then puts a small level through the hole keeping the level, level mark each corner of the hole on the metal bumper behind the grille the placement will be much easier than trying to eye it up. And the metal bumper has a flat face that is vertically level.
Next pull the nose off and mount the transponder to that rectangle.
One thing I noticed is the front of the transponder is slightly smaller than the back so the rectangle will have to be enlarged a bit.
Remember to apply clear silicone sealer to any holes that are drilled in metal so as to not allow rust to set in.
I am going to try this approach tomorrow after I get home from school.
Thread Starter
Attracts tree branches
Joined: Jun 2004
Posts: 5,940
Likes: 3
Link in first post updated, same content, new location, FYI: http://www.mazdaparts.com/images/Blinderdiy.pdf
Thread Starter
Attracts tree branches
Joined: Jun 2004
Posts: 5,940
Likes: 3
I'm working on a creative switch location...that is all that is left, anyone have any idea (please note I have the NAV and heated switch controllers and xbox controls are going inbetween the Nav controls and the shift boot
Registered
Joined: Oct 2005
Posts: 77
Likes: 0
truemagellen said:
I'm working on a creative switch location...that is all that is left, anyone have any idea (please note I have the NAV and heated switch controllers and xbox controls are going inbetween the Nav controls and the shift boot
I installed a double-pole double throw switch in one of the blank switch panels next to the dsc on/off switch, along with a LED to send power to my Valentine 1. I had planned to put a second switch in the other blank panel for my Blinder, but now I think I will use the second set of contacts on the same switch to power the Blinder, as long as I have enough room to mount both LEDs... I'll have to buy another blank panel now that I've drilled one hole for the original LED right in the middle of the blank, but I like the idea of turning on and off all of my defensive systems with one switch... if you want to know the part number for the switch, let me know... I bought it from Allied Electronics... it looks very good installed, almost factory... Made by Alcoswitch (now owned by ITT), it's a small black square two-position rocker with a narrow black bezel around it that press-fits into the mounting hole...
I have the switch mounted all the way to the left... easy for me to see by just shifting my eyes down, and easy to reach without anyone outside noticing.
When I first took the blank out it was a bitch, because I had no instructions or idea of what held it in place... cut my hand up to the point of bleeding pretty good when I tried to remove just the last blank by reaching through the access panel and plate under the steering column. I never did get it out that way. Instead, I found it was actually pretty easy to get out by reaching up through the same access hole and removing the rightmost blank by squeezing the tabs at the top and bottom of the blank panel and pushing it out; then release the DSC switch and push it partway out (not necessary to release the wiring); next release the headlight dimmer switch and finally the left most blank panel the same way. It's SO much easier to do this way and no bloodshed either!
Last edited by Shinka in MD; Nov 22, 2005 at 11:51 AM.
Thread Starter
Attracts tree branches
Joined: Jun 2004
Posts: 5,940
Likes: 3
if you can access the switch easily great...
you need to be able to immediately shut the blinder down after you've reached legal speeds
left hand on steering wheel needed right hand free if not shifting (most of the time)
you need to be able to immediately shut the blinder down after you've reached legal speeds
left hand on steering wheel needed right hand free if not shifting (most of the time)
Registered
Joined: Oct 2005
Posts: 77
Likes: 0
I'm good with my hands
Seriously, it hasn't been a problem, I use the same procedure for my Valentine 1, as radar detectors are illegal to use in several states I travel through regularly...
right hand off the shifter and onto the wheel as my right foot brakes and my left hand flips the detector switch off...
if your in a hurry, there is actually a "bite" switch available... keep it in your mouth and when your blinder goes off, bite down to turn off your blinder... or install a foot switch in your dead pedal and use your left foot...
Thread Starter
Attracts tree branches
Joined: Jun 2004
Posts: 5,940
Likes: 3
Originally Posted by Shinka in MD
I'm good with my hands
Seriously, it hasn't been a problem, I use the same procedure for my Valentine 1, as radar detectors are illegal to use in several states I travel through regularly...
right hand off the shifter and onto the wheel as my right foot brakes and my left hand flips the detector switch off...
if your in a hurry, there is actually a "bite" switch available... keep it in your mouth and when your blinder goes off, bite down to turn off your blinder... or install a foot switch in your dead pedal and use your left foot...
Seriously, it hasn't been a problem, I use the same procedure for my Valentine 1, as radar detectors are illegal to use in several states I travel through regularly...
right hand off the shifter and onto the wheel as my right foot brakes and my left hand flips the detector switch off...
if your in a hurry, there is actually a "bite" switch available... keep it in your mouth and when your blinder goes off, bite down to turn off your blinder... or install a foot switch in your dead pedal and use your left foot...

I keep forgetting when I tell people this stuff that I'm left handed

Foot switch is a great idea.
I contacted grille-tech about the surround on the grille insert I had purchased and wanted to put the surround around the transponders to make it look better and more custom. This is what they told me:
The "surround" (I'm assuming you mean the trim) is a UV protected rubber trim.
We are limited to how much trim we can sell; however, if you provide me with the exact amount, I can quote you a price.
I am sure they do not want to let me know where to get the surround.
I might cut into thier market or introduce pre-cut grille inserts that will fit the transponders in the corners.
Not like they are patented, since the same product can be gotten from multiple venders and do not have any sort of branding on them.

I haven't had the most sleep lately, should have thought of that, did actually but forgot... 
I should just take a peek at Home Depot, Menards, Lowes, Pep Boys, Autozone, Checker, Napa, or Bumper to Bumper.
Or maybe I'll be lazy and just get it sent to my house.
I should just take a peek at Home Depot, Menards, Lowes, Pep Boys, Autozone, Checker, Napa, or Bumper to Bumper.
Or maybe I'll be lazy and just get it sent to my house.
Registered
Joined: Oct 2005
Posts: 77
Likes: 0
I haven't seen the grille you're talking about in person, but I have seen and used both plastic and rubber edging in various electronic projects to protect wiring that runs through holes in sheet metal. It's used to make custom- sized and shaped grommets. One company that makes similar products is www.trimlok.com ... you may not find exactly what you're looking for, but if you don't, it maybe worth a phone call to them and describe what it is you're looking for, and they might be able to point you in the right direction. I doubt very much that this stuff is custom made for the custom grille company you're talking about and it's probably an off the shelf item. Once you find a manufacturer that has what you want, you might be able to persuade them to send you a sample of the material to try to see if it works...
this stuff is most likely used in electronics manufacturing, sheet metal fabrication, automotive industry, aircraft industry, etc., so look around a bit, you will probably find what your looking for...
this stuff is most likely used in electronics manufacturing, sheet metal fabrication, automotive industry, aircraft industry, etc., so look around a bit, you will probably find what your looking for...

Originally Posted by Shinka in MD
that sounds like what i was talking about... don't forget to take pictures as you do the install, 4 years to Supercharge!
Thanks almost forgot. Don't have a professional camera but should be able to see the couple of things I did different because of the aftermarket grille insert and approach to mark the metal bumper.

Grille
First thing I had to do was cut the holes in the grille and for the license plate bracket.
I've been driving around for almost six months without a front plate because I had read that it is harder to get tagged with laser by the police. Installing the plate deaccentuates the transponders. I also didn't want the officer to pull me over because he thought he couldn't get a read on my car because I didn't have a front plate.
I cut the grille very similar to Truemagellan, oh that is right I forgot he let me get some practice on his grille. The only real difference is I have the Grille-Tech grille you can find in the group buy on this forum.
https://www.rx8club.com/group-buy-center-85/closed-group-buy-rx8-grille-tech-custom-grille-inserts-69557/
Almost forgot after I cut the grille I painted it black because it is mild steel and will rust if not properly painted. One thing I like about the grille is it is able to bend around the curves of the grille. Most of the pics I have seen of this grille do not pull it in on the bottom. I think it makes it look more refined to follow the curve of the stock grille.
Transponder mounting prep
Next I used some double sided tape to build up the area next to the tow hook holes. As far as the placement I had already cut back the foam bumper piece as you can see it is just a chunk straight down from the black nose cone rest.
If the grille was cut in the corners it will line up right next to the black nose cone rest and over the tow hook hole.
I built up the area next to the tow hook hole with three pieces of double sided tape and one the length of where the transponder go.
I ran wire through the tow hook hole. That is why I cut the hole over the tow hook hole.
Last edited by BoosTED; Oct 28, 2005 at 03:54 AM.
Spacer out of license plate bracket
I used a license plate bracket to build up the area before mounting the transponder with the brackets that came with the Blinder. I picket this up from Pep Boys for $2.99.
I cut the bracket in half and trimmed it down so it was the width of the transponder with brackets.

I also cut the lower section off of the bracket (the smaller piece because with the bigger piece on the top it is stronger). Large piece points up.

I cut the bracket in half and trimmed it down so it was the width of the transponder with brackets.
I also cut the lower section off of the bracket (the smaller piece because with the bigger piece on the top it is stronger). Large piece points up.