View Full Version : DIY: Moisture In Your Tail Lights? Quick Easy Fix!


Rx8_rotory_Noobie
06-14-2009, 11:01 AM
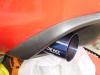
I have had moisture in my tail lights from the day i bought my 8, the solution is simple: Drill a small hole in the lower pointy side of the taillight (lower right side for the left one, lower left side for the right one) I did this and within a few days the moisture was gone and has not returned yet. Let me know how it works for you guys.

Jon316G
06-14-2009, 12:42 PM
This method works great. I did this years ago and the condensation has never returned.
Here is my post from another thread with pics:
http://www.rx8club.com/showpost.php?p=3049321&postcount=17

Rx8_rotory_Noobie
06-14-2009, 05:30 PM
Yup! =]

9krpmrx8
06-14-2009, 05:32 PM
Both of those methods are not needed. Just use black RTV around the gasket. I have fixed mine and some buds this way and the moisture never returned. Takes only a few minutes and you don't need to damage your tail lights.

Zoom49
06-14-2009, 10:30 PM
Just use black RTV around the gasket. I have fixed mine and the moisture never returned. Takes only a few minutes and you don't need to damage your tail lights.

Yea I also did it this way using clear silicone smeared lightly on both sides of the gasket. Been water tight for over 18 months.

Rx8_rotory_Noobie
06-15-2009, 05:17 PM
Well, all i know is its fast, free, not noticable at ALL, and works perfectly.

9krpmrx8
06-15-2009, 05:29 PM
Well, all i know is its fast, free, not noticeable at ALL, and works perfectly.

Most guys that have done this over the years end up having the problem again.

Rx8_rotory_Noobie
06-15-2009, 05:41 PM
well, over the years is long enough. who had problems like this 'over the years' j/w

Brettus
06-15-2009, 05:45 PM
well, over the years is long enough. who had problems like this 'over the years' j/w

I drilled mine 4 years ago and the problem did come back so I did the silicone trick on the gasket and now the problem is finally gone :)

That long enough ? :lol2:

Huey52
06-15-2009, 05:49 PM
Better solution - get them replaced under warranty. Had both of mine replaced and now with the new & improved gaskets I don't anticipate any future problems.

Socket7
06-15-2009, 05:55 PM
You can just take bondo to any dings you find on your doors too. Covers the ding right up.

Just because it solves the problem doesn't mean it's solved right.

But hey. If you have to be needlessly destructive to feel manly, go for it. Who cares about the well documented method of doing it right.

Why even bother finding the leak when you can just make a drain :fruit:

Rx8_rotory_Noobie
06-15-2009, 05:59 PM
Socket7: EXACTLY my point. and if this TEMPORARY fix lasts 4 years, then by all means. im fine with that.

Brettus
06-15-2009, 06:04 PM
/\ I should have said " i did it over 4 years ago but the problem came back 3yrs and 10 months ago" LOL

NACer4lyf
06-15-2009, 06:08 PM
this thread made me laugh.

hey what do i do if my window has alot of condensation? should i drill holes in each side? lmao jk of course

Rx8_rotory_Noobie
06-15-2009, 06:35 PM
What should i do if im an asshole? create a flame-a-thon and threadjack?

Socket7
06-15-2009, 06:35 PM
Socket7: EXACTLY my point. and if this TEMPORARY fix lasts 4 years, then by all means. im fine with that.

No. Exactly the opposite of my point. You've taken my sarcasm as encouragement. :icon_no2:

I view this sort of "Repair" in the same manner I view stereo shops who put holes in doors rather then passing the speaker wire through the wiring tube like they should.

It's a cheap, sloppy and lazy answer to a very simple problem of a bad gasket. This "Fix" flies in the face of my personal aesthetics, which says fix it the right way by figuring out what went wrong in the first place and solving that; rather then treating the symptoms of the problem.

It's safe to say I've got a bit of a bug up my ass about this particular "fix". :spank: I'm not trying to threadjack, or bring you down but every time someone starts another duplicate thread about this "fix", I feel duty bound to point out that A: This thread already exists B: This is not the proper way to fix this C: There is a DIY for fixing it the proper way.

Rx8_rotory_Noobie
06-15-2009, 06:40 PM
It's safe to say I've got a bit of a bug up my ass about this particular "fix".

I noticed lol.

shazy
06-15-2009, 07:37 PM
btw My gasket broke on both sides.
So I have to replace it due to some faggot friend slamming the door really hard.

BTW, please don't tell me the 14.79 is with all those mods you have.

VS8
06-15-2009, 07:44 PM
btw My gasket broke on both sides.
So I have to replace it due to some faggot friend slamming the door really hard.

BTW, please don't tell me the 14.79 is with all those mods you have.

im not suprised at 1/4 mile he has leather which is heavier than stock and the exhaust and intake dont do anything subs also weigh him down and he said it was 14.79 without spray soo yea...

but anyways i will try this out and if it doesnt work then i will buy new tailight from ebay for like 50 dollars

Rx8_rotory_Noobie
06-16-2009, 05:26 AM
14.79 isnt that bad considering my car is loaded down with heated seats, nav, leather, subs, etc. And yes, its true if you want i can post track slips. Stock it was running like 16s.

viprez586
06-21-2009, 04:06 PM
Take into consideration of a customer at a dealership, who's warranty has expired.

Also lets just say the customer will not pay for new taillights or the seals.


This comes into play with the dealership, while some dealers might just pay for the seals and/or taillight, other's would try not to since that's just giving away parts for free.(expensive taillights at that too).

You tell me what sounds better from a customer's perspective.

"Okay your car is fixed, we just drilled holes in the bottom or your taillights so the water drains and evaporates."

"Okay your car is fixed, we removed your taillights, cleaned out the dirt & debris on the sealing area of the taillight, then coated the sealing areas with a weather-proof sealant"

Both could be considered masking the real problem at hand, while both are effective.

Just food for thought.

Brian Major
06-21-2009, 04:55 PM
14.79 isnt that bad considering my car is loaded down with heated seats, nav, leather, subs, etc. And yes, its true if you want i can post track slips. Stock it was running like 16s.
16's? That boils down to the driver.

BTW, drilling a hole seems like a terrible idea when the gasket can be fixed. Drilling a permanent hole and possibly damaging your tail lamp in the process is just plain sloppy.

Rx8_rotory_Noobie
06-21-2009, 05:07 PM
Tail lamp was not damaged, theres still no condensations, and its IMPOSSIBLE to notice. I really dont see what the problem is, the problem was fixed for FREE and had the exact same effect as if you took the time/money to do these other techniques.

diamondrock
06-21-2009, 05:56 PM
Rotary Newbie - thanks for the info. And a free fix sounds good to me!! If I ever have that problem then I'll try it.

Jon316G
06-21-2009, 06:47 PM
I really dont see what the problem is, the problem was fixed for FREE and had the exact same effect as if you took the time/money to do these other techniques.

People have nothing else better to do than complain just because others don't do something THEIR way.

I have people comment when I use a c-clamp and pliers to compress a brake caliper piston.
They're like, "OH MY GOD... you NEED to use the special piston compression tool!"
I just look at them, shake my head, and say "Do it the way YOU want to do it!"
Just cause I don't use your method doesn't make me wrong.
Of course, most of these people barely do any work on cars or machines so it doesn't surprise me.

Like I mentioned in another thread... its your car so do what you want to do.
Look into the pros and cons of each method and decide for yourself.
If you're more comfortable with a gasket... great! I really don't care either way.
But people need to decide for themselves, not be pressured into it.

uncleant
06-21-2009, 09:27 PM
if its still under warranty the dealer will put a new lense and gasket on it. just got mine done last week for nothing

Rx8_rotory_Noobie
06-22-2009, 08:13 AM
No 04's are in warranty any more. At least i dont think.........

campbell45
10-19-2009, 09:39 PM
umm so to fix it with silicone or something like that do I have to put the tail light in an oven to take it apart and clean it? what could i use to reseal it?

9krpmrx8
10-19-2009, 09:44 PM
Dude don't do this retarded fix. Take the tail light out, remove the bulbs, rinse it out with a little pure filtered or distilled water, then leave it in the sun. Once it is all dried out apply black RTV to the factory gasket (after you clean it off with alcohol or something) and to the mating surface and then reinstall the light and tighten the bolts. That's it.

Rx8_rotory_Noobie
10-20-2009, 03:08 PM
OR save yourself 3 hours and drill a needle hole in one of the corners of the taillight and watch the moisture DISSAPEAR!!! OH LOOK 9KRPM!! I DID THIS 4 MONTHS AGO AND ITS STILL CRYSTAL CLEAR! WHO WOULDA THOUGHT!?!?!? Why the hell are you bringing back old posts anyway? I know the answer! Cuz your a ......

SayNoToPistons
10-20-2009, 03:19 PM
Dude don't do this retarded fix. Take the tail light out, remove the bulbs, rinse it out with a little pure filtered or distilled water, then leave it in the sun. Once it is all dried out apply black RTV to the factory gasket (after you clean it off with alcohol or something) and to the mating surface and then reinstall the light and tighten the bolts. That's it.

My driver side taillight had condensation for the first time after a rainstorm. I used this option instead of drilling holes.

9krpmrx8
10-20-2009, 03:28 PM
OR save yourself 3 hours and drill a needle hole in one of the corners of the taillight and watch the moisture DISSAPEAR!!! OH LOOK 9KRPM!! I DID THIS 4 MONTHS AGO AND ITS STILL CRYSTAL CLEAR! WHO WOULDA THOUGHT!?!?!? Why the hell are you bringing back old posts anyway? I know the answer! Cuz your a ......

Good for you bro, I'm glad drilling a hole in your tail lights worked for you. Don't get butt hurt because your solution to the problem is unnecessary. Obviously you don't live in a place where it is humid and rains. With your method the moisture will return. Oh, and I didn't bring it back, he did and I answered. Thank you and have a nice day.

Rx8_rotory_Noobie
10-20-2009, 09:59 PM
Your a class A dumbass.

9krpmrx8
10-20-2009, 10:42 PM
Your a class A dumbass.

Okay? :dunno:

campbell45
10-21-2009, 11:30 PM
I would never drill a hole into anything just for an easy fix...ill get a new gasket

No offense to anyone. I understand this is one way to do it and it works. but If I have the option of doing it the right way, I'll do that.

Jon316G
10-21-2009, 11:56 PM
I would never drill a hole into anything just for an easy fix...ill get a new gasket

No offense to anyone. I understand this is one way to do it and it works. but If I have the option of doing it the right way, I'll do that.

I don't think anyone will be offended by your choice.... because in the end, its still your choice.
I hate when other people try to control other people's thoughts and insist that they do it their way.
I always say to people, here are the options you can go with, decided what is best for you.
But you have some people who are control freaks and will flip-out if you don't do what they say.

I drilled mine and its been a few years now and the condensation has never returned.
Other locals have done the same thing with no issues.
And we go through pretty good climate changes here in Ohio.

burglar
11-09-2009, 04:32 PM
I had condensation in mine that would disppear / reappear depending on the weather. I took it out and in the drying process found that the previous owner had drilled a hole in the bottom.

I plugged the hole, coated both sides of the original gasket with black silicone, and reinstalled it. All good for the last few weeks despite some rain.

Based on my experience, I'd recommend against drilling a hole in your taillights. $3 tube of silicone and 30 minutes worked for me.

Huey52
11-10-2009, 06:47 AM
My way or the highway Jon. ;)

I don't think anyone will be offended by your choice.... because in the end, its still your choice.
I hate when other people try to control other people's thoughts and insist that they do it their way.
I always say to people, here are the options you can go with, decided what is best for you.
But you have some people who are control freaks and will flip-out if you don't do what they say.

I drilled mine and its been a few years now and the condensation has never returned.
Other locals have done the same thing with no issues.
And we go through pretty good climate changes here in Ohio.

Jon316G
11-10-2009, 06:51 AM
My way or the highway Jon. ;)

But I like the highways Huey ;)

exsequor
11-10-2009, 01:00 PM
I did this fix when I had my 8 and the moisture went away completely..even in more humid places then colorado.

BReal-10EC
11-15-2009, 12:40 PM
Better solution - get them replaced under warranty. Had both of mine replaced and now with the new & improved gaskets I don't anticipate any future problems.


I mentioned the water in taillights and the dealer said they could only remove them and clean them if the water leaves noticeable residue (which they did not have). Per the dealer- some condensation was "normal". Funny- I've never had that happen in any vehicle I've had before this. But then again, it was never there when I took it in. But this week it's been like this every day.

But whatever- I'll do the gasket seal thing.

daveStyle
12-21-2009, 05:32 PM
Hey guys,

Heated discussion this one. I'm the proud owned for all of 2 weeks now and I'm loving it.
But I have several fish living in the lights. Is there a document I can follow with instructions on how to remove the lamps. Tutorial, pictures, brief text, anything of the sort?

9krpmrx8
12-21-2009, 11:49 PM
No offense dude but if you need instructions on how to remove a tail lamp just take it to the dealer.

daveStyle
12-22-2009, 03:38 AM
hehe fair point.

I've done it before, just on cars I cared less about. Just wondering was there any little tricks or hidden screws to find. It's so damn cold and rainy outside I haven't had much time to look around.

Jon316G
12-22-2009, 03:42 AM
No offense dude but if you need instructions on how to remove a tail lamp just just take it to the dealer.

For once 9krpmrx8 and I agree on something in this thread :rollingla

SiLVeRE8
12-22-2009, 04:16 AM
No offense dude but if you need instructions on how to remove a tail lamp just just take it to the dealer.

LOL! best line in this thread

nuke0907
12-28-2009, 02:30 PM
LOL! best line in this thread

I had condensation in mine that would disppear / reappear depending on the weather. I took it out and in the drying process found that the previous owner had drilled a hole in the bottom.

I plugged the hole, coated both sides of the original gasket with black silicone, and reinstalled it. All good for the last few weeks despite some rain.

Based on my experience, I'd recommend against drilling a hole in your taillights. $3 tube of silicone and 30 minutes worked for me.

^ i like this quote better. more proof that drilling holes does not work and does not fix the problem.

BTW, not fixing the problem correctly will eventually lead to this, maybe even worse.

clicky! (http://i115.photobucket.com/albums/n303/nuke0907/rx8%20progress/DSC_0402.jpg)

nx04
12-28-2009, 02:48 PM
proxy, silicone or caulking works amazing will never come back ,, coming from somoene who lives with the fucked up canada weather :)

Slick8
12-29-2009, 09:48 AM
water and dirt runs directly from the truck lid drainage channel into the gasket seam
http://www.rx8club.com/attachment.php?attachmentid=149701&stc=1&d=1261680690

Water and dirt collect into a pocket at the gasket seam and erodes away the seal, see where the seal is compromised at the blue arrows
http://www.rx8club.com/attachment.php?attachmentid=149702&stc=1&d=1261680690

Speculation that removing the excess gasket seam would fix the problem
http://www.rx8club.com/attachment.php?attachmentid=149703&stc=1&d=1261680690

smalllittleblonde
01-01-2010, 07:09 PM
how long is the warranty on them?

rotarydrifter
01-02-2010, 11:18 AM
really holes? i just took mine off and let it air out and when it was dry i made a better foam gasket tape! and no condensation since then...


http://www.ntsupply.com/images/products/JVCCSCF48-01_lg.gif


buy here:
http://www.iaqsource.com/product.php?p=foam-tape-products_jvcc-scf48-0&product=112227

rotarydrifter
01-02-2010, 11:23 AM
really cheap fix without hacking up your taillight for little spiders to live in there haha

Wrathre
01-03-2010, 02:12 AM
water and dirt runs directly from the truck lid drainage channel into the gasket seam
http://www.rx8club.com/attachment.php?attachmentid=149701&stc=1&d=1261680690

Water and dirt collect into a pocket at the gasket seam and erodes away the seal, see where the seal is compromised at the blue arrows
http://www.rx8club.com/attachment.php?attachmentid=149702&stc=1&d=1261680690

Speculation that removing the excess gasket seam would fix the problem
http://www.rx8club.com/attachment.php?attachmentid=149703&stc=1&d=1261680690

Interesting. I'm going to have to pull mine off here shortly and attempt to fix the gasket (it rained for weeks it seems down in GA, caused mine to become a small lake). I may attempt removing the excess gasket and see what happens, will post results.

bleh
01-04-2010, 06:03 PM
i was wondering if anyone has also had this problem with their headlights?
also, if i don't get this problem fixed right away, will it cause severe damage to the lights?

Slick8
01-04-2010, 09:08 PM
Some pics for you


water and dirt runs directly from the truck lid drainage channel into the gasket seam
http://www.rx8club.com/attachment.ph...1&d=1261680690

Water and dirt collect into a pocket at the gasket seam and erodes away the seal, see where the seal is compromised at the blue arrows
http://www.rx8club.com/attachment.ph...1&d=1261680690

Speculation that removing the excess gasket seam would fix the problem
http://www.rx8club.com/attachment.ph...1&d=1261680690


water and dirt runs directly from the truck lid drainage channel into the gasket seam
http://www.rx8club.com/attachment.php?attachmentid=150052&stc=1&d=1262660354

Water and dirt collect into a pocket at the gasket seam and erodes away the seal, see where the seal is compromised at the blue arrows
http://www.rx8club.com/attachment.php?attachmentid=150053&stc=1&d=1262660354

Speculation that removing the excess gasket seam would fix the problem
http://www.rx8club.com/attachment.php?attachmentid=150054&stc=1&d=1262660354

See blue oval and arrow, used my index finger to push away excessive dirt/debris for photo. That clump was in the seam pocket.
http://www.rx8club.com/attachment.php?attachmentid=150055&stc=1&d=1262660468

Slick8
01-04-2010, 09:11 PM
really holes? i just took mine off and let it air out and when it was dry i made a better foam gasket tape! and no condensation since then...


http://www.ntsupply.com/images/products/JVCCSCF48-01_lg.gif


buy here:
http://www.iaqsource.com/product.php?p=foam-tape-products_jvcc-scf48-0&product=112227

This works too since there is no seam now, you are effectively making two separate gaskets. Put this on for $5.

http://images.lowes.com/product/converted/077578/077578012216md.jpg

It's Frost King black foam tape they sell at Lowes or HD, it's been 3+ years now since I put it on, no water at all, none. Just wrap around rim edge on the taillight where the gasket would seat, make sure to clean the tailllight and seat area with rubbing alcohol first. Also, make sure the seam faces down (water can not run uphill) where the tape meets up together, and butt it/bunch it up there to create a tighter seal. I used 3/4" X X 5/16" X 10'

http://ec-images.acehardwareoutlet.com/225/products/998035820_092408I_pm.jpg

I didn't post it because I wasn't sure that it would work and I lost the photos on a shdc card somewhere in my house. 3+ years is pretty good evidence it works.

bleh
01-07-2010, 04:10 PM
Anyone know what it might be if i'm having the same problem with the headlights?

armyjay
01-09-2010, 06:49 AM
i used this method, worked perfectly.drilled 2 holes in the lowest resting area of the taillight.fog was gone and hasnt come back.there may be other ways of doing this, but this method is quick, it works, and its free.

Rx8_rotory_Noobie
01-11-2010, 11:16 AM
<3 Armyjay. Finally someone who isnt an idiot.

88 rex turboII
01-12-2010, 01:54 PM
Foam tape from HD worked perfect on my tail lights

dmitrik4
01-12-2010, 06:05 PM
hehe fair point.

I've done it before, just on cars I cared less about. Just wondering was there any little tricks or hidden screws to find. It's so damn cold and rainy outside I haven't had much time to look around.

if you look on rosenthal mazda's site, they have a listing of all the TSBs that have been issued. the bulletin dealing with the taillight leaks has the procedure for removing the light.

BTW, i bought the redesigned gasket and installed it...better, but i still have water getting in.

BReal-10EC
01-16-2010, 04:20 PM
Dangit! I did this today and when finished both tail covers had a crack at the top where the black thing stops. I have no idea how I did that (I was very careful)- but they must be quite fragile.

Oh- and the nuts on both my mine came off by hand- no wrench needed. They were that loose.

Butters
01-18-2010, 11:19 AM
I just replaced my tail light gaskets with the "new and improved" ones from Mazda. I took out the housings and spent a good hour drying them out, which was a pain in the ass. The new gaskets are indeed thicker and more LUXURIOUS. BUT! I drove to work this morning and there is already condensation inside the tail lights after just a short 10min drive. Let me be clear, though, this is condensation not rain water seeping in. I'm sure it'll rain later today so we'll see if that seeps in.

What gives?!

Should I add silicone sealant to the gaskets? Or bin the fucking $45 dollar a piece gaskets I just bought and try a roll of rubber weather stripping from Home Depot and try that instead?

*shakes fist at Mazda*

ksanders8706
01-18-2010, 05:26 PM
Both of mine were nearly brimming with water after a spirited wash and rain storm. I searched the boards and felt wary of drilling my lenses. I've done it on beater cars before, but this one won't be tampered with in such a way. I removed both tail light assemblies and carefully peeled the old gaskets off in one piece. After removing the bulbs and having two void housings, I tried to figure out the fastest way to dry them out. I tried vacuum lines, hair dryers, regulated compressed air, but nothing worked as good as-- the oven.

After removing most of the larger deposits of water, I laid a cookie sheet in the oven with a few towels to serve as padding for the lights. After the oven reached it's lowest setting, 170F, I placed them on the towels, clear side down (light-holes facing up). I checked the lights every thirty minutes or so, wary that the plastic would become weak or the foam insulating around the LED strips would start to fail. It never happened, and I'm proud to say it was a case of set it and forget it. About an hour and a half passed and they were dry as a bone. I refreshed the old gaskets with some clear silicone adhesive and reinstalled the lights. I replaced the old nuts with new nylon lock nuts, preventing a vibratory backing as the previous nuts encountered.

I've been water/condensation free for just under a year now!

Aside from some dime lock nuts I happened to have lying around, this was free. I get the concept of drilling the holes is faster and easier, but my method allowed me to clean the trunk and enjoy a few Heinekens while waiting for my lenses to bake :)

armyjay
01-19-2010, 06:28 AM
this drilling method worked great for me, now my other taillight has water in it, damn damn damn, now i gotta do the same thing to the other tail light. stupid taillights - lol

Butters
01-22-2010, 02:20 PM
Well, I have replaced the $90 in OEM gaskets with $5 weather stripping from Home Depot and it seems to have solved the water seepage problem. The condensation problem is still around, though. I'm waiting to see if heavy rain will still seep in, wouldn't ya know that the day after I install the weather stripping it has ceased to rain in Seattle for three days straight. What the fuck?

Does anyone still get condensation in the tail lights even after your weather stripping/drilling/silicone sealant+weather stripping/silicone sealant+new gaskets?

jmc23200
01-22-2010, 02:35 PM
Why drill holes in the tail lights? It took me 5 minutes(no lie) to remove the tail light. Then the easiest way to remove the water is to get a couple sheets of paper towel, twist them together and push it into the light hole. Slosh around the water and let it get soaked up by the paper towel. Then, blow dry for 5 minutes on low to dry the gasket and remove any moisture left behind in the tail light. Clean around the gasket and put clear silicone around the entire gasket for good measure. Let it sit for 10 - 15 minutes(enough to scab over) and reinstall.

It took me about 30-40 minutes total or so to do both tail lights. If you live near boston, I'll fix them for you for a 6 pack :)

kendall1855
01-24-2010, 02:18 PM
Hi i have the same problem, i also have water in my boot would anybody no why this is?

exsequor
01-24-2010, 02:31 PM
I still have to say this. The hole method is just fine of a fix depending on where you live. If you do it on the bottom of the light, you'd never be able to tell.

kendall1855
01-25-2010, 08:54 AM
I drilling holes in my lights today , just have to wait and see what happens now

Huey52
01-25-2010, 09:13 AM
Exactly. After drying get the upgraded Mazda gaskets or some silicone sealant. Drilling holes is just silly.

Why drill holes in the tail lights? It took me 5 minutes(no lie) to remove the tail light. Then the easiest way to remove the water is to get a couple sheets of paper towel, twist them together and push it into the light hole. Slosh around the water and let it get soaked up by the paper towel. Then, blow dry for 5 minutes on low to dry the gasket and remove any moisture left behind in the tail light. Clean around the gasket and put clear silicone around the entire gasket for good measure. Let it sit for 10 - 15 minutes(enough to scab over) and reinstall.

It took me about 30-40 minutes total or so to do both tail lights. If you live near boston, I'll fix them for you for a 6 pack :)

jmc23200
01-25-2010, 09:39 AM
Drilling holes is a lazy workaround as some people have said that the condensation comes back. Like I said, it is a 30 minute, small project. While the silicone dries, you can detail the interior of your car. After putting the lights back on, you can detail the exterior. If the condensation comes back, you will need to do this anyway and then you will need to silicone the hole, which will look like crap. In the end, it is your car, do what you want.

exsequor
01-25-2010, 12:31 PM
The method you decide to use to repair your taillights will directly imply your character type :):smoker:.

rotarydrifter
01-27-2010, 05:10 PM
yup. thats what i thought the holes? then dirt and unnecessary things ill creep on in there.

9krpmrx8
01-27-2010, 05:52 PM
Are we still with the drilling holes holing thing?:wallbash:

Jon316G
01-27-2010, 05:56 PM
The method you decide to use to repair your taillights will directly imply your character type :):smoker:.
Talking bad about other people you don't even know shows your character type :icon_no2:
Its crazy to see people still like beating a dead horse in this thread.
And its sad to see people who have no real contribution to this forum post here just to attack others.
That alone shows me a person's "character type".
This is why I stayed out of this thread... the immaturity is incredible.

Jon316G
01-27-2010, 05:59 PM
Are we still with the drilling holes holing thing?:wallbash:

I agree with you... I think each side made their point on what they like or didn't like.
Think this thread should have been closed a long time ago.
We are getting nowhere further on this topic.

Huey52
01-28-2010, 07:14 AM
OK, I'll settle this. Addressing the root cause is always the best course of action. Therefore, after drying, get the new gaskets or use silicone to prevent moisture intrusion from recurring.

exsequor
01-29-2010, 12:34 PM
Talking bad about other people you don't even know shows your character type :icon_no2:
Its crazy to see people still like beating a dead horse in this thread.
And its sad to see people who have no real contribution to this forum post here just to attack others.
That alone shows me a person's "character type".
This is why I stayed out of this thread... the immaturity is incredible.

What are you talking about? I didn't imply anything about anyone.
The method one chooses to fix something, does imply their character type. That was all I was stating, nothing derogatory either way. ;)

jmc23200
01-29-2010, 12:49 PM
This is kind of like locking your keys in your car and breaking your window to get them when you could have just used the spare. The spare might have been at your house and took you a little longer to get, but there would be no damage done.

BReal-10EC
02-22-2010, 07:31 PM
Ok, so I found some used taillights at the junk yard for a good price (100 bucks for both) to replace the ones I cracked.....


The driver side is in excellent condition, but the passenger side was full of nasty ice and crap. I think it was mold. Anyway, I got all the ice and mold crap out, but there is still a soap scum looking film in many spots of the lens and even on the chrome reflectors.

My question- what's the strongest cleaner/solvent I can put in the taillight without damaging the plastic of chrome reflector surface?

nuke0907
02-22-2010, 08:07 PM
i think some people have mentioned using vinegar or distilled water.

khronus79
02-22-2010, 08:40 PM
Well, I have replaced the $90 in OEM gaskets with $5 weather stripping from Home Depot and it seems to have solved the water seepage problem. The condensation problem is still around, though. I'm waiting to see if heavy rain will still seep in, wouldn't ya know that the day after I install the weather stripping it has ceased to rain in Seattle for three days straight. What the fuck?

Does anyone still get condensation in the tail lights even after your weather stripping/drilling/silicone sealant+weather stripping/silicone sealant+new gaskets?

I still get condensation on my taillight, even after Mazda "fixed" them by drilling holes in them.

SayNoToPistons
02-22-2010, 08:47 PM
I cleaned off the gasket and sealed the whole thing with black silicone sealant. I topped it off by surrounding the edges with Frost King black foam tape. This thing can go through tsunami and come out dry. Sure beats buying a new gasket or drilling holes. Can you spray water directly at your taillights with holes in it and not have any moisture in it? I can.

MazdaManiac
02-22-2010, 09:32 PM
Drilling holes in the lights gives moisture a way in, which is exactly what you are trying to stop.

Just plain stupid.

The housings are supposed to be sealed. They fog because Mazda didn't allow adequate clearance between the lights and the trunk lid, which bangs into the lamp and causes the seal to crack. It is compounded on the right side of the vehicle because of the key-hole seal.
Just reseal it and you are done.

Cyanoacrylate is particularly good for this because it wicks into the seal and then closes it.

the1jesster
02-22-2010, 09:35 PM
I agree with you... I think each side made their point on what they like or didn't like.
Think this thread should have been closed a long time ago.

We are getting nowhere further on this topic.
If you want a good clean and clear debate I hear the premix thread is a good place to start:lol:

Jon316G
02-22-2010, 09:38 PM
Drilling holes in the lights gives moisture a way in, which is exactly what you are trying to stop.

:scratchhe You've seen water get in with holes drilled on the bottom of the housing?
Not saying its impossible... guess I've been lucky the past few years.

Though I did laugh when I looked at the taillights on my Mazda3 and each one had a single hole drilled in the center of each lens.
Of course I laughed thinking about this thread, but I don't agree with a hole in the lens itself.
Oh well... I can tell more people want to beat a dead horse on this topic...

Jon316G
02-22-2010, 09:40 PM
If you want a good clean and clear debate I hear the premix thread is a good place to start:lol:

HA... no thanks!
I know better than to step foot in that thread.

MazdaManiac
02-22-2010, 09:50 PM
:scratchhe You've seen water get in with holes drilled on the bottom of the housing?


Drilled? No. I don't have any personal contact with anyone foolish enough to try drilling holes in their taillights in order to relieve the effect of a hole in their taillight.
I have seen water get into the taillights through holes in the bottom cased by the reason that Mazda has a TSB on the subject (http://www.finishlineperformance.com/pdf/rx8/bulletin/09-028-04-1248a.pdf) (though they subsequently rescinded the condensation-specific TSB [09-007/08] with a new TSB (http://www.finishlineperformance.com/pdf/miata/bulletin/09-016-09-2086a.pdf), calling the phenomenon "normal", which I'm sure is a less expensive solution for Mazda).

EDIT: BTW - Put one of those "DO NOT EAT" silica packets in there for one sunny afternoon and it'll fix it, too.

muckwarrior
02-24-2010, 04:28 PM
I just replaced my tail light gaskets with the "new and improved" ones from Mazda. I took out the housings and spent a good hour drying them out, which was a pain in the ass. The new gaskets are indeed thicker and more LUXURIOUS. BUT! I drove to work this morning and there is already condensation inside the tail lights after just a short 10min drive. Let me be clear, though, this is condensation not rain water seeping in. I'm sure it'll rain later today so we'll see if that seeps in.

What gives?!


It's possible that the condensation is occuring because the air was relatively moist when you sealed the lamp. Remember warm air can hold more moisture than cold air. So if you sealed the lamp when the air was warm and moist, when the lamp gets cold the moisture in the air inside will condense because cold air cant hold as much moisture as warm air.

I've heard people recommending removing the bulbs and leaving the car running for a while with the air conditioning running to dry out the air.

BReal-10EC
02-24-2010, 09:24 PM
i think some people have mentioned using vinegar or distilled water.


Ok, I'll try the vinegar. Maybe I can recycle what I use as salad dressing...

What about CLR?

SayNoToPistons
02-24-2010, 09:56 PM
Not sure if CLR will have an ill-effect on the reflective coating and plastics. I used a gallon of distilled water for both headlights and it got the job done well.

dondo
02-24-2010, 09:59 PM
Not sure if CLR will have an ill-effect on the reflective coating and plastics. I used a gallon of distilled water for both headlights and it got the job done well.

how'd you dry them out after the rinse? i tried mine yesterday and couldnt get them all the way dry before i had to reinstall

SayNoToPistons
02-24-2010, 10:35 PM
I shook the headlight to get most of the standing water out, then tried a shop vac. One tube sucking through one hole and another tube blowing through another hole (no homo). I got tired of the noise after an hour and it hardly made a difference.

I ended up letting the taillights bake in the sun, which was more effective.

dondo
02-24-2010, 10:37 PM
I shook the headlight to get most of the standing water out, then tried a shop vac. One tube sucking through one hole and another tube blowing through another hole (no homo). I got tired of the noise after an hour and it hardly made a difference.

I ended up letting the taillights bake in the sun, which was more effective.

hmm. it's rainy up here...

i shook them out and baked on low in the oven for awhile but that didnt do it either.. maybe i have to wait for a sunny day to fix em.

nvrfalter
02-25-2010, 12:11 AM
this is long overdue, but OP is a jackass

jmc23200
02-25-2010, 11:13 AM
how'd you dry them out after the rinse? i tried mine yesterday and couldnt get them all the way dry before i had to reinstall

Its called reading the previous pages of the thread.


Why drill holes in the tail lights? It took me 5 minutes(no lie) to remove the tail light. Then the easiest way to remove the water is to get a couple sheets of paper towel, twist them together and push it into the light hole. Slosh around the water and let it get soaked up by the paper towel. Then, blow dry for 5 minutes on low to dry the gasket and remove any moisture left behind in the tail light. Clean around the gasket and put clear silicone around the entire gasket for good measure. Let it sit for 10 - 15 minutes(enough to scab over) and reinstall.

It took me about 30-40 minutes total or so to do both tail lights. If you live near boston, I'll fix them for you for a 6 pack :)

dondo
02-25-2010, 11:56 AM
Its called reading the previous pages of the thread.

i did. and i tried those steps. i got *most* of the water out but the last bit wouldn't dry out. i tried towels, blow dryer, oven, etc to no avail.

i think i'll try that silica idea or a sunny day next..

Huey52
02-25-2010, 12:21 PM
Exactly Jeff. Or the revised thicker Mazda gaskets, which really do work well.

Cap'n, we have a dilithium chamber containment leak!" ;)

Drilling holes in the lights gives moisture a way in, which is exactly what you are trying to stop.

Just plain stupid.

The housings are supposed to be sealed. They fog because Mazda didn't allow adequate clearance between the lights and the trunk lid, which bangs into the lamp and causes the seal to crack. It is compounded on the right side of the vehicle because of the key-hole seal.
Just reseal it and you are done.

Cyanoacrylate is particularly good for this because it wicks into the seal and then closes it.

jmc23200
02-25-2010, 01:56 PM
i did. and i tried those steps. i got *most* of the water out but the last bit wouldn't dry out. i tried towels, blow dryer, oven, etc to no avail.

i think i'll try that silica idea or a sunny day next..

You used a blow dryer and couldn't get the condesation out?


**See pic**


Try taking it off "Cool"

Butters
02-25-2010, 02:02 PM
Exactly Jeff. Or the revised thicker Mazda gaskets, which really do work well.

Cap'n, we have a dilithium chamber containment leak!" ;)

So having used the new Mazda gaskets and still getting water in the housings, I went and bought weather stripping from Home Depot for $5. The rain no longer gets in. Works like a charm. And for the naysayers, I did install the new OEM gaskets correctly, and no they didn't work. Not sure what was wrong with them. I'm not saying they don't work for everyone, but I *am* saying that the weather stripping way is probably the way to go.

I'm pissed I spent $90 on the Mazda gaskets. :suspect:

dondo
02-25-2010, 02:05 PM
You used a blow dryer and couldn't get the condesation out?


Try taking it off "Cool"

yes.

no need to be a dick.

jmc23200
02-25-2010, 02:13 PM
yes.

no need to be a dick.

Hot Air in an inclosed space with moisture for 5 - 10 minutes will get rid of said moisture. I don't really know a way to mess that up.

It's the same idea as putting it in the Sun except you are providing the external heat source instead of the sun. Hell, put the silica packet in and use the blow dryer. Don't forget to fix the gasket sealing with some silicone. Lightly lift the gasket and find where the gaskets seal broke. Apply some silicone directly in those areas to reseal it. Then add some all around the perimeter to provide extra water protection.

Huey52
02-25-2010, 03:22 PM
Sorry to hear that. I got mine under warranty and no further moisture instrusion and I even had to remove the lights/gaskets once to replace my bumper and they went back on aok and are still dry. And we've been as wet here as you out there lately. The gaskets are significantly thicker than the former ones, so hopefully they gave you the new rather than old. But common weatherstipping or silicone is still better than drilling holes!

So having used the new Mazda gaskets and still getting water in the housings, I went and bought weather stripping from Home Depot for $5. The rain no longer gets in. Works like a charm. And for the naysayers, I did install the new OEM gaskets correctly, and no they didn't work. Not sure what was wrong with them. I'm not saying they don't work for everyone, but I *am* saying that the weather stripping way is probably the way to go.

I'm pissed I spent $90 on the Mazda gaskets. :suspect:

dondo
02-25-2010, 05:21 PM
Hot Air in an inclosed space with moisture for 5 - 10 minutes will get rid of said moisture. I don't really know a way to mess that up.

It's the same idea as putting it in the Sun except you are providing the external heat source instead of the sun. Hell, put the silica packet in and use the blow dryer. Don't forget to fix the gasket sealing with some silicone. Lightly lift the gasket and find where the gaskets seal broke. Apply some silicone directly in those areas to reseal it. Then add some all around the perimeter to provide extra water protection.

thanks that's a lot more helpful. i could only do short min sessions in the oven and i probs only help the blow dryer on it for 5-10 min, not 10-15 so i can try that again.

thanks!

BReal-10EC
02-25-2010, 07:53 PM
Here's what the taillight looks like- and the film is from mold (I assume).

http://i1008.photobucket.com/albums/af209/BReal-10EC/inb4thelock-taillight.jpg

jmc23200
02-26-2010, 08:11 AM
thanks that's a lot more helpful. i could only do short min sessions in the oven and i probs only help the blow dryer on it for 5-10 min, not 10-15 so i can try that again.

thanks!

Oven? Bad idea. IF the lens seal heated up enough and you handled it a little rough, you could now have a break in the lens seal which would allow water in....... ask me how I know :sad:

dondo
02-26-2010, 05:35 PM
Oven? Bad idea. IF the lens seal heated up enough and you handled it a little rough, you could now have a break in the lens seal which would allow water in....... ask me how I know :sad:

that's why i didnt leave it in very long. i could always pick it up no prob so it wasn't that hot..

Drakeguy22
02-26-2010, 09:12 PM
i drilled the small hole over a year ago(black rtv didnt work) and i haven't had moisture since!

hornbm
02-26-2010, 11:07 PM
OK this new TSB that mazda maniac posted:

http://www.finishlineperformance.com/pdf/miata/bulletin/09-016-09-2086a.pdf

This is BULLSHIT! Ive never seen a car on earth where moisture in the taillight is NORMAL.

@!!narotordo
02-27-2010, 12:35 AM
+one

the1jesster
02-27-2010, 08:25 AM
The funny part about that is last week I would go to work in the morning temp was 20 end of the day temp was 45-50 this created huge amounts of water build up in both tail lights 3in deep by the end of the week. it was so bad that my co workers were saying that I should put some gold fish in there. I went right over to the Mazda dealer and was told this is suposed to happen untill they went out side to look at it and change there minds, however I was soon told that I was out of warrenty and they showed me the door:mad:

BReal-10EC
02-27-2010, 11:38 AM
So how are the clear cover and housing attached? Is it glue, silicone?
I'm thinking the only way to really salvage the one just yard light is to take it apart....

BReal-10EC
02-27-2010, 04:08 PM
The vinegar was a wash. But I use it in my laundry anyway.

Ok, I added hot (near boiling) distilled water and let it set....
I think that may have done the trick!
I guessed hot water would dissolve that ish eventually (that's how I do my dishes since I never clean them until the ish is all dried..lol).

SayNoToPistons
02-27-2010, 04:18 PM
Weather stripping for the win. I'm about to make a DIY thread with weather stripping so we can put this thread to a rest.

jmc23200
03-01-2010, 08:41 AM
weather stripping and/or silicone. I used the same gasket and just added silicone all around the gasket and were the gasket was lifting. My passenger tail light has been okie dokie since then. The real test is to go through an automated touchless car wash. If you don't get water in the light then, it will be fine :)

dondo
03-03-2010, 12:18 AM
weather stripping and/or silicone. I used the same gasket and just added silicone all around the gasket and were the gasket was lifting. My passenger tail light has been okie dokie since then. The real test is to go through an automated touchless car wash. If you don't get water in the light then, it will be fine :)

i blow dried it and used silicon to seal it. so far so good.. i'll report back later.

laythor
03-03-2010, 02:32 AM
was at the dealership last week and a guy pulled up in his 8 with the taillights almost half filled with water... i wonder if they told him it was a normal thing

jmc23200
03-03-2010, 07:31 AM
i blow dried it and used silicon to seal it. so far so good.. i'll report back later.

If you are still getting water in the tail light after that, you either didn't seal every nook and cranny of the gasket, or the lens' seal is broken. I bought a used tail light online and it appears someone tried to bake it as the seal around the lens has gaps. I tried filling the gaps that I could see with no luck. Guess it is time for me to buy anoter one and sell this one to someone who wants to practice opening tail lights.

~ Kuro ~
03-04-2010, 08:48 AM
OK this new TSB that mazda maniac posted:

http://www.finishlineperformance.com/pdf/miata/bulletin/09-016-09-2086a.pdf

This is BULLSHIT! Ive never seen a car on earth where moisture in the taillight is NORMAL.

It's easier for them to say that than to fix the problem.

jmc23200
03-04-2010, 10:53 AM
A corporate Fuck You is always better then a local dealer Fuck You.

leemoshuffle
03-04-2010, 04:23 PM
I replaced the crap gasket with somthing called "funky foam" from hobby lobby.
you have to cut the shape out yourself though. but it only costs 96 cents for a
18"x24" sheet 3 mil deep.

I will post some pics if you want.
just reply to this post.

khronus79
03-04-2010, 06:55 PM
pics^^^^^

We need more pics in this thread.

Zitman
03-06-2010, 04:13 AM
Ok I had water in the tail. I drilled tiny holes a while ago. Never fills up anymore and I have a seal ready to go. Only thing is from all the water inside it, There is a rust like dirt/film I cant get out. stuck in all the corners of the lamp. I tried soaps, vinegar, boiling etc. A lil afraid to bake as I haven't had luck with that ever. Any suggestions or should I scrap it and hit up ebay? Thnx

~ Kuro ~
03-07-2010, 09:04 AM
Ok I had water in the tail. I drilled tiny holes a while ago. Never fills up anymore and I have a seal ready to go. Only thing is from all the water inside it, There is a rust like dirt/film I cant get out. stuck in all the corners of the lamp. I tried soaps, vinegar, boiling etc. A lil afraid to bake as I haven't had luck with that ever. Any suggestions or should I scrap it and hit up ebay? Thnx


You can try ebay, but I bought a couple from people on there and they said "no water spots, blah blah" and I get them and they have water spots in them anyways... at least I was able to try a couple things on those that I wouldn't have tried without having spares. Try CLR on them, it took a lot of it out on mine when I let it soak for about 1 hour, rinsed with a mixed of vinegar and bottled water, then rinsed again with only bottled water. I might just take one of my spares and try some other chemicals soon. I'll let you know. There might be something that will take it out completely and not ruin the insides (wishful thinking).

It's still there mind you, but it's a lot less noticeable and since you can't take them apart there's no real good way to remove that film.

dondo
03-07-2010, 01:13 PM
mine are still clear and dry. yay! guess that silicone is working..

zenmoused
03-10-2010, 10:14 PM
For what it's worth I took mine to the dealer recently for my second taillight condensation issue (and engine replacement). Mazda's official warranty fix is to drill a small hole in the bottom corner of the light. Problem solved.

SayNoToPistons
03-11-2010, 12:29 AM
Where did you hear that it's the "official warranty fix"?

Huey52
03-11-2010, 07:11 AM
I can't believe this ill-advised "drill a hole" thread persists.

MazdaManiac
03-11-2010, 08:25 AM
Mazda's official warranty fix is to drill a small hole in the bottom corner of the light. Problem solved.

No, that is just your dealer's "official fix".
The Official Mazda fix is referenced in the TSB.
Your dealer probably reads this board.

zenmoused
03-11-2010, 09:08 AM
Perhaps, either way it's fixed and hasn't returned. Honestly, whichever route wastes the least amount of my time while achieving acceptable results is what I go with. I don't know how all the people knocking the "hole method" can justify the amount of time spent defogging a taillight. I wish I had that much free time.

dondo
03-11-2010, 09:17 AM
Where did you hear that it's the "official warranty fix"?

My dealer said that was their fix as well and why I went to fix it myself.

jmc23200
03-11-2010, 10:12 AM
Perhaps, either way it's fixed and hasn't returned. Honestly, whichever route wastes the least amount of my time while achieving acceptable results is what I go with. I don't know how all the people knocking the "hole method" can justify the amount of time spent defogging a taillight. I wish I had that much free time.

I can fix a tail light in less than 30 minutes. 5 minutes to take it off(if that), 5-10 minutes to dry it, 10 minutes to apply silicone and let it scab over, 5 minutes to put it back on. So you are complaining about what, an extra 10-15 minutes to apply silicone and let it scab? It gives you time to enjoy a beer or two or three before putting it back on. Then you don't have to damage the tail light at all. The hole is not preventing water from getting in, it is allowing the water to drain when it does get it. I would prefer to prevent it from getting in the light all together.

dondo
03-11-2010, 10:41 AM
I can fix a tail light in less than 30 minutes. 5 minutes to take it off(if that), 5-10 minutes to dry it, 10 minutes to apply silicone and let it scab over, 5 minutes to put it back on. So you are complaining about what, an extra 10-15 minutes to apply silicone and let it scab? It gives you time to enjoy a beer or two or three before putting it back on. Then you don't have to damage the tail light at all. The hole is not preventing water from getting in, it is allowing the water to drain when it does get it. I would prefer to prevent it from getting in the light all together.

true. it is really fast once you decide to get in there and do it.

jmc23200
03-11-2010, 10:52 AM
Yeah, you can drill it and make it look clean in 10 - 15 minutes or you can take it off and silicone it in 20 - 30 minutes. Really not a huge time difference.

ReyRey
03-13-2010, 03:16 AM
I can fix a tail light in less than 30 minutes. 5 minutes to take it off(if that), 5-10 minutes to dry it, 10 minutes to apply silicone and let it scab over, 5 minutes to put it back on. So you are complaining about what, an extra 10-15 minutes to apply silicone and let it scab? It gives you time to enjoy a beer or two or three before putting it back on. Then you don't have to damage the tail light at all. The hole is not preventing water from getting in, it is allowing the water to drain when it does get it. I would prefer to prevent it from getting in the light all together.

I second this. I did the silicone fix and have had no issues. Living in the Pacific NW I get my share of rain.

NOTE: I tried the drill method originally when I bought it used to fix it (happily I was able to negotiate a lower price because of it containing water). Some mornings I would find some residual moisture (condensation) in the light housing and on the bulb. One day the perfect conditions happened that the bulb froze with the condensation on it and while driving warmed up too quick and shattered the brake bulb. I ended up biting the bullet and bought the "improved" tail light. It has a super thick housing seal on the back but still ended the same way with water in it. Put some silicone around the edges and problem solved. No problems since and can't even tell its there. It looks completely stock.

So long story short DO THE SILICONE METHOD!!!

red61
03-19-2010, 11:00 PM
I've done both drilling the hole and sealing with silicone. Because there was water sloshing around in there during the winter and I don't have a garage, I drilled a tiny hole with my smallest drill bit in the lower corner of the tail light. The trapped water dribbled out but the moisture remained. The hole is practically invisible.

Today it was 60 degrees when I got home from work, so I removed the tail lights and applied black weather seal and gasket silicone made by 3M.

It would have been helpful if someone in this long thread had described in some detail how to remove the tail lights. Someone else asked and was ridiculed for it. I've never done it and was hesitant, not wanting to break something, but gave it a try. For those who want to try the silicone sealing but are some basic directions:

In your trunk, find the round, black snap-in tabs that hold the carpet in your trunk in place around your tail lights. There should be four on each side - two also hold in the black plastic piece in the center that runs between the tail lights. On of them can be loosened with a Philips screwdriver, the other three need to be popped out. Use you fingernails to pull the round center out from the circle it sits in then pull the whole thing out. It can be a little harder than it seems, but they do pop out.

After that, lift the black plastic cover that runs between the tail lights on the inside of the trunk. You have to pull it upward and it will snap out. Remove it and pull the carpeting back to reveal the back of the tail light assembly.

There is a black plastic, almost triangular-shaped cover on the top side of the tail light assembly toward the outer edge -- it looks like there are two pieces that fit together... you want to remove the smaller one by lifting it straight up. It has a small arrow on it, but don't push in that direction -- get your fingernails under it and lift straight up.

Now look in the trunk and find the two gold-colored nuts and remove them with a 10mm wrench. Remove the 3 tail light bulbs by twisting them slightly and pulling them out. Disconnect the wire that runs to the outer edge of the tail light assembly by disconnecting the white clip that is in the middle of the wire (it will be wrapped in thin grey foam). You have to press down on a small latch on the white clip in order to pull it apart. Pull the tail light assembly out the other side but lift the small latch that is in the hole where the middle tail light bulb was.

If you need to, let the assembly dry out or use a hair dryer to blow hot air in through the holes where the bulbs were located. Clean of the assembly and car of the crud that has surely accumulated there.

Check the gasket on the back of the tail light assembly and see if it peels back on any spots, revealing the holes where the bulbs fit. Squeeze a bead of the silicone in any such areas to hold the gasket down. I put a bead of the silicone all around where the gasket meets the black plastic of the tail light assembly. Then squeeze a bead on the outer part of the gasket all around the holes where the bulbs go. this will press up against the car when it is put back in place.

Slide the assembly back into place before the silicone dries. Tighten the two nuts on each assembly. Place the bulbs back in their respective holes and twist slightly to get them engaged and locked in place (beige base with clear bulb goes in the hole closest to the center, followed by the other clear one in grey base in the middle hole and the orange bulb in the outer-most hole). Turn on the car's lights and directional signals to make sure everything works.

Put the carpet and snap the black plastic covers back in place. Push the little round snap-in anchors back into their holes to hold the carpet and plastic center piece in place. It may be easiest to pull the round center portion of the anchors out a bit in order to get the pointy part to fit into the hole, then push it in like a thumbtack. Screw in the one that needs to be screwed in with a Philips screwdriver.

You're done. This probably can be done in 30-40 minutes.

If there is no more fogging up in the tail lights, I can put a small drop of clear plastic cement in the tiny hole I drilled before.

jmc23200
03-20-2010, 08:12 AM
Nice write up. I didn't think the DIY tail light removal was necessary as I figured it out in like 5 mins. Not rocket science, but nice write up none the less. You could just fill and cover the hole with the silicon as well.

dondo
03-20-2010, 12:45 PM
agreed. i've been in the trunk messing around so many times i didnt think about instructions for tail light removal.. nice write up

JeRKy 8 Owner
03-28-2010, 05:19 PM
There was a pretty wet storm that passed through here on Friday and one of my supposedly "fixed" tail lights got soaked inside. I pulled it off yesterday and there wa so much water inside there when I turned it downwards the water came pouring out. I already spent half an hour with a blow drier trying to get all the water out yesterday, but there's still plenty in there. There's so much water in there that I'm convinced the only way to completely clean it is to remove the glass from the assembly and dry it down with a towel. If my car were still under warranty I'd obviously take it to Mazda but that's no longer the case.

So is there a DIY anywhere here on completely disassembling the tail lights? I just don't see any screws or bolts where you can pry it off from.

dondo
03-29-2010, 12:11 AM
dude the blow dryer will work eventually. you just have to leave it for a looong time.

jmc23200
03-29-2010, 08:31 AM
Take 2-3 sheets of paper towel, twist together, insert in taillight as much as possible(allowing you to remove it easily), shake tail light, pull out paper towel, blow dry. The 2-3 sheets of papertowel will absorb most of the water and blow drying should then take about 10 minutes tops. Then, to clean the inside, use distilled water, pour it into the tail light and start over.

Disassembling the tail light is done by removing a couple of screws and baking the light. I've seen the instructions before. Now where are they........

~ Kuro ~
03-29-2010, 08:52 AM
The blow dryer will dry up the water eventually.


Disassembling the tail light is done by removing a couple of screws and baking the light. I've seen the instructions before. Now where are they........

I doubt it. I tried to separate them and I believe they are plastic-fused together. I also tried baking them even though there is nothing holding them together that would soften without melting the entire taillight.

Sorry but I don't believe those instructions exist.

jmc23200
03-29-2010, 09:27 AM
I don't believe the tail light is fused together. I currently have a tail light that was seperating and I had to silicone the entire permimeter of the tail light and not just the gasket.

~ Kuro ~
03-29-2010, 09:49 AM
I don't believe the tail light is fused together. I currently have a tail light that was seperating and I had to silicone the entire permimeter of the tail light and not just the gasket.


WTF really? I tried and couldn't pull it apart... :wallbash:

JeRKy 8 Owner
03-29-2010, 11:19 PM
I was wiping out some more water from my tail light a few hours ago by trying to squeeze in a paper towel as recommended above when it suddenly slipped off my arm onto the floor...so here I am with a nice set of little dings on my assembly and now I'm absolutely livid. Pardon my french, but I think Mazda's really got a lot of fuckin nerve to make this a warranty-only repair issue and not a recall. The symptoms didn't even start showing up on my 8 until 5 years later, and thanks to the faulty design of the tail light assembly, apparently water can still end up seaping into it during a heavy/windy downpour even if you "upgrade" to the thicker gaskets. And just by reading all the posts on this thread and the other threads, it's ridiculous to see how much time owners have spent attempting to completely clean out these pieces of shit. Worst of all you could end up needing to buy a full set of bulbs for the entire assembly if the sockets get wet, not to mention the traffic hazard/violations for driving around with a dead tail. Shit like this is a real reminder you're driving a Mazda

Rx8_rotory_Noobie
04-04-2010, 01:08 PM
Back to my original post.... The holes were drilled, condensation went away, and has yet to return....just saying.

Huey52
04-04-2010, 01:39 PM
^ Just wait for your first warm humid day followed by cooler evening. Inevitable.

erinyes_53
04-04-2010, 01:43 PM
Just an FYI, when I took my RX8 into Mazda to have the tail light fixed (I have two inches of standing water in my light), they said they could either charge me $400 to have the entire thing replaced or do the poor man's version of drilling a hole in the assembly to drain the water out for $160. I haven't done either yet, but drilling a hole seems to be what Mazda recommended.

Huey52
04-04-2010, 03:17 PM
^ I give up. Drill it to your heart's content. :wallbash:

dondo
04-04-2010, 09:55 PM
^ I give up. Drill it to your heart's content. :wallbash:

dont give up now! they almost believe!

jmc23200
04-04-2010, 09:56 PM
Just because a local Mazda dealer does something stupid, doesn't mean it is the right fix. I flooded my engine once and Mazda's procedure to get is started again was to hook up battery to external power source and crank for 1 minute intervals. Would you do that to your own car since Mazda did it? I doubt it.

Drilling a hole is not fixing the problem, it is just giving the water a way out of the tail light. Will it work in removing the water, yes to a point. Will it prevent water and condensation from getting in your tail light, absolutely not. I don't understand why so many people are unwilling to just use a little silicone. It takes a couple of minutes and FIXES the problem. Hell, if it doesn't, you can drill a hole. The tail light is a sealed unit for a reason......

Jon316G
04-04-2010, 10:07 PM
Looks like people are back to beat the dead horse and once again wrong with their observation with the drilling method.
Just let it go... obviously some people don't care to listen to you (including myself).
Its not the end of the world because someone doesn't agree with your method of repairing a stupid tail light.
ITS A TAIL LIGHT... nothing to get worked up over and its definitely not a topic for the little children to use to attack others.

jmc23200
04-05-2010, 08:29 AM
We should just fix everything by drilling holes in it. Clogged cat? Drill some holes in it....... Clogged fuel filter? more holes.........

Sorry, I tend to get worked up when someone calls a mickey mouse fix the proper fix. I am a perfectionist when it comes down to certain things and prefer to fix the main problem instead of masking the underlying cause. It is your car and you can do as you wish.

Jon316G
04-05-2010, 10:54 PM
Clogged cat? Drill some holes in it
Ummm.... yeah, that's what we do to convert it into a "mid-pipe"
Many people punch out the cat material when it clogs.

Sorry, I tend to get worked up when someone calls a mickey mouse fix the proper fix.
Nobody called it a proper fix... we call it an option.
And why are you getting worked up anyway? Its not your car to worry about.
This is just an internet forum... no big deal... life will go on.
If you get worked up over things like this, just stay away and don't post!

It is your car and you can do as you wish.
And that it how it should be... amen!

And don't be quick to judge others, you may have no clue what someone's background/education/experience really is.

jmc23200
04-06-2010, 10:05 AM
When did I judge someone's background, education or experience?

Huey52
04-06-2010, 10:39 AM
Easy gents. We're all impassioned in the use and maintenance of our RX-8's. Hence the valued insight no matter which side of the fence. Therefore it's difficult to not get emotionally involved in some of these discussions. We all want what's best for the original posters, hopefully dispelling misinformation along the way, and recognizing in the end it's the OP's choice on course of action.

vroom808
04-06-2010, 03:42 PM
I did the same with my tail lights, now I am trying to figure out how to get rid of the hard water spots that were left behind

Huey52
04-07-2010, 05:48 AM
White vinegar often works for water spots. Let it sit overnight.

Ixonal
04-07-2010, 06:04 PM
pardon me for not wading through more of the pointless arguments for this bit of relevant data, but silicon can be found in a general auto parts store, right?

dondo
04-07-2010, 06:13 PM
pardon me for not wading through more of the pointless arguments for this bit of relevant data, but silicon can be found in a general auto parts store, right?

hardware store might be better.

Ixonal
04-07-2010, 06:49 PM
hardware store might be better.

ok, so lowes. ummmm, which section of the store ya think? near caulk and the like?

dondo
04-07-2010, 10:41 PM
ok, so lowes. ummmm, which section of the store ya think? near caulk and the like?

yep exactly. just ask for silicone sealant and someone will show you

Ixonal
04-08-2010, 05:19 PM
yep exactly. just ask for silicone sealant and someone will show you

thanks for the help. got the silicone and will attempt the fix as soon as it gets a lil warmer. I'll let ya know how it turns out.

dondo
04-08-2010, 10:59 PM
Good luck!

jmc23200
04-10-2010, 08:05 AM
While your at lowes, ask them if they have black caulk. Then ask them if it's bigger then the white caulk :) I got silicone from a local hardware place.

WTBRotary!
04-19-2010, 08:22 PM
Hey Jon and Huey... I have a question for yall, and i didnt want to start a new thread...
My clear corners are virtually brand new and the passenger side corner recently started to leak. I just got Gasket sealant from my buddy who sealed his tail lights but the gasket sealant is BROWN, obviously this would stick out like a sore thumb on a clear corner, especially if I messed up. Any suggestions that would not require me to spend $80 on some new JDM Clear Corners? Ive used some clear silicone thats like $5 for a small tube, but that was on my old clear corners on my last 8, that didnt work. Maybe I should try a different brand or? I used GE Caulk Singles- 100% Silicone sealant and the Brown gasket sealant is Permatex.... Help :sad: thanks

Jon316G
04-19-2010, 08:40 PM
WTBRotary!- I would first try 100% clear silicone sealant.
Tape it with blue painter's tape like you would for caulking so it doesn't go where you don't want it.
Once you get a bead of sealant on it, dip your finger in water and run your finger along the seam.
The water is so the sealant doesn't stick to your finger.
Then remove the tape.

Also consider that the water could be getting in where the bulb socket inserts into the corner.

WTBRotary!
04-19-2010, 08:46 PM
^^^ Thanks Ill try that, I dont have Blue painters tape. Ill go get some and try that. I didnt do it nearly as professional/correctly the last time. The last time I took the corner and got a toothpick and tried my best to seal it but I dont think I got a good bead in the cracks. Also I dont think its the seal where the bulb socket inserts into the corner because I dont believe my corner was leaking until I ran into a buddys fence (LONG STORY) at a install party on a slanted drive way. I didnt run into it that hard but I scratched my bumper a little and popped the bumper out a little. Had to pop it back in, but I didnt hit the fence nearly enough to crack the corner, it was just a little nudge. Ill give yall a update soon as I try this. Thanks Jon

WTBRotary!
04-19-2010, 09:23 PM
Update: Turns out I did have blue painters tape... I put blue painters tape around the edges like Jon said and I filled every crevice with Silicone. I took a couple of pics to show the end results while my clear corner drys...

Ixonal
04-29-2010, 03:50 AM
hmmmm.... did it and the condensation came back the first time it rained and has stayed in there almost a week now... I'll have to take it back out and make sure everything was sealed I guess...

dondo
04-30-2010, 10:50 AM
^ you need to make sure you dried it out all the way. otherwise it'll come back.

FazdaRX_8
07-19-2010, 12:49 AM
Hey guy, my driver side light seemed to get this water on the inside, just a few drops but it hardly caused an issue, well the other day I went to a car wash, brought it home after a long day and noticed it was nearly a fish bowl!!!!, I got it off, and got the water out, and started reading, Probably going to do the silicone treatment, do you guys just add it to the gasket that is there?

one thing I have noticed is it looks like all my chrome paint on the inside is now cracking!!??!! is this a common issue?

dondo
07-19-2010, 01:26 AM
bring it to a meet and we'll look at it. shin has my silicone if you want to use that to seal it.

FazdaRX_8
07-21-2010, 09:54 PM
I wish I was closer to seattle!!!

so whats the trick to get all the moisture out, I have had Light off of the car and in the sun on 80 degree weather, and just gets condensation and sits there. also I have used distilled water and white vinager and there still is some water spots where it has dried

anything I am missing???

SayNoToPistons
07-21-2010, 11:30 PM
I wish I was closer to seattle!!!

so whats the trick to get all the moisture out, I have had Light off of the car and in the sun on 80 degree weather, and just gets condensation and sits there. also I have used distilled water and white vinager and there still is some water spots where it has dried

anything I am missing???

You are missing a few days. Took my tails a few days to dry.

imop45
07-22-2010, 01:12 AM
We should just take these taillights to nasa, and spend 10 years, $325 million dollars in research, to get a final DIY on there.

Or we can drill a small hole that you can plug if it really really affects your sleep at night. :p

dondo
07-22-2010, 03:49 AM
take them off the car and dry with a blow dryer for 10 min. problem solved.

Taz Ismail
08-04-2010, 03:14 AM
I got the same problem with my tail light last week but luckily i got rid of it with drilling holes..here's what u have to do.
Take out the light and then the bulbs. As soon as you take off the bulbs the fog inside the light starts to vanish leaving water drops. Turn the light upside down allowing all the excess water to pass out through thr bulb holders. Now, put the headlight in direct sunlight with the crystal facing the ground and the gasket facing upwards so that waterever water still remains inside evaporates.
It took around 6 hours for water to completly evaporate and offcourse it depends on climate condition and it may take longer.
Then i use the silicon gel to seal the gasket so that i can avoid same problem in future.

X Rx8
08-04-2010, 02:00 PM
Nothing was working for me for a long time so I used thick 3M double sided tape as a gasket Haven't seen a drop of water yet

vordme34
08-05-2010, 01:34 PM
Better solution - get them replaced under warranty. Had both of mine replaced and now with the new & improved gaskets I don't anticipate any future problems.

Did that under warranty.. guess what. It doesn't happen on its own (ie whenever it just rains) but when I wash the car with high pressure water it does. So annoying that Mazda uses bad quality products on expensive cars (as with the sun visors which I also replaced under warranty)

G8rboy
02-18-2011, 06:59 PM
I had this problem with my driver's side headlight within the first year of ownership, and had it replaced under warranty. Fast-forward seven years later, and the moisture monster attacked my passenger side taillight... I ignored it for a bit, but going back and forth between sub-freezing and garage temps, it was fogging up badly.

I decided to tackle it last night... removing the taillight and pouring out a couple of ounces of water. I carefully removed the dry and dirty gasket and put the taillight, bulb-holes facing down, on one of my home's heater vents overnight to finish drying out. I cleaned the crap off the gasket and moisturized it with some leather conditioner until it was soft and pliable again, and this morning reattached it to the taillight with a bead of RTV silicone, and did the same when I re-mounted the taillight with the RTV between the car and taillight. I don't think rain/snow will be making it's way into the taillight anytime soon :)

Hope that helps...

wberkshire
02-23-2011, 08:51 PM
just blackout/tint them wont see any water

monchie
02-23-2011, 10:44 PM
Just live where it never rains :) ...problem solve.

JeRKy 8 Owner
02-23-2011, 11:21 PM
After removing water from both tail lights I applied a thin layer of dum-dum sealant in a circular fashion around the gaskets and then put the tails back on the car. I did that early last year. They haven't gotten moisture or water inside of them ever since and there were plenty of heavy rains between then and now. Only problem is gonna be next time I have to put a new bulb into one of them, I'm probably going to have to use a crowbar to pry them off, cause that sealant crap is like crazy glue.

G8rboy
02-24-2011, 12:43 AM
just blackout/tint them wont see any water
Brilliant! From the "electrical tape over the CEL" book of repairs : )

G8rboy
02-24-2011, 12:48 AM
After removing water from both tail lights I applied a thin layer of dum-dum sealant in a circular fashion around the gaskets and then put the tails back on the car. I did that early last year. They haven't gotten moisture or water inside of them ever since and there were plenty of heavy rains between then and now. Only problem is gonna be next time I have to put a new bulb into one of them, I'm probably going to have to use a crowbar to pry them off, cause that sealant crap is like crazy glue.

Fortunately, the bulbs come out from the trunk opening without removing the taillights... or I would have thought twice about sealing the shit out of the taillight assembly myself : )

As an update, we've had snow, sleet, freezing rain and rain this week, and zero signs of moisture in my troublesome taillight... so far, so good.

Keldon
05-09-2011, 12:05 AM
I had moisture in my taillights since I bought the car over a year ago. I took them off emptied the water out the best I could and used foam weatherstripping from Home Depot to replace the gasket (dried them out in the oven on lowest temp and now I wish I wouldn't have, its not that bad but there are small hairline cracks if you look at it from certain angles that are obviously from overheating them). It worked for about 3 months. The second time I did it I left a small gap in the weatherstrip at the bottom of the light to let the moisture escape. I put them back on with a little moisture still in them and it has since all dissipated and they look great.

I didn't have to drill any holes =D

Pdub8
05-09-2011, 09:14 AM
Bought my rx8 and the first time I washed it had moisture in the right tail light. Took it off emptied it out dried it with hair dryer and put it back on never did it again. Then a couple months later the left tail light did it. Did the same thing and it got water in it the next time I washed the car.

Removed the taillight, put silicone all over the gasket, problem solved no drilling

RX3+5
10-03-2011, 11:02 AM
Waited till the end of summer.. Took it apart and I could see where the water enters. Silicon and done.

RoadHoag
03-20-2012, 04:49 AM
Where do I find instruction on how to take the lamp unit out?

Beodude
03-20-2012, 08:32 PM
Pull the circle tabs out of the plastic piece, then pull the carpet away from the tail light. A couple 10mm bolts and connectors for the lights, and it comes out easy. Just look and it's easy to see.

RoadHoag
03-22-2012, 04:34 AM
Thanks for that.