
DIY: Evo Ver. 2 Gauge Pod

Thread Starter
Registered User
Joined: Mar 2005
Posts: 531
Likes: 1
From: Topsail Island, NC
DIY: Evo Ver. 2 Gauge Pod
This is really a two part DIY. The first part shows how I modified the holes from 55 mm to fit the 60 mm DEFI BF gauges.
Part One:
Very simple, I used a dremel and a dremel grinding stone and SLOWLY ground the holes larger. Just be very careful the dremel does not jump out of the hole and damage the exterior of the pod. Any imperfections inside the hole are covered by the gauge itself. GO SLOW AND CHECK FREQUENTLY!
Here are a few pics to illustrate. The last picture is the first two holes modified just before step two starts.
Thread Starter
Registered User
Joined: Mar 2005
Posts: 531
Likes: 1
From: Topsail Island, NC
Part Two:
V. 2 Pod is designed to be screwed into the center top dash and slightly angled toward the driver. You can place it up there to play with the location but you will notice that the contour is slightly off. That is all taken care of once the pod is screwed down.
In preparation of drilling the holes, I clamped a square to the work bench, i figured on about three inches apart for the holes. However I did make on mistake so maybe you should try to go three and a half inches. The trick is to evenly space them but have a screw on each corner. Since I did make a slight mistake (you may can see an uneven spaced one in the finished pics), you may want to be a little more careful than I!
When you drill the holes, make sure you take the cover caps (in the next post) and drill the holes far enough in the lip so they do not hang off the front once installed.
The picture is the progress in drilling the holes.
Thread Starter
Registered User
Joined: Mar 2005
Posts: 531
Likes: 1
From: Topsail Island, NC
The next pictures are all in the process of drilling the holes. i have posted them in case someone may need them.
The screw covers and #6 machine screws with nuts can be bought at most hardware stores. I bought mine at home depot and they were about 50 cent a pkg.
The screw covers and #6 machine screws with nuts can be bought at most hardware stores. I bought mine at home depot and they were about 50 cent a pkg.
Thread Starter
Registered User
Joined: Mar 2005
Posts: 531
Likes: 1
From: Topsail Island, NC
Step 2b begins with modify the center dash panel. I searched the forum and found out how to remove it. I searched while doing this DIY but now I cannot fnd it  If anyone out there knows it, please feel free to post it!
The picutres below are of the dash coming apart to get to the top center panel (where the pod is mounted).
Note: Once the radio is out, two screws hold in the ac vents, remove them, remove the vents, and then pull up gently on the top center and it is out!
If anyone out there knows it, please feel free to post it!The picutres below are of the dash coming apart to get to the top center panel (where the pod is mounted).
Note: Once the radio is out, two screws hold in the ac vents, remove them, remove the vents, and then pull up gently on the top center and it is out!
Thread Starter
Registered User
Joined: Mar 2005
Posts: 531
Likes: 1
From: Topsail Island, NC
Now place the pod on the center dash panel and check for correct placement. Pay attention to the rear tweeter cover not to cover any of it.
Mark a few holes with a pencil and then drill away. I then place the screws in those holes to drill the remaining ones. I think it is best to work around the pod, pressing it down on each drill to ensure correct fitment.
Notice in these pictures that I have installed the screw head covers also.
Once the pod is totally secured and the nuts on the underside are snug (not super tight, may damage panel and pod) drill a hole from underneath for your gauge wires to be ran. With all the center dash apart, go ahead and run all your gauge wires (power, ground, sensors) and if you are installing DEFI, the glove box is easily within reach to run the wires.
Before putting everything back together, make sure the top panel fits correctly, you may need to dremel off the ends to make the screws shorter so the panel fits correctly. I need to, just have not done it yet, although I only have a very small gap, very unnoictable and easily fixed. i did not notice it until everything was back together.
Thread Starter
Registered User
Joined: Mar 2005
Posts: 531
Likes: 1
From: Topsail Island, NC
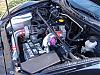
More pictures og running some wire with the center panel off and of the final product. Just re-assemble the panels in reverse order of taking them off of course.
My first posted DIY and I am exhausted!
note: the unused third hole is for another DEFI gauge, just can't decide if I want fuel pressure or a DEFI air/fuel ratio. Also if you guys like the DIY, please feel free to host these pics somewhere, just let me know what i need to do to help. I do not have any space anywhere.
Good Luck everyone.
Chris

Thread Starter
Registered User
Joined: Mar 2005
Posts: 531
Likes: 1
From: Topsail Island, NC
Just found the DIY on removing the head unit!
https://www.rx8club.com/series-i-do-yourself-forum-73/diy-mp3-factory-head-unit-removal-install-7644/
Thanks for the compliments Omicron!
https://www.rx8club.com/series-i-do-yourself-forum-73/diy-mp3-factory-head-unit-removal-install-7644/
Thanks for the compliments Omicron!


Thread
Thread Starter
Forum
Replies
Last Post
yurcivicsux
Series I Major Horsepower Upgrades
192
Sep 12, 2017 10:54 PM
05rx8mazda
RX-8 Parts For Sale/Wanted
18
Nov 28, 2015 09:42 AM