
DIY: RaceRoots Synchro Saver Install SII


DIY: RaceRoots Synchro Saver Install SII
So it turns out it doesn't just work, but works quite well. The longer bolts that came with the kit from RR are long enough, at least if you install it the way I did.
Tools I used were:
1/4" drive ratchet
3" 1/4" drive extension
10MM deep well socket
13MM standard socket
#2 Phillips screwdriver
Small (narrow) flat tip screwdriver (for the wire clips)
Knife
Scissors
Step one is to set your hand brake, open your center console and ashtray. Not posting pics of this, should be pretty straight forward, and its covered in the directions that come with the SS. Remove your shift ****, then pull up the plastic, starting at the back, right side is the easiest, it should come up pretty easy once you get the first tab at the back right up, the rest is just gentle pulling.
Now remove the ashtray assembly, just the two screws at the front, and it will snap out. Plenty of wire back there to move it far enough out of the way, I just used a piece of masking tape to keep the tension off the wires, and taped it to the passenger side console.
Now you have these two wire bundle clips, one at the back left, and one at the front right. I just used a small flat tip screwdriver on these with some upward pressure, then alternated which side I released, in essence "rocking" them off the studs. I am sure there's a real tool for that, but I don't have it.
Once that's done, a 10mm deep well and an extension gets your upper boot off.
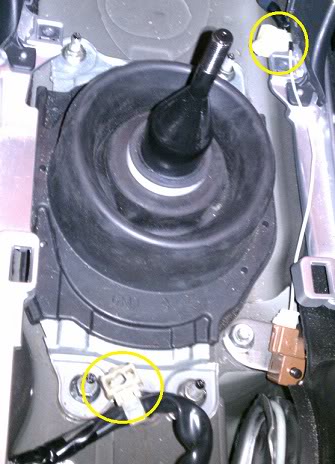
Now remove the lower boot, just peel it off.
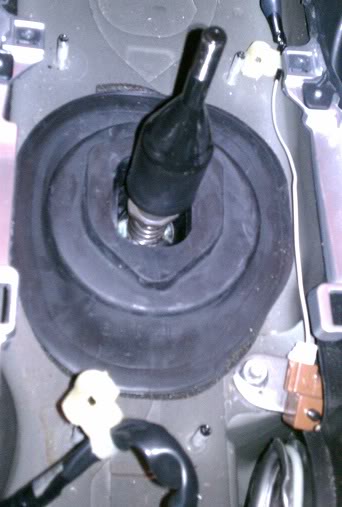
3 more 10mm bolts to remove the stock assembly. You'll be replacing these with longer bolts.
Here is where you have a choice to make, you can cut notches in the lower boot for the screws, per the RR directions, you can fight the boot and get it over the entire assembly later (apparently, I tried and did get it over, but it was all kinds of deformed, and actually pushed out from the shifter some), or you can go the route I did, and really trim up the top of the lower boot.
If you are going my route, follow along, otherwise, install your SS now, and work your lower boot magic.
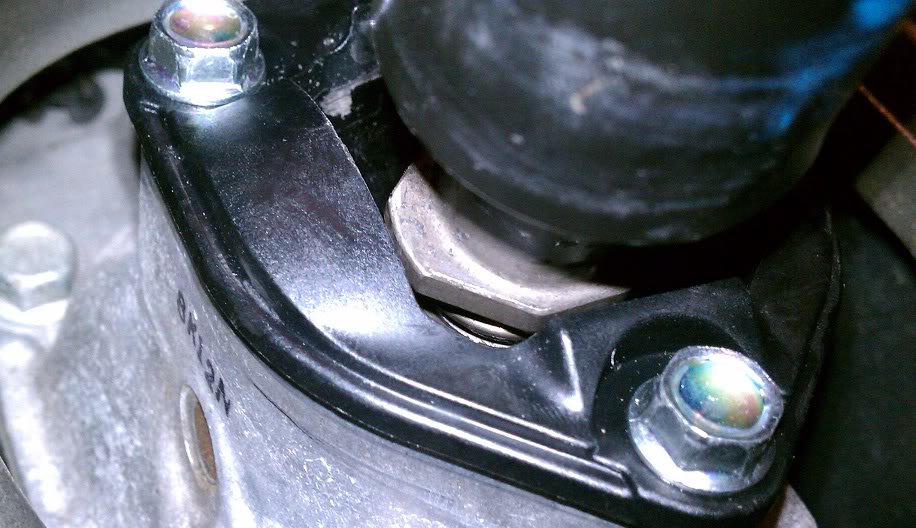
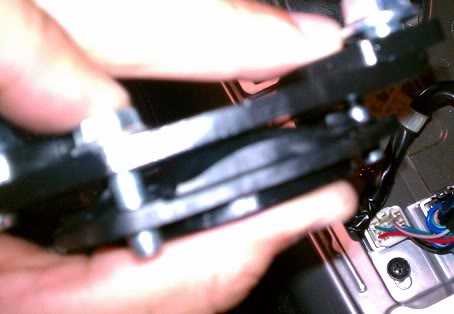
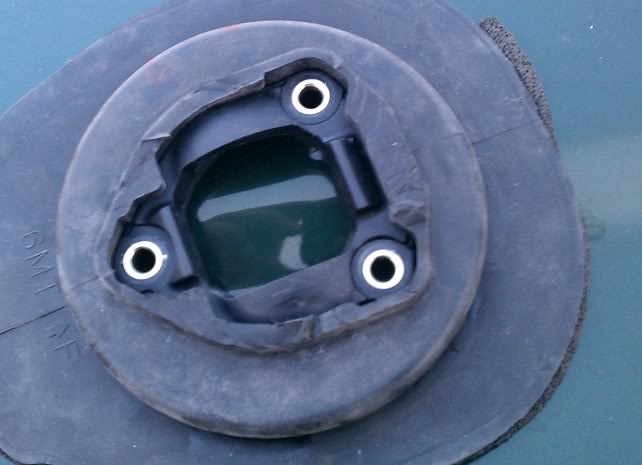
You can separate the upper piece of the stock assembly from the lower, by pulling the shifter out, turning it upside down and tapping the plastic parts against the fat portion of the shifter, the two plastic tabs on the lower piece will release and you can slide the upper portion off the shifter.
Upper portion:
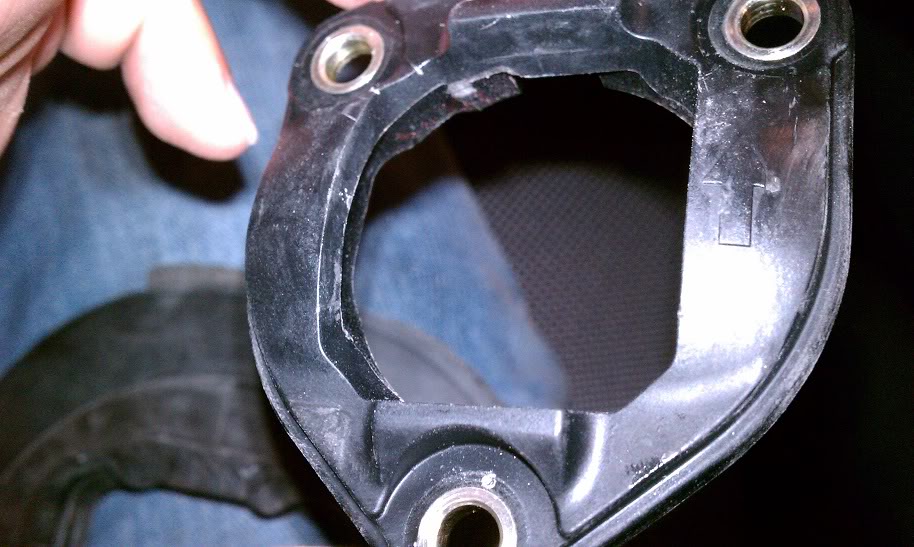
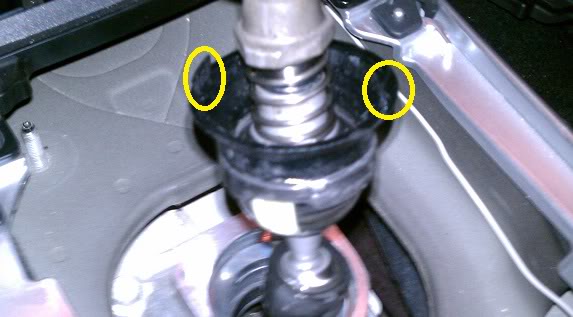
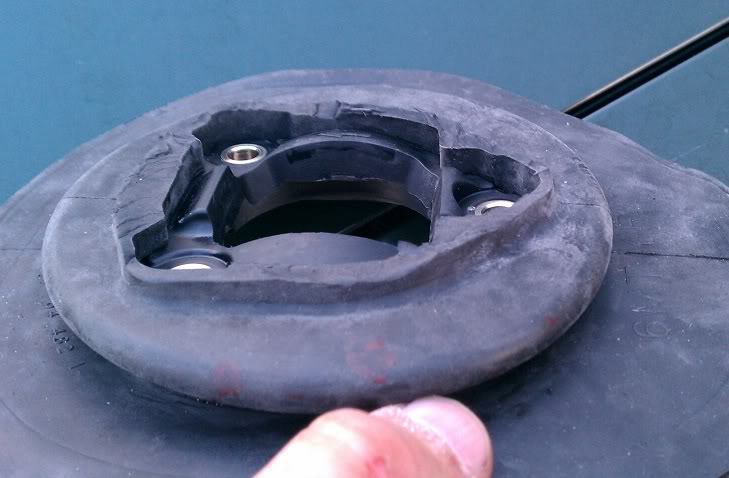
Lower portion: (note the tabs circled in yellow are positioned at the 12 o'clock and 6 o'clock positions when reinstalling)
Tools I used were:
1/4" drive ratchet
3" 1/4" drive extension
10MM deep well socket
13MM standard socket
#2 Phillips screwdriver
Small (narrow) flat tip screwdriver (for the wire clips)
Knife
Scissors
Step one is to set your hand brake, open your center console and ashtray. Not posting pics of this, should be pretty straight forward, and its covered in the directions that come with the SS. Remove your shift ****, then pull up the plastic, starting at the back, right side is the easiest, it should come up pretty easy once you get the first tab at the back right up, the rest is just gentle pulling.
Now remove the ashtray assembly, just the two screws at the front, and it will snap out. Plenty of wire back there to move it far enough out of the way, I just used a piece of masking tape to keep the tension off the wires, and taped it to the passenger side console.
Now you have these two wire bundle clips, one at the back left, and one at the front right. I just used a small flat tip screwdriver on these with some upward pressure, then alternated which side I released, in essence "rocking" them off the studs. I am sure there's a real tool for that, but I don't have it.
Once that's done, a 10mm deep well and an extension gets your upper boot off.
Now remove the lower boot, just peel it off.
3 more 10mm bolts to remove the stock assembly. You'll be replacing these with longer bolts.
Here is where you have a choice to make, you can cut notches in the lower boot for the screws, per the RR directions, you can fight the boot and get it over the entire assembly later (apparently, I tried and did get it over, but it was all kinds of deformed, and actually pushed out from the shifter some), or you can go the route I did, and really trim up the top of the lower boot.
If you are going my route, follow along, otherwise, install your SS now, and work your lower boot magic.
You can separate the upper piece of the stock assembly from the lower, by pulling the shifter out, turning it upside down and tapping the plastic parts against the fat portion of the shifter, the two plastic tabs on the lower piece will release and you can slide the upper portion off the shifter.
Upper portion:
Lower portion: (note the tabs circled in yellow are positioned at the 12 o'clock and 6 o'clock positions when reinstalling)
Last edited by AerialEight; May 7, 2011 at 09:45 PM.
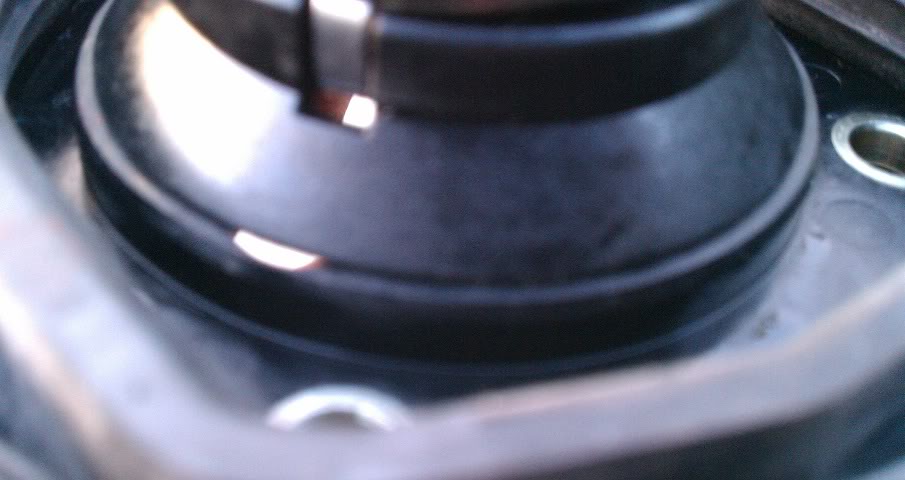
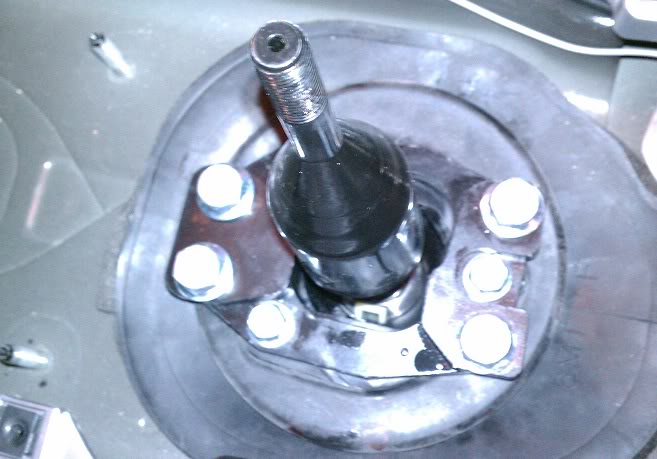
The SS will mount like this.
Fighting the boot over this whole assembly on my first unsuccessful attempt got me thinking this time, there's got to be a better way. Especially since once you do get it over the whole assembly, it doesn't sit snug on the sides which kind of bothers me.
What I found though, is if you separate the upper half of the stock assembly from the lower piece, the upper half comes right off the shifter, which allowed me to play with the fit of the lower boot. So I initially cut notches, then test fit the SS on that, running the bolts through. That's not going to work, the rubber from the boot is too thick to get a nice solid mount, the SS ends up on top of the rubber, and you would need longer bolts yet.
So I figured, I would try to trim some height off and see if I could get a solid mount and at the same time sandwich the boot in between the SS and the stock piece.
Bit of a hack job, I know, but this is all three layers deep (under the SS, under the upper boot, and under the console trim.
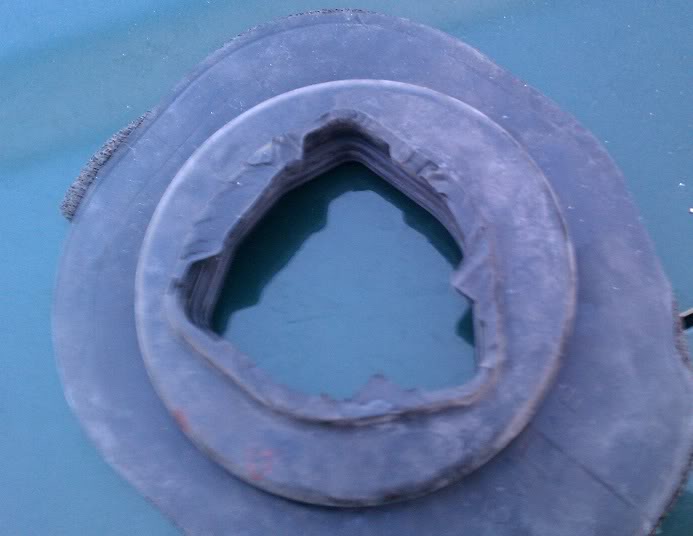
Now remember the upper piece of the stock assembly we took off the shifter, and need to mount the SS to? Here it is, fitted into the rubber boot. Fits nice and the rubber is pressed up against the edge all the way around. Meaning it should have a good seal when we're done.
top view
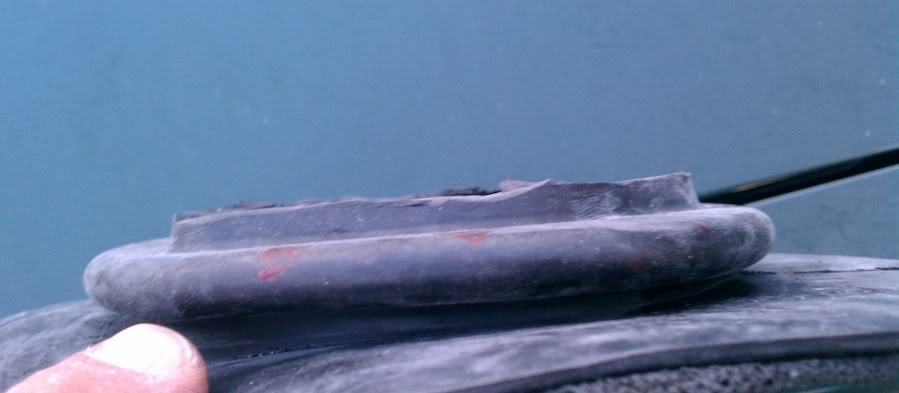
side view
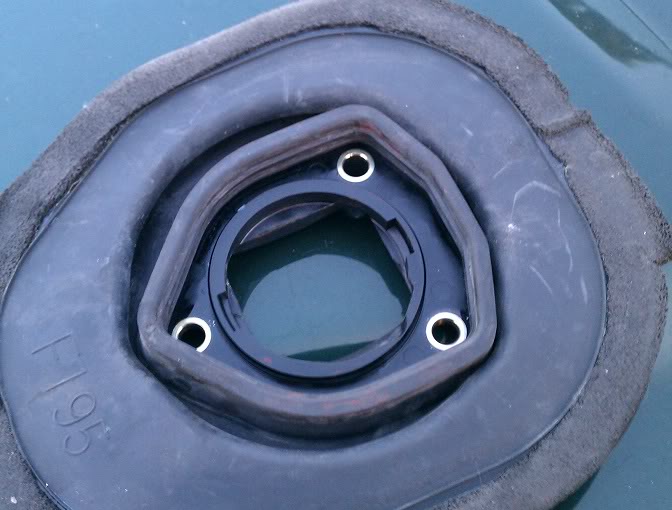
bottom view
Note in the side view, I left the rubber a little higher than the plastic we are mounting the SS to, so that we can squish the rubber down, and hopefully keep the seal.
Now pull the shifter back out, turn it upside down, and snap the two stock pieces back together.
Now just fit the whole assembly back down into the tranny.
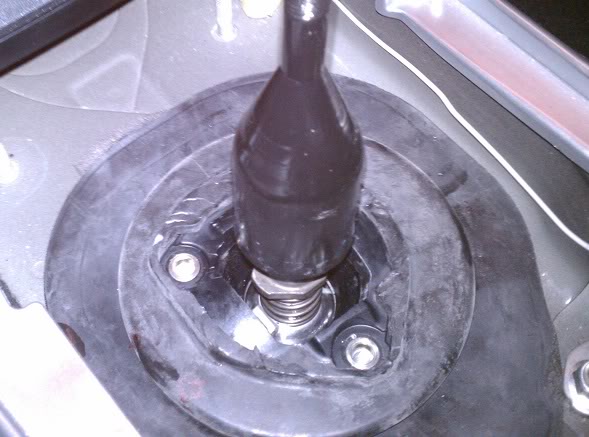
And mount and adjust the SS, keeping in mind we are compressing the rubber, so nice even torquing, a little on each, I just snugged everthing up, then a couple turns each until everything was nice and tight, with solid contact between the stock plastic and the SS. Took me a little fiddling to get the adjustment right, but definitely worth it. I though I had a good adjustment, but when I put the upper boot back on, the little bit of tension towards neutral showed me I could adjust the tabs in a little more and still get solid gear engagement.
And that's all there is to it, reassembly is the reverse, and stone simple. Just be careful not to drop any bolts through. I did and got the perfect bounce where I couldn't get it from above and it didn't drop to the garage floor. I ended up underneath and having to loosen a couple of bolts on the driveshaft cover to get the little bolt out.
Enjoy, hope that helps, and clears things up. Apologies again for saying it didn't work.
Fighting the boot over this whole assembly on my first unsuccessful attempt got me thinking this time, there's got to be a better way. Especially since once you do get it over the whole assembly, it doesn't sit snug on the sides which kind of bothers me.
What I found though, is if you separate the upper half of the stock assembly from the lower piece, the upper half comes right off the shifter, which allowed me to play with the fit of the lower boot. So I initially cut notches, then test fit the SS on that, running the bolts through. That's not going to work, the rubber from the boot is too thick to get a nice solid mount, the SS ends up on top of the rubber, and you would need longer bolts yet.
So I figured, I would try to trim some height off and see if I could get a solid mount and at the same time sandwich the boot in between the SS and the stock piece.
Bit of a hack job, I know, but this is all three layers deep (under the SS, under the upper boot, and under the console trim.
Now remember the upper piece of the stock assembly we took off the shifter, and need to mount the SS to? Here it is, fitted into the rubber boot. Fits nice and the rubber is pressed up against the edge all the way around. Meaning it should have a good seal when we're done.
top view
side view
bottom view
Note in the side view, I left the rubber a little higher than the plastic we are mounting the SS to, so that we can squish the rubber down, and hopefully keep the seal.
Now pull the shifter back out, turn it upside down, and snap the two stock pieces back together.
Now just fit the whole assembly back down into the tranny.
And mount and adjust the SS, keeping in mind we are compressing the rubber, so nice even torquing, a little on each, I just snugged everthing up, then a couple turns each until everything was nice and tight, with solid contact between the stock plastic and the SS. Took me a little fiddling to get the adjustment right, but definitely worth it. I though I had a good adjustment, but when I put the upper boot back on, the little bit of tension towards neutral showed me I could adjust the tabs in a little more and still get solid gear engagement.
And that's all there is to it, reassembly is the reverse, and stone simple. Just be careful not to drop any bolts through. I did and got the perfect bounce where I couldn't get it from above and it didn't drop to the garage floor. I ended up underneath and having to loosen a couple of bolts on the driveshaft cover to get the little bolt out.
Enjoy, hope that helps, and clears things up. Apologies again for saying it didn't work.
Last edited by AerialEight; May 7, 2011 at 09:37 PM.

Thread
Thread Starter
Forum
Replies
Last Post
TotalAutoPerformance
Vendor Classifieds
12
Oct 17, 2018 09:00 AM
jasonrxeight
RX-8's For Sale/Wanted
2
Sep 30, 2015 01:53 PM
Evan Gray
Series I Trouble Shooting
0
Sep 26, 2015 12:30 PM