When you click on links to various merchants on this site and make a purchase, this can result in this site earning a commission. Affiliate programs and affiliations include, but are not limited to, the eBay Partner Network.
Heatshield done 😎 Only one more thing preventing me from installing the manifold and that is the weather. Hopefully we get a nice weekend before winter sets in.
Last edited by jacksback; Nov 21, 2024 at 01:45 PM.
Had a productive day today and managed to wire the boost and AFR guage, EBC, and rotary start button. I also ran some thinner power cables to my sensors (water/oil temp and oil pressure), which gave me the extra space needed to install all the new cables and the EBC silicone hose through the bonnet release cable hole. The sensor connector on the AFR guage was too thick, so I removed the pins and reconnected them after pushing all the individual wires though the hole.
By removing some of the cable shields, I was able to install all the AEM power and sensor wires without cutting or drilling into any of the vent pipes.
Last edited by jacksback; Dec 2, 2025 at 12:51 AM.
Day 3 of my 1 day wiring job. I didn't like the fact that I couldn't close my ashtray lid, so I moved the EBC to the coin/card holder slot. I actually prefer it there because there are less bends in the silicone hose and I think it looks better. I also moved the EBC and all my guages from Acc to the Ignition wire, so they don't power up while I'm parked and listening to the radio.
Last edited by jacksback; Jan 15, 2026 at 01:03 PM.
The AFR shouldn't be fired up until your starting the engine. This way its much safer. a heated up afr sensor gets thermally shocked by cold engine exhaust..
Nice job by the way. Attention and care always gets rewarded in the end
The AFR shouldn't be fired up until your starting the engine. This way its much safer. a heated up afr sensor gets thermally shocked by cold engine exhaust..
Good to know. Thanks for the info
Nice job by the way. Attention and care always gets rewarded in the end
Thank you. I always try to do things properly when working on my car
Received my intercooler piping kit. Does anyone have any experience with those pipe beading kits on ebay? I know some people make them with old cutters, but I think the beader will do it quicker and better.
Pipe beader
Last edited by jacksback; Jan 15, 2026 at 01:04 PM.
Nice to see your build coming along. I was looking at the same bead rolling tool recently, and truthfully after talking to a few individuals I have decided personally that I am going to have more of my aluminum intercooler piping welded together to eliminate couplers, and have just a few couplers total across all of the intake piping using the Vibrant HD pin-less spring loaded clamps as when welded/installed correctly they still allow for flex and movement. I really just don't want the headache of having a bunch of couplers like I do now and having to do a lot of work to leak test the whole system every time I undo a coupler or periodically to check for something that develops more over time. Just something to consider it could be worth the extra effort of getting things welded
Nice to see your build coming along. I was looking at the same bead rolling tool recently, and truthfully after talking to a few individuals I have decided personally that I am going to have more of my aluminum intercooler piping welded together to eliminate couplers, and have just a few couplers total across all of the intake piping using the Vibrant HD pin-less spring loaded clamps as when welded/installed correctly they still allow for flex and movement. I really just don't want the headache of having a bunch of couplers like I do now and having to do a lot of work to leak test the whole system every time I undo a coupler or periodically to check for something that develops more over time. Just something to consider it could be worth the extra effort of getting things welded
Thanks Ricky. That's my long term plan as well.
ps - your build is making me super jealous!! Looks like you are really close to completing it. Hopefully not much longer before I can start working in the engine bay.
Last edited by jacksback; Jan 10, 2025 at 11:27 AM.
I finally have all the bits I need to get started on my Brettspeed power project. The missing bits and a family issue delayed things for a while, but everything is back on track now.
I bought some used blue injectors and a used sump, a K&N air filter, a 90 degree 3.5" pipe for connecting the air filter to the homeycomb MAF tube, a 45 degree 3.5" to 3" silicone reducer, a 3" pipe with 32mm T connector for connecting to the recirculation valve, and four new R7420-9/6448 spark plugs.
The four blue injectors and two of my yellows will be flow tested and serviced while I work on the car. Hoping to start next weekend.
Last edited by jacksback; Jan 15, 2026 at 01:04 PM.
There's no time like the present. Thought I would get everything ready before next weekend. Installed the new spark plugs, removed the engine mount bolts and front bumper, jacked the car up and put it on stands, and also removed the battery and airbox. Garage space is limited, but I think I'll have enough room to work in the wheel well and under the car
Last edited by jacksback; Jan 15, 2026 at 01:05 PM.
Made some good progress tonight. Clocked the turbo as per Brett's instructions, fitted the water connectors from his pipe kit, removed the cat, engine bracket, engine mount, and the stock manifold.
Tomorrow I'm going to attempt to install the legendary Brettspeed manifold
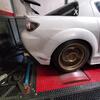
First test fit done. Quite difficult doing it by yourself but not impossible. Excuse all the packaging paper, I was trying to protect the turbo as much as possible
Last edited by jacksback; Apr 26, 2025 at 06:08 AM.
Forgot to mention that removing the engine mount tab and moving the brake line frees up much needed space when trying to fit the turbo. I used a reciprocating saw to remove the tab and trimmed my stock mount by 8mm to fit Brett's custom engine bracket
Last edited by jacksback; May 18, 2025 at 10:48 PM.
that heat shielding on the turbo looks soo good :D I would protect it as well.
I hope you plan to replate the exhaust manifold gasket :D it looks really bad.
that heat shielding on the turbo looks soo good :D I would protect it as well.
I hope you plan to replate the exhaust manifold gasket :D it looks really bad.
Thanks. Already cleaned the gasket and it looks much better but will replace it if needed. I also found out that I'm missing 4 manifold studs. The garage that rebuilt it gave me 2 studs and 4 bolts. I'll replace the 4 bolts with studs next weekend 👍🏻
The weather is great today, so I got on with cleaning up the crusty crash bar. Not the best job, but I removed as much surface rust as I could. Still need to put a few coats of clear coat on.
Last edited by jacksback; Jan 28, 2026 at 12:28 AM.
See if you can get some Nordlock washers instead of the spring washers (turbo to mani.). I've just tested them over a 3000 km road trip plus some extra running around and they don't loosen off like the spring washers do over time.