
Removing Headliner----How?


Thread Starter
Registered User
Joined: Jan 2007
Posts: 16
Likes: 0
From: San Angelo, TX
Removing Headliner----How?
I have looked around for a while, but have yet to find a reliable source for how to remove the headliner of the RX-8. Feel free to flame me if there are links on this site I haven't read yet.
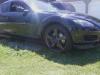
It is a 2005 OEM no sundroof. Any diagrams or simple directions on what comes out first would be great, I just don't want to break anything like the plastic panels trying to rip the liner out. Thanks in advance.
-R
It is a 2005 OEM no sundroof. Any diagrams or simple directions on what comes out first would be great, I just don't want to break anything like the plastic panels trying to rip the liner out. Thanks in advance.
-R
- Disconnect the negative battery cable.
- Partially peel back the seaming welt.
- Remove the following parts:
- Roof side trim.
- Sunroof seaming welt (vehicles with sunroof)
- A-pillar trim.
- Rear seat.
- Inner scuff plate.
- Tire house trim.
- Rear pillar trim.
- Map light.
- Interior light.
- Sunvisor.
- Assist handle.
- Disconnect the roof wiring harness connector and remove the roof wiring harness connector clip from the body.
- Remove the fasteners.
- Detach the tab from the roof panel and remove the headliner.
- Take the headliner out from the opened passenger-side door.
- Install in the reverse order of removal.


Registered
Joined: Jan 2012
Posts: 80
Likes: 0
From: New Mexico
We really need to expand this thread, and move it to the DIY section? I tried to use just this, and it leaves quite a bit lacking in terms of directions. I'll start with a few questions. I'll add some instructions as I go through the rest of this tomorrow night. Right now I'm about halfway done, and I'm stuck.
DONE
Weather stripping - easy to remove and replace (Mazda did a great job on the weather stripping, here and in the trunk...)
Sun Visor - easy, 2 Philips head screws and a small wire clip
Rear column panels - easy, 1 bolt (underneath SRS Airbag cover) a few clips (pictured in post a few below)
Center light - no bolts, 2 clips similar removal to map lights
Map lights - plenty of posts on how to take these apart
Rear fasteners - easy to remove, just get plastic panel removal tool set or small flat blade screw driver
A pillars - see below, top one needs to be slid out of place once retracted. (pictured in post below)
Oh sh*t handle / passenger ceiling handle - This top 'cap' (one on each side of the handle) needs to be pried out. The center piece holds the two edges of the clips out. Once they are removed, the handle comes right off. (pictured in post a few below)
The clips for the sun visors - have clips like the sunglasses holder. Locate the clips, and press them toward the center from both sides, while both are depressed, pull down. (pictured below)
Don't forget the center ceiling clip, the whole headliner once free moves towards the rear to free the clip. (pictured below)
Last edited by Silverhorn; Jun 14, 2013 at 01:07 AM. Reason: Finished liner removal, and added pictures

We really need to expand this thread, and move it
NOT DONE...
A pillars - I can't get these off, the top-most clip will not come free. I've put my whole body weight into it and I'm about to break it. It is stuck about 3/4 the way out. The bottom few clips were very easy, but the top one on both sides won't come free. Anyone know what isn't working here? I'll add a picture tommorrow...

Registered
Joined: Jan 2012
Posts: 80
Likes: 0
From: New Mexico
^^
That's correct.
You should pull a bit upwards first to disengage the white plastic fastener from the cover (marked with the circle), then pop out the two lower fasteners.
See photo
That's correct.
You should pull a bit upwards first to disengage the white plastic fastener from the cover (marked with the circle), then pop out the two lower fasteners.
See photo
Added remainder of pictures from above.
Last edited by Silverhorn; Jun 14, 2013 at 01:09 AM.

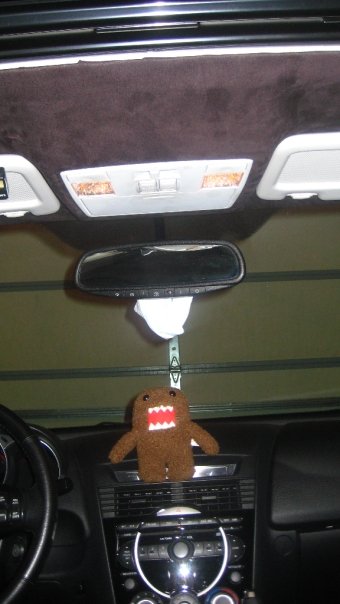
used a special paint on the visors and made them black. My wrapped fixtures in CF. Still trying to figure out what to do about the handle. When I redo my seats I'll probably do the same fabric on the handle.

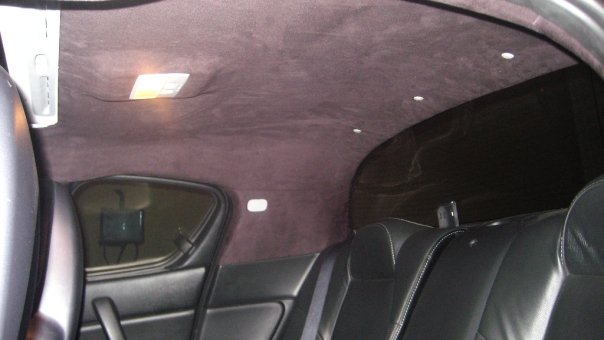
This is how my headliner looks like now....Not very hard to do just need patience when laying the fabric down so that you avoid and ripples/lumps
Danmn858 is a bit ahead of me as I have yet to decide what to do with my fixtures ect. I will prob end up blacking them out as well once I come back to working on my interior.
If I remember right this whole little project took one afternoon some 3M Spray Glue and a trip to a fabric store totaling around $50
I have my B-Pillars done as well
Last edited by RockTown07; Jul 12, 2013 at 11:49 PM.


Thread
Thread Starter
Forum
Replies
Last Post
Racingjunkie
Series I Wheels, Tires, Brakes & Suspension
2
Sep 29, 2015 05:05 PM
Learners_Permit
Series I Interior, Audio, and Electronics
8
Sep 27, 2015 07:38 PM