
Plastidipping my badges and came up with a cool tip


Thread Starter
Registered
Joined: Jan 2013
Posts: 188
Likes: 1
From: Spain
This is a simple mod' that i've been wanting to do for ages so when I found that Plasticoat had a Spanish website (the postage from the UK or US was twice the cost of the product as spray cans are classed as hazardous), I eagerly ordered a can last week. All the hype about this product is true, simple, easy with superb, professional looking results, I can't recommend it enough!
I've invented a good tip which should help a bit too, so lets get to the pics to show you the process. We start with masking up, unlike most paint jobs, this is a simple 5 min process as you only need to stop overspray going elsewhere and leave about an inch border around each item to be sprayed,
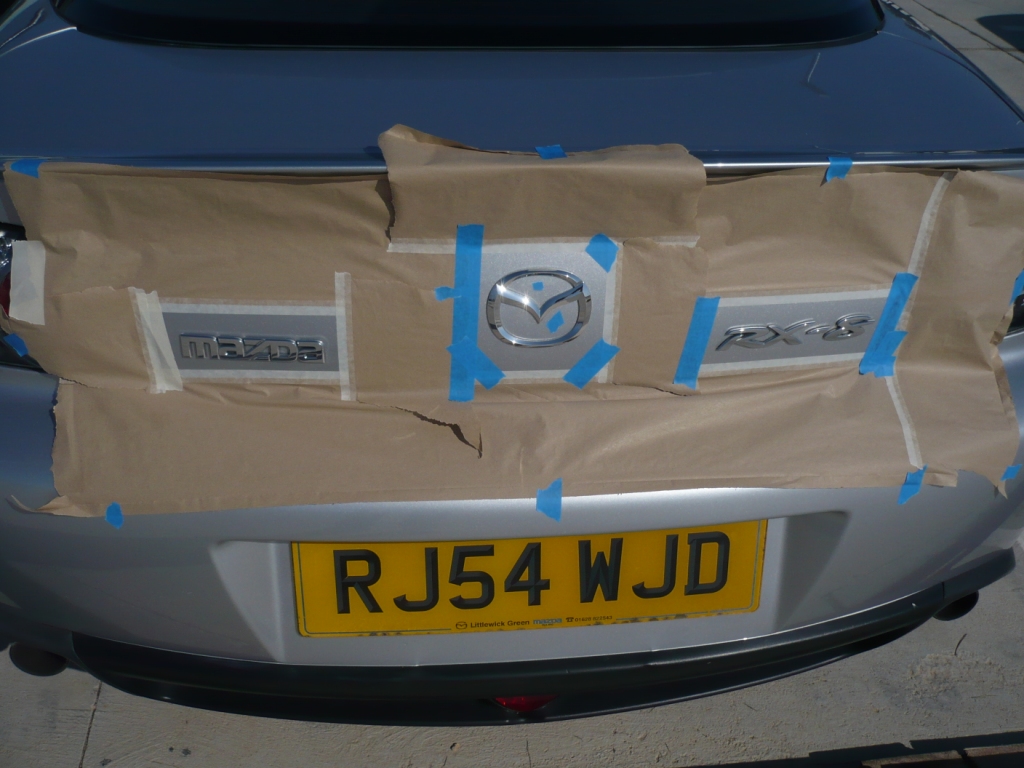
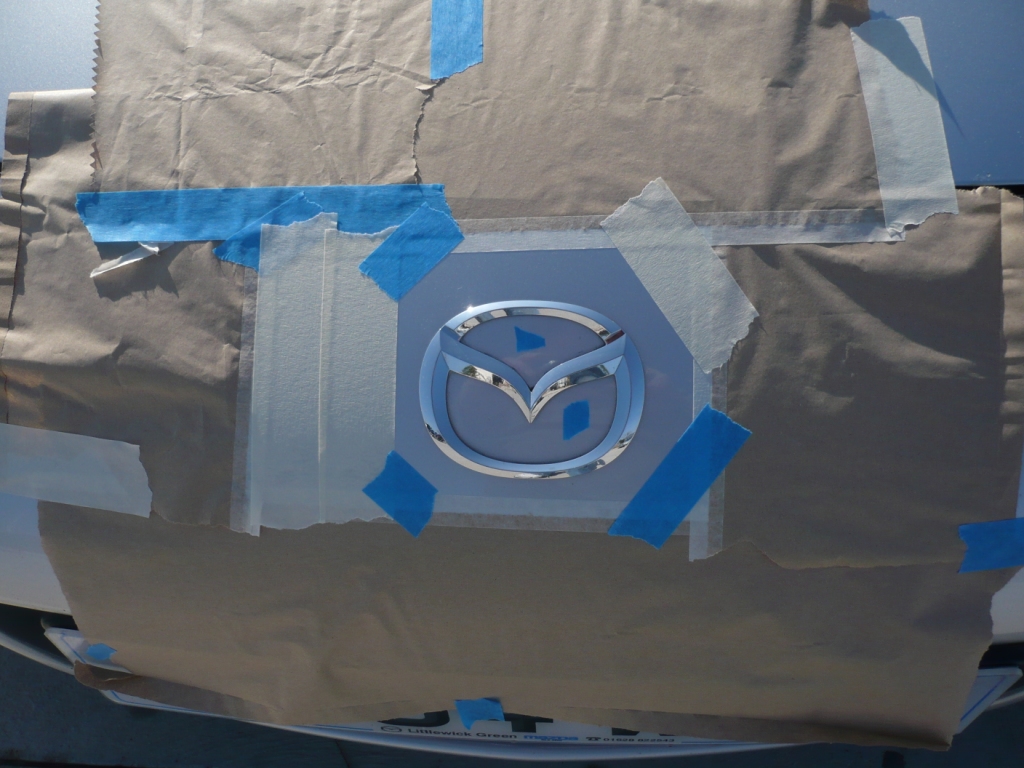
Same with the front, notice the little blue bits of masking tape in the Mazda logos? That's the tip i've invented, well, i've not seen it done anywhere else anyway but I had an idea, you'll see why in a couple of pics,
First coat, apparently best to give the lightest of coat to start with, no more than 50% coverage,
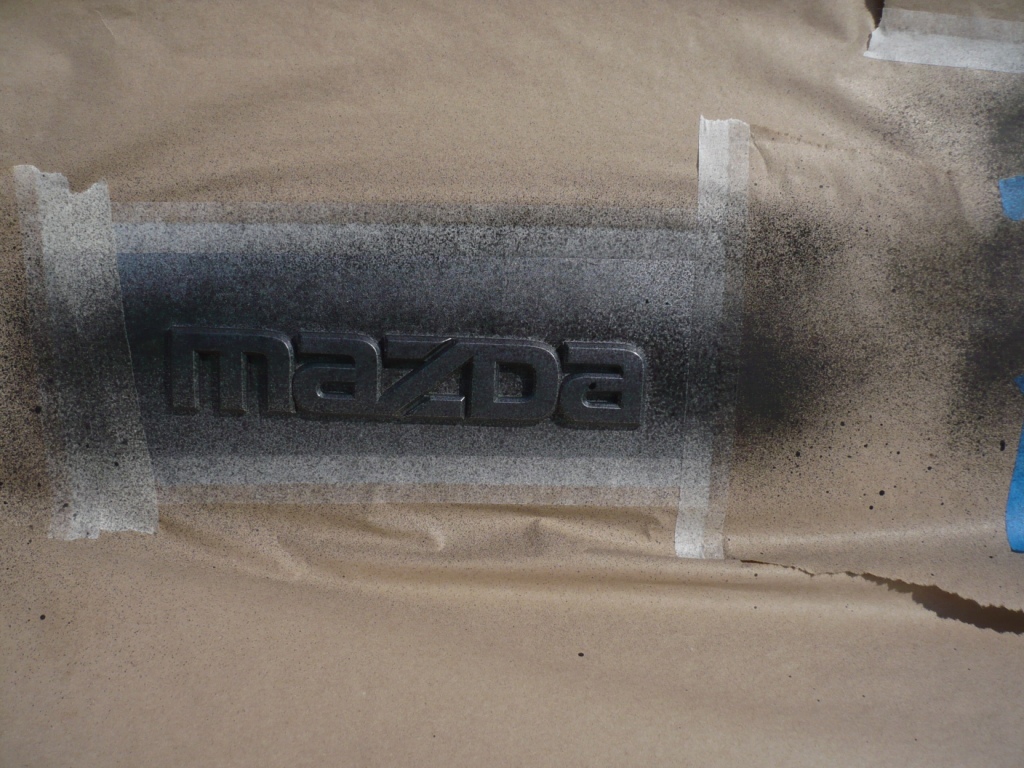
Then keep building up the coats, I ended up doing about 5 or 6 but some videos i've seen say about 4 is fine. Remember with badges like these, they are very 3d and have lots of intricate corners, etc. Be carefull to make sure you get at them from every angle, especially from below to get the bottom edges done,
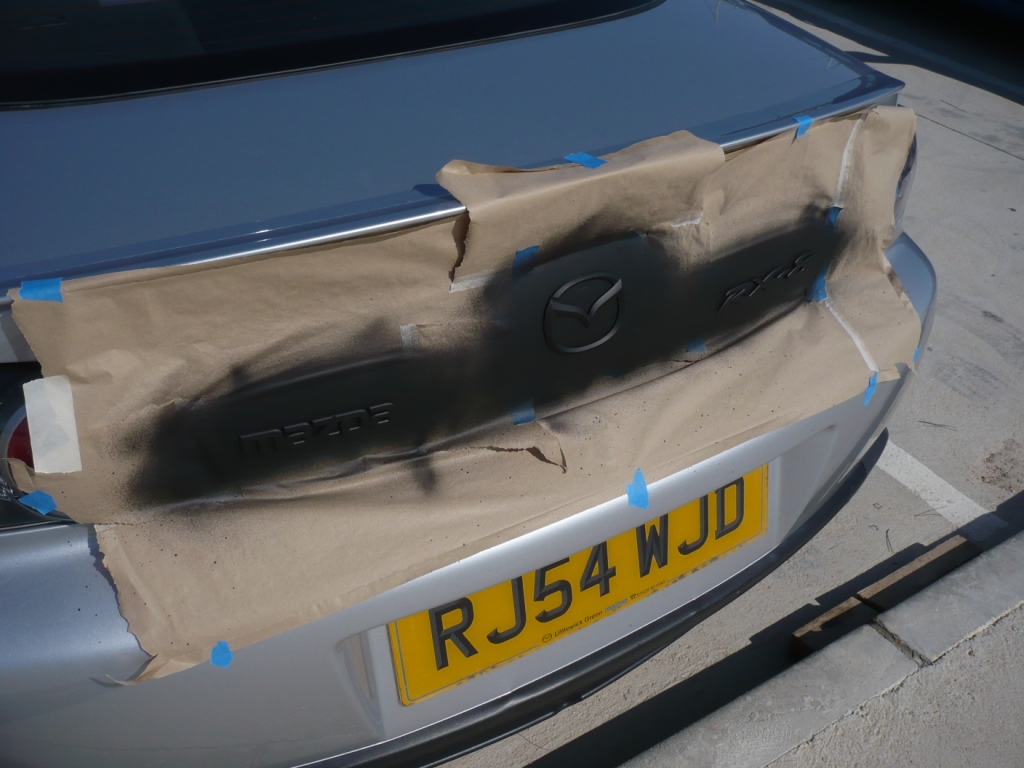
I found it seemed fine to do a new coat every 10 mins or so, kept myself busy by polishing the rest of the car inbetween. Finally left them for an hour after the last coat to be sure everything had set enough before it was time to start removing the masking and unwanted Plastidip. This was the scary part, i've seen it done on video but was still unsure as to how easy it would be but,
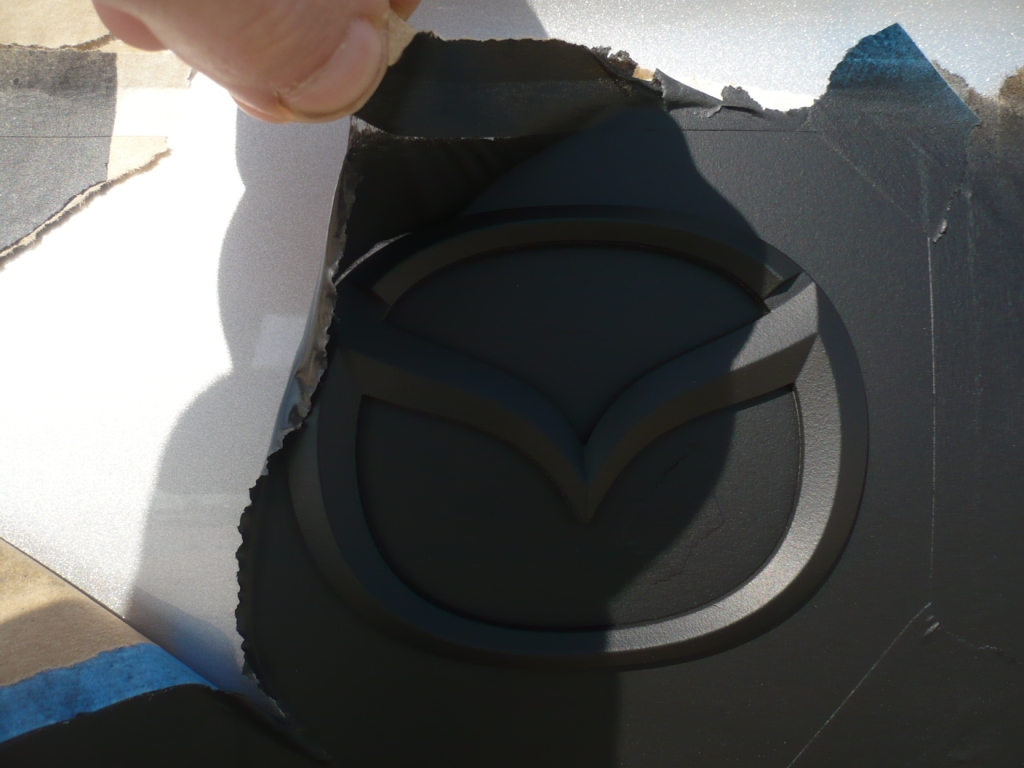
Only a few secs later and the border was easily removed, leaving a lovely clean edge,
Now the clever bit, remember the two little bits of tape left in the insides of the logo? This is how they come into play, as you have to try to scrape away at the center to get a bit large enough to be able to pull the rest away, I thought it would help to have something there already that it would be easy to get a fingernail under,
Worked perfectly, how smart is that?
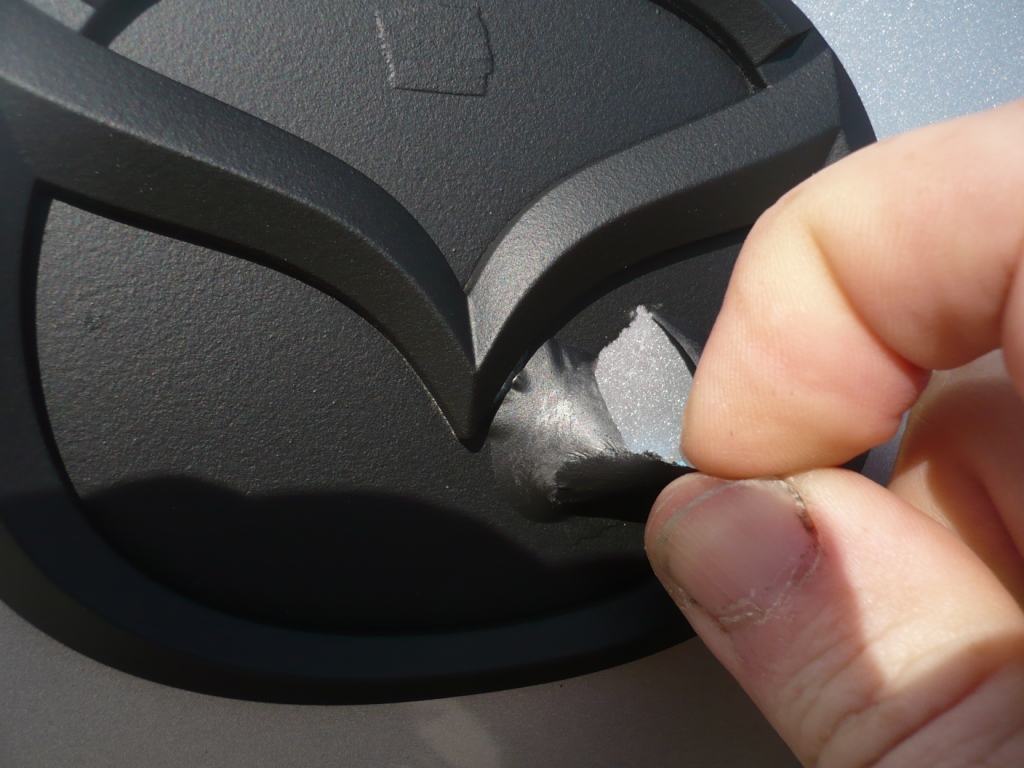
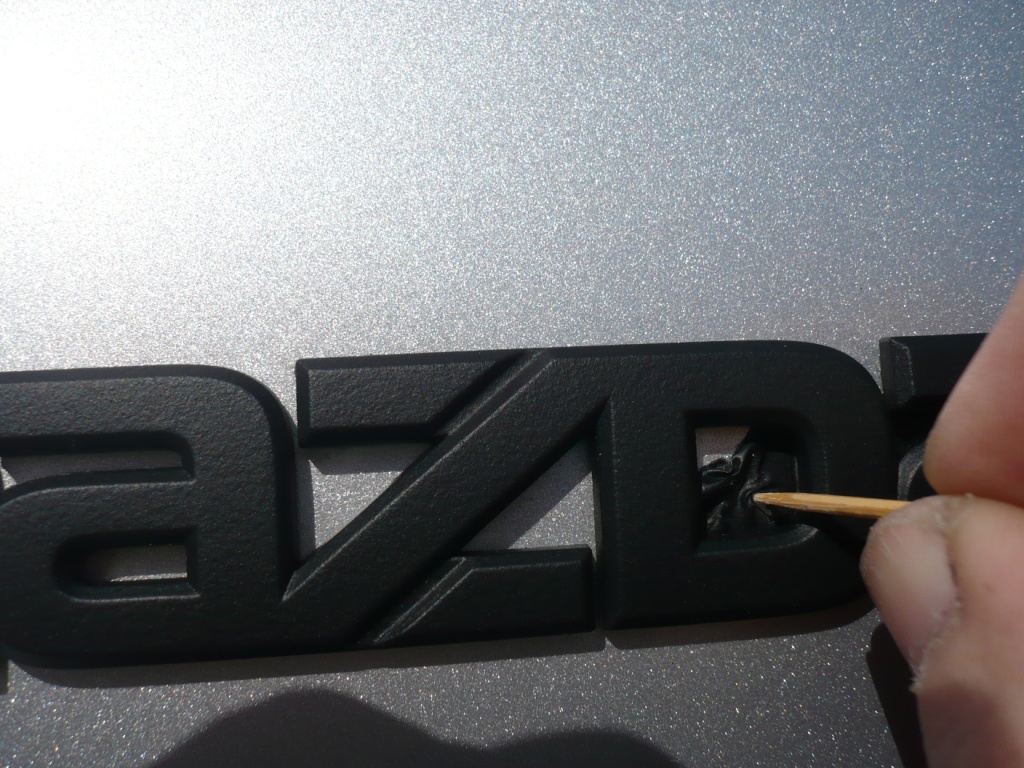
Smaller and more fiddely bits like the Mazda badge are best tackled with a wooden toothpick, don't use a small screwdriver as you risk damaging the paint. Gently tease the dip away from the edges, working towards the center until it can be carefully prised out,
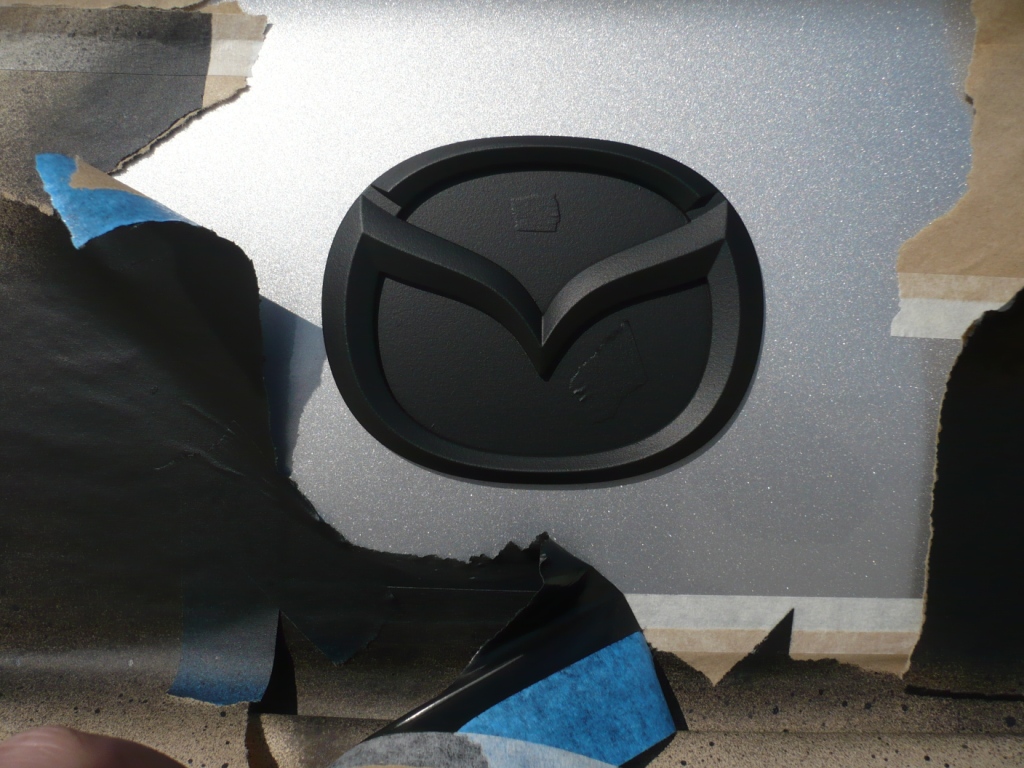
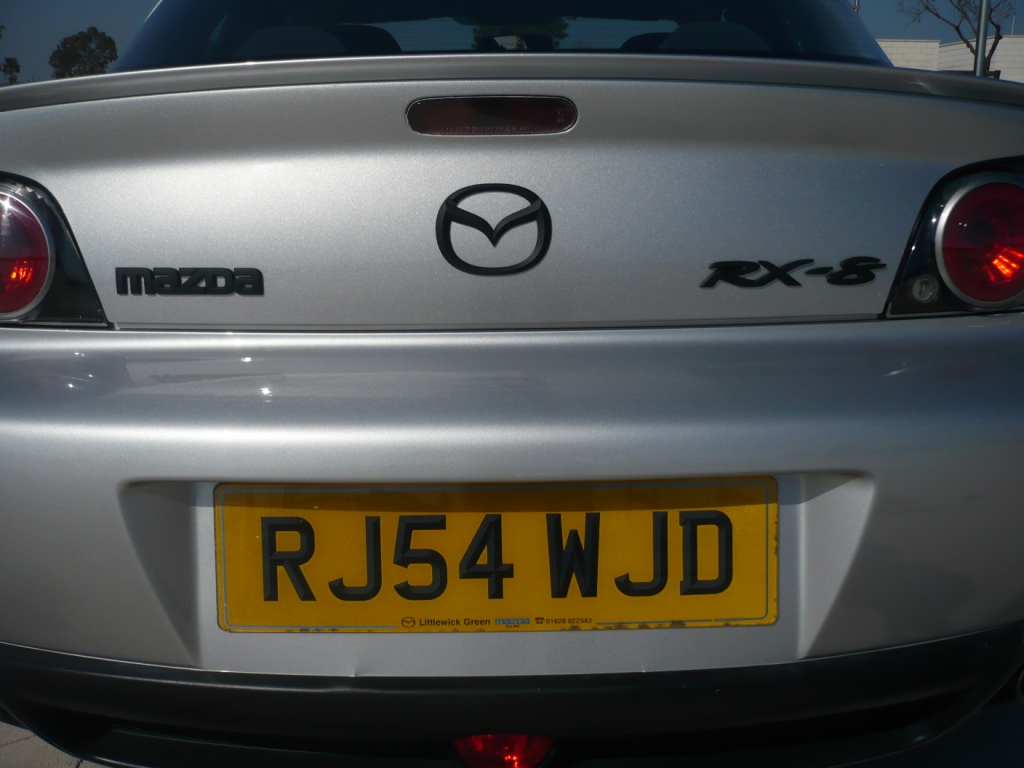
It literally took 10 mins to remove all the masking and unwanted dip, leaving a very smart result,
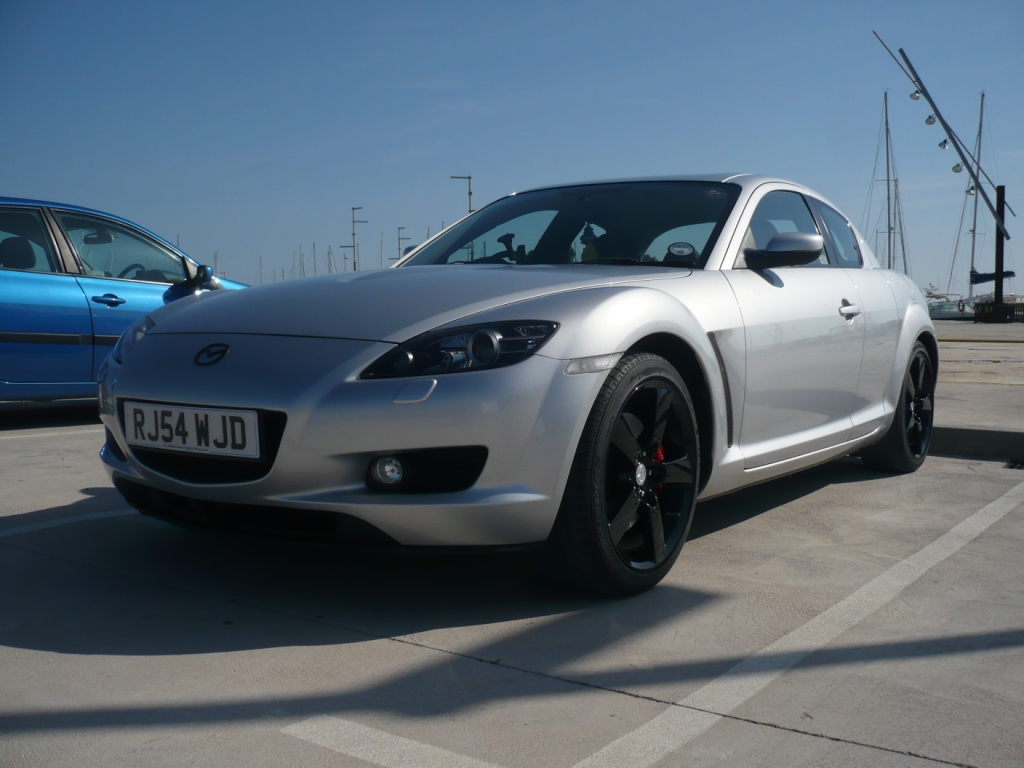
The front was just as easy and looking very smart after a good polish too don't you think?
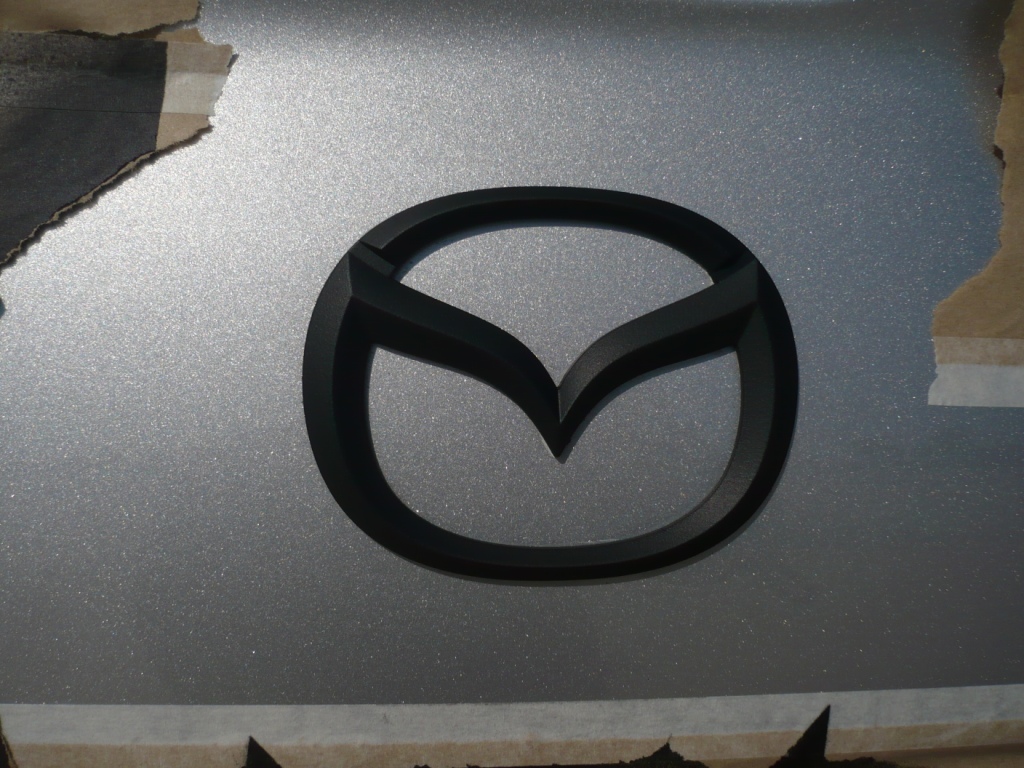
Finished! I should note that it's not silver inside the 'R' on the RX-8 section as there was a bit of the black double sided tape in there already that the badge is stuck on with. Not sure if all RX-8 logos are the same or if mine wasn't removed but it's a minor detail,
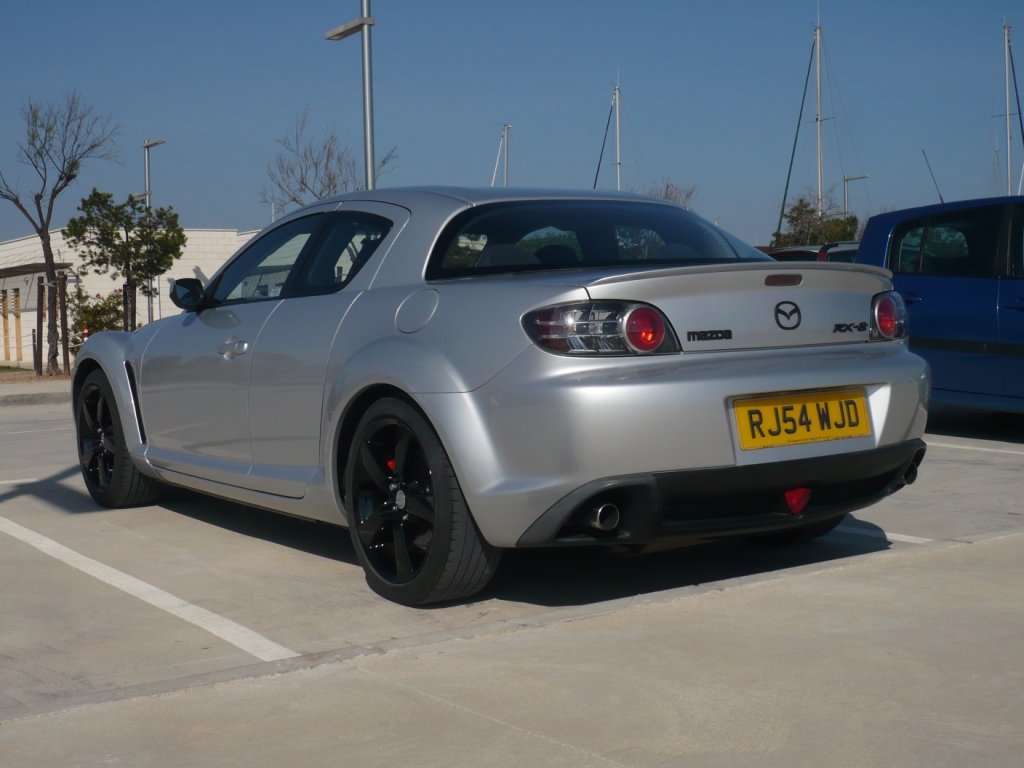
What a product this is, it really is that simple and easy to use as everyone has said and the best thing is if you dont like the end result or manage to mess anything up, simply peel the entire lot off with no damage! Personally i'm well pleased and I think it goes with my black and silver theme perfectly.
I've invented a good tip which should help a bit too, so lets get to the pics to show you the process. We start with masking up, unlike most paint jobs, this is a simple 5 min process as you only need to stop overspray going elsewhere and leave about an inch border around each item to be sprayed,
Same with the front, notice the little blue bits of masking tape in the Mazda logos? That's the tip i've invented, well, i've not seen it done anywhere else anyway but I had an idea, you'll see why in a couple of pics,
First coat, apparently best to give the lightest of coat to start with, no more than 50% coverage,
Then keep building up the coats, I ended up doing about 5 or 6 but some videos i've seen say about 4 is fine. Remember with badges like these, they are very 3d and have lots of intricate corners, etc. Be carefull to make sure you get at them from every angle, especially from below to get the bottom edges done,
I found it seemed fine to do a new coat every 10 mins or so, kept myself busy by polishing the rest of the car inbetween. Finally left them for an hour after the last coat to be sure everything had set enough before it was time to start removing the masking and unwanted Plastidip. This was the scary part, i've seen it done on video but was still unsure as to how easy it would be but,
Only a few secs later and the border was easily removed, leaving a lovely clean edge,
Now the clever bit, remember the two little bits of tape left in the insides of the logo? This is how they come into play, as you have to try to scrape away at the center to get a bit large enough to be able to pull the rest away, I thought it would help to have something there already that it would be easy to get a fingernail under,
Worked perfectly, how smart is that?
Smaller and more fiddely bits like the Mazda badge are best tackled with a wooden toothpick, don't use a small screwdriver as you risk damaging the paint. Gently tease the dip away from the edges, working towards the center until it can be carefully prised out,
It literally took 10 mins to remove all the masking and unwanted dip, leaving a very smart result,
The front was just as easy and looking very smart after a good polish too don't you think?
Finished! I should note that it's not silver inside the 'R' on the RX-8 section as there was a bit of the black double sided tape in there already that the badge is stuck on with. Not sure if all RX-8 logos are the same or if mine wasn't removed but it's a minor detail,
What a product this is, it really is that simple and easy to use as everyone has said and the best thing is if you dont like the end result or manage to mess anything up, simply peel the entire lot off with no damage! Personally i'm well pleased and I think it goes with my black and silver theme perfectly.

With putting the bit of tape inside the flying "M" logo, I'd recommend instead taking a slightly longer piece of tape, and folding (pinching) it in the center before sticking it to the surface to make a sort of tab. It'd be easier to pull off afterwards than picking at a flat piece of tape.


Thread Starter
Registered
Joined: Jan 2013
Posts: 188
Likes: 1
From: Spain
Why not black? I've seen owners of Black cars do theirs black!
If you want a contrast, you could consider yellow and coordinate it with other items like strakes. Green and yellow is the Lotus colour scheme after all.
If you want a contrast, you could consider yellow and coordinate it with other items like strakes. Green and yellow is the Lotus colour scheme after all.

Hey man this looks nice. How well has that been holding up to weather/road debris/washing?
Thinking about going the same route with my SS, but don't want to have to keep re-doing it every couple months.
Thinking about going the same route with my SS, but don't want to have to keep re-doing it every couple months.
Lasts a long time. I have had my badges done for over a year. This stuff is pretty tough!


Thread
Thread Starter
Forum
Replies
Last Post
titaneum_grey
Series I Trouble Shooting
7
Sep 16, 2015 11:51 PM