
Air Dam Installation help

Air Dam Installation help
I'm purchasing a front air dam from a fellow member and need a little help. Can someone post some pictures of which screws need to be removed to take the bumper off? There are none which have a yellow dot painted next to them. The pictures that were evidently in the DIY thread for bumber removal are gone. Also, it doesn't come with any hardware. What / How many screws / clips will I need to get? And will I need to get any 3M tape? If someone can help me save a few bucks plus the time of having to leave my car at the dealer for who knows how long, I would really appreciate it.

i don't have any pics, but from memory when i did this about a year ago...
-undo the foglight wiring
-unscrew all the screws on the undertray (about 10 or so)
- unscrew about 4ish bolts on the plastic piece where the hood latch is... should be on the ends)
- i believe you also then have to undo the plastic fasteners on the front the the wheel wells
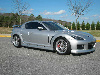
To install the airdam you need to strip the stock airdam piece off the bumper. Then locate the 6 crosshairs on the back of the bumper near the lower ends and drill them out. I believe the new airdam has the studs of the bolts that go through these holes molded into the airdam, so you will only need some nuts for them. I don't recall how the center section fastens - something tells be it was 1 or 2 screws. The only 3M tape i remember are on the 2 bottom side sections where the molded in studs are.
-undo the foglight wiring
-unscrew all the screws on the undertray (about 10 or so)
- unscrew about 4ish bolts on the plastic piece where the hood latch is... should be on the ends)
- i believe you also then have to undo the plastic fasteners on the front the the wheel wells
To install the airdam you need to strip the stock airdam piece off the bumper. Then locate the 6 crosshairs on the back of the bumper near the lower ends and drill them out. I believe the new airdam has the studs of the bolts that go through these holes molded into the airdam, so you will only need some nuts for them. I don't recall how the center section fastens - something tells be it was 1 or 2 screws. The only 3M tape i remember are on the 2 bottom side sections where the molded in studs are.
Originally Posted by jskup1
is the stock airdam piece just bolted to the bumper or will I need to cut it off?
can you also shoot some pictures of what screws to remove under the hood. I know I need to remove the ones in the wheel wells and the ones underneath, but there are a bunch under the hood that are pointed down and some that are pointed 90 degrees towards the front of the bumper and I'm not sure which ones or all I need to remove.

Registered User
Joined: Jun 2005
Posts: 26
Likes: 0
From: Mount Airy, MD
JSK,
Just did my REVi and RAM this past weekend and it was really easy per RB directions. I don't have them in front of me (and someone might be able to clarify anything I say wrong) but from memory...
1) Remove all the pop screws along the black trim piece just inside the nose - should be about 6-8 of them all the same pointing straight down. Just take a flat bladed screwdriver and gently work it under the inner lip of each and they will slightly popup then pull them out and the black piece will come out.
2) Then you will see some bolts underneath the black try holding the bumper top on (brass colored if I remember) and remove those 4? You will also see a white clip on each side that needs to be removed. Pry up with a flat blade and it comes right out.
3) Now remove all the screws along the bottom edge of the bumper where the bottom pan is attached along the front.
4) Reach up inside and disconnect both fog lights (if you have them) by twisting the connection 1/4 turn and pulling it out.
5) Go to each wheel well and remove the four screws holding the well to the nose. The 4 screws are the ones from the bottom edge up. Don't worry about the rest.
6) Once they are removed, you will see a screw that is in the white housing for the amber corners. Remove the housing by sliding it forward towards the front end of the car. It has a straight piece that needs to clear the rear before it will come out. Disconnect the bulb using a 1/4 twist and pull. Push the bulb through the housing assembly into the nose so that it won't get caught.
7) Make sure you take tape and cover the headlights. I taped the whole face of each with masking tape to make sure I didn't scratch them. If you don't the front nost could scratch it taking it off or putting it on.
8) Gently pull on each corner of the nose toward the front end and it will come free. Then tilt the whole nose assembly forward and up and it will come right off.
Directions are the reverse for putting it back on.
1zzy
Last edited by 1zzy; Aug 4, 2005 at 09:32 AM.

Modena
Joined: Oct 2004
Posts: 308
Likes: 0
From: Wentzville, MO
Originally Posted by modena
Give me some time till tonight,
I will be taking my front bumper of and can snap some pictures of the air dam mounted to the bumper...
I will be taking my front bumper of and can snap some pictures of the air dam mounted to the bumper...
Best I could do

http://www.verlinden-productions.com...-8_RB_Ram_Air/

beyond the ultraworld
Joined: Oct 2003
Posts: 479
Likes: 0
From: Southampton, UK
Posted a DIY on the UK forum, with some pics and the workshop manual pages :
http://www.rx8ownersclub.co.uk/forum...pic.php?t=6713
http://www.rx8ownersclub.co.uk/forum...pic.php?t=6713

Thread
Thread Starter
Forum
Replies
Last Post
LMURailsplitter02
New Member Forum
1
Sep 6, 2015 10:56 PM
Rupanrx
Series I Aftermarket Performance Modifications
1
Sep 4, 2015 06:44 AM
akagc
RX-8's For Sale/Wanted
7
Aug 11, 2015 07:07 PM