
DIY: Spark Plug change.......


Senior Member
Joined: Jul 2003
Posts: 1,554
Likes: 1
From: DC Metro Area, USA


TK
Joined: Jan 2007
Posts: 362
Likes: 1
My car was really rough starting. It also has a weird raspy type sound when I got on the gas thru 3-6k rpm.
So I replaced the plugs $84 (didn't fix the problem), then I did coils and wires $180 @ Atkins Rotary in Puyallup, wa. Problem fixed. i was able to change the coils by simply removing the airbox, which is pretty straight forward. and i have skinny arms, so i was able to avoid removing the FL wheel and just reaching deep into the engine and plugging the wires onto the plugs. including the plugs...maybe an hour or so for the plugs, wires, and coils...
So I replaced the plugs $84 (didn't fix the problem), then I did coils and wires $180 @ Atkins Rotary in Puyallup, wa. Problem fixed. i was able to change the coils by simply removing the airbox, which is pretty straight forward. and i have skinny arms, so i was able to avoid removing the FL wheel and just reaching deep into the engine and plugging the wires onto the plugs. including the plugs...maybe an hour or so for the plugs, wires, and coils...
Last edited by tksnobords; Jun 21, 2009 at 12:00 PM. Reason: added more info

Registered
Joined: Oct 2007
Posts: 2,210
Likes: 0
From: Ajax, Ontario
Great thread and DIY...thx!
My car was running well, just some odd fluctuation at idle, drop and go back up and a little rough. But lots of power when driving normally.
Bought my plugs from vendor on here ($80us), did the change, idle seemed good, lots of power, but got the flashing CEL around 7500+rpm over and over. Slow down it would go off. Then one time it stayed on. So annoyed I reset the ECU via disconnect the battery. Redline it no more CEL and lots of power. However...when it's cold (start up) I get some crazy fluctuation in idle. When the idle slowed down to around 1500 rpm and wants to go down to 750-1000 (norm), it kinda sputters and kicks the rpms back up to 1750ish/2000ish. Does this a few times and for awhile. I have not waited for it to settle down. I go drive and then once more warmed up idle is pretty good.
Any ideas?
Oh and coils were replaced at the beginning of the summer.
Only thing I can think is wires, but they were replaced 1 1/2 or so years a go.


Registered
Joined: Oct 2007
Posts: 243
Likes: 0
From: Atlanta area
I hope you were told better than that. L is for leading or Lower on both rotors. T is for trailing or top for both rotors. Best thing to do is one at a time and complete one before you do ANY thing to the others. Dont even take the wires off of another one til you get done with the one you are on. Its not hard really. Takes me about 15 mins or so after i get the wheel off.

Good suggestion to do one at a time; almost idiot proof (j/k). You can't miss the 'L' and 'T' cast into the motor housing (see the photo's earlier in the thread).
And don't forget the anti-seize paste. A single packet from Autozone (usually at the checkout counter) will last several changes.
A socket extension with a wobble joint really is helpful and taking the wheel off makes for a much easier job.
And don't forget the anti-seize paste. A single packet from Autozone (usually at the checkout counter) will last several changes.
A socket extension with a wobble joint really is helpful and taking the wheel off makes for a much easier job.

Registered
Joined: Oct 2007
Posts: 243
Likes: 0
From: Atlanta area
The plug wires are different in that either the trailing or leading have a green stripe on it if they are stock. Just make sure you dont mix them up. You dont want your trailing plug firing before your leading and the leading fires 2 times during combustion. That would be very bad.

Registered
Joined: Jan 2007
Posts: 1,401
Likes: 0
From: NJ
just for the information for people to remember easily...
T = TOP = Trailing ....remember T=Top, it's trailling (both Top)
L = LOWER = Leading ...remember L=Lower, it's leading (both bottom)
now, L1 and T1 .....front rotor (start from your front bumper)
L2 and T2 .....of course after front rotor.....(near the fire wall)
now the coil connection: L1 . T1 . L2 . T2 ....
the Mazda coil connection start from the front of the car 1, 2 , 3, 4...
you will notice that are 4 connections from mazda harness to coils, start from front (toward bumber) #1..and follow up with 2,3,4..
i give this information just incase people get messed up or need more ways to remember ...good luck
steven
I've already forgotten all that. 
Just match up what's already there (one at a time). Simple.
Just match up what's already there (one at a time). Simple.
just for the information for people to remember easily...
T = TOP = Trailing ....remember T=Top, it's trailling (both Top)
L = LOWER = Leading ...remember L=Lower, it's leading (both bottom)
now, L1 and T1 .....front rotor (start from your front bumper)
L2 and T2 .....of course after front rotor.....(near the fire wall)
now the coil connection: L1 . T1 . L2 . T2 ....
the Mazda coil connection start from the front of the car 1, 2 , 3, 4...
you will notice that are 4 connections from mazda harness to coils, start from front (toward bumber) #1..and follow up with 2,3,4..
i give this information just incase people get messed up or need more ways to remember ...good luck
steven
T = TOP = Trailing ....remember T=Top, it's trailling (both Top)
L = LOWER = Leading ...remember L=Lower, it's leading (both bottom)
now, L1 and T1 .....front rotor (start from your front bumper)
L2 and T2 .....of course after front rotor.....(near the fire wall)
now the coil connection: L1 . T1 . L2 . T2 ....
the Mazda coil connection start from the front of the car 1, 2 , 3, 4...
you will notice that are 4 connections from mazda harness to coils, start from front (toward bumber) #1..and follow up with 2,3,4..
i give this information just incase people get messed up or need more ways to remember ...good luck
steven


Registered User
Joined: Jan 2009
Posts: 21
Likes: 0
From: Edmonton
So i'm attempting to change my spark plugs myself for the first time. First 3 plugs came out easy. However the 4th plug, It is the top (trailing) plug behind the plastic splash flap will not come out. My spark plug socket does not fit in it very well and slips when I attempt to turn it, i think the sides may be a little bit stripped. It will catch if the socket is lined up perfectly with the plug, however I cannot hold it there and turn at the same time.
Its 3 hours later now, and my arms are pretty banged up. Any suggestions?
I'm using extensions however they wont go around the bend on the wheel arch very well.
Its 3 hours later now, and my arms are pretty banged up. Any suggestions?
I'm using extensions however they wont go around the bend on the wheel arch very well.

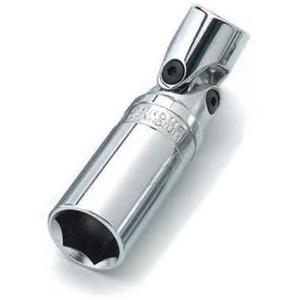
As Jon cites a U-joint, or as I did earlier above and prefer in this application a "wobble" joint, is essential. Methinks a trip to Sears or Autozone is in your near future.
So i'm attempting to change my spark plugs myself for the first time. First 3 plugs came out easy. However the 4th plug, It is the top (trailing) plug behind the plastic splash flap will not come out. My spark plug socket does not fit in it very well and slips when I attempt to turn it, i think the sides may be a little bit stripped. It will catch if the socket is lined up perfectly with the plug, however I cannot hold it there and turn at the same time.
Its 3 hours later now, and my arms are pretty banged up. Any suggestions?
I'm using extensions however they wont go around the bend on the wheel arch very well.
Its 3 hours later now, and my arms are pretty banged up. Any suggestions?
I'm using extensions however they wont go around the bend on the wheel arch very well.
Registered
Joined: Oct 2007
Posts: 243
Likes: 0
From: Atlanta area
So i'm attempting to change my spark plugs myself for the first time. First 3 plugs came out easy. However the 4th plug, It is the top (trailing) plug behind the plastic splash flap will not come out. My spark plug socket does not fit in it very well and slips when I attempt to turn it, i think the sides may be a little bit stripped. It will catch if the socket is lined up perfectly with the plug, however I cannot hold it there and turn at the same time.
Its 3 hours later now, and my arms are pretty banged up. Any suggestions?
I'm using extensions however they wont go around the bend on the wheel arch very well.
Its 3 hours later now, and my arms are pretty banged up. Any suggestions?
I'm using extensions however they wont go around the bend on the wheel arch very well.

Registered
Joined: Oct 2008
Posts: 39
Likes: 0
From: Austin, TX
Installed
First I'd like to say THANKS for the great DIY thread. After reading this I was able to easily change the spark plugs in my 8.
The reason I did it in the first place was because the car has seemed to lose a small amount of power over the 2 years I've had it and also has a bit of trouble starting. Nothing major but it takes several cranks. It goes Vabum vabum vabum vabum vabum VROOOOOM. If you say that out loud somewhat fast its exactly what it sounds like. Its at 54k miles now so I checked a plug, sure enough it was the nastiest plug I'd ever seen.
But after completing the job I really expected a bit more power out of it and better starting. But neither has changed. I just got done with it an hour ago and drove around for maybe 15 minutes, so I haven't tested it extensively or anything.
Should all this be expected? Or should I keep going and change the wires and coils as well? The wires looked to be in very good condition. I looked at both the coil connection and plug connection of all four cables and they're very silvery bright shinny looking.
Thx for any opinions or facts

Super Moderator
Joined: Apr 2005
Posts: 10,880
Likes: 340
From: Australia
I am forming the opinion that Coils should be changed at every other spark plug change.
And about 15,000 Miles is enough for the Spark Plugs, even though "Mazda" says you can go a lot further..yes, you can, but how efficient is the spark, from that how complete is your Fuel Igniting.
Much also depends on your type of driving and RPM's, even weather.
And about 15,000 Miles is enough for the Spark Plugs, even though "Mazda" says you can go a lot further..yes, you can, but how efficient is the spark, from that how complete is your Fuel Igniting.
Much also depends on your type of driving and RPM's, even weather.
I changed my 'plugs at 20k miles and it made a noticeable improvement.
As we know, coils seem to be particularly susceptable to electrical degradation in the '8 and cables in any vehicle become electrically porous over time.
I'm going with the BHR coil/cable module near future.
As we know, coils seem to be particularly susceptable to electrical degradation in the '8 and cables in any vehicle become electrically porous over time.
I'm going with the BHR coil/cable module near future.

If you scroll down they also have a packaged deal that includes 1 leading, 1 trailing and a pack of NGK ZE81 spark plug wires for 59.00 so thats roughly 120$ for a set of plugs and wires.