When you click on links to various merchants on this site and make a purchase, this can result in this site earning a commission. Affiliate programs and affiliations include, but are not limited to, the eBay Partner Network.
I have the CSF radiator, and I've largely been very pleased with it; but due to time constraints when my prior BHR/Griffin radiator crapped out, I farmed the remove and replace out, and I discovered yesterday that the top tank is about half an inch higher than it should be, as it's blocking part of the intake pass-through in the forward bulkhead. It wasn't an issue with the OEM air box and VFAD; but the RacingBeat REvi that I'm struggling to install is not having it, so I'm going through everything I can find on Radiator removal and installation to get any possible hints on what went wrong and how I might be able to massage the installation enough to clear the REvi.
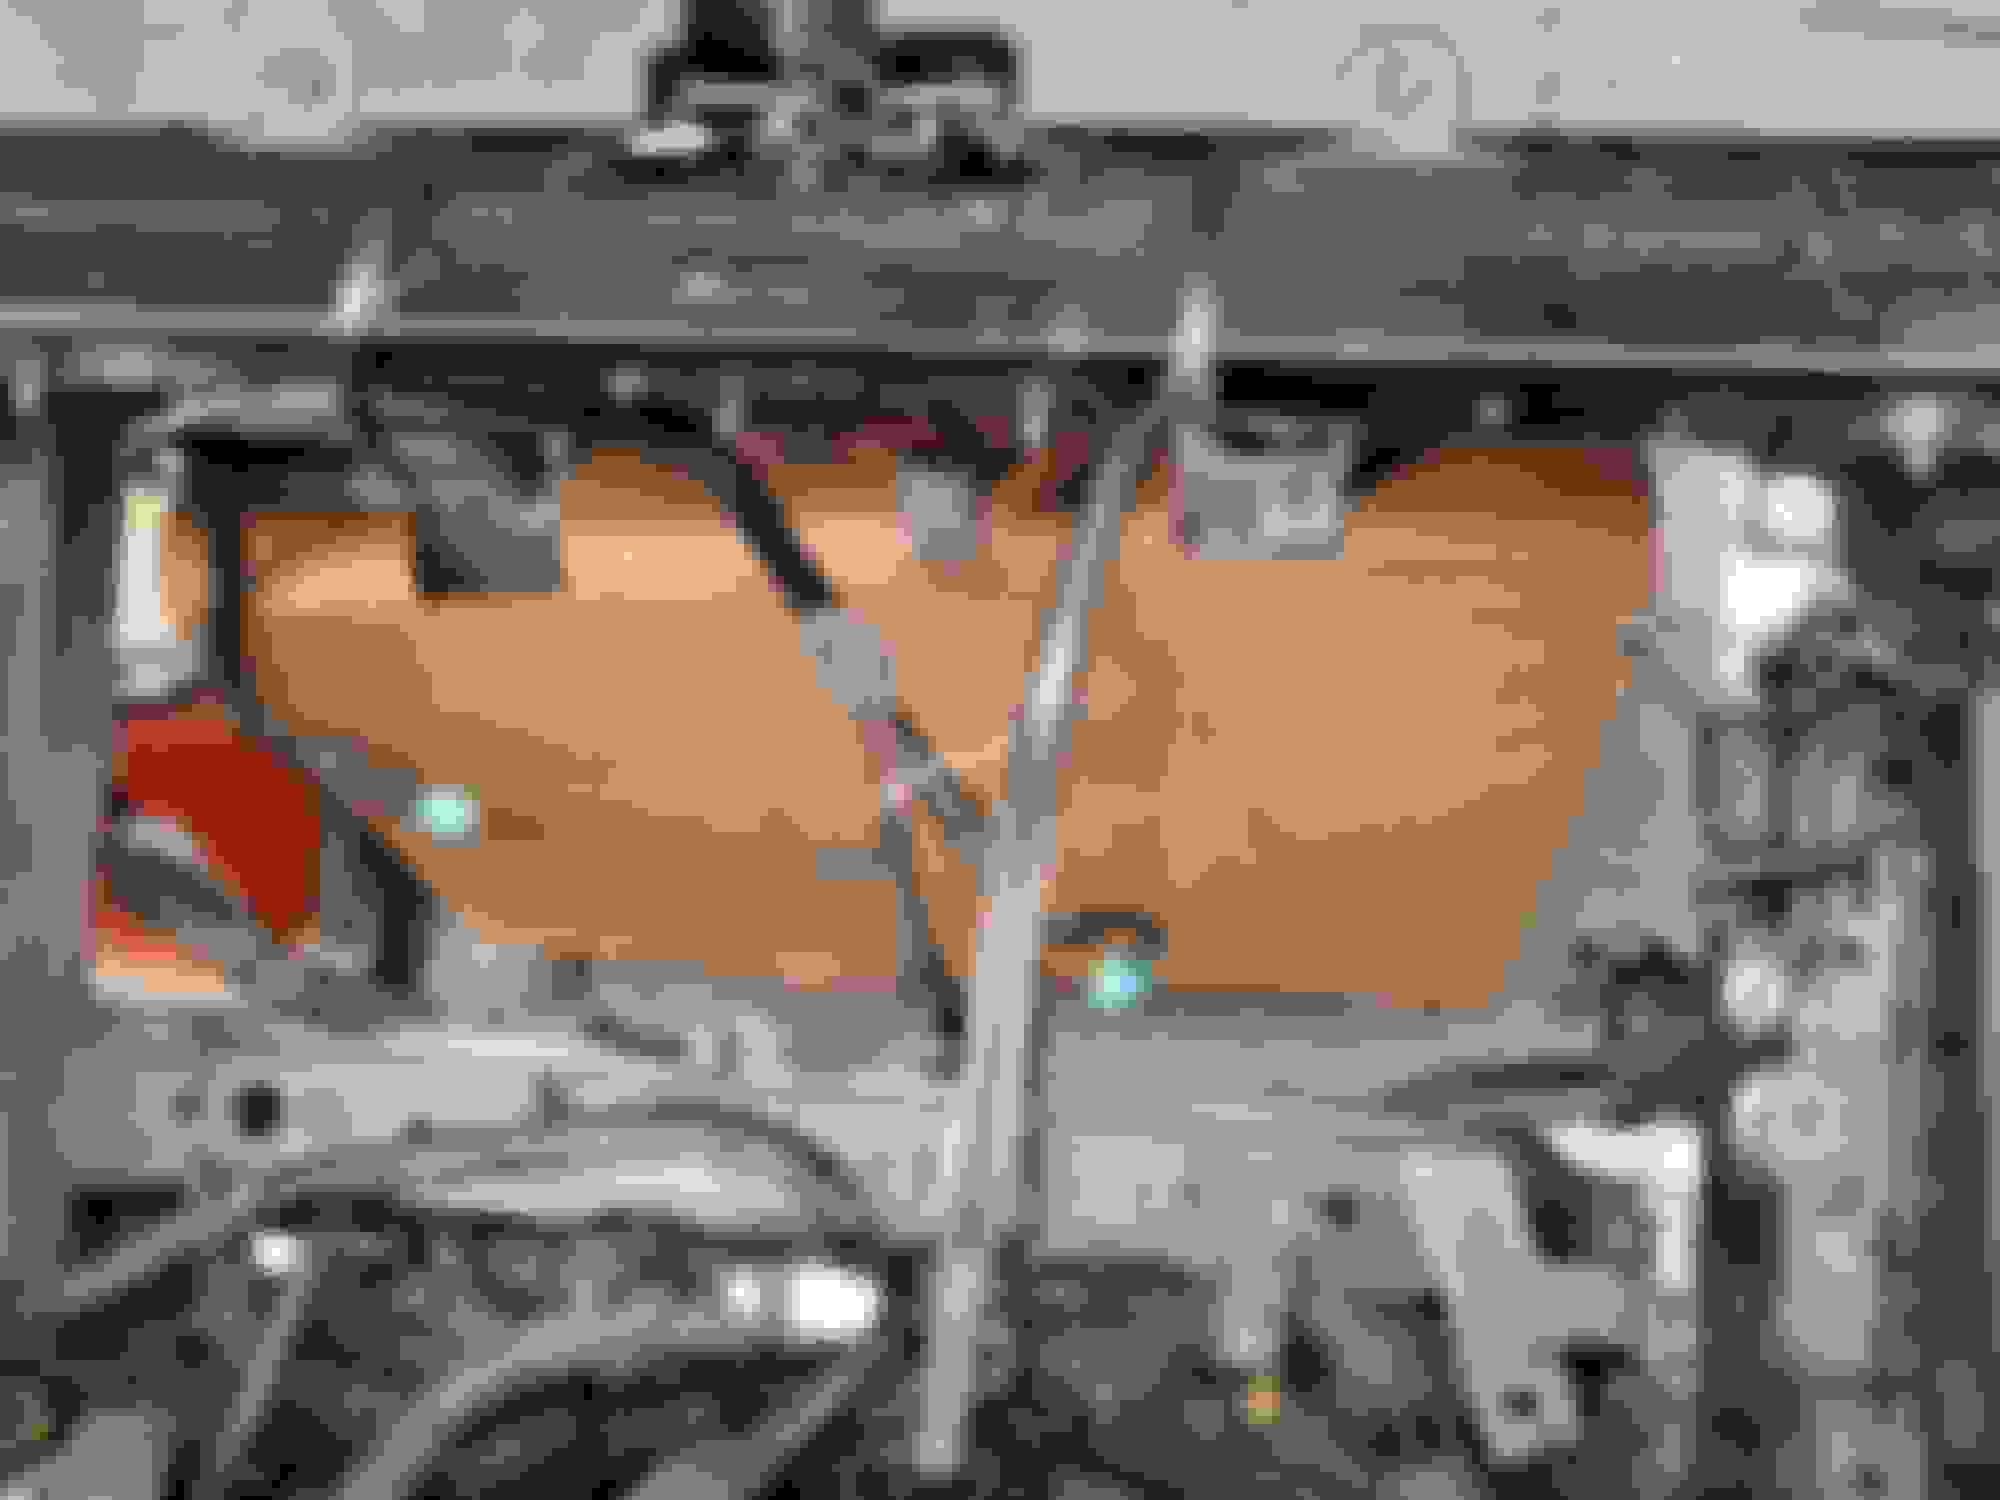
For reference:
View from the front of the forward bulkhead, looking rearward, showing the radiator�s occlusion.
...I'm going through everything I can find on Radiator removal and installation to get any possible hints on what went wrong and how I might be able to massage the installation enough to clear the REvi....
Thanks for those pictures - I've read though the posts and I'm interested in what current wisdom the forum has on this too. I'm replacing my leaking radiator, and would spend the $ upgrade if it can keep the same clearances as OEM. Seems like all the aluminum options increase the stack enough to foul parts of the intake, battery box, or REVi intake snorkel & box like you show in yours.
The only one I believe clears everything while increasing the coolant capacity of the radiator is the plastic end tank Series 2 radiator TeamRX8 (I think) picked up from RockAuto - but even that has issues with the fan shroud mount points that differ in design. With one screw point moved for S2. So an adapter would need to be fabricated to connect everything back up fully.
I�ve tired to follow the steps, but I must be missing something, I can�t even get it into the car. I have the right parts, it�s just I can�t do it myself. Is there anyone in the phoenix area willing to help a younger rx8 owner. I don�t have much money since my car has been down, but I�d make it up in some way.
I�ve tired to follow the steps, but I must be missing something, I can�t even get it into the car. I have the right parts, it�s just I can�t do it myself. Is there anyone in the phoenix area willing to help a younger rx8 owner. I don�t have much money since my car has been down, but I�d make it up in some way.
I am in the midst of a radiator replacement on a 2009 R3. I cannot think of many DIY's that are a bigger PITA than replacing this radiator. I am over 4 hours into this just to get the radiator out. Getting the undertray out is a complete hassle. On the R3, I had to remove both inner fenders (front lower) to get at the fasteners for the undertray (two 10mm bolts and a Phillips pushpin on each side.) One of the biggest difficulties is getting the wire holders off of the undertray, and also off of the fan shroud. Not fun. While I was deep into this I replaced the two drive belts (alternator and AC, and the tensioner pulley) because I don't wan't to pull the engine compartment apart again. While I am in the midst of this I'll replace the plugs because I have the front wheels off and have access. I cannot even imagine what the dealer or a rotary shop would charge for spelunking this deep into the inner depths of our cars. Jeeeesh.
I don't know if I have it in me if I needed do it again.
This started due to a coolant tank replacement for the common level sensor failure. I tried very carefully to not break the radiator nipple. I thought I had succeeded. However, on the test drive I was loosing coolant. To some extent I am glad this lead to replacing the original radiator because it was a disaster waiting to happen. On the other hand, if I had it to do over, I'd just live with the level sensor issue rather than go through this unpleasant DIY.
I went with the Denso radiator from RockAuto. I pulled the AT line/nipples and filled the inlets with Mazda grey sealant to keep out moisture. If I knew how difficult this would be, I'd probably have used an aluminum unit if I could find one for a Series II that was plug and play, to avoid future nipple breakage issues.
This is an old thread, however I assume this DIY is being accessed on an ongoing basis.
I feel your pain as I recently installed a Koyo radiator and an air conditioning condenser in my 2010. So glad to have a friend that saw what I didn�t. Besides having to create a little space in the car due to the rad being a couple mm too wide at the welds, I didn�t notice the bolt on aspect of the oil lines. I fought with installation for several hours due to those oil lines. Undo the bracket to gain a little space. Sometimes a buddy can sure help see the obvious.
I just finished this job. I may post a comprehensive accounting of how I approached it. In the meantime, here is an overview of some items that I didn't see above.
1) I ordered the Denso radiator from RockAuto. It was about $130 shipped. Very similar to the factory radiator. However, it comes with auto transmission line stubs attached. I removed the line stubs and filled in the remaining nipples with Mazda Grey sealant. I put the sealant in the holes because I did not want to risk corrosion in side from water potentially entering.
2) When I was putting the new radiator in, I created a heavy cardboard shield to the surface of the condenser so it would not get damaged when sliding the radiator up from under the car into position. I made a tab at a the top of the cardboard shield that I could fold over to keep it in place. Once installed, I was able to pull the shield out from the bottom. If I had it to do over, I might try to install the shield between the radiator and condenser before I remove ed the radiator.
3) I was able to install the new radiator into position on my own without much difficulty. When under the car, I got it oriented correctly and leaned the top at the proper angle against the bottom of the condenser. Then from the top, I slid it up into place by holding onto the fan shield (that I had pre-installed.) I had ultra-long zip ties ready and put them through two opportunistic places on the fan shield. There is no handy place on the car to attach them, so I took two 18 - 24 inch pieces of 1 x 2 wood and angled them at a 45-degree angle to span the corner from the front top cross-member to the electronic boxes on the left and right. This held up the radiator perfectly while I climbed back underneath and got the top radiator brackets secured. I also loosely put ultra-long zip ties onto the condenser before I removed the radiator to hold the condenser in place. Be careful with the rubber mounts on the top of the radiator when pulling the radiator down and out. The 10mm screw stub can drag across the condenser surface. The cardboard would help protect from damage.
4) When you have everything apart, I highly recommend flushing coolant from the block, replacing the spark plugs, replacing the drive belts and tensioner pulley, and replacing the air filter if any are close to being due for maintenance. Also, look at your radiator and ancillary smaller hoses that might be worse for wear. Now is the time to replace them. I bought a set of main radiator hoses to have on hand (Continental), but I kept the original Mazda hoses. However, I did replace some of the smaller narrower factory hoses. These small-diameter specialty hoses are not inexpensive.
5) You'll want to take your front fender liners/splash shields out (at least on my R3) to be able to get at the fasteners for the splash shield risers if you have the factory plastic undertray. Have plenty of clips Mazda part # BC1D56145 available for those you break (you can get factory or aftermarket.) The aftermarket clips I've used work, but are difficult to get out. The factory clips work better (the post rises up when you give it a quarter turn.) These clips are used to secure the inner fender splash shield and some areas of the undertray. Also, the battery box vent tube is much easier to remove with the fender-liner/splash shield removed.
6) When I finished, the ABS and DSC lights were on. I had to take the inner fender liners back out to get at the connectors and found one connector was not seated fully.
7) Go through the correct procedure to add coolant and that air is not trapped in the coolant circuit. I removed a small hose on the throttle body to check this.
8) Use Fl-22 coolant. I used the factory coolant.
9) Now is the time to replace your coolant tank if it is not a newer revision to avoid or fix a failed level sensor. In my case, replacing this tank led to the radiator replacement.
10) One of the greatest difficulties in this job for me was releasing the wire loom clips that hold the wire in place to the body and other parts. What a PITA. Those on the undertray become accessible from behind so they are not too bad if you have patience. Those related to the air box removal require some contortions. Those on the fan shroud are the worst. For those that have a clip securing the wiring loom with an integrated zip tie, I found the best way method is to cut the zip tie portion. If you do not get new clips, when you cut them, leave a semicircular stub, and when you put things back together, just run a new zip tie through the empty slot under the clip to secure the wire. This seems to work well. Two big grey electric connectors are at the top of the fan shroud. If you can get a small skinny screwdriver into the slot under them, you may be able to slide them off their securing slip. They shall pull upward to come off if you can depress the tab.
Photos of zip ties holding up the AC condenser. I used similar zip ties to hold up the new radiator while securing it to its mounts. They would be attached to two pieces of 1" x 2" wood that are 18" to 24" inches long, that would be placed at 45-degree angles at the top of the photo.
 04-27-2022, 04:02 PM