
DIY: Painting Engine Cover(s) and Strut Bar


Thread Starter
i haz rotary? say what?
iTrader: (2)
Joined: Nov 2010
Posts: 534
Likes: 0
From: Southern Arizona
DIY: Painting Engine Cover(s) and Strut Bar
This was a bit of an experiment for me, even after reading everything I could find on the subject.
First and foremost, I believe that the actual engine cover itself is a different type of plastic than the other 4 covers. I had trouble getting High Temp Primer to stick to the engine cover and I had to redo it completely with an Adhesion Promoter (AP). With that said, painting the engine cover will be a little different. 1 more note, the paint I use is Dupli-Color high temp paint. I don't know if the adhesion promoter will be problematic on the engine cover, but if it starts bubbling or flaking, I'll let you guys know ASAP.
I do know that if you don't use primer or AP, the paint will look like ****, so use one of the 2. The reason I don't know which is better is because I painted all the covers in primer first. When I started painting the covers, I painted some silver on the engine cover then tried to tape over it, but in the process of masking everything the paint started coming off. This is after letting it dry overnight. After pressure washing it to get all the loose paint off, I sprayed it with 3 light coats of AP (as per the instructions), then sprayed red over the top of that. I haven't tried to tape over it yet, but so far it seems to be OK with AP and what's left of the primer.
Tools needed:
Screwdriver (Philips)
Pliers (or anything you feel like using to loosen a couple fasteners)
Pressure washer (not necessary, but it'll make your life 100x easier)
High Temp Paint (HTP) (I used DE1653 Red (mainly) and DE1613 Gloss Black)
High Temp Primer (DE1612 Gray Engine Primer - might not be necessary, I used it on everything but the engine cover)
Adhesion Promoter (AP)
Painters Tape (I went with 3M's Automotive Performance Masking Tape (green)).
Sand paper (I bought everything from 200 grit to 1500 grit and use a little bit of it all. I mainly used 600, but if I screwed up and had to sand the over paint off I used 200 then 600.)
Almost everything above can be found at O'Reilly's. I don't know if they carry HTP at advanced auto or other stores.
The build! *coughpaintcough*
First thing you want to do is take off everything you're going to paint. The only tricky part is the air filter box, you can find out how to take that off here:
https://www.rx8club.com/series-i-do-yourself-forum-73/diy-stock-air-filter-box-144789/.
Next is cleaning I recommend pressure washing everything before you do anything else, if possible. If not, this next step will be a pain.
Now you'll want to wash everything with soap and water. Dish soap will do fine. If you have any kind of degreaser, use that as well. I didn't use any and mine turned out fine, but it may make your life easier.
Now you may want to sand anything especially shiny (see: fuse box). I don't know if sanding helps at all on the textured parts, I sanded the engine cover before spraying primer on it and the primer still came right off with tape, but it definitely worked on the shiny stuff.
The final step in the prep work is to mask everything you do not intend to paint. Don't worry about the undersides of your parts, if they're laying on the ground you can't get paint in there anyways. Mask all clips and connectors, and stuff toilet paper in screw holes.
Now you should be ready to go. Spray your choice of primer or AP on your parts. AP says to spray 3 light coats, 1 every 3 minutes. Color should be applied immediately. Primer says to spray 2 light coats with 10 minutes between each coat, then spray a medium coat over that. Start spraying color within 1 hour of the first coat. If you're planning on painting anything multiple colors, especially the engine cover itself, spray the color you're going to paint the letters/emblem first, don't worry about over spray because you'll just paint over it anyway. Let that dry over night, then mask over it and spray your second color. The first color will still be visible everywhere you put tape.
Now the fun part: Pictures!
Picture 1: This is why you should use a pressure washer. This would be nearly impossible without one.
Picture 2: All clean. I got a little bit carried away with the air filter box and sanded it before I finished cleaning it.
Picture 3, 4, and 5: After a failed painting attempt (see the airbox?) I went to get some primer. These are coats 1 and 2. I sprayed a 3rd coat on as well.
Last edited by Matrx8; Mar 15, 2012 at 10:26 PM.
Thread Starter
i haz rotary? say what?
iTrader: (2)
Joined: Nov 2010
Posts: 534
Likes: 0
From: Southern Arizona
Moar Pictures!
Picture 1: Make sure you sand everything shiny or the primer will come off!
Picture 2: First coat of red
Picture 3: Second coat of red
Picture 4: Third and final coat of red. Final product!
Picture 5: First coat of primer on strut. Make sure you sand it first!
Picture 1: Make sure you sand everything shiny or the primer will come off!
Picture 2: First coat of red
Picture 3: Second coat of red
Picture 4: Third and final coat of red. Final product!
Picture 5: First coat of primer on strut. Make sure you sand it first!
Last edited by Matrx8; Mar 15, 2012 at 10:18 PM.
Thread Starter
i haz rotary? say what?
iTrader: (2)
Joined: Nov 2010
Posts: 534
Likes: 0
From: Southern Arizona
Even Moar Pictures!
Picture 1, 2, and 3: Finished red strut and engine cover. Sorry, forgot to take pictures in stages
Picture 1, 2, and 3: Finished red strut and engine cover. Sorry, forgot to take pictures in stages
Last edited by Matrx8; Mar 15, 2012 at 10:22 PM.
Thread Starter
i haz rotary? say what?
iTrader: (2)
Joined: Nov 2010
Posts: 534
Likes: 0
From: Southern Arizona
After painting the engine cover red I tried to mask over it but the paint pealed off primer and all when I tested removing the tape, so I ordered Krylon Fusion (for plastic) paint and am waiting for it to get here. I'm confident that will stick, I just don't know if it'll warp and crack under the engine heat. Only one way to find out. I'll finish/edit this DIY when I figure it out -_-

Registered User
Joined: Jan 2012
Posts: 10
Likes: 0
Funny that i saw this two days ago when i decided i was going to try this. I got red and white rustoleum for plastic though so ill see how it goes.. just put the red's on tonight and ill tape tomm. Night and see if it peels. I got clear coat in hopes it will be easier to clean


Thread Starter
i haz rotary? say what?
iTrader: (2)
Joined: Nov 2010
Posts: 534
Likes: 0
From: Southern Arizona
Eric, not everybody is a master mechanic, that's why there's change your oil diys etc. Do you know what paint to use? Plastic specific paint or high temp? If so please enlighten us. I'm on a business vacation right now, ill finish this when I get back. Hopefully.
look into this:
There was someone who put a bluish carbon fiber pattern on their engine cover. It looked amazing. Id looks alot nicer than painting IMHO. My engine cover came painted from the factory because its the 40th anny, black and silver.
There was someone who put a bluish carbon fiber pattern on their engine cover. It looked amazing. Id looks alot nicer than painting IMHO. My engine cover came painted from the factory because its the 40th anny, black and silver.

Registered User
Joined: Jan 2012
Posts: 10
Likes: 0
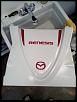
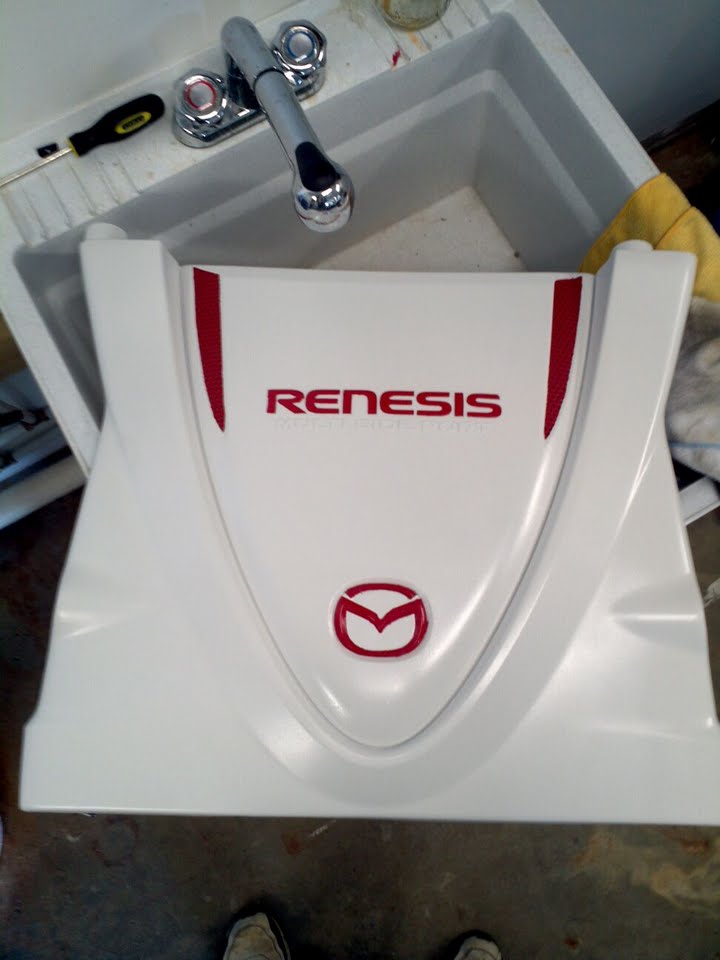
Well i figured it out thankfully, this is the cover taped off initially when i sprayed it with Rustoleum for plastics in white. Then you have the finished product before clear coat since i have to wait like 48 hours to clear coat it so tomorrow night ill hit that. A lil bit of advice.. i had issues with paint sticking to the metal emblem... i would suggest either masking it off entirely or using a diff. type paint other than the for plastics kind... i had to get some touch up pain for metal and fix a couple peel spots on it nothin major just a few nicks.


Thread Starter
i haz rotary? say what?
iTrader: (2)
Joined: Nov 2010
Posts: 534
Likes: 0
From: Southern Arizona
That's pretty interesting Eric, ill look into that more when I have a chance.
Rm, I hope that's just a bad picture cause that looks like a red marker on a white piece of paper
Rm, I hope that's just a bad picture cause that looks like a red marker on a white piece of paper

SHKWAV
Joined: Jun 2008
Posts: 662
Likes: 2
From: Massillon, Ohio
first, you don't press down on a can to paint.
Second, why would you fill air on a tire? Wouldn't you fill a tire with air?
Next time you want to begin to attempt to try to come off as a smart ***, make sure you have a clue as to what you want to say. More importantly, be intelligent enough to express what you want to say so as to come across like a smart *** rather than a dumb ***.
Thread Starter
i haz rotary? say what?
iTrader: (2)
Joined: Nov 2010
Posts: 534
Likes: 0
From: Southern Arizona
Please don't turn this into a flame thread, there's way too much drama on this forum as it is.
Depending on when I get back (Thursday or Friday), I may have this finished over the weekend, or I may have to wait till Monday when the mail room opens. Graduating from the Non-Commissioned Officer Academy's Warrior Leader Course with Honors on Thursday
Depending on when I get back (Thursday or Friday), I may have this finished over the weekend, or I may have to wait till Monday when the mail room opens. Graduating from the Non-Commissioned Officer Academy's Warrior Leader Course with Honors on Thursday

Thread
Thread Starter
Forum
Replies
Last Post
Mr.Durden
RX-8's For Sale/Wanted
4
Aug 12, 2015 02:21 PM
Jazzmeson
West For Sale/Wanted
1
Jul 31, 2015 01:48 AM