


DIY: Oil cooler opening mesh & grille replacement

Is this title ok?
Joined: Jan 2003
Posts: 300
Likes: 2
From: El Monte, CA
I bouth a roll of this grill from home depot a year ago that I was planning to use for my Teg, but ended up putting in my 8 instead :D
A whole roll can cover the entire 3 cars (Two oils cooler + Front air damp) which only cost $24. Look like aluminum, but I think it's some type of galvanized metal.
A whole roll can cover the entire 3 cars (Two oils cooler + Front air damp) which only cost $24. Look like aluminum, but I think it's some type of galvanized metal.

Is this title ok?
Joined: Jan 2003
Posts: 300
Likes: 2
From: El Monte, CA
Red circles are threaded with screw. Blue are tap and tied with wire. One can do away with wire tie by have access bends overlap to the bottom and use OEM screws location; Which I didn't find out until I cut the piece, so ended up using wire tie :p

Lubricious
Joined: Oct 2003
Posts: 3,425
Likes: 4
From: SF Bay Area, California
Another homemade grille
Finally took the time to do my grille project, both lower air inlet and oil coolers.
After agonizing between bronze and stainless steel mesh (here), I finally settled on the stainless steel, at 2 openings per inch. This can be purchased online in reasonable quantities from TWP INC. .
To fit the mesh I first followed the excellent instructions for front bumper removal here
The mesh itself was cut fairly easily with dual-pivot tin snips. It is stiff but bendable enough by hand to be workable.
There are several locations for the openings that present ideal locations for attachment - hollow posts along the openings. I used short self-tapping metal screws along with brash washers where needed to hold down the mesh. The oil coolers have 2 posts above and one below the opening and these seemed sufficient for mounting. For the larger lower opening there were only 2 posts, but additional attachments were possible along the top edge. The bottom edge was more involved. There is a triangular (rotor-shaped?) tab at the mid-point that was larger than a mesh opening. I cut a small notch which allowed me to press-fit the screen down until it locked upon the tab. Zip ties can be used at the bottoms of the 2 vertical struts. I happened to have "lightning yellow" zip ties but will probably change over to black . Finally, at the bottom outside edges I fashioned some hooks from thick copper wire and secured the mesh to some bolts that lie just outside of the opening.
All in all it seems fairly sturdy. It's not going to stop tiny stuff but my main goal is to stop things that would otherwise threaten rupture of the AC coils or oil coolers, while keeping airflow as high as possible.
Here are the attachment points for the oil-cooler openings
After agonizing between bronze and stainless steel mesh (here), I finally settled on the stainless steel, at 2 openings per inch. This can be purchased online in reasonable quantities from TWP INC. .
To fit the mesh I first followed the excellent instructions for front bumper removal here
The mesh itself was cut fairly easily with dual-pivot tin snips. It is stiff but bendable enough by hand to be workable.
There are several locations for the openings that present ideal locations for attachment - hollow posts along the openings. I used short self-tapping metal screws along with brash washers where needed to hold down the mesh. The oil coolers have 2 posts above and one below the opening and these seemed sufficient for mounting. For the larger lower opening there were only 2 posts, but additional attachments were possible along the top edge. The bottom edge was more involved. There is a triangular (rotor-shaped?) tab at the mid-point that was larger than a mesh opening. I cut a small notch which allowed me to press-fit the screen down until it locked upon the tab. Zip ties can be used at the bottoms of the 2 vertical struts. I happened to have "lightning yellow" zip ties but will probably change over to black
. Finally, at the bottom outside edges I fashioned some hooks from thick copper wire and secured the mesh to some bolts that lie just outside of the opening.All in all it seems fairly sturdy. It's not going to stop tiny stuff but my main goal is to stop things that would otherwise threaten rupture of the AC coils or oil coolers, while keeping airflow as high as possible.
Here are the attachment points for the oil-cooler openings
Lubricious
Joined: Oct 2003
Posts: 3,425
Likes: 4
From: SF Bay Area, California
Note - the lower post for the oil-cooler opening is not that deep. I used 3/4" screws and I would recommend even shorter for the lower posts.
Here are the points for the lower opening
Here are the points for the lower opening
Lubricious
Joined: Oct 2003
Posts: 3,425
Likes: 4
From: SF Bay Area, California
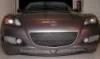
I haven't taken any pics of it installed outdoors yet, so for now here's a "flashlight pic" to give you an idea. It does have a bit of a rough look, which is actually what I was going for. Difficult to follow the lines of the fog lights with a mesh this large so I opted to keep a straight panel. The other option would have been to attach closer to the cooler itself and not to the bumper.
Anyway, here she is. I'll try to take a better outdoor shot maybe when she gets her Saturday bath.
Anyway, here she is. I'll try to take a better outdoor shot maybe when she gets her Saturday bath.


Registered
Joined: Oct 2001
Posts: 7,966
Likes: 4
From: Boulder County, Colorado
Originally posted by Parmer8
I cut out the inside portion and formed the mesh inside the grill. It's zip-tied to the frame.
I cut out the inside portion and formed the mesh inside the grill. It's zip-tied to the frame.
Could you do us a favor though and show a close up of how you zip-tied it to the frame? Thanks...
Registered
Joined: Mar 2003
Posts: 229
Likes: 0
From: Austin,Tx
Sorry, I didn't take a picture of the zip tie location, but hopefully you can visualize what I'm saying. The last picture is of the back of the grill and mesh. The grill is about one inch deep. I formed the mesh to the interior of the grill. The edges of the mesh are bent to the shape of the interior contour. Imagine pushing paper down a bowl. The paper's edge conforms to the interior's shape.
The zip tie location is at the back edges. I just predrilled holes where I think the mesh could be push in. I moved the zip tie head where you can't see it at all. The heads of the zip ties does not touch the bumper at all since the grill does not fully insert through the opening. Hopefully this explains it.
I also pushed/hammered the center of the mesh out so it's not flat to give it a contour shape, like the original grill.
Of course you have to spray paint the foam piece black. Remember use a primer first so the paint will stick or each through the foam.
The zip tie location is at the back edges. I just predrilled holes where I think the mesh could be push in. I moved the zip tie head where you can't see it at all. The heads of the zip ties does not touch the bumper at all since the grill does not fully insert through the opening. Hopefully this explains it.
I also pushed/hammered the center of the mesh out so it's not flat to give it a contour shape, like the original grill.
Of course you have to spray paint the foam piece black. Remember use a primer first so the paint will stick or each through the foam.
Lubricious
Joined: Oct 2003
Posts: 3,425
Likes: 4
From: SF Bay Area, California
Originally posted by Nubo
...... I'll try to take a better outdoor shot maybe when she gets her Saturday bath.
...... I'll try to take a better outdoor shot maybe when she gets her Saturday bath.