DIY: Fix Your Illuminated Shift Knob
 03-30-2007, 11:00 PM
#1

DIY: Fix Your Illuminated Shift ****
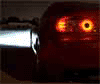
There are two models of the JDM illuminated ****, the original used brittle zinc wires, the newer one uses copper (this one usually only breaks because the service tech is a moron).
If you lack mechanical skill, send your shift **** to this address:
Polak Graphics
321 Glenn Ave.
Lawrenceville, NJ 08648
I will fix it for you for $40 shipped.
If your wires break close to the base of the shifter, you probably won't be able so solder them so this is what you do:
Step 1:
Take a dust buster can turn it upside down to make the glue less effective
OR
Take a hair dryer and heat the top of the **** it make the glue less effective
Tap against a desk and use your finger nail and it should come right out, with a little persuasion. NOTE duck tape over the loosened circle also works well.
Step 2:
remove the light diffuser screen, blow dryer and you fingernail work well here. If you want to "dim" the amount of light given off by these shift ***** add an addtional plastic piece of "polycarbonate" your local "fastsigns" will have it.
Step 3:
Unscrew the philps head, (in the original model this is a hex screw), this will detach the silver chrome looking piece.
Step 4:
Tug on the microchip and pull up the broken lines.
Last edited by PoLaK; 03-31-2007 at 10:55 AM.
 03-30-2007, 11:06 PM
#2
Step 5:
Touch the microchips +/- terminals with a solder iron while pulling on the cables they will pop out.
Step 6:
Using replacement cable, fish it up from the base of the **** it the top and then sodler it to the microchip by heating up the terminal whcih will still have some solder in it, once its through add more sodler to the terminal. TEST with a 9V battery.
Step 7:
Reassble and use a very tiny tiny amount of crazy glue around the edges of the 1-2-3-4-5-6-R button to get it to stay down, if you don't then it will buzz at high RPM.
Last edited by PoLaK; 04-07-2007 at 04:42 PM.
 03-31-2007, 10:54 AM
#4
Originally Posted by Rotary Rasp
How hard do you think it would be to retro a stock shift **** with leds?
04-06-2007, 04:21 PM
#5
Registered
iTrader: (1)

Join Date: May 2003
Location: PA
Posts: 3,754
Likes: 0
Received 0 Likes
on
0 Posts
I just wanted to give Polak a plug since I bought this particular shift ****. It was in excellant shape and the repair looked very good. Dealing with him was a pleasure as expected.
I ended up cutting the wires pretty close to the shift **** and wiring in a plug just below the know so the **** can be easily disconnected and unscrewed. I then used the rest of the wiring and tapped into the lighting circuit in the driver side seat heater switch... which turns on with the parking lights and works off of the cabin light dimmer switch.
overall, I like it alot!
04-10-2007, 06:35 PM
#8
Registered
iTrader: (1)
Join Date: May 2003
Location: PA
Posts: 3,754
Likes: 0
Received 0 Likes
on
0 Posts
I still haven't been able to find the voltage spec for the chip that blew up... BUT
- the circuit board is not available as a part
- the above doesn't matter as I tossed the board and went to Radio Shack and bought a variety of red LED lights for like 99 cents a piece. I was able to squeeze a 5mm 12V red LED in the position where the OEM center LED use to peak through the white plastic chassis piece. This provides about 85-90% of the unitformity and light of the 3 OEM LED's (for $1 and an hour of time). I'm going to give this some time and if it bothers me, I found tiny 3mm 2volt LEDs i can fit in the now 2 vacant holes of the white chassis piece to increase the light uniformity (just requires a simple resistor to keep from blowing them up)
... so in the end, your shift **** blowing up isn't that big of a deal
06-28-2012, 02:10 PM
#11

Pretty hard, i believe the 12356R button on the stock **** is opaque, and beyond that you don't have a channel running through the body of the shifter so you would have to drill one out between the leather and the metal because you can't just have it go down the hole where you screw it on or the wire will get all chewed up....
It isn't too bad, I have the DIY here, still waiting on the LED and then I will be able to finish, but it is wired and reupholstered and ready to go just need the LED and it is on order now.
https://www.rx8club.com/showthread.p...=1#post4295856
08-04-2012, 11:11 AM
#12
ProfDean

Join Date: May 2006
Location: Horseheads, NY
Posts: 47
Likes: 0
Received 0 Likes
on
0 Posts
Is your offer still good?
There are two models of the JDM illuminated ****, the original used brittle zinc wires, the newer one uses copper (this one usually only breaks because the service tech is a moron).
If you lack mechanical skill, send your shift **** to this address:
Polak Graphics
321 Glenn Ave.
Lawrenceville, NJ 08648
I will fix it for you for $40 shipped.
If your wires break close to the base of the shifter, you probably won't be able so solder them so this is what you do:
Step 1:
Take a dust buster can turn it upside down to make the glue less effective
OR
Take a hair dryer and heat the top of the **** it make the glue less effective
Tap against a desk and use your finger nail and it should come right out, with a little persuasion. NOTE duck tape over the loosened circle also works well.
Step 2:
remove the light diffuser screen, blow dryer and you fingernail work well here. If you want to "dim" the amount of light given off by these shift ***** add an addtional plastic piece of "polycarbonate" your local "fastsigns" will have it.
Step 3:
Unscrew the philps head, (in the original model this is a hex screw), this will detach the silver chrome looking piece.
Step 4:
Tug on the microchip and pull up the broken lines.
If you lack mechanical skill, send your shift **** to this address:
Polak Graphics
321 Glenn Ave.
Lawrenceville, NJ 08648
I will fix it for you for $40 shipped.
If your wires break close to the base of the shifter, you probably won't be able so solder them so this is what you do:
Step 1:
Take a dust buster can turn it upside down to make the glue less effective
OR
Take a hair dryer and heat the top of the **** it make the glue less effective
Tap against a desk and use your finger nail and it should come right out, with a little persuasion. NOTE duck tape over the loosened circle also works well.
Step 2:
remove the light diffuser screen, blow dryer and you fingernail work well here. If you want to "dim" the amount of light given off by these shift ***** add an addtional plastic piece of "polycarbonate" your local "fastsigns" will have it.
Step 3:
Unscrew the philps head, (in the original model this is a hex screw), this will detach the silver chrome looking piece.
Step 4:
Tug on the microchip and pull up the broken lines.
 02-28-2020, 07:10 AM
#14

Super bump!
I bought one of these on the cheap that has had its harness cut just below the ****.
Does anyone know the part number for the harness? Or have a photo of it and its connector?
I was going to make my own and then realized without the connector info I may not be able to.
I bought one of these on the cheap that has had its harness cut just below the ****.
Does anyone know the part number for the harness? Or have a photo of it and its connector?
I was going to make my own and then realized without the connector info I may not be able to.
03-04-2020, 01:52 AM
#15

Speedanimal, I was in the same boat, picked up a practically new one for $40 and the harness was cut off... I couldn't find a part number or anything useful at the time so I simply extended the wires and spliced them directly to the cigarette lighter light. not as clean and plug-and-play as I want it to be, but it works great.
03-04-2020, 06:10 AM
#16
Speedanimal, I was in the same boat, picked up a practically new one for $40 and the harness was cut off... I couldn't find a part number or anything useful at the time so I simply extended the wires and spliced them directly to the cigarette lighter light. not as clean and plug-and-play as I want it to be, but it works great.
In your wiring did you include an inline fuse for the ****? I was debating running a super small one in the case the wires get messed up.
03-05-2020, 06:38 PM
#17
Hey! Thank you for the info! Yeah, I think that will be my best bet. I found the P/N for the full kit but just the harness is not listed it seems. Nor do I expect to find one.
In your wiring did you include an inline fuse for the ****? I was debating running a super small one in the case the wires get messed up.
In your wiring did you include an inline fuse for the ****? I was debating running a super small one in the case the wires get messed up.
I also thought about putting a resistor inline in case the illumination was too bright for my liking, however I found that I was fine without it. Have had it connected like this for 2 years now and no issues.
Last notes - be very careful when you screw the new shift **** on and don't over-tighten it, especially with the wire extension. It's easy to get the wire trapped/stuck in that area and it will rip off if you keep screwing and you might not even feel it. Screw on the shift **** first, and connect it afterwards. Remember that you'll have to do the reverse if you ever need to take it off. If you want, you can add a simple inline connector so it's a bit more "plug-and-play" if you see yourself taking anything around there apart.

Thread
Thread Starter
Forum
Replies
Last Post
Danield97
Series I Trouble Shooting
1
09-30-2015 05:59 PM