


DIY In-car camera mount using the car seat Latch mounts


Thread Starter
A Torque-Free Zone
Joined: Oct 2004
Posts: 859
Likes: 0
From: Virginia Beach
DIY In-car camera mount using the car seat Latch mounts
I decided to make a camera mount for the car using the Latch mounting points on the rear shelf. Since they are used to secure car seats, I figured they would be a solid mounting point for a camera. A couple points: first, I can’t seem to drill straight, so my bolts are in at goofy angles, second, the bolts are way bigger than you need for this thing.
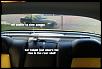
actually, I realized that the really off position bolt didn't get put in all the way when I reassembled if for pictures, so it isn't as bad as it looks. But it is bad.
The parts are from Home Depot except the last two:
36” square aluminum tube – cut to 31” (30” would be OK)
1-½ inch wide aluminum bar – need three 5” sections (3rd section depends on your camera)
Six 1-½” bolts with nuts or wingnuts
One screw mount to fit the bottom of a camera, like the ones on a tripod (or a 1/4-20 bolt, if you don't have a parts tripod)
Thin, rubbery padding like from shelf liner of tool box liner
First, lift up the Latch mount covers behind the rear seats. When they are open, pull almost straight up on them and they pop out. It’s just easier to work with them out of the way.
Unbolt the Latch mounts (12mm) and remove them.
Cut 2 pieces of the 1-½” aluminum bar to 5” in length. I bent them in the middle into an “L” shape using a bench vise and rubber mallet.
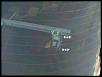
Place the “L” shaped bracket, upright part against the front of the Latch recess and mark the drill point for the Latch mount bolt. If you keep it centered, you can use the latch mount on top of the “L” bracket with the little side tab right at the edge to keep the bracket from rotating. You don’t need to reuse the Latch bracket, though.
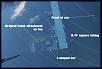
Cut the square tubing to about 30”. I did mine to 31” and have a fair amount of overhang. This will bolt to the top of the “L” brackets, so match them up and drill for the bolts. I used 2 bolts on each side to minimize any rotation, but that may be overkill, since the base is solid. If it's at the top of the "L" bracket, it should clear the rise at the center of the back shelf.
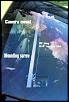
For the camera mounting plate, I used another 5” section of the aluminum bar. How much length you need depends on the size of the camera and location of the camera’s mounting point. I bent the end of the bar at 90 degrees to wrap around the back of the ¾” square tube. I put 2 bolts horizontally through the square tube and upright of the camera mounting plate. Because the aluminum is slightly curved at its bend, but the tube is truly square, they don’t meet flush. I had to put a washer on the bolt between the tube and the plate to keep the corner of the tube off the rounded corner of the mounting plate.
Once it’s assembled, mark the mounting plate for the screw to hold the camera. There are usually 2 holes on the bottom of the camera, but only one is threaded! They also are not usually centered, so don't assume you know the position before you drill. If the camera mounting plate is under the square bar like mine, make sure the camera will clear the bolts as well. I didn’t the first time. The demo video has the mounting plate on top of the square bar, but I relocated it to an underslung position hoping there is less rear view mirror on the screen. An even higher mount might be better for autocross. I'll see next month.
If the camera is mounted right to the aluminum plate, it will spin. I placed the rubbery padding under the camera then tightened it down and it doesn’t budge.
Lastly a link to a demo video. It's also a good example of why I wanted to do this. I got the car out of shape on the track, but remembered what happened incorrectly, so the video helped me to clarify the event.
[EMBED]2o0ozOOAFWQ[/EMBED]
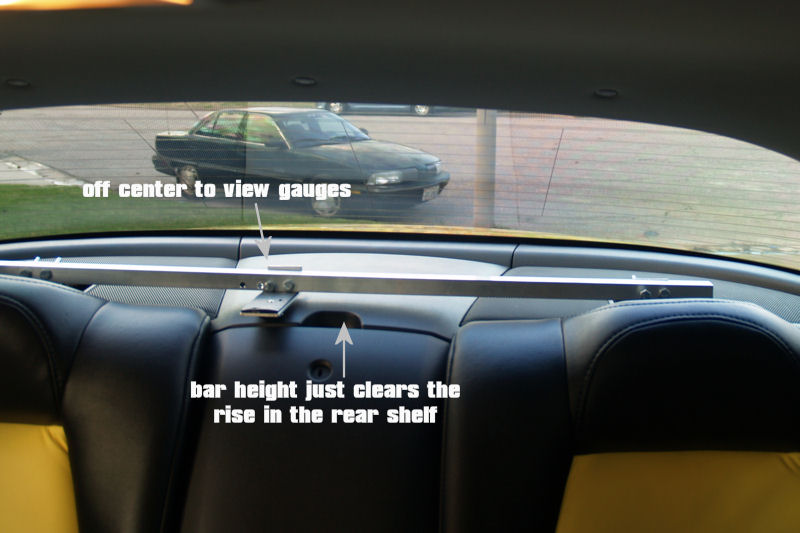
actually, I realized that the really off position bolt didn't get put in all the way when I reassembled if for pictures, so it isn't as bad as it looks. But it is bad.
The parts are from Home Depot except the last two:
36” square aluminum tube – cut to 31” (30” would be OK)
1-½ inch wide aluminum bar – need three 5” sections (3rd section depends on your camera)
Six 1-½” bolts with nuts or wingnuts
One screw mount to fit the bottom of a camera, like the ones on a tripod (or a 1/4-20 bolt, if you don't have a parts tripod)
Thin, rubbery padding like from shelf liner of tool box liner
First, lift up the Latch mount covers behind the rear seats. When they are open, pull almost straight up on them and they pop out. It’s just easier to work with them out of the way.
Unbolt the Latch mounts (12mm) and remove them.
Cut 2 pieces of the 1-½” aluminum bar to 5” in length. I bent them in the middle into an “L” shape using a bench vise and rubber mallet.
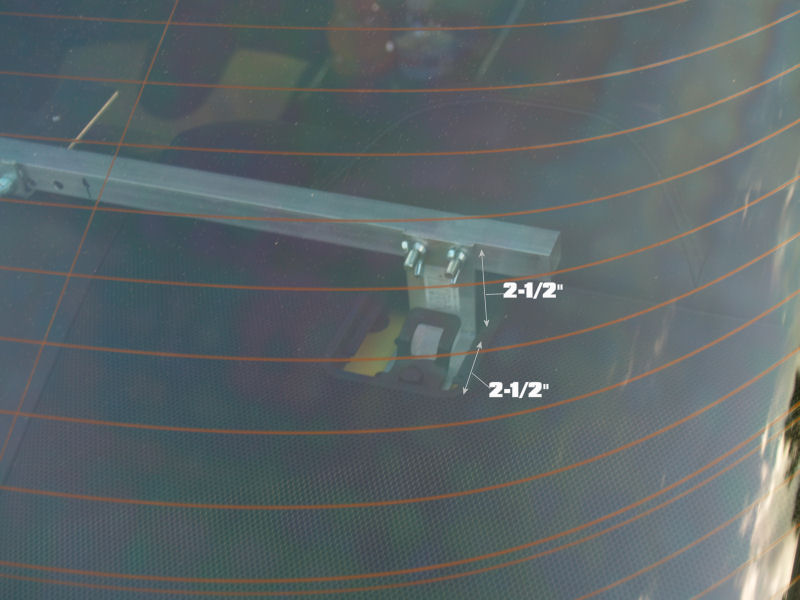
Place the “L” shaped bracket, upright part against the front of the Latch recess and mark the drill point for the Latch mount bolt. If you keep it centered, you can use the latch mount on top of the “L” bracket with the little side tab right at the edge to keep the bracket from rotating. You don’t need to reuse the Latch bracket, though.
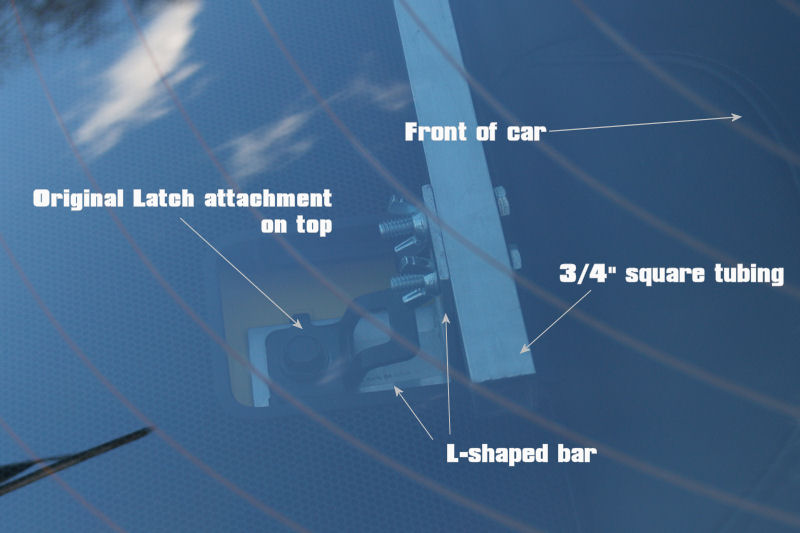
Cut the square tubing to about 30”. I did mine to 31” and have a fair amount of overhang. This will bolt to the top of the “L” brackets, so match them up and drill for the bolts. I used 2 bolts on each side to minimize any rotation, but that may be overkill, since the base is solid. If it's at the top of the "L" bracket, it should clear the rise at the center of the back shelf.
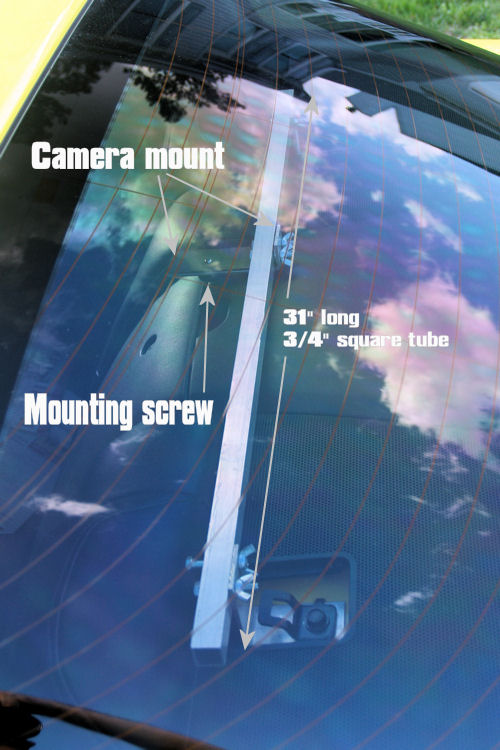
For the camera mounting plate, I used another 5” section of the aluminum bar. How much length you need depends on the size of the camera and location of the camera’s mounting point. I bent the end of the bar at 90 degrees to wrap around the back of the ¾” square tube. I put 2 bolts horizontally through the square tube and upright of the camera mounting plate. Because the aluminum is slightly curved at its bend, but the tube is truly square, they don’t meet flush. I had to put a washer on the bolt between the tube and the plate to keep the corner of the tube off the rounded corner of the mounting plate.

Once it’s assembled, mark the mounting plate for the screw to hold the camera. There are usually 2 holes on the bottom of the camera, but only one is threaded! They also are not usually centered, so don't assume you know the position before you drill. If the camera mounting plate is under the square bar like mine, make sure the camera will clear the bolts as well. I didn’t the first time. The demo video has the mounting plate on top of the square bar, but I relocated it to an underslung position hoping there is less rear view mirror on the screen. An even higher mount might be better for autocross. I'll see next month.
If the camera is mounted right to the aluminum plate, it will spin. I placed the rubbery padding under the camera then tightened it down and it doesn’t budge.
Lastly a link to a demo video. It's also a good example of why I wanted to do this. I got the car out of shape on the track, but remembered what happened incorrectly, so the video helped me to clarify the event.
[EMBED]2o0ozOOAFWQ[/EMBED]
Last edited by G-ReX; Apr 16, 2009 at 09:49 PM.


Thread Starter
A Torque-Free Zone
Joined: Oct 2004
Posts: 859
Likes: 0
From: Virginia Beach


Rotary Runner Redux
iTrader: (3)
Joined: Aug 2008
Posts: 307
Likes: 1
From: DelMarVa by the "Bridge"
Very nicely done! My VIR instructor's RX-8 had a similar mount, I forgot to ask him about it.
How often do you make it to VIR? February was my first HPDE there, what a place to start track days.
How often do you make it to VIR? February was my first HPDE there, what a place to start track days.
Thread Starter
A Torque-Free Zone
Joined: Oct 2004
Posts: 859
Likes: 0
From: Virginia Beach
Thanks! It's my second time at VIR for DE. I've been out for a couple Grand Am races just to watch. I'm Planning on another DE with MazdaDrivers in June.

Thread Starter
A Torque-Free Zone
Joined: Oct 2004
Posts: 859
Likes: 0
From: Virginia Beach

Rotary Runner Redux
iTrader: (3)
Joined: Aug 2008
Posts: 307
Likes: 1
From: DelMarVa by the "Bridge"
My take on the G-Rex original:
Photo 1 shows the mount plate w/ drawer lining mat and right-side attach point. The mat is held on with double-sided tape at each corner, makes it easy to swap out if it gets damaged in any way. The mat helps damp out vibrations and keeps the camera from moving.
Photo 2, the bolt shows position of the mount point for peeking at the driver's instruments, while the wing nut shows the "centerline" camera mount point. I was in a hurry to make it work for VIR, so I grabbed a bag of 1" long 1/4-24 screws and a couple of wing nuts. Just run the screw into the camera 'til it bottoms (lightly!), then use the wing nut to snug it to the mount.
Photo 3 shows how I messed up the length of the "L" bottom , and just bent the assembled mount back against the car seat latch until the mount bar was leveled horizontally. The entire mount was pop-riveted together for a cleaner look, and to prevent anything working loose.
Last pic shows the fist-sized Toshiba Camileo H30 I use for inside car shooting, mounted in the centerline position. You can see the default image in the viewfinder.
Photo 1 shows the mount plate w/ drawer lining mat and right-side attach point. The mat is held on with double-sided tape at each corner, makes it easy to swap out if it gets damaged in any way. The mat helps damp out vibrations and keeps the camera from moving.
Photo 2, the bolt shows position of the mount point for peeking at the driver's instruments, while the wing nut shows the "centerline" camera mount point. I was in a hurry to make it work for VIR, so I grabbed a bag of 1" long 1/4-24 screws and a couple of wing nuts. Just run the screw into the camera 'til it bottoms (lightly!), then use the wing nut to snug it to the mount.
Photo 3 shows how I messed up the length of the "L" bottom
, and just bent the assembled mount back against the car seat latch until the mount bar was leveled horizontally. The entire mount was pop-riveted together for a cleaner look, and to prevent anything working loose.Last pic shows the fist-sized Toshiba Camileo H30 I use for inside car shooting, mounted in the centerline position. You can see the default image in the viewfinder.
Thread Starter
A Torque-Free Zone
Joined: Oct 2004
Posts: 859
Likes: 0
From: Virginia Beach
Wow, that is much cleaner looking than mine. I need to get me a rivet gun! The mounting plate you used looks like a great idea. I just got back from VIR and I would get my mount shaking as I got past 100 MPH. I still may try to undermount it to get less mirror in the view.

Thread
Thread Starter
Forum
Replies
Last Post
akagc
RX-8's For Sale/Wanted
7
Aug 11, 2015 07:07 PM
MolecularConcept
New Member Forum
15
Aug 5, 2015 04:43 PM
Jazzmeson
RX-8 Parts For Sale/Wanted
7
Jul 31, 2015 01:47 AM


