
DIY: Better Looking OEM Rear Diffuser


Momentum Keeps Me Going
Joined: Sep 2002
Posts: 5,036
Likes: 5
From: Colorado
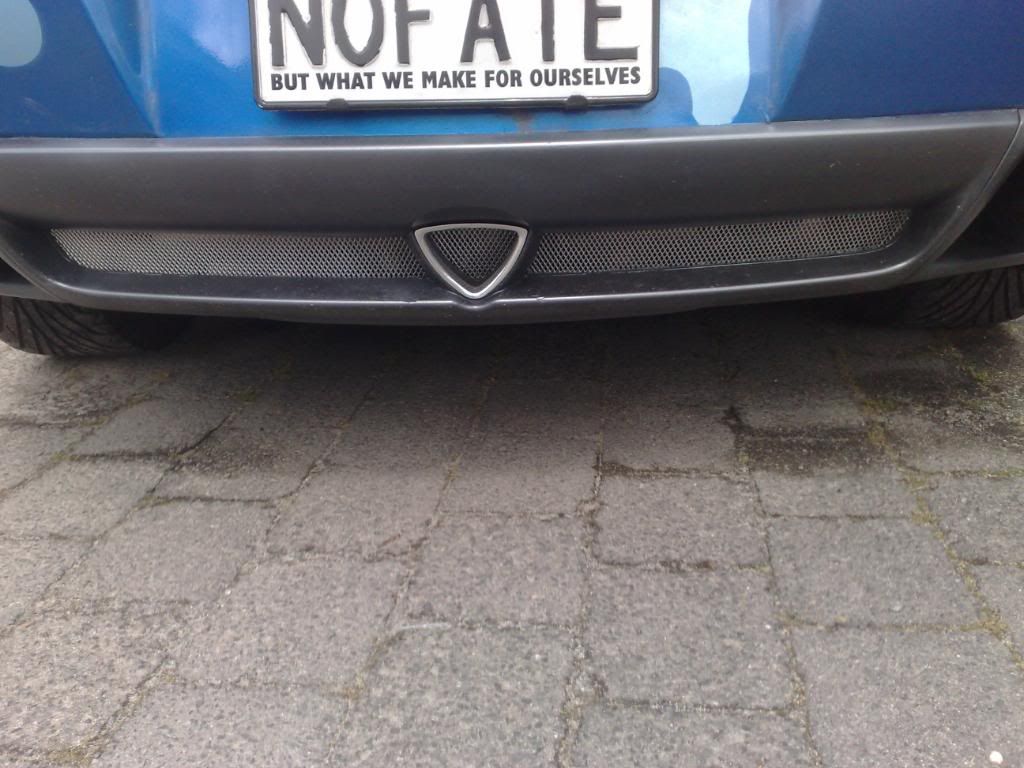
I used (from the local craft store) 'Plaid' brand 'Paint Plastic Primer' (clear) and 'Paint Plastic Silver', followed by 'Paint Plastic Sealer' (clear). Application took about 10 min per coat using a 1" foam brush. Not really hard at all.
Total cost $2 + $2 + $2 + $.50 (brush).
The primer is liquid and dries invisible, so just brush it on. The (aluminum) paint is a gel like substance. It doesn't go anywhere, esp. when on the brush I used (see pic). The clear coat is clear too.
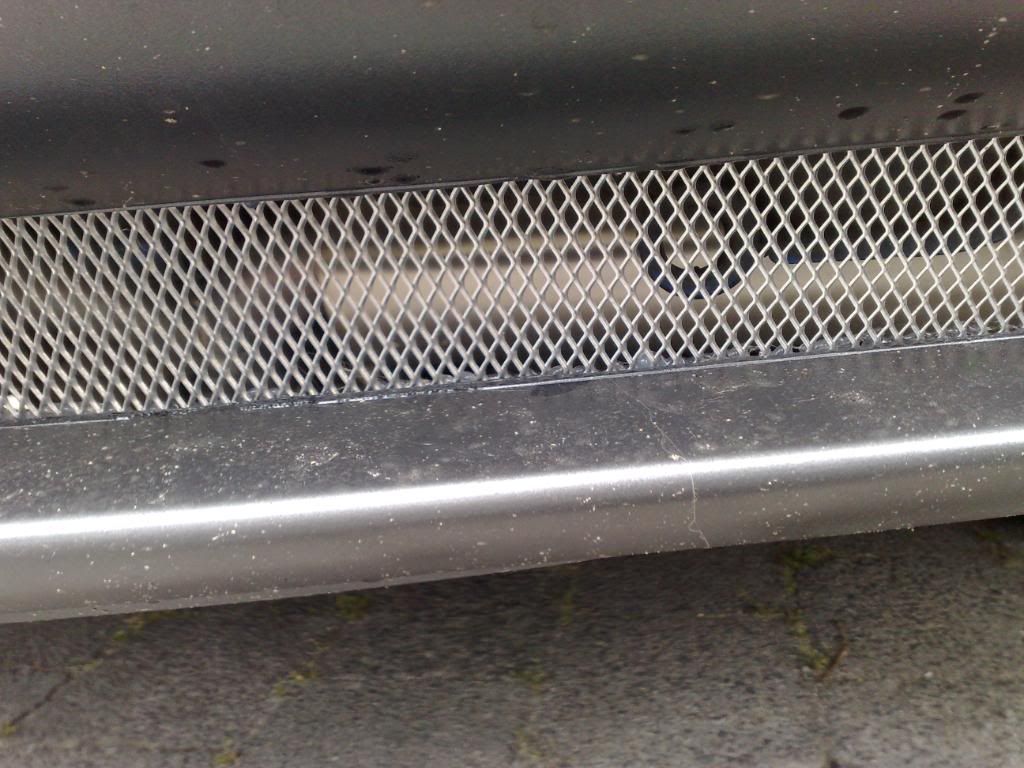
The plastic grillwork is raised off the background plastic so the wide brush, if you're just reasonably careful, rides atop the ridges and doesn't get in the valleys. I used the little brush for a couple places near the crest cause the wide brush was too tight there. Also as the paint is water based, I used the little brush wet to clean a couple spots by swirling it on the plastic and dissolving the paint. FYI first coat is not quite complete coverage, the brush leaves lines like a little rake sort of. 2nd coat can cover these nearly completely depending on how carefull you are.
It drys in 30 minutes, and 'cures' in 48-72 hrs/ coat. It is billed as water resistant after curing, but not water submersible. The primer helps adhesion on the plastic, the clear coat helps duribility and adds more water resistance. 4 yrs later, stil perfect!
Total cost $2 + $2 + $2 + $.50 (brush).
The primer is liquid and dries invisible, so just brush it on. The (aluminum) paint is a gel like substance. It doesn't go anywhere, esp. when on the brush I used (see pic). The clear coat is clear too.
The plastic grillwork is raised off the background plastic so the wide brush, if you're just reasonably careful, rides atop the ridges and doesn't get in the valleys. I used the little brush for a couple places near the crest cause the wide brush was too tight there. Also as the paint is water based, I used the little brush wet to clean a couple spots by swirling it on the plastic and dissolving the paint. FYI first coat is not quite complete coverage, the brush leaves lines like a little rake sort of. 2nd coat can cover these nearly completely depending on how carefull you are.
It drys in 30 minutes, and 'cures' in 48-72 hrs/ coat. It is billed as water resistant after curing, but not water submersible. The primer helps adhesion on the plastic, the clear coat helps duribility and adds more water resistance. 4 yrs later, stil perfect!


Registered
Joined: Aug 2006
Posts: 872
Likes: 0
From: San Antonio --> San Diego


always filling [the c]up
Joined: Apr 2006
Posts: 1,267
Likes: 0
From: Alice, Texas
Registered
Joined: Aug 2006
Posts: 872
Likes: 0
From: San Antonio --> San Diego
Back in the day on my Hondas.. when I would put a body kit on or something I'd first cut up a few paperclips so they are just straight pins. Then on the back side of the bumper I'd put a few dabs of epoxy or even some bondo and stick the paperclips in them. After everything is dry, just cut the mesh to desired size, slip it over the paperclips and bend them down so the mesh doesn't slide off.
And there is no reason why I use paperclips, I use them cause there easy to bend and I work in an office.
Well I've never looked behind the bumper, so I don't really know what it looks like. But there are several different ways you can hold the mesh up.
Back in the day on my Hondas.. when I would put a body kit on or something I'd first cut up a few paperclips so they are just straight pins. Then on the back side of the bumper I'd put a few dabs of epoxy or even some bondo and stick the paperclips in them. After everything is dry, just cut the mesh to desired size, slip it over the paperclips and bend them down so the mesh doesn't slide off.
And there is no reason why I use paperclips, I use them cause there easy to bend and I work in an office.


Registered User
Joined: Oct 2008
Posts: 8
Likes: 0
Anyone just try some blue tape then a can of silver car spray paint from like kragen, bout 20 bucks but probably a better finishing result. If you're into it you can even do other colors to accent your paint job, gold, blue, red w.e

IRC Founder
Joined: May 2008
Posts: 842
Likes: 0
From: Jacksonville Beach, FL
+1, rubbing compound FTW!
Not gonna lie.... when i saw the first picture i thought "oh god, why did he sharpie his 8"... but it doesn't look half bad, think i'll use real paint like spin did tho.
Not gonna lie.... when i saw the first picture i thought "oh god, why did he sharpie his 8"... but it doesn't look half bad, think i'll use real paint like spin did tho.
Last edited by risky business; Oct 22, 2008 at 06:23 PM.