
DIY 09+ Series 2 Exterior LED light install guide(possibly older)


Thread Starter
Registered User
Joined: Jul 2009
Posts: 131
Likes: 0
DIY 09+ Series 2 Exterior LED light install guide(possibly older)
Alright, I have been talking about doing this for a while now and just now had the time to accually write it up. First off, I wasn't able to take pics of taking the plastic pieces off because I'm stupid and forgot. Secondly, I'm not responsible for anything that comes from this if you burn up your car or anything  . With that out of the way lets get to the guide.
Bulb List for exterior bulbs on the Series II RX8(if you are using this for a series 1 then there is a sticky in the Exterior Apperance portion of this site):
Headlights:
Replacement Bulbs:
I used all V-LED Bulbs and most of these can be replaced with similar(same bulb #) on their site.
Front Signals: 1157 Mine
Rear Signals: 7443 Mine (note don't get SACK bulbs)
Rear Backup: 921 Mine
3rd Brake Light: 7440 (Mine is coming soon, will update when I get it )
)
Rear Side Markers: 194 (Mine are coming soon, will update when I get some)
License Plate Light: 194 (Mine is coming soon, will update when I get it)
Other Parts:
Resistors for Turn Signals:
These are not required but fix the problem of having the rapid blinking you normally get with changing to LEDs. This is due to the LED Bulbs not putting enough load on the wire and the car things one of the bulbs is burned out. Some cars require you to put in resistors for both hazards and turn signals but our cars don't care about the hazards and they will work w/o resistors fine. There are 2 resistors you can get, 3 Ohm 50W for changing all 4 turns to LED and 6 Ohm 50W for doing just 2 Signals to LED. These are ordered in pairs, one for each side.
6 Ohm 50W (2 Bulb Fix): Link
3 Ohm 50W (4 Bulb Fix): Link (These are what I use)
Short #6 bolts, lockwashers and nuts(I got the smallest or 2nd to smallest ones at Home Depot, only need 4 of these.
Resistor Plates:
Link
These are not required, but are used in my install and help a ton in making the install alot cleaner and imo worth every penny of the $5 it'll cost you(you'll see)
Tools Needed:
(I think this is it)
Phillips head screw driver
7-10mm socket and wrench(can't remember the exact #, just used on one screw)
Electrical Tape
Either finger nails or a small tool to pop up the tabs on the push tabs.
Now to get rolling. :D
. With that out of the way lets get to the guide.Bulb List for exterior bulbs on the Series II RX8(if you are using this for a series 1 then there is a sticky in the Exterior Apperance portion of this site):
Headlights:
Low Beam:
HID - D2S 35W
Halogen - H7
Halogen - H7
High Beam:
Front Turn Signals/Parking Lights:Halogen - H9
1157 (B1157MA)
Fog Lights:9005 (HB4)
Rear Turn Signals:7440 (WY21W)
Brake/Tail Lights:LED(Built into the housing)
3rd Break Light:7440 (WY21W)
Reverse Lights:921 (W16W)
Liscense Plate Light:194 (W5W)(I believe its 194)
Rear Side Markers:194 (W5W)(I believe its 194)
Alright the only other exterior light on the series II are the sidemarkers. These are full units and can not be changed with out breaking into them(I'm not sure if even this will work) or getting a replacement from the dealer.Replacement Bulbs:
I used all V-LED Bulbs and most of these can be replaced with similar(same bulb #) on their site.
Front Signals: 1157 Mine
Rear Signals: 7443 Mine (note don't get SACK bulbs)
Rear Backup: 921 Mine
3rd Brake Light: 7440 (Mine is coming soon, will update when I get it
)Rear Side Markers: 194 (Mine are coming soon, will update when I get some
)License Plate Light: 194 (Mine is coming soon, will update when I get it
)Other Parts:
Resistors for Turn Signals:
These are not required but fix the problem of having the rapid blinking you normally get with changing to LEDs. This is due to the LED Bulbs not putting enough load on the wire and the car things one of the bulbs is burned out. Some cars require you to put in resistors for both hazards and turn signals but our cars don't care about the hazards and they will work w/o resistors fine. There are 2 resistors you can get, 3 Ohm 50W for changing all 4 turns to LED and 6 Ohm 50W for doing just 2 Signals to LED. These are ordered in pairs, one for each side.
6 Ohm 50W (2 Bulb Fix): Link
3 Ohm 50W (4 Bulb Fix): Link (These are what I use)
Short #6 bolts, lockwashers and nuts(I got the smallest or 2nd to smallest ones at Home Depot, only need 4 of these.
Resistor Plates:
Link
These are not required, but are used in my install and help a ton in making the install alot cleaner and imo worth every penny of the $5 it'll cost you(you'll see)
Tools Needed:
(I think this is it)
Phillips head screw driver
7-10mm socket and wrench(can't remember the exact #, just used on one screw)
Electrical Tape
Either finger nails or a small tool to pop up the tabs on the push tabs.
Now to get rolling. :D
Last edited by Wheeldog; Sep 19, 2009 at 12:43 AM.
Thread Starter
Registered User
Joined: Jul 2009
Posts: 131
Likes: 0
Some Pictures of the parts before installation.
Front Parking Lights/Turn Signals:

Rear Turn Signals:

Rear Backup Bulbs:

Resistors(3 Ohm but I think 6 Ohm look the same):

Plates and the wire clips that come with the resistors:

Front Parking Lights/Turn Signals:
Rear Turn Signals:
Rear Backup Bulbs:
Resistors(3 Ohm but I think 6 Ohm look the same):
Plates and the wire clips that come with the resistors:
Thread Starter
Registered User
Joined: Jul 2009
Posts: 131
Likes: 0
Alright, here is where I appologize and realize I didn't take pictures of accually installing the physical bulbs  I can walk you though the steps and you'll be able to see the rear Bulb housing but the front I'm leaving you hanging.
Front:
In order to access the back of the Front Light housing you can take off the panel in front of the wheels. First you need to turn the wheels towards the side you are working on, so left if you are working on the drivers side and right on the passenger. I suppose you could remove the wheels too, but where's the fun in that. Next if you look at the panel in the front of the wheel you'll see 5-6 screw pops (these are the little plastic pops that you have to turn about half a revolution to be able to pop them out. Remove these all then there is one 7-10mm screw along the edge by of the wheel well that when removes makes the install alot easier. If you look in your manual it'll show you how to change these but the pics are kinda crappy. After you get this panel pulled back, you don't have to remove it completely, reach your hand up to the now exposed light housing. When up there the parking light is to the outside of the big round headlight, grab the clip on the back and turn it counter-clockwise(I think). It might be a little tough to turn this and you will most likely squish your hand but it'll turn about a quarter turn then you'll be able to pull the socket out and remove the stock bulb. Once this is removed install the new bulb the reverse way then put it back into the socket(I looked through the headlight to get my barings here) and turn it clockwise to lock it back in place(make sure to lock it in place or the bulb and socket will rattle around. Put the panel back and all the pops/screw and you are done with the front.
Rear:
These are substantially easier. In the trunk there is a plastic piece that holds the lugnut wrench thing. this is held on by 4 pop fasteners, one in each corner. Remove these then pull the panel out(it makes it alot easier with this removed. after this there is 1 more pop on each side of the trunk and a little plastic screw on each part of the carpet on the sides, remove these then pull the carpet back some, try and not use too much force or it will start to hold a bent shape. once these are pulled back you get easy access to the sockets for the bulbs, just turn the applicable one and remove the bulb, these are really tight and might need to have the wire worked out of the housing a little bit, just lightly pull it out some. The turn signals go in easily just make sure to lock the sockets back in place when done but the backup lights you'll need someone to help you, the bulbs only install in one way and might need to be turned around. After you get all these installed it's time to install the resistors. If you are fine with the bulbs blinking like mad then you can put all the parts back and go along with your new LED bulbs. If not lets keep going, either way you can see the rear light housing easily in the following pics.
I can walk you though the steps and you'll be able to see the rear Bulb housing but the front I'm leaving you hanging.Front:
In order to access the back of the Front Light housing you can take off the panel in front of the wheels. First you need to turn the wheels towards the side you are working on, so left if you are working on the drivers side and right on the passenger. I suppose you could remove the wheels too, but where's the fun in that
. Next if you look at the panel in the front of the wheel you'll see 5-6 screw pops (these are the little plastic pops that you have to turn about half a revolution to be able to pop them out. Remove these all then there is one 7-10mm screw along the edge by of the wheel well that when removes makes the install alot easier. If you look in your manual it'll show you how to change these but the pics are kinda crappy. After you get this panel pulled back, you don't have to remove it completely, reach your hand up to the now exposed light housing. When up there the parking light is to the outside of the big round headlight, grab the clip on the back and turn it counter-clockwise(I think). It might be a little tough to turn this and you will most likely squish your hand but it'll turn about a quarter turn then you'll be able to pull the socket out and remove the stock bulb. Once this is removed install the new bulb the reverse way then put it back into the socket(I looked through the headlight to get my barings here) and turn it clockwise to lock it back in place(make sure to lock it in place or the bulb and socket will rattle around. Put the panel back and all the pops/screw and you are done with the front.Rear:
These are substantially easier. In the trunk there is a plastic piece that holds the lugnut wrench thing. this is held on by 4 pop fasteners, one in each corner. Remove these then pull the panel out(it makes it alot easier with this removed. after this there is 1 more pop on each side of the trunk and a little plastic screw on each part of the carpet on the sides, remove these then pull the carpet back some, try and not use too much force or it will start to hold a bent shape. once these are pulled back you get easy access to the sockets for the bulbs, just turn the applicable one and remove the bulb, these are really tight and might need to have the wire worked out of the housing a little bit, just lightly pull it out some. The turn signals go in easily just make sure to lock the sockets back in place when done but the backup lights you'll need someone to help you, the bulbs only install in one way and might need to be turned around. After you get all these installed it's time to install the resistors. If you are fine with the bulbs blinking like mad then you can put all the parts back and go along with your new LED bulbs
. If not lets keep going, either way you can see the rear light housing easily in the following pics.
Thread Starter
Registered User
Joined: Jul 2009
Posts: 131
Likes: 0
Now for the part that scares most people that want to do the LED, I think I've found a pretty good way to do these and it SHOULD work on the older models just have to run the wires differantly. First off to mount the resistors on the mounting plates, below are pics. The placement on the plates for each side is important as you'll see when installing.
Driver's Side:


Passenger's Side:
 ?
?

Driver's Side:
Passenger's Side:
?

This one is the best that I follow:
https://www.rx8club.com/series-i-exterior-appearance-body-kits-27/new-leds-wow-bright-158590/page24/
https://www.rx8club.com/series-i-exterior-appearance-body-kits-27/new-leds-wow-bright-158590/page24/
Thread Starter
Registered User
Joined: Jul 2009
Posts: 131
Likes: 0
Now to install the Resistors. I found that the mounting plates will atatch perfectly to the back bolt that holds the trunk hinge to the Fender. If you look in the picture you'll see how the plate hugs the edge of the trunk and puts the resistor back a little ways and if you look there are a few inches of air behind the carpet to cool it off well and won't be melting any plastic or carpet and is alot easier to fit and splice then in the front of the car.
Driver Side Installed Pics:


Passenger Side:

Driver Side Installed Pics:
Passenger Side:

Thread Starter
Registered User
Joined: Jul 2009
Posts: 131
Likes: 0
Now that we have the Resistors installed it's time to wire them up, which is a lot easier then I thought it would be although there is one strange thing with the 09+ tail lights. Instead of tapping the acuall wire running to the bullb our wire tucks into the housing but there is a white plug right next to it with a green and a black wire. These are our turn signal wires. Unplug this plug then using the supplied wire splicer things install one of the resistor wires on the green wire and the other on the black wire. No cutting of the wires or anything like that, these go in parallel to the bulbs. I found after doing one side to stagger the splicers because after you get them installed you just tape up the wires and connectors with electrical tape then plug the socket back in and ding you're done, just put the carpet and the plastic piece back an enjoy your new LED lights.
Driver Side Wiring Pics:


Passenger Side Wiring Pics:

That should be all you need, any questions can be pmed to me or posted right here and I'll be happy to help you. I'll post other info on the rest of the bulbs when I get my own. And I'll post pics/videos of these in action after this post.
Driver Side Wiring Pics:
Passenger Side Wiring Pics:
That should be all you need, any questions can be pmed to me or posted right here and I'll be happy to help you. I'll post other info on the rest of the bulbs when I get my own. And I'll post pics/videos of these in action after this post.
Thread Starter
Registered User
Joined: Jul 2009
Posts: 131
Likes: 0
Daytime pics, and for the record my parking lights are the bi-color white and amber ones.
Front Far:

Front Close:

Rear Far:

Rear Close:

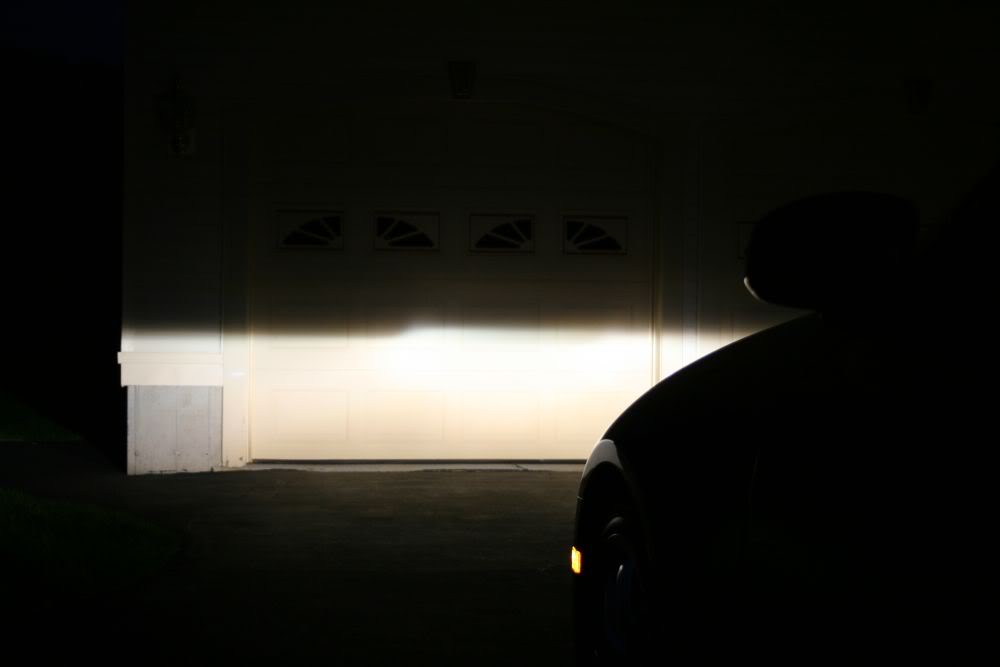
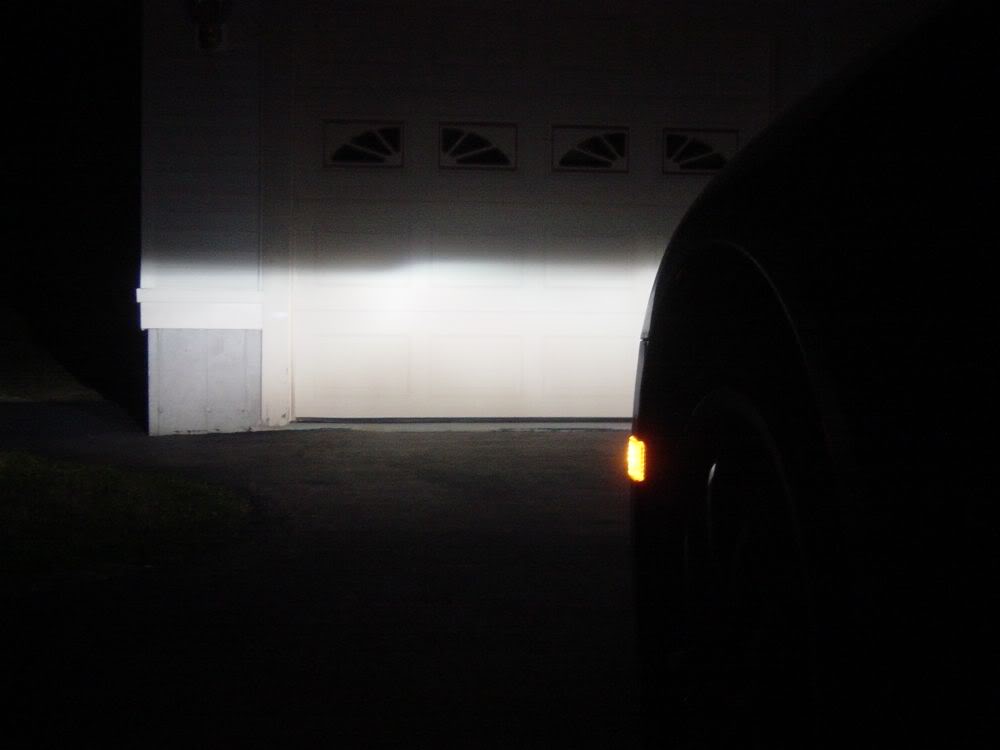
Night Pics:
Far Parking only:

Far Parking and HID Headlight:

Close Parking and HID Headlight:

Close Parking only:


Front Far:
Front Close:
Rear Far:
Rear Close:
Night Pics:
Far Parking only:
Far Parking and HID Headlight:
Close Parking and HID Headlight:
Close Parking only:
Thread Starter
Registered User
Joined: Jul 2009
Posts: 131
Likes: 0
And Finally Videos :D
Video 1: Just the Parking lights, I hit both signal individually.
[EMBED]<object width="425" height="344"><param name="movie" value="http://www.youtube.com/v/oisGMVkTYr0&hl=en&fs=1&"></param><param name="allowFullScreen" value="true"></param><param name="allowscriptaccess" value="always"></param><embed src="http://www.youtube.com/v/oisGMVkTYr0&hl=en&fs=1&" type="application/x-shockwave-flash" allowscriptaccess="always" allowfullscreen="true" width="425" height="344"></embed></object>[/EMBED]
Video 2: Parking lights and headlights. I only hit the flashers here, but they behave the same.(Pay no attention to the man behind the curtain..I mean car door)
[EMBED]<object width="425" height="344"><param name="movie" value="http://www.youtube.com/v/Ibes2xvoQuI&hl=en&fs=1&"></param><param name="allowFullScreen" value="true"></param><param name="allowscriptaccess" value="always"></param><embed src="http://www.youtube.com/v/Ibes2xvoQuI&hl=en&fs=1&" type="application/x-shockwave-flash" allowscriptaccess="always" allowfullscreen="true" width="425" height="344"></embed></object>[/EMBED]
Video 3: Close up of just the Parking light, no Headlight
[EMBED]<object width="425" height="344"><param name="movie" value="http://www.youtube.com/v/2ryVHOwUL1s&hl=en&fs=1&"></param><param name="allowFullScreen" value="true"></param><param name="allowscriptaccess" value="always"></param><embed src="http://www.youtube.com/v/2ryVHOwUL1s&hl=en&fs=1&" type="application/x-shockwave-flash" allowscriptaccess="always" allowfullscreen="true" width="425" height="344"></embed></object>[/EMBED]

Thread Starter
Registered User
Joined: Jul 2009
Posts: 131
Likes: 0
Well, I don't have a series I so I can't tell you exact differences, but I think the mounting location of the Resistor should be the same(not 100% sure tho). The front lights are going to be a little different since the series 1 have the little LED parking light towards the inside of the light and the separate turn signal on the side where the bumper and the fender meet. In the rear the lights are different as well because the series II have the LED brake lights but even with that you should be able to track down where the turn signals are to find which wire to splice, if you can't find the wire, look for a plug in my picture, but before putting anyting on the wires unplug the plugs to make sure it kills just the turn signals. Also most of the bulb #'s are going to be different but there is a post in the exterior appearance forum that lists all the bulb #'s.
Thread Starter
Registered User
Joined: Jul 2009
Posts: 131
Likes: 0
The stock bulbs are like 4700 I Think, I put in the 5k LEDs and you can tell they are crisper, I'll probably change out my HID bulbs for 5 or 6k when I do the fogs. You should be able to just do the bulbs themself just get the right ones and flip them out, I wouldn't want to do it via the wheel well like I did my signals, there just isn't much room there. You would want to drop the bumper to change them out I woujld think, the socket for the HIDs are alot bigger then the other ones. Hope that helps.

Choo Choo!
Joined: Jan 2009
Posts: 99
Likes: 1
From: Tampa, FL
The stock bulbs are like 4700 I Think, I put in the 5k LEDs and you can tell they are crisper, I'll probably change out my HID bulbs for 5 or 6k when I do the fogs. You should be able to just do the bulbs themself just get the right ones and flip them out, I wouldn't want to do it via the wheel well like I did my signals, there just isn't much room there. You would want to drop the bumper to change them out I woujld think, the socket for the HIDs are alot bigger then the other ones. Hope that helps.
This place by chance? http://www.intensehid.com/d2c.html
Last edited by FarSide792; Dec 21, 2009 at 11:56 PM.

Interesting.... What bulbs would I need to get such that I could just 'swap' them out?
This place by chance? http://www.intensehid.com/d2c.html
This place by chance? http://www.intensehid.com/d2c.html
Choo Choo!
Joined: Jan 2009
Posts: 99
Likes: 1
From: Tampa, FL
I've looked at lots of posts and forums and etc about the HID D2S bulbs, and those 6000K Philips seem to be popular.....I thought the 8000K bulbs might be a nice change, but I'm worried about them being too 'ricer' blue :-S I used to have a 2007 Acura TL before the '09 RX8 and I really loved the way the headlights looked in that car...the extremely WHITE light, and then the purple/blue tints that came off the lights when seen from 'off' angles....

Can some please verify what fog light bulb is needed for the 09 R3. I thought I needed H11's but when I removed one fog light it had 9006 on the back. I found this thread before looking in my owners manual and both say 9005....wtf.


Living is best Modified.
Joined: Jul 2007
Posts: 479
Likes: 1
From: South Carolina
9006 are the fog lights. I took the fog lamps assembly apart.
As I've already done a lot of research into replacement D2S headlight bulbs: If you're looking for a bulb to be the brightest for yourself on the road- go Philips "85122+".
There's three different versions of the 85122: "Normal", + and CM
85122
--More blueish
--4100K
--Look bright white in a projector such as TSX or S2K
--Will eventually turn blue as the bulb "dies"
85122+
--More whiteish
--4300K
--Almost have a yellowish tint in a projector such as TSX or S2K. Look like a "really bright halogen"
--Does not turn "blue" as the bulb dies
+ vs CM:
85122+: 4200k, 3400 lumens
85122cm: 4800k, 3100 lumens
85122+
85122+CM
[Soapbox]
Kelvin & Brightness
The Kelvin (K or degrees) of the bulbs do not equal to better when it comes to seeing at night. Getting a deep blue or purple bulb will mean you'll see less of the road.
The lumens are the brightness of the bulbs. The brightest (lumens) bulbs range from 4100k to 4300k. The higher the K the lower the Lumens.
--- More information can be found at:
1: http://www.hidplanet.com/forums/show...uths-and-Myths
What do HID kits in OEM headlamps look like to other drivers?
http://www.youtube.com/watch?v=_B5DhqPVRpg
Illegal HID kits explained: http://www.youtube.com/watch?v=yVuSSdZNsZw


Thread
Thread Starter
Forum
Replies
Last Post
BigMikeATL
RX-8's For Sale/Wanted
12
May 26, 2016 12:31 AM
akagc
RX-8's For Sale/Wanted
7
Aug 11, 2015 07:07 PM