SR20 Drift Build


Thread Starter
Project Addict
Joined: Nov 2011
Posts: 154
Likes: 0
From: Ireland
Hammer and chisel FTW
I bought it to break it  And boy will I have fun along the way...
Cheers fella, thanks alot...
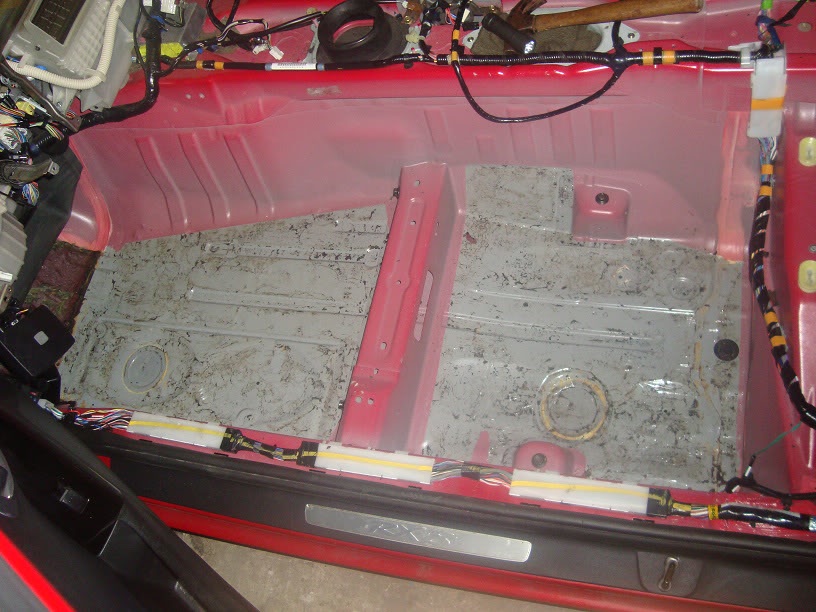
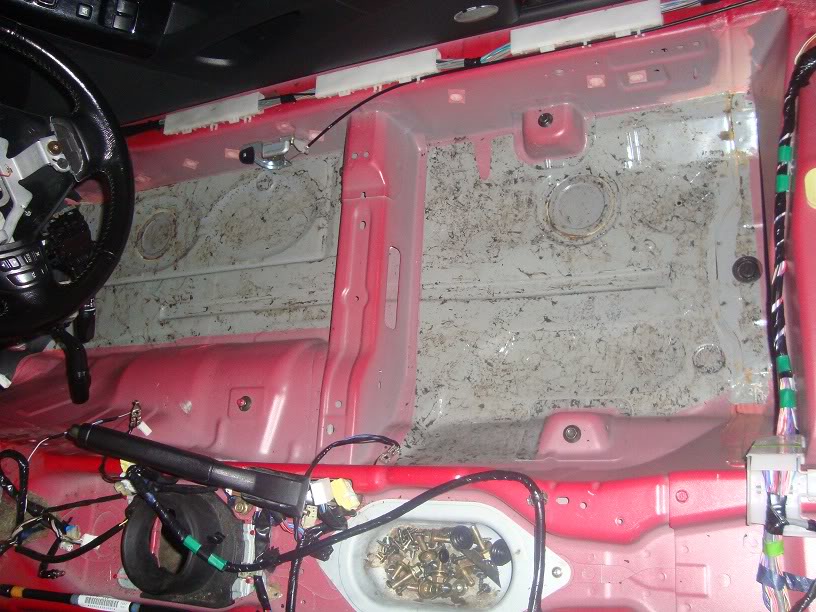
Been kept going with removing the sound proofing from the passenger foot well and drivers foot well :
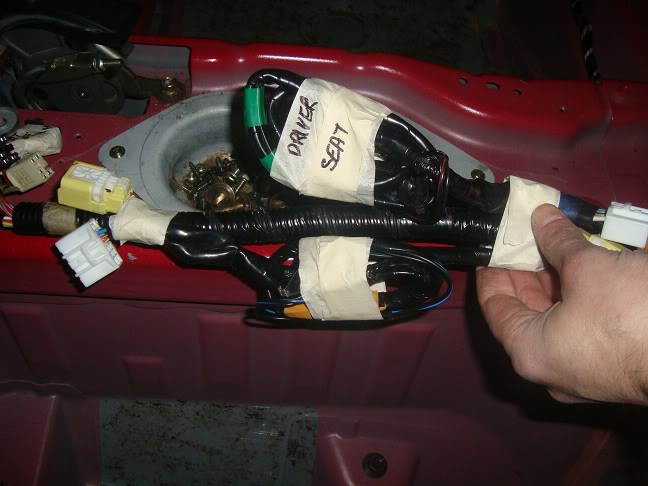
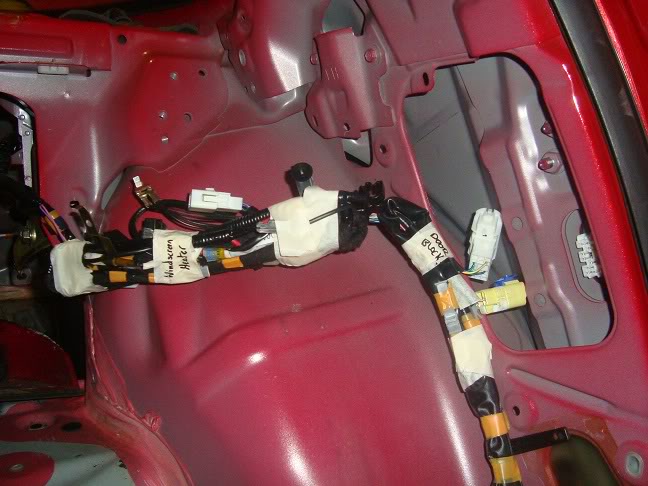
And now the dreaded wiring, this f'ing car is riddled with wires, labelling plugs
Can't wait to see this thing with a full wide arch kit dropped on its ring

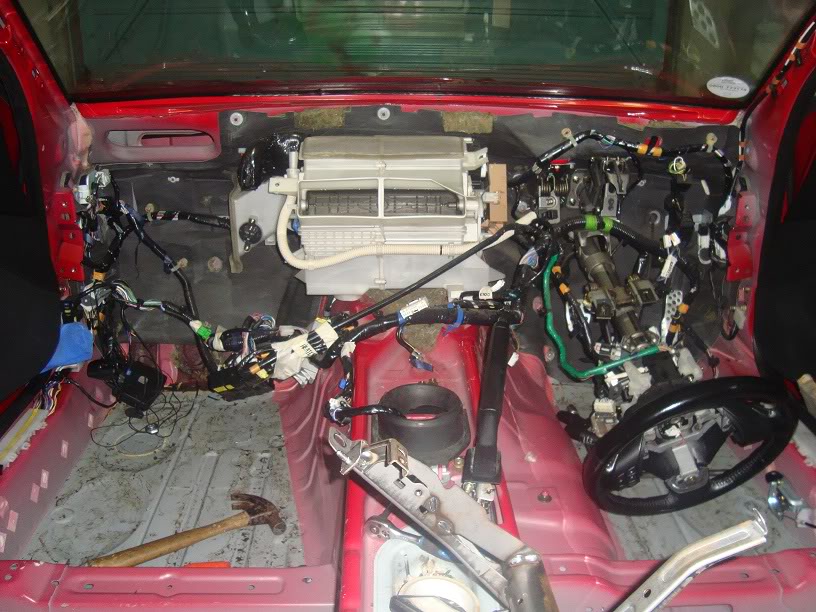
Then got stuck into ripping out the heater matrix and more sound proffing from the firewall, small bit more to chisel off the foot wells but almost complete, nearly ready to receive the cage
And boy will I have fun along the way...Cheers fella, thanks alot...
Been kept going with removing the sound proofing from the passenger foot well and drivers foot well :
And now the dreaded wiring, this f'ing car is riddled with wires, labelling plugs
Can't wait to see this thing with a full wide arch kit dropped on its ring
Then got stuck into ripping out the heater matrix and more sound proffing from the firewall, small bit more to chisel off the foot wells but almost complete, nearly ready to receive the cage
Thread Starter
Project Addict
Joined: Nov 2011
Posts: 154
Likes: 0
From: Ireland
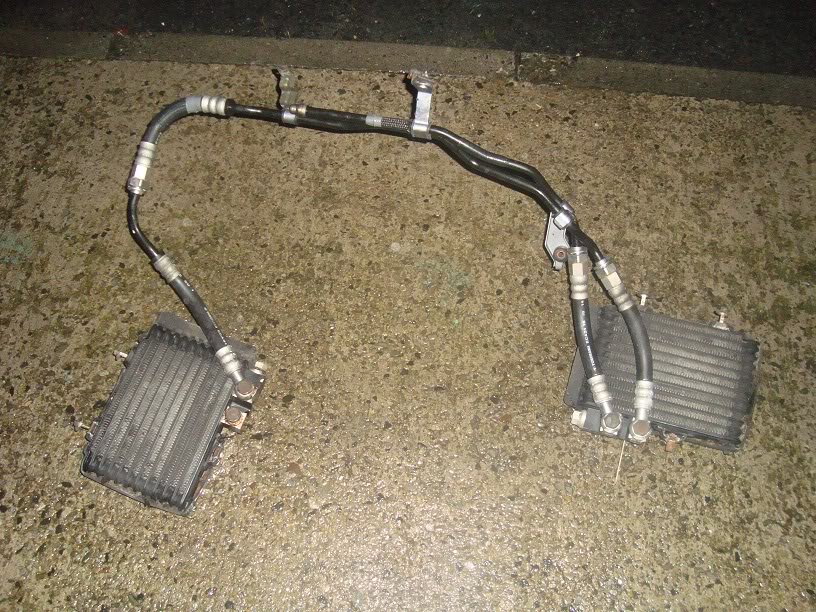
So here is todays quick update, there was a drip, drip, drip from the pipes leading to the oil coolers and it was getting on my nerves and the garage floor so they had to come out. Threw the car up on axle stands got ripping the splash gaurds from the front arches.
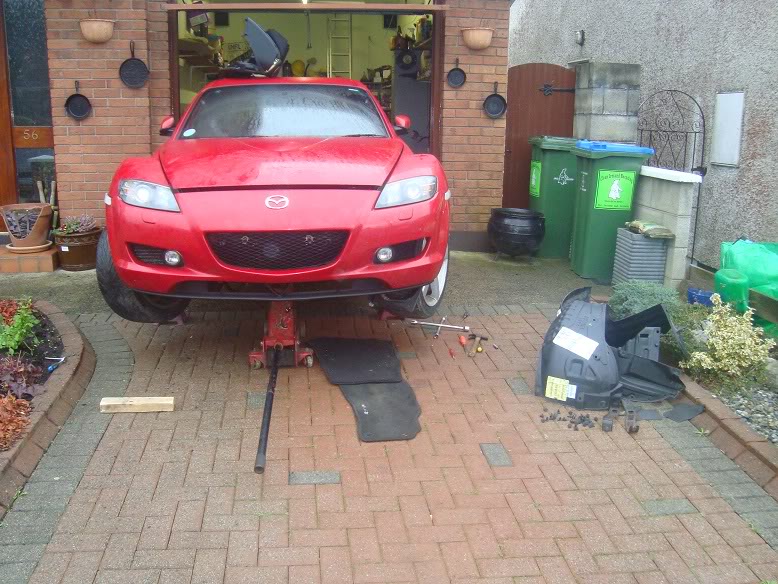
I don't think Mazda used enough bolts and clips")
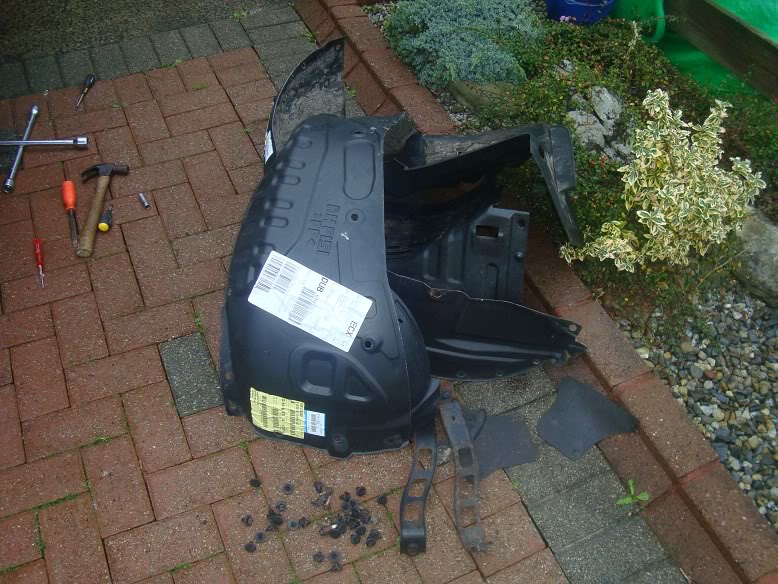
Unbolted the corners of the bumper which gave me access to the top bolts on the cooolers, 3 more bolts and the complete system dropped out, some set up to have direct from the factory.
Job as usual cut short by crap weather, so back to the garage until tomorrow, bless Ireland LoL
I don't think Mazda used enough bolts and clips
Unbolted the corners of the bumper which gave me access to the top bolts on the cooolers, 3 more bolts and the complete system dropped out, some set up to have direct from the factory.
Job as usual cut short by crap weather, so back to the garage until tomorrow, bless Ireland LoL

Thread Starter
Project Addict
Joined: Nov 2011
Posts: 154
Likes: 0
From: Ireland
No just crappy Irish rain as per usual
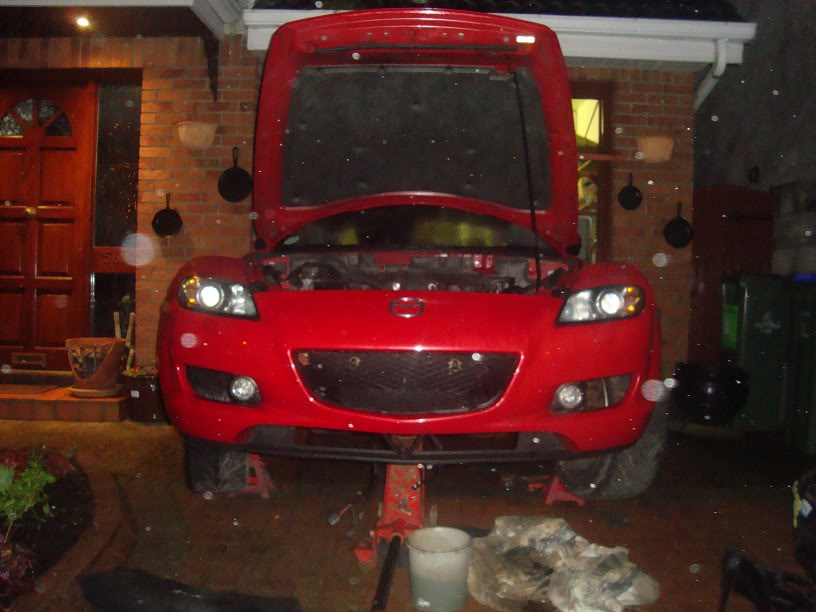
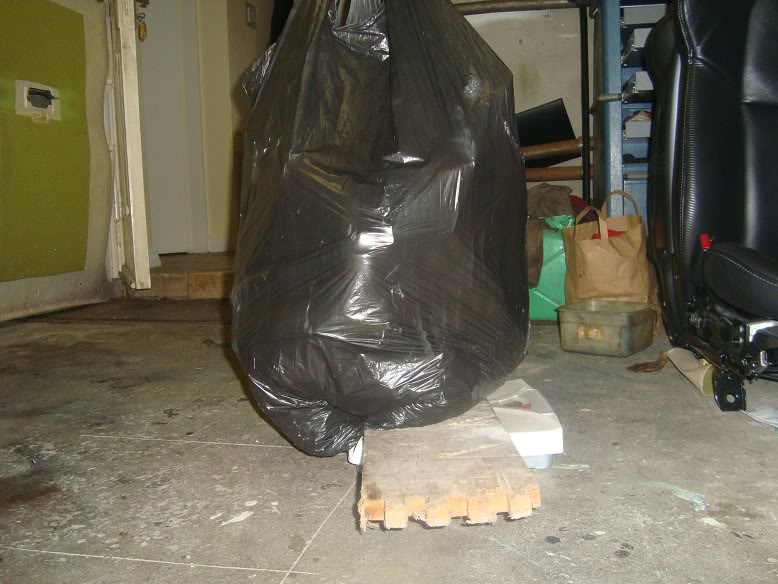
So haven't done a whole lot over the weekend barr finish off the jobs I started, it took a few days but 15kgs lighter now thankfully. Just have the last of the glue to remove from the drivers side foot well.
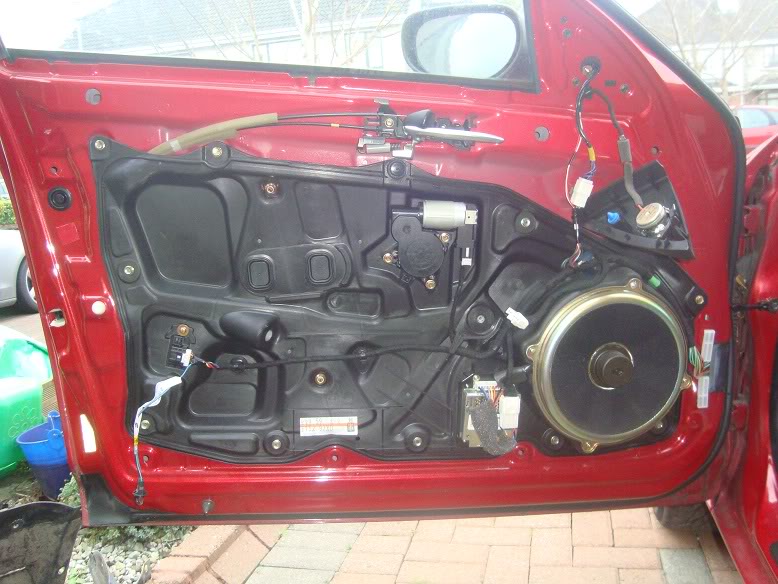
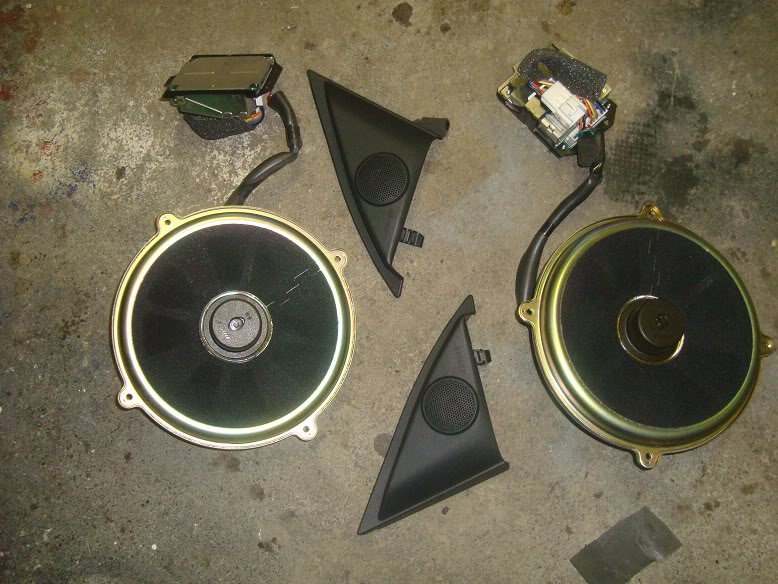
I had planned on stripping the front doors down like the rear but there is a second skin and the window harness and runner is bolted to it so the weight saving there is on hold until I get the fibreglass doors and lexan kit. All I could really remove were the speakers.
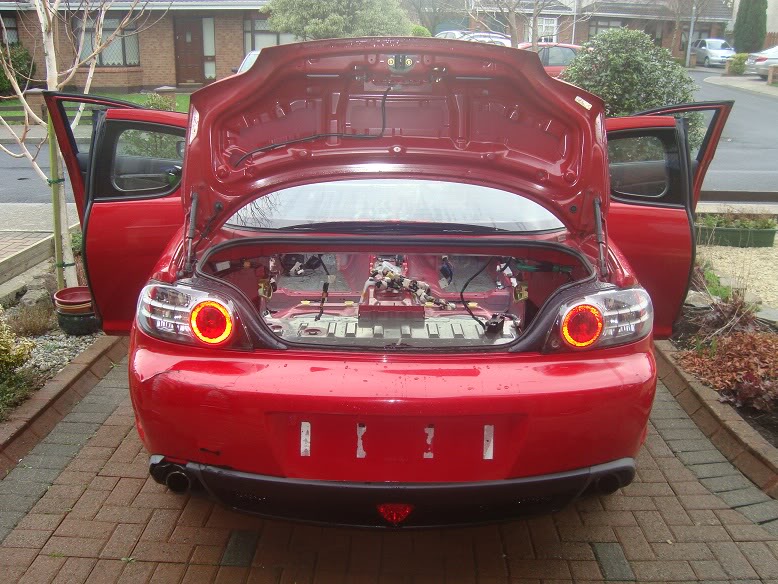
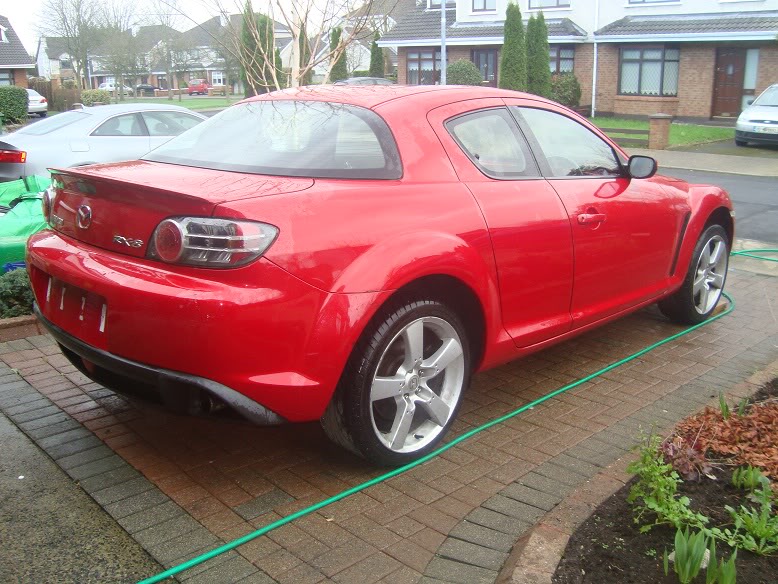
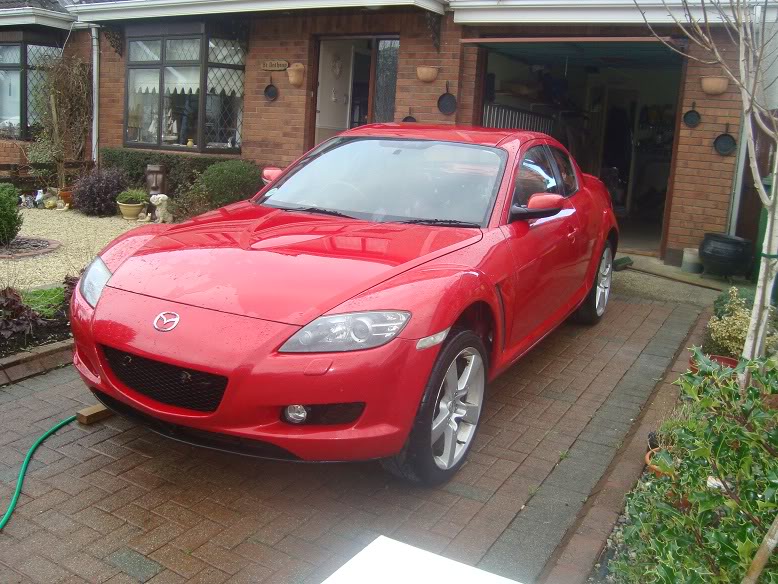
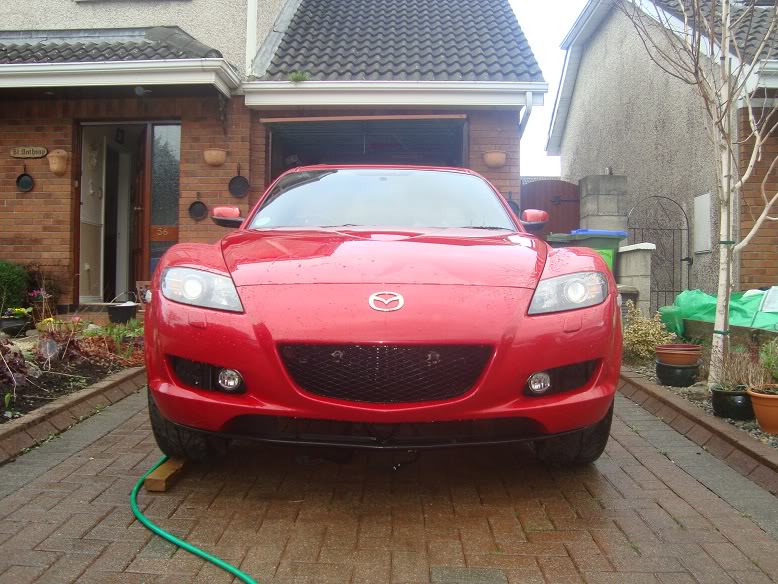
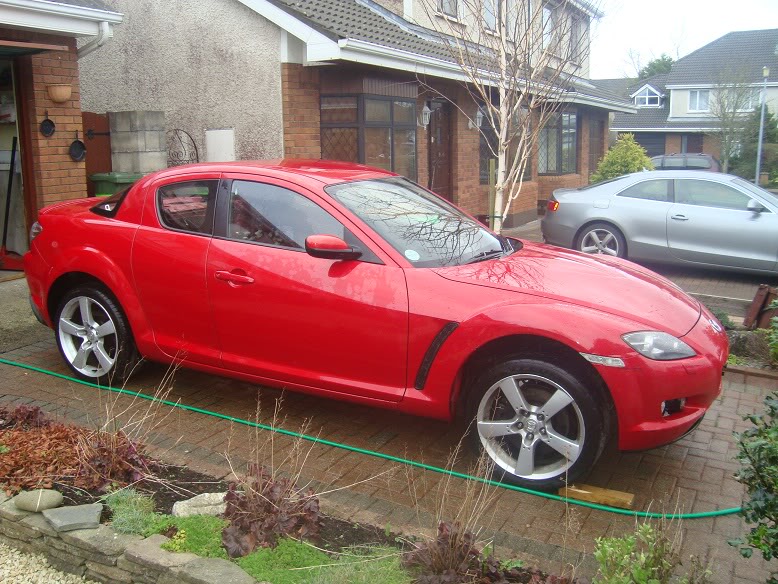
I've only ever seen the car in darkness or partial light due to being in the garage so brought her out for a wash to get an idea of what repairs are need, awkward dent on the passenger rear door, front and rear bumpers are being replaced so nothing needed there and all thats left is the drivers side wing so I happy enough, big weight off my mind is there is no rust repair needed thankfully as I was concerned being from the uk originally...

So haven't done a whole lot over the weekend barr finish off the jobs I started, it took a few days but 15kgs lighter now thankfully. Just have the last of the glue to remove from the drivers side foot well.
I had planned on stripping the front doors down like the rear but there is a second skin and the window harness and runner is bolted to it so the weight saving there is on hold until I get the fibreglass doors and lexan kit. All I could really remove were the speakers.
I've only ever seen the car in darkness or partial light due to being in the garage so brought her out for a wash to get an idea of what repairs are need, awkward dent on the passenger rear door, front and rear bumpers are being replaced so nothing needed there and all thats left is the drivers side wing so I happy enough, big weight off my mind is there is no rust repair needed thankfully as I was concerned being from the uk originally...

#50
Joined: Nov 2007
Posts: 7,521
Likes: 11
From: Caput Mundi
Can i suggest that you use a particularly cheap but highly reputable manufacturer of lexan windows that's active up in the uk?
They have both rail-less and complete window kits for 450-600€ (depending on the rail\sliders)... That's half of what other manufacturer charge.
They have both rail-less and complete window kits for 450-600€ (depending on the rail\sliders)... That's half of what other manufacturer charge.
Thread Starter
Project Addict
Joined: Nov 2011
Posts: 154
Likes: 0
From: Ireland
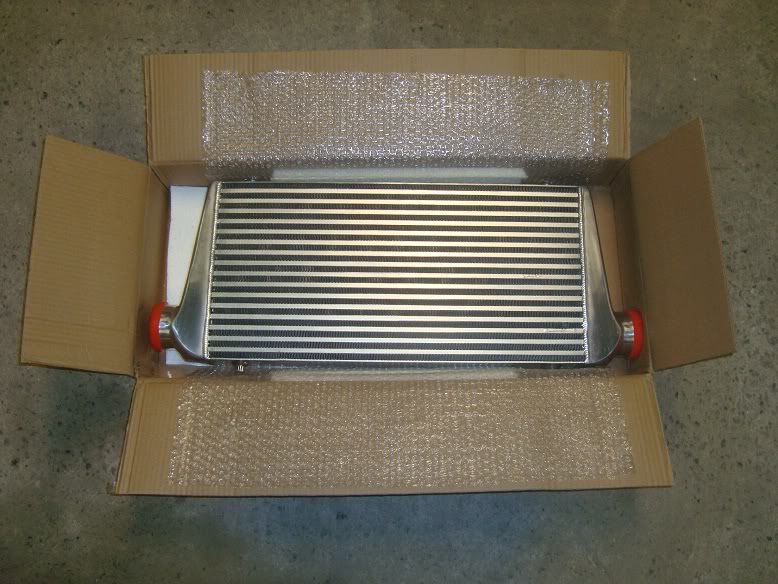
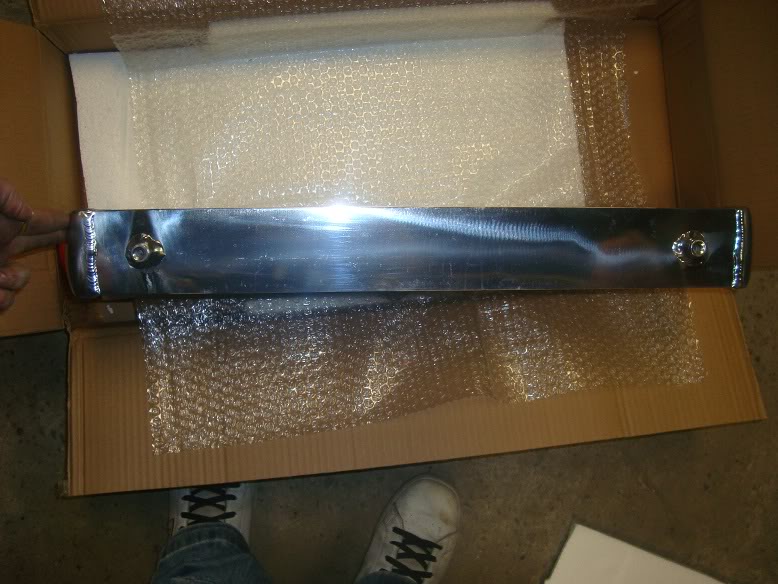
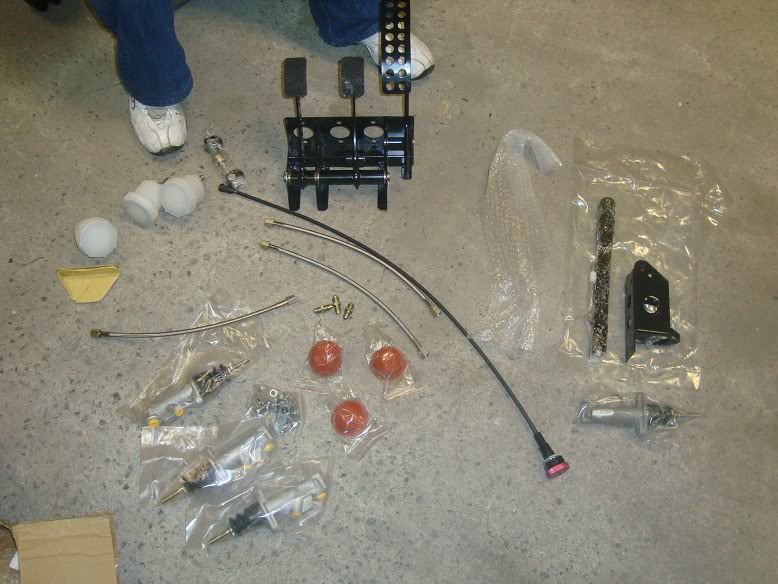
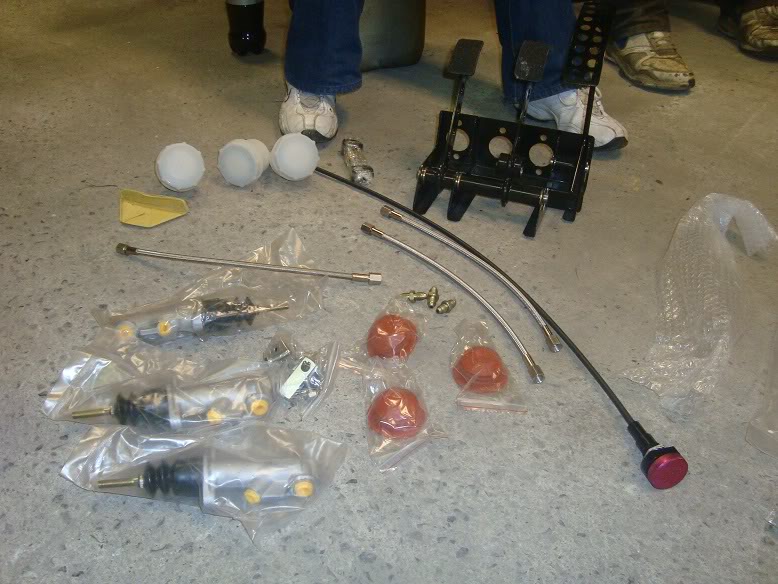
Was up in Yowdy’s last night so just got a few pic’s of the parts we have ready to go in.
RB25 Box and Adapter plate thanks to Alan Sinnott.

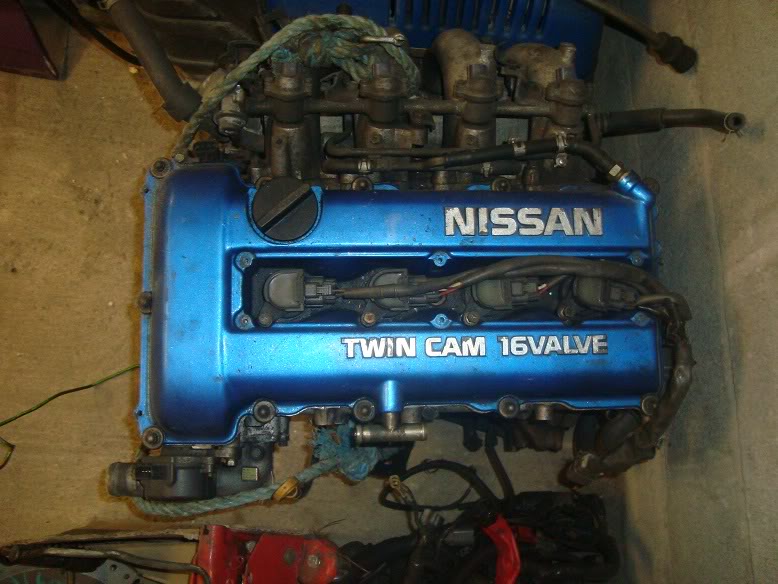
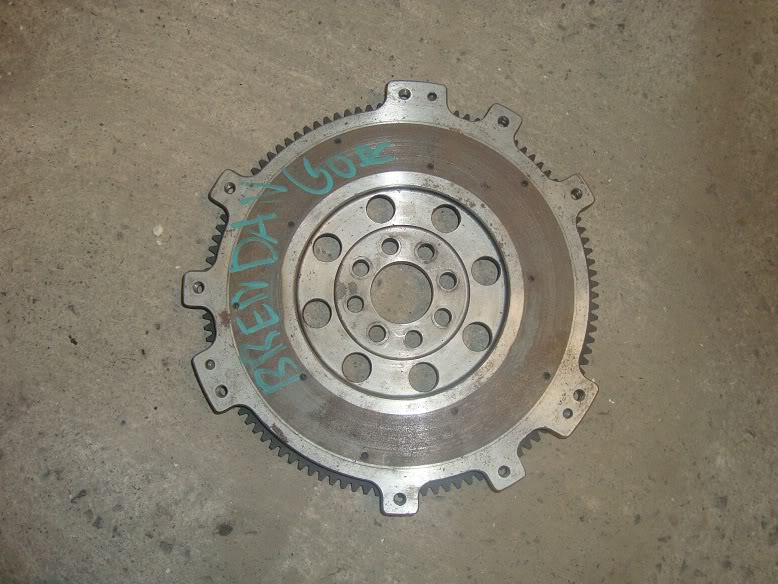
SR20 Engine with metal headgasket and lightweight flywheel thanks to Gem

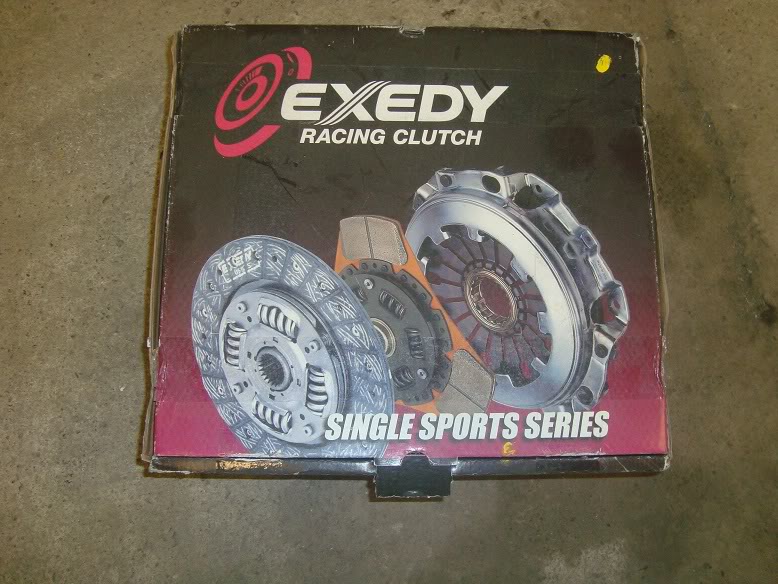
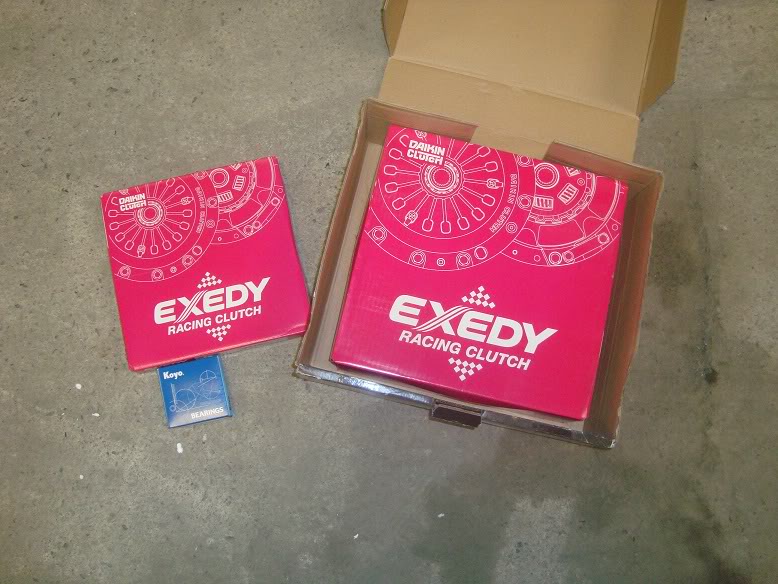
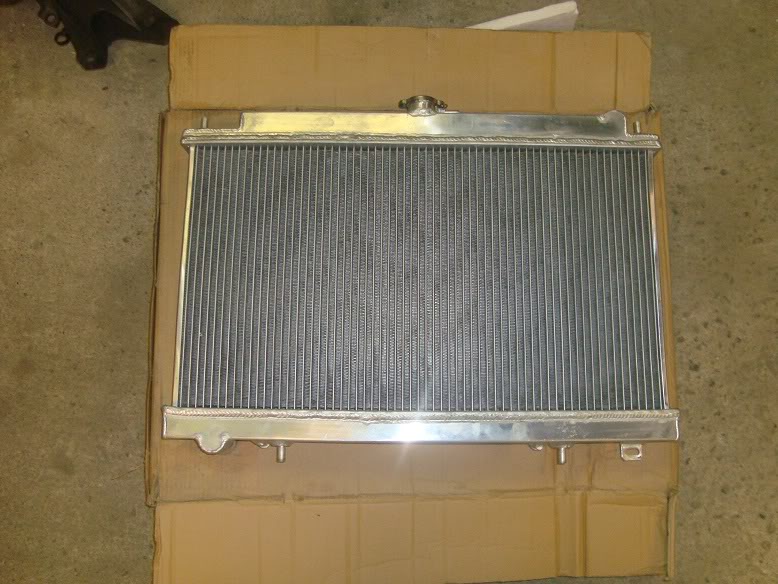
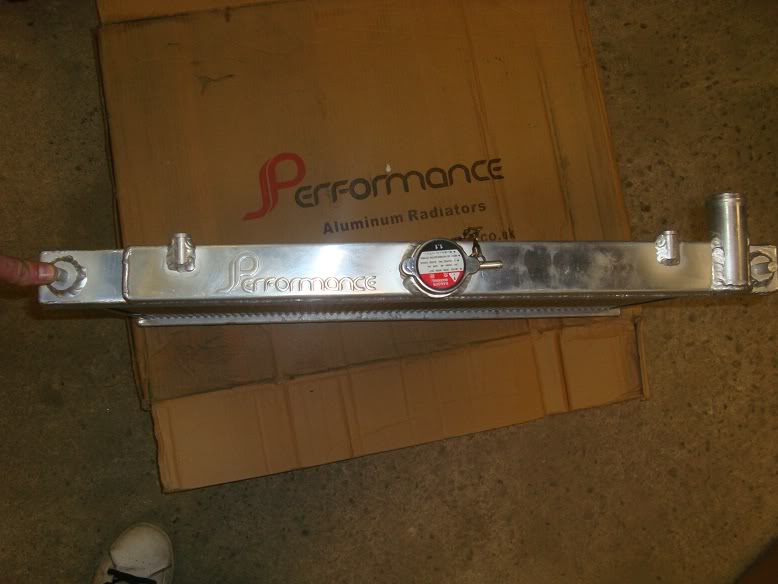
Exedy stage 2 clutch, J Performance Rad and Cooler thanks to Dave in Japanese Performance
Finally a pedal box and hydro that Yowdy sourced

Last edited by Kruizer; Jan 24, 2012 at 02:37 AM.
#50
Joined: Nov 2007
Posts: 7,521
Likes: 11
From: Caput Mundi
http://www.plastics4performance.com
This is the company anyway, in case you have trouble with the rear window especially... that one is nearly impossible to replicate with a flat sheet.
Is the pedal box one of obp ltd ones?
This is the company anyway, in case you have trouble with the rear window especially... that one is nearly impossible to replicate with a flat sheet.
Is the pedal box one of obp ltd ones?
Thread Starter
Project Addict
Joined: Nov 2011
Posts: 154
Likes: 0
From: Ireland
http://www.plastics4performance.com
This is the company anyway, in case you have trouble with the rear window especially... that one is nearly impossible to replicate with a flat sheet.
Is the pedal box one of obp ltd ones?
This is the company anyway, in case you have trouble with the rear window especially... that one is nearly impossible to replicate with a flat sheet.
Is the pedal box one of obp ltd ones?
No idea of brand mate sorry
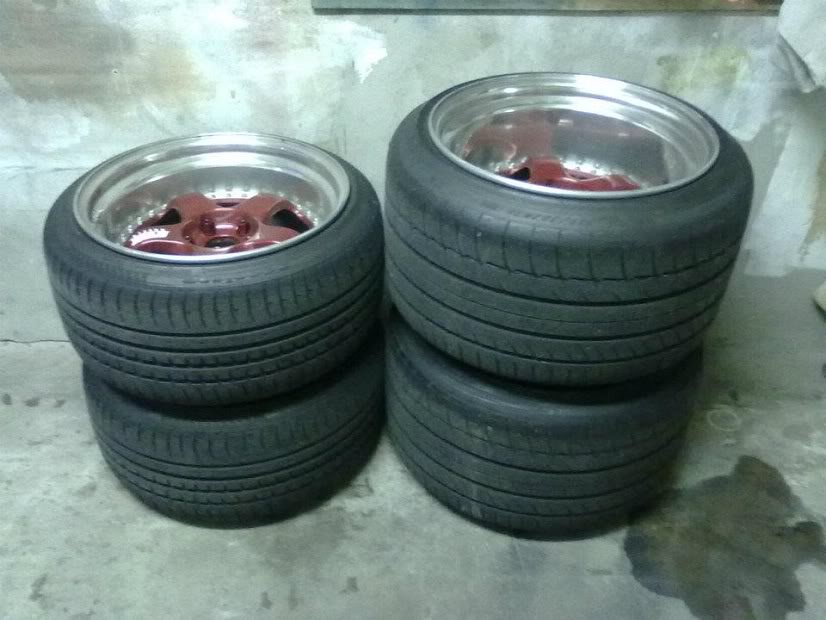
I decided to keep my monster Works Wheels and will use these as a point of reference so I can build the wings and quarters, must pick up another pair for the rear something like 18 x 11JJ or 11.5JJ -10 offset as I don�t fancy ripping up 315�s� Back onto Dave to wreck his head some more�
Work Meister S1�s
Front 18 x 11JJ +10 offset : Tires 255 / 35 / R18
Rear 18 x 13.5JJ -10 offset : Tires 315 / 30 / R18
Thread Starter
Project Addict
Joined: Nov 2011
Posts: 154
Likes: 0
From: Ireland
The front will stay put, gonna use the rears as a show piece and track down some 18 x 10 Meisters with spacers for the track
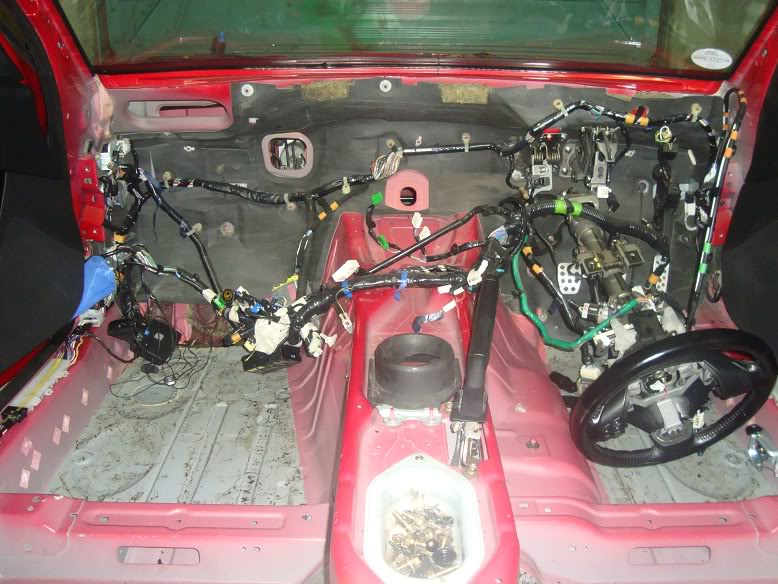
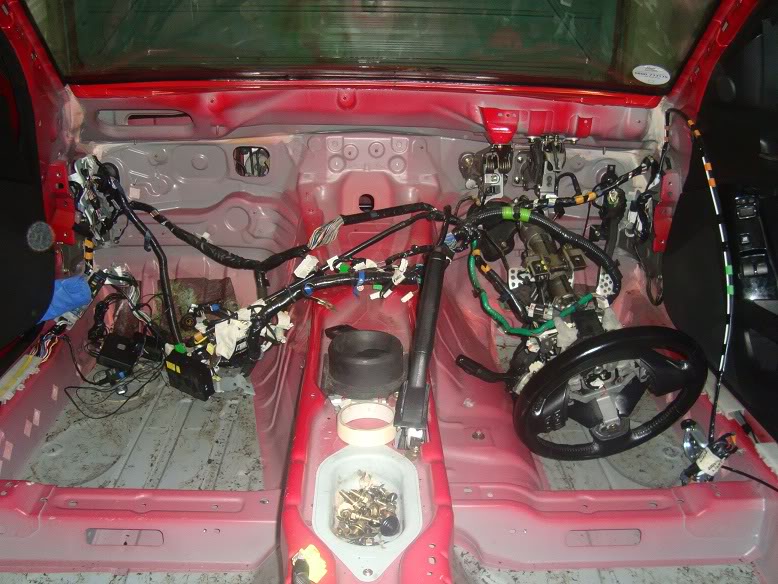
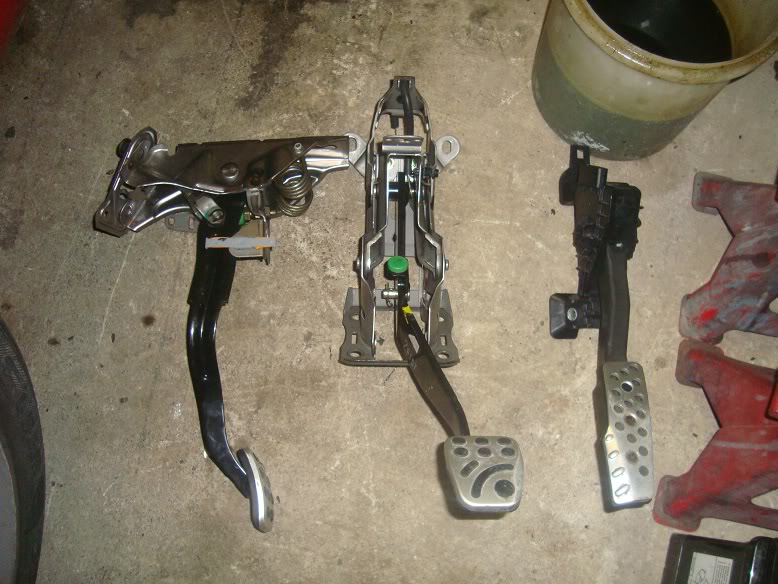
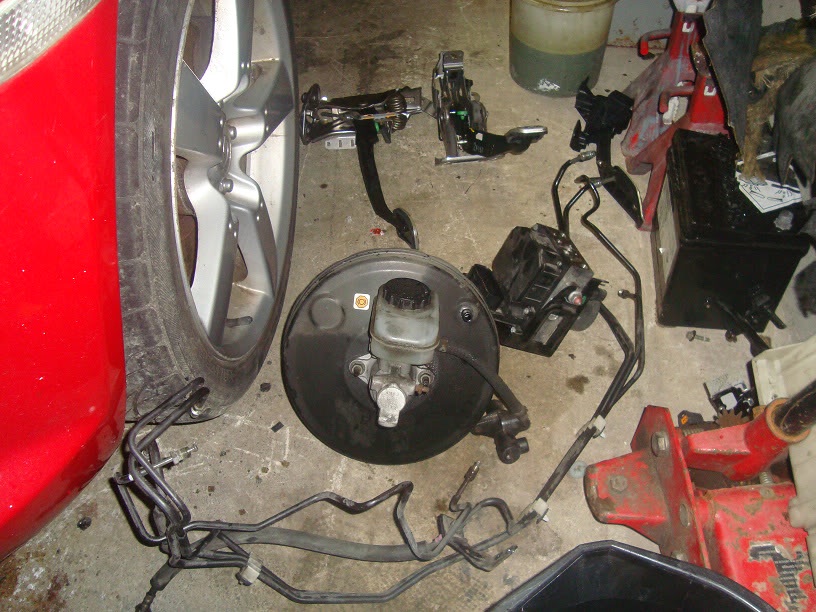
Did a bit more ripping, took out all the pedals, master cylinder and abs unit...
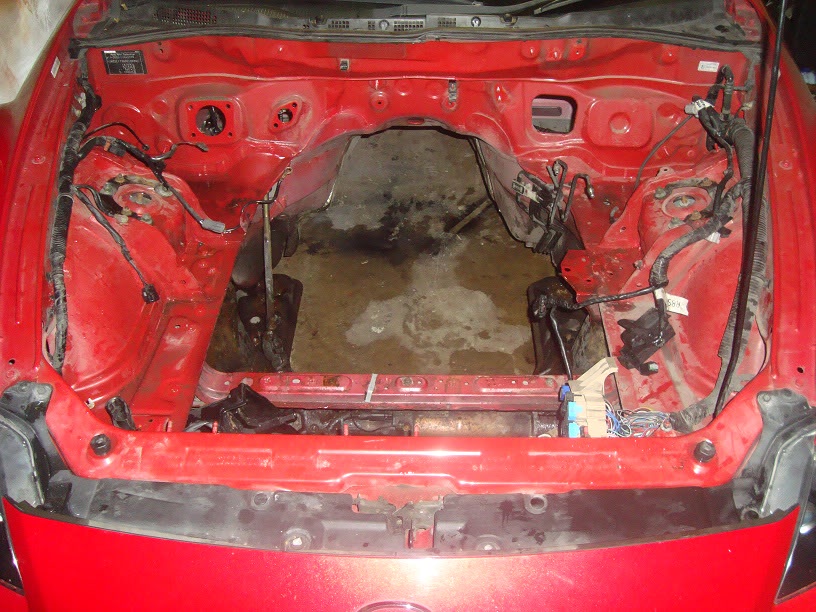
The engine bay is starting to look alot cleaner, except for that monstrous loom !
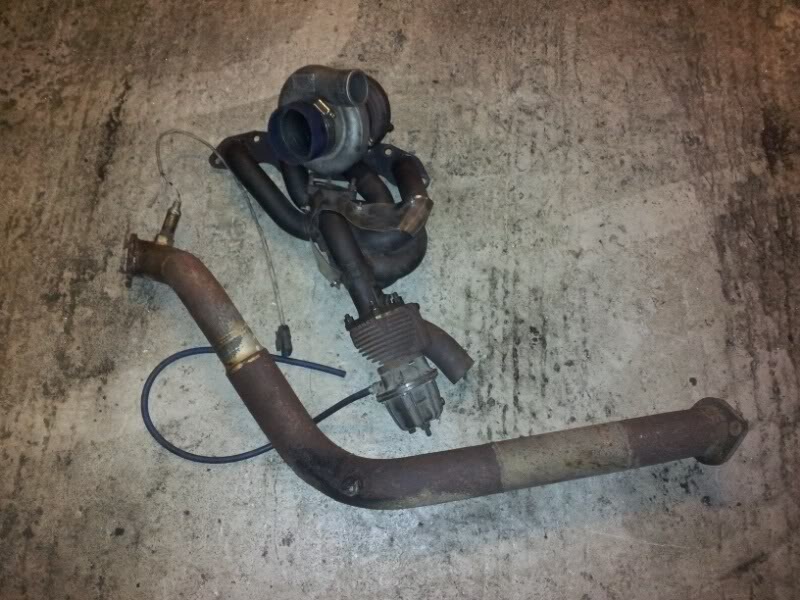
Dave in JP sent me a pic of my turbo kit, TD06 20g freshly rebuilt with a topmount manifold and hks wastegate The pic of the coilovers was the box, not even opened LoL
Did a bit more ripping, took out all the pedals, master cylinder and abs unit...
The engine bay is starting to look alot cleaner, except for that monstrous loom !
Dave in JP sent me a pic of my turbo kit, TD06 20g freshly rebuilt with a topmount manifold and hks wastegate
The pic of the coilovers was the box, not even opened LoL
Last edited by Kruizer; Jan 27, 2012 at 02:47 AM.
Thread Starter
Project Addict
Joined: Nov 2011
Posts: 154
Likes: 0
From: Ireland
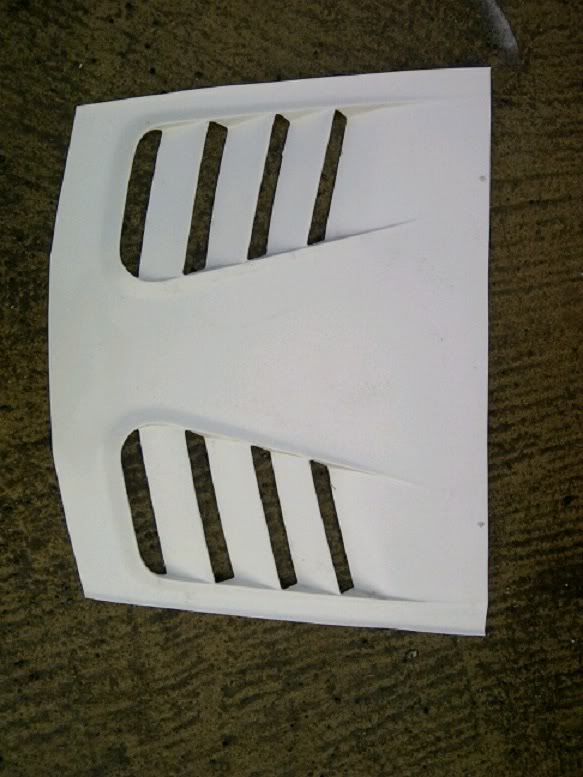
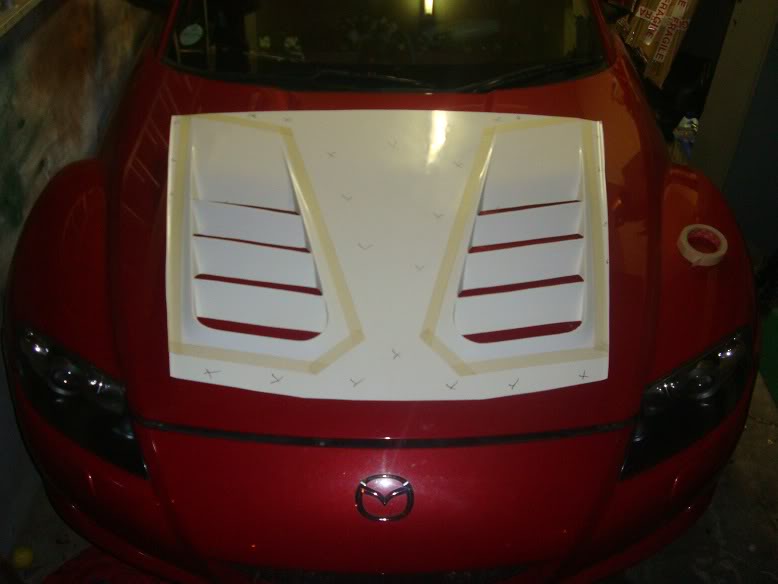
So just a small update, I was onto Brian in Driftkits.eu and looking for a vent to build into my own bonnet, so he cut up an S15 skin he had in stock, legend ! Looking forward to fitting it once it arrives
And the next pic is probably my favourite of the thread to date, I got a set of Bride Fixed back seats in red and head protection, saw them in Ffrenchie’s ages ago but a mate of mine bought them, they came up for sale so I bit the bullet and doubled my budget on seats, should look awesome in the car…
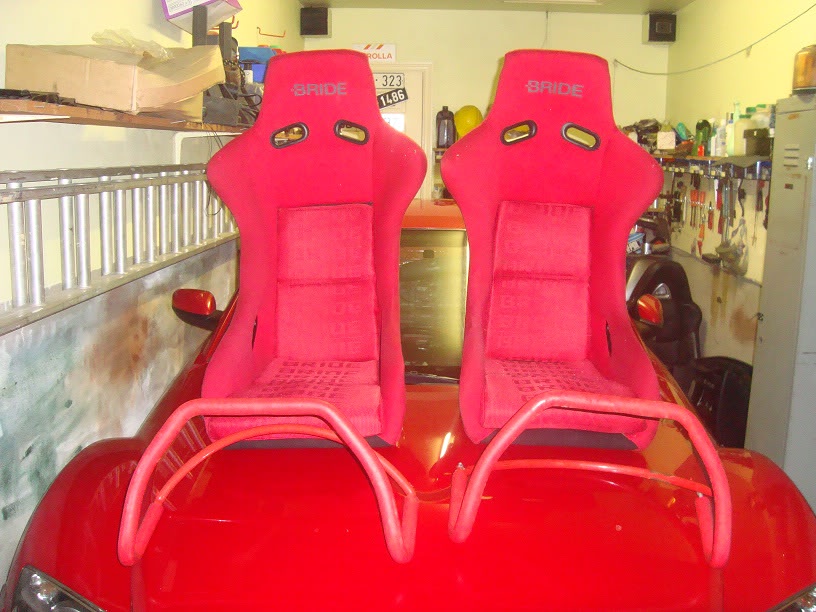
And the next pic is probably my favourite of the thread to date, I got a set of Bride Fixed back seats in red and head protection, saw them in Ffrenchie’s ages ago but a mate of mine bought them, they came up for sale so I bit the bullet and doubled my budget on seats, should look awesome in the car…


Thread Starter
Project Addict
Joined: Nov 2011
Posts: 154
Likes: 0
From: Ireland
Me too
I'm sure you'll build something bad *** dude !
LoL
Don't show him this thread so fella...
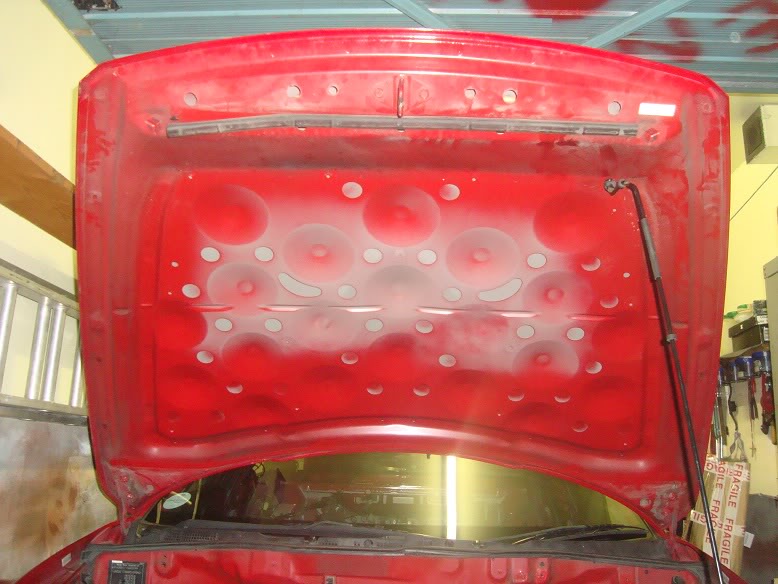
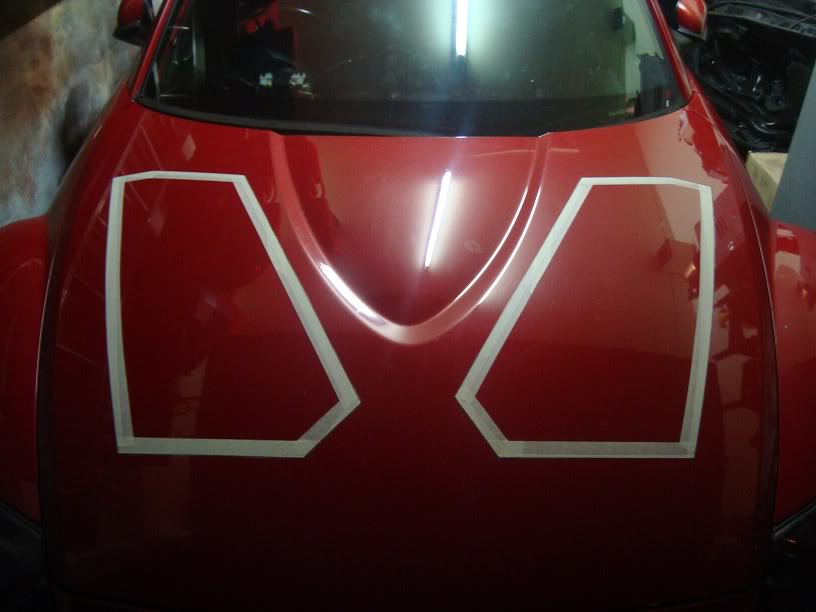
Finished removing all the glue with petrol left over from the sound deadening, took off the heat cover under the bonnet, lined up the vent and have it ready for cutting tomorrow
Weird looking bonnet...
Everything outside the masking tape is now waste, will have to fit the vents seperately to avoid the standard dip in the original bonnet...
LoL
Don't show him this thread so fella...
Finished removing all the glue with petrol left over from the sound deadening, took off the heat cover under the bonnet, lined up the vent and have it ready for cutting tomorrow
Weird looking bonnet...
Everything outside the masking tape is now waste, will have to fit the vents seperately to avoid the standard dip in the original bonnet...
Thanks fella, I may use them for the rear screen
No idea of brand mate sorry
I would say so...
Hopefully not, reason for it is to empty the bay and my abs won't work with the new stoppers...
I decided to keep my monster Works Wheels and will use these as a point of reference so I can build the wings and quarters, must pick up another pair for the rear something like 18 x 11JJ or 11.5JJ -10 offset as I don�t fancy ripping up 315�s� Back onto Dave to wreck his head some more�
Work Meister S1�s
Front 18 x 11JJ +10 offset : Tires 255 / 35 / R18
Rear 18 x 13.5JJ -10 offset : Tires 315 / 30 / R18
holy ****! good luck getting those to fit! lol should look crazy dope if it works out tho


ive been watching this from the get go, figured i would sub.
great work man
why are these swaps so common in every country but the us? theres a bunch over in the sand box
great work man
why are these swaps so common in every country but the us? theres a bunch over in the sand box
Thread Starter
Project Addict
Joined: Nov 2011
Posts: 154
Likes: 0
From: Ireland
Thanks mate...
Have the bonnet marked up ready for cutting tomorrow...
How it should look...
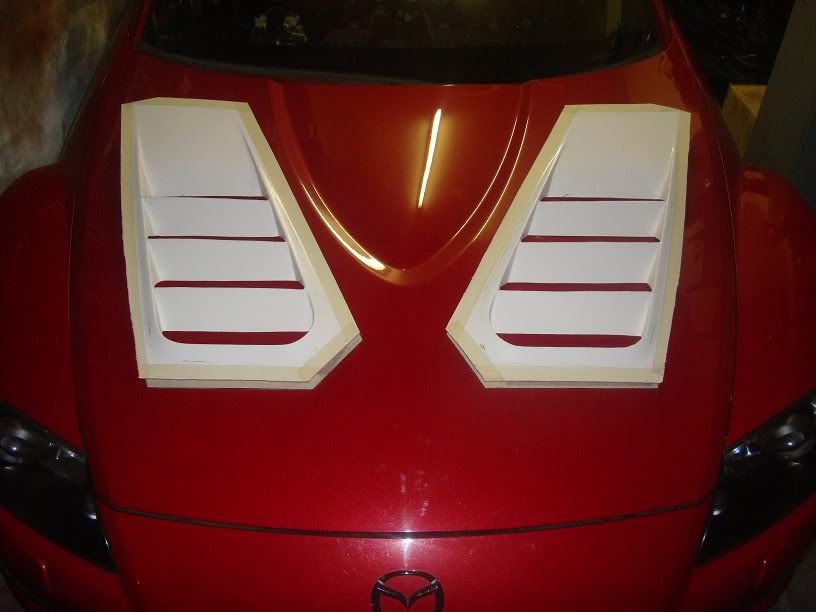
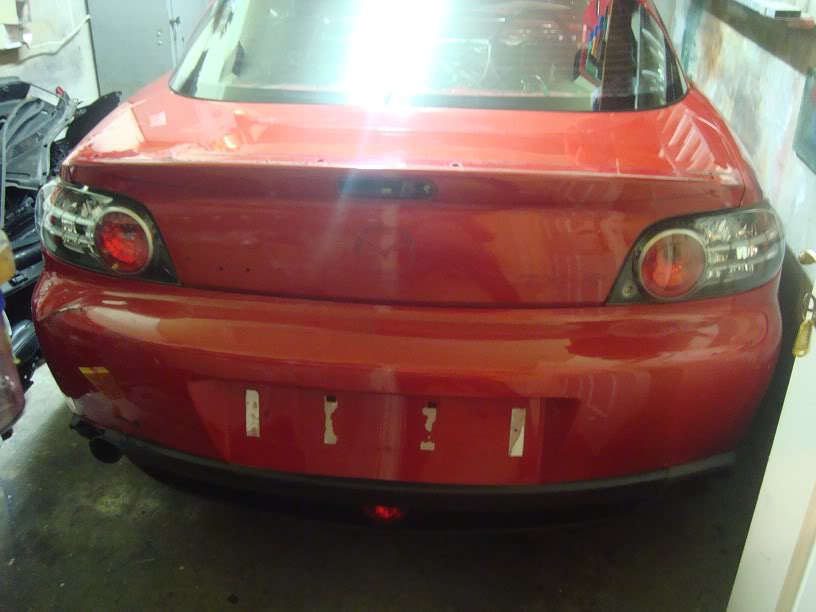
Said I'd resort to using the Limerick method of removing the spoiler...
Debadged and spoiler off, just getting the last few shitty bits done before she goes away Sunday...