RX8Club.com
  • LOG IN
  • REGISTER
  • Forums
    • Vendors and Group Buys
      • Group Buy Center
      • Vendor Forums
      • Vendor Classifieds
    • General Topics
      • New Member Forum
      • RX-8 Discussion
      • RX-8 Multimedia/Photo Gallery
      • General Automotive
      • Website-related Suggestions
    • Series I Tech & Performance
      • Series I Tech Garage
      • Series I Trouble Shooting
      • Series I Do It Yourself Forum
      • Series I Aftermarket Performance Modifications
      • Series I Major Horsepower Upgrades
      • Series I Engine Tuning Forum
      • Series I AT-Specific Performance Mods
      • Series I Wheels, Tires, Brakes & Suspension
      • Series I Exterior Appearance and Body Kits
      • Series I Interior, Audio, and Electronics
    • Series II Tech & Performance (US 2009MY-)
      • Series II Technical and Trouble shooting
      • Series II DIY
      • Series II Aftermarket Performance Modifications
      • Series II Forced Induction and Nitrous
      • Series II Engine Tuning
      • Series II Wheels, Tires, Brakes & Suspension
      • Series II Exterior Appearance and Body Kits
      • Series II Interior, Audio, and Electronics
    • RX-8 Competition
      • RX-8 Racing
      • RX-8 Show and Shine
      • Drifting
    • Engine Swap Forum
      • Rotary Swaps
      • Non-Rotary Swaps
    • Regional Forums
      • Rotary Owner Events
      • NE RX-8 Forum
      • SE RX-8 Forum
      • MW RX-8 Forum
      • Gulf RX-8 Forum
      • Mountain Forum
      • West RX-8 Forum
      • NW RX-8 Forum
      • Canada Forum
      • Europe Forum
      • Australia/New Zealand Forum
      • Far East/Asia
      • Latin America
    • RX-8 Classifieds - PRIVATE SALES ONLY - Dealer Ads Prohibited
      • Bubbletech Fundraising Auction
      • RX-8's For Sale/Wanted
      • RX-8 Parts For Sale/Wanted
      • Good Guy/Bad Guy
  • Marketplace
    • Vendor Directory
    • Become a Vendor
  • New Posts
  • Tools
    • Car Payment Calculator
    • Tire Rim Calculator
    • Recalls
    • Technical Service Bulletins (TSBs)
    • Members List
    • Live Feed
  • Gallery
  • View Dark Mode
    • Please register or login to enable Dark Mode.
  • Log In
  • Register
RX8Club.com
    • Threads
      • Advanced
Dark Mode

Please register or login to enable Dark Mode.

Log In

Forgot your Password?

By logging into your account, you agree to our Terms of Use and Privacy Policy, and to the use of cookies as described therein.
  • Recent
  • Commented
  • Albums
  • My Pictures

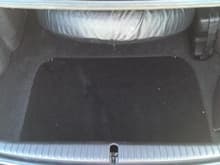
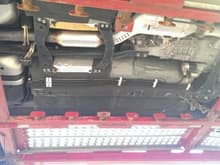
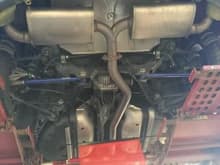
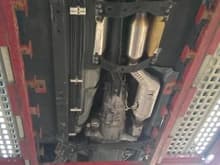
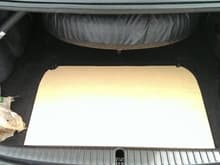
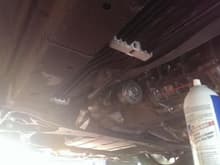
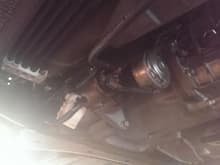
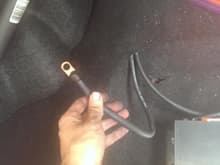
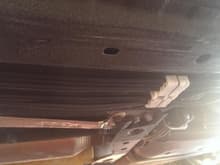
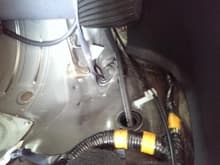
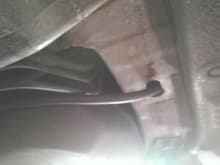
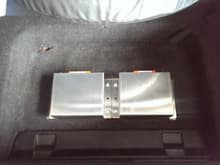
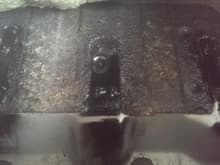
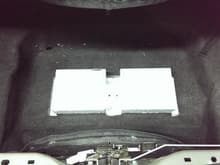
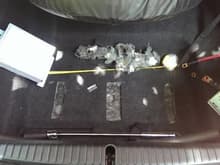
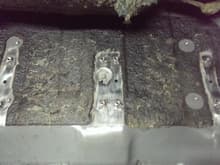
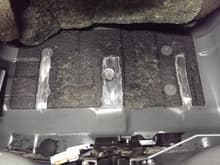
Stealth Battery Relocation to trunk

Ricky SE3P
October 30, 2014
 17
 0
Description:
as album title reads

Read more ยป
Sort:
Most Recent
  • Default
  • Most Recent
hidden
hidden
0 2014/10/30 19:10:43 Ricky SE3P
have to look to see the cable under the car, hidden like its OEM.
0 2014/10/30 19:10:43 Ricky SE3P
have to look to see the cable under the car, hidden like its OEM.
0 2014/10/30 19:09:26 Ricky SE3P
have to look to see the cable under the car, hidden like its OEM.
0 2014/10/30 19:09:26 Ricky SE3P
panel fabricated with magnetic anchors made to help hold the panel in place.
0 2014/10/30 19:09:26 Ricky SE3P
clean up the positive of the main harness (oem harness that continues forward to the fusebox) to ensure a solid connection between that terminal, the terminal of your wire for the battery relocation, and the starter positive terminal.
0 2014/10/30 19:08:31 Ricky SE3P
connecting positive terminal
0 2014/10/30 19:08:31 Ricky SE3P
run the battery wires under the carpet towards the rear seats. The positive will go forward past the rear seats, the negative cables (I grounded each battery separately using 2awg cable to the base of both shock towers against the body of the car as well as provided them a shared ground)
0 2014/10/30 19:08:31 Ricky SE3P
clip the 2awg positive cable into the open space on the clips under the car
0 2014/10/30 19:07:21 Ricky SE3P
after passing the cable through the rear sear back, cut out the middle of this rubber grommet and pass the cable through this hole. It might be easier/helpful to use something like a wire hanger to help feed the wire from under the car through the hole the cable will exit through (see next picture for reference)
0 2014/10/30 19:07:21 Ricky SE3P
cable comes out through the bottom near the lines for the fuel system. At this point follow these lines and use cable ties to help secure and tuck away this battery cable from drooping down and supporting it until it reaches the fuel line clips further ahead the underneath of the vehicle.
0 2014/10/30 19:07:21 Ricky SE3P
locked in
locked in
0 2014/10/30 19:06:19 Ricky SE3P
apply paint for corrosion protection
0 2014/10/30 19:06:19 Ricky SE3P
test fit
test fit
0 2014/10/30 19:06:19 Ricky SE3P
cut out carpet where brackets will need to be welded into trunk
0 2014/10/30 19:05:35 Ricky SE3P
nuts welded in place
0 2014/10/30 19:05:35 Ricky SE3P
grind the area and clean to ensure good weld
0 2014/10/30 19:05:35 Ricky SE3P


Top
RX8Club.com
  • Contact Us
  • FAQ
  • Archive
  • Advertising
  • Cookie Policy
  • Privacy Statement
  • Terms of Service
  • Your Privacy Choices
  • Manage Preferences

© 2026 MH Sub I, LLC dba Internet Brands


When you click on links to various merchants on this site and make a purchase, this can result in this site earning a commission. Affiliate programs and affiliations include, but are not limited to, the eBay Partner Network.