
Racing Beat REVi Installed

Thread Starter
Registered User
Joined: Aug 2004
Posts: 416
Likes: 0
Well it's done. Yesterday my buddy and I installed the REVi Intake, the install went very smooth and took about 2.5 hours including the Rad and Oil cooler screens. THe fog lights are tricky which stalled us for about 10 mins, as well there was the headlight washer tubing that required disconnecting for us Canadians.
The quality of the kit is awesome and the fit is perfect, you can easily tell that it is prepped for the upcoming Cold Air Intake add-on to be released later this year.
Although I only took it out for a 15 min drive afterwards I did notice a smoother idle, more responsive throttle aswell the pull from 4500-9000+ RPM was more crisp. The sound at idle seems pretty much stock, at WOT it is louder but not over bearing by any means. The true test will be today with the wife in the car, she will surely give me her opinion on the noise level.
Now for power increase. Racing Beat claims an average of 2HP throughout the powerband, my butt dyno thinks there is a bit more then that but I will need to drive a bit more to really test this :D .
The Screens:
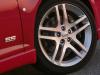
If you guys have not put any kind of screen protection for your Coolers I highly suggest you do so, I had quite a bit of fin damage on mine, especially an area that looked like it got hit by a 1 inch stone. Oil cooler replacements are not cheap.
I'll post some pictures of the install, just have to re-size them all as they are huge.
The quality of the kit is awesome and the fit is perfect, you can easily tell that it is prepped for the upcoming Cold Air Intake add-on to be released later this year.
Although I only took it out for a 15 min drive afterwards I did notice a smoother idle, more responsive throttle aswell the pull from 4500-9000+ RPM was more crisp. The sound at idle seems pretty much stock, at WOT it is louder but not over bearing by any means. The true test will be today with the wife in the car, she will surely give me her opinion on the noise level.
Now for power increase. Racing Beat claims an average of 2HP throughout the powerband, my butt dyno thinks there is a bit more then that but I will need to drive a bit more to really test this :D .
The Screens:
If you guys have not put any kind of screen protection for your Coolers I highly suggest you do so, I had quite a bit of fin damage on mine, especially an area that looked like it got hit by a 1 inch stone. Oil cooler replacements are not cheap.
I'll post some pictures of the install, just have to re-size them all as they are huge.

I am The One!
Joined: Jul 2003
Posts: 2,754
Likes: 25
From: Aurora, ont
Hellbreed,
*Welcome to the Darkside!* :D
I'm sure your Butt dyno is working properly, but don't be deceived... you know you want that Greddy kit...
We'll see how you run for Ottawa...
Lates,
*Welcome to the Darkside!* :D
I'm sure your Butt dyno is working properly, but don't be deceived... you know you want that Greddy kit...
We'll see how you run for Ottawa...
Lates,
Thread Starter
Registered User
Joined: Aug 2004
Posts: 416
Likes: 0
No Greddy for me until the ECU riddle has been solved and the exhaust ports get polished. Which means never I guess...  I think after I pay the RX-8 off I'll get me a nice FD, a REAL one that is , to toy with.
I think after I pay the RX-8 off I'll get me a nice FD, a REAL one that is , to toy with.

Thread Starter
Registered User
Joined: Aug 2004
Posts: 416
Likes: 0
Originally Posted by Danielson
Where did you get the SCREENS for the RX8 ? How much ?
Thank in advance...
Thank in advance...
http://www.racingbeat.com/FRmazda4.htm
Thread Starter
Registered User
Joined: Aug 2004
Posts: 416
Likes: 0
Noticed a couple of differences today since the install. Many with the M flash have the 6000RPM hesitation on these boards including myself when shifting at redline, apparently the N flash fixes this. Well today I gave my car a few good runs and I do not have that hesitation anymore. The other difference is that 5th & 6th gear have noticably more punch to them.

Registered
Joined: Aug 2004
Posts: 1,343
Likes: 0
From: Mississauga, Ontario
Originally Posted by Hellbreed
Noticed a couple of differences today since the install. Many with the M flash have the 6000RPM hesitation on these boards including myself when shifting at redline, apparently the N flash fixes this. Well today I gave my car a few good runs and I do not have that hesitation anymore. The other difference is that 5th & 6th gear have noticably more punch to them.
:D
Thread Starter
Registered User
Joined: Aug 2004
Posts: 416
Likes: 0
Originally Posted by Shamblerock
Sounds like you are happy with the result. Hope you can take me for a spin the next time we hook up. This is a mod I was also looking for but want to see it installed first.
:D
:D
Sure thing, we'll do it at the next meet!
Registered
Joined: Mar 2005
Posts: 155
Likes: 0
Hellbreed - I recall you wanting to hit a dyno. I have been in touch with a new place that has a dyno with drag lights set up. You can actually simulate the quarter mile on the dyno. Rev to 6000 and dump it. Well anyhow I am working on a rate for the entire day so those that are interested can see just how much fibbing Mazda was guilty of.

Registered
Joined: Mar 2004
Posts: 627
Likes: 0
From: Richmond Hill, Ontario
Originally Posted by Mic Jagger
Hmmm...That's why I love you guys.... I have no idea what you're talking about ... but it sounds sooo coool ...
________
MAGIC FLIGHT LAUNCH BOX
Last edited by hobbes; Mar 3, 2011 at 01:58 AM.
Thread Starter
Registered User
Joined: Aug 2004
Posts: 416
Likes: 0
Originally Posted by Neo
You're going to get the N flash regardless, right??
Thread Starter
Registered User
Joined: Aug 2004
Posts: 416
Likes: 0
Originally Posted by Lawyer's Spirit
Hellbreed - I recall you wanting to hit a dyno. I have been in touch with a new place that has a dyno with drag lights set up. You can actually simulate the quarter mile on the dyno. Rev to 6000 and dump it. Well anyhow I am working on a rate for the entire day so those that are interested can see just how much fibbing Mazda was guilty of.
Thread Starter
Registered User
Joined: Aug 2004
Posts: 416
Likes: 0
Ok, here are some PICs of the install, not all but key points.
Pic 1: Bumber Removed - Circled area not in the instructions, don't forget to disconnect the headlight washer hose. Also, no screens on the oil coolers.
Pic 2: Oil cooler screens added.
Pic 3: Before install
Pic 4: Ready for REVi
Pic 5: Perfect Fit!
Pic 1: Bumber Removed - Circled area not in the instructions, don't forget to disconnect the headlight washer hose. Also, no screens on the oil coolers.
Pic 2: Oil cooler screens added.
Pic 3: Before install
Pic 4: Ready for REVi
Pic 5: Perfect Fit!
Thread Starter
Registered User
Joined: Aug 2004
Posts: 416
Likes: 0
Pic 6: Before Rad screen
Pic 7: After Rad screen
In Picture 3 you can see the VFAD which feeds the stock intake with air from the right headlight area. There is a vacuum hose which controls the front of the VFAD to open for more air at higher RPMs. This whole unit is removed and is not used with the REVi, you can see the opening that remains in PIC 5. Later this year Racing Beat is releasing the Cold Air part of this intake that will adapt to this unit, it's still in R&D.
There is a little weight reduction with this install as the REVi is lighter then the stock assembly, also the undertray to the stock intake is removed and the VFAD mentioned above.
Gas Mileage update:
I still have not used my first full tank since the install, I seem to be getting about the same mileage as before but the difference is I am running the engine harder as I love to hear the sound it makes at high RPM!
Last edited by Hellbreed; May 14, 2005 at 12:36 AM.
Registered
Joined: Aug 2004
Posts: 1,343
Likes: 0
From: Mississauga, Ontario
Originally Posted by Hellbreed
Ok, here are some PICs of the install, not all but key points.
Pic 1: Bumber Removed - Circled area not in the instructions, don't forget to disconnect the headlight washer hose. Also, no screens on the oil coolers.
Pic 2: Oil cooler screens added.
Pic 3: Before install
Pic 4: Ready for REVi
Pic 5: Perfect Fit!
Pic 1: Bumber Removed - Circled area not in the instructions, don't forget to disconnect the headlight washer hose. Also, no screens on the oil coolers.
Pic 2: Oil cooler screens added.
Pic 3: Before install
Pic 4: Ready for REVi
Pic 5: Perfect Fit!

Thread
Thread Starter
Forum
Replies
Last Post
8is>enuff
NE For Sale/Wanted
4
Sep 3, 2015 07:57 PM
Touge
Canada Forum
0
Sep 1, 2015 10:47 PM