When you click on links to various merchants on this site and make a purchase, this can result in this site earning a commission. Affiliate programs and affiliations include, but are not limited to, the eBay Partner Network.
So back in march I took my rx8 to a local body shop that was highly rated by locals to fix some damage I had done to the back of my car. They replaced the bumper and driver side taillight among some other parts. While they were washing it to give it back to me they said the taillight they just replaced filled up with water so they called Mazda and got a new taillight same day, put in the new one for free and I had my car later that day. A couple of weeks later during a really wet snowfall I noticed condensation on the inside of my driver side taillight, called them up, they got a new one and put it in for free. Fast forward to a couple of days ago again we had a brief but really wet snow fall and once again my driver side taillight has condensation in it. I called the body shop but this time instead of the jolly old guy who usually answers the phone and runs the place didn't answer some new guy did. Told him the situation he said he'd call Mazda and get back to me. The old guy would get back to me same day and was genuinely on my side but this new guy hasn't called me back and we talked last Thursday nor does he seem to really care. I'm worried they're not gunna replace it this time around and when I called my local mazda dealership to explain the situation the guy said that condensation was normal and would only do the work if there was standing water. The car is a 2009 so there's apparently no warranty to replace the taillight, nor my recaro plastic inserts but thats another problem. Should this body shop replace the taillight? It looks like crap and I had to pay a fortune first time around to replace the taillight, I don't wanna be driving around now with fuzzy looking taillights all the time. How do I handle this? Thank you much
Just a few pointers on these Tail Lamp gaskets or seals from 2008MY's, ( All Mazda's.)
Mazda or should I say Koito the maker of the majority of Mazda's Lamp Assemblies (all major car brands) has changed the structure of these gasket.
S2 Gaskets are NOT the same as Series 1 and visa versa, DO NOT use any Series 1 Light Gaskets on a Series II, unless you want a worse water entry, plus the design is not the same anyway.
Having said that water/condensation in S2 Tail Lamps are not as big a problem as the Series 1 or Mazda's made on and before 2008MY.
When tightening up nuts from inside boot (trunk) if you see the black/grey seal being squeeze through the stud hole you are turning up the nuts too tight, also tighten up the 3 nuts in sequence.
Unfortunately with todays car designs trunk water gutters pour the excess roof water back and under behind the Tail Lamp, not over outer Lens like the old days, so if any weakness or break in these seals and you will get water in Lamp, or in trunk floor if bad enough.
There are also a couple of critical things to point out when installing Tail Lamp bodies to rear panel, make certain that the panel is clean and dry, and lamp, make certain you use a new gasket (broken sticky old seals are a pain to get off the light body).
BUT, more critical is the tightening of these 3 nuts on each rear lamp.
From the factory Mazda tends to have them a little loose, they can become looser over time and road use...Make sure you tighten the nut up a little more, BUT DO NOT over-tighten as you will or can break out the stud for the nuts or crack lamp body...
I was actually re-sealing my MX-5 Tail lamps after removing them yesterday.
This is the Series 2 Tail Lamp Seal/Gasket OEM Numbers..
F189-51-153A RHR
F189-51-163A LHR
$25.75 Each from Mazda Dealer
Thanks Ash, I was completely not thinking about the differences in tail lights between the S1 and S2 when I replied about that kit. I know it drives you nuts, sorry
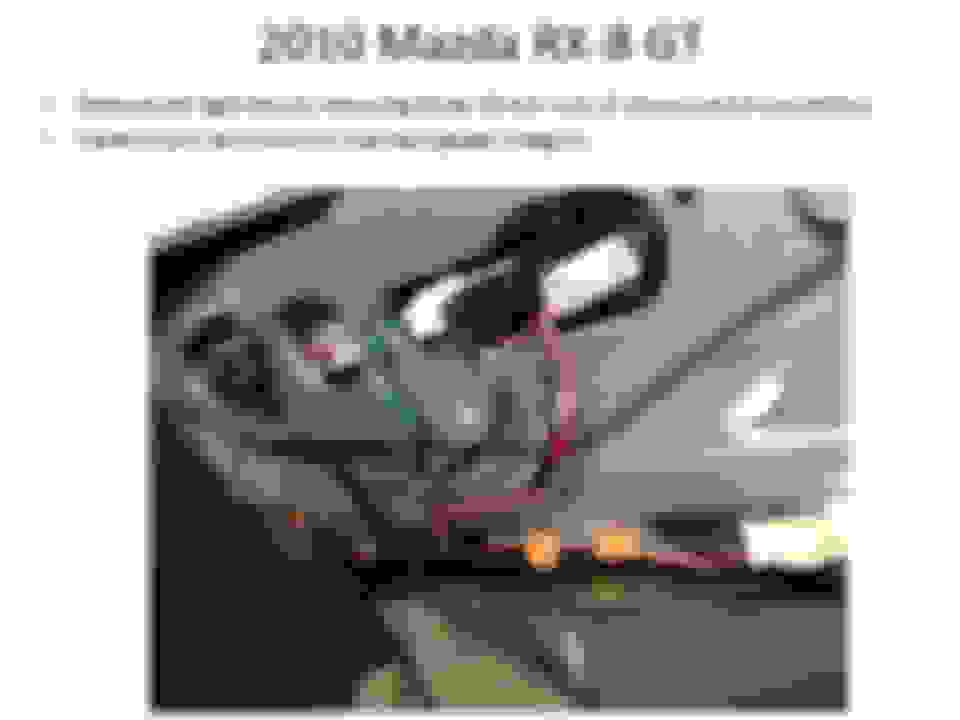
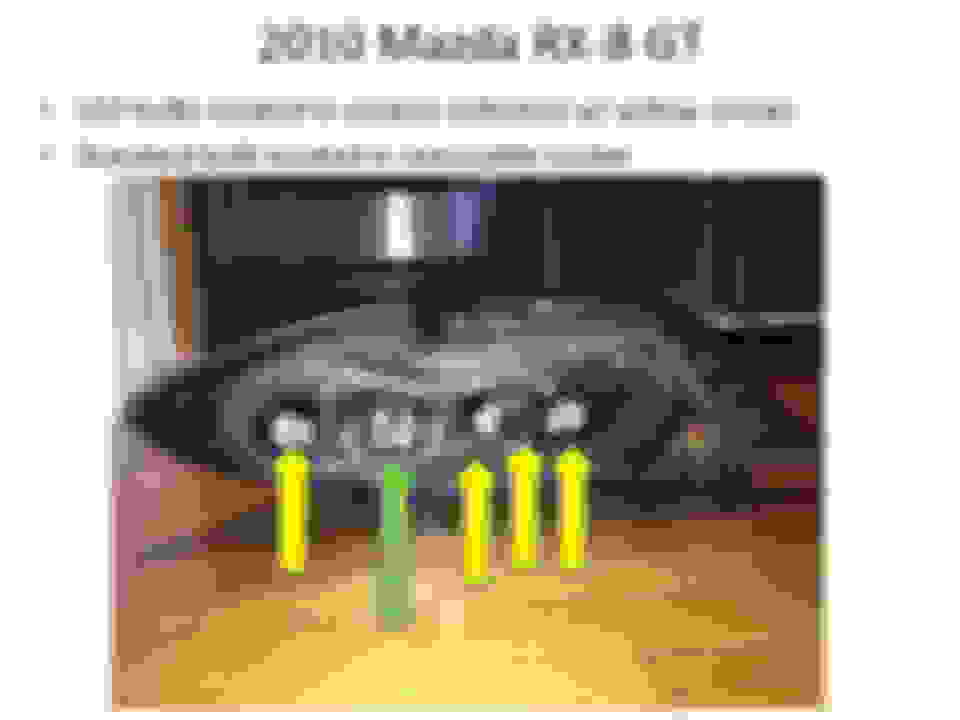
How do I drain the excess water out of the fishbowl area? The series II tail light lens appears to have sealed LED bulb ports and only the orange/yellow turn signal bulb is removable. In removing the turn signal bulb, the cavity is located in appears sealed off front t
he "fishbowl" area that contains the water.
LED bulb sockets on Series II rear tail light lens
standing water in Series II rear tail light lens
connections Series II rear taillight lens
bulb connectors and tail light mounting bolts on Series II rear tail light lens
Last edited by wannawankel; 10-18-2015 at 09:52 AM.
Reason: add pictures
Thanks - drilling that 3/32" hole allowed me to drain the dirty water and replace it with (sarcasm - bloody mary's) distilled water to clear out the dirt. After a few flushes of DIW, I opened up the standard bulb ports and it took 2 days to dry (with very low humidity conditions in the Midwest this week). Condensation free. Plan to liberally RTV silicone up the gasket (and the drilled hole) and mount back up tonight to take 24h to cure. Thank you for the guidance.
Now to take "Dana" out on some awesome roads in SE Ohio and SW Pennsylvania soon.
Last edited by wannawankel; 11-11-2015 at 08:57 PM.
Reason: correct info
Thanks for the part numbers on the seal. Having same issues on my 2011 R3. Body shop did not tighten bolts properly first and second time around. It seems that the got the passenger side correct this time, but still getting some moisture in the drivers side. I am now on my 3rd set of tail lights and may require a fourth.
I experienced the same wellknown RX-8 problem, which is a partly faulty bonding of the clear cover and the black taillight body base.
Thus finally I discovered that it were not the seals but the bonding of the 2 taillight halves; after repair I instantly NEVER had any more water/fogging of my tail light. It was the passenger side which was the faulty one but I decided to repair them both.
Mine (series 1) was also always fogging since new (without accident); I tried the new improved type of gaskets of Mazda and payed a lot attention to a precise installation etc. still fogging........
Many other owners have the same problem and also always on the passenger side.........I now assume that this is a common production (sealing) failure of the subsupplier of the taillight and probabely only for the passengers side one (however I have heard since short also about leaking of the other taillight).
At last I submerged it in a bath; light bulb openings at the lowest point.
There was a small leak (tiny air bubbles escaped) between the clear plastic- and the black plastic halves {both (supposed to be) "sealed/glued" together} at the upper part of the light assembly (in mounted position). Rain water could enter constantly there.
The design of the taillight is in such a way that there is some common slot/free space between these halves (where sometimes green algea is deposited). In this slot/free space silicone kit can be applied almost all around the tail light. At first this space should be cleaned thoroughly in advance; removing dirt and algea.
Thereafter I rubbed clear silicone kit in this free space all around (360 degrees) the whole common sealing joint of both halves.
I did NOT inject it with the commonly used nozzle of the silicone cartridge pistol since in that situation you can not fill the common space sufficiently and will not achieve a complete uninterrupted sealing without enclosed air bubbles.
Apply the clear silicone kit in a "rich" manner time after time on your middle finger and rub/press it (in a 45 degr. angle versus the sealing joint of both tail light halves) into their common joint. You go all around the taillight paying good attention not to enclose trapped air......it takes some time but it is progressing surprisingly well. It is just like a wave of kit that you are driving forward around the joint.
Remove/clean the overdosis of silicone kit with terpentine and finally rinse the inner side of the tail light with distilled water in order to prevent limescale from the clear bathwater. Dry it at a moderate temperature with a hair dryer or give it a sunbath.
There is no specific expertise needed for this kind of repair; everybody can do it.
This worked perfectly for me.......never more any fog in my taillight.
Let me know if your repair is succesfull too!
Just wanna share my experience in case anyone has this issue:
I actually went to a body shop to get the right taillight sealed. I have tried once before myself, but I think I applied too little silicon sealant for it to be effective. The body shop has done a good job and sealed up the right taillight perfectly with the silicon sealant.
I believe the idea is just be generous with the sealant, but if you are in doubt, find a good body shop that will do it for you.
Now my left side one is fogging up. Fffffffffffffffffffff... Time for another visit.
Seal the bulb sockets, immerse in water, look for bubbles.
This way there will be no bubbles escape, due to cpl. airtightness / no flow of the rearlight......
Especially if water is colder as environment....
Simply leave the bulb sockets open and submerge the taillight with a horizontal positioning in the water......
An evt. minor entrance of water eventually is no problem since the taillight anyway has to be cleaned by rinsing with demineralized water and drying thoroughly......
See also my post # 16
Since my repair both taillights are free from any kind of condensation etc in summer, winter and rain...for 2 years already........
My observation is that more cars have condensation now than they did in the 1990s. More complex taillight shapes and chambers. Your 1999 Corolla has simple tail lights
Anyway, turns out there were no issues with the seals, as I went to a touchless car wash and there was no condensation in the taillight(I blew the water in there before out with a hairdryer). The condensation is coming from inside the trunk - there was a leak around the third brake light, I believe, and I blew out the water again with the hairdryer.
 10-22-2013, 12:00 PM


 (Sorry, just have to rant a bit here)