RX8Club.com
Register Photo Gallery FAQ Members List Calendar Search Today's Posts Mark Forums Read Used CarsVendorsRX8 Live! TSB & Recalls

Go Back   RX8Club.com > Series II Tech & Performance (US 2009MY-) > Series II DIY
Sign in using an external account
Register Forgot Password?

Welcome to RX8Club.com!
Welcome to RX8Club.com,

You are currently viewing our forum as a guest, which gives you limited access to view most discussions and access our other features. By joining our community, at no cost, you will have access to start new topics, reply to conversations, privately message other members (PM), respond to polls, upload content and access many other special features. Registration is free, fast and simple, so please join RX8Club.com today!


Reply


LinkBack Thread Tools Search this Thread Rate Thread Display Modes
Old 04-17-2011, 01:40 PM   #1
dɐıɯou˙soɹoɹ
 
paimon.soror's Avatar
 
Trader Score: (11)
Join Date: Jun 2010
Location: Between Cones
Posts: 5,778
paimonsorornejad chooliobravo
DIY: Painting Stock Muffler

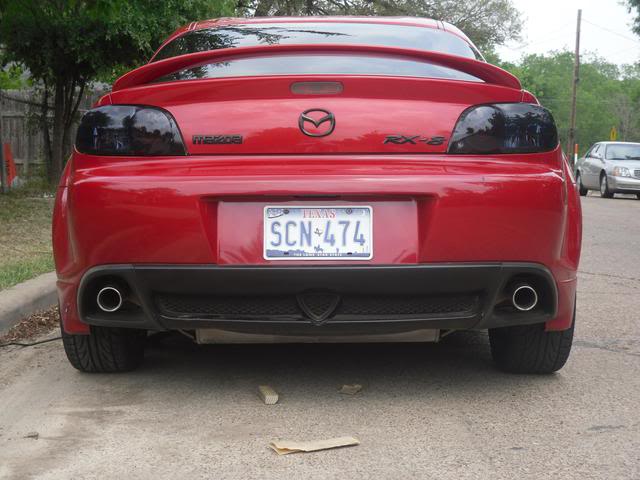
For some of us who have yet to get a new exhaust, but want something a bit more sleek looking than the stock exhaust, one option is to give the muffler a few good coats of matte black paint. For this project, you will need the following:

2 cans of BBQ/Stove Grade Flat Black spray paint
200 grit sandpaper
Masking Tape
Newspaper / Trash Bags for masking curtains
About two hours
This ad is not displayed to registered and logged-in members.
Register your free account today and become a member on RX8Club.com!
paimon.soror is online now   Reply With Quote
Old 04-17-2011, 01:41 PM   #2
dɐıɯou˙soɹoɹ
 
paimon.soror's Avatar
 
Trader Score: (11)
Join Date: Jun 2010
Location: Between Cones
Posts: 5,778
paimonsorornejad chooliobravo
Here is what the stock exhaust looks like. As you can see, once the muffler starts to get discolored, it can really throw off the look of the rear of the car.

Click the image to open in full size.

Click the image to open in full size.
Attached Thumbnails
DIY: Painting Stock Muffler-img_0967-jpg   DIY: Painting Stock Muffler-img_0968-jpg  

Last edited by paimon.soror; 04-17-2011 at 01:47 PM.
paimon.soror is online now   Reply With Quote
Old 04-17-2011, 01:41 PM   #3
dɐıɯou˙soɹoɹ
 
paimon.soror's Avatar
 
Trader Score: (11)
Join Date: Jun 2010
Location: Between Cones
Posts: 5,778
paimonsorornejad chooliobravo
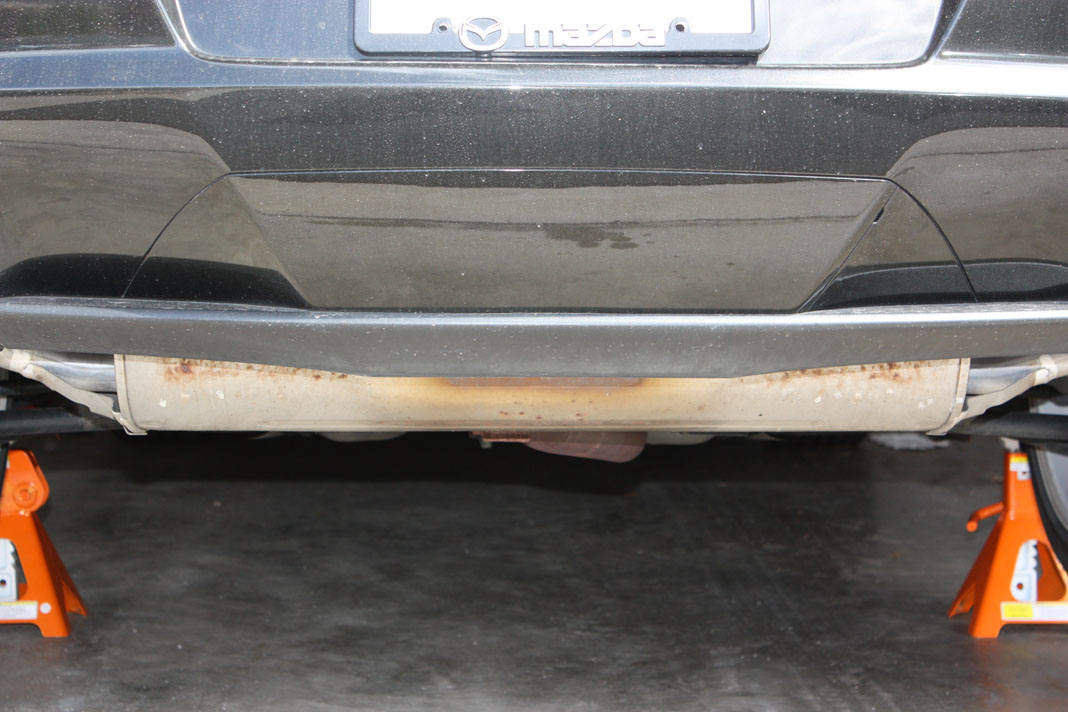
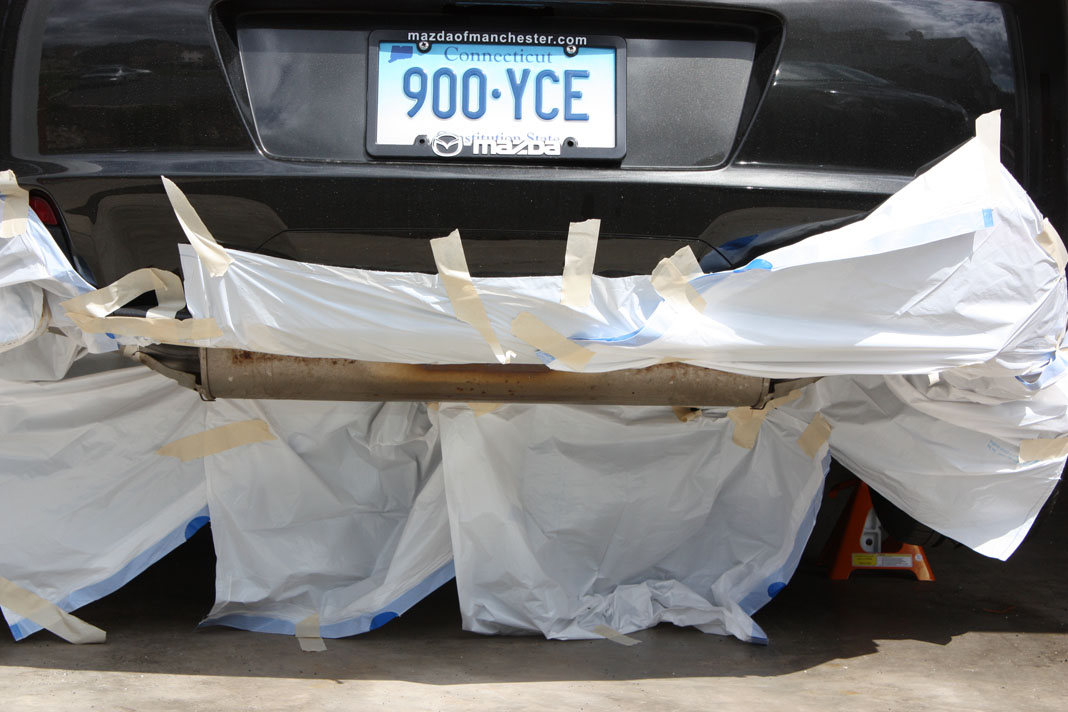
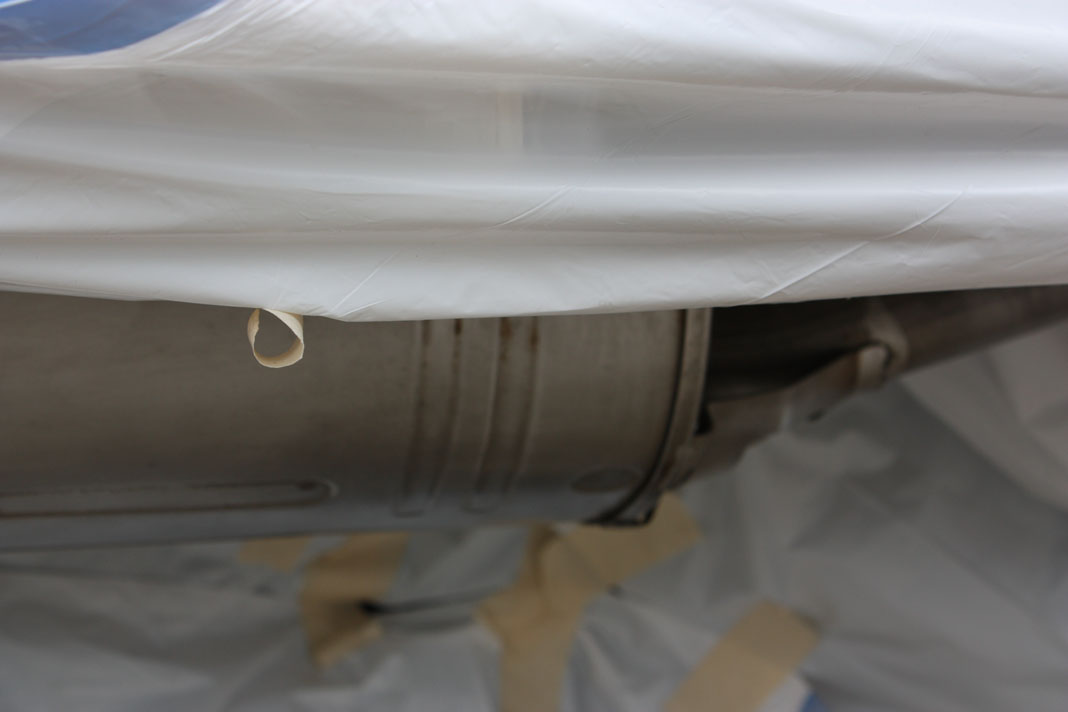
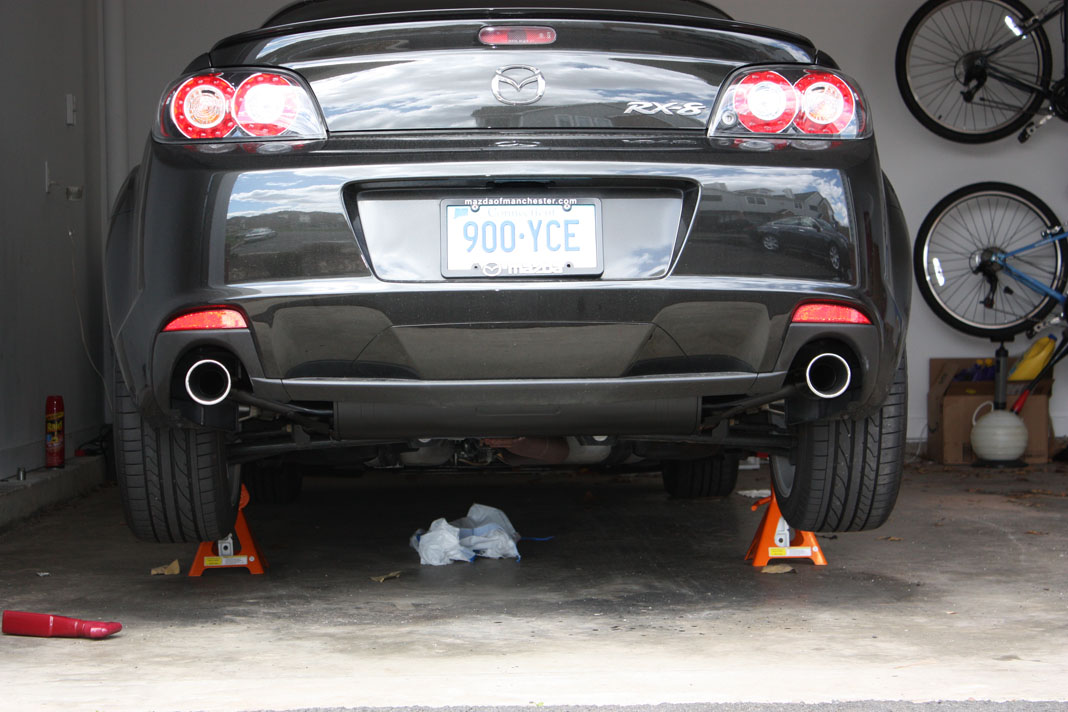
We want to take really good care to mask off the car. In my case, I wanted to do the painting with the muffler on. I am not going for super show room quality, so i dont mind not painting the top portion of the exhaust. Also, because the exhaust is essentially a one piece from the cat-back, it would require quite a bit of effort, and then I would have to worry about gaskets and torque specs and possible rusted bolts.

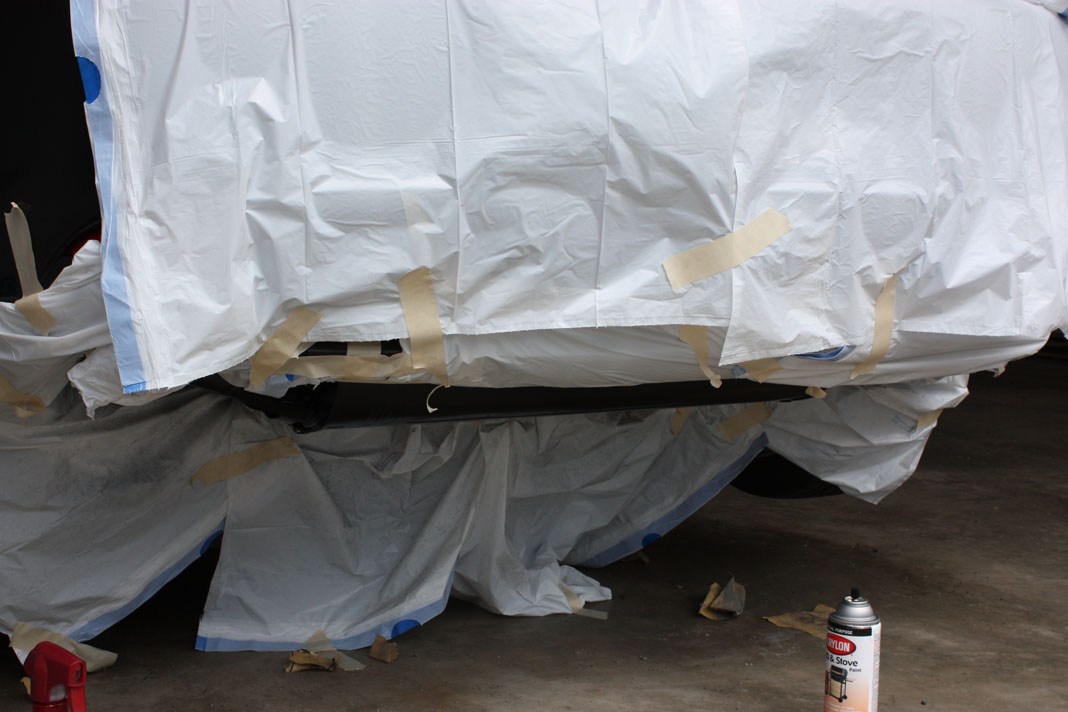
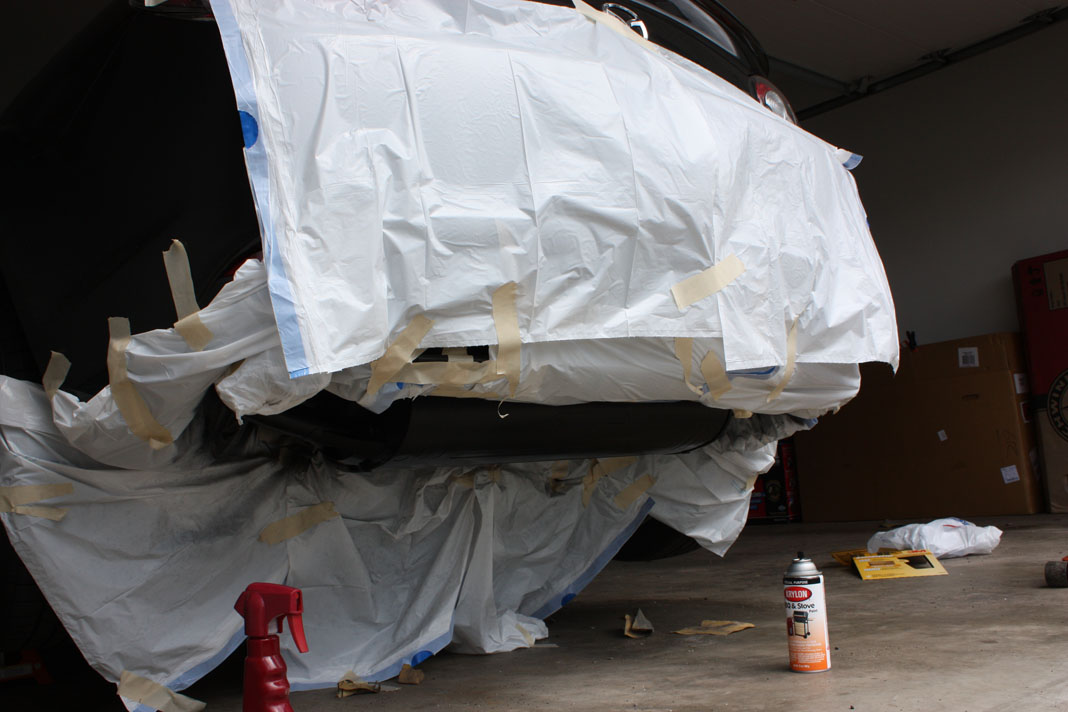
Spend some quality time under the car masking everything off. Even mask up the trunk to the back window, you dont want some overspray travel through the air on the paint.

Click the image to open in full size.

Click the image to open in full size.

Click the image to open in full size.
Attached Thumbnails
DIY: Painting Stock Muffler-img_0970-jpg   DIY: Painting Stock Muffler-img_0971-jpg   DIY: Painting Stock Muffler-img_0972-jpg  

Last edited by paimon.soror; 04-17-2011 at 01:49 PM.
paimon.soror is online now   Reply With Quote
Old 04-17-2011, 01:42 PM   #4
dɐıɯou˙soɹoɹ
 
paimon.soror's Avatar
 
Trader Score: (11)
Join Date: Jun 2010
Location: Between Cones
Posts: 5,778
paimonsorornejad chooliobravo
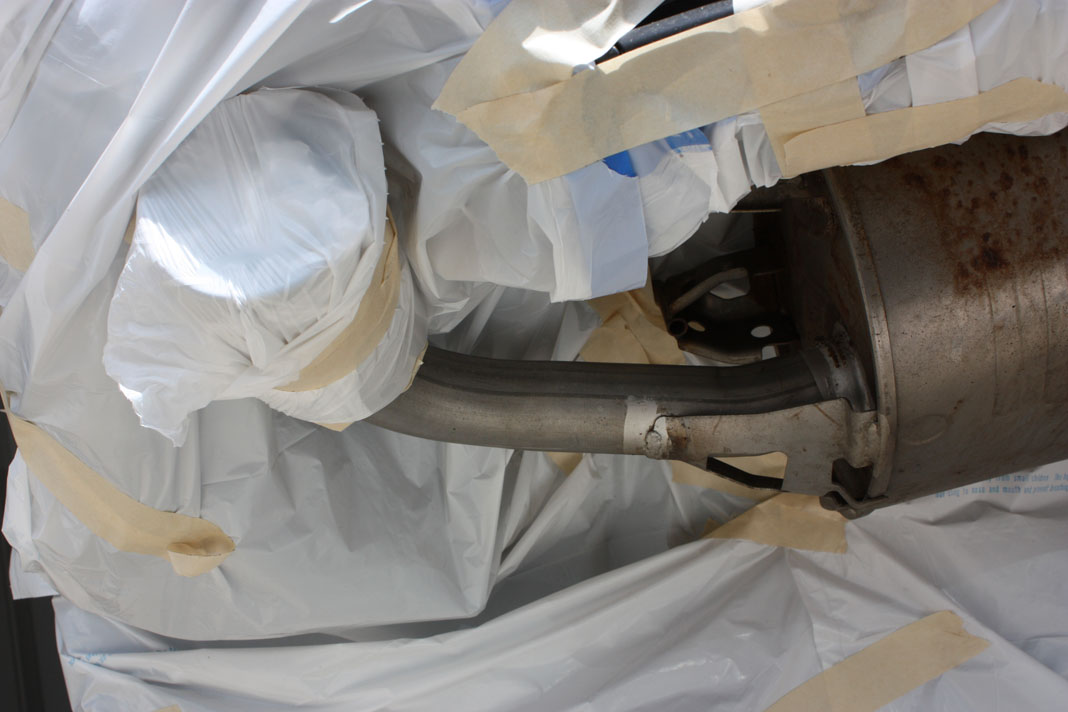
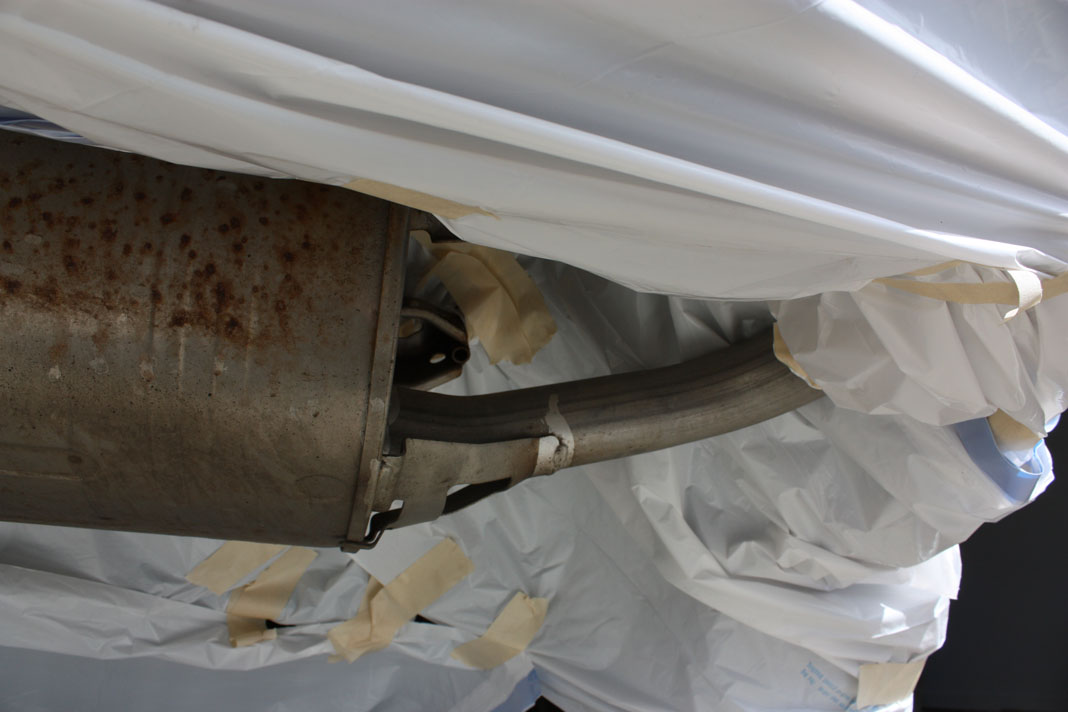
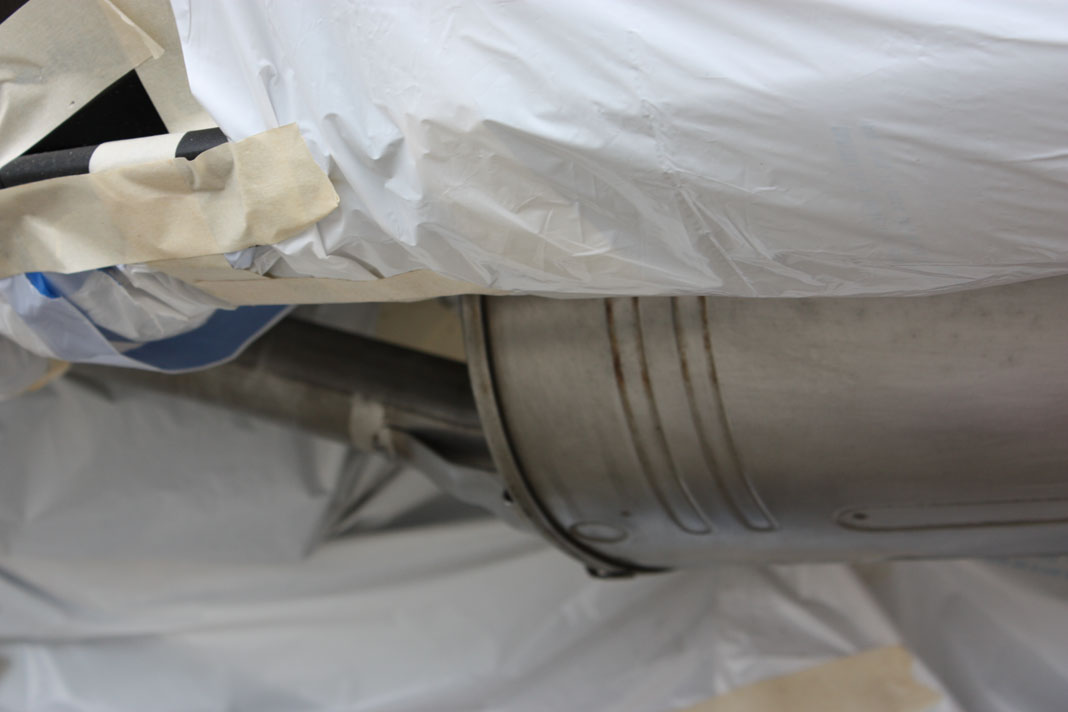
We now need to prepare the metal for paint bonding. To do this, get your 200 grit sandpaper and start attacking the muffler. I used some detailing spray to lubricate the muffler to let the sandpaper work better. You can also use some dish soap and water. Make sure to get every nook and crannie possible. The better your sanding, the better hte paint will bond.

Click the image to open in full size.

Click the image to open in full size.

Click the image to open in full size.
Attached Thumbnails
DIY: Painting Stock Muffler-img_0973-jpg   DIY: Painting Stock Muffler-img_0974-jpg   DIY: Painting Stock Muffler-img_0975-jpg  

Last edited by paimon.soror; 04-17-2011 at 01:51 PM.
paimon.soror is online now   Reply With Quote
Old 04-17-2011, 01:42 PM   #5
dɐıɯou˙soɹoɹ
 
paimon.soror's Avatar
 
Trader Score: (11)
Join Date: Jun 2010
Location: Between Cones
Posts: 5,778
paimonsorornejad chooliobravo
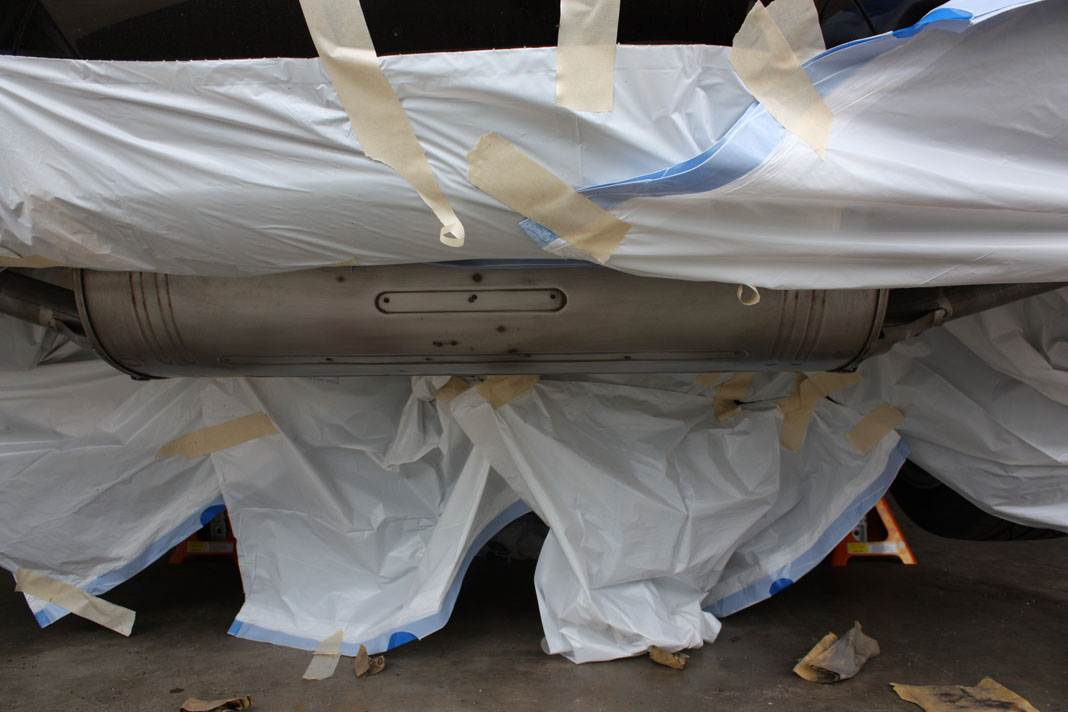
Next, take your spray paint, and shake it up real nice. Apply a nice thin even coat to the muffler. You really want to be sure to stay even and not overspray so that the paint drips. Use the side to side technique from about 6 inches away, and use a light misting action. We want a thin coat to allow the next few coats to really bond.

Click the image to open in full size.

Click the image to open in full size.

Click the image to open in full size.
Attached Thumbnails
DIY: Painting Stock Muffler-img_0976-jpg   DIY: Painting Stock Muffler-img_0977-jpg   DIY: Painting Stock Muffler-img_0978-jpg  

Last edited by paimon.soror; 04-17-2011 at 01:54 PM.
paimon.soror is online now   Reply With Quote
Old 04-17-2011, 01:43 PM   #6
dɐıɯou˙soɹoɹ
 
paimon.soror's Avatar
 
Trader Score: (11)
Join Date: Jun 2010
Location: Between Cones
Posts: 5,778
paimonsorornejad chooliobravo
After about 15 minutes of dry time, start applying your second coat. Again, be sure to spray evenly and making sure the can is shaken nicely. Then give about a 5 minute dry time, and repeat this process. I used about 1 1/2 cans to really get a nice thick even coat (the can recommends 1 whole can per small grill fyi).

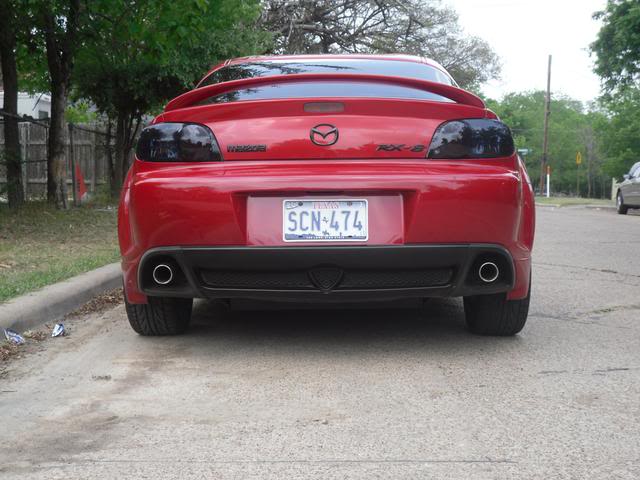
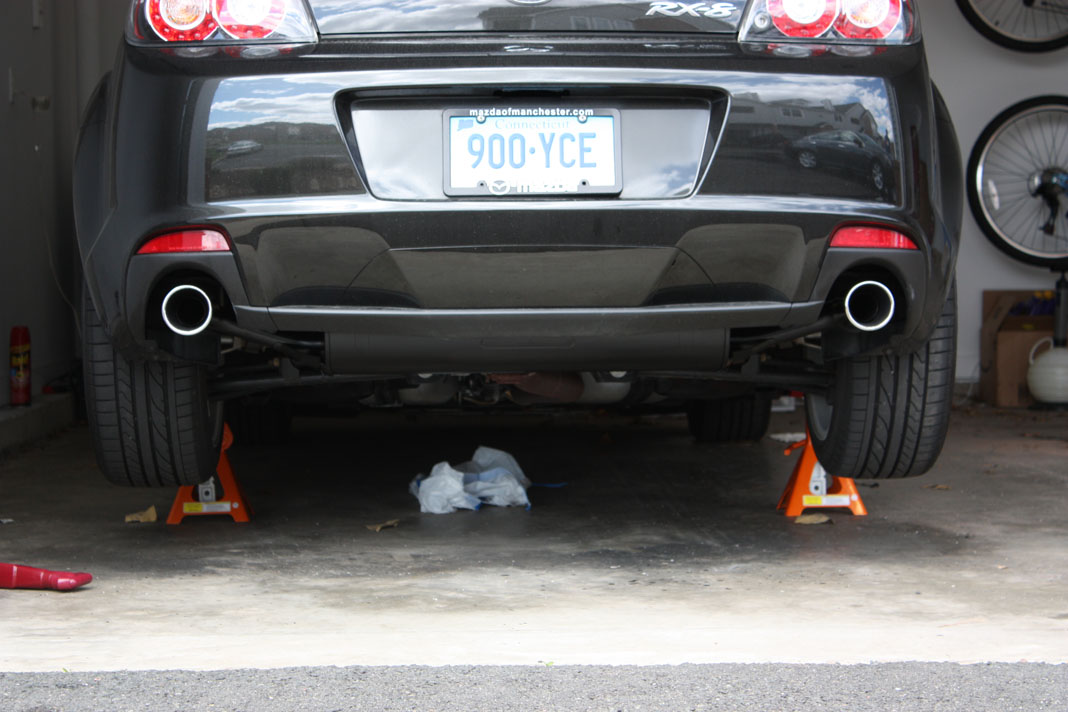
Once you are done laying out all of your coats, remove the masking, and marvel at your "new" muffler . Let sit for a few hours to cure (at least one hour). FYI the first time you turn on the car, the paint may smoke, this is perfectly normal, the heat from the exhaust actually causes the paint to bond even stronger.

Click the image to open in full size.

Click the image to open in full size.

Click the image to open in full size.

Click the image to open in full size.
Attached Thumbnails
DIY: Painting Stock Muffler-img_0979-jpg   DIY: Painting Stock Muffler-img_0980-jpg   DIY: Painting Stock Muffler-img_0981-jpg   DIY: Painting Stock Muffler-img_0982-jpg  

Last edited by paimon.soror; 04-17-2011 at 01:57 PM.
paimon.soror is online now   Reply With Quote
Old 04-17-2011, 02:00 PM   #7
running on double cream!
 
rickeo's Avatar
 
Trader Score: (1)
Join Date: Aug 2005
Location: North Wales, PA
Posts: 723
chrisriccio
Send a message via Skype™ to rickeo
Great job!
__________________
Quote:
Originally Posted by Luftwaffle
If I had a license to taser people, the world would be a much better place.
Quote:
Originally Posted by CRO8TIA View Post
I treat my 8 like my *****, only me and the wife ever touch it
rickeo is offline   Reply With Quote
Old 04-17-2011, 02:04 PM   #8
05 M/T BB
 
viprez586's Avatar
 
Trader Score: (5)
Join Date: Feb 2009
Location: New Berlin, WI
Posts: 380
Looks good, but I'm not too sure about the extremely high exhaust gas temps that rotaries are known to produce.

Perhaps since you did multiple thin coats it will last.

I tried the same thing on my Talon muffler and it began to chip from stones/salt/etc.
__________________

05 M/T Brilliant Black vB Garage

Air Pump Rebuild DIY
viprez586 is offline   Reply With Quote
Old 04-17-2011, 02:07 PM   #9
dɐıɯou˙soɹoɹ
 
paimon.soror's Avatar
 
Trader Score: (11)
Join Date: Jun 2010
Location: Between Cones
Posts: 5,778
paimonsorornejad chooliobravo
yea the paint is rated for 1200 max flash temp and a 600F ( or more supposudly) constant temp. Exhaust temps shouldn't really reach more than 600F constant
paimon.soror is online now   Reply With Quote
Old 04-17-2011, 02:54 PM   #10
Registered User
 
Trader Score: (2)
Join Date: Feb 2008
Posts: 1,323
Nice option for those with stock exhaust. Nice DIY!
terch1 is offline   Reply With Quote
Old 04-17-2011, 03:07 PM   #11
dɐıɯou˙soɹoɹ
 
paimon.soror's Avatar
 
Trader Score: (11)
Join Date: Jun 2010
Location: Between Cones
Posts: 5,778
paimonsorornejad chooliobravo
ty sir, appreciate it
paimon.soror is online now   Reply With Quote
Old 04-17-2011, 04:11 PM   #12
Registered
 
jasonrxeight's Avatar
 
Trader Score: (0)
Join Date: Jan 2010
Location: Omaha, NE
Posts: 3,275
nice work. Ima do mine soon.
__________________
09+ Racing Beat oil cooler screen install

2009 Mazda RX-8 R3
2013 Toyota FJ Cruiser
2008 Yamaha YZF-R6
jasonrxeight is offline   Reply With Quote
Old 04-17-2011, 04:20 PM   #13
Constructive Criticism :)
 
RX8Soldier's Avatar
 
Trader Score: (10)
Join Date: Jun 2010
Location: Winnipeg, MB Canada
Posts: 4,177
ohh I never would have considered that! You're outside the box thinking is a credit to our fair community
__________________
GBNF --'86 RX7 GX RIP | '88 10th AE T-II RIP | '05 RX8 Ti Grey SOLD--
'07 RX8 GT Phantom Blue Mica
Mazdaspeed || BHR || Enkei/ Falken || AFE/VooDoo || Cobb || Lo-Tek/Prosport || Tein || Racing Beat || KEI || Buddy Club|| XCarLink || Redline/ Lucas
RX8Soldier is offline   Reply With Quote
Old 04-17-2011, 04:52 PM   #14
Blue Bullet?
 
mscamp02's Avatar
 
Trader Score: (3)
Join Date: Dec 2008
Location: morehead, Ky
Posts: 2,568
much better
__________________

04


mscamp02 is offline   Reply With Quote
Old 04-18-2011, 07:11 AM   #15
dɐıɯou˙soɹoɹ
 
paimon.soror's Avatar
 
Trader Score: (11)
Join Date: Jun 2010
Location: Between Cones
Posts: 5,778
paimonsorornejad chooliobravo
Quote:
Originally Posted by jasonrxeight View Post
nice work. Ima do mine soon.
Oh it would probably look so sexy offsetting the blue

Quote:
Originally Posted by RX8Soldier View Post
ohh I never would have considered that! You're outside the box thinking is a credit to our fair community
Thank you sir, can't take full credit though, it's a fairly common mod among the honda and scooby guys

Quote:
Originally Posted by mscamp02 View Post
much better
thanks buddy, i agree
paimon.soror is online now   Reply With Quote
Old 04-18-2011, 08:04 AM   #16
Living is best Modified.
 
Trader Score: (0)
Join Date: Jul 2007
Location: South Carolina
Posts: 476
melanton melanton
Send a message via ICQ to RogueTadhg Send a message via AIM to RogueTadhg Send a message via MSN to RogueTadhg Send a message via Yahoo to RogueTadhg
thats looking good sir.

Did you think about painting the tips as well?

Oh, Meguiar's Quick Detailer in the pictures as well?
__________________
2008 VW / Jetta Wolfsburg 2.0T / Reflex Silver Metallic Clearcoat. Current.
2009 Mazda / RX-8 R3 (FE17) / Aurora Electric Blue Mica. Traded
2001 Toyota / Corolla CE (E114) / Sandrift Metallic. Totalled - Not at Fault.

"My happiness can be measured by my odometer."
RogueTadhg is offline   Reply With Quote
Old 04-18-2011, 08:07 AM   #17
dɐıɯou˙soɹoɹ
 
paimon.soror's Avatar
 
Trader Score: (11)
Join Date: Jun 2010
Location: Between Cones
Posts: 5,778
paimonsorornejad chooliobravo
Haha yup, I used the MQD as my lubricant for the sandpaper, thats actually the stuff that came with their claybar... I personally like their Ultimate Detailer better.

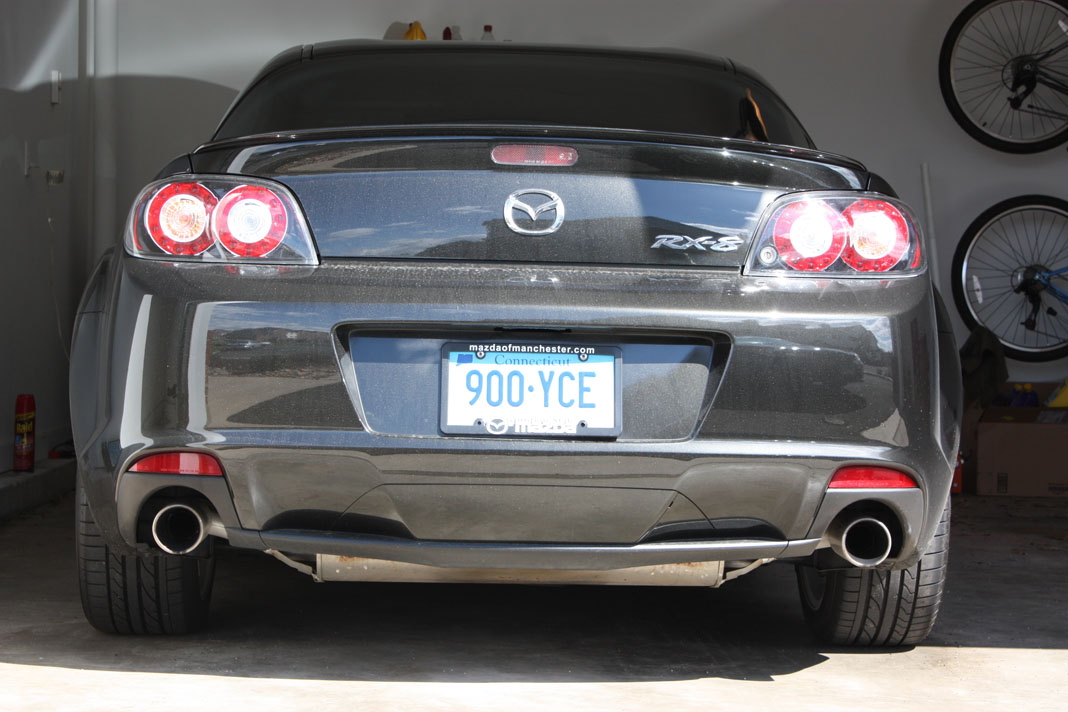
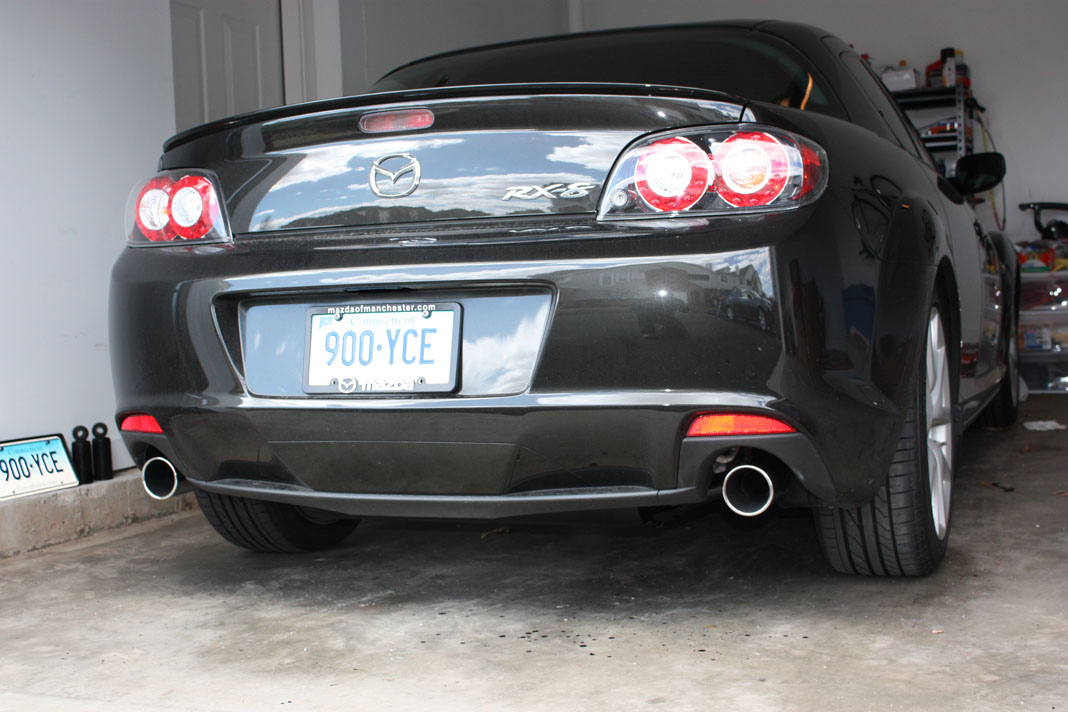
As far as the tips go, I like the chrome on the tips, but I have it painted black all the way up to where the tips meet the exhaust piping, so there is a very nice factory looking break. I will have to take some better close up pics later.
paimon.soror is online now   Reply With Quote
Old 04-18-2011, 03:38 PM   #18
Registered
 
Trader Score: (0)
Join Date: Jul 2010
Posts: 202
yeah the stock exhaust is a real eyesore. I painted mine after a mere month of ownership. Looks good. I used flat black. Since my car was brand new, I got away with a damp sponge on a semi-hot exhaust as far as the prep lol.

Last edited by Beefy98; 04-18-2011 at 03:41 PM.
Beefy98 is offline   Reply With Quote
Old 04-18-2011, 03:39 PM   #19
dɐıɯou˙soɹoɹ
 
paimon.soror's Avatar
 
Trader Score: (11)
Join Date: Jun 2010
Location: Between Cones
Posts: 5,778
paimonsorornejad chooliobravo
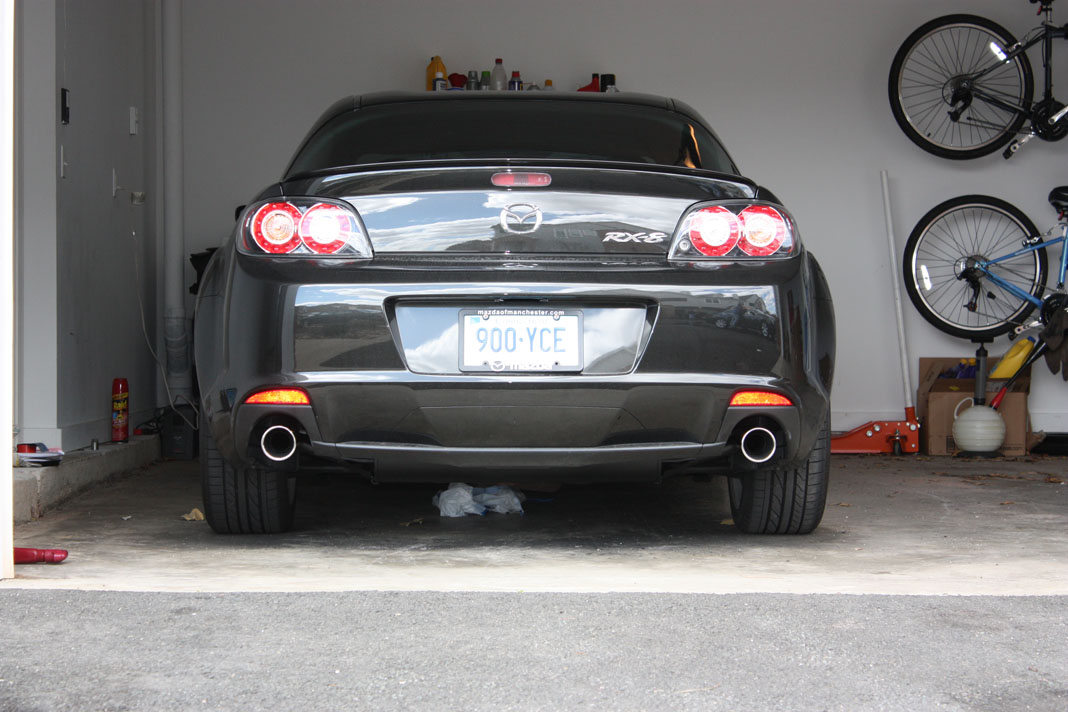
Here are some more detail shots...dont mind the dirty car... fyi these pics came from right after the drive home from work, with 2 2nd gear redline pulls. and FYI those are not missed spots, its actually the flash reflecting off some overspray
Attached Thumbnails
DIY: Painting Stock Muffler-img_0987-jpg   DIY: Painting Stock Muffler-img_0988-jpg   DIY: Painting Stock Muffler-img_0989-jpg   DIY: Painting Stock Muffler-img_0993-jpg  
paimon.soror is online now   Reply With Quote
Old 04-20-2011, 01:40 PM   #20
Registered
 
blakem2008's Avatar
 
Trader Score: (0)
Join Date: Mar 2009
Location: Bryan,Texas
Posts: 193
blakese3p
im about to go and do this right now will post pics when done...

thanks for the diy
__________________
Bryan Texas,
blakem2008 is offline   Reply With Quote
Old 04-20-2011, 01:54 PM   #21
Relax baby!
 
Trader Score: (3)
Join Date: Oct 2008
Location: Nurburgring driver, Germany
Posts: 1,014
It will be easier and better to take the muffler out, paint the complete muffler not just the bottom and installed, nice diy
__________________
[SIGPIC][/SIGPIC]MAZDASPEED/BILSTEIN/EIBACH/ROCKFORD/LEDS/CARBON
RB ET500/INGS/UNLIMITED/RX7STORE/OPTIMA

Last edited by rx 8speciale; 04-20-2011 at 01:56 PM.
rx 8speciale is offline   Reply With Quote
Old 04-20-2011, 02:17 PM   #22
#50
 
bse50's Avatar
 
Trader Score: (0)
Join Date: Nov 2007
Location: Caput Mundi
Posts: 7,020
Nice diy Paimon!
It would be a good practice to deep degrease the exhaust after sanding it with some strong product. Road dirt, gas fumes etc all make up for a messy surface and paints don't like grease\oil at all
__________________


Enlightenment is man’s leaving his self-caused immaturity. Immaturity is the incapacity to use one's intelligence without the guidance of another. Such immaturity is self-caused if it is not caused by lack of intelligence, but by lack of determination and courage to use one's intelligence without being guided by another. Sapere Aude! - Immanuel Kant
bse50 is offline   Reply With Quote
Old 04-20-2011, 02:49 PM   #23
dɐıɯou˙soɹoɹ
 
paimon.soror's Avatar
 
Trader Score: (11)
Join Date: Jun 2010
Location: Between Cones
Posts: 5,778
paimonsorornejad chooliobravo
agreed, thanks for the tips ^^

So far the paint seems to be ok, smooth to the touch and no signs of cracking or fragmenting. I will keep you guys posted from month to month

Quote:
Originally Posted by rx 8speciale View Post
It will be easier and better to take the muffler out, paint the complete muffler not just the bottom and installed, nice diy
I agree with you, if I had the patience I would just remove the muffler, but that requires removing the whole cat-back and as I mentioned in the first post, I didn't want to deal with torquing and exhaust gaskets and possibly damaging the springs,nuts, etc.

The job is only to hold me over till I get a new exhaust
paimon.soror is online now   Reply With Quote
Old 04-20-2011, 03:47 PM   #24
Registered
 
Trader Score: (0)
Join Date: Jul 2010
Posts: 202
Funny enough, when I was under the car the other day putting on the rear bar I noticed the entire bottom of the muffler is all silver---the black paint just burned right off! No sign of rust all is clean. I think its a stainless steel muffler so why does the rear discolor? So anyone that wants to do this save yourself some effort and just paint the rear and the parts between the muffler and tips.
Beefy98 is offline   Reply With Quote
Old 04-20-2011, 03:54 PM   #25
Registered
 
blakem2008's Avatar
 
Trader Score: (0)
Join Date: Mar 2009
Location: Bryan,Texas
Posts: 193
blakese3p
Before
Click the image to open in full size.


After

Click the image to open in full size.
__________________
Bryan Texas,

Last edited by blakem2008; 04-20-2011 at 03:57 PM.
blakem2008 is offline   Reply With Quote
Old 04-20-2011, 03:54 PM
RX8Club
Mazda RX8


Paid Advertisement


Reply

Tags
92, black, club, diy, exhaust, muffler, mufflers, paint, painted, painting, rx8, spray, stock, talon, voodoo

Thread Tools Search this Thread
Search this Thread:

Advanced Search
Display Modes Rate This Thread
Rate This Thread:

Posting Rules
You may not post new threads
You may not post replies
You may not post attachments
You may not edit your posts

BB code is On
Smilies are On
[IMG] code is On
HTML code is Off
Trackbacks are On
Pingbacks are On
Refbacks are On


Similar Threads
Thread Thread Starter Forum Replies Last Post
DIY: Painting brake calipers XcelR8 Series I Do It Yourself Forum 156 04-08-2013 03:52 PM
DIY: Painting your OEM Rims Chrishoky Series I Do It Yourself Forum 138 03-06-2013 11:01 PM
DIY: Emblem painting ineffable13 Series I Do It Yourself Forum 22 11-02-2011 12:09 AM
painting stock rims, diy maybe? sxe1215 RX-8 Discussion 17 08-17-2009 10:33 PM
Painting the muffler? apotocki Series I Tech Garage 22 01-06-2006 01:49 PM


All times are GMT -5. The time now is 06:50 AM.


Powered by vBulletin® Version 3.8.7
Copyright ©2000 - 2013, vBulletin Solutions, Inc.
SEO by vBSEO ©2010, Crawlability, Inc.
All content Copyright © 2007 by Internet Brands, Inc.
Emails Backup