
DIY: Painting polyurethane front lip


DIY: Painting polyurethane front lip
Things you'll need:
1. Wet/dry sandpaper various grits (I got an assortment pack 220, 400, 600, 800 and 1000 grit)
2. Filler/Sandable primer (1 can)
3. Oem color of your car from automotivetouchup.com/ paintscratch.com/ scratchwizard etc. 1 can (I got 29Y TiGray)
4. Clear coat (1 can)
5. Time
and a few beers
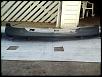
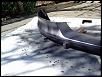
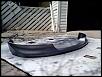
Basically I've had this replica Poly lip for over a year I got for free from a friend. Its been sitting in my garage for quite some time and I decided to paint it myself since my investment in it was minimal
I originally didn't plan on making a writeup so pics of each step are limited.
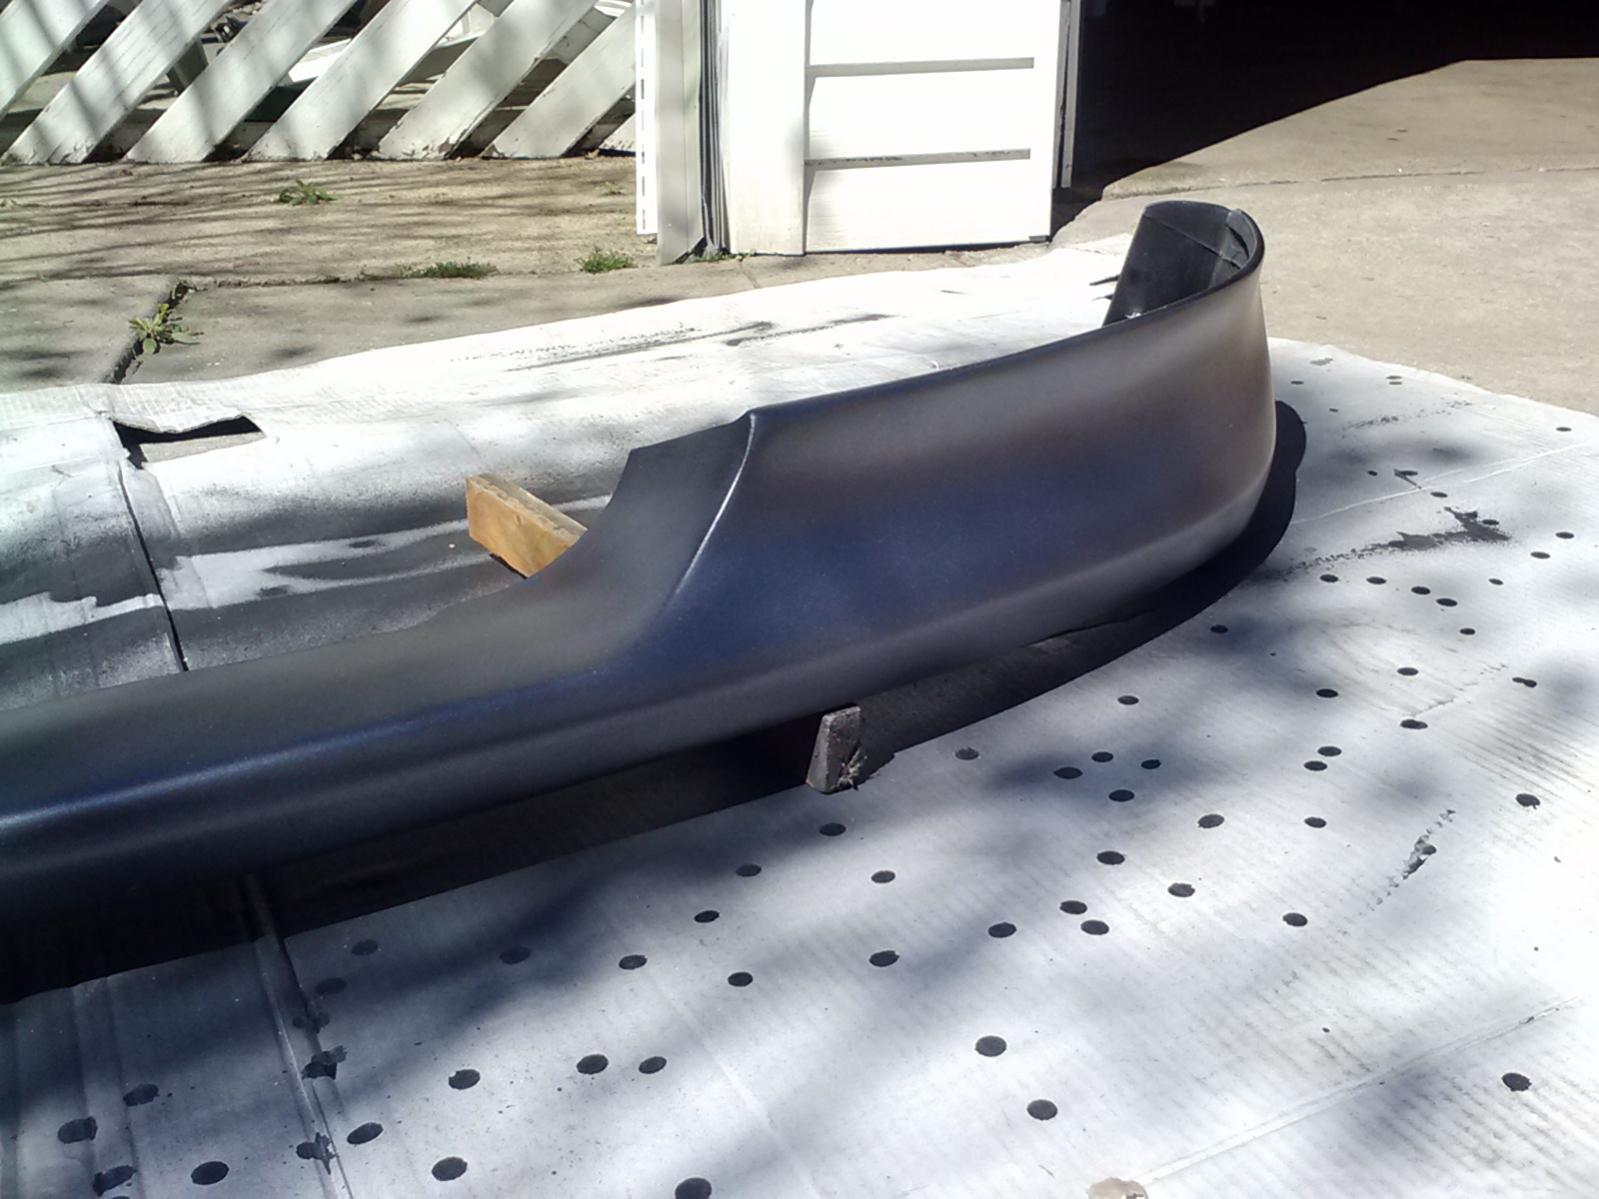
First step was wet sanding. I started with 220 on the bare poly just to scuff the surface and give the primer better adhesion. After wetsanding, washing and letting it dry. I wiped the lip down with a clean rag and some rubbing alcohol. I then started priming.
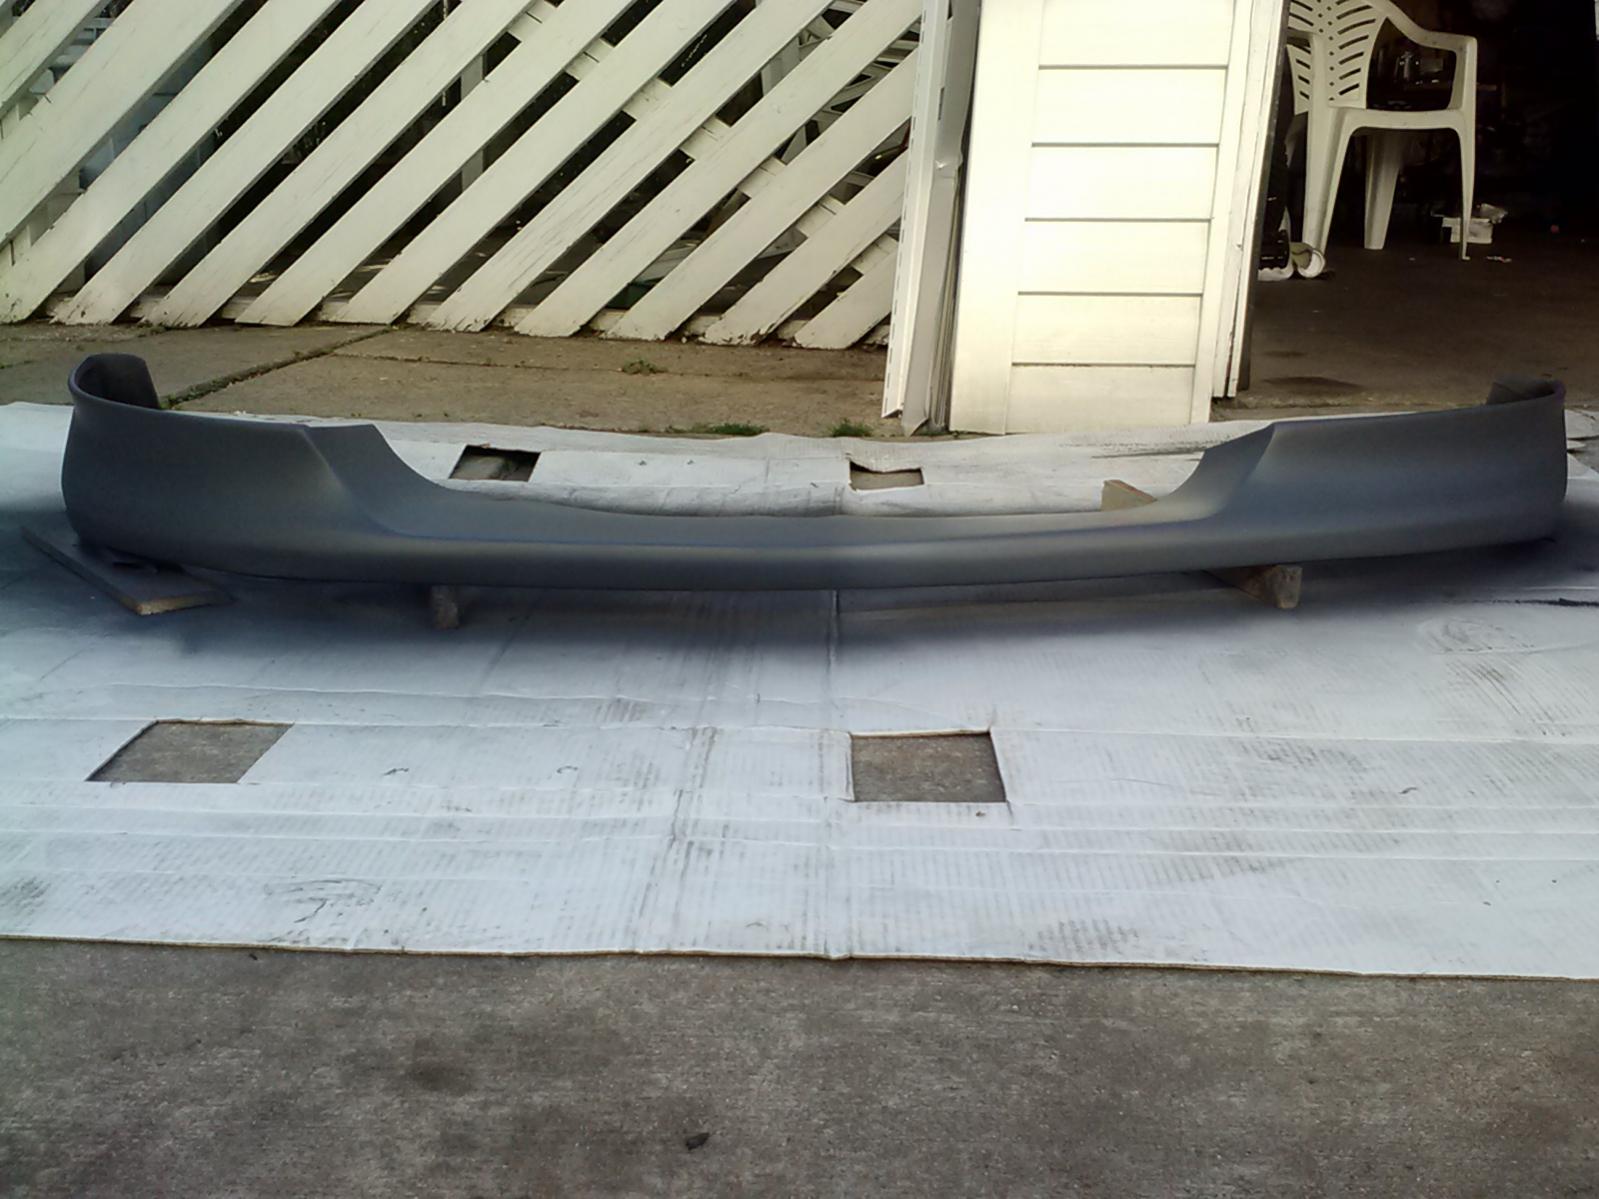
I laid down 4 coats of primer giving about 10 minutes of flash time in between coats (where the beers come in). The key is to get the spray even. I started with light coats and sprayed the last 2 a little thicker. Spraying about 8-12 inches from the lip I used a 50% overlap on each pass
Even coats of primer.
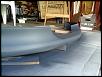
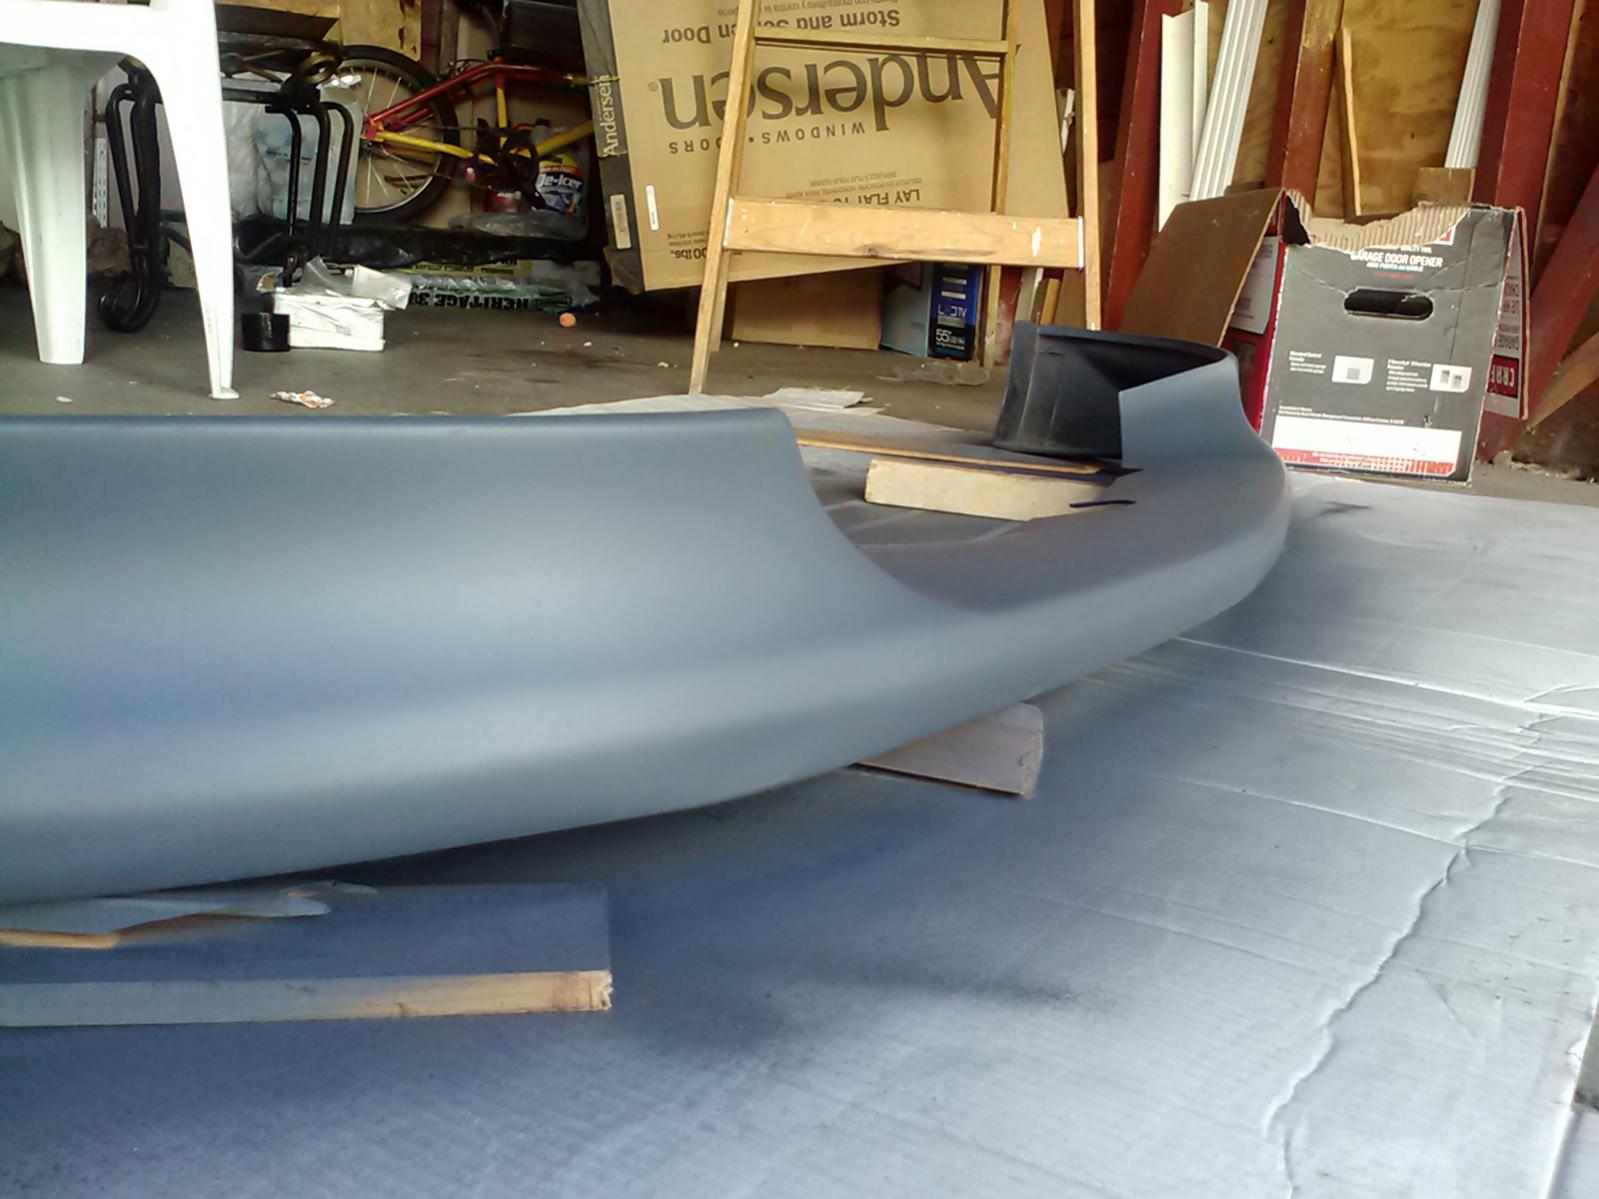
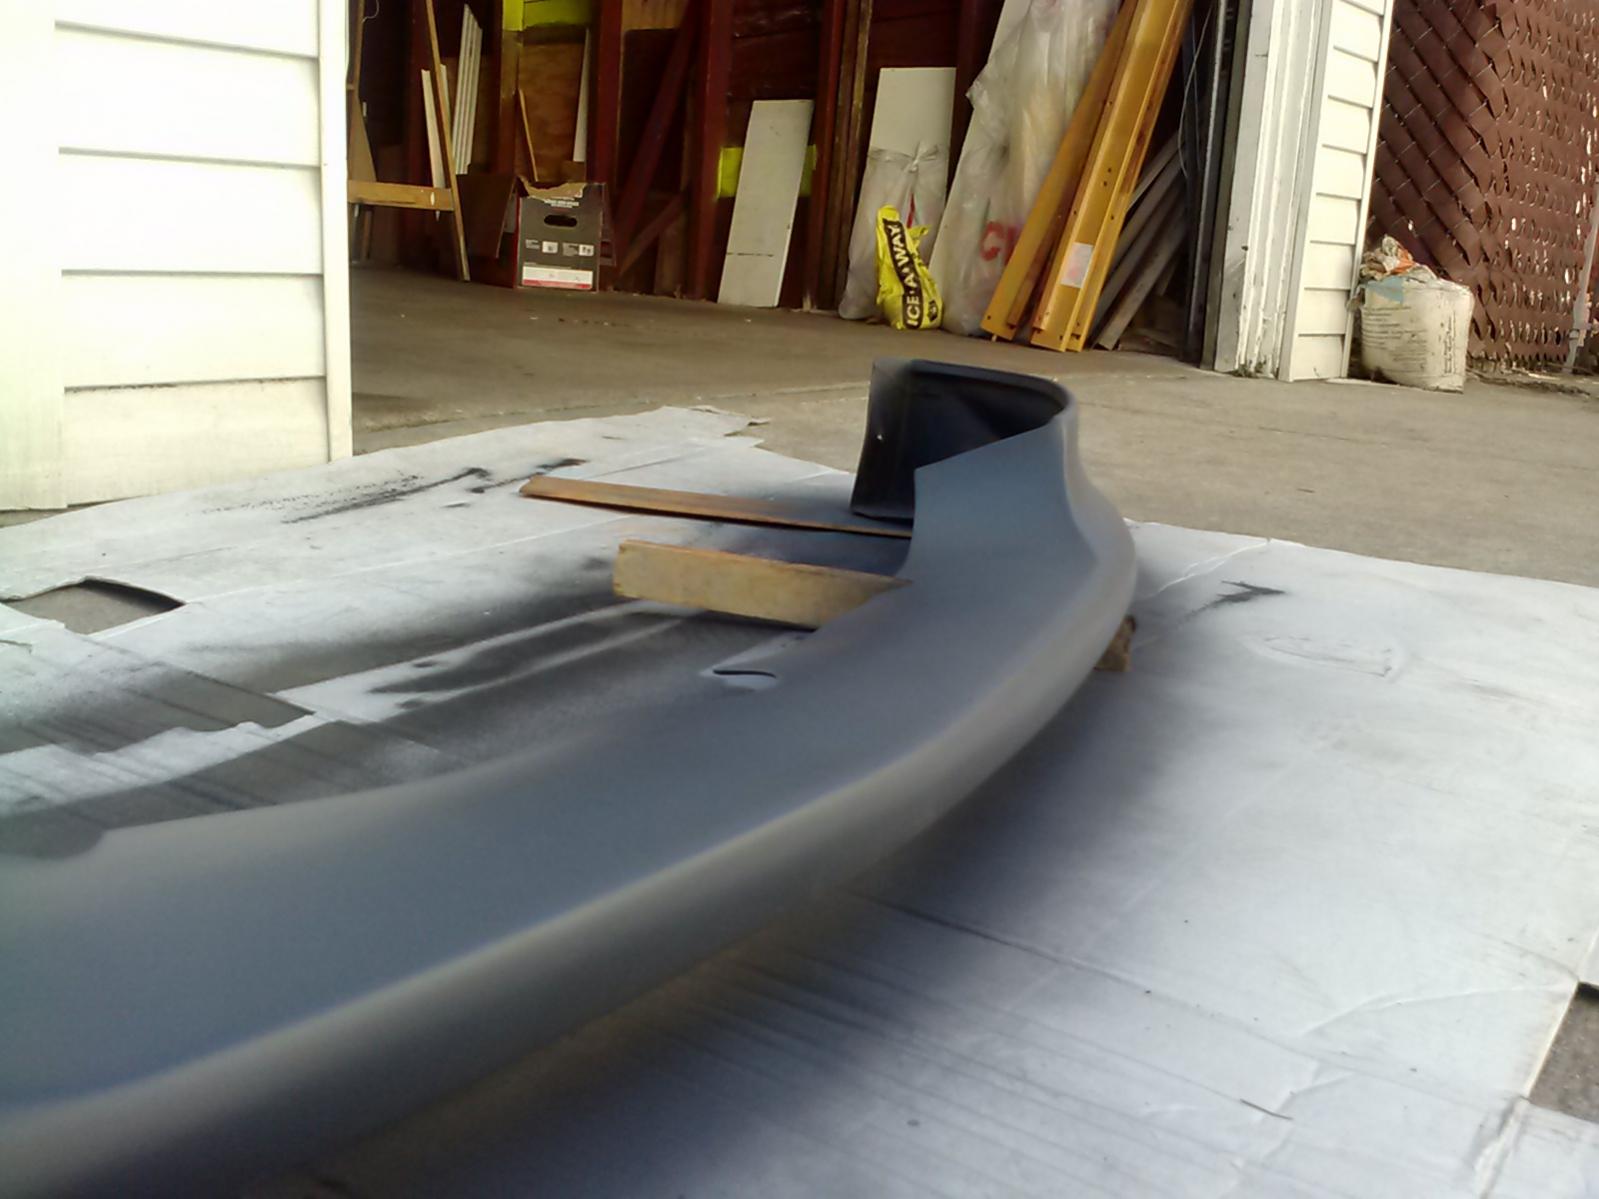
I then let the primer dry overnight, the can says 1 hour until its completely dry. I waited overnight for good measure. After drying I wetsanded with 600 grit for good adhesion.
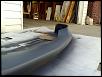
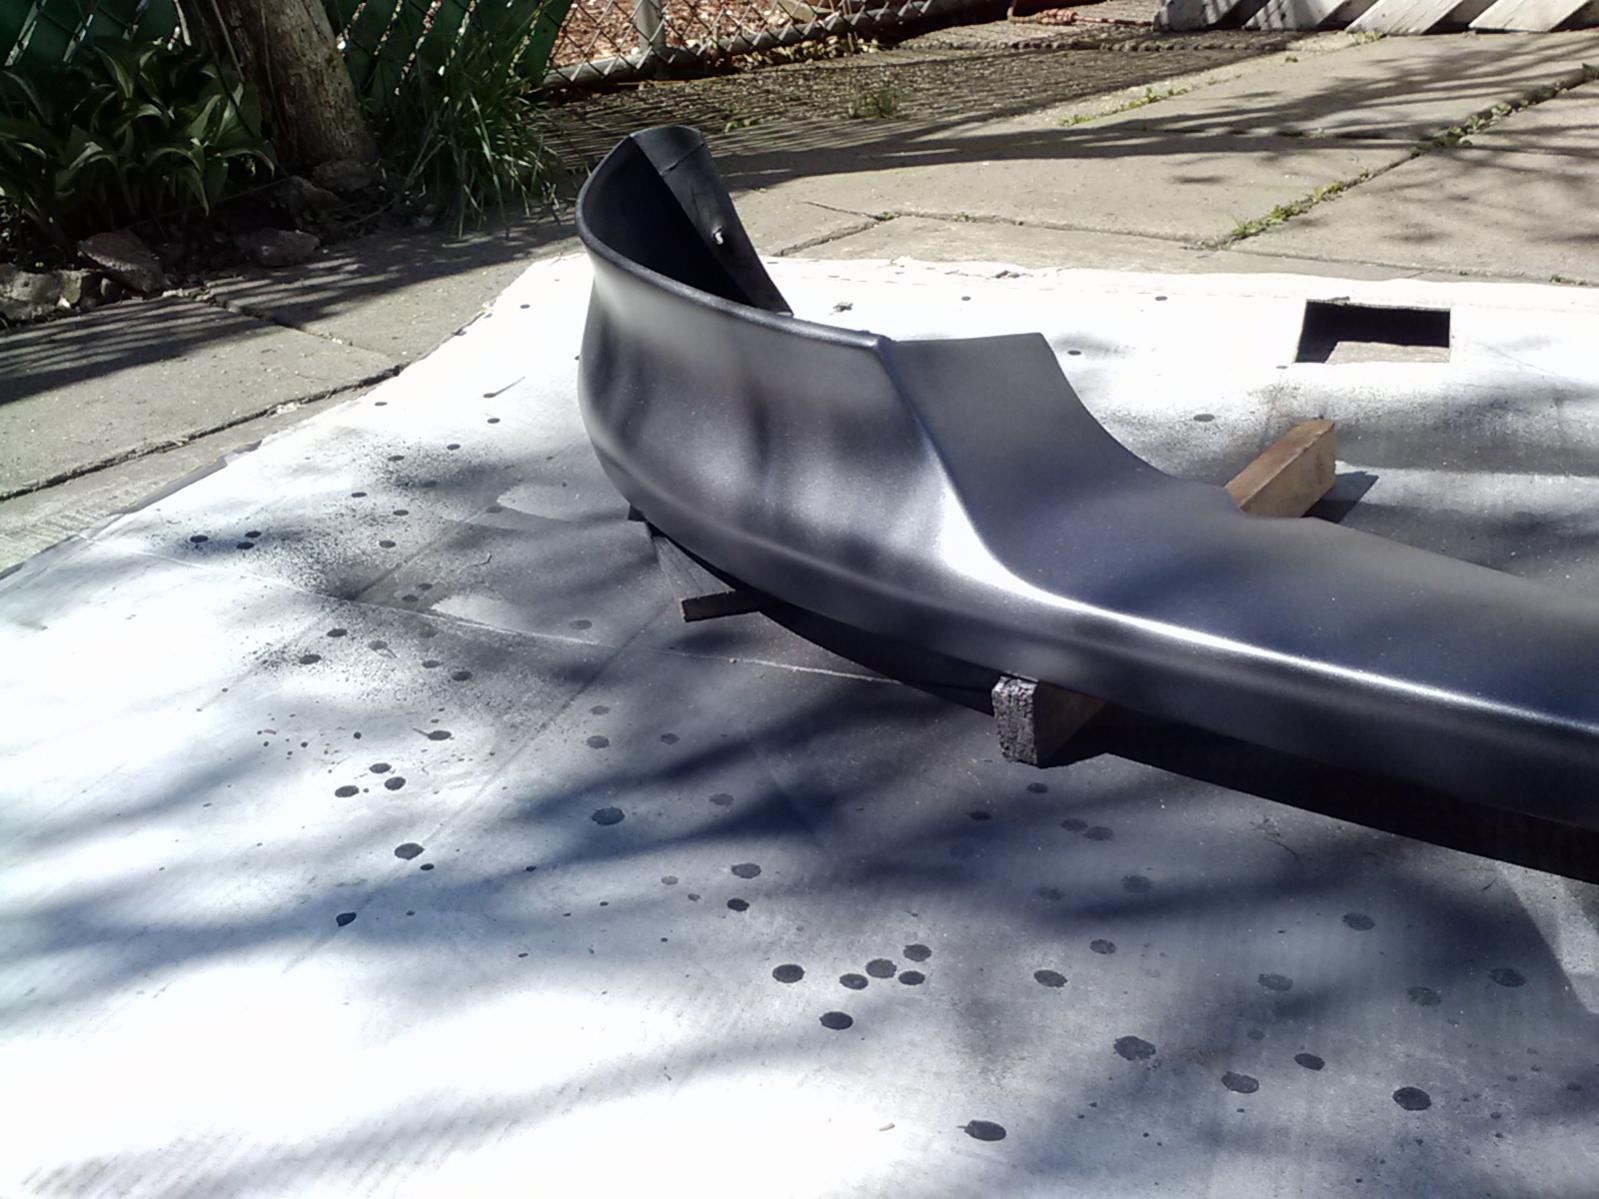
Wiped with a clean rag and rubbing alcohol. I started laying the basecoat. 3 coats giving about 10 min flash time in between. Each coat should be tacky but not completely dry before spraying another coat for good adhesion.
1. Wet/dry sandpaper various grits (I got an assortment pack 220, 400, 600, 800 and 1000 grit)
2. Filler/Sandable primer (1 can)
3. Oem color of your car from automotivetouchup.com/ paintscratch.com/ scratchwizard etc. 1 can (I got 29Y TiGray)
4. Clear coat (1 can)
5. Time
and a few beers
Basically I've had this replica Poly lip for over a year I got for free from a friend. Its been sitting in my garage for quite some time and I decided to paint it myself since my investment in it was minimal
I originally didn't plan on making a writeup so pics of each step are limited.
First step was wet sanding. I started with 220 on the bare poly just to scuff the surface and give the primer better adhesion. After wetsanding, washing and letting it dry. I wiped the lip down with a clean rag and some rubbing alcohol. I then started priming.
I laid down 4 coats of primer giving about 10 minutes of flash time in between coats (where the beers come in). The key is to get the spray even. I started with light coats and sprayed the last 2 a little thicker. Spraying about 8-12 inches from the lip I used a 50% overlap on each pass
Even coats of primer.
I then let the primer dry overnight, the can says 1 hour until its completely dry. I waited overnight for good measure. After drying I wetsanded with 600 grit for good adhesion.
Wiped with a clean rag and rubbing alcohol. I started laying the basecoat. 3 coats giving about 10 min flash time in between
. Each coat should be tacky but not completely dry before spraying another coat for good adhesion.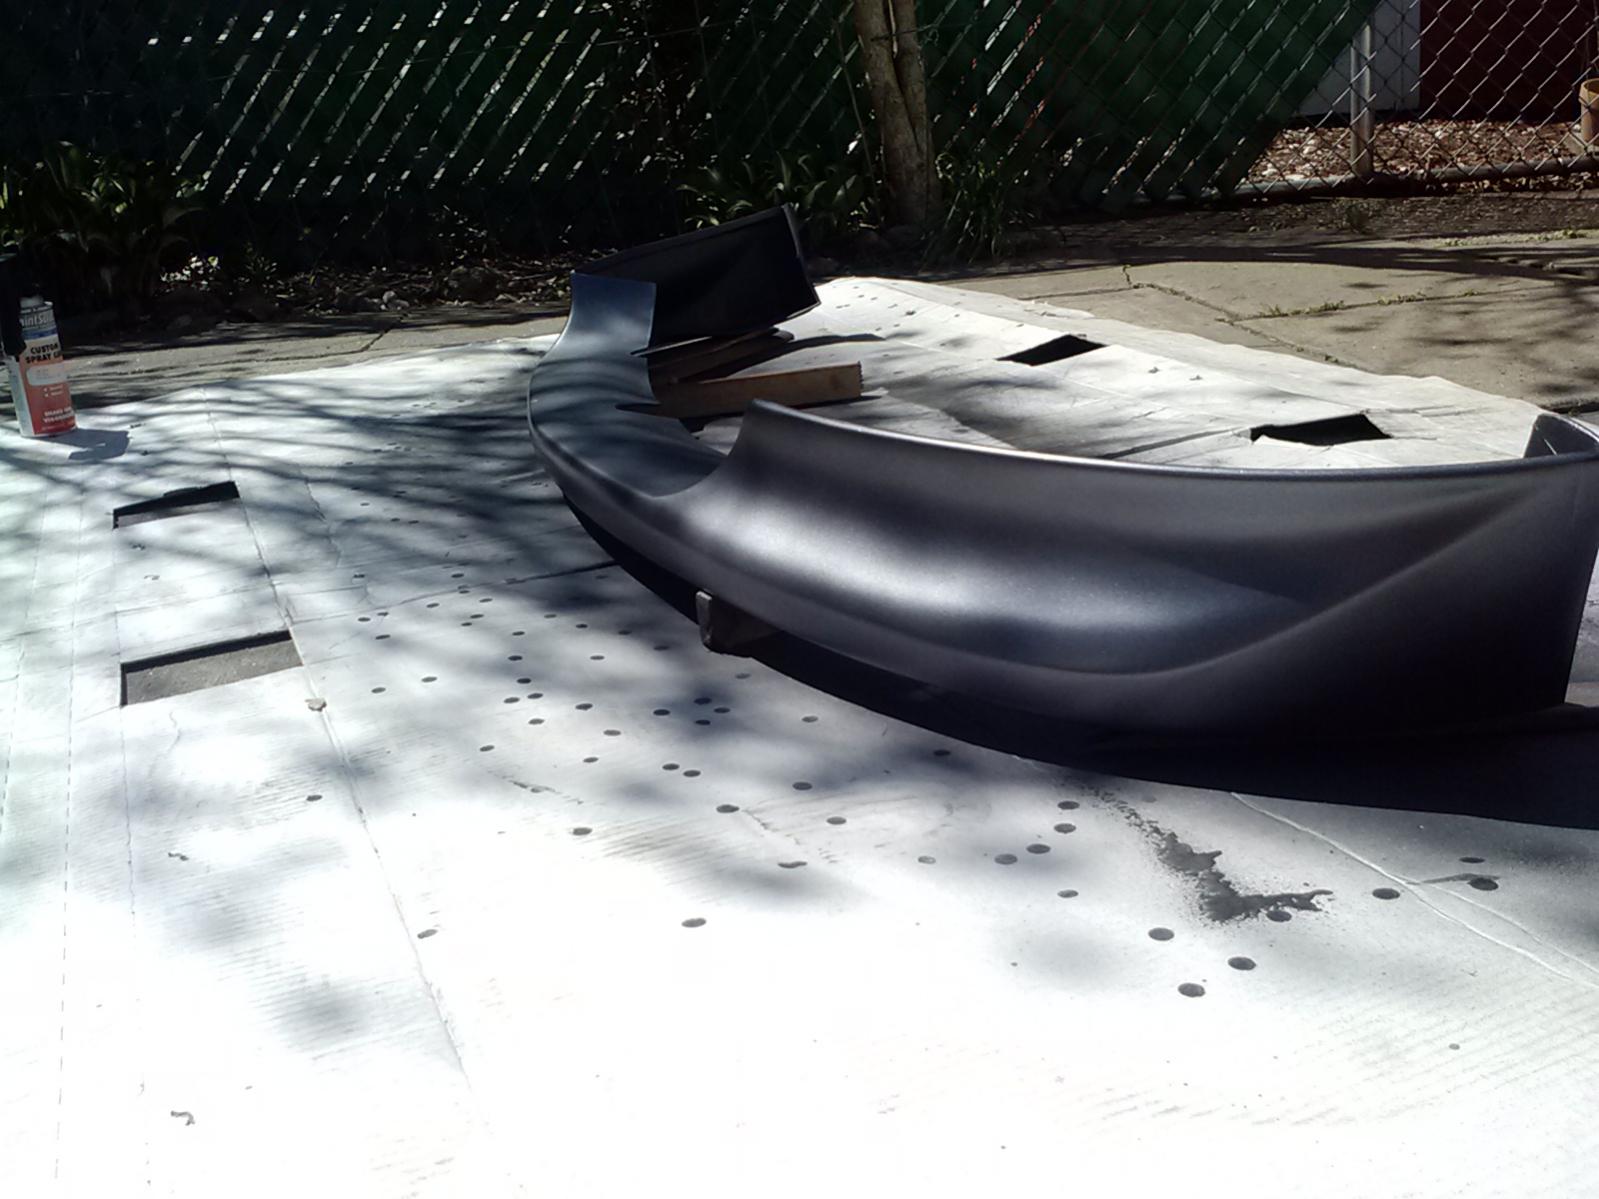
Last edited by GK1707; Jan 2, 2015 at 09:47 AM.
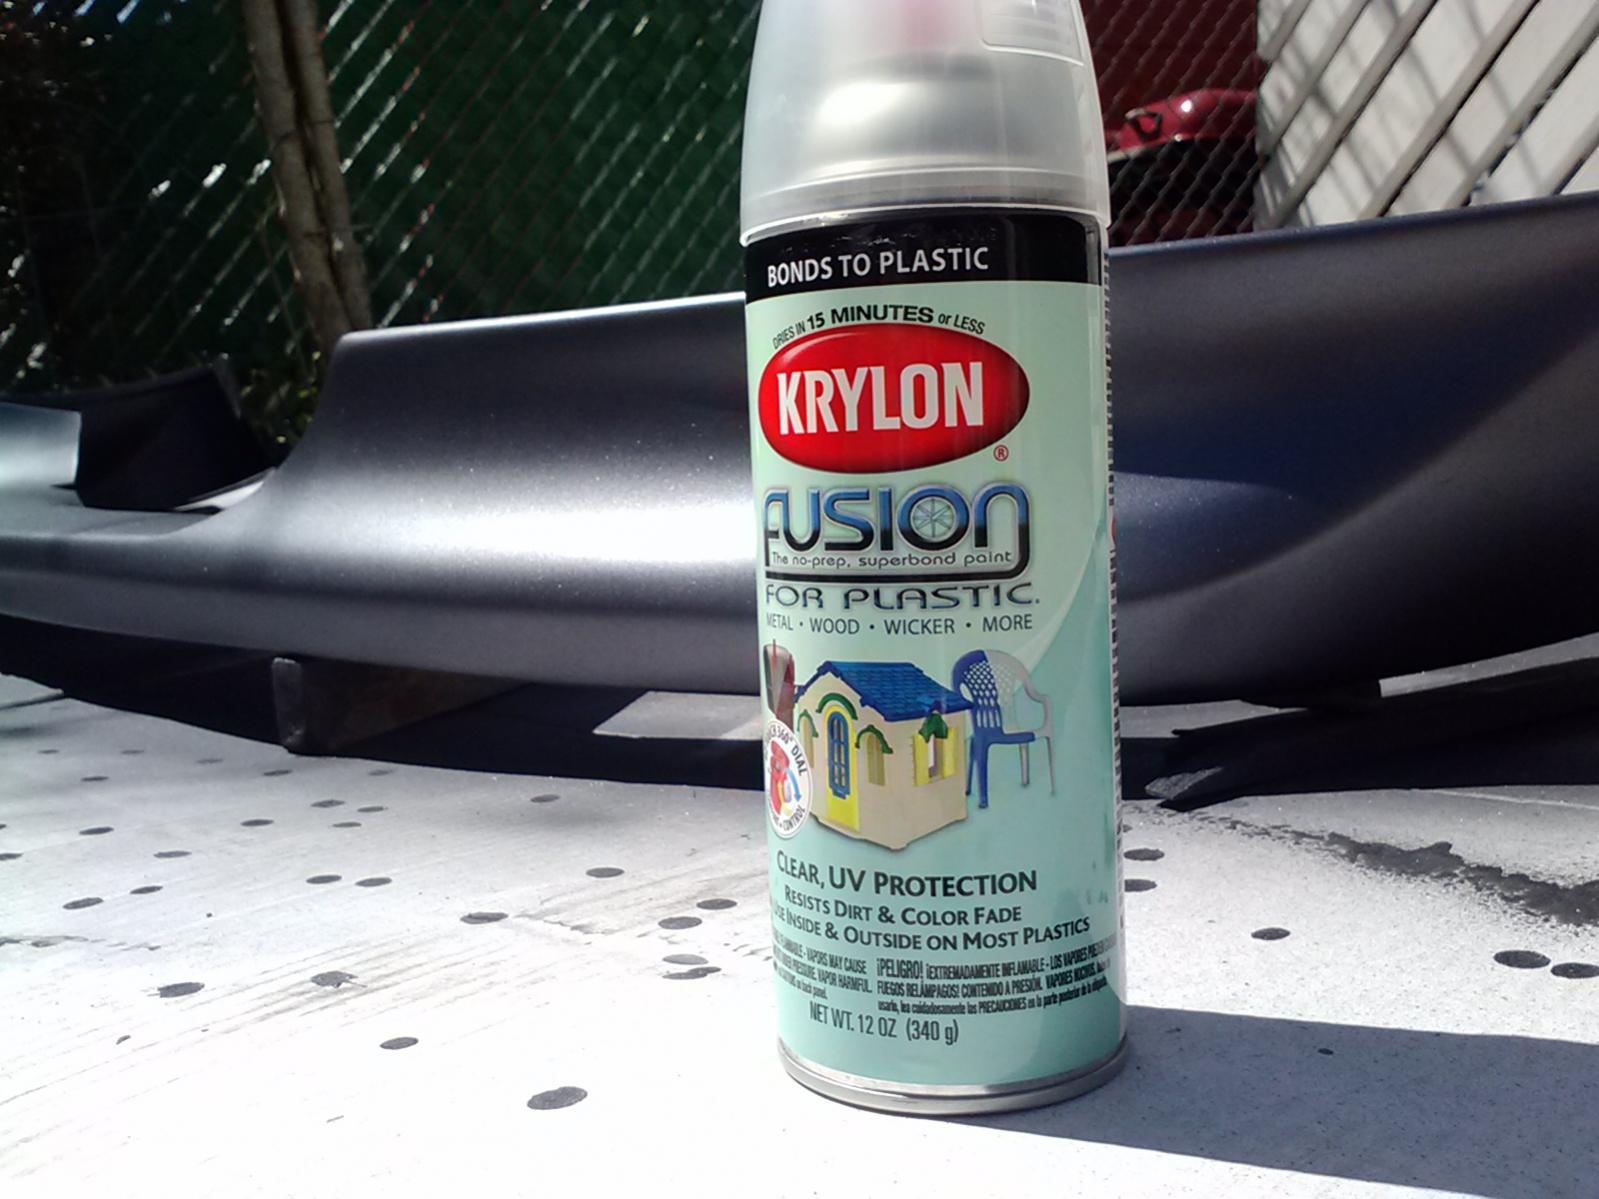
After all 3 coats of base I gave about 30 minutes of dry time and started spraying clear.
I used Krylon fusion for plastic after reading reviews I came to the conclusion it would be perfect for my purpose. See update
2-3 coats. You can go a little thicker on the clear, just make sure it doesn't run.
Again 10 minute flash time in between coats.
Ideally you want to leave it to dry overnight, and after a few day of curing you can wetsand the clear with either 1500 or 2000 grit and the buff with compound. I have yet to decide if I wanna take off the lip again to wetsand and buff since the imperfections in the paint are minimally noticeable and I'm fine with them.

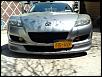
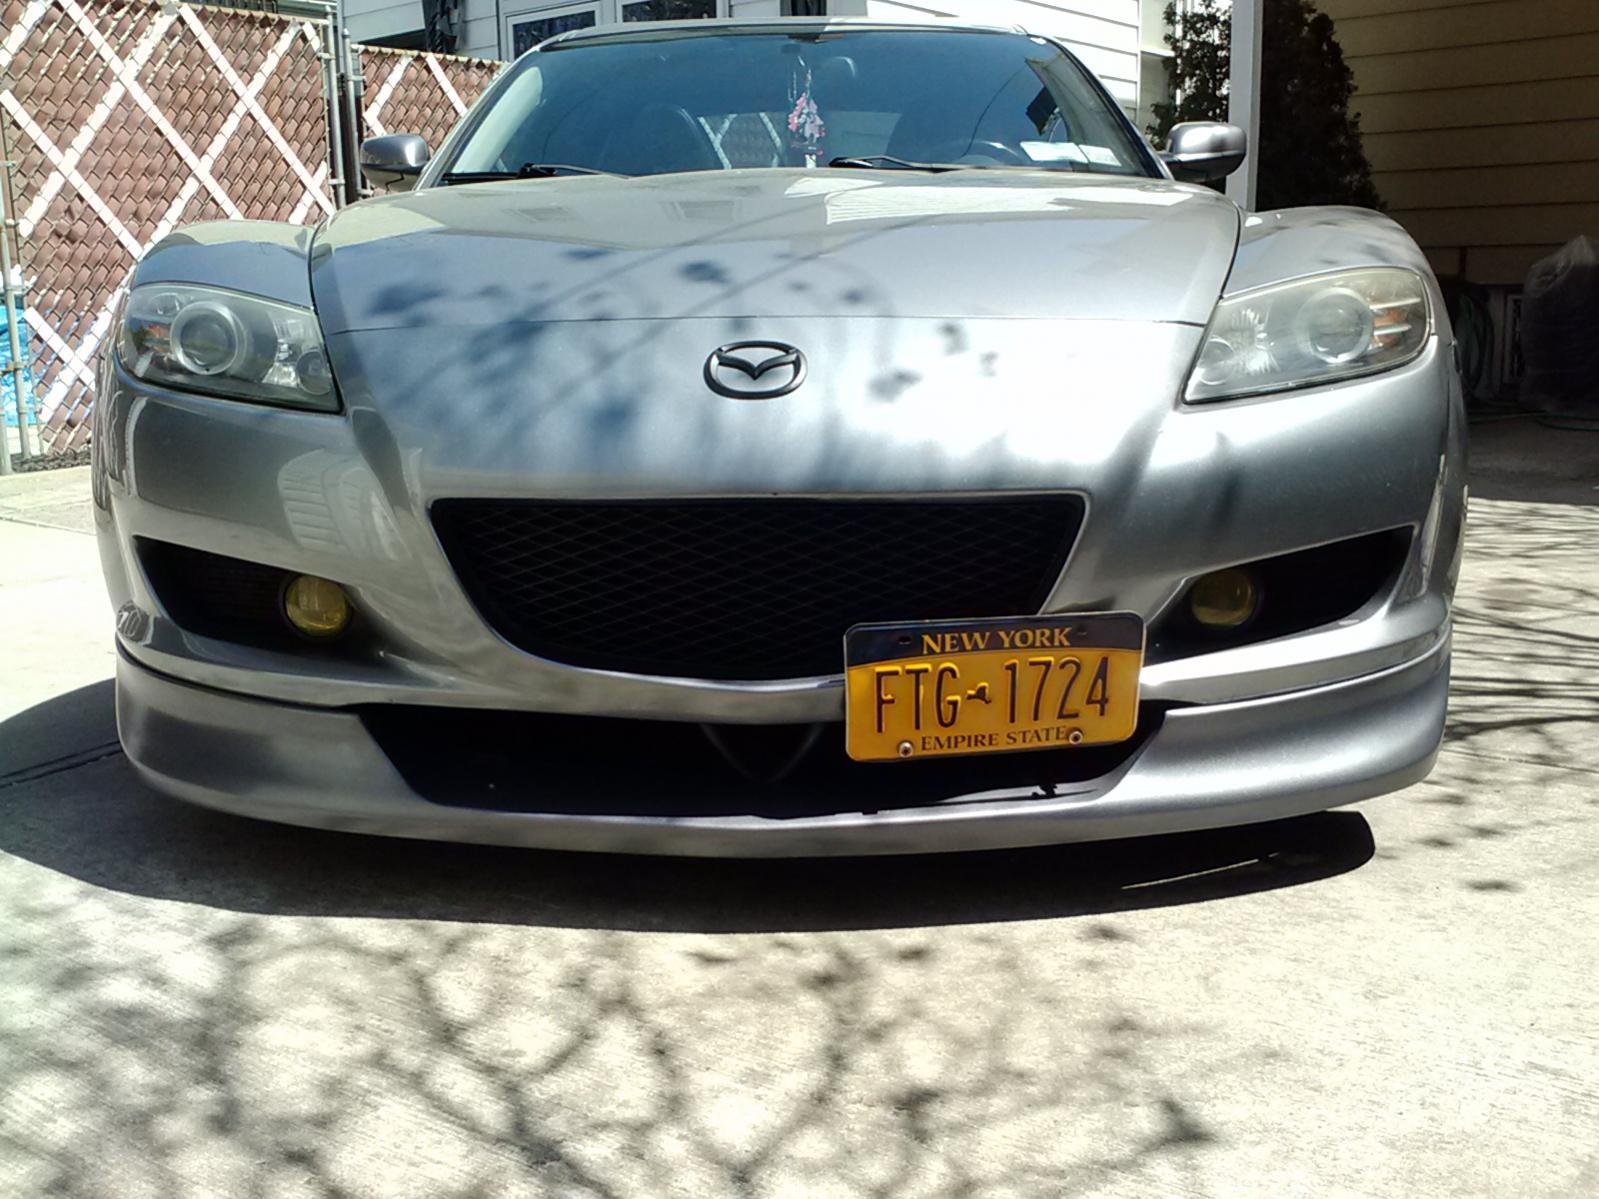
Overall if you prep well and get all even coats you should have a perfect match.
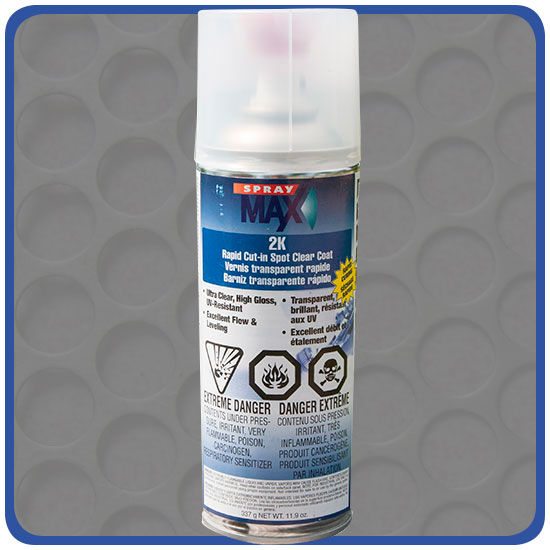
UPDATE: This paint job lasted almost 2 years before I repainted, mainly because there was severe chipping. It was a clear coat issue. Make sure you use 2K Urethane clear coat when you paint it. Urethane clear coat is much more durable and UV resistant rather than the cheap acrylics and enamels.
I've recently repainted the lip.. Same process but instead of the cheap auto parts store clear coat I managed to get SprayMax 2K clear coat in a can along with the can on 29y Titanium grey from automotivetouchup.com, its about $19 a can for the clear from them, not cheap but cheaper than most places. It stands to hard flexing and rock chips and is much more resistant than the cheaper clears.
Make sure you WEAR A MASK WHEN YOU SPRAY 2K URETHANE. It is very toxic and can leave build up in your lungs, that will never go away. But common sense says you should always wear a mask when spraying anything.
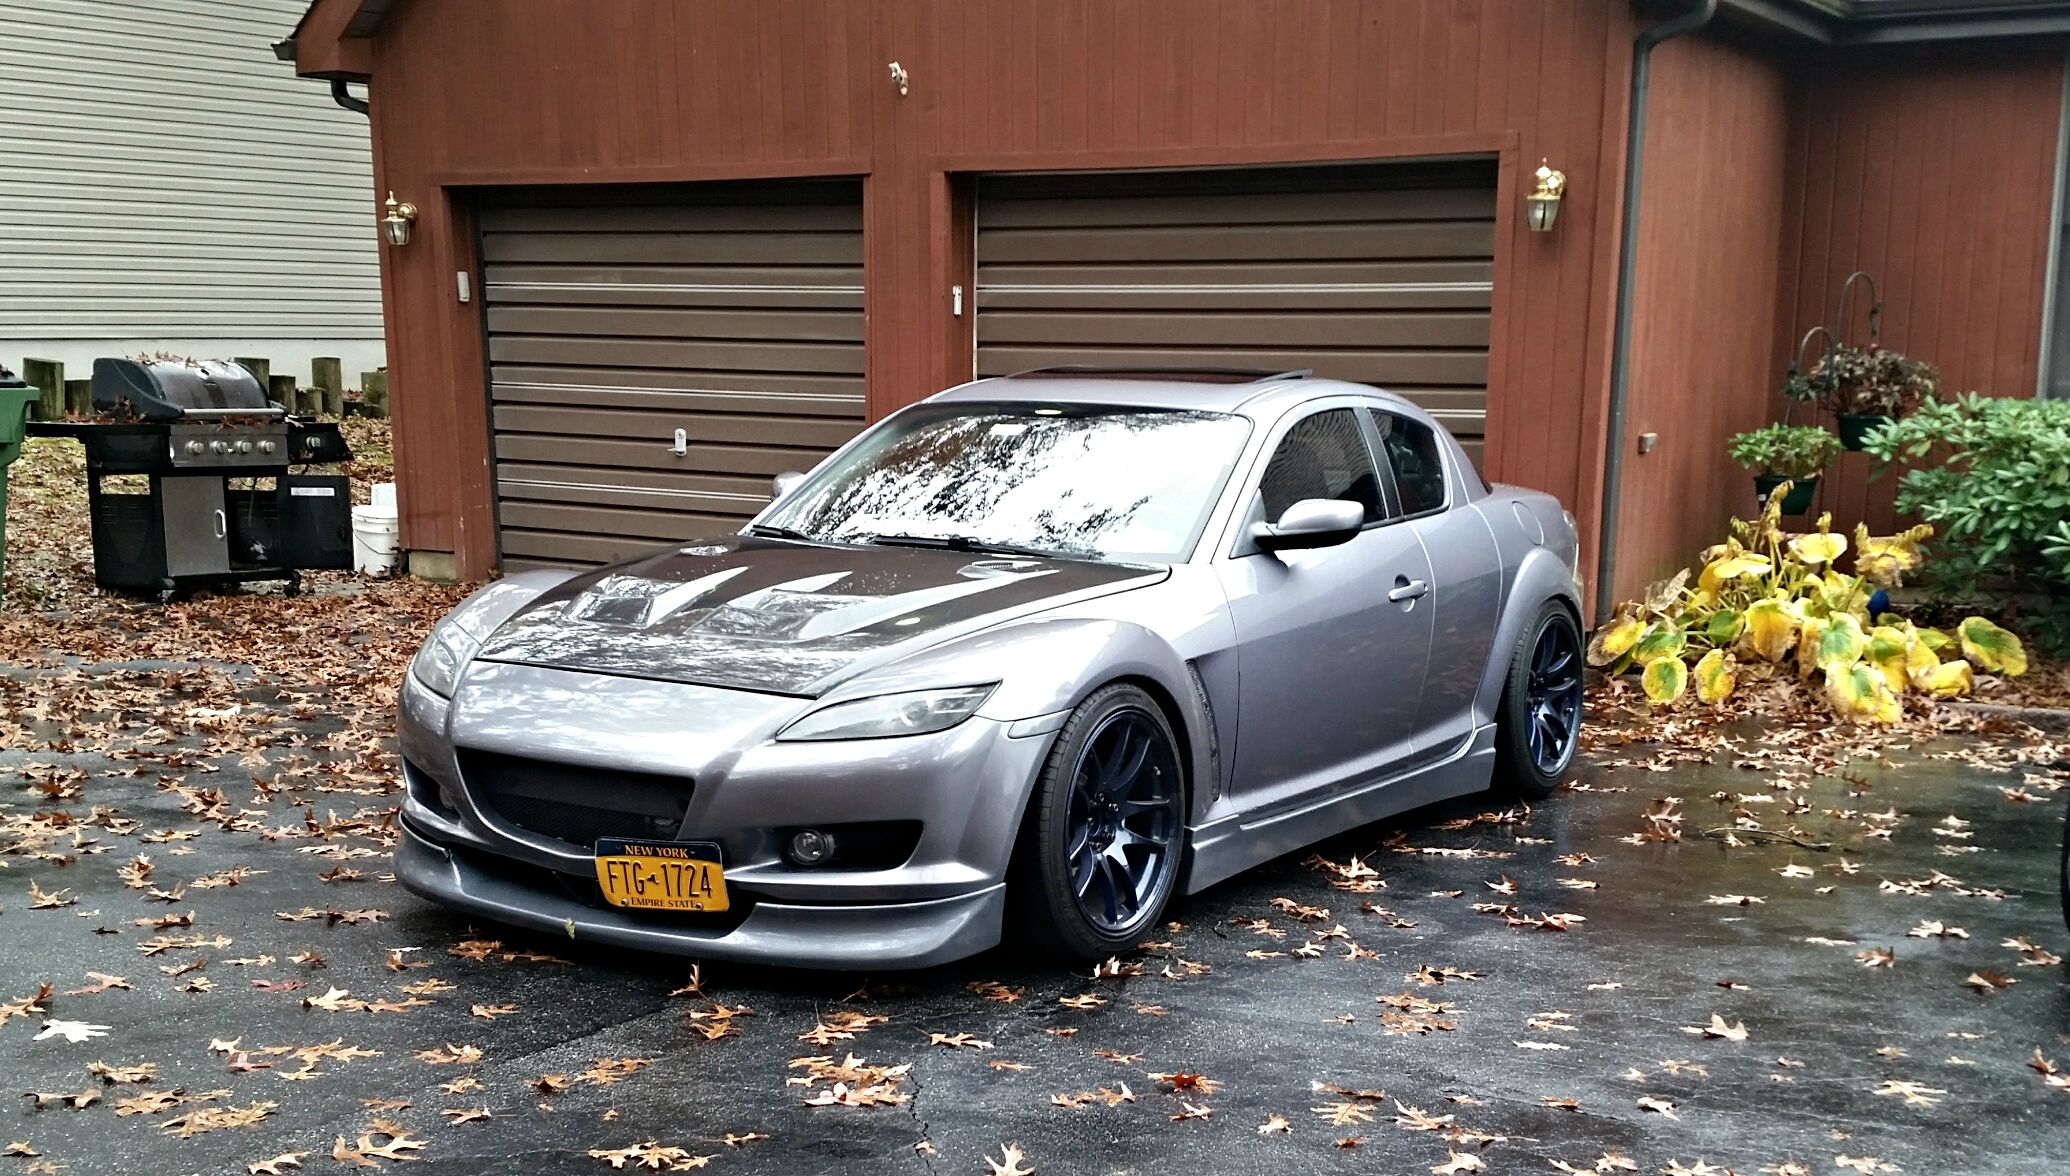
Don't really have any up close pics but I will soon. This is everything painted with the 2k clear and rattle can. Lip, skirts, eyelids, and side markers.
I used Krylon fusion for plastic after reading reviews I came to the conclusion it would be perfect for my purpose. See update
2-3 coats. You can go a little thicker on the clear, just make sure it doesn't run.

Again 10 minute flash time in between coats.
Ideally you want to leave it to dry overnight, and after a few day of curing you can wetsand the clear with either 1500 or 2000 grit and the buff with compound. I have yet to decide if I wanna take off the lip again to wetsand and buff since the imperfections in the paint are minimally noticeable and I'm fine with them.

Overall if you prep well and get all even coats you should have a perfect match.
UPDATE: This paint job lasted almost 2 years before I repainted, mainly because there was severe chipping. It was a clear coat issue. Make sure you use 2K Urethane clear coat when you paint it. Urethane clear coat is much more durable and UV resistant rather than the cheap acrylics and enamels.
I've recently repainted the lip.. Same process but instead of the cheap auto parts store clear coat I managed to get SprayMax 2K clear coat in a can along with the can on 29y Titanium grey from automotivetouchup.com, its about $19 a can for the clear from them, not cheap but cheaper than most places. It stands to hard flexing and rock chips and is much more resistant than the cheaper clears.
Make sure you WEAR A MASK WHEN YOU SPRAY 2K URETHANE. It is very toxic and can leave build up in your lungs, that will never go away. But common sense says you should always wear a mask when spraying anything.
Don't really have any up close pics but I will soon. This is everything painted with the 2k clear and rattle can. Lip, skirts, eyelids, and side markers.
Last edited by GK1707; Jan 2, 2015 at 09:52 AM.

Registered
Joined: Mar 2012
Posts: 177
Likes: 1
From: Fresno, Ca
i did this back when i had my m3 and even tho the paint looks great now. the tone is slightly off after wet sanding and polishing it will shine more and look just like the rest of the car
but good job looks great
but good job looks great
Yeah the wet sand and buff after clear really makes a big difference and helps in blending the tones. I figure ill do it when I have access to a buffer. Might have to borrow one. For now the lip matches really well so im happy with the backyard paintjob lol.

Rotary Evolution
Joined: Oct 2011
Posts: 853
Likes: 2
From: Central FL
the krylon fusion does have flex agents in it but the problem is the primer, which doesn't have any. so with this method i would avoid the primer and go straight to a flex agent/adhesion promoter instead of the primer or skip that step altogether.
Last edited by Karack; May 5, 2013 at 12:29 PM.
I thought about using adhesion promoter then primer, but felt like it would have been too thick on the lip with all those coats and would chip. Which is why I wet sanded the bare polyurethane surface with 220 before priming, to scuff the smooth surface and get good adhesion.
Primer sprayed over and stuck like a charm. So far the lip has plenty of flex to it still.
Primer sprayed over and stuck like a charm. So far the lip has plenty of flex to it still.

Registered
Joined: Apr 2006
Posts: 674
Likes: 0
From: Cali
I thought about using adhesion promoter then primer, but felt like it would have been too thick on the lip with all those coats and would chip. Which is why I wet sanded the bare polyurethane surface with 220 before priming, to scuff the smooth surface and get good adhesion.
Primer sprayed over and stuck like a charm. So far the lip has plenty of flex to it still.
Primer sprayed over and stuck like a charm. So far the lip has plenty of flex to it still.
On that lip.. Seriously you should have... Also best to let it sweat for a few HOT days... That lip I have painted a few times has a **** ton of oils in it from the manufacturing process... letting it sit in the sun a couple of times and cleaning it with both dish soap and alcohol a few times Then doing everything you did AFTER spraying it with a good adhesion promoter like Bull Dog that worked well for me... But It could start to bubble on you or chip very easy.. haha mine is the same color as yours as well..
On that lip.. Seriously you should have... Also best to let it sweat for a few HOT days... That lip I have painted a few times has a **** ton of oils in it from the manufacturing process... letting it sit in the sun a couple of times and cleaning it with both dish soap and alcohol a few times Then doing everything you did AFTER spraying it with a good adhesion promoter like Bull Dog that worked well for me... But It could start to bubble on you or chip very easy.. haha mine is the same color as yours as well..
Registered
Joined: Apr 2006
Posts: 674
Likes: 0
From: Cali
It should be good... I did the same steps as you.. It last for about a month before I saw any issues.. However Other parts last about 6 months before any issues.. However It could happen still. Good Luck.. I did not use an AP I did this time and its been good so far for about a month. So good luck.. Im in CA so im not sure if that will affect anything But this are the issues I have had with this lip so far.

Banned
Joined: Feb 2013
Posts: 384
Likes: 0
From: State of insanity
Yu can get velocity red in a can by going to Napa's auto parts if there is one in your neck of the woods. They take your vin and make up a can , around $20.00, pricy ...but if that's your goal that's how.
Registered
Joined: Jan 2012
Posts: 95
Likes: 0
From: The bURG
SERIOUS?!?!?! Yeah there is one in my town, guess I'll go check it out, in a spray can? Thanks...
 lol, I don't drink any more but it is legal to smoke one ummmmm.

Thread
Thread Starter
Forum
Replies
Last Post
garethleeds
Europe For Sale/Wanted
6
Nov 19, 2015 06:32 AM