
DIY Sohn tank under Air Box

Thread Starter
04 and still lovin it
Joined: Jun 2004
Posts: 297
Likes: 0
From: Toronto
DIY Sohn tank under Air Box
This is a hands on DIY. You will need to do some thinking as well.
Sohn adapter remote oil tank.
Reference sites for the Sohn adapter
http://www.rotaryinsider.com/diy-tac...pter-gap28.htm
http://www.rotaryaviation.com/oil_in...p_adaptors.htm
What I am describing here is my second iteration of this tank with some lessons learned from the first one.
Objectives
Stock appearance under the hood
Full 32 oz capacity
maintain windshield washer tank
Easy to fill
visual tank level
Problem
Where do you find a spot under the hood to put a 32 oz tank without taking anything out and must be located above the oil pump?
Solution
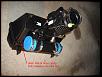
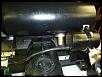
Under the stock air box. There is a decent size space under there. Sorry for the crummy picture.

Materials used
3 1\2� OD drain pipe
matching end caps
hose clamps
2 for mounting
2 for securing the end caps
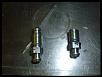
2 Break bleed fitting
1 barb fitting 5/16�
garden hose fittings, hoses and matching cap (Home Depot)
assorted tubing for oil pick up (silicone) vents, level gauge and fill tube
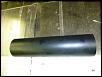
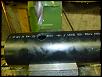
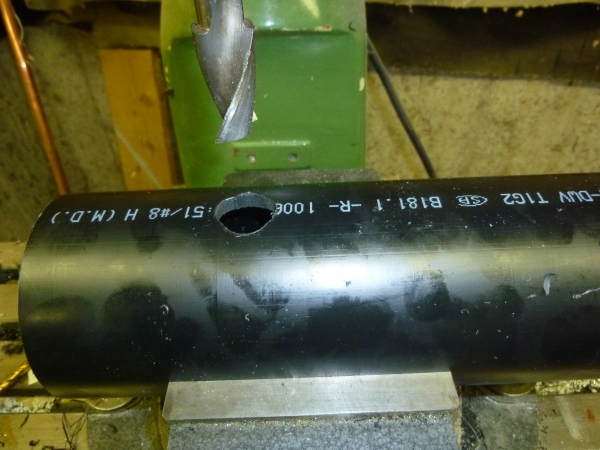
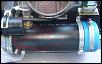
Looking at the location and reviewing my size target I needed to use a 3.5� x 10 3/4� plastic drain pipe. This size is a maximum size for this location and I will explain why later.
So here what I did
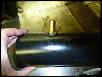
Start by cutting the pipe to a length of 10 3/4� this is necessary to put the tank between the hinge points for the top of the air box, any larger and the top will not be able to be removed.
Fit tube into place, mark the location of both ends on the air box these are your limits.
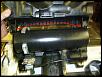
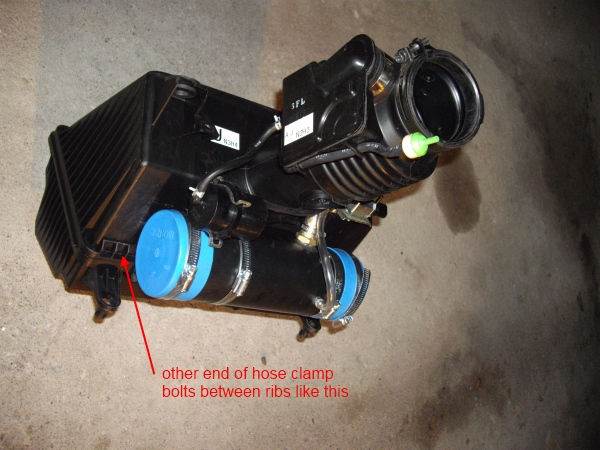
Determine your positions for the hose clamp mounting straps
 From First tank version
Cut the hose clamps into two halves, depending on the actual width of your straps you may have to grind this a bit narrower to fit in between the ribs.
Drill and bolt in place , you will likely have remove the dividers from inside the air box while you do this ( put them back in after) cut out sections of the ribs in the air-box as required to bolt the straps in place.
More to follow
Sohn adapter remote oil tank.
Reference sites for the Sohn adapter
http://www.rotaryinsider.com/diy-tac...pter-gap28.htm
http://www.rotaryaviation.com/oil_in...p_adaptors.htm
What I am describing here is my second iteration of this tank with some lessons learned from the first one.
Objectives
Stock appearance under the hood
Full 32 oz capacity
maintain windshield washer tank
Easy to fill
visual tank level
Problem
Where do you find a spot under the hood to put a 32 oz tank without taking anything out and must be located above the oil pump?
Solution
Under the stock air box. There is a decent size space under there. Sorry for the crummy picture.

Materials used
3 1\2� OD drain pipe
matching end caps
hose clamps
2 for mounting
2 for securing the end caps
2 Break bleed fitting
1 barb fitting 5/16�
garden hose fittings, hoses and matching cap (Home Depot)
assorted tubing for oil pick up (silicone) vents, level gauge and fill tube
Looking at the location and reviewing my size target I needed to use a 3.5� x 10 3/4� plastic drain pipe. This size is a maximum size for this location and I will explain why later.
So here what I did
Start by cutting the pipe to a length of 10 3/4� this is necessary to put the tank between the hinge points for the top of the air box, any larger and the top will not be able to be removed.

Fit tube into place, mark the location of both ends on the air box these are your limits.

Determine your positions for the hose clamp mounting straps
 From First tank version
Cut the hose clamps into two halves, depending on the actual width of your straps you may have to grind this a bit narrower to fit in between the ribs.
Drill and bolt in place , you will likely have remove the dividers from inside the air box while you do this ( put them back in after) cut out sections of the ribs in the air-box as required to bolt the straps in place.
More to follow
Thread Starter
04 and still lovin it
Joined: Jun 2004
Posts: 297
Likes: 0
From: Toronto
Page 2
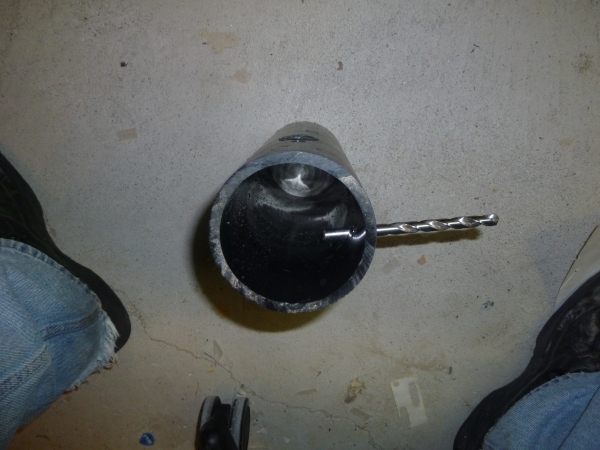
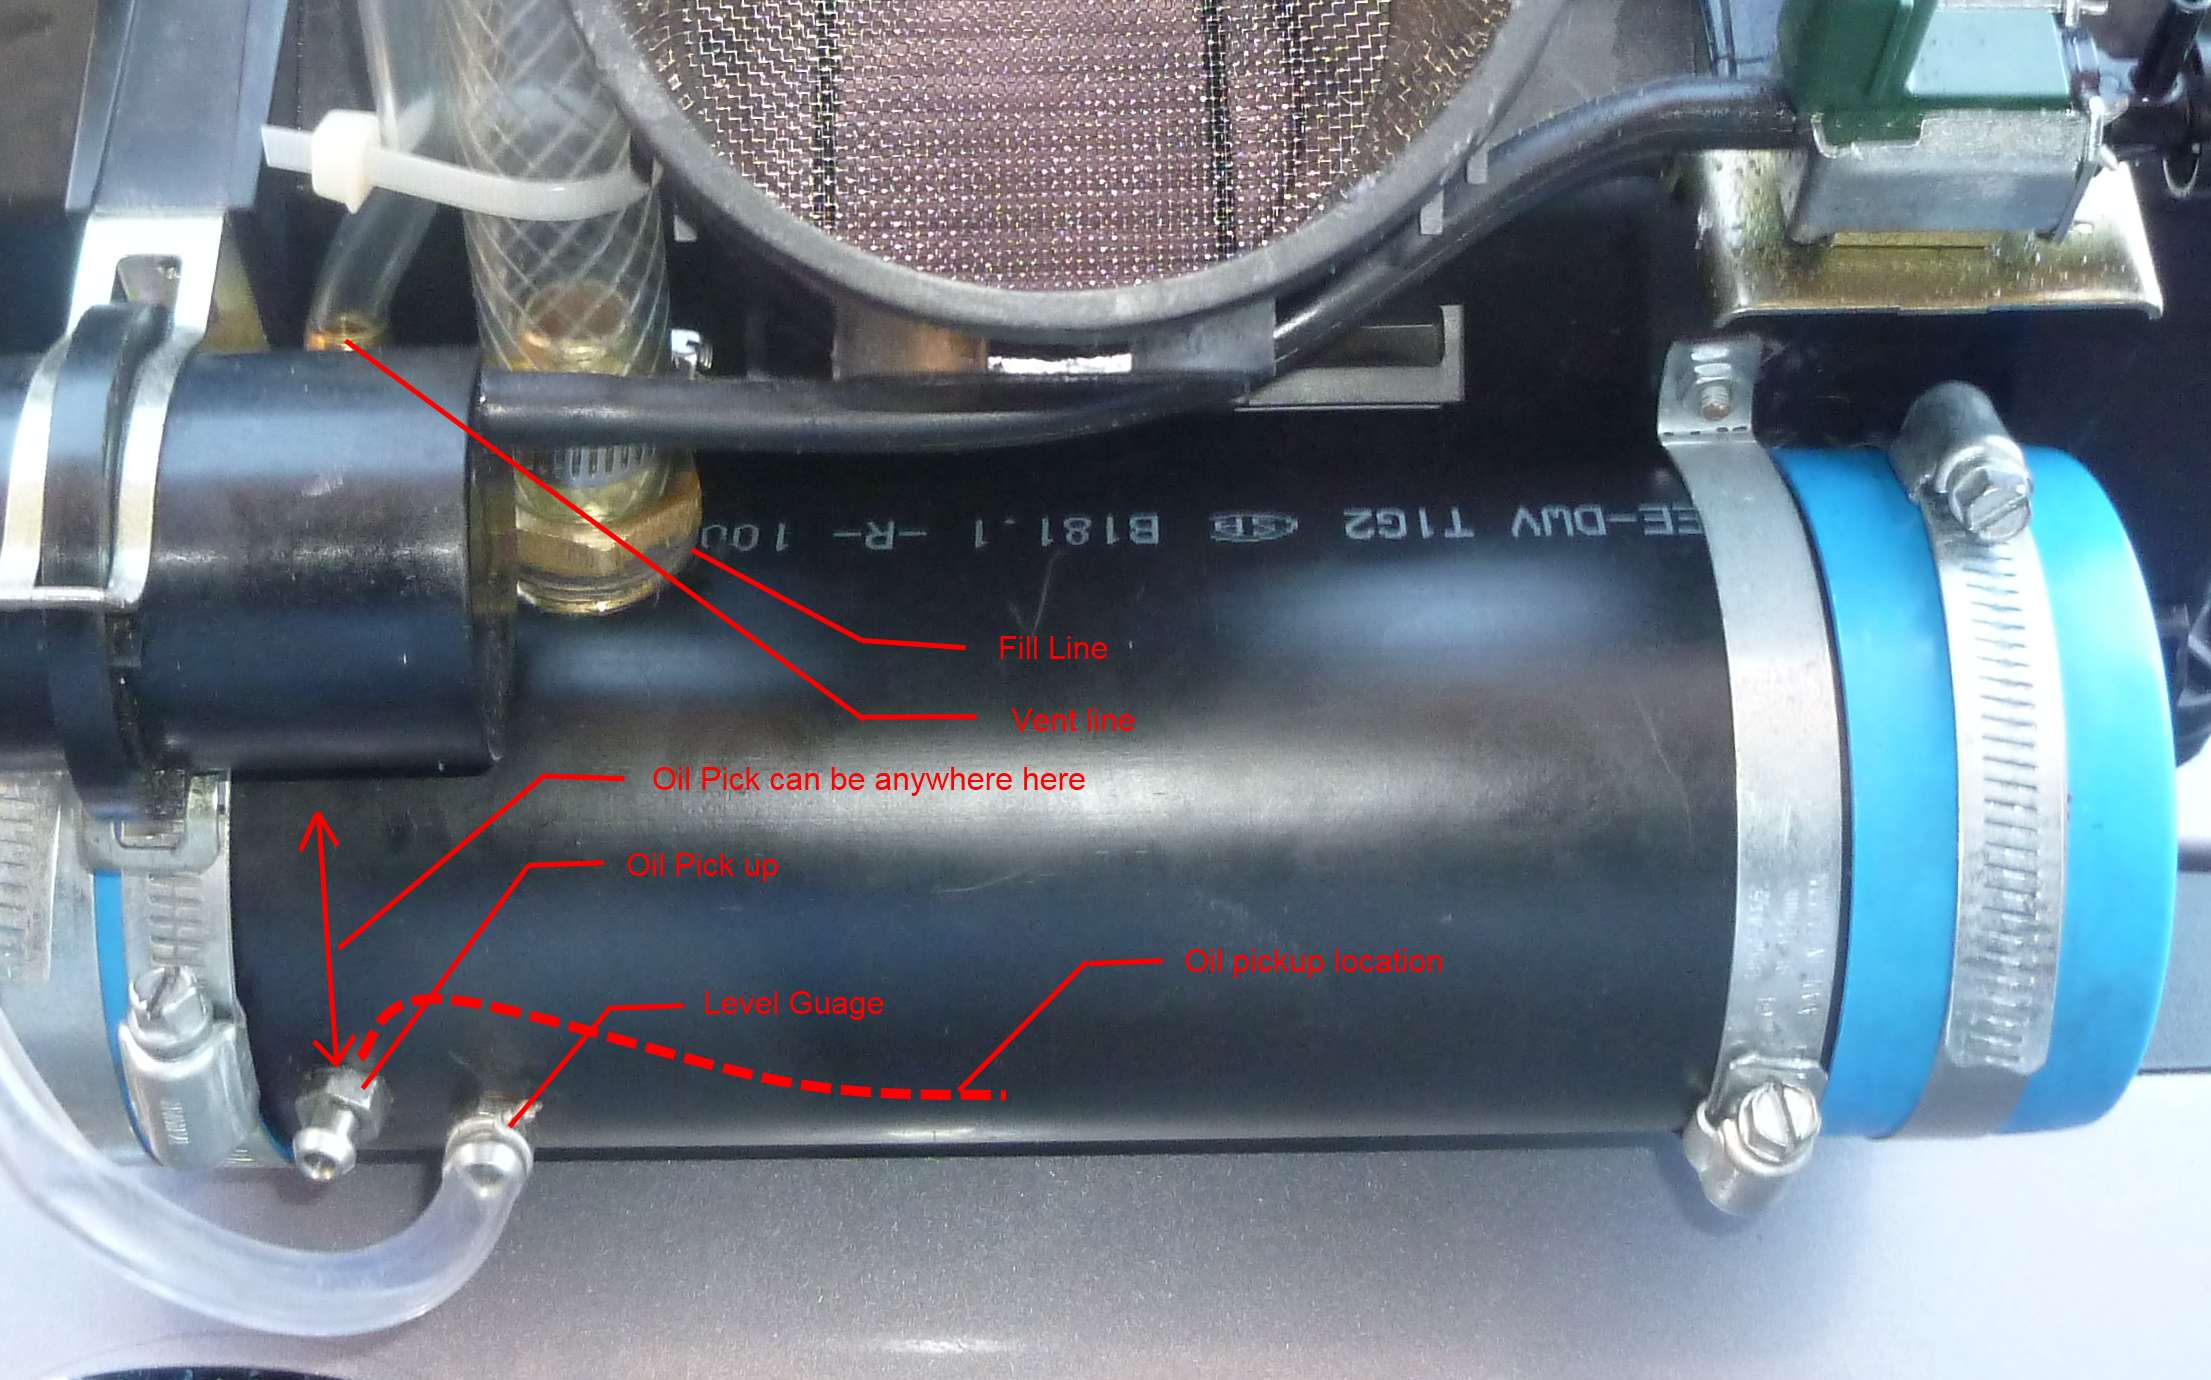
Test fit in location and mark out locations for fill and vent holes. You need the vent hole of the fill tube will back up and overflow ( lessons learned)
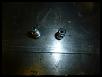
I drilled locations slightly undersized. I didn't have any of the tap sizes I would have needed to do this properly so I used a method of strip threading the fittings into the pipe.
Assemble these components together, I used some sealant just to be sure of a good seal.
Once again fit this all back together ALWAYS MAKE SURE THINGS FIT
mark out positions for oil pick up and another as low as you can for oil level gauge.
Attachment 169736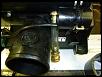
More to come
I drilled locations slightly undersized. I didn't have any of the tap sizes I would have needed to do this properly so I used a method of strip threading the fittings into the pipe.
Assemble these components together, I used some sealant just to be sure of a good seal.

Once again fit this all back together ALWAYS MAKE SURE THINGS FIT
mark out positions for oil pick up and another as low as you can for oil level gauge.
Attachment 169736

More to come
Thread Starter
04 and still lovin it
Joined: Jun 2004
Posts: 297
Likes: 0
From: Toronto
Page 2
Test fit in location and mark out locations for fill and vent holes. You need the vent hole of the fill tube will back up and overflow ( lessons learned)

I drilled locations slightly undersized. I didn't have any of the tap sizes I would have needed to do this properly so I used a method of strip threading the fittings into the pipe.
Assemble these components together, I used some sealant just to be sure of a good seal.

Once again fit this all back together ALWAYS MAKE SURE THINGS FIT
mark out positions for oil pick up and another as low as you can for oil level gauge.

More to come

I drilled locations slightly undersized. I didn't have any of the tap sizes I would have needed to do this properly so I used a method of strip threading the fittings into the pipe.
Assemble these components together, I used some sealant just to be sure of a good seal.

Once again fit this all back together ALWAYS MAKE SURE THINGS FIT
mark out positions for oil pick up and another as low as you can for oil level gauge.


More to come
Last edited by RotorWheeee; Mar 20, 2011 at 02:50 PM.
Thread Starter
04 and still lovin it
Joined: Jun 2004
Posts: 297
Likes: 0
From: Toronto
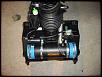
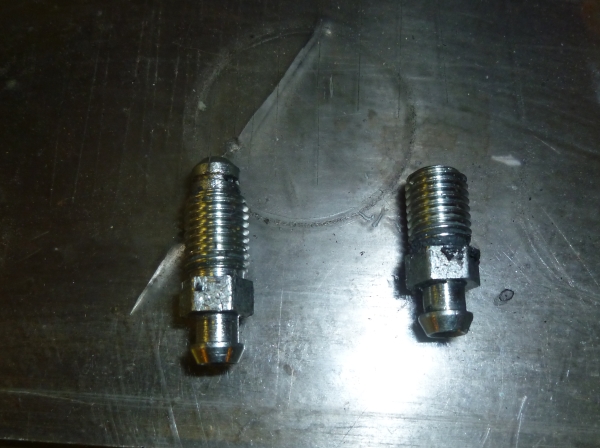
Drill these two hole location on an angle as shown or you will run into problems with the lines coming out of here interfering with the under-tray for the air box (trust me on this one)
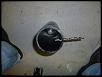
I modified my fitting by drilling outr the inside diameter to get better flow. (Disreguard the sort one both can be the same as the long one or one of your own design?
Thread your fittings in.
More to come

I modified my fitting by drilling outr the inside diameter to get better flow. (Disreguard the sort one both can be the same as the long one or one of your own design?

Thread your fittings in.
More to come
Thread Starter
04 and still lovin it
Joined: Jun 2004
Posts: 297
Likes: 0
From: Toronto
Now here's a vitally important stage.
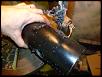
The pick up on this is what is called a clunk tank. Flexible tubing with a weighted end. This will allow the pick up to move with the oil or sit at the lowest point in the tank. The tube must be flexible and able to move around for this to work, or you will not get complete tank pickup
Mine is done rather Ghetto but you get the idea. This worked on my initial system for about a year.
Drained the tank down to the last ounce.
Clamp and seal on the end caps.
You should have something like this now.
One step away from installing this in your car.
As the target was to leave everything stock.
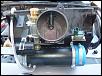
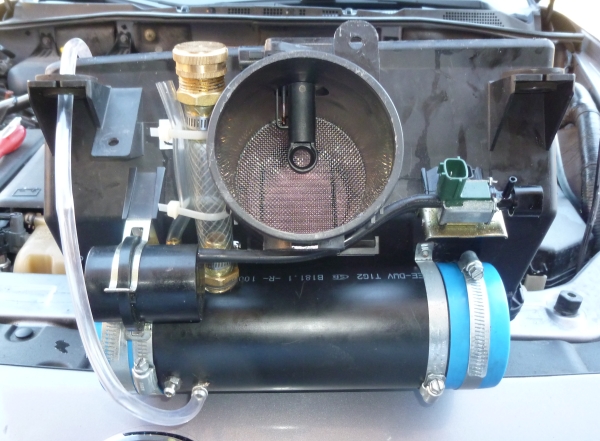
There is a vacuum tube that runs under the air box it takes a bend up and will want to occupy the same space as the tank so we need to do something about that. Remove the metal tube and carefully straighten it, put it back in.
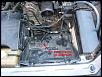
Test fit
Install it for the last time
With this setup the tank is securely mounted to the air-box and goes in and comes out with the air box. Yes the air-box can still come out like it used to and you don't need to cut the air box tray. The only modification to the air-box is to drill the 4 mounting holes for the straps.
Hook up the feed line from the Sohn per the images above, add the clear tube to the bottom tap and run it up higher then the tank in a visible area ( this is your level gauge)
assebly.jpg above
The first one took me the better part of a day to make and install this one was a bit less then 4 hours.
First unit had the fill tube up the other side of the MAF sensor but there is a bit too much going on and I was not able to position the level gauge as low as I wanted and the tube was getting pinched off due to interference with the air-box tray.
Good luck
If you do this post your improvements.
The pick up on this is what is called a clunk tank. Flexible tubing with a weighted end. This will allow the pick up to move with the oil or sit at the lowest point in the tank. The tube must be flexible and able to move around for this to work, or you will not get complete tank pickup

Mine is done rather Ghetto but you get the idea. This worked on my initial system for about a year.
Drained the tank down to the last ounce.
Clamp and seal on the end caps.
You should have something like this now.
One step away from installing this in your car.
As the target was to leave everything stock.
There is a vacuum tube that runs under the air box it takes a bend up and will want to occupy the same space as the tank so we need to do something about that. Remove the metal tube and carefully straighten it, put it back in.

Test fit
Install it for the last time
With this setup the tank is securely mounted to the air-box and goes in and comes out with the air box. Yes the air-box can still come out like it used to and you don't need to cut the air box tray. The only modification to the air-box is to drill the 4 mounting holes for the straps.

Hook up the feed line from the Sohn per the images above, add the clear tube to the bottom tap and run it up higher then the tank in a visible area ( this is your level gauge)
assebly.jpg above
The first one took me the better part of a day to make and install this one was a bit less then 4 hours.
First unit had the fill tube up the other side of the MAF sensor but there is a bit too much going on and I was not able to position the level gauge as low as I wanted and the tube was getting pinched off due to interference with the air-box tray.
Good luck
If you do this post your improvements.

Thread Starter
04 and still lovin it
Joined: Jun 2004
Posts: 297
Likes: 0
From: Toronto
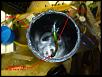
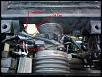
Take a close look at the last picture in post #5. There is a clear tube running up from the bottom along side the tank that shows the tank level an arrow points to the actual oil level, it's labeled "Fill level" Its easier to see then the picture indicates. I have plans to add a level sensor that will indicate on the dash board but that one will have to wait for a bit yet.

Registered Lunatic
iTrader: (1)
Joined: Aug 2003
Posts: 3,591
Likes: 49
From: SF Bay Area, California
This is cool and it indeed has the advantage of keeping the stock look.
But isn't it much easier to just use something like a regular 1 qt bottle (made of clear plastic) and mount it next to the windshield washer reservoir, right there where some people keep a bottle of oil in the engine bay?
Really easy to access for fillup and to keep an eye on the oil level.
But isn't it much easier to just use something like a regular 1 qt bottle (made of clear plastic) and mount it next to the windshield washer reservoir, right there where some people keep a bottle of oil in the engine bay?
Really easy to access for fillup and to keep an eye on the oil level.

Dude, this is totally awesome. I have tried several SOHN reservoirs and every time I change something in the engine bay (strut bar design for example) I have to change reservoirs. Not to mention the white plastic reservoirs do not look good IMO.
This is really just great, I wish I had seen it a while ago
Now my Nitrous management unit is mounted there and I am going turbo so I will have to ditch the stock intake.
This is really just great, I wish I had seen it a while ago
Now my Nitrous management unit is mounted there and I am going turbo so I will have to ditch the stock intake.
Thread Starter
04 and still lovin it
Joined: Jun 2004
Posts: 297
Likes: 0
From: Toronto
Thanks for the comments guys.
I was rather happy with both function and the end results. There may be more to this if I can find some items for a tank level sensor.
Tamas
I looked at that location but its a lot tighter then it looks and I didn't care for the look or that I would have such a thin wall container. I was looking for a more finished look.
The cars becoming more of the hobby car I had intended now the warranty is done.
Working on some front end links right now. I'll post that when there done.
Dude, this is totally awesome. I have tried several SOHN reservoirs and every time I change something in the engine bay (strut bar design for example) I have to change reservoirs. Not to mention the white plastic reservoirs do not look good IMO.
This is really just great, I wish I had seen it a while ago
Now my Nitrous management unit is mounted there and I am going turbo so I will have to ditch the stock intake.
This is really just great, I wish I had seen it a while ago
Now my Nitrous management unit is mounted there and I am going turbo so I will have to ditch the stock intake.


Registered
Joined: Dec 2009
Posts: 426
Likes: 29
From: Norway
Just a thought.

Thread Starter
04 and still lovin it
Joined: Jun 2004
Posts: 297
Likes: 0
From: Toronto
Similar thinking
I developed this a bit further a while ago.
I added an oil float switch to the tank and tied it into the washer fluid circuit. Now the wash fluid light comes on for either the washer fluid level or the oil level. You can usually tell which it is as if your getting low, if go around a corner and the light will come on until you straighten back out than you know it time to top up the oil.

Thread
Thread Starter
Forum
Replies
Last Post