
Aem Cai


I just installed one a couple of weeks ago. Should have done a DIY Video.
It really is quite easy to install.
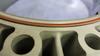
Here's a pic of it installed with out the bumper on. Look for DIY on the front bumper the rest is easy.
It really is quite easy to install.
Here's a pic of it installed with out the bumper on. Look for DIY on the front bumper the rest is easy.

AEM ships with pretty simple instructions (with pictures too).
Only thing I would ignore from their instructions is to remove the front wheels.
I've been able to take my bumper off several times without taking the wheels off... you'll just have to move them all the way in or out depending on what side you're working on!
I have a PDF version of the instructions, but its 12MB. So unless your email server will allow 12MB attachments (like GMail), I wouldn't be able to send it to you.

ok, for anyone with a MT, i juss installed my aem cai, whatd u guys do with the whole VFAD assembly? i didnt know what to do with it so its juss zip tied down, but i juss got a CEL and im bettin thats the problem.
I just zip tied the wire harness off to the side.
Did you remember to cap the inlet nipple on the intake manifold?
hmm, so u take all the tubes of the vfad assembly includign the tubing that connects it to the intake manifold? and anything i should cap it with specifically? and the wiring harness doesnt have to be plugged back into anything else?
Did you get this new or used?
New AEM intakes come with directions and page 5 tells you what to do.
If you got this used... yes, remove all the hoses/vacuum lines from the front air duct to the intake manifold.
You then need to cap the nipple to the intake manifold with a rubber vacuum cap.
A new intake will have this included in the packaging.
If you got this used (or simply don't have one) you can buy a variety size pack of rubber vacuum caps from Autozone for a couple dollars.
Use this guide to clear the PCM:
There are two reset procedures, one for the NVRAM and the other for the KAM. Neither will erase your radio presets and such like the method SpooledUp7 posted:
1) With the key in the off position, press and hold the odometer reset button and turn the key to on;
Continue to hold the odo button until the odometer reads "TEST" and then release.
2) Turn the key to off and repeat step one.
This will reset the entire PCM except the KAM which contains the sensor profiles amongst other things. You can reset it with the familiar procedure:
1) Turn the key to on
2) Depress the brake pedal rapidly 20 times in a row until the oil pressure gauge sweeps to halfway and back again.
oh, its already installed lol. juss left some tubing of the vfad ziptied there cuz i didnt know what do with it, but i got the cel and that was the prob i think. i juss disconnected the vfad where it came off easier in another part of the tubing

Surf Hard, Drive Hard
Joined: Feb 2007
Posts: 7,840
Likes: 13
From: Indialantic, Florida
I have the Racing Beat instructions saved as .jpg files and totals only about 1.5M.........can send them to you if you want. Need your E-mail though. Even smaller if I don't include the Ram air instructions. It's not exact AEM, but will show you what to do with the VFAD and bumper etc.
I took my VFAD completely out..................why leave it in there?
I took my VFAD completely out..................why leave it in there?

Surf Hard, Drive Hard
Joined: Feb 2007
Posts: 7,840
Likes: 13
From: Indialantic, Florida
I sold it with my stock airbox when I changed over. Didn't see me ever going back the other way.
Anyway.......all you have to do is cap the VFAD port on the intake located right behind the throttle body........this is where you should have taken the long hose off. If you left that hose connected at the throttle body, then cap off that hose somehow, but I'd do it the other way.
Yeah, and you need to reset the PCM.
But think you got it all now.
Last edited by Mazurfer; Oct 7, 2008 at 12:39 PM.
alright so this is what i did. i took out the whole vfad assembly, then plugged the nipple with a rubber vacuum cap. then i followed ur steps to clear the pcm...now, theres still a CEL on. i ran a scan and i got the p2097 error. i searched it on here and some people say it might be an error with the o2 sensor, so i swapped out the o2 sensor on the aem with the one from stock, and re-ran the steps to clear the pcm. and still have the light. any advice anyone? 
Are you saying that you received a used AEM intake WITH a MAF sensor attached?

LOL... unfortunately I can't see anything right now because I'm at work and the company has filters for Photobucket.
You can attach it and I can see it, just can't be linked to another site like Photobucket!
You can attach it and I can see it, just can't be linked to another site like Photobucket!
Last edited by Jon316G; Oct 7, 2008 at 09:39 PM.