Lightning Yellow Vents
 06-12-2005, 08:09 PM
#1
Lubricious
Thread Starter

Join Date: Oct 2003
Location: SF Bay Area, California
Posts: 3,425
Likes: 0
Received 4 Likes
on
4 Posts
Lightning Yellow Vents
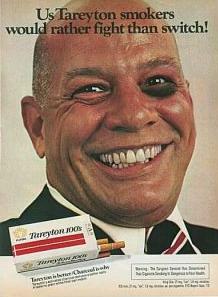
I've always wanted to do something about the fender vents on my Lightning Yellow. To me the black vents are just too much on such a light colored car. They sort of remind me of of one of the old Tareyton cigarrette ads, or maybe a Doonesbury character. 

Last edited by Nubo; 06-12-2005 at 08:21 PM.
 06-12-2005, 08:13 PM
#2
Lubricious
Thread Starter
Join Date: Oct 2003
Location: SF Bay Area, California
Posts: 3,425
Likes: 0
Received 4 Likes
on
4 Posts
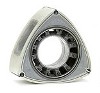
So I toyed around with the idea of painting them a lighter color, using one of the Krylon Fusion paints. In the end, I decided to try to match the Lightning Yellow itself. So, I used some Fusion paint to serve as a primer, and got color-matched spray paint and clearcoat from Paintscratch.com.
The results are just what I was hoping for. Here's a closeup.

The results are just what I was hoping for. Here's a closeup.
Last edited by Nubo; 06-12-2005 at 08:23 PM.
06-12-2005, 08:16 PM
#3
1st time rotorhead

Join Date: May 2005
Location: Closter, NJ
Posts: 449
Likes: 0
Received 0 Likes
on
0 Posts
Nice color match. Blends in well with the car. I personally think the black ones are nice because they accentuate the side fenders, and those are a big part of the car.
06-12-2005, 08:18 PM
#4
Lubricious
Thread Starter
Join Date: Oct 2003
Location: SF Bay Area, California
Posts: 3,425
Likes: 0
Received 4 Likes
on
4 Posts
And here's a wider shot below.
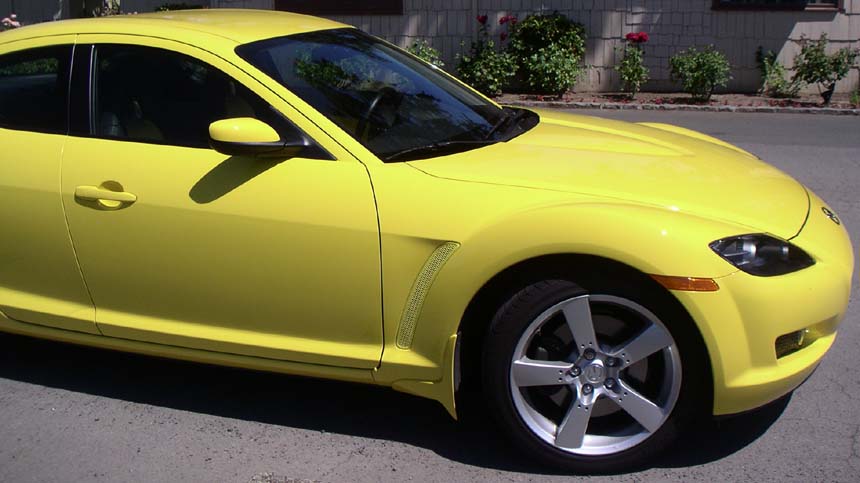
It's a nice effect. The appearance of the vents changes as you walk around the car, depending on the angles that the honeycomb facets are presenting. sometimes it's almost solid yellow and other times you're looking at the holes straight-on. I think it gives a lot more interest and brings out the nature of the vents. It draws the eye as it tries to look into and through the vents, instead of the black, which shows very little detail unless you're right up on the car. Kind of hard to show the effect in these photos since it takes some pretty high resolution to show the vent details on a full-vehicle shot. But hopefully you get the idea.
I think it also tightens up the lines of the car by getting rid of the "black eyes". I think it's a good idea for the light colors. Maybe not to everyone's tase but thought I'd share...
Last edited by Nubo; 06-12-2005 at 08:24 PM.
06-12-2005, 08:53 PM
#5
A Torque-Free Zone

Join Date: Oct 2004
Location: Virginia Beach
Posts: 859
Likes: 0
Received 0 Likes
on
0 Posts
I hadn't thought of that myself. Looks really cool. You did a nice job Any trouble with paint collecting in the corners of the openings?
I think your black eye analogy is pretty good. I go back and forth about what they do to/for the car's looks on LY. I'm hoping body-colored strakes subdue the vertical black some.
I think your black eye analogy is pretty good. I go back and forth about what they do to/for the car's looks on LY. I'm hoping body-colored strakes subdue the vertical black some.
 06-12-2005, 09:40 PM
#7
Lubricious
Thread Starter
Join Date: Oct 2003
Location: SF Bay Area, California
Posts: 3,425
Likes: 0
Received 4 Likes
on
4 Posts
Originally Posted by G-ReX
I hadn't thought of that myself. Looks really cool. You did a nice job Any trouble with paint collecting in the corners of the openings?
I kept a close eye for paint collecting in any nooks. No real problems in the corners of the honeycomb holes. The place where accumulation first starts to show up is right at the edges where the honeycomb meets the frame of the vent. There aren't holes there, but the mesh leaves increasingly small pockets against the edge framing. Once I started to just see the beginnings of filling in those places, I was just about done with the base coat and decided to quit there.
Another thing that was helpful was painting both the front and back of the vents. Starting with the back gives some useful practice and is helpful in getting full coverage all the way through the honeycomb. Plus, this way there arent any transitions from bare plactic to paint to promote flaking.
 06-13-2005, 01:11 AM
#11
Revvus Maximus
iTrader: (2)

Join Date: Aug 2003
Location: Seattle, WA
Posts: 182
Likes: 0
Received 0 Likes
on
0 Posts
Welcome to the vent painting club, Nubo!
I chose to make my vents really stand out because I prefer the contrast between the black vents on the light colored cars. Whatever you do to them though, it's a nice mod with a lot of visual bang for the buck.
I chose to make my vents really stand out because I prefer the contrast between the black vents on the light colored cars. Whatever you do to them though, it's a nice mod with a lot of visual bang for the buck.

 06-13-2005, 11:22 AM
#14
Lubricious
Thread Starter
Join Date: Oct 2003
Location: SF Bay Area, California
Posts: 3,425
Likes: 0
Received 4 Likes
on
4 Posts
Originally Posted by rex
Welcome to the vent painting club, Nubo!
I chose to make my vents really stand out because I prefer the contrast between the black vents on the light colored cars. Whatever you do to them though, it's a nice mod with a lot of visual bang for the buck.
I chose to make my vents really stand out because I prefer the contrast between the black vents on the light colored cars. Whatever you do to them though, it's a nice mod with a lot of visual bang for the buck.


 06-14-2005, 09:43 AM
#19
Lubricious
Thread Starter
Join Date: Oct 2003
Location: SF Bay Area, California
Posts: 3,425
Likes: 0
Received 4 Likes
on
4 Posts
Originally Posted by BlueEyes
me no likey 
It looks really cheap, like yellow chicken wire. Maybe it's just the pictures though.
It looks really cheap, like yellow chicken wire. Maybe it's just the pictures though.
06-15-2005, 12:48 AM
#20

Don't like but glad you do.
I think I would use a differnet color to tone it down. I think you need a contrast.
Perhaps it's bette in person.
Come see us at Seven Stock. I'll be there.
I think I would use a differnet color to tone it down. I think you need a contrast.
Perhaps it's bette in person.
Come see us at Seven Stock. I'll be there.

 06-16-2005, 01:22 AM
#23
Revvus Maximus
iTrader: (2)
Join Date: Aug 2003
Location: Seattle, WA
Posts: 182
Likes: 0
Received 0 Likes
on
0 Posts
Nice work, Nubo! The larger image really shows off the effect nicely. I wonder what black strakes would look like on those vents? Don't you have the whole black and yellow "bee" theme going on in your car's interior? It'd be kind of fun to play with that on the outside
09-18-2005, 01:13 AM
#25

I really like it...especially on yellow...on my sun silver I think silver's continuity and smoothness will be disrupted...one thing I think would look much better though is a piano black type finish...I may do a quick wet sand to get them ultra smooth...hit it with a nice gloss black...maybe 2-3 light coats....then
wait til dry, wet sand with 1500...then 2000...then do 3 layers of clear coat
let dry, then wet sand the clear coat...and use a rubbing compound...:D...then put a nice layer of wax on...then reinsert
what do you think?
wait til dry, wet sand with 1500...then 2000...then do 3 layers of clear coat
let dry, then wet sand the clear coat...and use a rubbing compound...:D...then put a nice layer of wax on...then reinsert
what do you think?

