DIY: Rear Bumper Removal
 07-22-2004, 12:28 AM
#1
Mr. Blue Man
Thread Starter

Join Date: Dec 2003
Location: Carmel, IN
Posts: 887
Likes: 0
Received 0 Likes
on
0 Posts
DIY: Rear Bumper Removal
Well this past weekend I removed my rear bumper to get it painted. Unfortunately, the painting didn’t work out and I won’t detail the issues her in the DIY. But I did take the time to get some pictures of the reassembly as I don’t think there is a DIY for he rear bumper on the site.
Anyway, I’ll start with the “manual” pages. You’ll notice there are lots of steps but I really think it looks harder than it is on paper.
Anyway, I’ll start with the “manual” pages. You’ll notice there are lots of steps but I really think it looks harder than it is on paper.
 07-22-2004, 12:30 AM
#2
Mr. Blue Man
Thread Starter
Join Date: Dec 2003
Location: Carmel, IN
Posts: 887
Likes: 0
Received 0 Likes
on
0 Posts
Step 1 - Trunk End Removal Step.
Remove the four fasteners shown in pics.
Pull straight up on rear trip as there are clips just a few inches on each side of the trunk mechanism.
Lift out.
Remove the four fasteners shown in pics.
Pull straight up on rear trip as there are clips just a few inches on each side of the trunk mechanism.
Lift out.
07-22-2004, 12:31 AM
#3
Mr. Blue Man
Thread Starter
Join Date: Dec 2003
Location: Carmel, IN
Posts: 887
Likes: 0
Received 0 Likes
on
0 Posts
Step 2 – Trunk Side Trim Removal
I found by that by removing the three closest connectors to the Trunk End, you could access that area needed. I removed the fasteners with a screw head with a screw driver “turn” and pulled the other type. Then I pulled the carpet back.
I found by that by removing the three closest connectors to the Trunk End, you could access that area needed. I removed the fasteners with a screw head with a screw driver “turn” and pulled the other type. Then I pulled the carpet back.
07-22-2004, 12:32 AM
#4
Mr. Blue Man
Thread Starter
Join Date: Dec 2003
Location: Carmel, IN
Posts: 887
Likes: 0
Received 0 Likes
on
0 Posts
Step 3 – Rear Combination Light Removal
There are two bolts that hold these in place show in the pic. Remove these.
Then disconnect the FOUR wire harnesses. Three are easily viewable behind each bulb. There is a fourth for the side strip lights.
Then gently pull these toward the rear of the car. Mine were pretty snug.
There are two bolts that hold these in place show in the pic. Remove these.
Then disconnect the FOUR wire harnesses. Three are easily viewable behind each bulb. There is a fourth for the side strip lights.
Then gently pull these toward the rear of the car. Mine were pretty snug.
07-22-2004, 12:33 AM
#5
Mr. Blue Man
Thread Starter
Join Date: Dec 2003
Location: Carmel, IN
Posts: 887
Likes: 0
Received 0 Likes
on
0 Posts
Step 4 – Rear Bumper Removal – Exhaust guard
There are two fasteners on the underside of each piece. I only have a pic of one. The only way I was able to remove them was to pry the head of the center piece up enough to pull it out with a pliers. I was fortunate not to break any. Once this has been complete, pull the piece in the direction of the rear of the car. There are plastic tabs all around it that will come loose.
There are two fasteners on the underside of each piece. I only have a pic of one. The only way I was able to remove them was to pry the head of the center piece up enough to pull it out with a pliers. I was fortunate not to break any. Once this has been complete, pull the piece in the direction of the rear of the car. There are plastic tabs all around it that will come loose.
07-22-2004, 12:34 AM
#6
Mr. Blue Man
Thread Starter
Join Date: Dec 2003
Location: Carmel, IN
Posts: 887
Likes: 0
Received 0 Likes
on
0 Posts
Step 5 – Rear Bumper Removal – Wheel Well
This was easily the most difficult step in my removal. However, that’s because I have the appearance package pieces on my rear fender which blocked access to some of the fasteners. So your fasteners and screws may vary. Included are some pics. Basically make sure you remove any fastener to the fender well from the bottom, all the way up to the point where the bumper meats the rear quarter panel. This is a bolt show below in the last pic. This pic is taken from the ground looking up to give the best view.
This was easily the most difficult step in my removal. However, that’s because I have the appearance package pieces on my rear fender which blocked access to some of the fasteners. So your fasteners and screws may vary. Included are some pics. Basically make sure you remove any fastener to the fender well from the bottom, all the way up to the point where the bumper meats the rear quarter panel. This is a bolt show below in the last pic. This pic is taken from the ground looking up to give the best view.
07-22-2004, 12:35 AM
#7
Mr. Blue Man
Thread Starter
Join Date: Dec 2003
Location: Carmel, IN
Posts: 887
Likes: 0
Received 0 Likes
on
0 Posts
Step 6 – Rear Bumper Removal – Underside of Bumper.
Remove the three fastners on the underside of the bumper. They are fastened though pieces that are directly behind the faux rear grill.
Remove the three fastners on the underside of the bumper. They are fastened though pieces that are directly behind the faux rear grill.
07-22-2004, 12:36 AM
#8
Mr. Blue Man
Thread Starter
Join Date: Dec 2003
Location: Carmel, IN
Posts: 887
Likes: 0
Received 0 Likes
on
0 Posts
Step 7 – Rear Bumper Removal – Upper Bumper.
The last fasteners in the bumper are a fastener and a bolt on each side of the bumper near the top where the bumper gets closest to the trunk lid. Once these have been removed, you are almost ready to remove the bumper. You simply need to remove the license plate light. This can be done by pulling the light toward the front of the car from the backside of the rear bumper. You should now be able to remove the bumper.
The last fasteners in the bumper are a fastener and a bolt on each side of the bumper near the top where the bumper gets closest to the trunk lid. Once these have been removed, you are almost ready to remove the bumper. You simply need to remove the license plate light. This can be done by pulling the light toward the front of the car from the backside of the rear bumper. You should now be able to remove the bumper.
 05-15-2006, 01:35 PM
#11
One ball, corner pocket
Join Date: Apr 2004
Location: Fontucky, right next to Patriotville
Posts: 2,053
Likes: 0
Received 1 Like
on
1 Post
I will be doing this after work today. It is great to know I'll have this to aide me through the process. Is there anything that you would like me to add to this, or additional pictures you overlooked that may provide some additional help?


 12-02-2009, 08:02 AM
#21
10,000 Revs in the Air!

Join Date: Jan 2008
Location: Tipperary, Ireland
Posts: 233
Likes: 0
Received 0 Likes
on
0 Posts
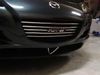
Anyone have any DIY instructions and/or pics for taking off the balck plastic exhaust surrounds? These are also known as rear bumper guards...
Pic: http://www.rotaryfx.com/product_p/ext1083.htm
I need to take them off so I can get bad lacquer off them and relacquer them.
Thanks in advance!
Pic: http://www.rotaryfx.com/product_p/ext1083.htm
I need to take them off so I can get bad lacquer off them and relacquer them.
Thanks in advance!
12-02-2009, 08:18 AM
#22
He's as bad as Can

 04-02-2010, 08:20 PM
#25
The RX-8 is missed
iTrader: (3)

Join Date: Aug 2005
Location: Houston, TX
Posts: 2,084
Likes: 0
Received 0 Likes
on
0 Posts
wow...um, thanks, AND WHAT A COMPLETE PAIN THE *** TAKING OFF THE REAR BUMPER IS!
holy **** man, i'd take off and put on the front 10 times before i go through this again...
holy **** man, i'd take off and put on the front 10 times before i go through this again...