DIY: Replace Passenger side airbag cover thats splitting for $150.
 07-21-2010, 03:22 PM
#1
Tailgaters beware
Thread Starter
DIY: Replace Passenger side airbag cover thats splitting for $150.
About a year ago my passenger side dash cover started to split right at the seams where the airbag would burst through.
The dealer wouldn't cover it in warranty because I had an accident a year earlier and they said that the Mazda rep said that the car probably twisted enough to cause a strain on the material that it eventually began to tear. The dealer told me the part is $550 and the labor would be $150 so $700 total to replace a split piece of dash!
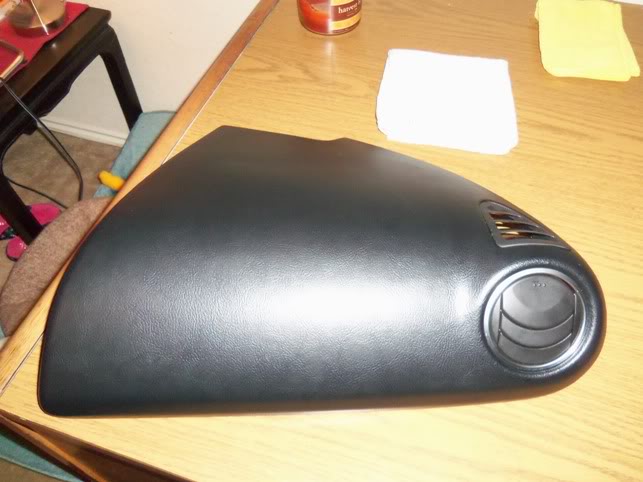
I decided to find a used dash panel (with airbag attached because they are riveted on), and I found a few on Ebay at junk yards for between $180-400.
Be sure that when you are searching that there is a picture of the piece because after zooming in on some pictures, I noticed a few of them had the same split mine did.
I actually made a OBO offer on one that wanted $200 and they accepted $75. Luckily I contacted the seller before making payment, because he wasn't supplying the dash cover because they told me it was damaged during removal.
After a few weeks of searching I found one that said $189.00 Or Best Offer, so I made few offers until he accepted $105 plus $35 for shipping. This was a great deal since the one in his picture looked flawless except for a little dirt. The item that arrived was exactly the one in the picture.
Here is some pictures and info on the easy removal and replacement.
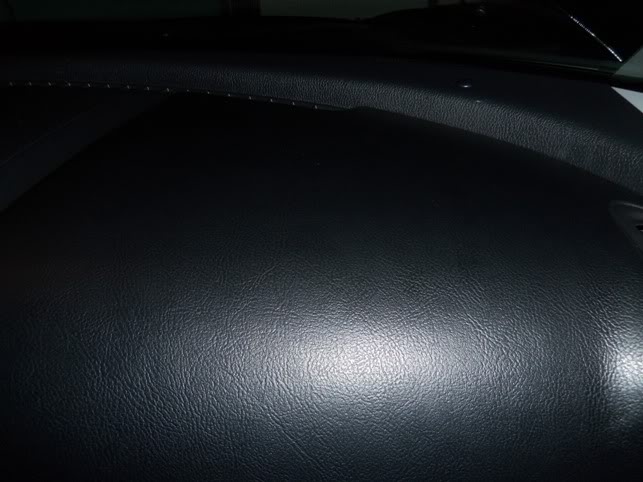
The picture below shows the split in the material.
The dealer wouldn't cover it in warranty because I had an accident a year earlier and they said that the Mazda rep said that the car probably twisted enough to cause a strain on the material that it eventually began to tear. The dealer told me the part is $550 and the labor would be $150 so $700 total to replace a split piece of dash!
I decided to find a used dash panel (with airbag attached because they are riveted on), and I found a few on Ebay at junk yards for between $180-400.
Be sure that when you are searching that there is a picture of the piece because after zooming in on some pictures, I noticed a few of them had the same split mine did.
I actually made a OBO offer on one that wanted $200 and they accepted $75. Luckily I contacted the seller before making payment, because he wasn't supplying the dash cover because they told me it was damaged during removal.
After a few weeks of searching I found one that said $189.00 Or Best Offer, so I made few offers until he accepted $105 plus $35 for shipping. This was a great deal since the one in his picture looked flawless except for a little dirt. The item that arrived was exactly the one in the picture.
Here is some pictures and info on the easy removal and replacement.
The picture below shows the split in the material.
Last edited by Rocketman1976; 08-21-2010 at 12:03 AM.
 07-21-2010, 03:40 PM
#2
Tailgaters beware
Thread Starter
Step 1
Before you even start on the project, you need to first remove the negative terminal on your battery this way you don't cause any kind of power spike when disconnecting or connecting your new and old airbags, this is to avoid deploying one by accident.
Next thing you need to do is open your glove box and look on the right hand side outside of the actual box.
There is a small piston that slows the opening of the box.
Pull the loop on the end of the piston off the plastic **** on the side of the glove box.
Be careful with it because it break very easily (I broke mine).
Even if you do break it you glove box will still be fine, it will just kind of slam open if there is a lot of stuff in it.
Last edited by Rocketman1976; 08-21-2010 at 12:04 AM.
07-21-2010, 03:45 PM
#3
Tailgaters beware
Thread Starter
Step 2
Next you need to drop the glove box to access the 2 bolts under the air bag, and the airbag connector.
To drop the glove box you will need push in on the sides of the box where the red arrows are.
You don't need to apply much pressure at all, it just bends slightly to pull in the stoppers and allow the box to drop down all the way.
After dropping it you can remove it entirely if you want, but with it just hanging down there was plenty of room to finish the removal and install.
Last edited by Rocketman1976; 08-21-2010 at 12:06 AM.
07-21-2010, 04:00 PM
#4
Tailgaters beware
Thread Starter
3
Next use a set of needle nose pliers to squeeze this clip and push it out of the hole.
Make sure your car's battery is disconnected before disconnecting the airbag.
After you get the Airbag connector free from the bracket you can disconnect it.
It's better to disconnect this connector before the next step because it gives you better access to the bolts holding in the airbag and dash cover.
Last edited by Rocketman1976; 08-21-2010 at 12:14 AM.
07-21-2010, 04:07 PM
#5
Tailgaters beware
Thread Starter
4
Here are the only two bolts that actually need to be removed in order to remove the entire cover and airbag assembly
If you disconnected the airbag plug connector it should be very easy to remove the bolts.
If you disconnected the airbag plug connector it should be very easy to remove the bolts.
Last edited by Rocketman1976; 08-21-2010 at 12:09 AM.
07-21-2010, 04:19 PM
#6
Tailgaters beware
Thread Starter
5
Once the two bolts are removed, you can begin to pull up on the edges of the dash panel. The only thing holding it in now is 8 clips around the edge of the panel. The clips release when you pull up on the dash.
I started by pulling up on the edge right where the glove box met with the dash.
I removed the A/C vent and the defroster vent to give me more area to pull up on, but I don't think it is necessary.
The A/C vent comes out by just pulling evenly on two sides of it by reaching your fingers inside of the cup, and the defrost just pulls forward and up.
Last edited by Rocketman1976; 08-21-2010 at 12:10 AM.
07-21-2010, 04:23 PM
#7
Tailgaters beware
Thread Starter
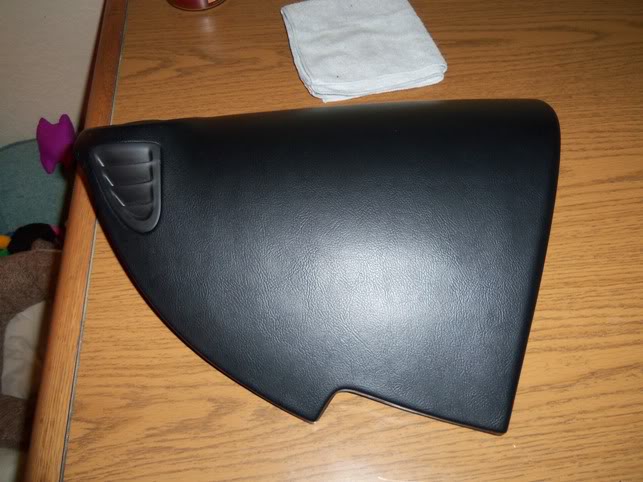
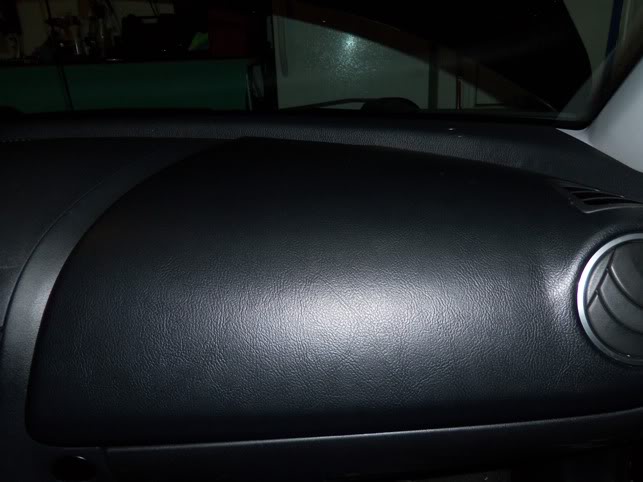
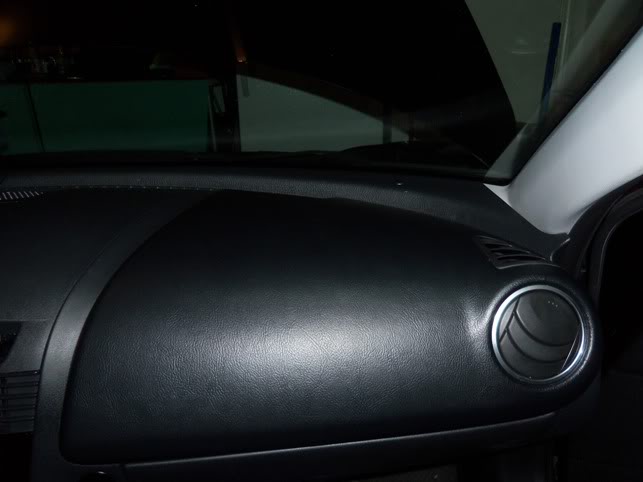
The Final Product.
When putting the new dash panel in just be sure you feed the airbag line through before you push the new dash into place securing the clips, otherwise you may pinch the connector cable.
Good as new and I saved $550!
I can't believe the dealer wanted $150 to do the install that only took about 30 mins for a first timer.
Good as new and I saved $550!
I can't believe the dealer wanted $150 to do the install that only took about 30 mins for a first timer.
Last edited by Rocketman1976; 08-21-2010 at 12:13 AM.


 07-17-2011, 05:01 AM
#13
Super Moderator
Great job mate!!
08-10-2011, 05:01 PM
#14
Tailgaters beware
Thread Starter
No problem everyone.
I'm just an occasional DIY backyard mechanic and I appreciate when others share so I try to give back when I can.
I'm just an occasional DIY backyard mechanic and I appreciate when others share so I try to give back when I can.
Last edited by Rocketman1976; 08-10-2011 at 05:08 PM.
The following 2 users liked this post by Rocketman1976:
Jedi54 (12-06-2021),
RX8_Spidey (05-12-2019)
 09-17-2011, 05:25 PM
#16
Surf Hard, Drive Hard

Join Date: Feb 2007
Location: Indialantic, Florida
Posts: 7,840
Likes: 0
Received 11 Likes
on
9 Posts
Well, mine's on order and I was gonna wing it, but Ash8 pointed me over to this thread, so why wing it when there is some sort of a guide.
I know how to get the glove box out but it's nice to see where the damn clips are......that's for sure.
I know how to get the glove box out but it's nice to see where the damn clips are......that's for sure.


The following users liked this post:
CynthiaSue1 (01-03-2021)
 09-30-2011, 12:03 PM
#20

Thanks for the DIY, I will need to do mine at some point. I have a feeling that I would rather wait till I want to sell the car because I live in FLorida so if I change it the sun will just eat through the new one. I do like tcornholio135's idea of getting it recoated or upholstered.
09-30-2011, 12:06 PM
#21
Thanks for the DIY, I will need to do mine at some point. I have a feeling that I would rather wait till I want to sell the car because I live in FLorida so if I change it the sun will just eat through the new one. I do like tcornholio135's idea of getting it recoated or upholstered.

Also since it is vinyl, if the air bag does deploy it should have no problem ripping thru (I have seen the passenger air bag in other vehicles break the windshield)
And thank GOD i do not have to look at that cracked dash anymore...

...
Last edited by cornholio135; 09-30-2011 at 12:11 PM.
10-02-2011, 10:10 AM
#25
Registered

Join Date: Apr 2009
Posts: 918
Likes: 0
Received 0 Likes
on
0 Posts