
DIY : AT Cooler install

Thread Starter
Original Turbo 'd Auto !!
Joined: Mar 2004
Posts: 2,136
Likes: 5
From: Surprise, Arizona
DIY : Automatic Transmission Cooler install
Disclaimer: Since I do not know what mechanicial skill level you (the reader) possess, I am not resposible for any damage that may result from you (the reader) following these directions.
Since thats out of the way.
Hear is a DIY that i did for my tranny cooler.
I noticed that during our runs through the Az mountaing it dosen't struggle as much and shifts better.
If you guys can wait till tomorrow I post the DIY w/ pics.
Also it was $45 http://www.jegs.com/webapp/wcs/store...58370_-1_10535
its the 19.000 GVW cooler. Part #130-70268
Edit: updated the link. Found it broken.
Also I plan on using a pressure riser (www.superior-transmission.com) Part # PR234 around $90 (Note: Not installed yet. )
ANyway onto the tranny cooler install.
Last edited by 09Factor; Jun 16, 2007 at 08:16 PM.
Thread Starter
Original Turbo 'd Auto !!
Joined: Mar 2004
Posts: 2,136
Likes: 5
From: Surprise, Arizona
The kit has 3' of 5/8 hose, 4 screw clamps, 4 hose fittings, 4 sheet metal screws,4 machine screws, washers and nuts.
Don't pay attention to the zip tie straps and small blk plastic backers for the zip ties. They dont hold up for crap!
Figure out where you are going to install the cooler first. Since I have a RB AC screen I dicided to mount it to that. more toward the passenger side (right) on the the screen.
Figuring that I'd would add a second oil cooler in the future I didn't want to use the area behind the fog light.
Remove the middle under skirt by unscrewing the front screws and the the two 10mm screws on either side in the wheel wells. You can leave the inner fender plastic shields in place.
Thread Starter
Original Turbo 'd Auto !!
Joined: Mar 2004
Posts: 2,136
Likes: 5
From: Surprise, Arizona
After you have mounted the AT cooler with the input/outputs toward the right side,take the hose provided with the kit and clamp both ends to the cooler. Secure the ends with the provided screw clamps. DON'T CUT THE HOSE YET! I'll tell you when later on.
IF you have the RB screen mount it back onto it's mounts. fish the hose around the to the bottom of the Radiator.
IF you have the RB screen mount it back onto it's mounts. fish the hose around the to the bottom of the Radiator.
Thread Starter
Original Turbo 'd Auto !!
Joined: Mar 2004
Posts: 2,136
Likes: 5
From: Surprise, Arizona
With the hose now close to the Radiator AT cooler connections, what I did was is take the side of the hose that goes to the TOP of the added AT cooler and leave some slack in the hose and place it next to the output side (Left) of the Radiator AT cooler connection and cut the Hose. NOT THE HOSE on the stock AT cooler !
now take the bottom hose coming from the extra AT cooler put a hose clamp on the hose and insert the fatter threaded end of the barbed hose connector. Tighten the hose clamp. Using either thread paste or Teflon tape, wrap the threads and screw on it's female side of the hose barb. This connection is for the return line back into the tranny.
now take the bottom hose coming from the extra AT cooler put a hose clamp on the hose and insert the fatter threaded end of the barbed hose connector. Tighten the hose clamp. Using either thread paste or Teflon tape, wrap the threads and screw on it's female side of the hose barb. This connection is for the return line back into the tranny.
Thread Starter
Original Turbo 'd Auto !!
Joined: Mar 2004
Posts: 2,136
Likes: 5
From: Surprise, Arizona
Ok Now remove the left (Return) hose off of the radiator cooler and you may get some ATF on you and the hoses. Now connect the Bottom hose that connects to the Add in cooler to the stock AT return hose you just pulled off. Secure the hose connection with either the stock hose clamp or the screw clamp. Your call.
Thread Starter
Original Turbo 'd Auto !!
Joined: Mar 2004
Posts: 2,136
Likes: 5
From: Surprise, Arizona
Now to connect the feed (Top) hose of the add in cooler to the output side (left) of the Radiator cooler.
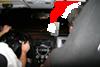
It's a tight space here between the steering rack motor and the output line. The hose supplied has a very tight fit on the output line. Once you get the remaining hose (TOP hose on the add in cooler) on the output side of rhe Radiator cooler, clamp it down.
I had to put a piece of closed cell foam between the hose connectors and the output pipe because they vibrated against each other. Just look at the pic.
It's really tight.
Check all of you connections again. make sure they are all tight.
Thread Starter
Original Turbo 'd Auto !!
Joined: Mar 2004
Posts: 2,136
Likes: 5
From: Surprise, Arizona
Start the car, let it idle, check for any leaks, If you see a leak, shut off the car. Duh.
Tighten up the connection and try again. once no leaks are seen put the underskirt back on.
Drive the car around, get the AtTfluid up to operation temp, usually 10-15 min of driving and check the level of the AT fluid add ATF is needbe.
It's not a difficault install. The worse part is the connections near the steering rack.
if something dosen't make sense to you about this install, post here.
One final pic of the space between the AC condenser and AT cooler.


Registered User
Joined: May 2007
Posts: 37
Likes: 0
I like what you did, I'm doing research into this mod. How much did this project cost you in total? I'm workiing all year on cooling mods since I live in guam and the car is here, cooling will be my best friend here.
Thread Starter
Original Turbo 'd Auto !!
Joined: Mar 2004
Posts: 2,136
Likes: 5
From: Surprise, Arizona
Anyway total cost was about 60$ for the cooler. The RB Ac screen was I think $70..
There is just enough hose to install this cooler where the second oil cooler usually goes.


RX8: God of Swiftness
Joined: Dec 2007
Posts: 47
Likes: 0
From: Carefree in the Arid Zone
I'm reviving this thread because my install is basically the same but with some differences that may be interesting to anyone driving an auto 8.
My install also uses the Racing Beat screen. It definitely seems strong enough and it has to be better than poking those plastic straps (the ones that come in the cooler kit) through the A/C condenser and the radiator.
I differed from 09Factor by buying a thicker B&M cooler, #130-70264 :
http://www.jegs.com/p/B%26M/758370/10002/-1
It is only about 10% more heat rejection but I wanted to minimize the area I was placing in front of the condenser and I didn't plan to squeeze it between the screen and condenser anyway. I've not experienced a summer with my RX-8 yet, but most of what I've read on this forum leads me to believe I shouldn't do anything that might reduce the A/C system's performance.
I took some photos, just a minute while I go find them........
RX8: God of Swiftness
Joined: Dec 2007
Posts: 47
Likes: 0
From: Carefree in the Arid Zone
OK, I found the photos. I don't own a camera, so I borrowed my wife's Sony DSC P5 pocketcam which does mostly a fine job but doesn't do close-ups very well.
The other difference in my install is I used an in-line Magnefine filter. I've done the same on my other two Mazdas with the expectation of never having a transmission failure.
Here is a pdf of the cooler mounted to the RB screen and the in-line filter. As you can see, putting the cooler all the way to one side allows you to pick up one hole in the screen's frame so you only need to drill one new hole.
RX8: God of Swiftness
Joined: Dec 2007
Posts: 47
Likes: 0
From: Carefree in the Arid Zone
More photos of the install-
Mounting the cooler as low as possible on the RB screen worked out well, with the outboard hose pressing just slightly on the undertray.
The in-line filter is strapped to the steering actuator which I know very little about but must be OK to strap something to because I found a Mazda-installed strap around it. The insulation pad is a leftover from the Mazda satellite radio (Sirius) install kit.

RX8: God of Swiftness
Joined: Dec 2007
Posts: 47
Likes: 0
From: Carefree in the Arid Zone
Hey, thanks for the congrats!
But now I have a question: how do I add transmission fluid? Adding the cooler and hoses must have lowered the fluid level at least a quart. I've checked the owners manual and there is no reference to a dipstick location which I would normally use as a fill tube. I've also looked through the engine compartment and I'm convinced there is no dipstick tube for this transmission.
So I've ordered the service manual from mazdastuff.com and I expect somewhere in there is an explanation of how to add fluid. I have searched this forum thoroughly and I am surprised to not find any discussion about this. Maybe Mazda considers this a sealed system has eliminated the fill tube?
Thread Starter
Original Turbo 'd Auto !!
Joined: Mar 2004
Posts: 2,136
Likes: 5
From: Surprise, Arizona
You should really hang out with us some time...
Anyway the Trans dipstick is neatly tucked under the Upper intake manifold. on the passenger side of the engine bay.
I try. I had this on my car for a year before i posted the DIY.
Anyway the Trans dipstick is neatly tucked under the Upper intake manifold. on the passenger side of the engine bay.
I try. I had this on my car for a year before i posted the DIY.
Last edited by 09Factor; Apr 18, 2008 at 12:15 AM.
RX8: God of Swiftness
Joined: Dec 2007
Posts: 47
Likes: 0
From: Carefree in the Arid Zone
Well, it took a lot longer than I expected for the service manual to arrive but here it is.....
the page that reveals the secret of how to add transmission fluid to the 6-speed autos.
As I suspected, its a lot tougher than it used to be!
the page that reveals the secret of how to add transmission fluid to the 6-speed autos.
As I suspected, its a lot tougher than it used to be!


Bump.
Okay Guys, I actually did this Install today on REDRX3RX8's 2007 GT Auto. He came into to town for a track day at Harris Hill and after having his tranny replaced a couple months ago after a track day we thought it would be a good idea.
This is a great DIY. I did it a different way and think it's easier to pull the battery and intake and go through the top. There really is no reason to go under the car or remove the bumper to do it. REDRX3RX8 made the brackets to fit the factory rock guard and that was a really smart idea, it worked perfect. So for those of you with older Auto's, you will need the factory rock guard t do it this way.
Anyway, hope this helps.
http://www.flickr.com/photos/9krpmrx8/5462875379/
http://www.flickr.com/photos/9krpmrx8/5463477176/
http://www.flickr.com/photos/9krpmrx8/5462875681/

Thread
Thread Starter
Forum
Replies
Last Post
yankeepicker
Series I Trouble Shooting
3
Sep 11, 2015 05:42 PM