DIY: LED Halo Tail Lights (S1)
 10-17-2011, 11:14 AM
#1

DIY: LED Halo Tail Lights (S1)

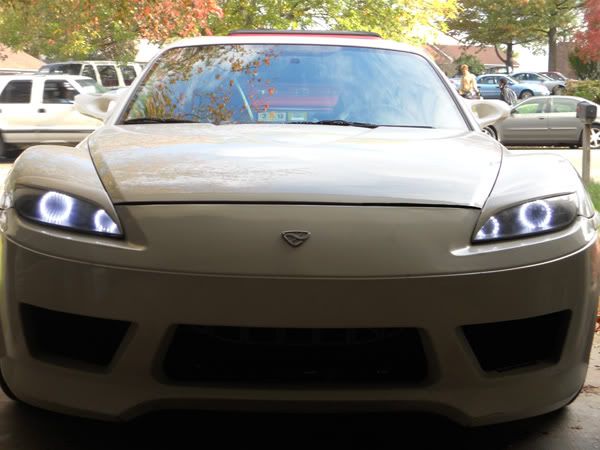
LED halo headlights -
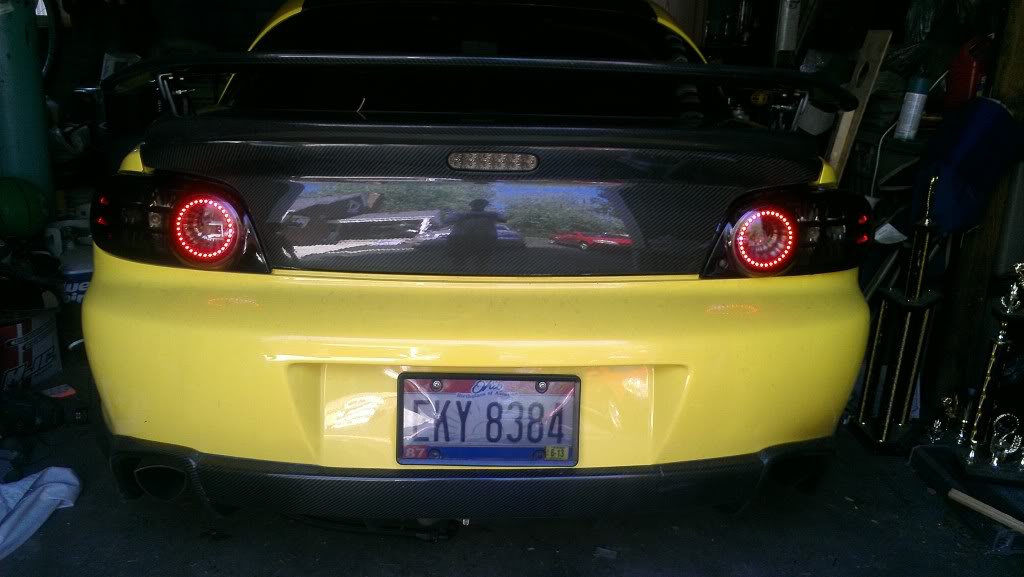
Many of you guys have seen my other post with pics of my LED halo tail lights I have been working on. Here is a basic DIY for those of you who have always wanted to tackle this project, but didnt want to tear up a few tail lights in the process of figuring it out.
What you need..
1. First off, these tail lights do crack..this method makes it a lot less likely, but be aware, one slip up and you can ruin the tail light. Id recommend getting a spare set off ebay, and if all goes well, sell your current tails back on ebay.
2.Dremmel Diamond Cut-off wheel. (see link: http://www.amazon.com/Anytime-Tools-.../dp/B000FJLWNK) This seemed to slice through the plastic the best, no melting, easy to handle, and a tiny separation line unlike other cut off applications out there.
3.Clear silicone
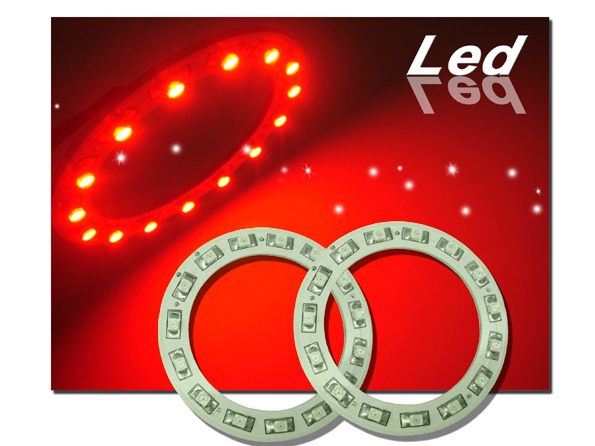
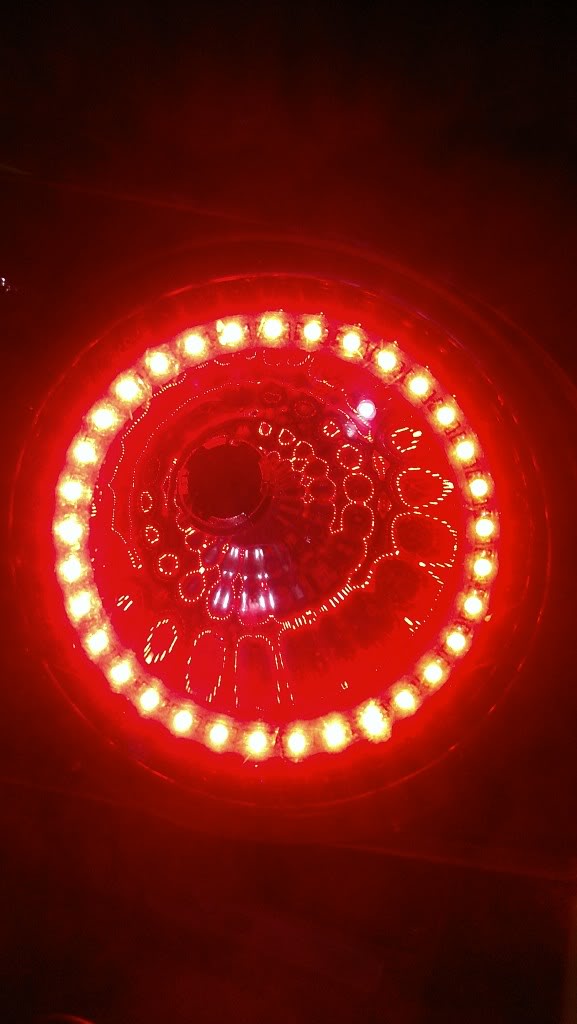
4. 100mm red LED (SMD) Halo/Angel Eye. You could get away with 110mm or so if your not going to use the stock red lens inside the tail light like I did. With the 100mm, you can attach the ring, and still have a gap to replace the red lens on the inside.
My source on ebay was seller ID ipremiertek*co
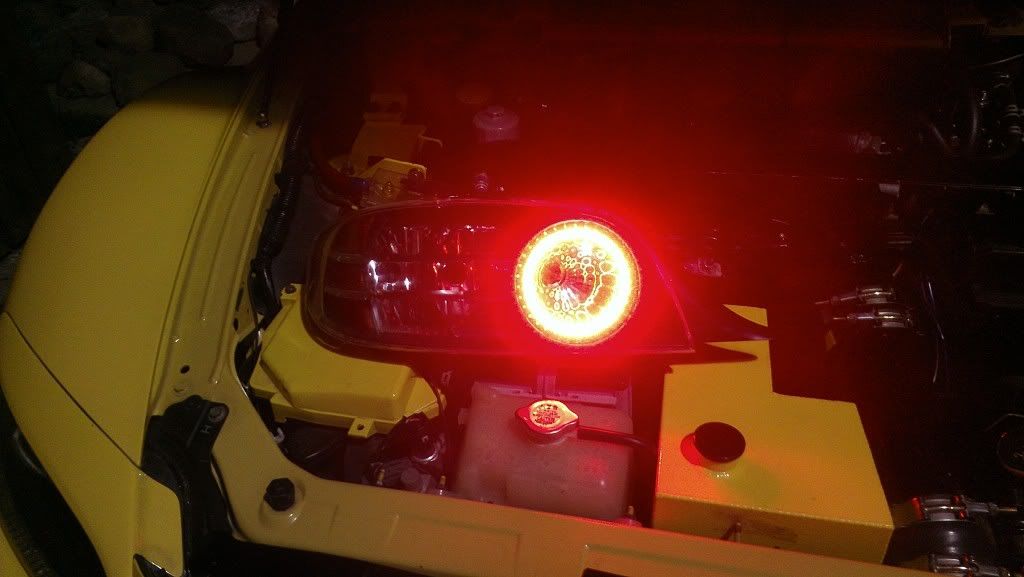
5. LED brake bulbs
------------------------------------------------------------------------------
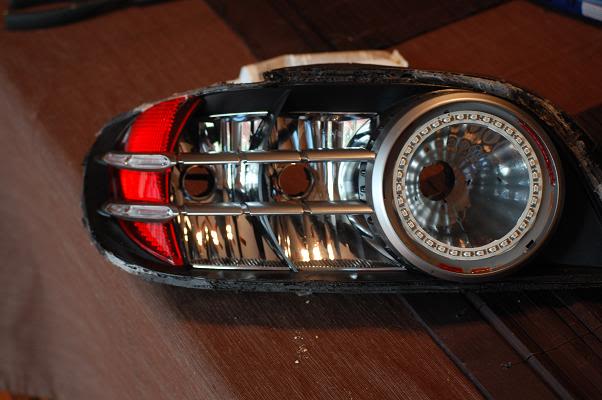
Step one- Start dremmeling. Your going to want to go around the perimeter of the clear lens, as close to the black plastic as possible. This will hide most of the cut line. I dont have pics of the process, but its pretty self explanitory when you look at the setup of the tail.
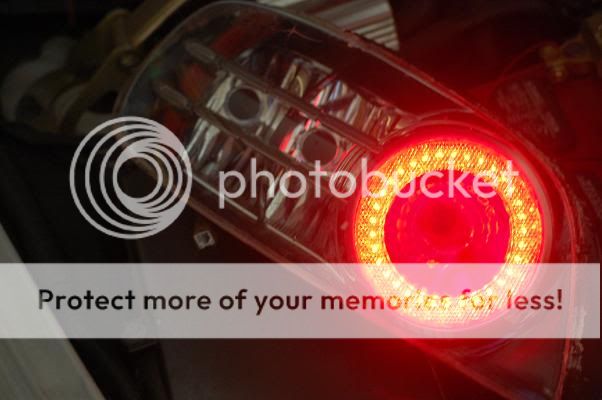
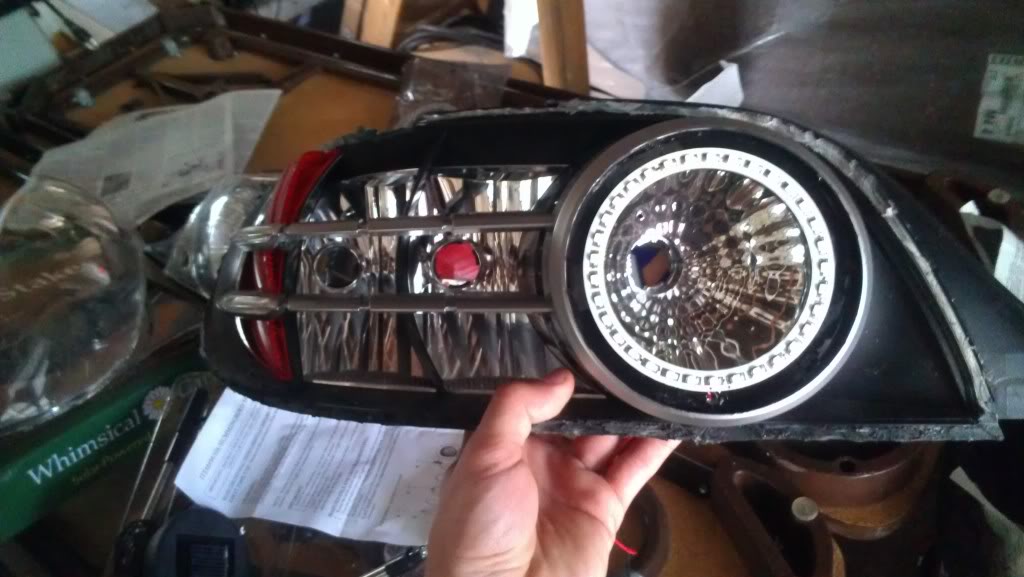
The issue your going to have, is when you get near the key hole on the passenger side tail. The lens is sealed together in this whole section. I found the best way to get around this issue, was to stop, and cut down the black plastic and on the back side of the tail light, avoiding the keyhole altogether. Attached is a pic where you can see the lens separated, with the keyhole section still attached. Sorry its a little blurry but it shows what I mean.
Dont try to cut around the whole lens, thinking this section will pop apart..it wont. You need to leave this connected to the clear lens as one piece

Due to some heat cutting the plastic, your going to have to actually "pop" the lens off the housing. Heres where it can get tricky..if you didnt cut all the way through the plastic you can easily run into cracking. I used a butter knife, and gradually, and gently put it in along the cut line and popped a little section at a time all the way around the lens. It should eventually pop off as a whole piece, just take your time.
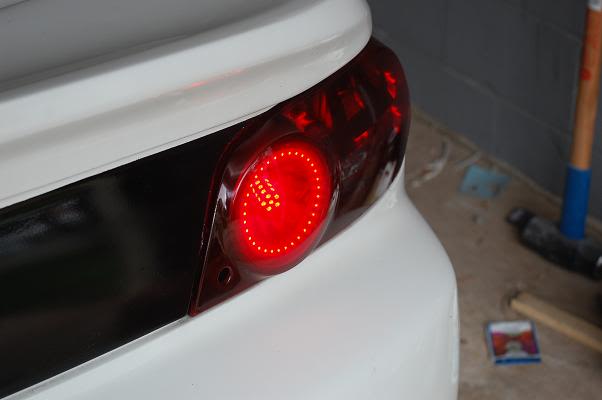
Step two- Now that the lens is off, your going to want to pop the inner red lens off. This is attached by two clips, and a little glue I believe. I used a tooth brush handle and stuck it in the bulb hole on the back of the tail lights. A few good whacks, and the lens popped off.
Step three - Mount the LED smd ring with silicone, drill a small hole on the inside of the ring through to the back of the tail light and run the wires through. If your going to keep the red lens on the inside, put it back on with a few spots of silicone or super glue.
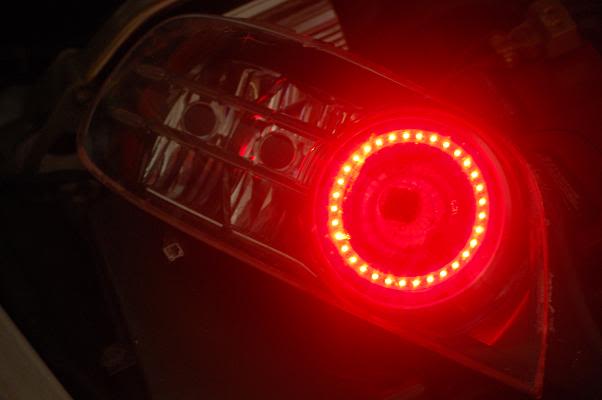
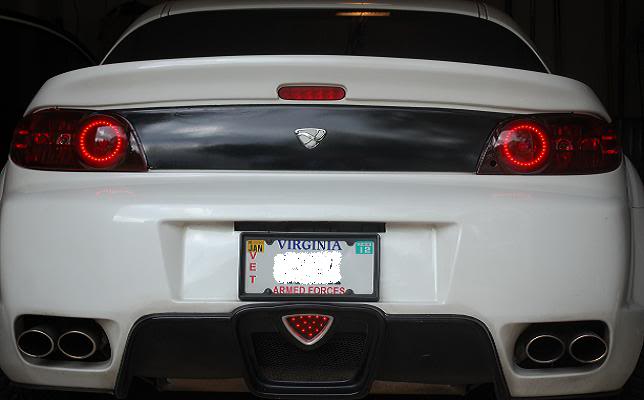
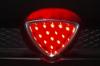
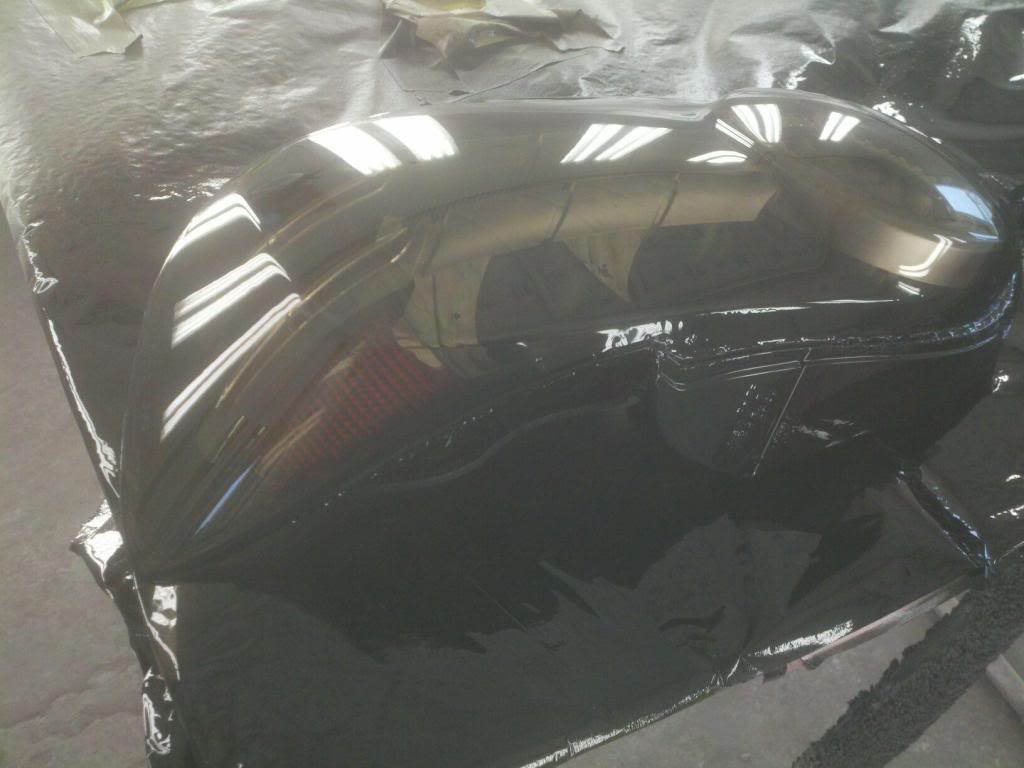
This is the tail with the red lens on the inside remounted over the LED ring.. obviously this would be what it would look like if you were to do it with a stock appearance. The red reflector lens seemed to make the halo look wider, but since I was spraying the tails red anyway, I didnt use it[/B]
broken down, mid process. I sprayed my tails red after, so I decided not to use the red lens to get a crisper LED look.
This is the tail not sprayed red, and without the red lens on the inside
Step four- Seal them up. They should fit together like a glove due to the thin cut line with the diamond cutoff wheel. I used clear weathergrade silicone, and like you would with the headlights, sealed all the way around. The way our tails are mounted, most of where you just cut is going to be hid by the trunk. The part you will see should look fairly untouched if you did a good cutting/siliconing job.
Step five- Connecting the wires. (Ill update this later today with wire colors when I get home and take a look) Your going to splice the wires in with two out of the three wires currently going to your brake lights. The "tail light" function is going to be disabled from your brake lights by disconnecting one of the wires, which will leave your tail bulbs to work only as brake bulbs. Same deal as how your 3rd brake light is wired.
Step six-Replace the brake light with a good LED brake bulb, and install the tail lights on the car.
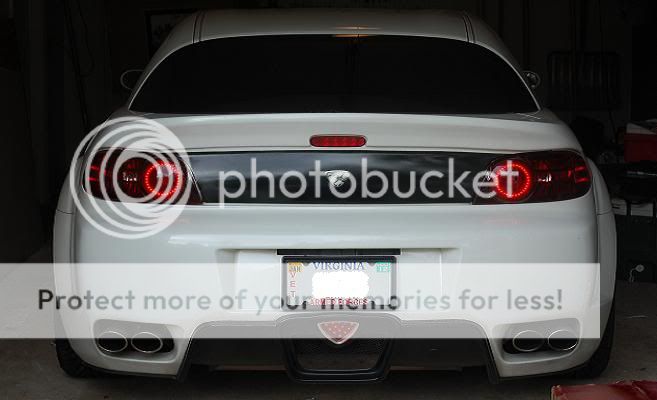
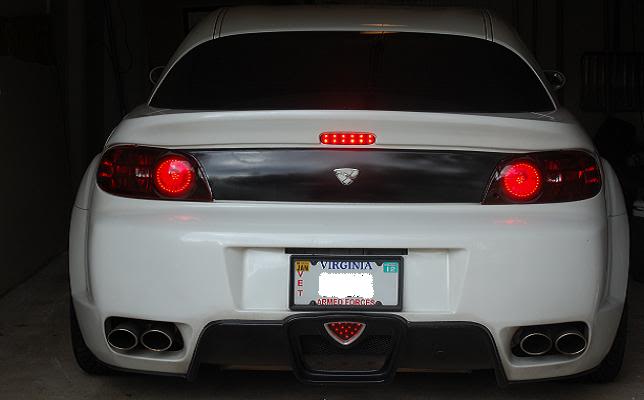
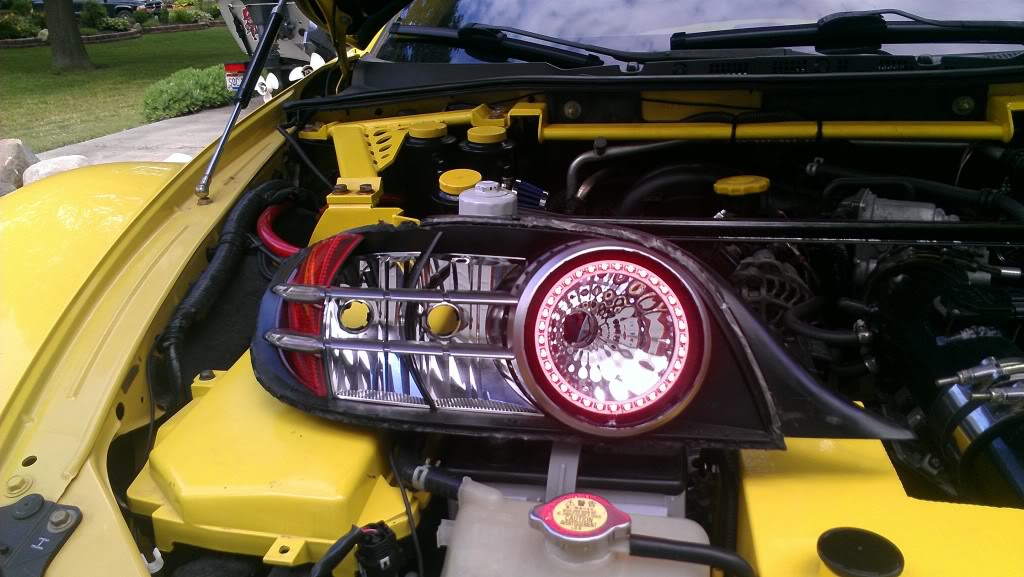
FYI- If you want them red like mine, Ive had the best luck with Krylon Red stained glass spray from Michaels arts and craft stores... covered by several coats of good quality clear spray.
PICS

Last edited by shakeyourbrakes; 03-03-2013 at 06:47 AM.


 10-17-2011, 02:41 PM
#4

great job, was following the other thread and for the money you did a very good job with them
You may want to consider changing those linked images as attachments to your post because there are quite a few diy threads where the links go dead over time, which pretty much ruins the whole point of the thread
You may want to consider changing those linked images as attachments to your post because there are quite a few diy threads where the links go dead over time, which pretty much ruins the whole point of the thread
 10-17-2011, 09:01 PM
#6
If I remember right, they arnt really removable.. You shouldn't have an issue painting them in place though, it's all pretty wide open.
I don't remember where I got the brake bulbs.. I think they are just 30 SMD LEDs from superbrightleds.com.
I don't remember where I got the brake bulbs.. I think they are just 30 SMD LEDs from superbrightleds.com.
 10-21-2011, 08:07 PM
#8
Always Under Construction

Join Date: Nov 2008
Location: Jacksonville, FL
Posts: 152
Likes: 0
Received 0 Likes
on
0 Posts
Great job and it looks great. also your instructions make it almost to easy lol good write up.
by any chance do you have a diy on your headlights? i think i will give that one a try before trying the taillights.
by any chance do you have a diy on your headlights? i think i will give that one a try before trying the taillights.
10-21-2011, 09:58 PM
#10
I looked on a pair I still have open, the chrome is covered by the twin bars that go across the tail lights. The only way to paint the chrome would be to tear it out from behind these, or tape off everything and try to spray behind them
10-25-2011, 04:06 PM
#11
Always Under Construction
Join Date: Nov 2008
Location: Jacksonville, FL
Posts: 152
Likes: 0
Received 0 Likes
on
0 Posts

 12-14-2011, 04:07 PM
#13
Registered

Nice DIY. I gotta say I really like that black strip on the back of your trunk but it seems like it needs something to complete it but I just cant put my finger on it....
06-05-2012, 07:01 PM
#16
Yup... Black with red stripe (the middle one on the brake bulb socket) is the one your going to disconnect from the brake bulb. Rewire this wire to the power on the led halo and your set. Mine have been working great since I installed them. Post pics when your done!
06-05-2012, 11:05 PM
#18
yeah i had a cracked pass side tail light i used for practice to prefect where i needed to cut and checked the inside out. the wheel left marks on the clear part from not cutting at the right angle.
I cut the driver side apart tonight and it came out perfect so far (all the way cut). waiting on the rings and the cree leds i ordered along with the passanger side tail minus the crack.
that wheel was a bit more expensive than i thought but o well it does the job.
I plan on doing a light tint with a automotive paint rather than nightshades this time. I like your red but it would seem out of place on my car i think.
06-08-2012, 01:27 PM
#21
New Member

Join Date: Jun 2012
Posts: 6
Likes: 0
Received 0 Likes
on
0 Posts
This is awesome. I'm curious, once you have them apart, would it be possible to convert them to all clear tails? Like remove all the red but still have them look legit? Or would they look incomplete?
06-10-2012, 10:23 PM
#22
removing the brake light cover is no problem but i would not remove the red near the factory led. Mine are at the painters right now. he is painting a black ring to cover up the cut line and a small crack that was in the tail. Then doing his custom taillight tint job. Also I have Cree LED in the mail for the brake, reverse, and all 4 turn. here is one of mine before i dropped them off.

I though the diy helped out a lot. Now actually doing it, it kind of sucks and it not as easy as it may sound to some one who has not played with these kinds of things. This is one you should really think about before cutting into you only set of tail lights or needing to drive the car. Or going to do this and thinking there is no possibility of something going wrong
I though the diy helped out a lot. Now actually doing it, it kind of sucks and it not as easy as it may sound to some one who has not played with these kinds of things. This is one you should really think about before cutting into you only set of tail lights or needing to drive the car. Or going to do this and thinking there is no possibility of something going wrong
Last edited by bumblebeerx8; 06-10-2012 at 10:25 PM. Reason: for some reason it will not post pictures only link to them
 06-11-2012, 03:10 PM
#24
removing the brake light cover is no problem but i would not remove the red near the factory led. Mine are at the painters right now. he is painting a black ring to cover up the cut line and a small crack that was in the tail. Then doing his custom taillight tint job. Also I have Cree LED in the mail for the brake, reverse, and all 4 turn. here is one of mine before i dropped them off.


I though the diy helped out a lot. Now actually doing it, it kind of sucks and it not as easy as it may sound to some one who has not played with these kinds of things. This is one you should really think about before cutting into you only set of tail lights or needing to drive the car. Or going to do this and thinking there is no possibility of something going wrong
I though the diy helped out a lot. Now actually doing it, it kind of sucks and it not as easy as it may sound to some one who has not played with these kinds of things. This is one you should really think about before cutting into you only set of tail lights or needing to drive the car. Or going to do this and thinking there is no possibility of something going wrong
Well said... I highly recommend spending the money and buying a used waterlogged set of tails or something in the FS section before trying this. Luckily I had 3 lights in my garage I could practice on first.
Pics looks great man, can't wait to see the final product.