When you click on links to various merchants on this site and make a purchase, this can result in this site earning a commission. Affiliate programs and affiliations include, but are not limited to, the eBay Partner Network.
Hey guys, figure I should move this over to the racing section to keep track of my build process. I'm pretty big on keeping all my own personal info in a single thread that way I have a way of keep track of what I've done over the years. Either way, if this isn't the right spot feel free to move it.. this will also be a consolidation and addition to this newbie section thread I made: https://www.rx8club.com/new-member-f...-racing-270566
So, the story: I've been getting more and more into racing as I've gotten older, and to do that I was using my 98 Impreza (Shameless plug: https://www.rs25.com/threads/equinox...inside.164980/) to race. That car means the world to me and it occurred to me last season that the biggest thing holding me back from going any faster is fear of wrecking that car. It had been in the back of my head to get something I really enjoy, but also don't mind smashing up if it comes to that. The RX-8 has always had my attention as a fairly cheap thrill, having plentiful parts, and a committed community around it.
Que my auction buy of an RX-8!
I will update the below posts to tell the full story, and keep this main post as a "Table of Contents" of such for the car.
The goal is to build a Club TR Time attack car to compete (well, at least participate) in the #GRIDLIFE series around the Midwest. I'm better at putting cars together than racing them, but that doesn't stop me from enjoying a good time!
Engine
-HKS Hi-Power Catback
-Agency Power Catless Midpipe
-AEM/Custom Intake
-Self tuned engine cal w/ VersaTuner + more
-Koyo Aluminum Radiator
-Secondary air removed
-S2 Fuel Sender
Suspension/Drivetrain
-Fortune Auto 500 Coilovers w/12k/8k valving
-12k F Hyperco Springs
-8k Rear Swift Springs
-Evo R adjustable endlinks
-Hotchkis 21mm Hollow adjustable sway bar
-Ogura Racing Light HP Clutch Kit
-SuperNow Toe Arms
-Super Now trailing link bushings (sorta)
-SuperNow Front Strut Spherical Bushings
-Superpro front control arm bushings w/ caster add
-Superpro Poly offset FUCA Bushings
-Superpro Diff Mount Bushings
-CAE Ultimate Shifter
-Cusco RS 1.5 way LSD
-5.12 Ring and Pinion gears
-Diff temp sensor
-Carbotech XP12 Front Brake Pads
-Carbotech XP10 Rear Brake Pads
-Sikky Solid Rear Subframe bushings
-Progress 32mm front sway bar w/ 95A bushings
-AP Racing CP9200 Front Calipers w/ custom brackets
-CP3580-900G8 Rotors w/ custom 7075-T6 hat
-Infiniti G35 1in Brake Master Cylinder + Willwood External Clutch Res w/ custom hardlines
Interior/Safety
-Autopower Roll bar w/ extra roll bar
-Momo 330mm Wheel
-NRG Quick Release
-NRG Shorthub
-Custom designed slip ring (for the horn... why did I spend so much time on this)
-Recaro RS-GK Driver's seat w/ Recaro slider and offset side mounts
-Recaro SR-7F Passenger seat with Recaro slider
-Custom in cluster gauge system over CAN (water temp, oil temp, oil pressure)
-Schroth 6 Point harnesses
-Metra Dash Kit
-Carbon delete panels for radio and glovebox
-Flocked Dash
So back in October I tried to buy this RX-8 at auction on Copart. It was just across the state and the car was listed as a run and drive. Neat. Ended up winning the car (without hitting the reserve) 3 separate times and eventually was able to convince the seller that he/she wasn't going to get what they thought the car was worth. A month or so later, it showed up at my house.
First things I saw were that it was two colors. Oh boy.. they certainly did NOT look like two colors in the auction pictures.. the sun was hitting the car JUUUUUST right. What have I got myself into!? Upon further inspection, the car didn't looked wrecked in the front.. in fact it looked pretty dang good. Maybe it was oxidized like the roof was a bit..?? The world may never know.. but the paint job is CLEARLY awful and there's overspray all over.
The car was also quite a bit rustier than I had hoped. The car report showed the car living a long life in Georgia up until 2014 when it moved up here to Michigan, but even then it didn't have many miles put on it since it had been in the state. Oh well, no big deal.. I'm not afraid to cut holes in things and all that.
So I started it up and it seemed to run super well. The battery was nearly dead, but it ran and it drove. It also came with the Agency Power catback and sounded fantastic! Not a bad deal for $1800 DELIVERED.
I was trying to figure out why this car was thrown up at auction.. and to make matters worse, it had actually been sold at auction even before I found it back in February of 2019 listed as "mechanical damage". Not really unusual, I figured it had the engine replaced by the people who put it up for auction when I got it. Upon inspection it was very clear the engine had NOT been replaced.. and after some more automotive archeology of cleaning out the interior the car was clearly bought by someone who didn't have much money to treat the car right. So what the hell was WRONG with this car!?
I decided to do a "power check", and by that I just meant doing a 0-60 run and seeing how close it was to the factory number. Did my run and the time was around 14 seconds. Yikes... that's not great. This engine must be toast... or wait... maybe the cat is!
I pulled off the midpipe to be greeted with this:
I think we found the problem. Stamped it out, popped the pipe back in and did another 0-60 run. We were back down in the 7 second range. Awesome. That makes more sense.
I figured the two previous owners figured the engine was going out, and just never thought to check the cat?? I'm not sure. Once I knew I was working with something that wasn't completely trashed, I did the usual things anyone should probably do. Coils, spark plugs, cleaned the MAF, put back on a stock airbox (the car came with a VERY worn out and awful K&N TYPHOOOOOOON intake). I used factory Type C coils, NGK wires and NGK plugs. The stock airbox came from a car I found in a local junkyard. I planned on replacing this, but for less than $20 it was nice to have around. I also ordered new intake pipe nipples from the dealer since mine were toast (sweet vacuum leak post MAF!).
While everything was apart I also noticed the factory radiator was leaking in like... 4 different spots. No worries, needed to put a nicer rad in there anyways. In went the Koyo! I made sure to try to reuse the OEM foam as much as possible to channel as much air through the rad.. I hear heat is just a huge issue with these cars. I'm sure my battle isn't over.
With all of these things done, it became very clear to me that this car went through a few owners that just absolutely beat the **** out of the poor car. The car ran fantastic now, had good power, and no longer left puddles in the garage. Now it was time to do something about the small weird things done on the exterior...
One thing that was really odd was the gas cap cover was absolutely torn to shreds. I'm assuming someone either tried to break into it, or it was frozen shut... or... I don't really know. Easy fix, and now that worked.
While I was at least making it look nicer, I also found a driver's side door local for 30 bucks that was actually painted the RIGHT color. The paint on the car that was bad was done on the front bumper and fenders and then ONLY the driver's side door.. why.. I have no idea, but at least for 30 bucks it could be isolated to just the front area. The door also came with a Bose door amp and lock solenoid, both of which seemed to be wonky on my car so I was happy to have extras to fix stuff at a later date.
I also replaced BOTH mirrors because they were blown off... what the hell happened to this poor car!?
So now with the many minor things worked out.. I could spend some time on starting to do things to the car to ENHANCE the race car potential of it, instead of fighting poor previous owner's choices.
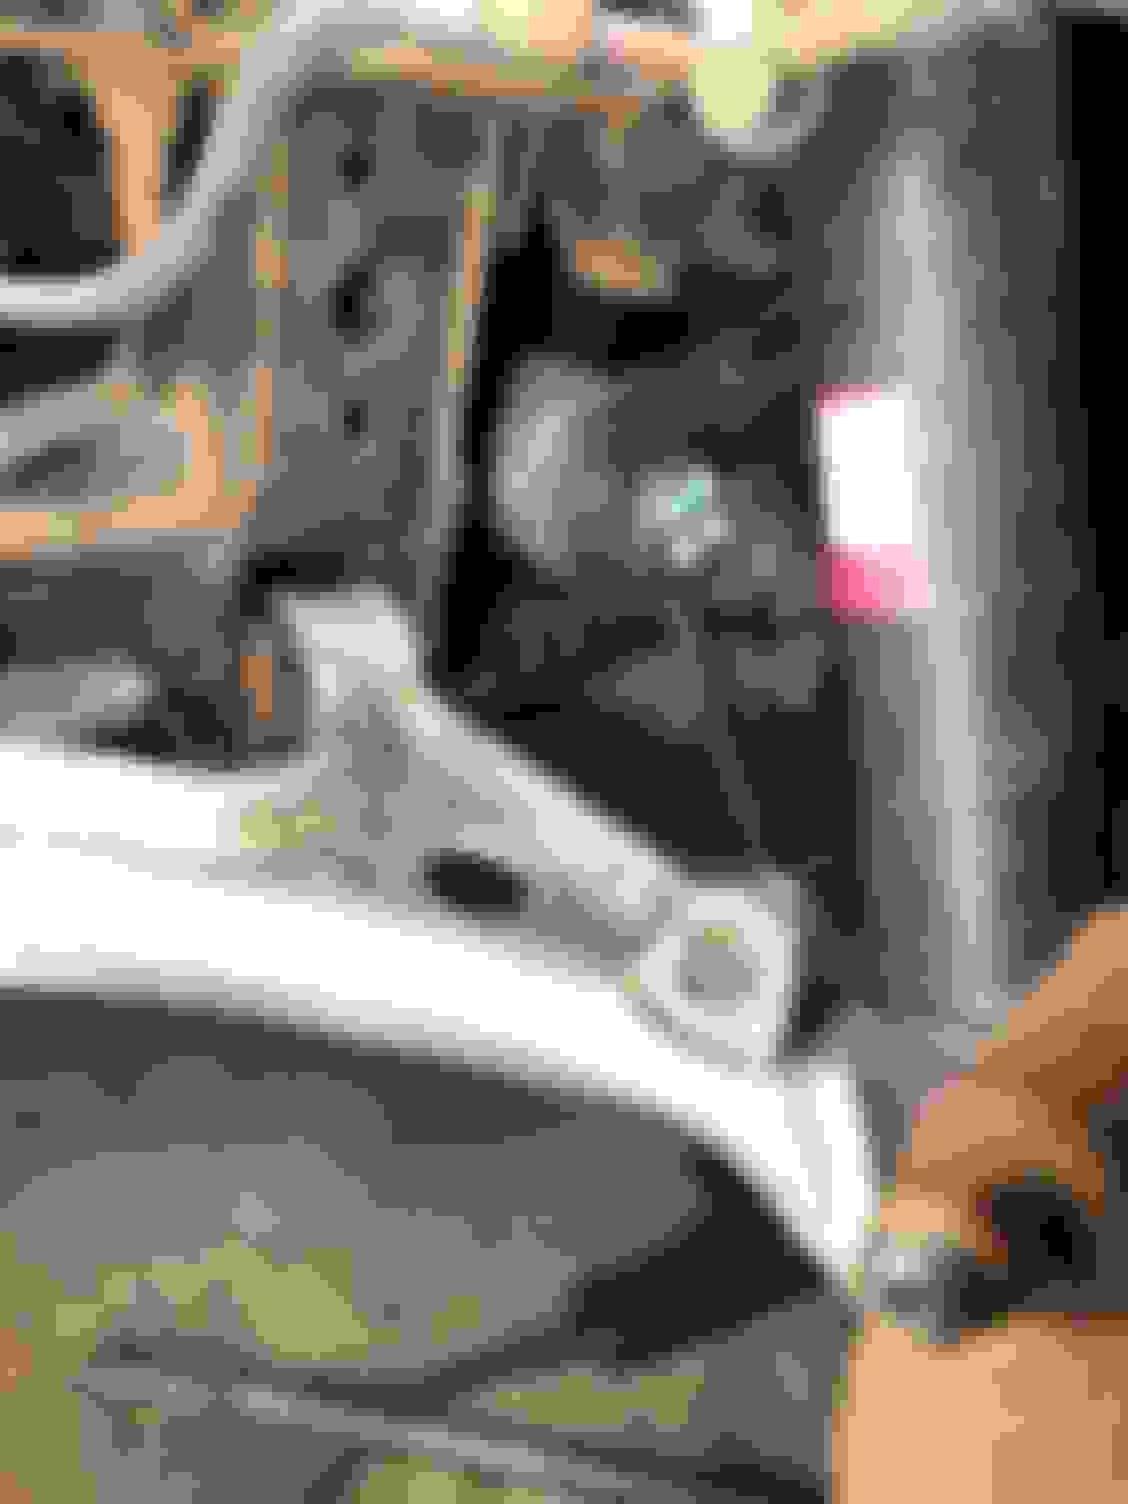
Continuing the strategy of first getting a good baseline of a car to work with, I had noticed that the lower ball joint was completely trashed. FIRST THINGS FIRST: If I had looked up the recall, I could have saved myself LOTS of time and money... but alas this is the story .
Seeing the broken ball joint I ordered a new (used) part from ebay and went to go install it. Thought it was going to be an easy job, but instead it basically just ended up being the cause for me to finally buy an angle grinder. Bolt seized, blah blah blah, this seems like a pretty common thing on these cars.
By the time I realized I could have taken the car in for the recall, I had already ordered new bolts, as well as factory endlinks since they were both blown out in the front (THIS POOR CAR)
Either way, with the car FINALLY back on the ground and now actually having a front swaybar I felt like I at last had a useable car to determine what my goal was here. And yes, I do plan on taking the car in to get the other side done (also completely seized) and have them replace this side as well.
I drove the car around quite a bit and started to really enjoy it. Now it was time to party.
So I was looking at the Ohlins Road and Track coilovers but didn't really like the springs they came with and also didn't really want to spend as much money on struts initially. I found a member selling these coilovers and it seemed like an absolute no brainer. Had some good springs, and the dampers were also properly valved.
Pretty simple install. I left the settings as they were on the previous owners car. I will corner balance and set everything up once I have everything ready for the race intent... still a lot to gather and install.
As you can tell, the endlinks ABSOLUTELY need to be replaced with some shorter ones. I have some Flyin' Miata adjustables I have and just need to get on the car.
I also cut some holes in the rear trim for little doors to adjust the dampers. Didn't really see the need in ripping everything out just yet... and also at this time I wasn't sure if I was going to run Street or Street Mod class, so I made an attempt to keep the interior as in tact as possible. The only other issue with the adjusters I ran into was in the front. The factory strut bar seems to hit the adjuster caps. Probably just going to go with an aftermarket bar.
While I was under the car, I also noticed the rear suspension was pretty much in dire need of needing to be redone... but that's a project for anything day.
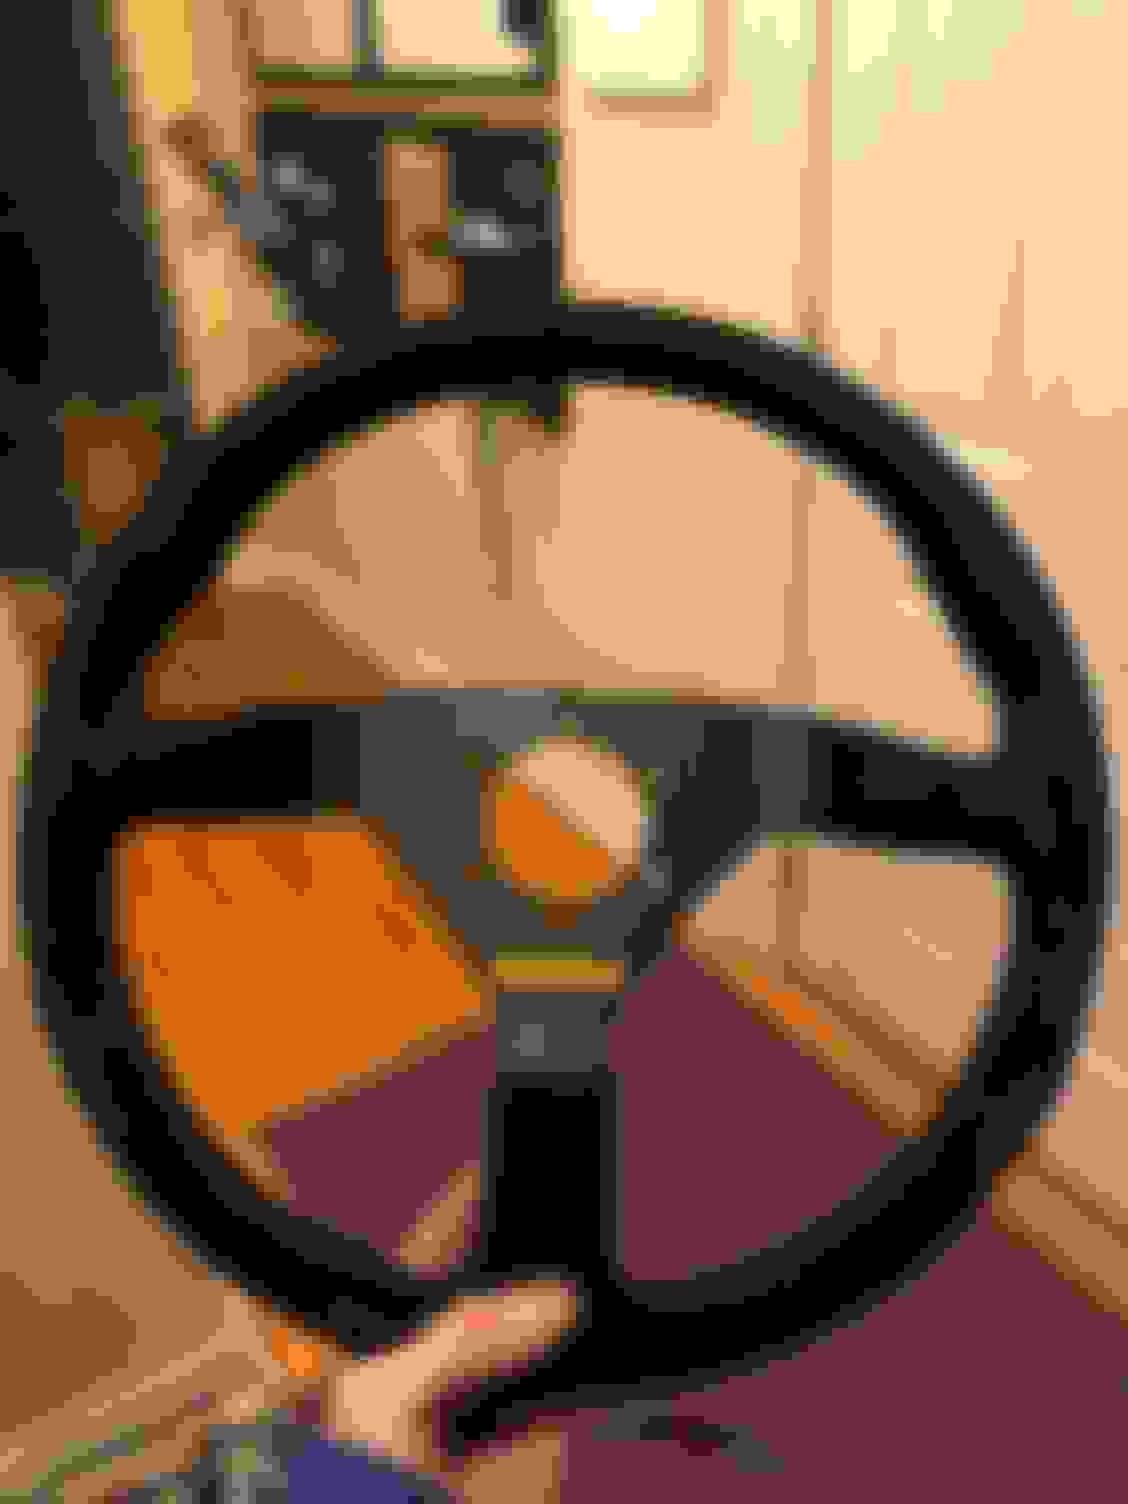
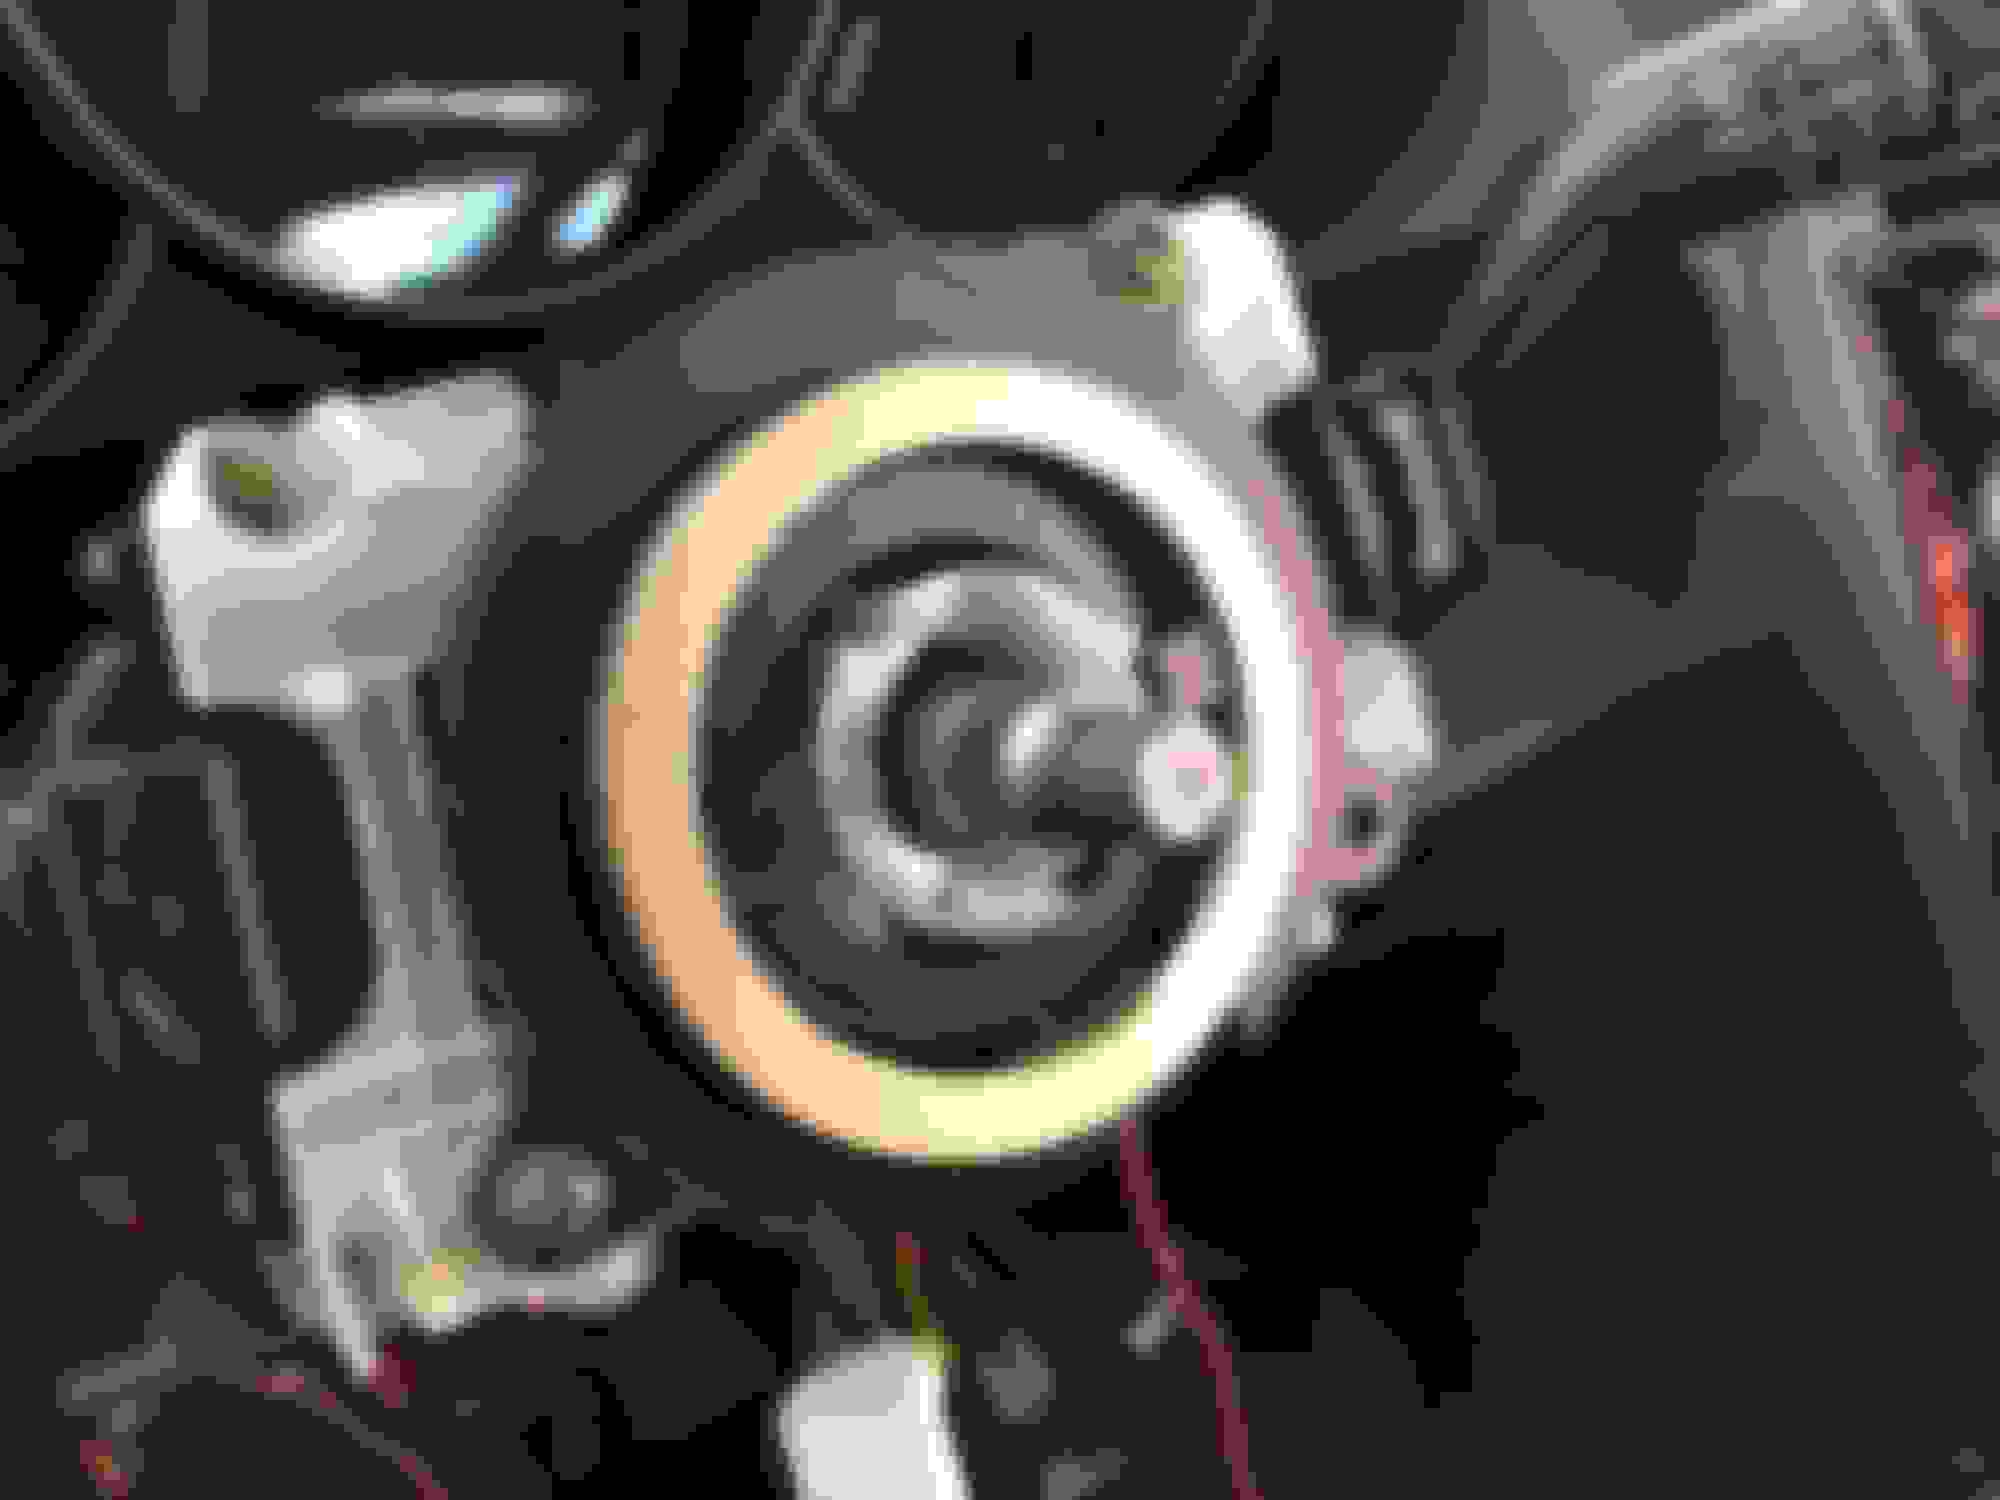
Momo Steering Wheel + NRG Short Hub + NRG Quick Release + Custom Slip Ring
Well, the steering wheel install part was easy.. the making of a slip ring simply be able to use a horn on a race car was not.. however It really didn't take that long, and the results are fantastic.
As far as the steering wheel and quick release install, it was very plain and simple with the kits made for the car. I also wired in some 2.2 Ohm resistors just to keep the airbag light off. Easy enough to alleviate a light.
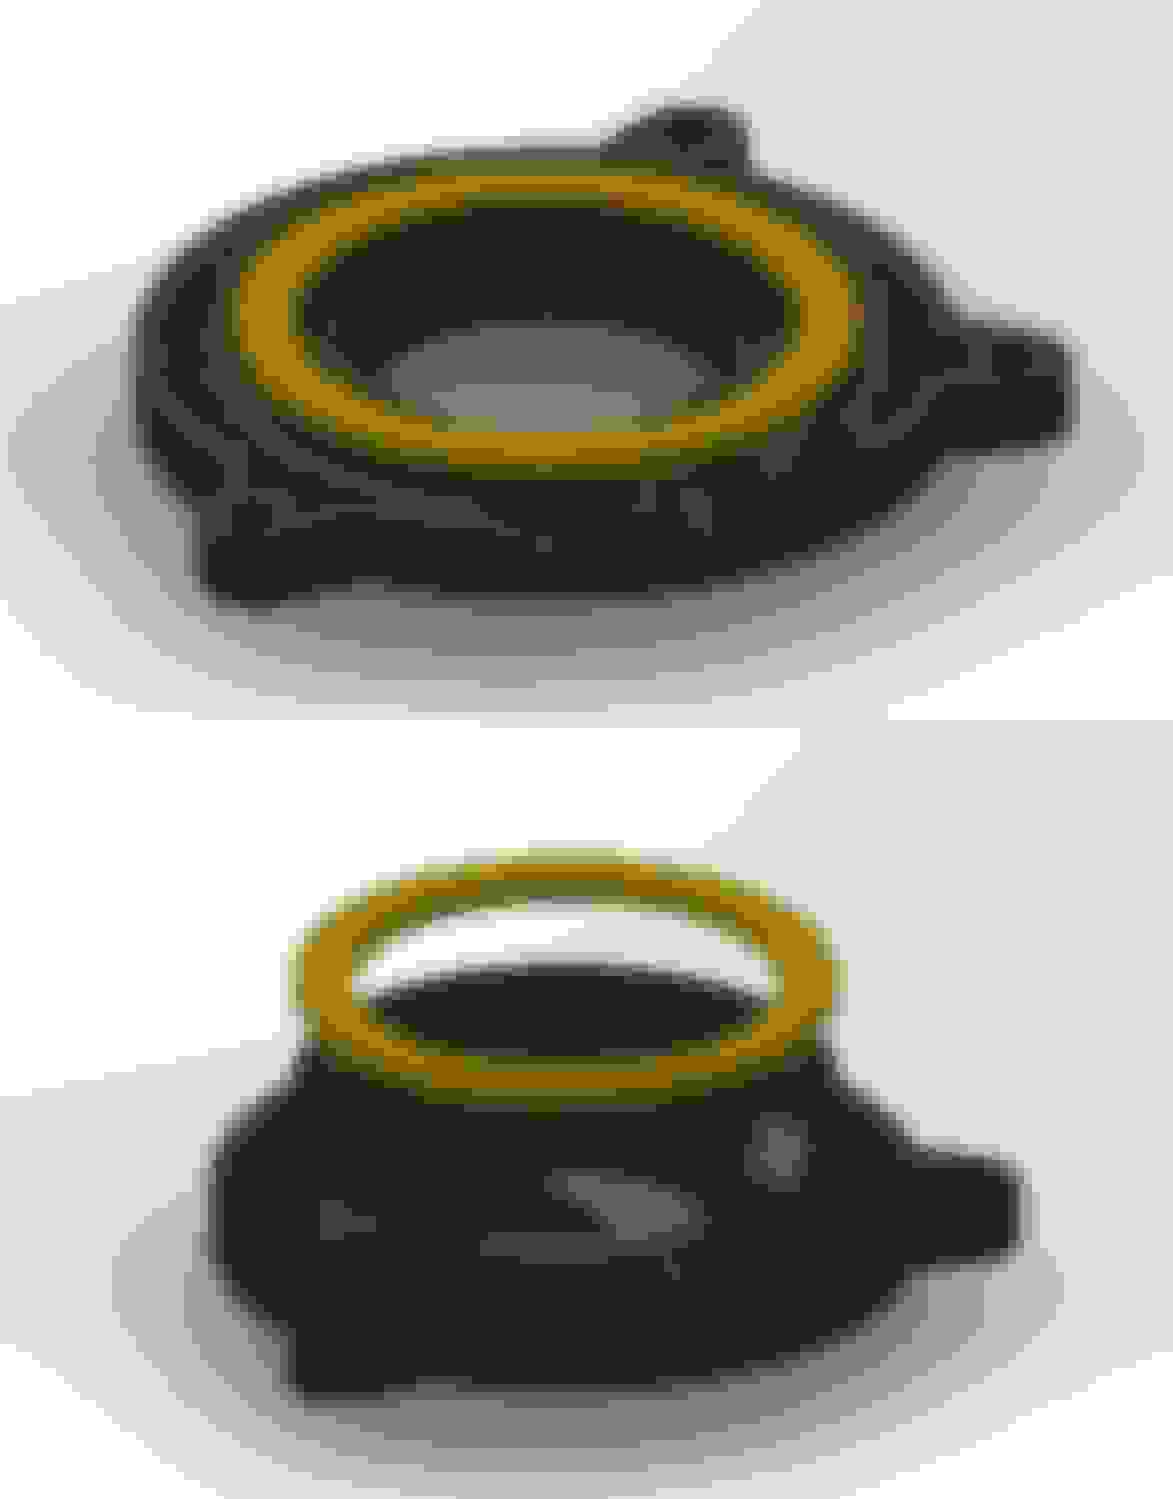
The complicated bit was when I got tired of seeing people use paper clips and bobby pins for the horn contact.
I decided to spend a lazy Sunday afternoon designing a quality interface so I could be able to use my horn. This is what I ended up with:
The idea was that a piece bolt bolt right in place of the factory clockspring, and using a stationary machined brass ring with a wire soldered on it would create a slip ring to make contact with NRG hubs brass rear. The springs were there to preload the piece against the hub for all wear situations and there was a key and race to take any radial movement out of the brass ring as well.
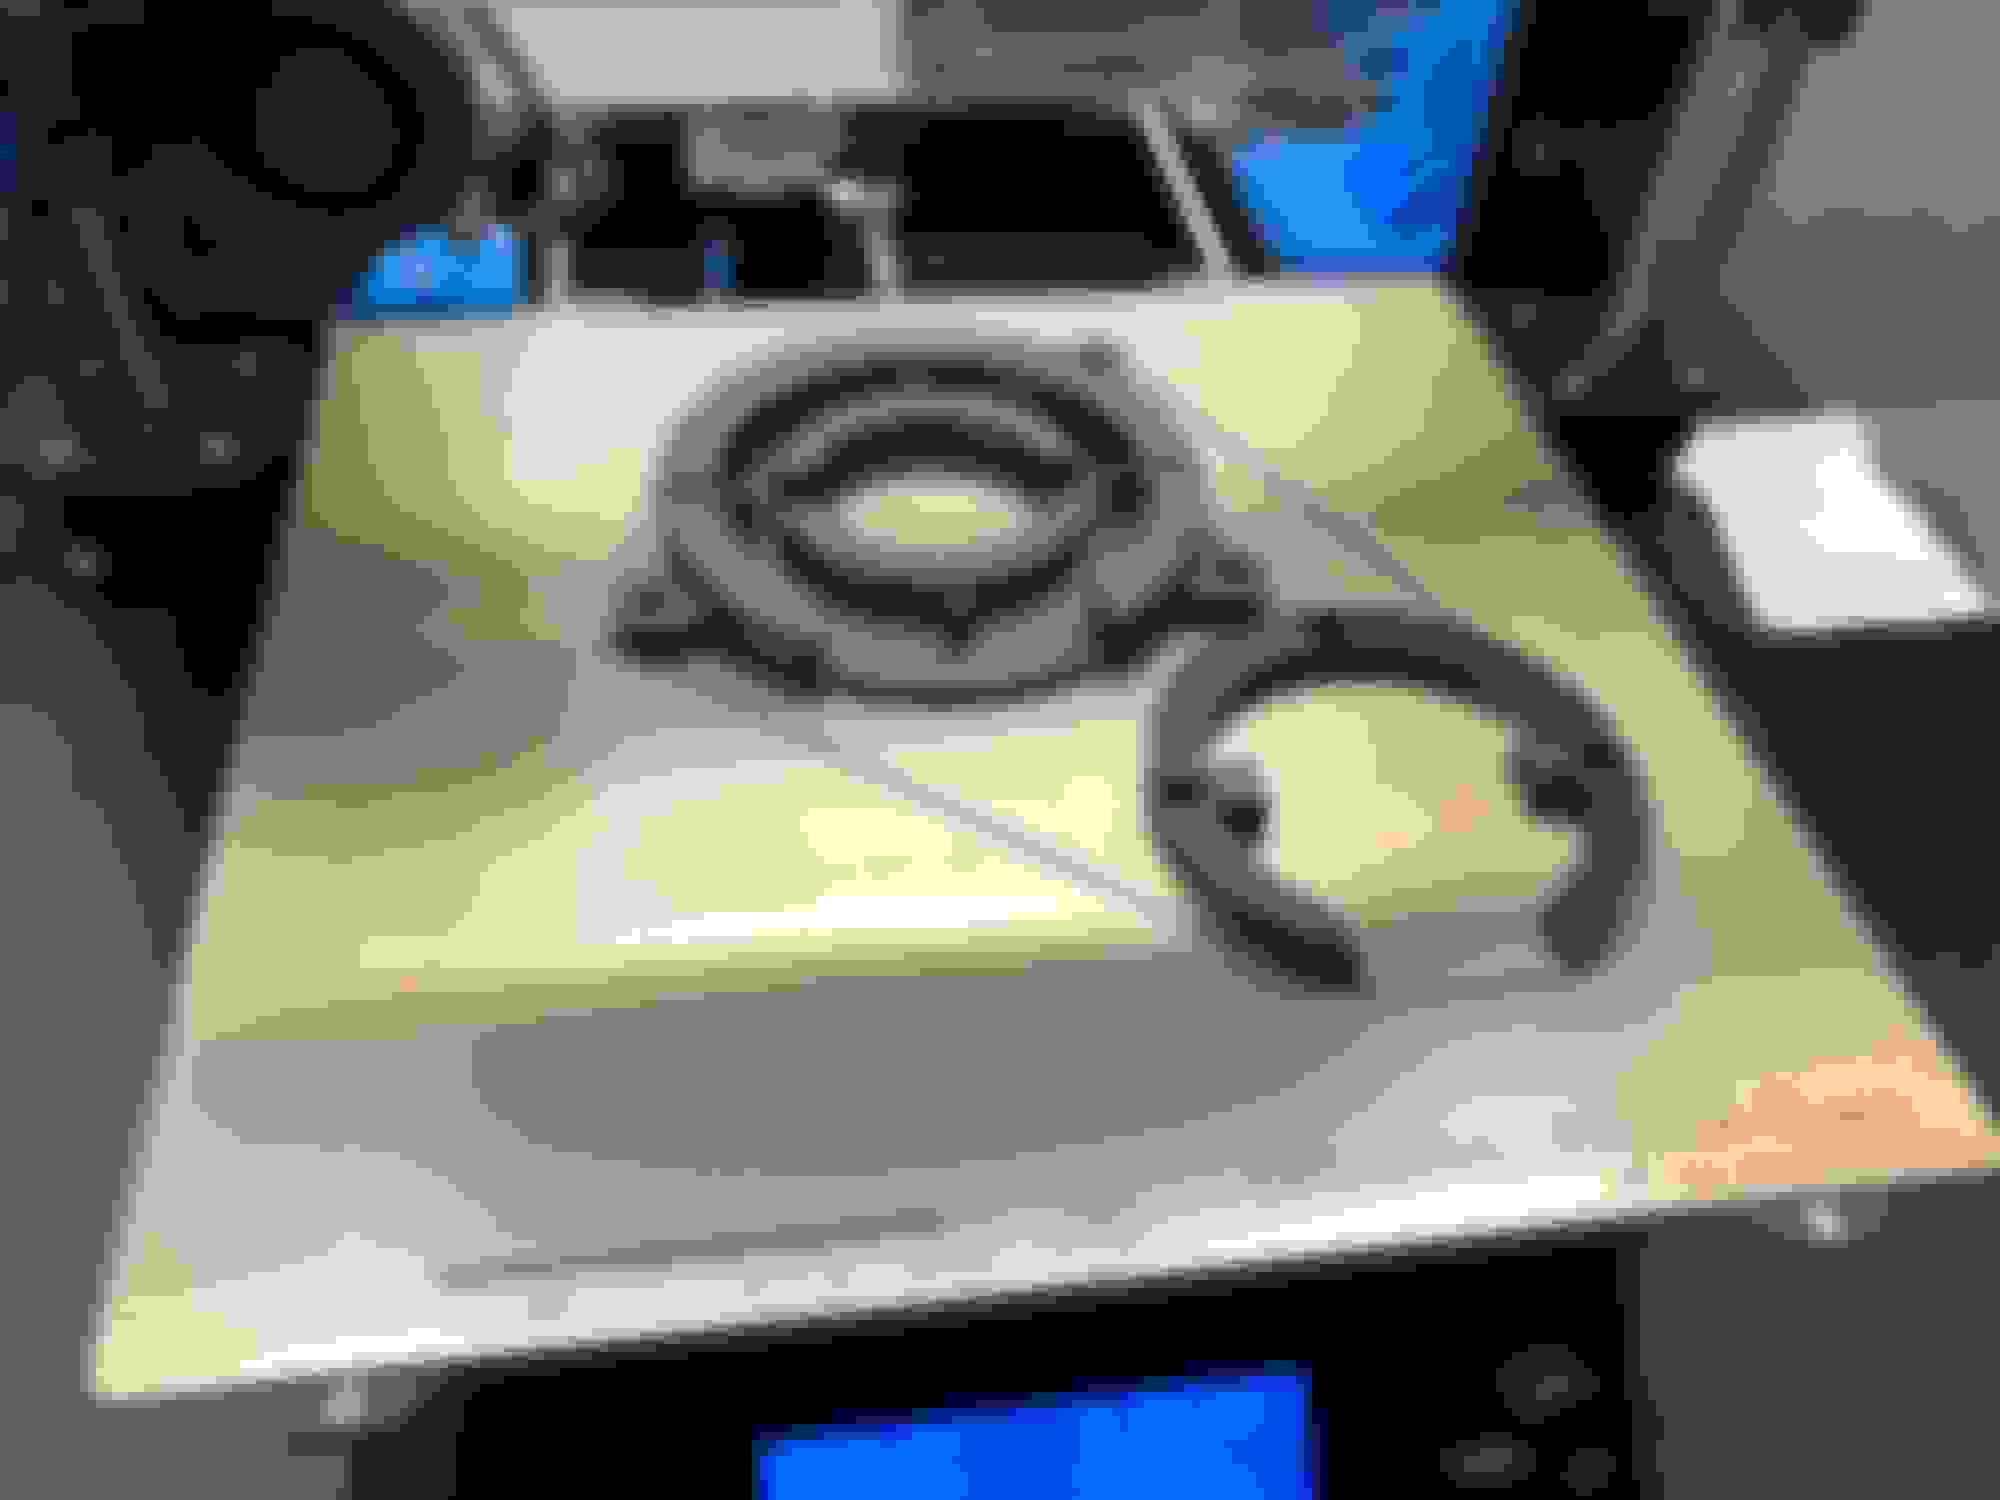
So I fired up the 3D printer and using ABS plastic (the minimum one should be using for automotive applications) printed out my parts. I then sent my drawing of the brass ring off to my buddy where he machined it for me (Check his stuff out, he's a car guys and makes cool stuff: http://realitymachine.us/)
I then assembled it all in car (well, this was over the course of many design revisions and a week or two..) and everything worked perfectly!
Everything works and fit great, the only thing left to do is thrash it around and see if it doesn't break!
This was kind of an impulse buy because I got a good deal on it. It's also one of the thing that puts me into Street Mod up from Street class. I'm not going to be competitive in either class, so I may as well add fun stuff to the car to play with. I've never done any sort of aero on a car before, so this is my dive into a whole new world. I know I am doing things wrong, but I will learn as I go surely.
Right now the wing still requires some reinforcements... will update post once I have a solution. I know the proper way would be to add trunk scaffolding, but I don't really have the time or resources to make something properly right now. So my idea is going to be reinforcement plates for the trunk.
Anyway: Install was pretty simple. Measure up some holes, poke em through, cut out the trunk carcass and there it is. Like I mentioned I know I need reinforcement, but these pictures show what it is at the moment. I am not planning to even drive the car like this.
I'll also come up with a way to cover up and seal the holes. Maybe I'll weld them up. Will make another post once that's done.
Also to note: I will need to gaffer tape up or remove the second element and that is NOT allowed in Street Mod. Will decide what's best to do as those events come closer.
EDIT: Was able to get my hands on some 3/16 aluminum and just made some backing plates that extended out towards the rear and sides of the trunk. This wasn't planned to be my final solution, but it works super well. The entire trunk is now deflecting instead of the local metal. With my weight (all massive 120lbs of it -_-) i can make the car squat even after the deflection of the trunk occurs. We will see what this looks like in practice and figure out what other things need to happen to create effective aero. This is all a learning activity for me, do I don't plan on perfect, or even good, results off the hop.
I know cooling seems to be a bit of a hassle on these cars, and hood vents are a pretty easy way to try to help with that. I was looking into some waaaaaaaay more expensive options, like an R-Magic hood, or even some replicas of that hood. I figured I could reduce weight and get some cooling.. but no one seemed to have weights for their hoods and quite frankly, the OEM hood is pretty dang light. No use to spend nearly $2000 to save a pound or two.
I had seen someone post about installing these hood vents and I thought they looked pretty slick and were at a pretty much impossible to beat (aside from just cutting holes) price point. Ordered a set, waited the month and some change to get them in, and started to chop up my hood!
Install was super straight forward, and my aforementioned angle grinder came in handy! The only issue I realistically had was the rivet tails not breaking off.. but I attribute that to my crappy rivet gun.
The vinyl guide was also kind of cheap, but not really the end of the world. It peeled up some of my paint (guaranteed way shittier than the vinyl though) but that didn't bother me.
Definitely would suggest these to a friend for ease of install and price. As far as performance goes, I have no idea... don't have a baseline to compare them to.. and can only assume more holes = more cool.
First and foremost I have to say that all in all I am extremely unimpressed with fitment per the price point of this intake new. It really isn't great quality and I am 100% willing to remove it. It's also possible I have an older version, or mismatched parts because I bought it used.
Got the whole intake for a pretty decent deal. Wasn't really planning on using an aftermarket intake, however I figured I could try with an open mind.
First I removed the factory VFAD. It really seems like a wayyyyyy too complicated system to be of any use.. however I guess the principle of it makes sense. In it's place I put the Racing Beat intake sucker-thinger. It fit like garbage, but I continued nonetheless. I also trimmed the little shroud in order to keep the air channel as normal as possible.
I then wrestled in the intake tube, filter and airbox. I think a lot of the airbox fitment issues were do to my Koyo radiator getting in the way.. but knowing how well Koyo stuff fits vs random Mazda aftermarket company.. my bets are that it fits pretty poorly always.
The MAF housing barely seemed long enough to make good contact with the airbox and the after MAF hose.. I'm still a little leery of the connection. I guess I can just keep an eye on fuel trims and I'll know it if starts leaking.
To Racing Beat's credit, their claims of "low intake noise" are true, and I am happy to be able to remove the stock intake box and VFAD solenoid mount to try to promote more airflow through the radiator.. so I guess in that regard I am happy about this install.
Haven't had enough drive time to see if I'll need to rescale the MAF or not, but my guess is that it'll be "good enough".
I just helped install one a couple of days ago ...... Didn't have to rescale the maf at all ...which is actually unusual for aftermarket intakes. Install was way harder than it should be but ....it looks nice
Can those vents be glued to the hood vs the rivets ?
Alright! I think I have most of the work on the car updated, though definitely out of chronological order. I still do have some other stuff I am working, but not quite done enough to make a stand alone post for... here's what's coming..
I've also got a few small things to update, and some super cool electronics stuff to do... all in due time.. will keep this thread up to date as time goes on.
I just helped install one a couple of days ago ...... Didn't have to rescale the maf at all ...which is actually unusual for aftermarket intakes. Install was way harder than it should be but ....it looks nice
Can those vents be glued to the hood vs the rivets ?
Good to hear on the MAF scaling.. less work for me haha
As far as the vents... I SUPPOSE you could glue them.. but I really wouldn't want to considering the hot environment it will be under.
I think I'm gunna steal your brake vent through the fog lamp hole idea .... Mine get waaay too hot ATM!
I still need to get some adapters on the backing plates welded up.. but if you're looking for some mounts... I can fire up the printer. I do need to adjust the loft on the final piece where the ducting clamps on to.. it's a bit too thick right now.
Oh wow ..that is way cool (no pun intended) . I'll pm you for a price !
Let me know! I'll modify the drawing for the 3in ID tubing to fit on better, and could send em your way for basically material and shipping cost. I just want more people to test them! I am worried about the heat being near the oil coolers and the mounting solution being an issue. Just wanna get some miles on the design.
Kind of regret buying this because I really just see it being more of a pain in the *** than worth any sort of benefit... but full disclosure my car might not be the perfect example of fitment. The car doesn't have an OEM bumper, and some of the chassis mounts for the undertray were full of broken, rusted bolt. So I guess my experience may differ from yours.
So yeah, came in the mail, I bent the parts per the directions. All of that was well, and then mounting it on the car was just a huge pain in the ***. It's also very flimsy aluminum which I kind of expected, but am all kind of sad about. I was really hoping to use this as a small baseline for a proper chassis mounted splitter (was going to make larger holes for mounting to the chassis, and attach material to the aluminum pieces), but I really don't see this as a good way to do that.
Is it a good replacement for a torn up plastic one? Probably.
Is it going to increase cooling or reduce front end lift? I doubt it.
My suggestion would have been to drill out the rivets “carefully” on the OE piece, then replace them with larger rivet nuts and screws/washers. You can then drop off the center piece without also having to remove the two vertical support pieces. However, you should be looking at installing a front splitter to compliment the rear wing. Which extending and tying it in there and a few other places will greatly stiffen up the whole thing.
My suggestion would have been to drill out the rivets “carefully” on the OE piece, then replace them with larger rivet nuts and screws/washers. You can then drop off the center piece without also having to remove the two vertical support pieces. However, you should be looking at installing a front splitter to compliment the rear wing. Which extending and tying it in there and a few other places will greatly stiffen up the whole thing.
Splitter is on the menu. Other things to worry about first... like is the car going to even stay together on the track
Originally Posted by TeamRX8
Couple other thoughts
not sure why you went through all that for a horn, but there are aftermarket race steering wheel add-on horn button kits that cost literally nothing.
same for adding resistors to get rid of the SRS light rather just unplug or remove the SRS control module.
.
It really wasn't much effort for the horn, and it's easier for me to shove resistors in a connection than anything else
Plus if you rip the module out, you'll still get a light on the dash. Not that a light is a big deal, but when I have the parts laying around to make it off.. maybe as well spend the 30 seconds.
yeah, I forgot that the light is likely tied into the dash ecu. It must have been on since 2009 in my car. Going to assume it must always be on because I never notice, lol.
yeah, I forgot that the light is likely tied into the dash ecu. It must have been on since 2009 in my car. Going to assume it must always be on because I never notice, lol.
Yeah I'll eventually rip it all out after I get the takata recalls done (free airbags and dash piece yo!) and then just toss a CAN simulator inline so it sends the message the cluster needs to see to keep the light off.
Figured I'd just make note of this here since it's fairly relevant and work I am doing.
Was able to pull the ROM from the ECU, both on the car and on my bench. My bench ECU is factory software, where the Versatuner stuff on my car isn't.. so per romraider rules I have only posted the factory ROM.
I�m glad I am not the only one who felt a little underwhelmed by the aluminum undertray.
I too struggled to get the fitment right. Honestly even the final result I am not happy with. I�ve also found the hardware�s corrosion coating to be mega inadequate.
But oh well, it is solid and costs less than the plastic.
Alright, so this was a mod that's fairly "controversial". Will it work? I have no idea! Is it gonna flex the trunk? Maybe! Was it a cheap item that allows me to figure out how a damn wing works or doesn't work? Yes!
Looking at the wing, its height and length both met the Gridlife street mod rules (under the roofline and no wider than the car), so I figured what the heck, let's try it out. I will need to gaffer up the second element, but that's no biggie.
According to my brother, who is (by degree) an aerospace engineer based on the profile of the wing is has a large amount of camber in the downward direction and should create a decent amount of downforce. Anecdotal, but hey.. whatever gets me to talk to my brother!
Anyways, mounted up the wing and added some big fat 3/16 aluminum as backing plate that extend out to the edges of the trunk to give it some rigidity. I KNOW the right way would be to create a trunk structure, but that's just not in the scope of the car right now.
I put my entire weight on the wing (all 120lbs of it at least) and while the deck did flex a bit, the suspension did compress and the trunk actually gains angle when it is flexed down so it should be safe and MAYBE useful. I have no idea.
It hasn't flown off the car let about 60mph, so that's a plus.
I really wanted to get some aftermarket seats in the car to bring down some weight, as well as to get some seats that properly bolster me. In order to do that I also needed to use some harnesses and obviously those needed to be mounted properly in the car with a bar. I'd really like to say this mod was mostly for safety, but I think the benefits on a bolted in roll bar aren't as much as one may think... but I guess any metal where the B pillar would be is better than none.
I don't know.
The point is, I am doing this out of a driver comfort item more than a safety item and I know that. Anyways. Install was really actually simple. Fit, drill, bolt, trim in that order. The only semi annoying issue I ran into was the bar hitting the dome light even after specifying my car had a sunroof. Not the end of the world, but the little things since I am required to keep the interior in the car.
I did end up removing a lot of the sound deadening tar to get the bolts in nicely. Definitely wouldn't want to bolt it in through that stuff. Also, my method of using a compressed can of air upside down to freeze everything off worked really well! No dry ice or any of that nonesense.
As you can see here, the dome light had to be removed. I will probably rig up some sort of LED light mounted on the bar just to be able to get some light in the cabin when needed.
Rear door cards were cut to accommodate the bar, and make access easier. I think TECHNICALLY per the ruleset I don't need to have them in, but it's like 2lbs and I have to keep rear seats anyways.
Pretty happy with the rollbar so far. easy install, does what it says on the box, can easily mount harnesses and other things to it. Super stoked!

 02-22-2020, 06:40 PM


 .
.