My RX8 Build/Progress Thread
 10-04-2011, 09:12 PM
#1
Registered
Thread Starter

My RX8 Build/Progress Thread
(I wasnt exactly sure where to put this, but I see other threads in this section similar to what I want to do with mine, so I posted it here. Mods feel free to move it of you want.)
10/2/2011
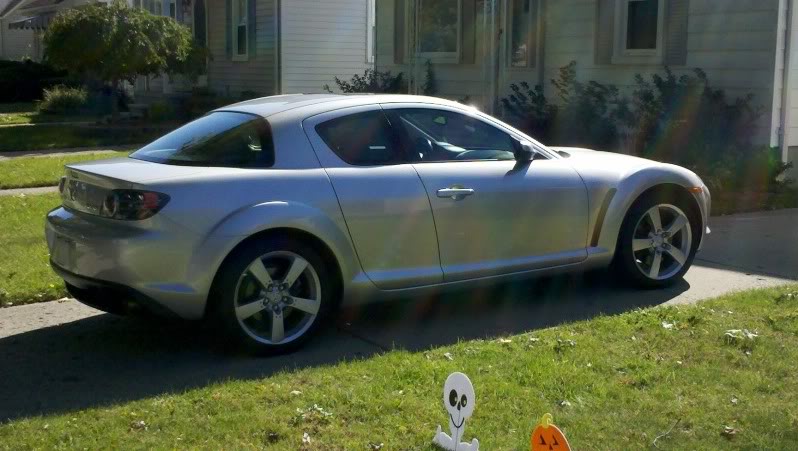
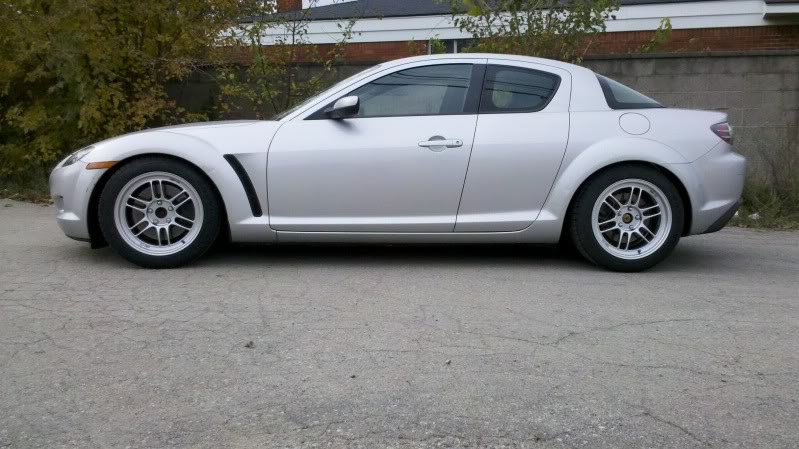
So, as of today, I am now the owner of this:
Specs:
-2004 Mazda RX8
-Sunlight Silver
-6MT
-Factory LSD
-76k miles
-Options include: traction control, foglights, and a BOSE sound system
This car popped up on autotrader a few days ago. I called and looked at it, threw them a lowball offer and they took it, although I'm not a fan of silver, I couldn't pass up the price for what the car was. It's not perfect, but it's solid and pulls nice and strong.
Some of the added bonuses:
-A new engine with only 1500 miles on it!
-A stack of service records (dealer maintained) and documents all the way back to the original window sticker.
-Clutch was replaced at 55k.
-Power steering unit was replaced at 74k.
-Clean undercarriage (Looks like no winters at all).
Now the car isn't without issues, but I find most of the things quite fixable:
-Tear in the driver's seat bolster.
-Dent in the d/s front fender.
-Some light scrathes and small door dings here and there.
-Wheels are all curbed and one has a slight bend and the rear tires are worn and LOUD.
-The nose has some decent chips and scrapes and some of the fasteners are missing.
I recently sold my custom 1988 Pontiac Fiero (custom 3.8 litre V6 turbo that ran 11.30;s in the 1/4 mile). I sold it for a few reasons. #1 I wasn't able to drive my 18-month old son around in it (only 2-seats). #2 Driving fast in a straight line was getting kind of boring. #3 I felt it was time to move onto something new. I decided that I wanted to replace the car with something that most importantly had 4-seats, but was still fun to drive. I also wanted something that was more auto-x friendly and track-day friendly. I had initially started out looking at the RX8, Pontiac GTO, and the Infiniti G35 coupe. I had test-driven all 3 of them back-to-back one day and it wasn't even close. I immediately fell in love with the RX8 and felt that it suited me, and my needs perfectly. After that, I had test-driven about 8 RX8's until I found this one.
So, I plan on documenting all my repairs, upgrades, and mods in this build-thread and I will be cross-posting on a few different forums. I hope this will be a continual thread with regular updates but we'll see what happens. I have a pretty set plan for what I want to do with this car and I hope I can use this to look back on what I did.
So, what are my goals for this car?? I want this car to not only handle better than stock, but I also want it to ride better than stock. I also want the car to be more reliable as the Renesis engine isn't exactly known for longevity. And of course a few extra hp should be gained along the way. So basically I want this to be a 70% street car and 30% track car.
First off, I plan on doing some basic maintenance and repairs. That includes:
-A full interior and exterior detail
-Repairing the fender ding and replacing the missing body hardware
-Oil Change
-Replacing rear-diff and trans fluid with Redline synthetics
Planned Reliability Mods
-SOHN Adapter (Allows for the injection of fresh 2-stroke oil instead of the engine oil)
-BHR ignition system (Stock coils are marginal at their best) and new plugs
-Mazmart high-flow water pump
-COBB Accessport and probably a MazdaManiac tune. Besides increasing power, the COBB AP allows for things like lowering the cooling fan temps, and increasing of the oil-metering pump flow rates
Suspension Mods
-H&R sport springs
-Bilstein B8 shocks
-Possibly some bigger swaybars, or at the least upgraded endlinks
-A more performance oriented alignment
Wheels/Tires
-17" Enkei RPF1's w/ Continental Extremecontact DW tires in 245-45-17 (I will be ordering these very soon)
-Eventually the stock wheels will get some more aggressive compounds and I will probably use those for track-days.
Engine Performance
-Some kind of catless resonated midpipe. I haven't decided on brand yet.
-K&N panel filter with airbox mod
Brakes
-I'm keeping the stock brakes for now as they are brand-new
-I plan on purchasing seperate pads and rotors for track days (eventually)
-High performance fluid
That's about as far as my planning goes. I also have some exterior mods planned, but I will up date as things go on. I really hope that I can get this car on the track at least a few times a year. It's difficult because I work most weekends. So, yeah, that's about it.
10/2/2011
So, as of today, I am now the owner of this:
Specs:
-2004 Mazda RX8
-Sunlight Silver
-6MT
-Factory LSD
-76k miles
-Options include: traction control, foglights, and a BOSE sound system
This car popped up on autotrader a few days ago. I called and looked at it, threw them a lowball offer and they took it, although I'm not a fan of silver, I couldn't pass up the price for what the car was. It's not perfect, but it's solid and pulls nice and strong.
Some of the added bonuses:
-A new engine with only 1500 miles on it!
-A stack of service records (dealer maintained) and documents all the way back to the original window sticker.
-Clutch was replaced at 55k.
-Power steering unit was replaced at 74k.
-Clean undercarriage (Looks like no winters at all).
Now the car isn't without issues, but I find most of the things quite fixable:
-Tear in the driver's seat bolster.
-Dent in the d/s front fender.
-Some light scrathes and small door dings here and there.
-Wheels are all curbed and one has a slight bend and the rear tires are worn and LOUD.
-The nose has some decent chips and scrapes and some of the fasteners are missing.
I recently sold my custom 1988 Pontiac Fiero (custom 3.8 litre V6 turbo that ran 11.30;s in the 1/4 mile). I sold it for a few reasons. #1 I wasn't able to drive my 18-month old son around in it (only 2-seats). #2 Driving fast in a straight line was getting kind of boring. #3 I felt it was time to move onto something new. I decided that I wanted to replace the car with something that most importantly had 4-seats, but was still fun to drive. I also wanted something that was more auto-x friendly and track-day friendly. I had initially started out looking at the RX8, Pontiac GTO, and the Infiniti G35 coupe. I had test-driven all 3 of them back-to-back one day and it wasn't even close. I immediately fell in love with the RX8 and felt that it suited me, and my needs perfectly. After that, I had test-driven about 8 RX8's until I found this one.
So, I plan on documenting all my repairs, upgrades, and mods in this build-thread and I will be cross-posting on a few different forums. I hope this will be a continual thread with regular updates but we'll see what happens. I have a pretty set plan for what I want to do with this car and I hope I can use this to look back on what I did.
So, what are my goals for this car?? I want this car to not only handle better than stock, but I also want it to ride better than stock. I also want the car to be more reliable as the Renesis engine isn't exactly known for longevity. And of course a few extra hp should be gained along the way. So basically I want this to be a 70% street car and 30% track car.
First off, I plan on doing some basic maintenance and repairs. That includes:
-A full interior and exterior detail
-Repairing the fender ding and replacing the missing body hardware
-Oil Change
-Replacing rear-diff and trans fluid with Redline synthetics
Planned Reliability Mods
-SOHN Adapter (Allows for the injection of fresh 2-stroke oil instead of the engine oil)
-BHR ignition system (Stock coils are marginal at their best) and new plugs
-Mazmart high-flow water pump
-COBB Accessport and probably a MazdaManiac tune. Besides increasing power, the COBB AP allows for things like lowering the cooling fan temps, and increasing of the oil-metering pump flow rates
Suspension Mods
-H&R sport springs
-Bilstein B8 shocks
-Possibly some bigger swaybars, or at the least upgraded endlinks
-A more performance oriented alignment
Wheels/Tires
-17" Enkei RPF1's w/ Continental Extremecontact DW tires in 245-45-17 (I will be ordering these very soon)
-Eventually the stock wheels will get some more aggressive compounds and I will probably use those for track-days.
Engine Performance
-Some kind of catless resonated midpipe. I haven't decided on brand yet.
-K&N panel filter with airbox mod
Brakes
-I'm keeping the stock brakes for now as they are brand-new
-I plan on purchasing seperate pads and rotors for track days (eventually)
-High performance fluid
That's about as far as my planning goes. I also have some exterior mods planned, but I will up date as things go on. I really hope that I can get this car on the track at least a few times a year. It's difficult because I work most weekends. So, yeah, that's about it.
Last edited by AkursedX; 10-04-2011 at 09:17 PM.
 10-04-2011, 09:13 PM
#2
Registered
Thread Starter
So a couple of things, I figured I would show the reason why I bought this car. My son fits quite nicely!
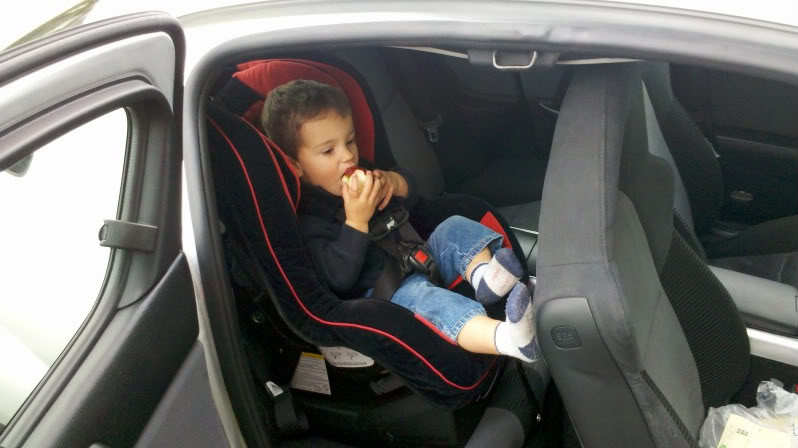
And I can even fit his big stroller in the car:
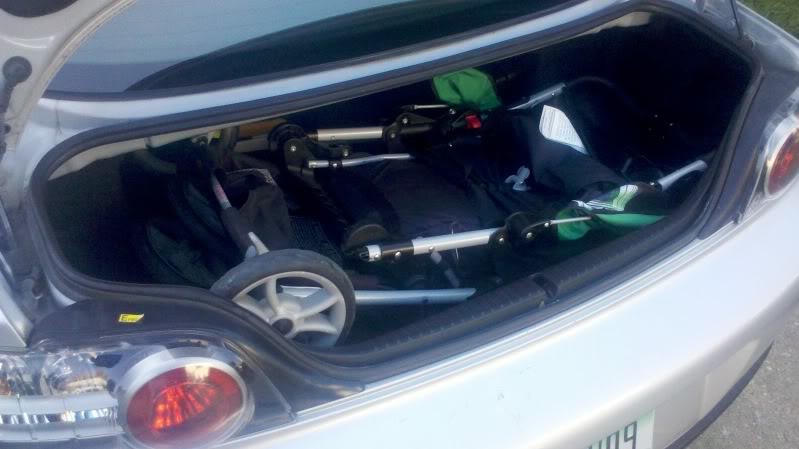
As far as mods, the only thing I've done is install Bosch Icon wiper blades. My SOHN Adapter arrived today and I purchased a universal coolant reservoir tank to hold the oil. I also picked up some Red Line 75w90 gear oil for the rear end.
And I can even fit his big stroller in the car:
As far as mods, the only thing I've done is install Bosch Icon wiper blades. My SOHN Adapter arrived today and I purchased a universal coolant reservoir tank to hold the oil. I also picked up some Red Line 75w90 gear oil for the rear end.
Last edited by AkursedX; 10-04-2011 at 09:16 PM.
 10-05-2011, 07:41 PM
#4
Registered
Thread Starter
So I ordered my wheels/tires, springs, and shocks from the tire rack yesterday at 3:30pm. I got all of this by 12:30 today:
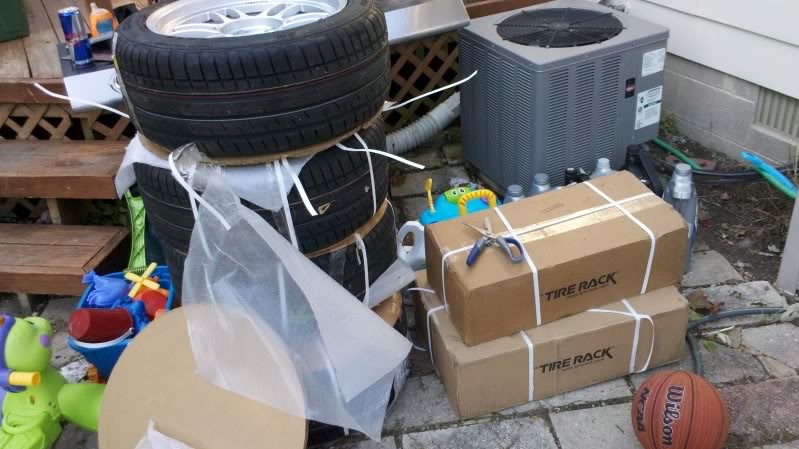
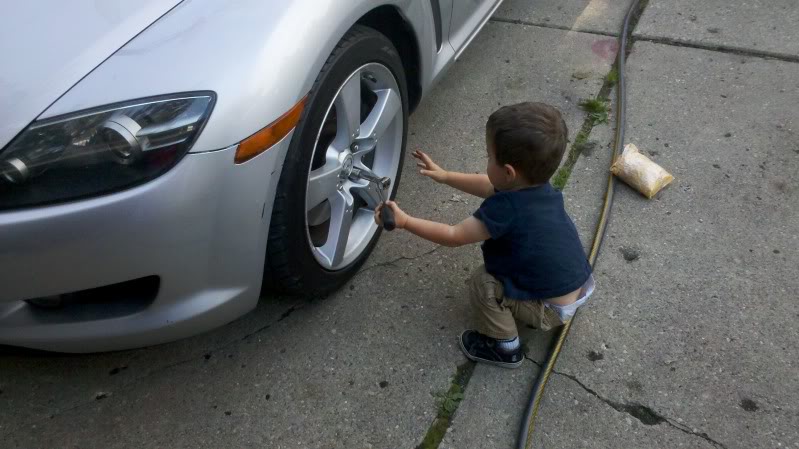
All I had time to do today was to install the wheel/tire setup. Getting the lugs off were near impossible as they felt like they were torqued to 300ft/lbs, and I'm not a small guy either. I had a little bit of help along the way too:
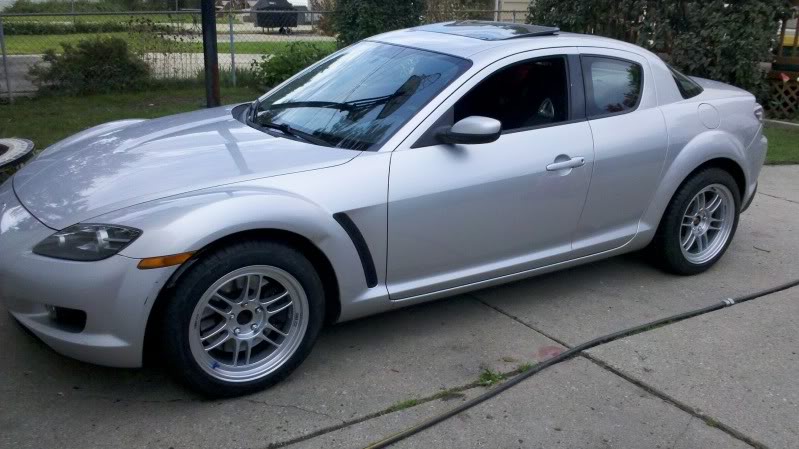
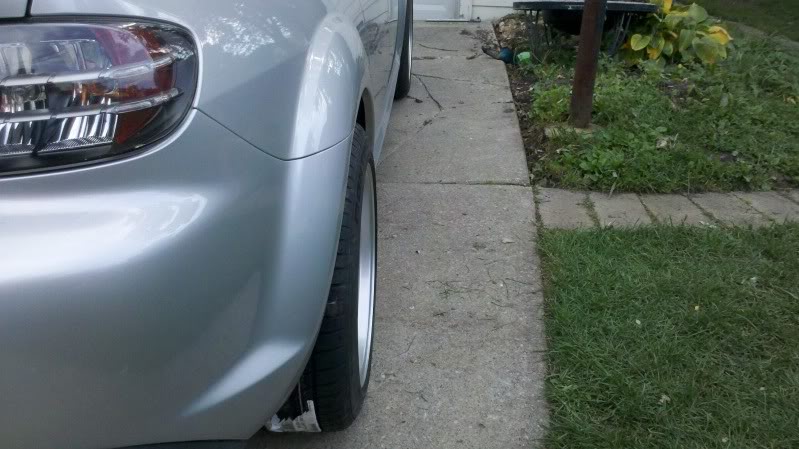
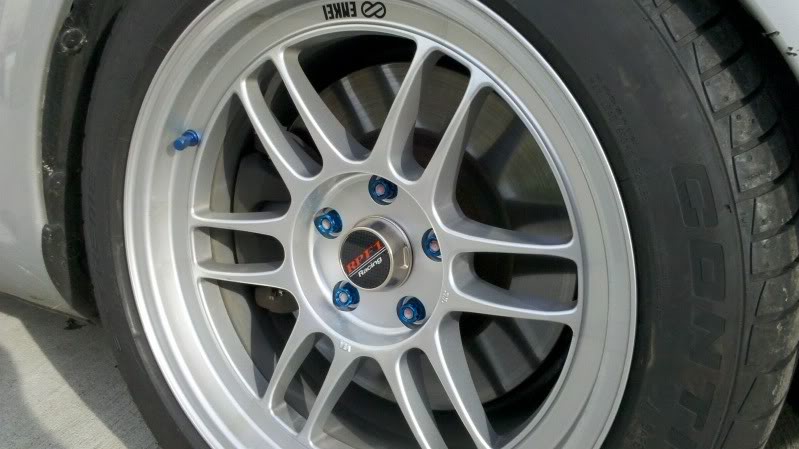
Anyways, here is the end result. Please pardon the 4x4 height. I have some H&R springs and bilstein shocks that will be going on soon. The wheels are Enkei RPF1's 17x9et35 with 245-45-17 Continental Extremecontact DW.
There is no rubbing issues, but the fitment is VERY tight on the inside. There is only a few mm's between the wheel weights and the front brake calipers. Also, the stock wheels and worns tires weighed 43.5lbs. The new wheel/tire combo weighs 39.5lbs. I'm happy with a nice 4lb savings per corner while adding another 20mm of contact patch width.
Stock side-view:
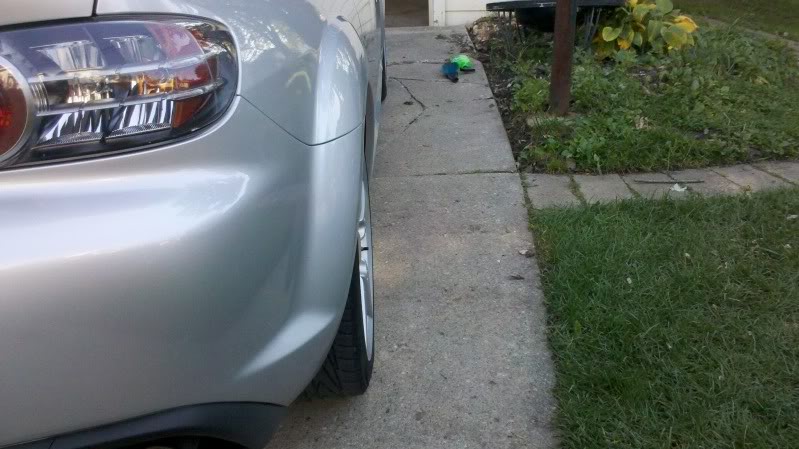
New side-view:
All I had time to do today was to install the wheel/tire setup. Getting the lugs off were near impossible as they felt like they were torqued to 300ft/lbs, and I'm not a small guy either. I had a little bit of help along the way too:
Anyways, here is the end result. Please pardon the 4x4 height. I have some H&R springs and bilstein shocks that will be going on soon. The wheels are Enkei RPF1's 17x9et35 with 245-45-17 Continental Extremecontact DW.
There is no rubbing issues, but the fitment is VERY tight on the inside. There is only a few mm's between the wheel weights and the front brake calipers. Also, the stock wheels and worns tires weighed 43.5lbs. The new wheel/tire combo weighs 39.5lbs. I'm happy with a nice 4lb savings per corner while adding another 20mm of contact patch width.
Stock side-view:
New side-view:
10-05-2011, 07:47 PM
#5
Registered
Thread Starter
Also, I have been working on tracking down a repetitive chirping that I've been having. I originally thought it was a dry idler pulley, but it's coming from the clutch-area. When the car is warm and in neutral with my foot off the clutch, it has a constant but not too loud chirp. As soon as I step on the clutch, it goes away.
From what I have searched, I'm 99% certain it's the throwout bearing. I have sent an e-mail to a local rotary-specialty shop to see how much it would cost me in labor to replace it, and possibly the clutch. Depending on the price, I might have them do it or I might do it myself. I haven't decided yet.
Is there anything else I should replace while I'm in there?


 10-06-2011, 01:14 PM
#9
Registered
Thread Starter
I saw another member (Rzoops) here with the same wheels and I just liked the look of it. I'm not a fan of big wheels and the 17" RPF1's make it look a little more racer-like. Plus, it's plenty cheaper. If I would have went 18's, I probably would have gone with 18x9.5 RPF1's. It would have been around $600 more.
 10-07-2011, 08:24 PM
#11
Registered
Thread Starter
I only get 2 Fridays off out of every 7 weeks. You would think I would take advantage of that and go out and have some fun. No, I decided to do this:
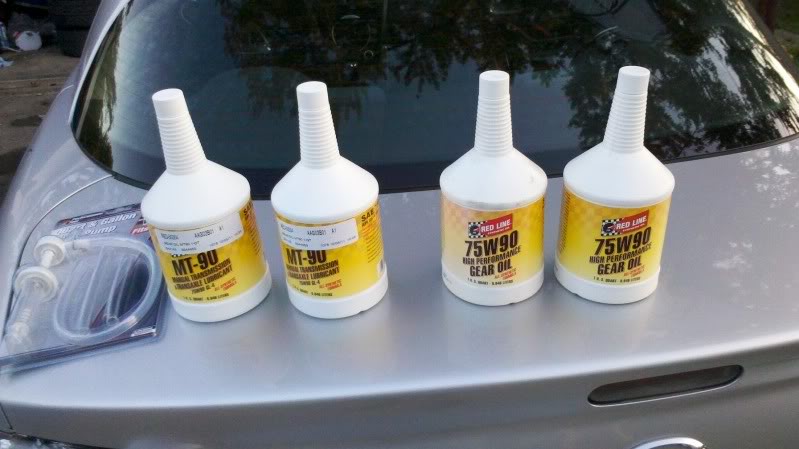
Both the transmission and rear diff now have new Red Line oil in them. I haven't noticed a huge difference in the smoothness of the drivetrain, but there was a bit of improvement. It was a pretty easy job and probably took about an hour and a half from start to finish. The hardest part was getting the damn pump primed for the oil.
On another note, I just used up my 1st tank of gas. I managed 20.2mpg. I'm pretty happy with that. The only 'engine' mod I have done so far was adding 6oz of premix to the gas. I'm hoping I can get a couple more mpgs after adding the SOHN adapter, synthetic oil, tune, and BHR ignition.
10-07-2011, 10:05 PM
#12
my other car is a 787b

Nice starting point and nice set of mods! I didn't notice the redline much in my old Rx-7 Turbo II right away until it was really cold or really hot. Redline handles the extremes much better than the oil that was in before.
I plan to do the same wheels. Could I ask for a closeup of the wheel to caliper clearance?
I plan to do the same wheels. Could I ask for a closeup of the wheel to caliper clearance?
 10-08-2011, 04:45 AM
#14

Nice thread and introduction!
Even the new throwout bearing will do the same noise eventually. It's a lost cause
However if you want to replace the clutch and the bearing a lightweight flywheel might be a very wise option. Unlike most other mods it makes a difference!
Reinforce your clutch pedal, too.
Have you considered Mazmart's 8bar oil pressure regulator to go with the water pump? The s1 renesis has a very low system pressure, lower than the previous and following engines. It's a cheap mod that may add something to your "reliability" plan!
Now premix and enjoy the ride
10-08-2011, 09:41 AM
#15
Registered
Thread Starter
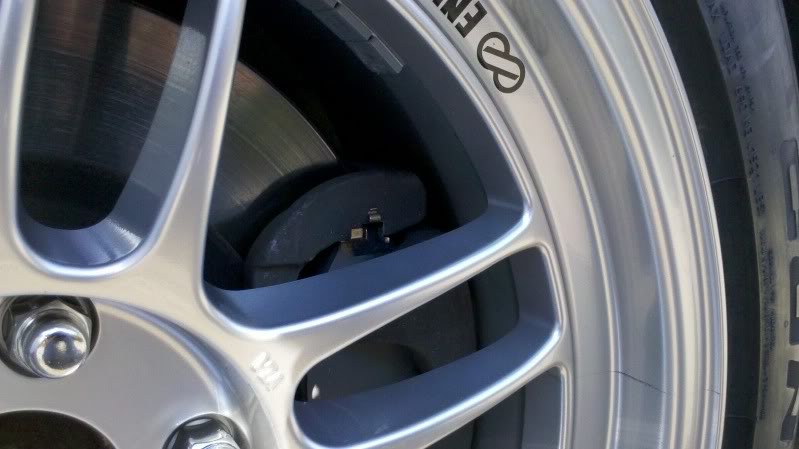
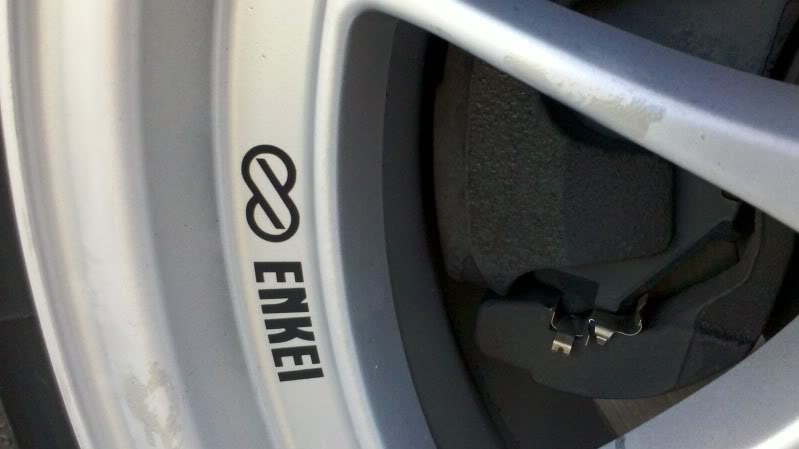
In the 1st pic, you can see that my wheel weights are pretty close to the spokes. When I ordered these from the Tirerack, I asked the sales rep if he could put a note to mount the weights as close to the spokes as possible due to the tight clearance. As you can see, they took care of me. All 4 of the wheels clear the front calipers.
10-09-2011, 03:51 PM
#16
my other car is a 787b
 10-13-2011, 07:30 AM
#17
Registered
Thread Starter
So I am getting a new driveway poured right now, so my RX8 is currently imprisoned in my garage for the next 7-10 days. I plan on getting a fair amount of work done in this time and this is what I have done so far.
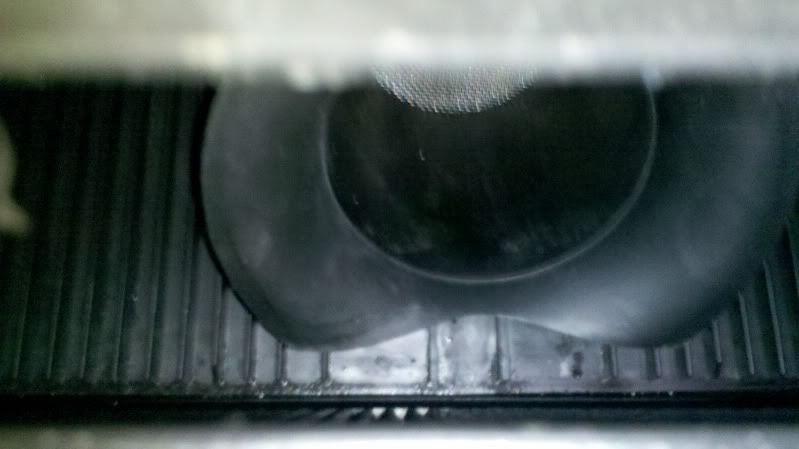
First off, I received a K&N panel air filter. I installed that and then did a couple of airbox mods. Here is the stock airbox:
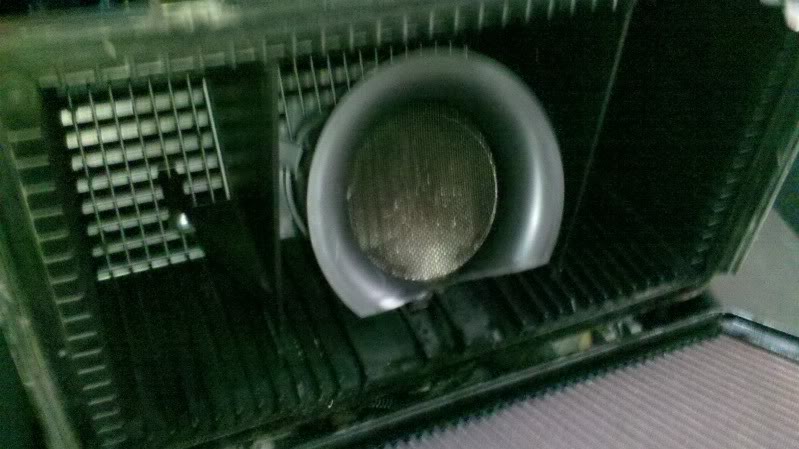
I removed the two side-fins from each side of the venturi and I also removed the 1st screen. I have never seen a car that has two screens before the MAF.
After pic:
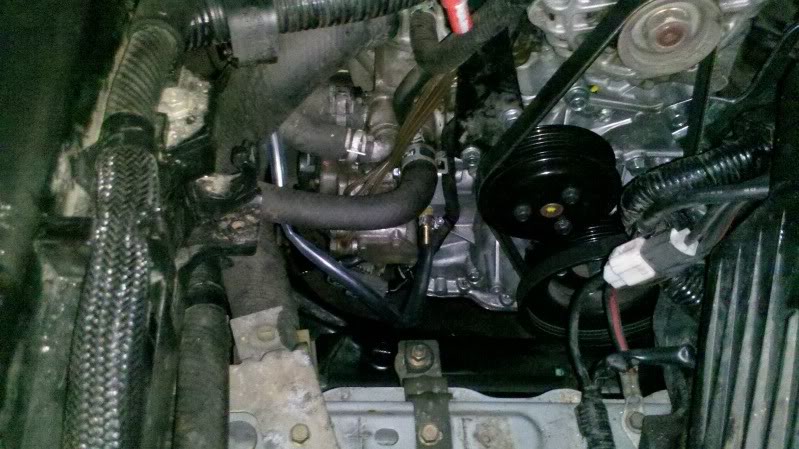
I have also started working on installing the Oil-Metering-Pump adapter. The basic instructions I followed can here found here . It was a pretty easy job although getting the plastic oil lines moved to the other side of the coolant hose took long than I thought and I spilled more coolant than I wanted to. Also, I found it quite easy to get at the two back-bolts through the wheelwell with a long extension.
Here's a pics of it installed on the engine:
(You can see the nozzle right to the left of the pulleys and just below the horizontal coolant hose)
Disregard the clear hose in this pic. I am going to install something that is a bit smaller and fits better:
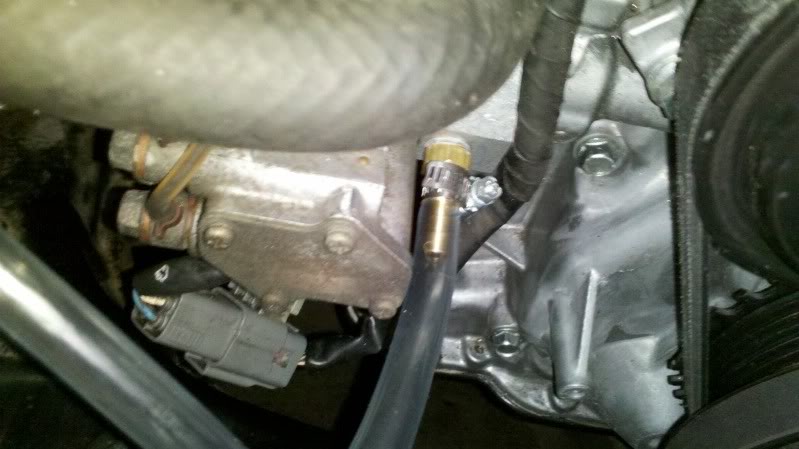
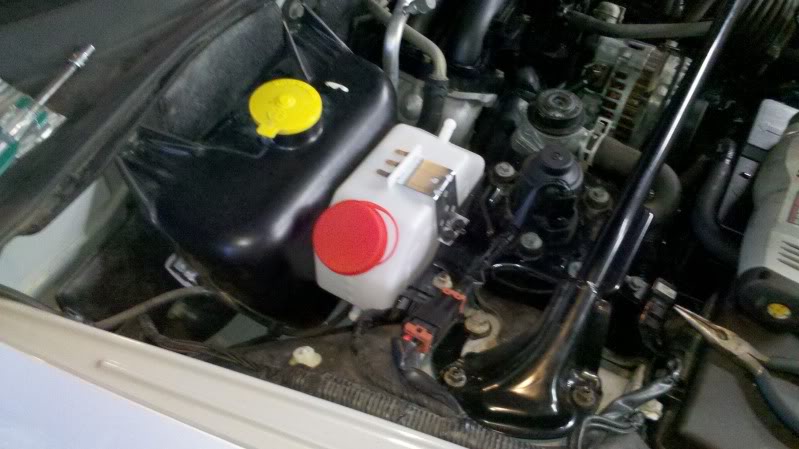
Now I still wanted to keep my windshield washer fluid so I picked up a $10 universal coolant reservoir from Advance Auto. It fits quite snugly between the washer fluid bottle and the air pump (I think) bracket. I am going to pick up a fitting like the one on the SOHN adapter and fit it in the bottom of the tank and get some better fitting clear hose. It'll be a few days before I get it done as I won't have any garage-time for a few days.
Here is a test of the new reservoir (I made a couple of fitment adjustments and painted the bracket after this pic):
First off, I received a K&N panel air filter. I installed that and then did a couple of airbox mods. Here is the stock airbox:
I removed the two side-fins from each side of the venturi and I also removed the 1st screen. I have never seen a car that has two screens before the MAF.
After pic:
I have also started working on installing the Oil-Metering-Pump adapter. The basic instructions I followed can here found here . It was a pretty easy job although getting the plastic oil lines moved to the other side of the coolant hose took long than I thought and I spilled more coolant than I wanted to. Also, I found it quite easy to get at the two back-bolts through the wheelwell with a long extension.
Here's a pics of it installed on the engine:
(You can see the nozzle right to the left of the pulleys and just below the horizontal coolant hose)
Disregard the clear hose in this pic. I am going to install something that is a bit smaller and fits better:
Now I still wanted to keep my windshield washer fluid so I picked up a $10 universal coolant reservoir from Advance Auto. It fits quite snugly between the washer fluid bottle and the air pump (I think) bracket. I am going to pick up a fitting like the one on the SOHN adapter and fit it in the bottom of the tank and get some better fitting clear hose. It'll be a few days before I get it done as I won't have any garage-time for a few days.
Here is a test of the new reservoir (I made a couple of fitment adjustments and painted the bracket after this pic):
10-28-2011, 03:54 PM
#18
Registered
Thread Starter
So it's been a bit since I posted an update so I thought I would show where I am in my suspension install (Bilstein shocks and H&R springs).
I started out doing the rear suspension as I though it would be a bit easier. I ended up having a few issues along the way. First off, the swaybar endlinks were quite stubborn coming off. After some heat, I was finally able to get them off. I decided to order some new Moog endlinks from rockauto.com.
After I took care of that, everything else came out nicely. I followed the removal procedure on racing-beat's website http://www.racingbeat.com/manuals/14027-sprg-shock.pdf
Here's a pic of a comparison of stock springs vs the H&R springs:
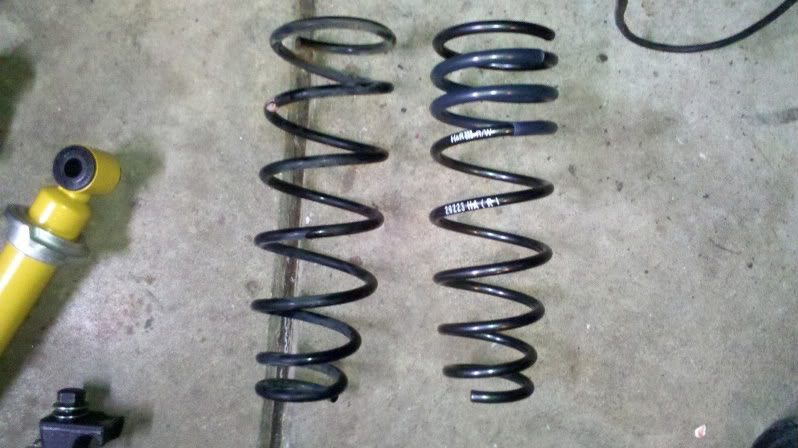
The H&R springs are about 3/4" short than the stock one and you can see by the design that they are a progressive rate spring.
Now another hiccup I had in the install was my own stupid mistake. I installed the wrong nut on top of the shock which was a different thread pitch. I ended up chewing up the threads and wrecked the allen threads on the shaft trying to get it unscrewed. I ended up having to take a cutoff wheel to the nut to get everything undone. I had to order an additional shock at $120. Ouch.
After that, everything went back together nicely. Everything was torqued to spec on a loaded suspension. I don't have any pics of how the car sits, but I am very happy with it. I hope the front will sit just as nice.
And pic of the shock/spring combo installed.

This Sunday and Monday I am tackling the front suspension install. If I have enough time, I will also be installing my BHR Ignition System and new plugs. I hope my next update will be a good one!
I started out doing the rear suspension as I though it would be a bit easier. I ended up having a few issues along the way. First off, the swaybar endlinks were quite stubborn coming off. After some heat, I was finally able to get them off. I decided to order some new Moog endlinks from rockauto.com.
After I took care of that, everything else came out nicely. I followed the removal procedure on racing-beat's website http://www.racingbeat.com/manuals/14027-sprg-shock.pdf
Here's a pic of a comparison of stock springs vs the H&R springs:
The H&R springs are about 3/4" short than the stock one and you can see by the design that they are a progressive rate spring.
Now another hiccup I had in the install was my own stupid mistake. I installed the wrong nut on top of the shock which was a different thread pitch. I ended up chewing up the threads and wrecked the allen threads on the shaft trying to get it unscrewed. I ended up having to take a cutoff wheel to the nut to get everything undone. I had to order an additional shock at $120. Ouch.
After that, everything went back together nicely. Everything was torqued to spec on a loaded suspension. I don't have any pics of how the car sits, but I am very happy with it. I hope the front will sit just as nice.
And pic of the shock/spring combo installed.
This Sunday and Monday I am tackling the front suspension install. If I have enough time, I will also be installing my BHR Ignition System and new plugs. I hope my next update will be a good one!

 10-31-2011, 12:55 PM
#21
Registered
Thread Starter
Lowering is now all complete!
Now that I'm all done, I have to say that doing shocks and springs on this car is one of the easiest suspension jobs I have done. Everything is easy to get to and besides some spring compressors, all you need is basic hand tools. I feel I could do a full suspension job in a full-day now.
So anyways, I did the front suspension by following the directions I found from Racing Beat: http://www.racingbeat.com/manuals/14026-sprg-shock.pdf
I had no major hiccups doing the installation. You need to make sure you really compress the stock springs as they are quite long. Here are a couple of suspension component comparison pics. I was a bit worried about how the low front was going to be when I put the parts side-by-side, but it turned out ok.
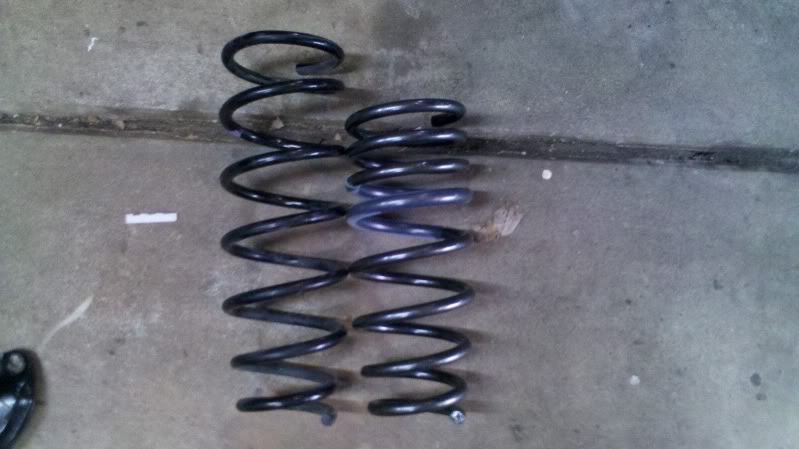
Stock shock vs the Bilstein shock (The spring mount is roughly .5" lower than the stocker)
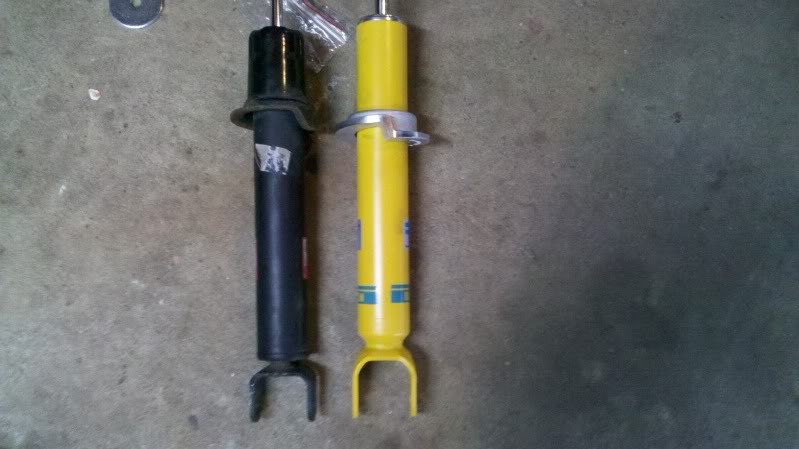
Stock spring vs H&R spring (The taller one is the stock and although the H&R spring is much shorter, it also has one extra coil)
Here's a quick pic of the parts installed:

And now here's the result. I am very happy with the ride height. It's pretty close to perfect (for me) in the looks department. Ride quality is a bit more firm, but it's not anywhere close the teeth shattering. I haven't driven it much, but in the little bit I did, it feels even more confident in cornering.
For someone who wants some increased performance without a harsh ride, I would say that this Bilstein / H&R combination is a good choice.
Anyways, here's a couple of pics:


Now that I'm all done, I have to say that doing shocks and springs on this car is one of the easiest suspension jobs I have done. Everything is easy to get to and besides some spring compressors, all you need is basic hand tools. I feel I could do a full suspension job in a full-day now.
So anyways, I did the front suspension by following the directions I found from Racing Beat: http://www.racingbeat.com/manuals/14026-sprg-shock.pdf
I had no major hiccups doing the installation. You need to make sure you really compress the stock springs as they are quite long. Here are a couple of suspension component comparison pics. I was a bit worried about how the low front was going to be when I put the parts side-by-side, but it turned out ok.
Stock shock vs the Bilstein shock (The spring mount is roughly .5" lower than the stocker)
Stock spring vs H&R spring (The taller one is the stock and although the H&R spring is much shorter, it also has one extra coil)
Here's a quick pic of the parts installed:
And now here's the result. I am very happy with the ride height. It's pretty close to perfect (for me) in the looks department. Ride quality is a bit more firm, but it's not anywhere close the teeth shattering. I haven't driven it much, but in the little bit I did, it feels even more confident in cornering.
For someone who wants some increased performance without a harsh ride, I would say that this Bilstein / H&R combination is a good choice.
Anyways, here's a couple of pics:
11-05-2011, 09:50 AM
#22
Registered
Thread Starter
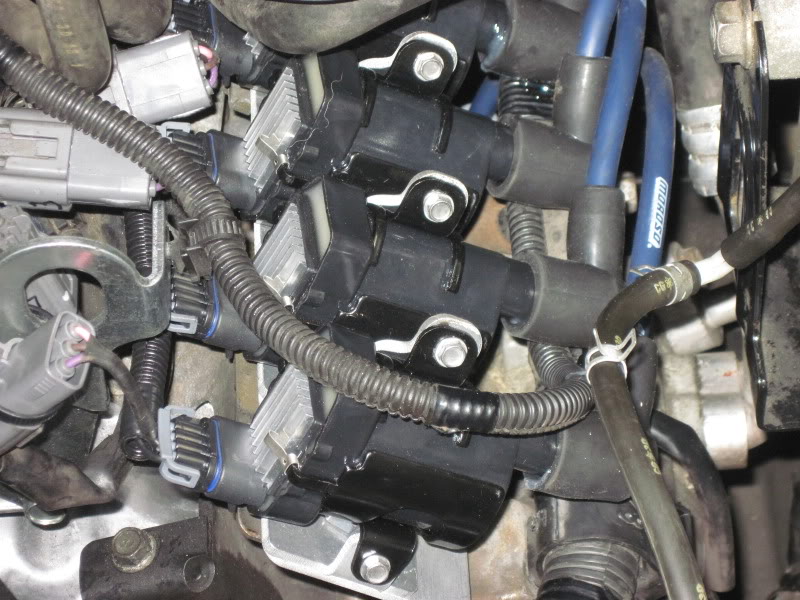
So I installed my BHR ignition system a couple of days ago. Install is pretty easy and the instructions that came with it very easy to follow. I also changed out my sparkplugs. Even with my discount, the plugs still cost me $17 a piece! Fitment is tight on the harness-side and you have to make sure you have things set up in the place you want before you put the new bracket on the old one.
I noticed right away that it smoothed out the idle. But other than that, I haven't noticed any difference on the butt-dyno. But them again, my stock coils didn't have too many miles and my plugs looked near new (I'm guessing they came with the new engine).
Here's a pic of the ignition system installed:
Right after I installed the ignition system, I took the car out and ran a bunch of errands. I stopped at the post office, got out of the car to mail a letter and when I came back and started the car, I lost my power steering. I was quite annoyed by this especially since the power steering rack was replaced in July. I drove a short distance and went to have a bite to eat. While sipping back a Harvest Ale from Bastone, I did some searching about my problem. When I got back to the car, I did the computer reset where you turn the ignition and hit the brake pedal 20-times. After I did this and started the car, I had my power steering again, until I got home. I tried to start the car again and it was gone.
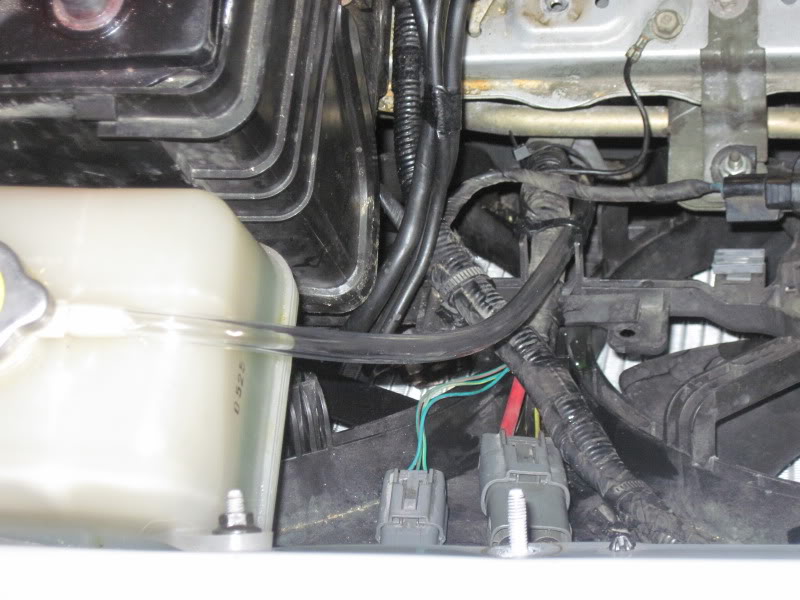
I checked the receipt for the power steering replacement and found that they only replaced the rack. The harness was still the original. I had already known that this harness tended to cause a lot of problems due to poor connections and the fact that the coolant reservoir overflow tube dumps right onto two of the power steering harness connectors. I determined that this is probably what happened to me. I added coolant to the reservoir after I installed my OMP adapter since it required popping a coolant tube. The day this happened was the warmest day that we had in awhile and it was a bunch of stop and go driving so my coolant probably got warm enough to pour the excess coolant out.
I decided to follow this harness cleaning DIY. When I pulled the intake box off, I could see the evidence of spilled coolant that was still on the radiator shroud which confirmed my suspicions. So I pulled all the harness connections, made a couple of bends to ensure better contacts in the connectors and used dielectric grease in all the connectors.
I also extended the coolant reservoir overflow tube so it dumps at the bottom of the rad shroud now (The clear tube in the pic):
Things are all now back together and it seems to have taken care of my issue. I also went through tank#2 and got 20.1mpg. I am trying to drive it as much as I can before the weather turns bad. The only immediate things that I still need to do is to change the oil.
I noticed right away that it smoothed out the idle. But other than that, I haven't noticed any difference on the butt-dyno. But them again, my stock coils didn't have too many miles and my plugs looked near new (I'm guessing they came with the new engine).
Here's a pic of the ignition system installed:
Right after I installed the ignition system, I took the car out and ran a bunch of errands. I stopped at the post office, got out of the car to mail a letter and when I came back and started the car, I lost my power steering. I was quite annoyed by this especially since the power steering rack was replaced in July. I drove a short distance and went to have a bite to eat. While sipping back a Harvest Ale from Bastone, I did some searching about my problem. When I got back to the car, I did the computer reset where you turn the ignition and hit the brake pedal 20-times. After I did this and started the car, I had my power steering again, until I got home. I tried to start the car again and it was gone.
I checked the receipt for the power steering replacement and found that they only replaced the rack. The harness was still the original. I had already known that this harness tended to cause a lot of problems due to poor connections and the fact that the coolant reservoir overflow tube dumps right onto two of the power steering harness connectors. I determined that this is probably what happened to me. I added coolant to the reservoir after I installed my OMP adapter since it required popping a coolant tube. The day this happened was the warmest day that we had in awhile and it was a bunch of stop and go driving so my coolant probably got warm enough to pour the excess coolant out.
I decided to follow this harness cleaning DIY. When I pulled the intake box off, I could see the evidence of spilled coolant that was still on the radiator shroud which confirmed my suspicions. So I pulled all the harness connections, made a couple of bends to ensure better contacts in the connectors and used dielectric grease in all the connectors.
I also extended the coolant reservoir overflow tube so it dumps at the bottom of the rad shroud now (The clear tube in the pic):
Things are all now back together and it seems to have taken care of my issue. I also went through tank#2 and got 20.1mpg. I am trying to drive it as much as I can before the weather turns bad. The only immediate things that I still need to do is to change the oil.
 11-16-2011, 01:41 PM
#24
Registered
Thread Starter
Not much of an update but I stopped by Oakos Automotive last week and bought some RPF1 center caps and some Muteki spline lug nuts. I think they make a bit of an improvement in the look of the wheels. I have some other parts on order from Corksport as they had an 11% off sale on 11/11. That update should be a bit more fun.
02-10-2012, 01:01 PM
#25
Registered
Thread Starter
So it's been a couple of months since I've updated this. In that time, I really haven't done much to the car besides drive it and accumulate parts. Fortunately due to this mild winter, I have been able to drive the RX8 a fair amount and it has been running great.
So anyways, here's a couple of pics of the parts I have collected:
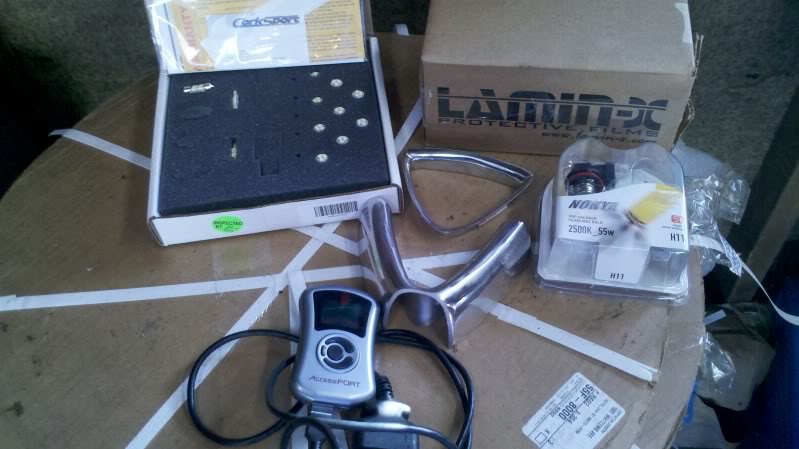
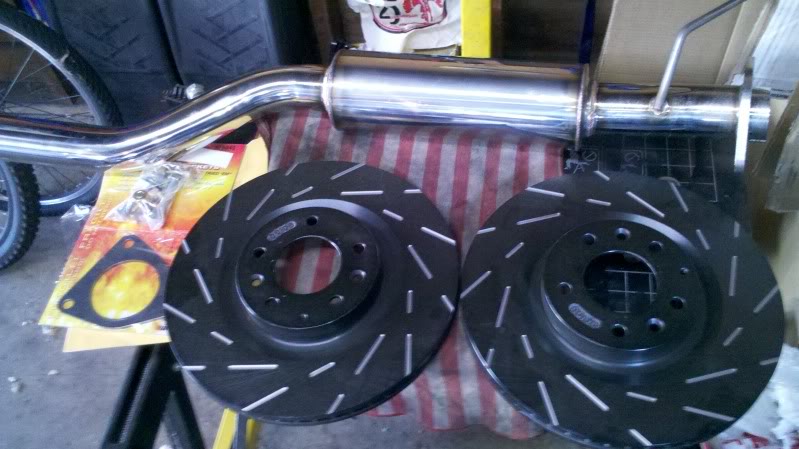
Here's what's all there:
-Lamin-X blue-tinted headlamp covers and yellow tinted foglamp covers
-Yellow Fog Light Bulbs
-Corksport LED lighting kit
-Front and rear stainless Rotary Bumper Emblems
-Cobb ACCESSPORT (With Accompanying MazdaManiac tuning service)
-Corksport Single-resonated Midpipe
-EBC USR Front Rotors
Not pictured here as I already installed it was a brushed-stainless shift **** repair cover as mine was chipped and ugly. That's pretty much the only thing I have installed recently (Yeah, I've been lazy/busy). Oh, I also installed the the Mazdamaniac base map on the car.
So, as you can see, I have a fair bit of work ahead of me to get all this stuff installed. None of it will be too hard. Even the midpipe should be pretty easy as the front bolts that are usually a big pain were removed a few thousand miles ago, so they shouldn't be too bad to remove again. Most of the other work I have is basic cosmetic stuff which will just need a bit of patience.
As far as stuff I still need to buy, the only things I need for this year are brake pads and rear-rotors. I know I am buying Porterfield R4-S pads for the front, but I am probably going to go with something like the Hawk HPS for the rear as they are quite a bit cheaper than the R4-S's. I will probably buy some matching EBC USR rotors for the rear as they are pretty much the same price as the other performance rotors out there.
As for other stuff that I hope to buy, I might also buy some stainless brake hoses during the brake installation process, and I also hope to buy some track tires for my stock wheels. Right now, I am considering the Nitto Nt05's in 245/40/18 as they are cheap and a fairly new un-tested product. I like to test out new tires. One of my stock wheels has a bend, so I need to get that fixed, plus I want to powdercoat the wheels (Magnesium Blue is my current front-runner for the color). How much of this I get done depends on how much overtime I can work in the next couple of months.
Work probably won't start until March, but from there I should start posting more updates.
So anyways, here's a couple of pics of the parts I have collected:
Here's what's all there:
-Lamin-X blue-tinted headlamp covers and yellow tinted foglamp covers
-Yellow Fog Light Bulbs
-Corksport LED lighting kit
-Front and rear stainless Rotary Bumper Emblems
-Cobb ACCESSPORT (With Accompanying MazdaManiac tuning service)
-Corksport Single-resonated Midpipe
-EBC USR Front Rotors
Not pictured here as I already installed it was a brushed-stainless shift **** repair cover as mine was chipped and ugly. That's pretty much the only thing I have installed recently (Yeah, I've been lazy/busy). Oh, I also installed the the Mazdamaniac base map on the car.
So, as you can see, I have a fair bit of work ahead of me to get all this stuff installed. None of it will be too hard. Even the midpipe should be pretty easy as the front bolts that are usually a big pain were removed a few thousand miles ago, so they shouldn't be too bad to remove again. Most of the other work I have is basic cosmetic stuff which will just need a bit of patience.
As far as stuff I still need to buy, the only things I need for this year are brake pads and rear-rotors. I know I am buying Porterfield R4-S pads for the front, but I am probably going to go with something like the Hawk HPS for the rear as they are quite a bit cheaper than the R4-S's. I will probably buy some matching EBC USR rotors for the rear as they are pretty much the same price as the other performance rotors out there.
As for other stuff that I hope to buy, I might also buy some stainless brake hoses during the brake installation process, and I also hope to buy some track tires for my stock wheels. Right now, I am considering the Nitto Nt05's in 245/40/18 as they are cheap and a fairly new un-tested product. I like to test out new tires. One of my stock wheels has a bend, so I need to get that fixed, plus I want to powdercoat the wheels (Magnesium Blue is my current front-runner for the color). How much of this I get done depends on how much overtime I can work in the next couple of months.
Work probably won't start until March, but from there I should start posting more updates.