2004 Nordic Green Restoration
 02-18-2021, 08:30 PM
#1
RX-Heaven
Thread Starter
iTrader: (6)

2004 Nordic Green Restoration
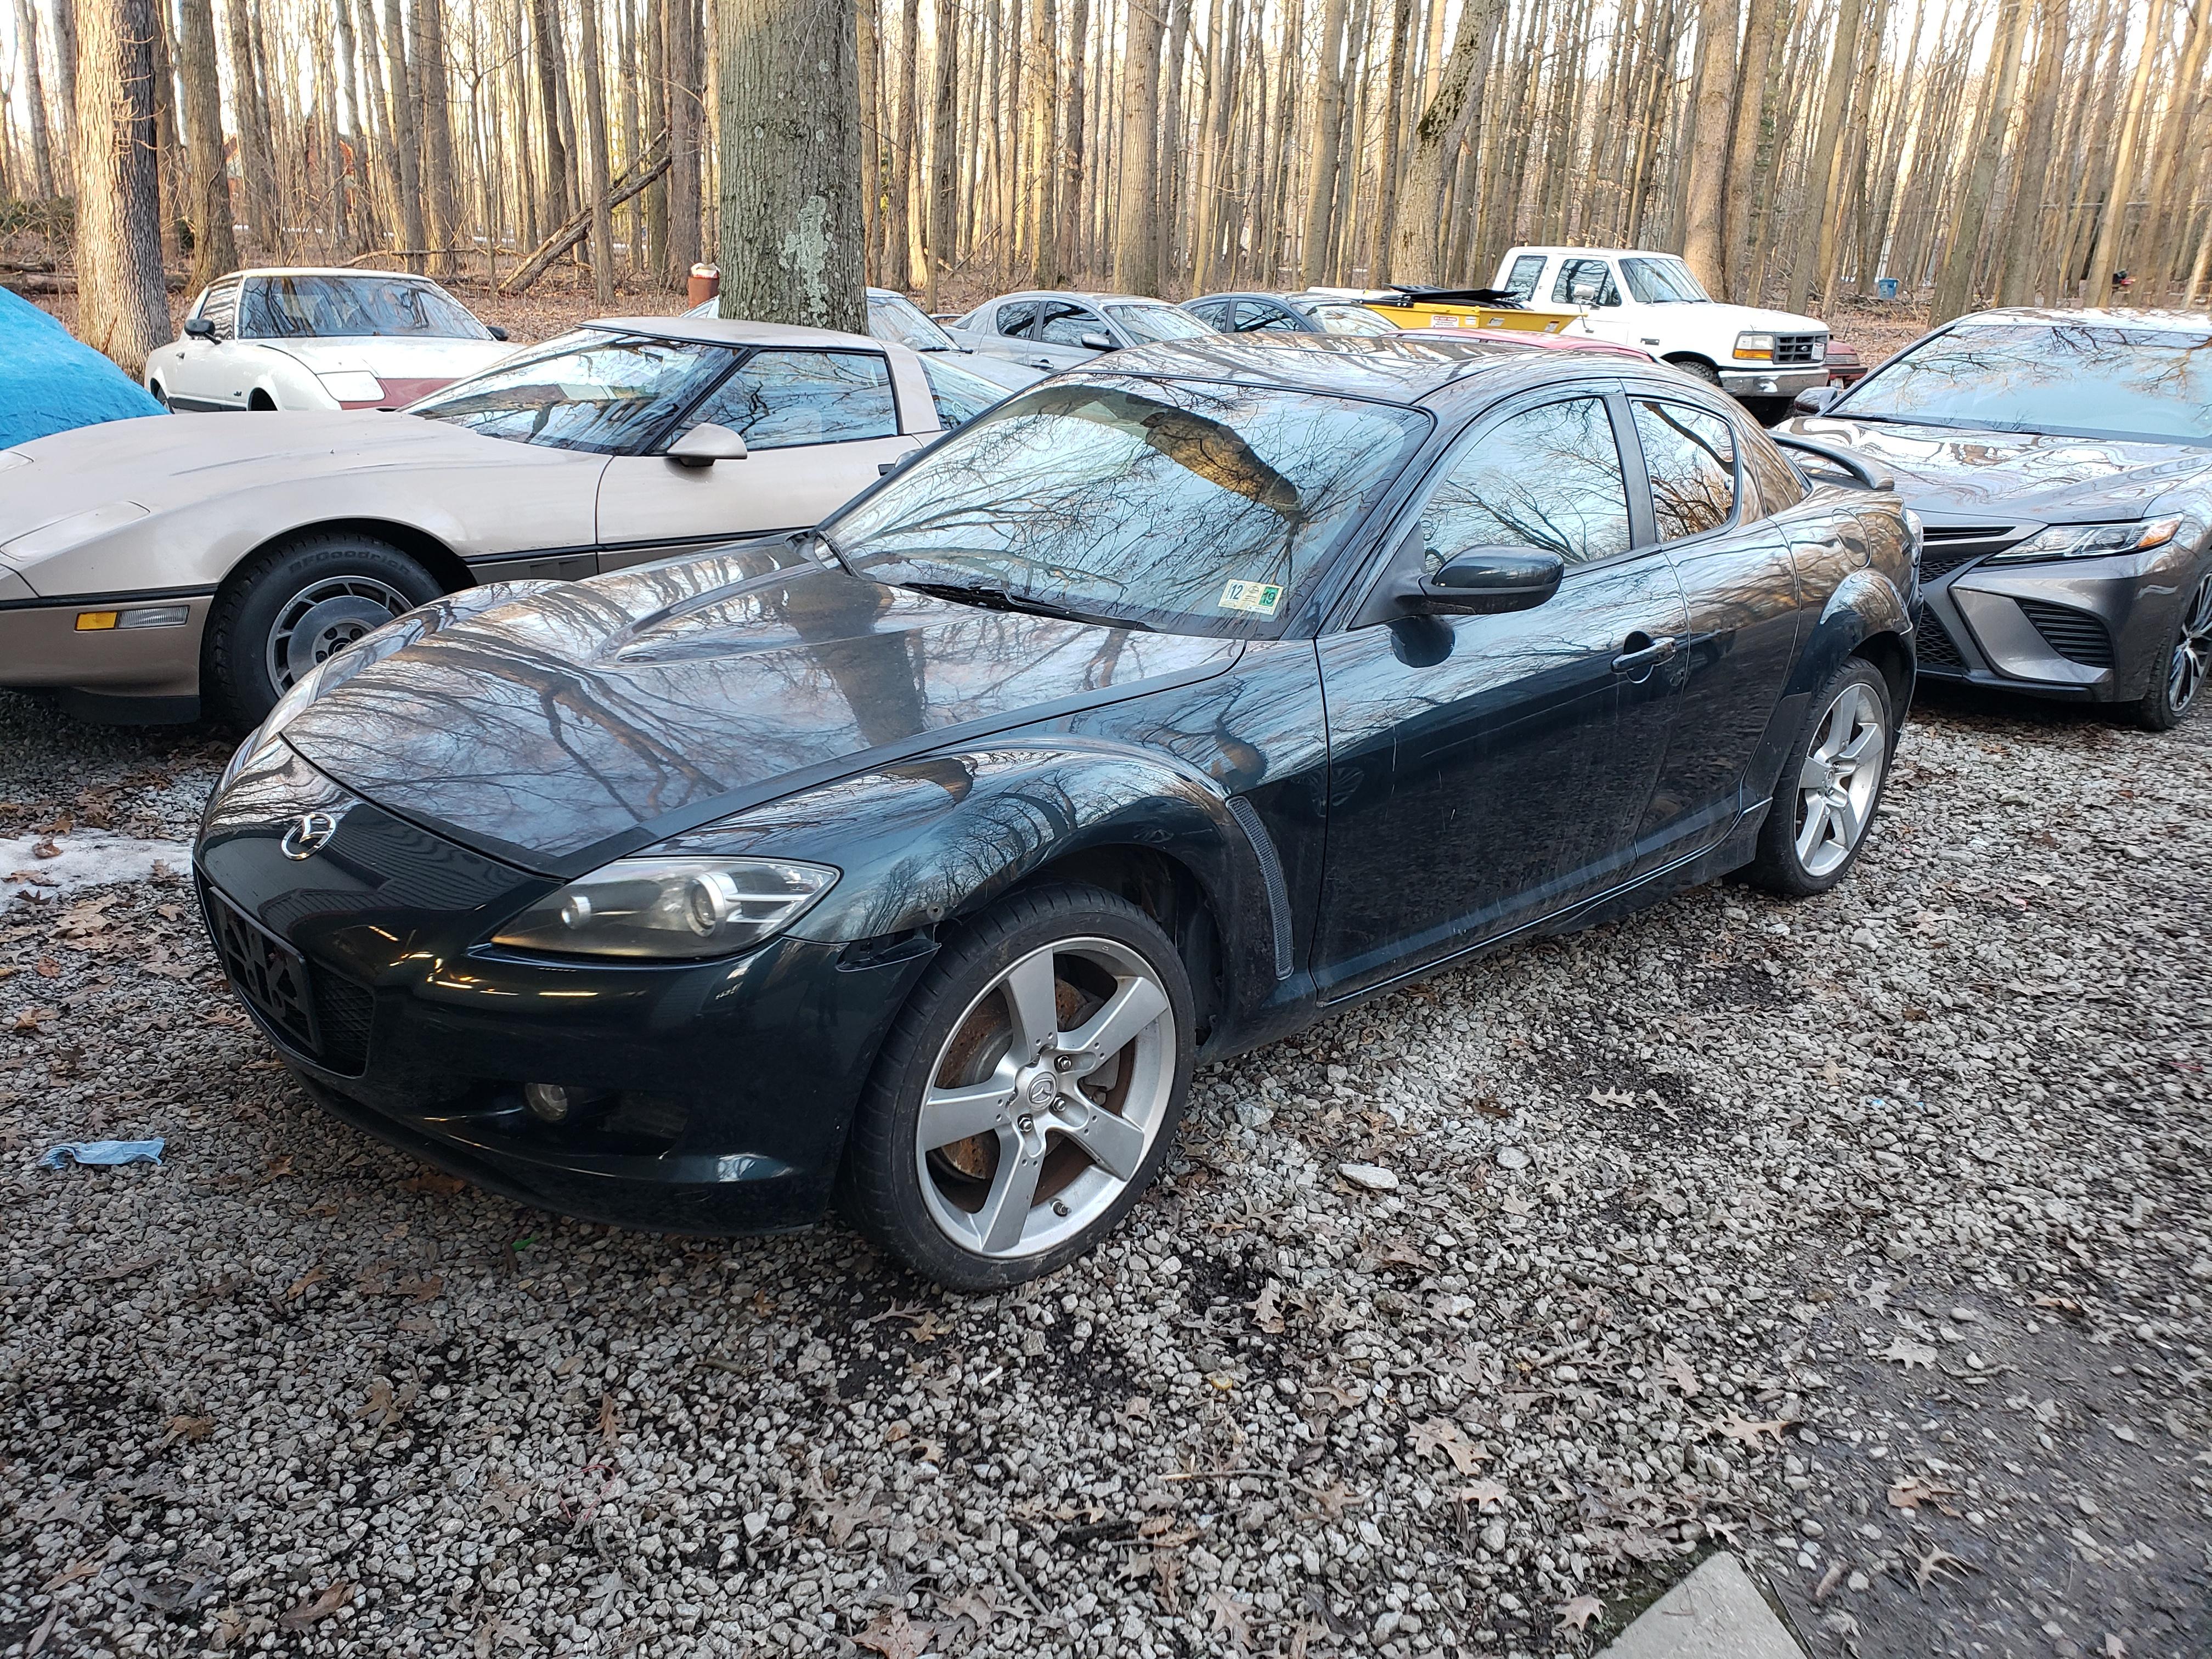
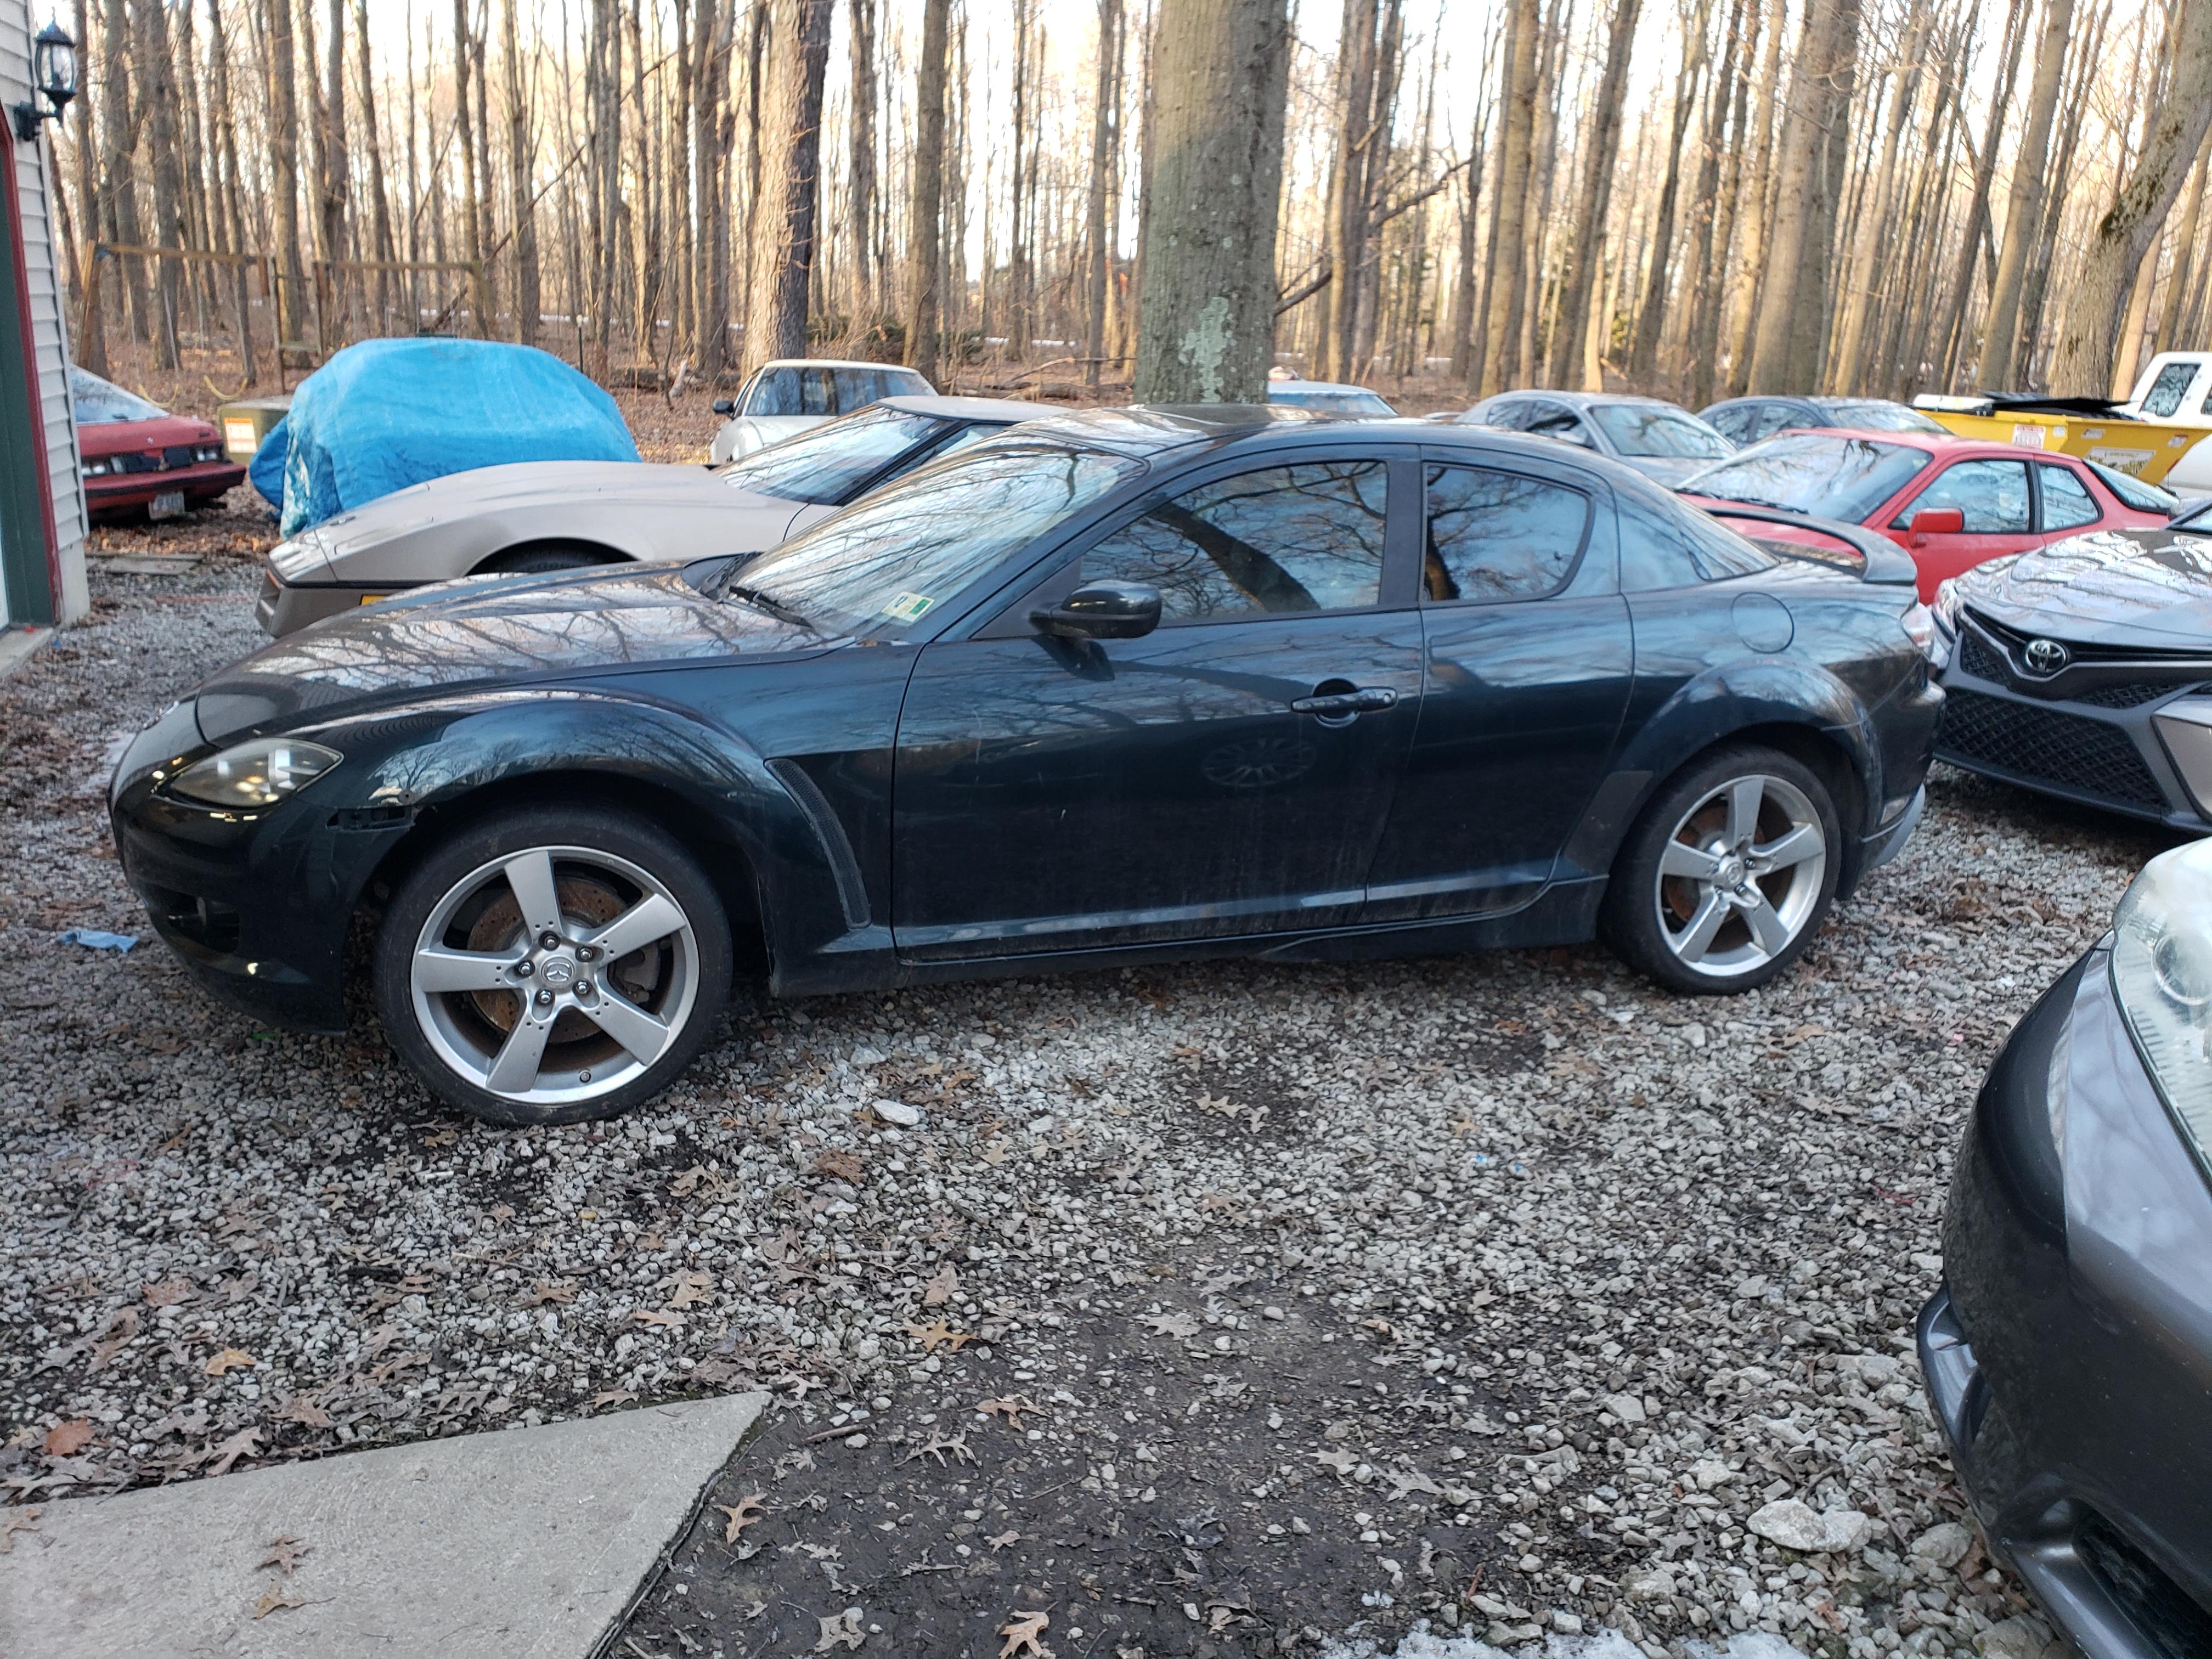
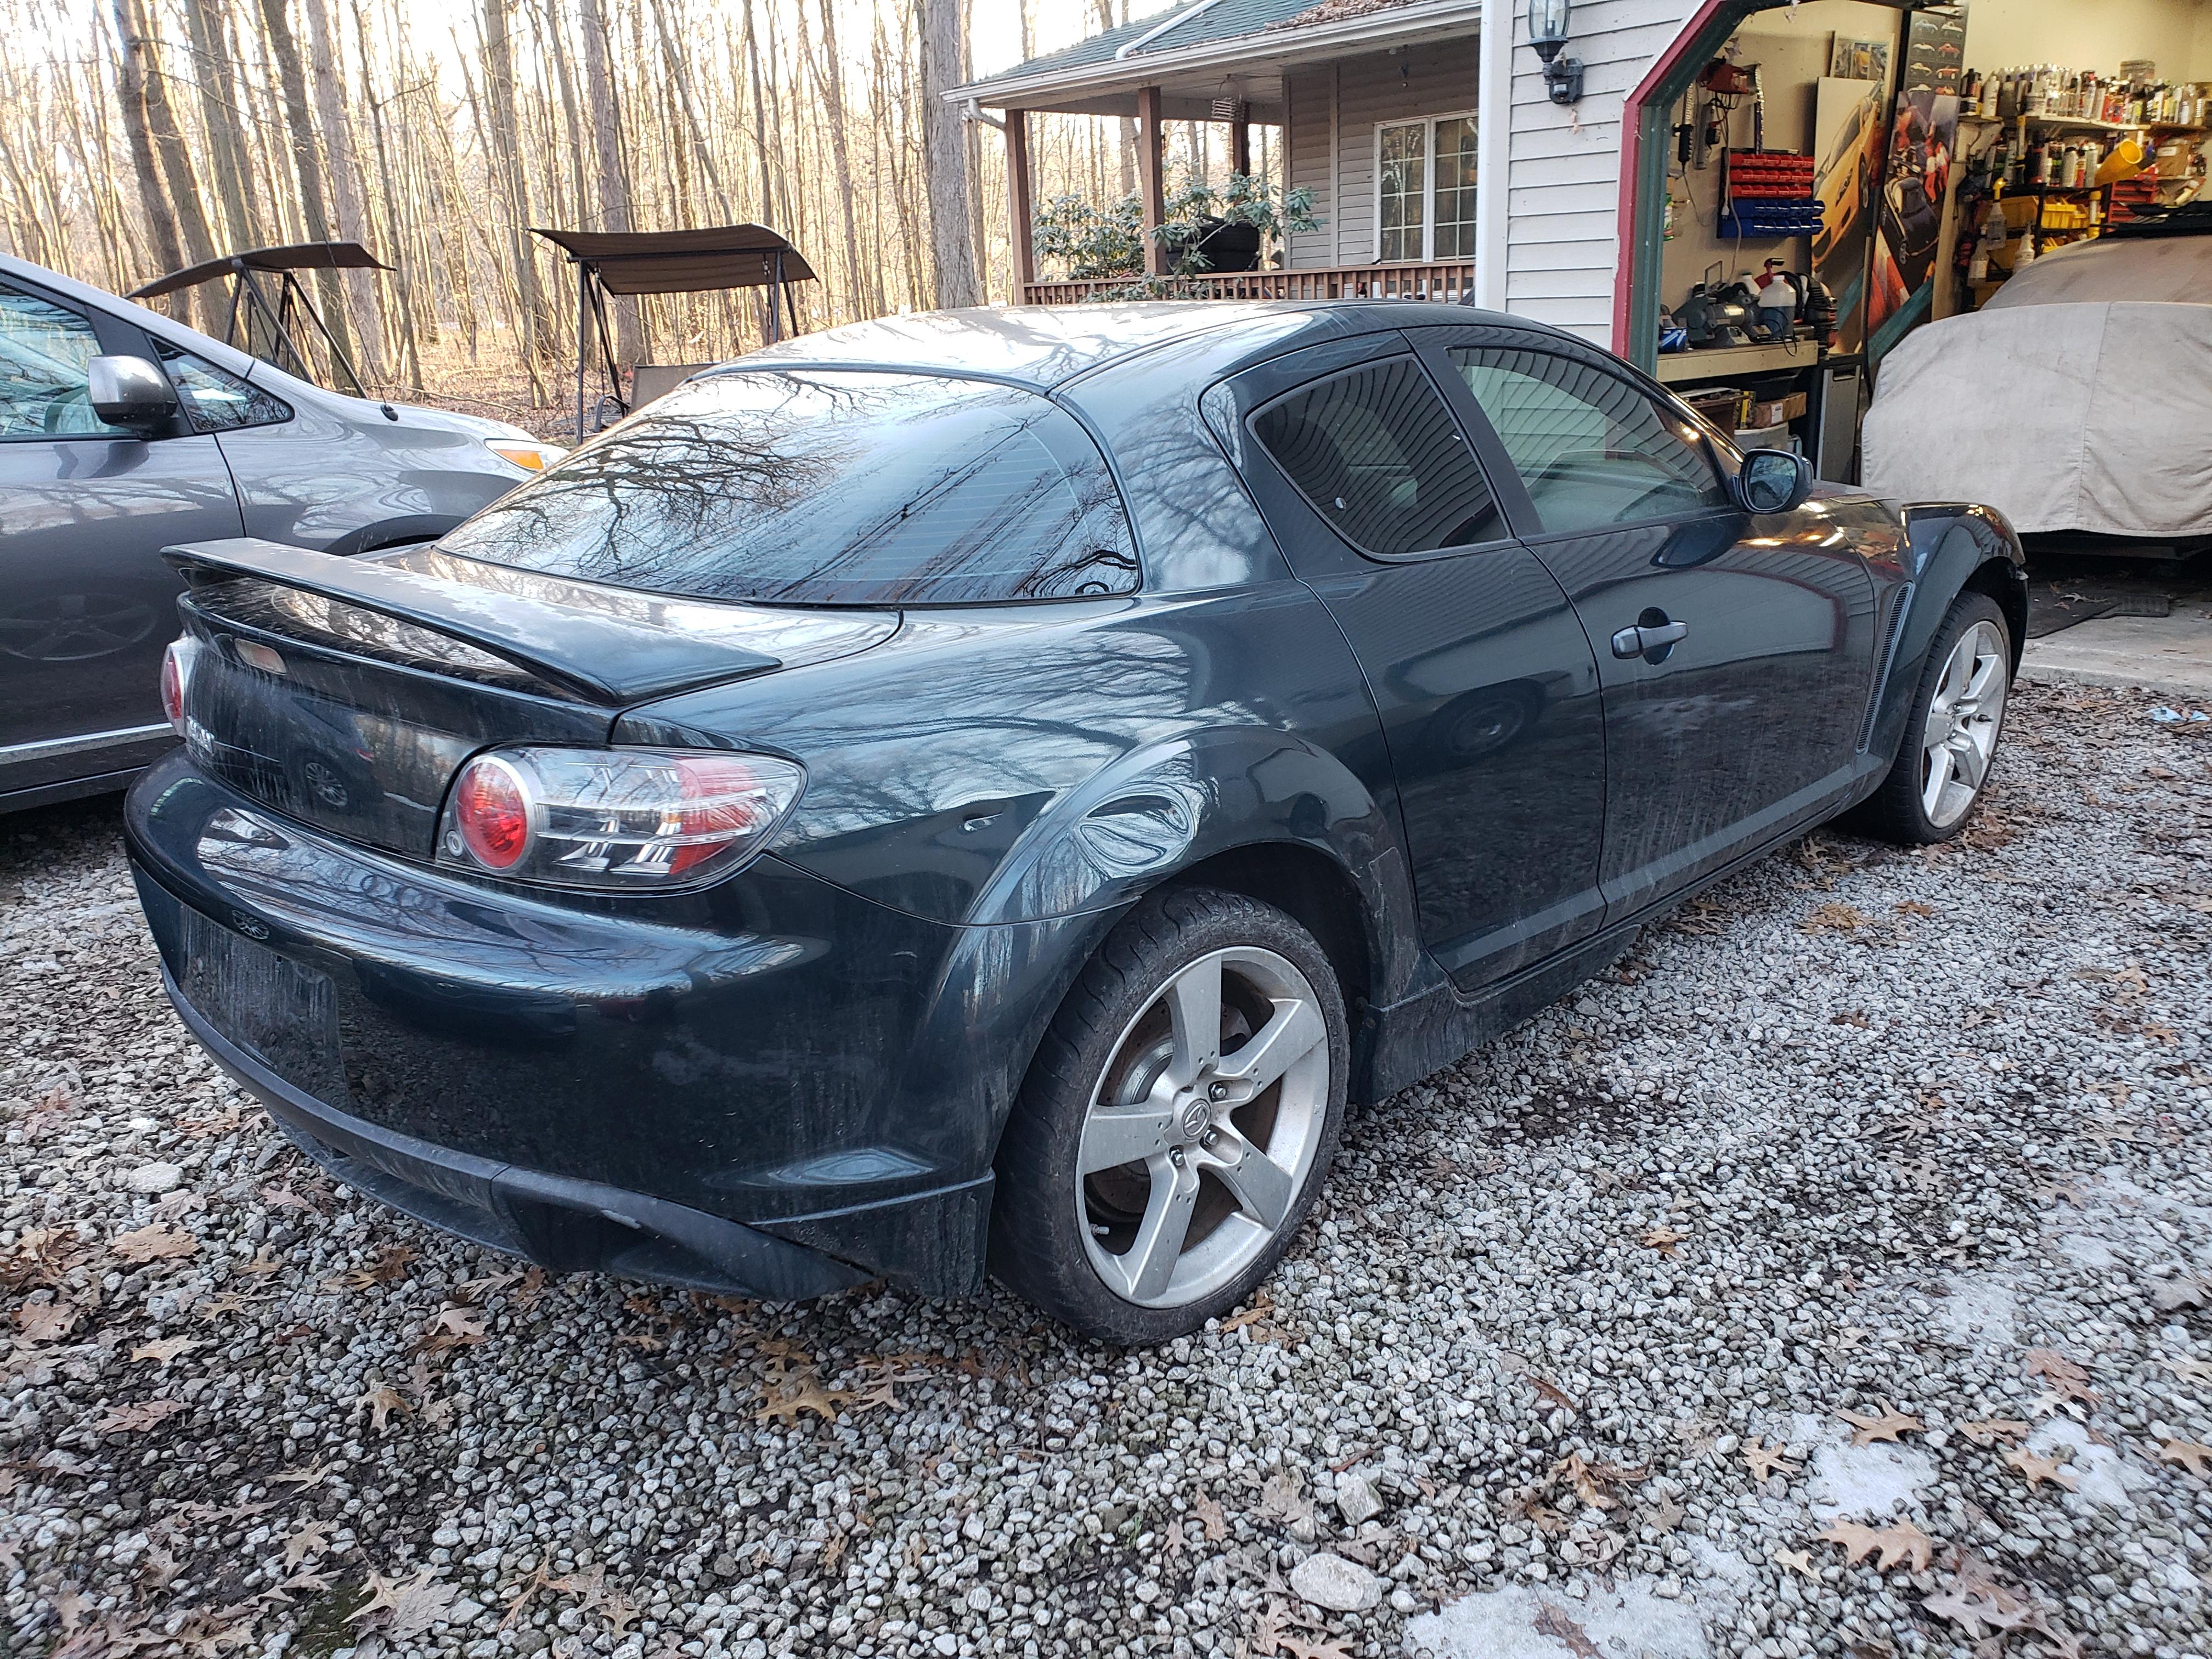
I found this car online in Virginia and made a deal with the seller who was amazing throughout. The reason I bought this car is because it's incredibly clean as far as rust and corrosion goes and its straight with an excellent service history. It was originally owned by a woman who loved the car very much and took great care of it. Once the original engine failed she sold the car and after changing hands it ended up with a 4 port engine installed but never to run. Allegedly the engine is good but I will remove it and replace it with a good 6 port engine that I have ready to go. The car came with the 6spd transmission and what appears to be most parts that were removed. From my understanding the car was destined to be a parts car when a couple owners ago was unable to get the 4 port engine running. My intention is to put it all back to stock other than a RB exhaust. I have many parts waiting to go on the car and am every excited to rebuild it!
Here in Ohio its very tough to find a car that has little to no rust such as this one. This car for the bill perfectly and is a great car to restore and include my oldest son in its restoration. Its very important for me to be able to pass some of my restoration knowledge along to him. I bought him an 84 RX-7 GSL-SE and that's a project he and I have been working on. I feel as though he is ready to work on the 8. Took a few pictures to share and I plan on updating this thread with pictures and details every step of the way!
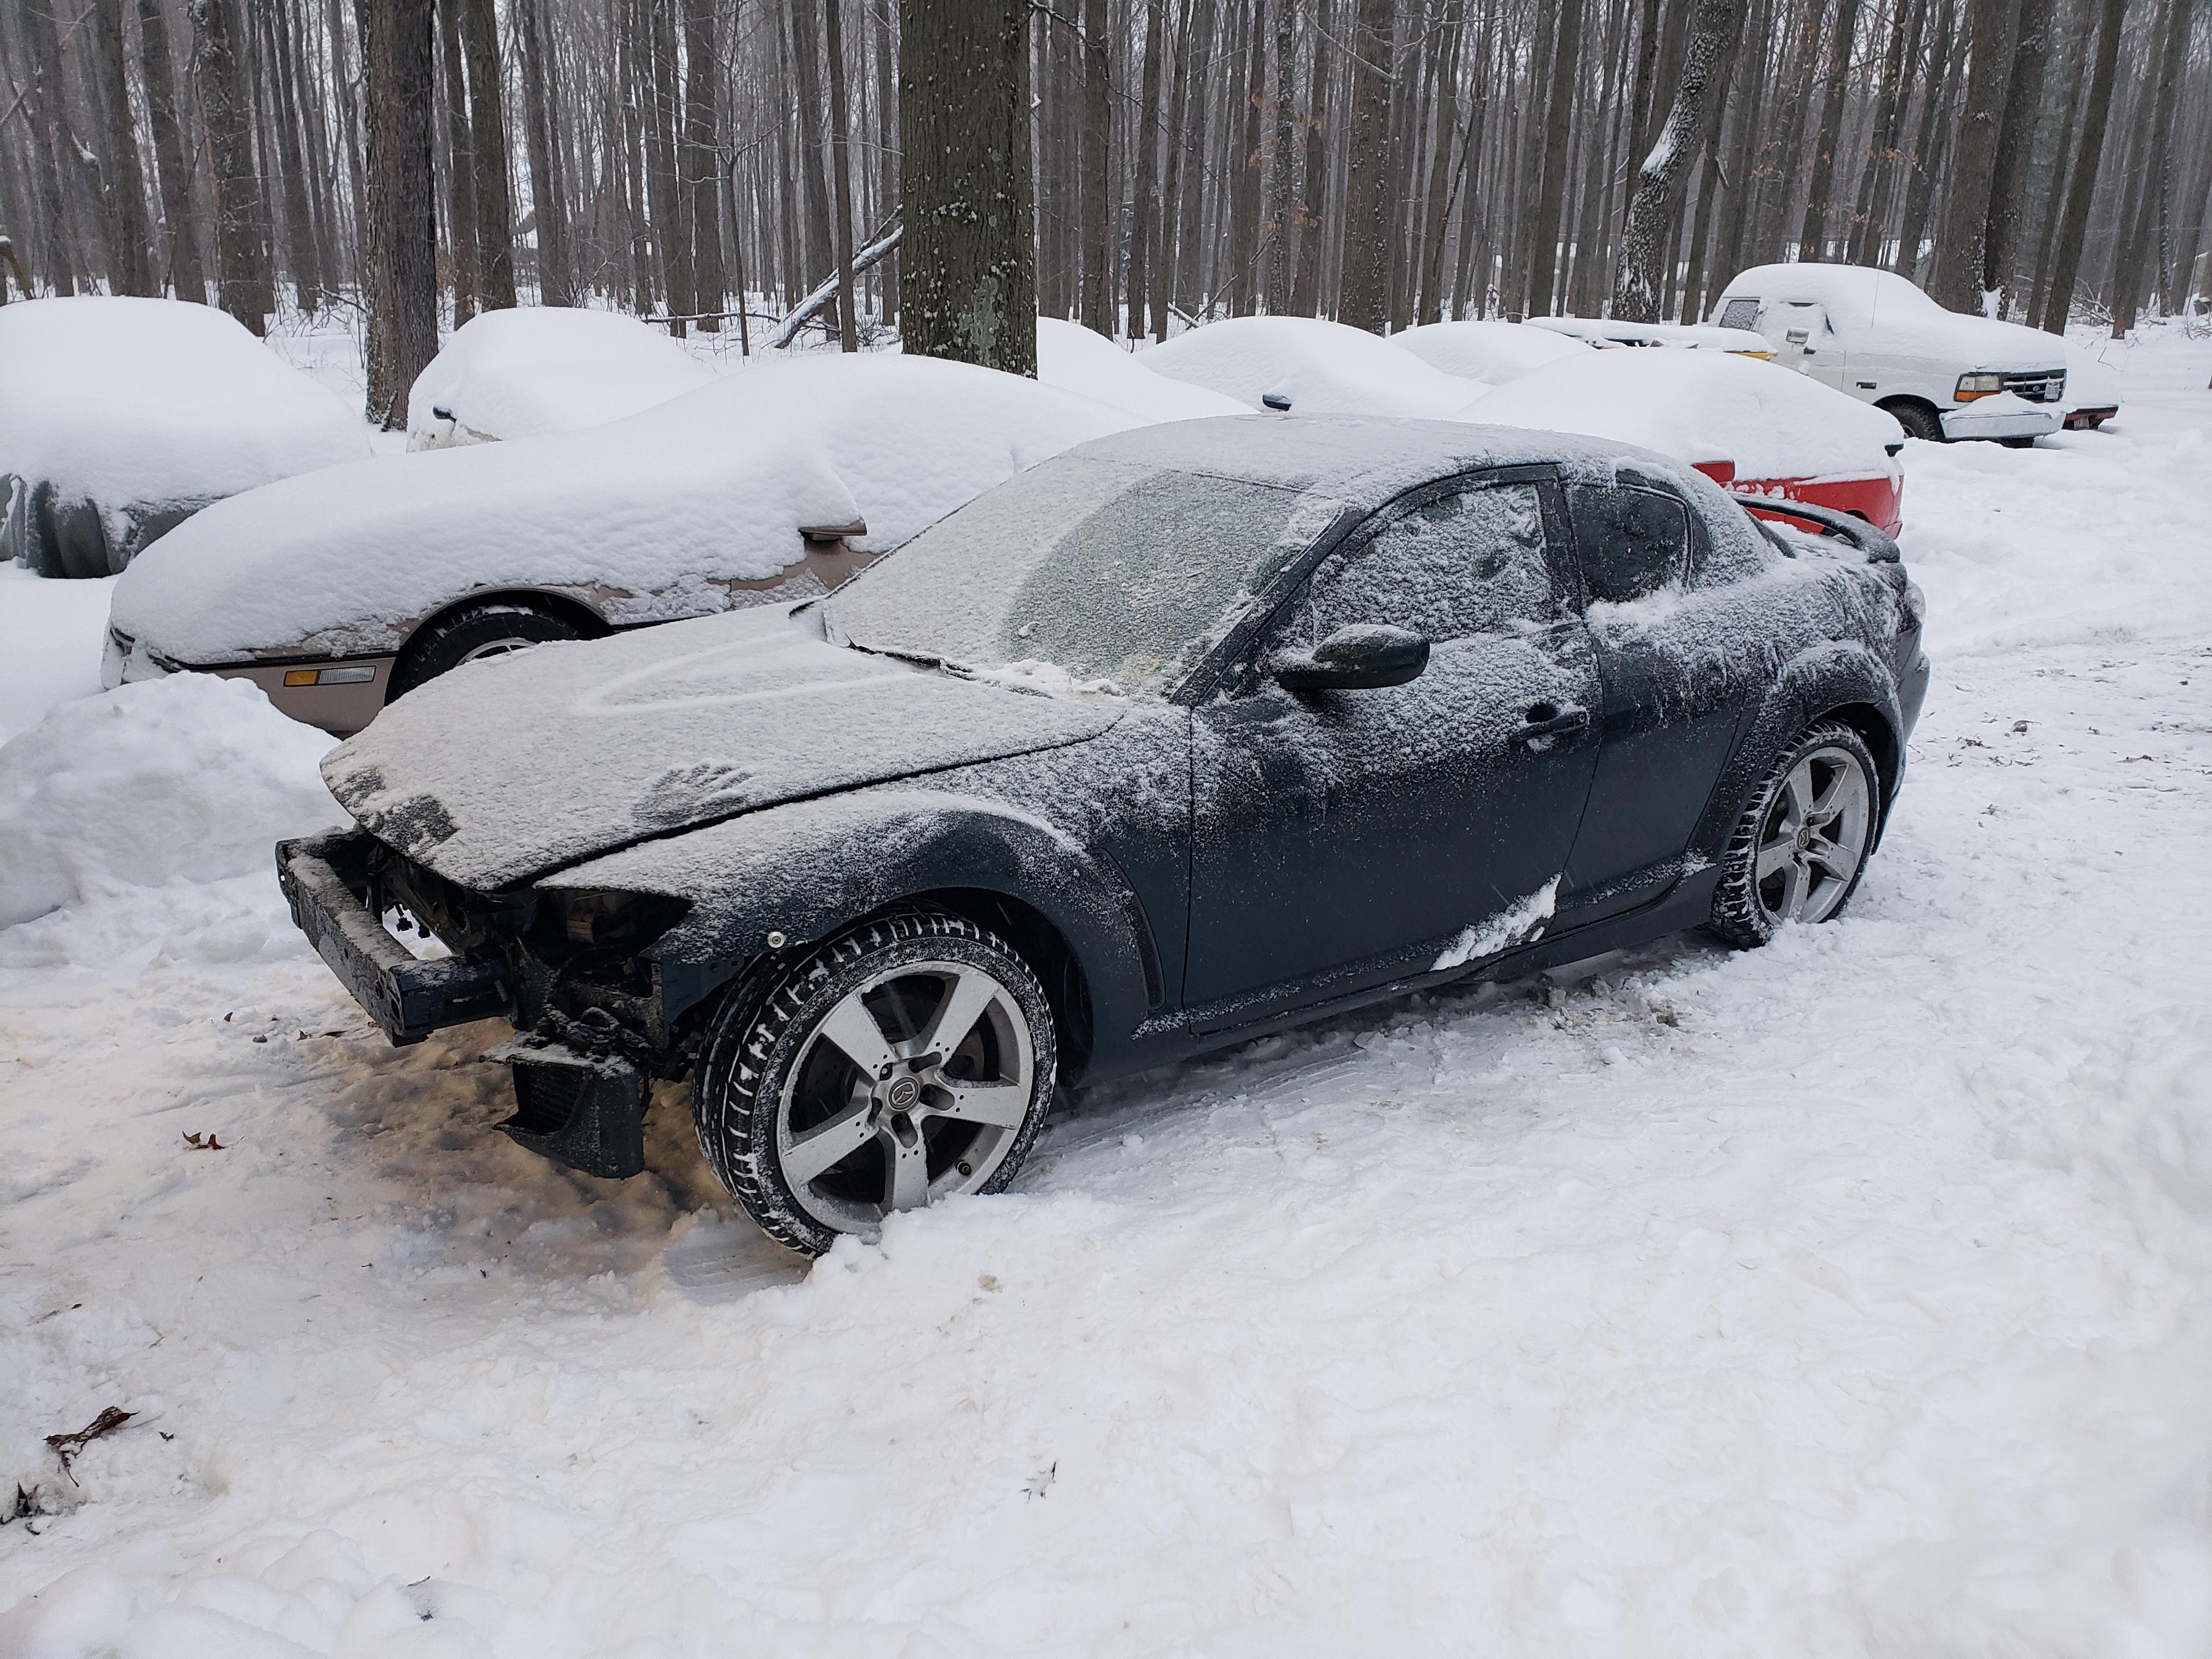
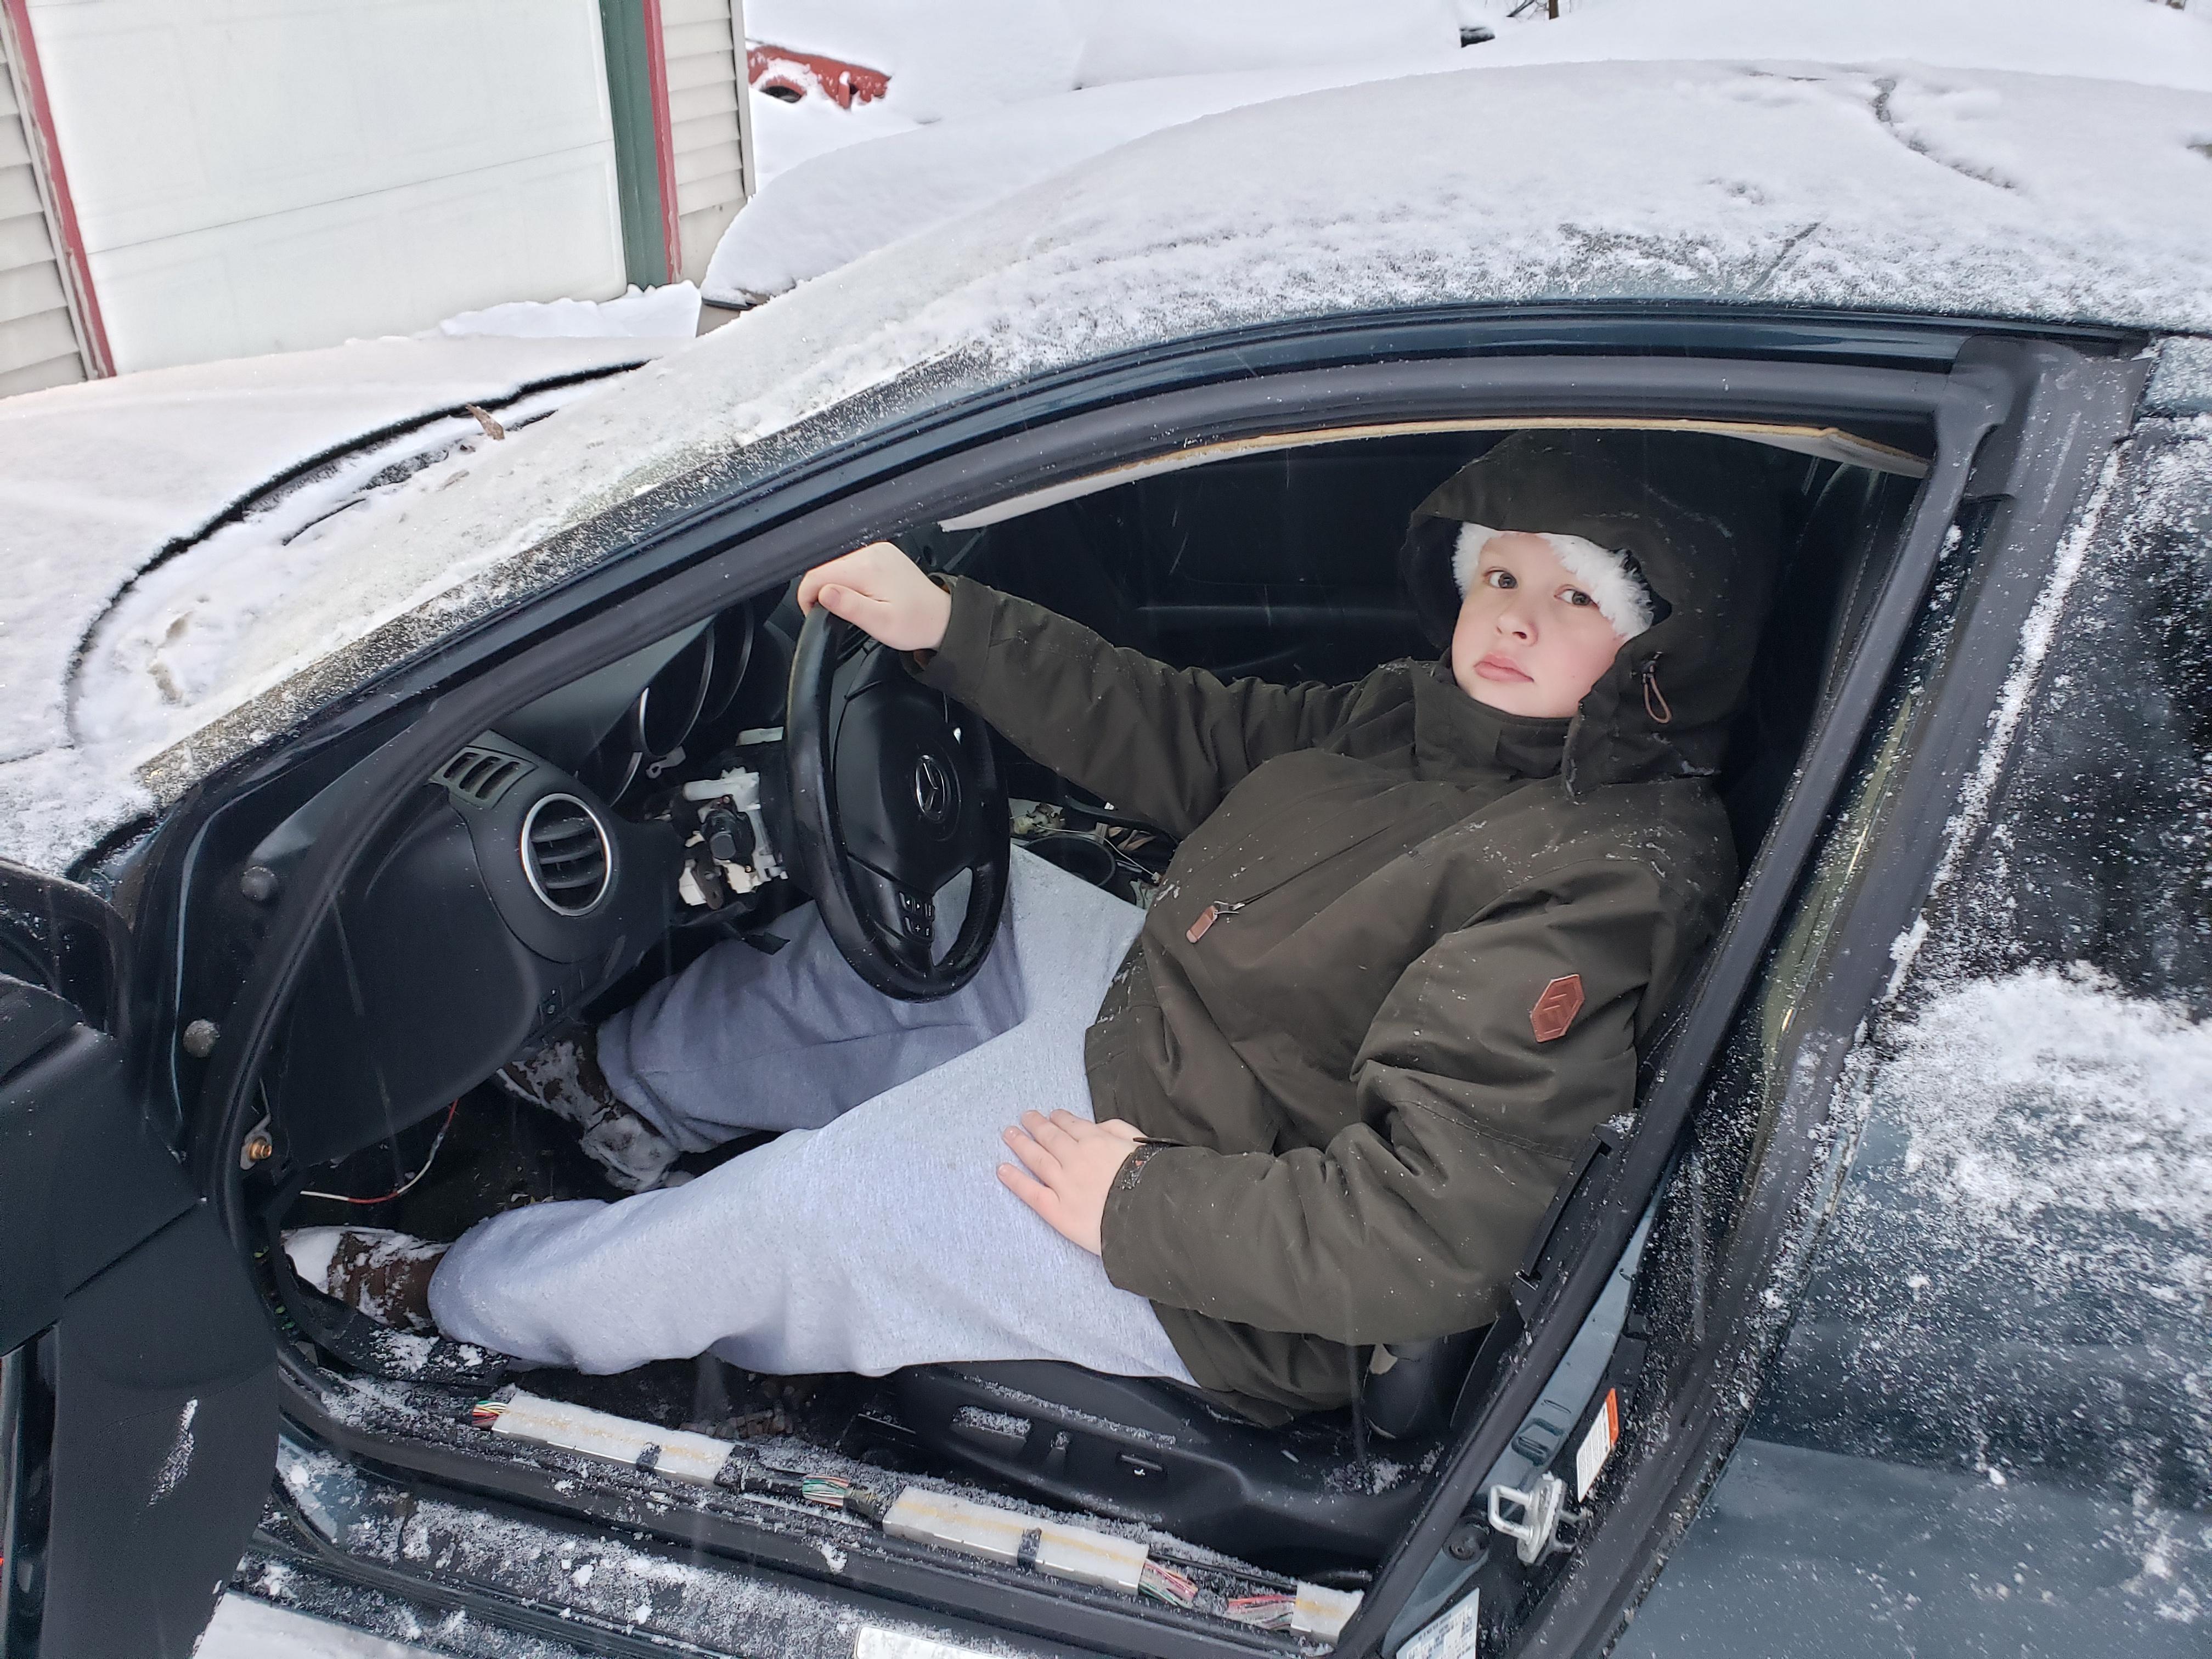

Here in Ohio its very tough to find a car that has little to no rust such as this one. This car for the bill perfectly and is a great car to restore and include my oldest son in its restoration. Its very important for me to be able to pass some of my restoration knowledge along to him. I bought him an 84 RX-7 GSL-SE and that's a project he and I have been working on. I feel as though he is ready to work on the 8. Took a few pictures to share and I plan on updating this thread with pictures and details every step of the way!


The following users liked this post:
mazdaverx7 (02-20-2021)
02-20-2021, 05:36 AM
#3
RX-Heaven
Thread Starter
iTrader: (6)
jer2911, Thank you very much!! I try to make sure all of my children have a basic understanding of how to fix things and how stuff works. I don't feel I'd be doing my job as a father if I didn't teach them. Plus I love fixing thing, especially cars that are condemned to the being parts cars. I have a few of them I'm going to bring back. It's a great time to bond with the kids and I'm getting work done on my projects so its a win win.
02-20-2021, 05:39 AM
#4
RX-Heaven
Thread Starter
iTrader: (6)
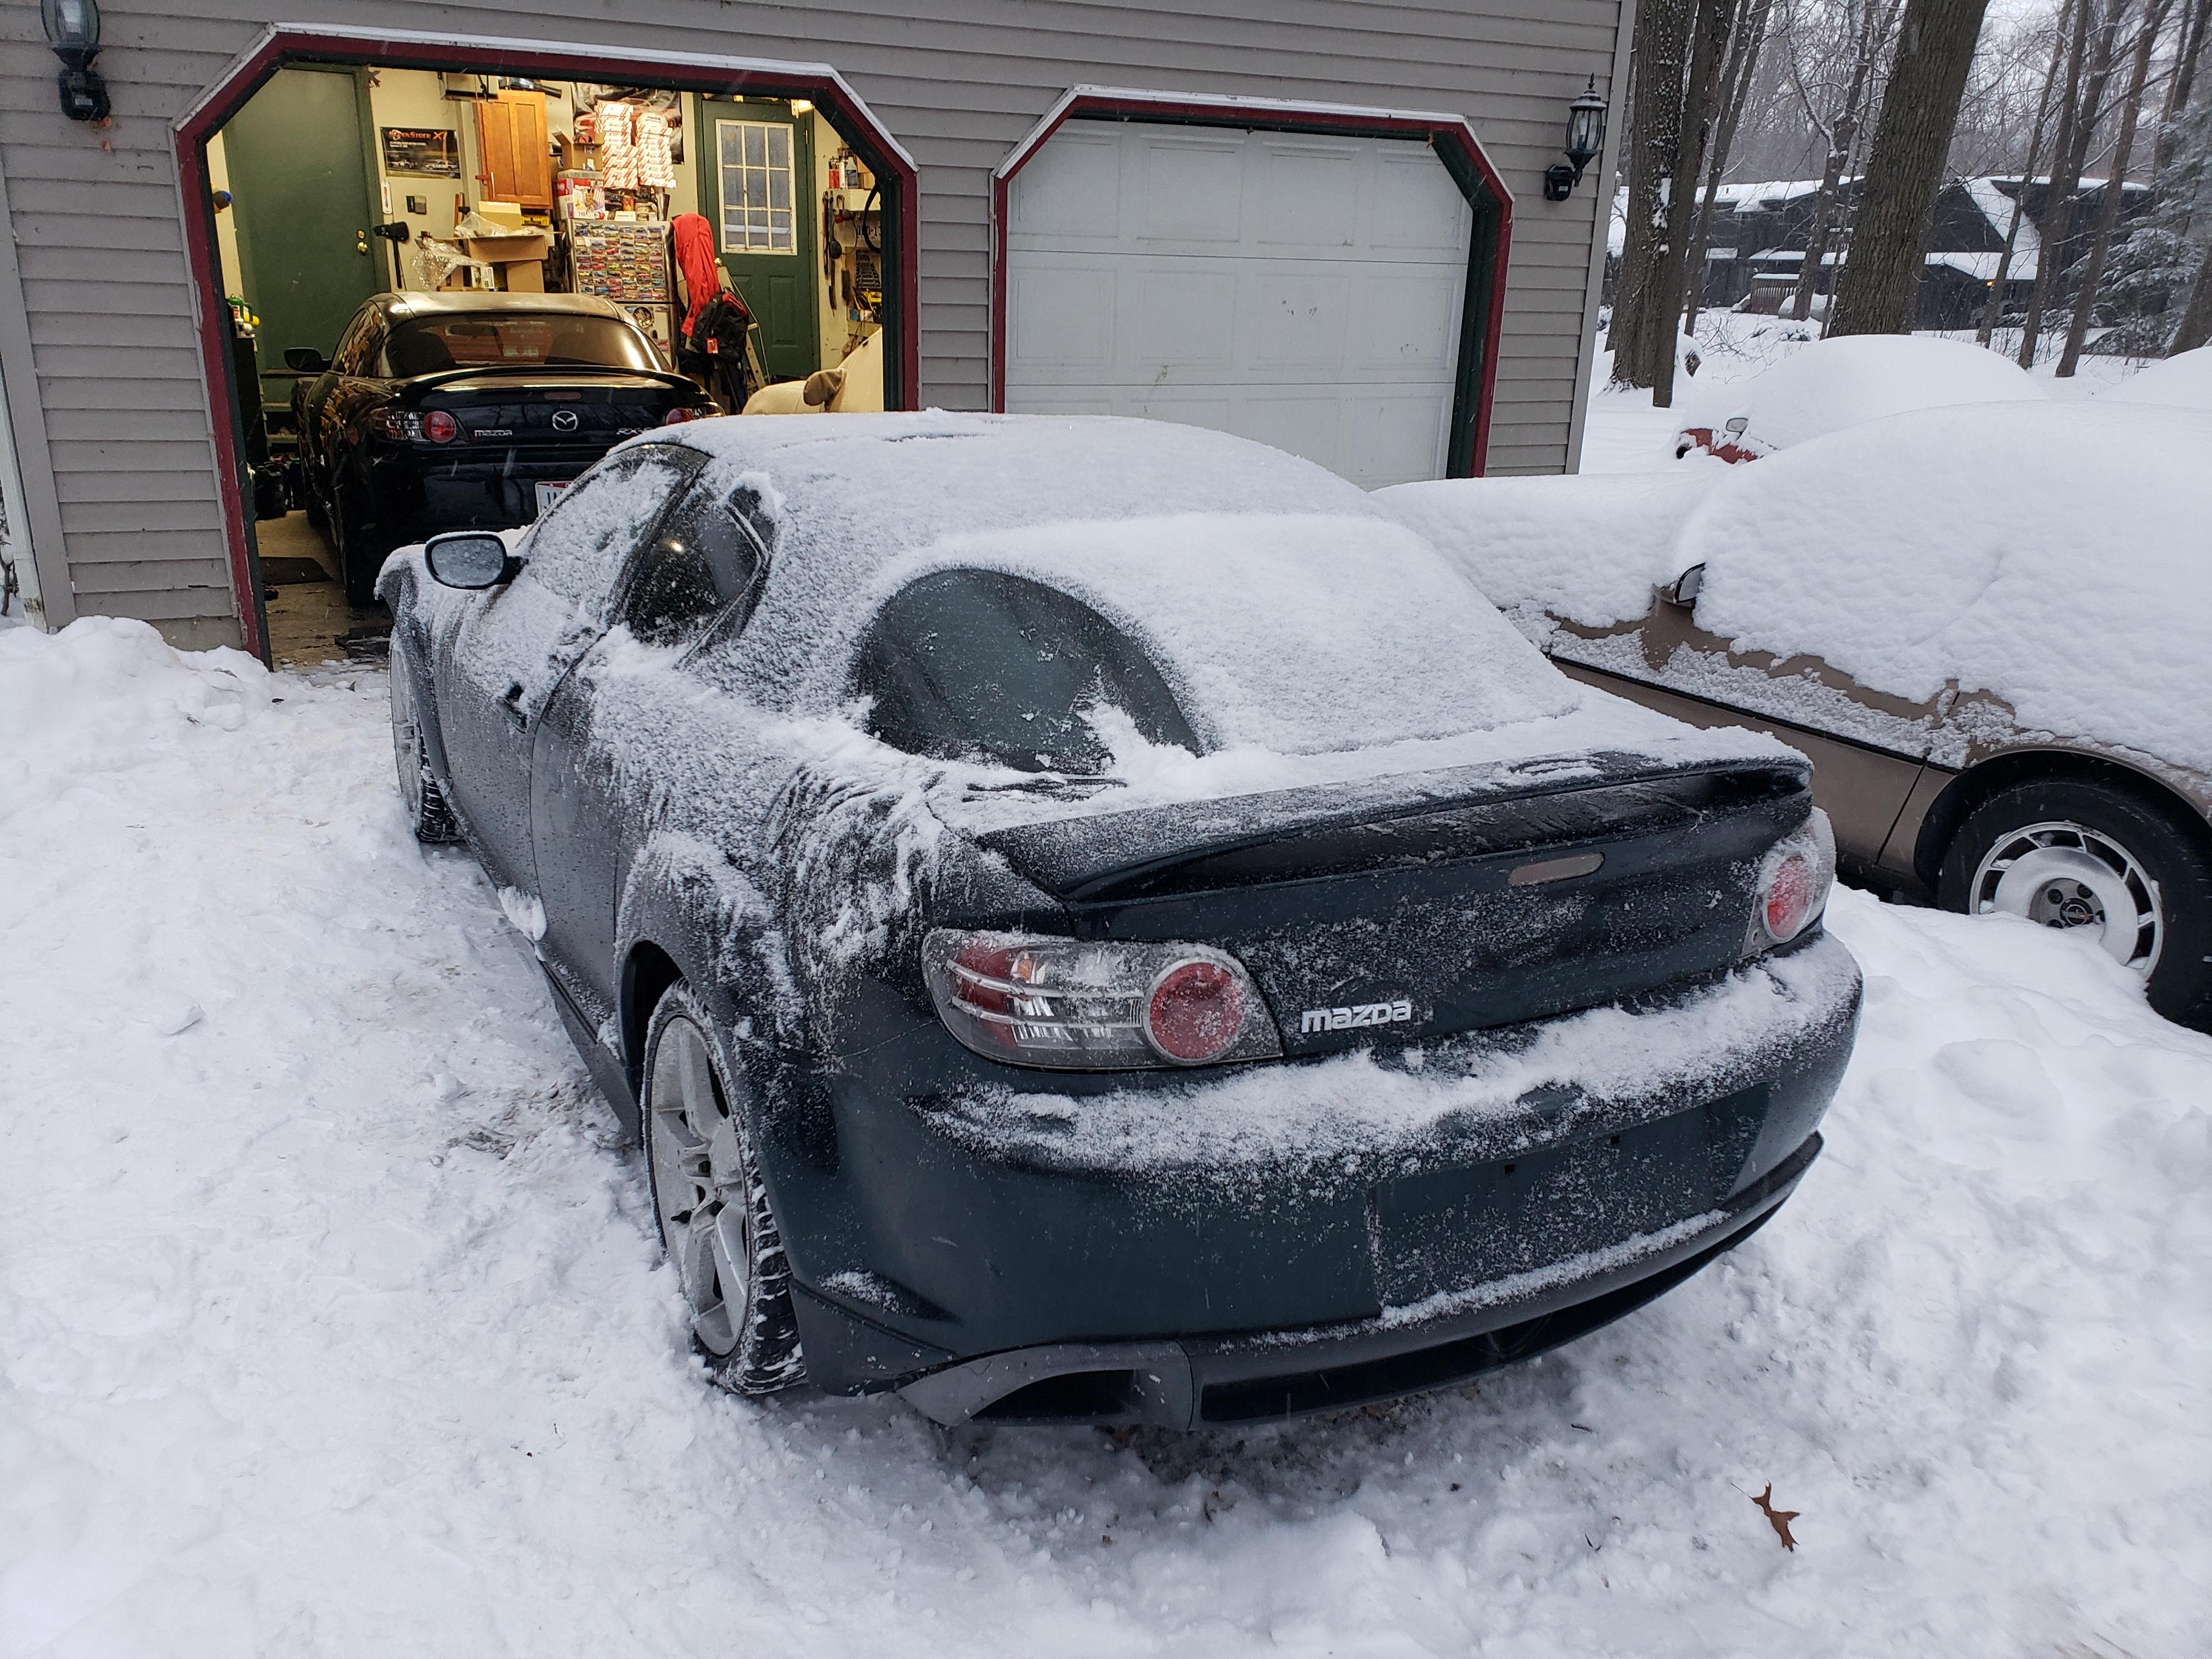
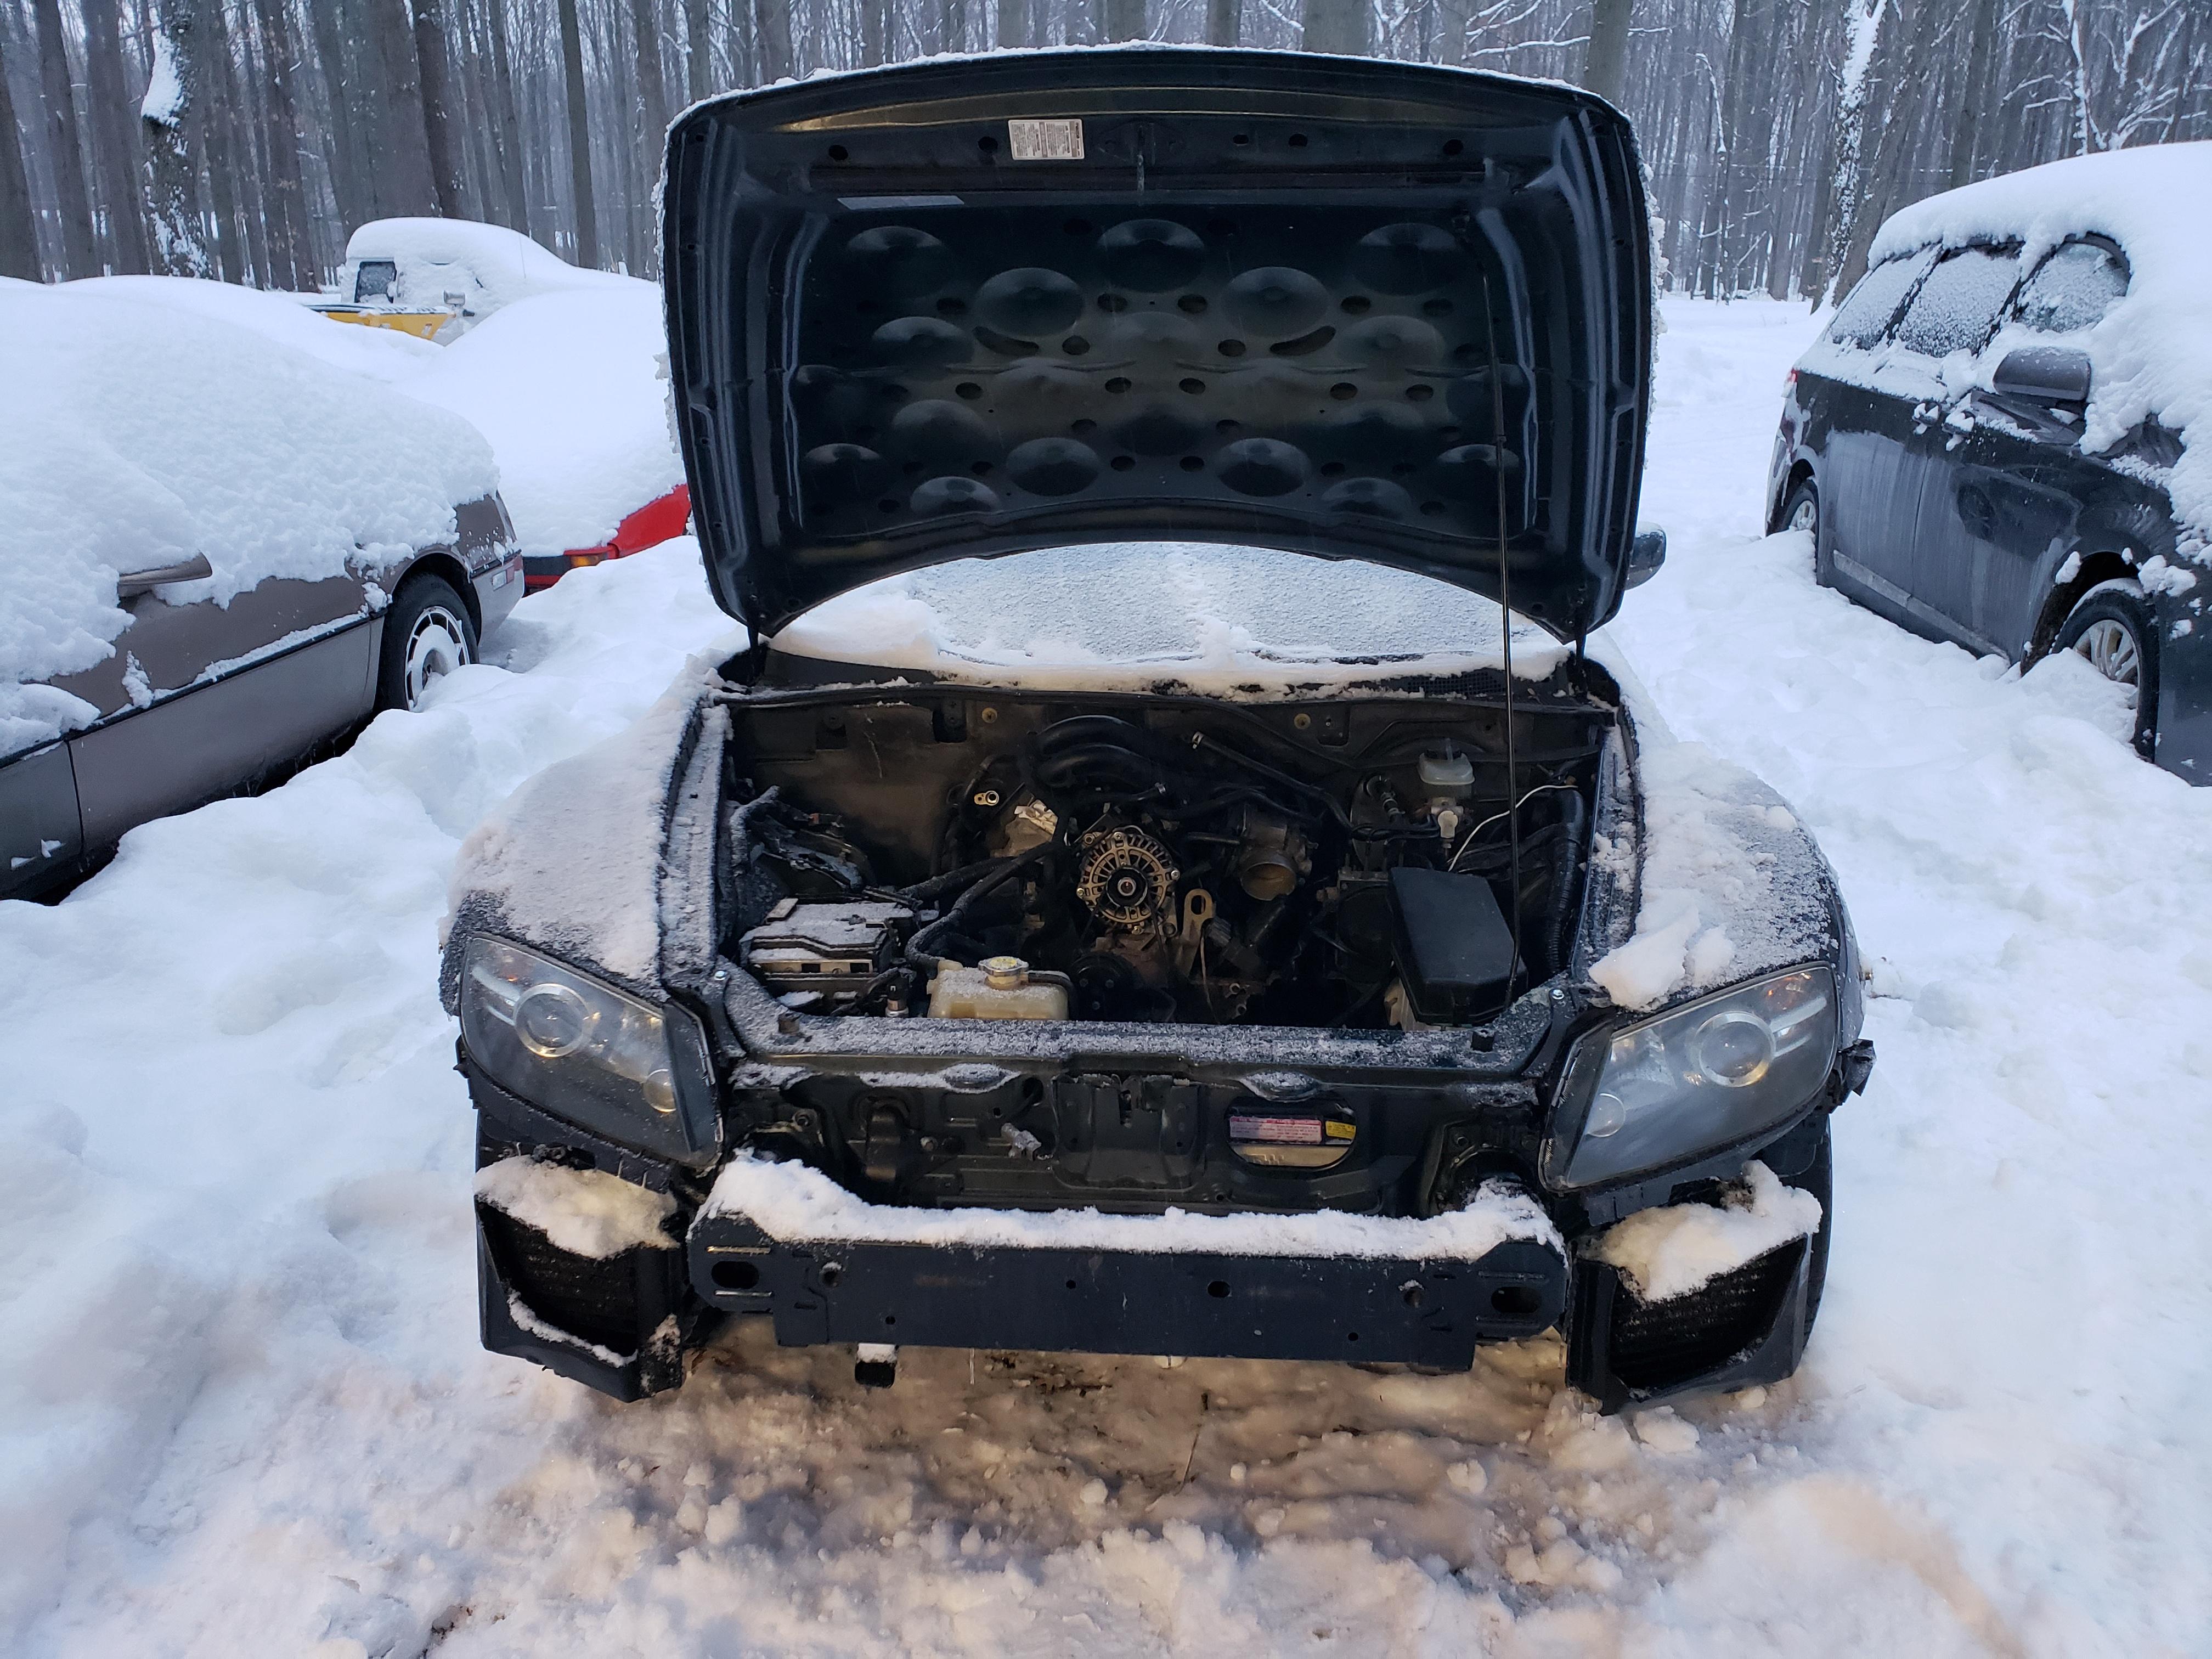
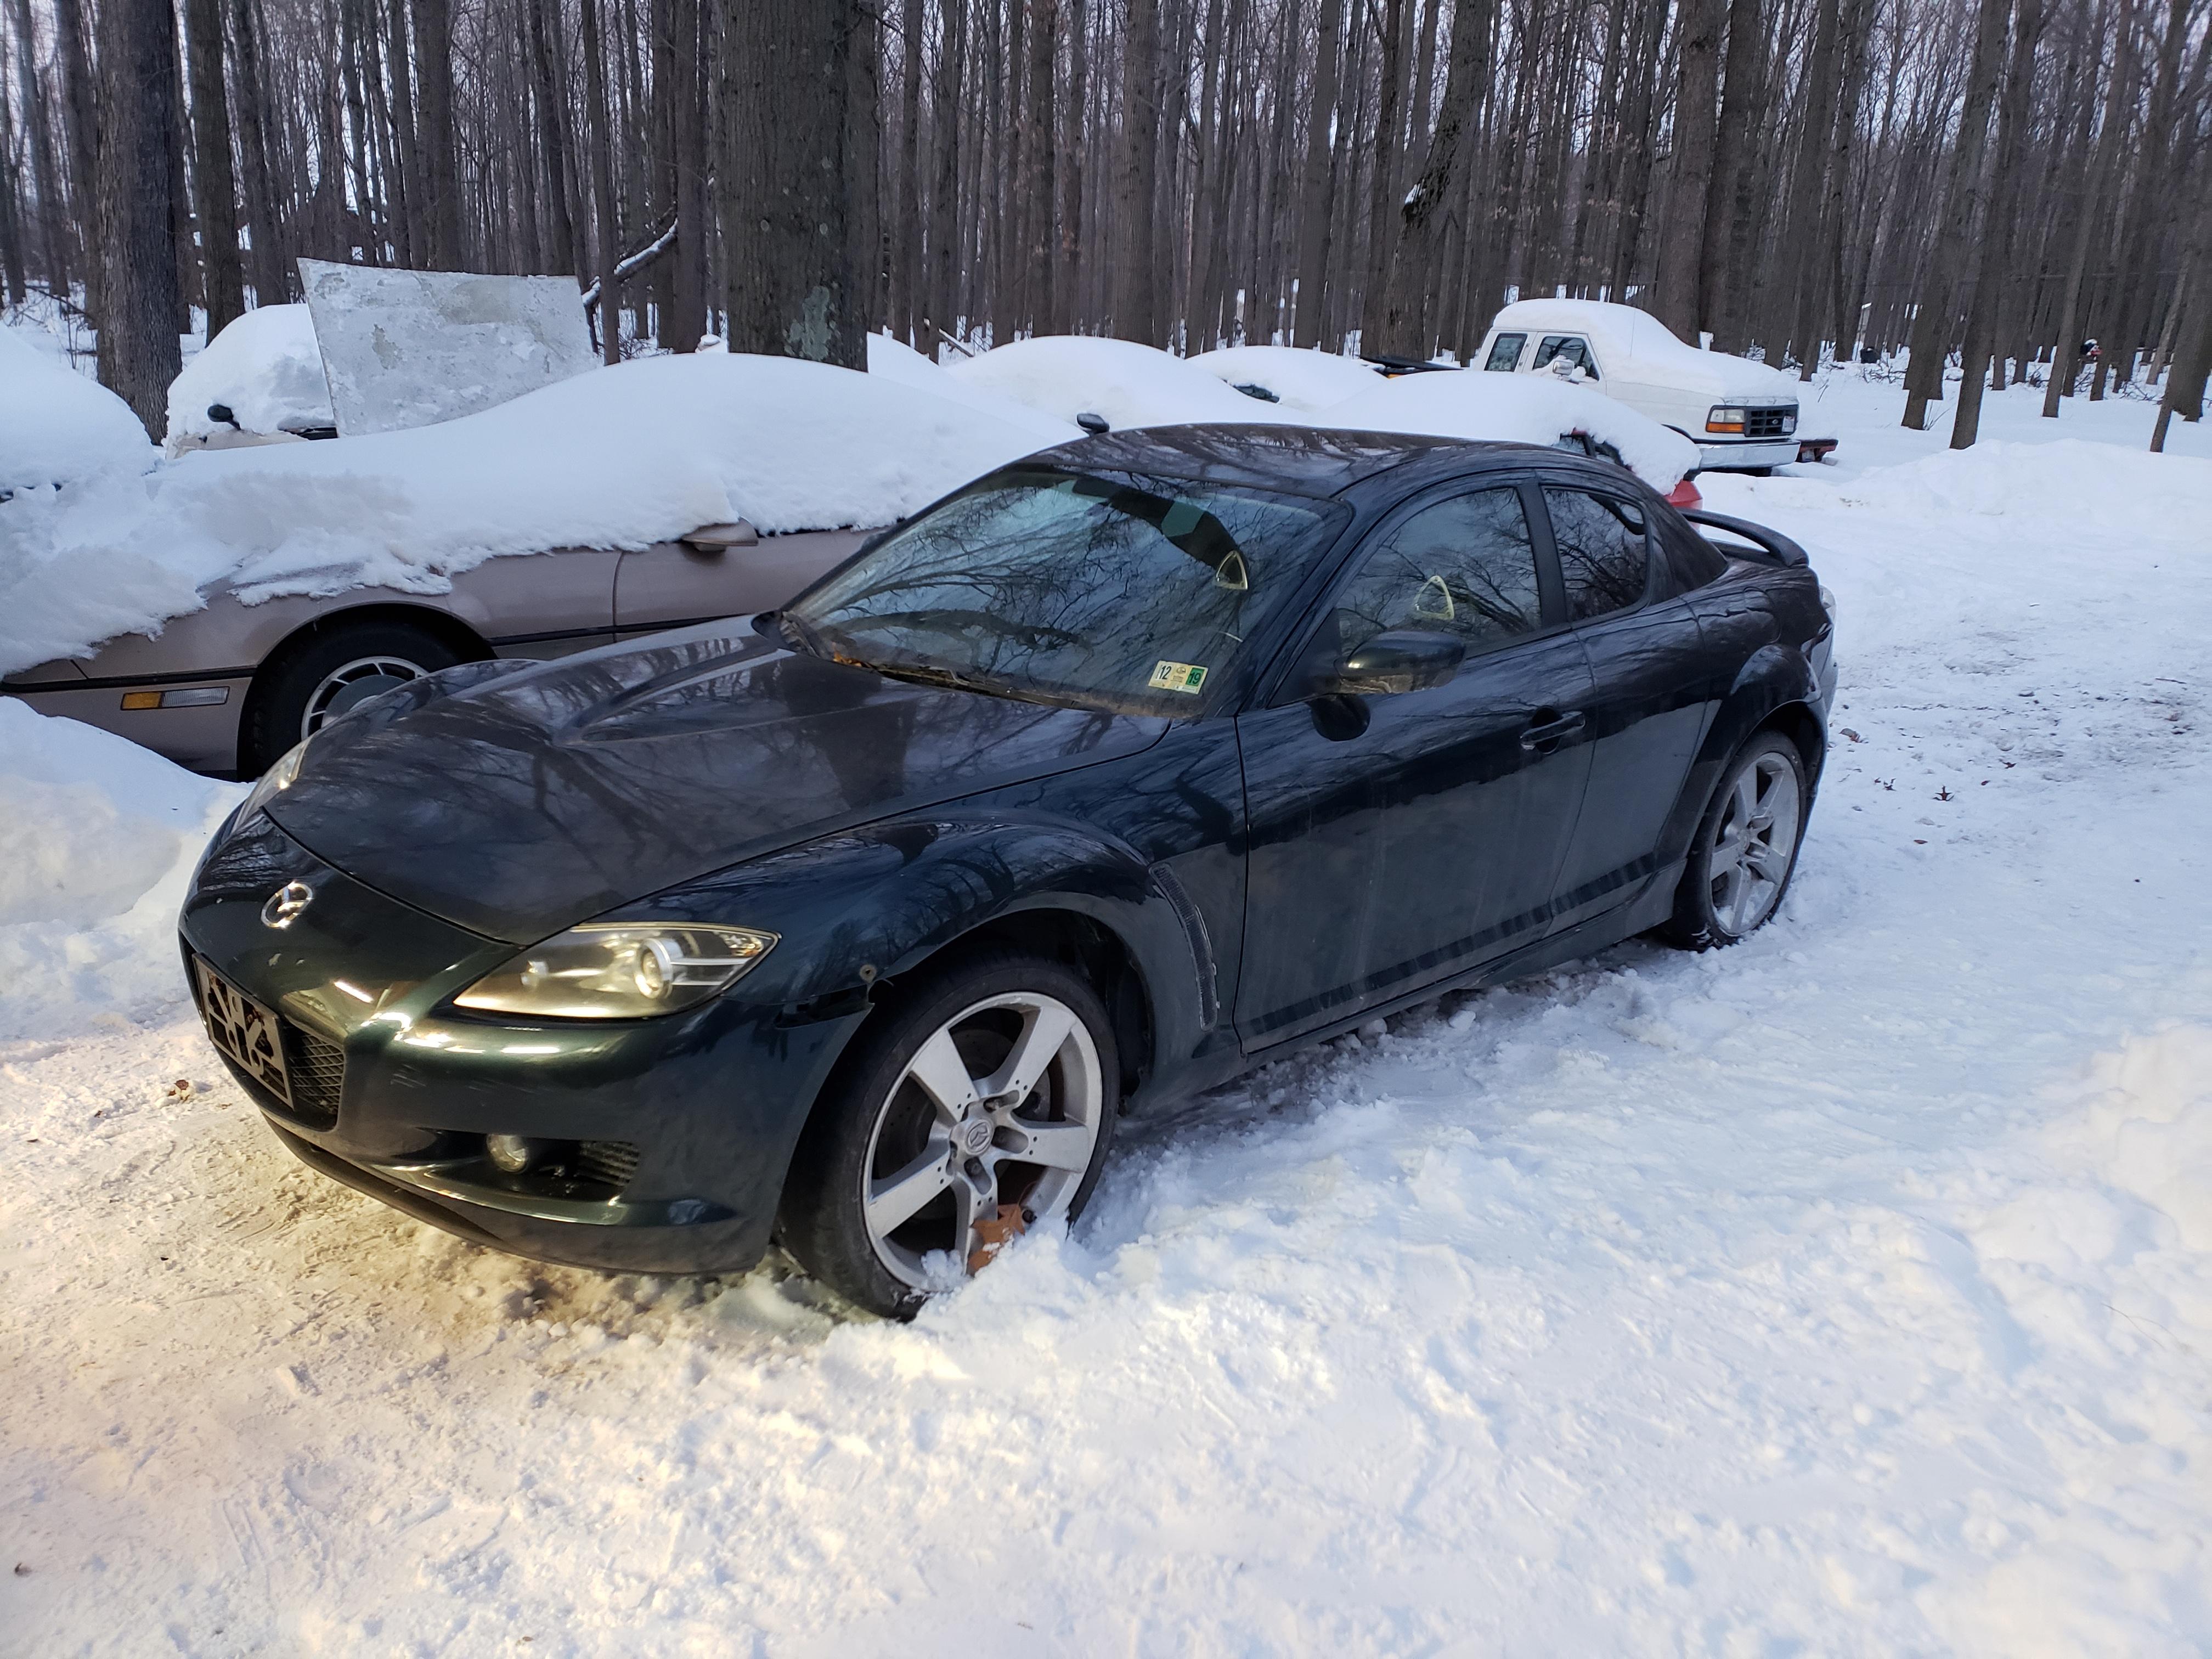
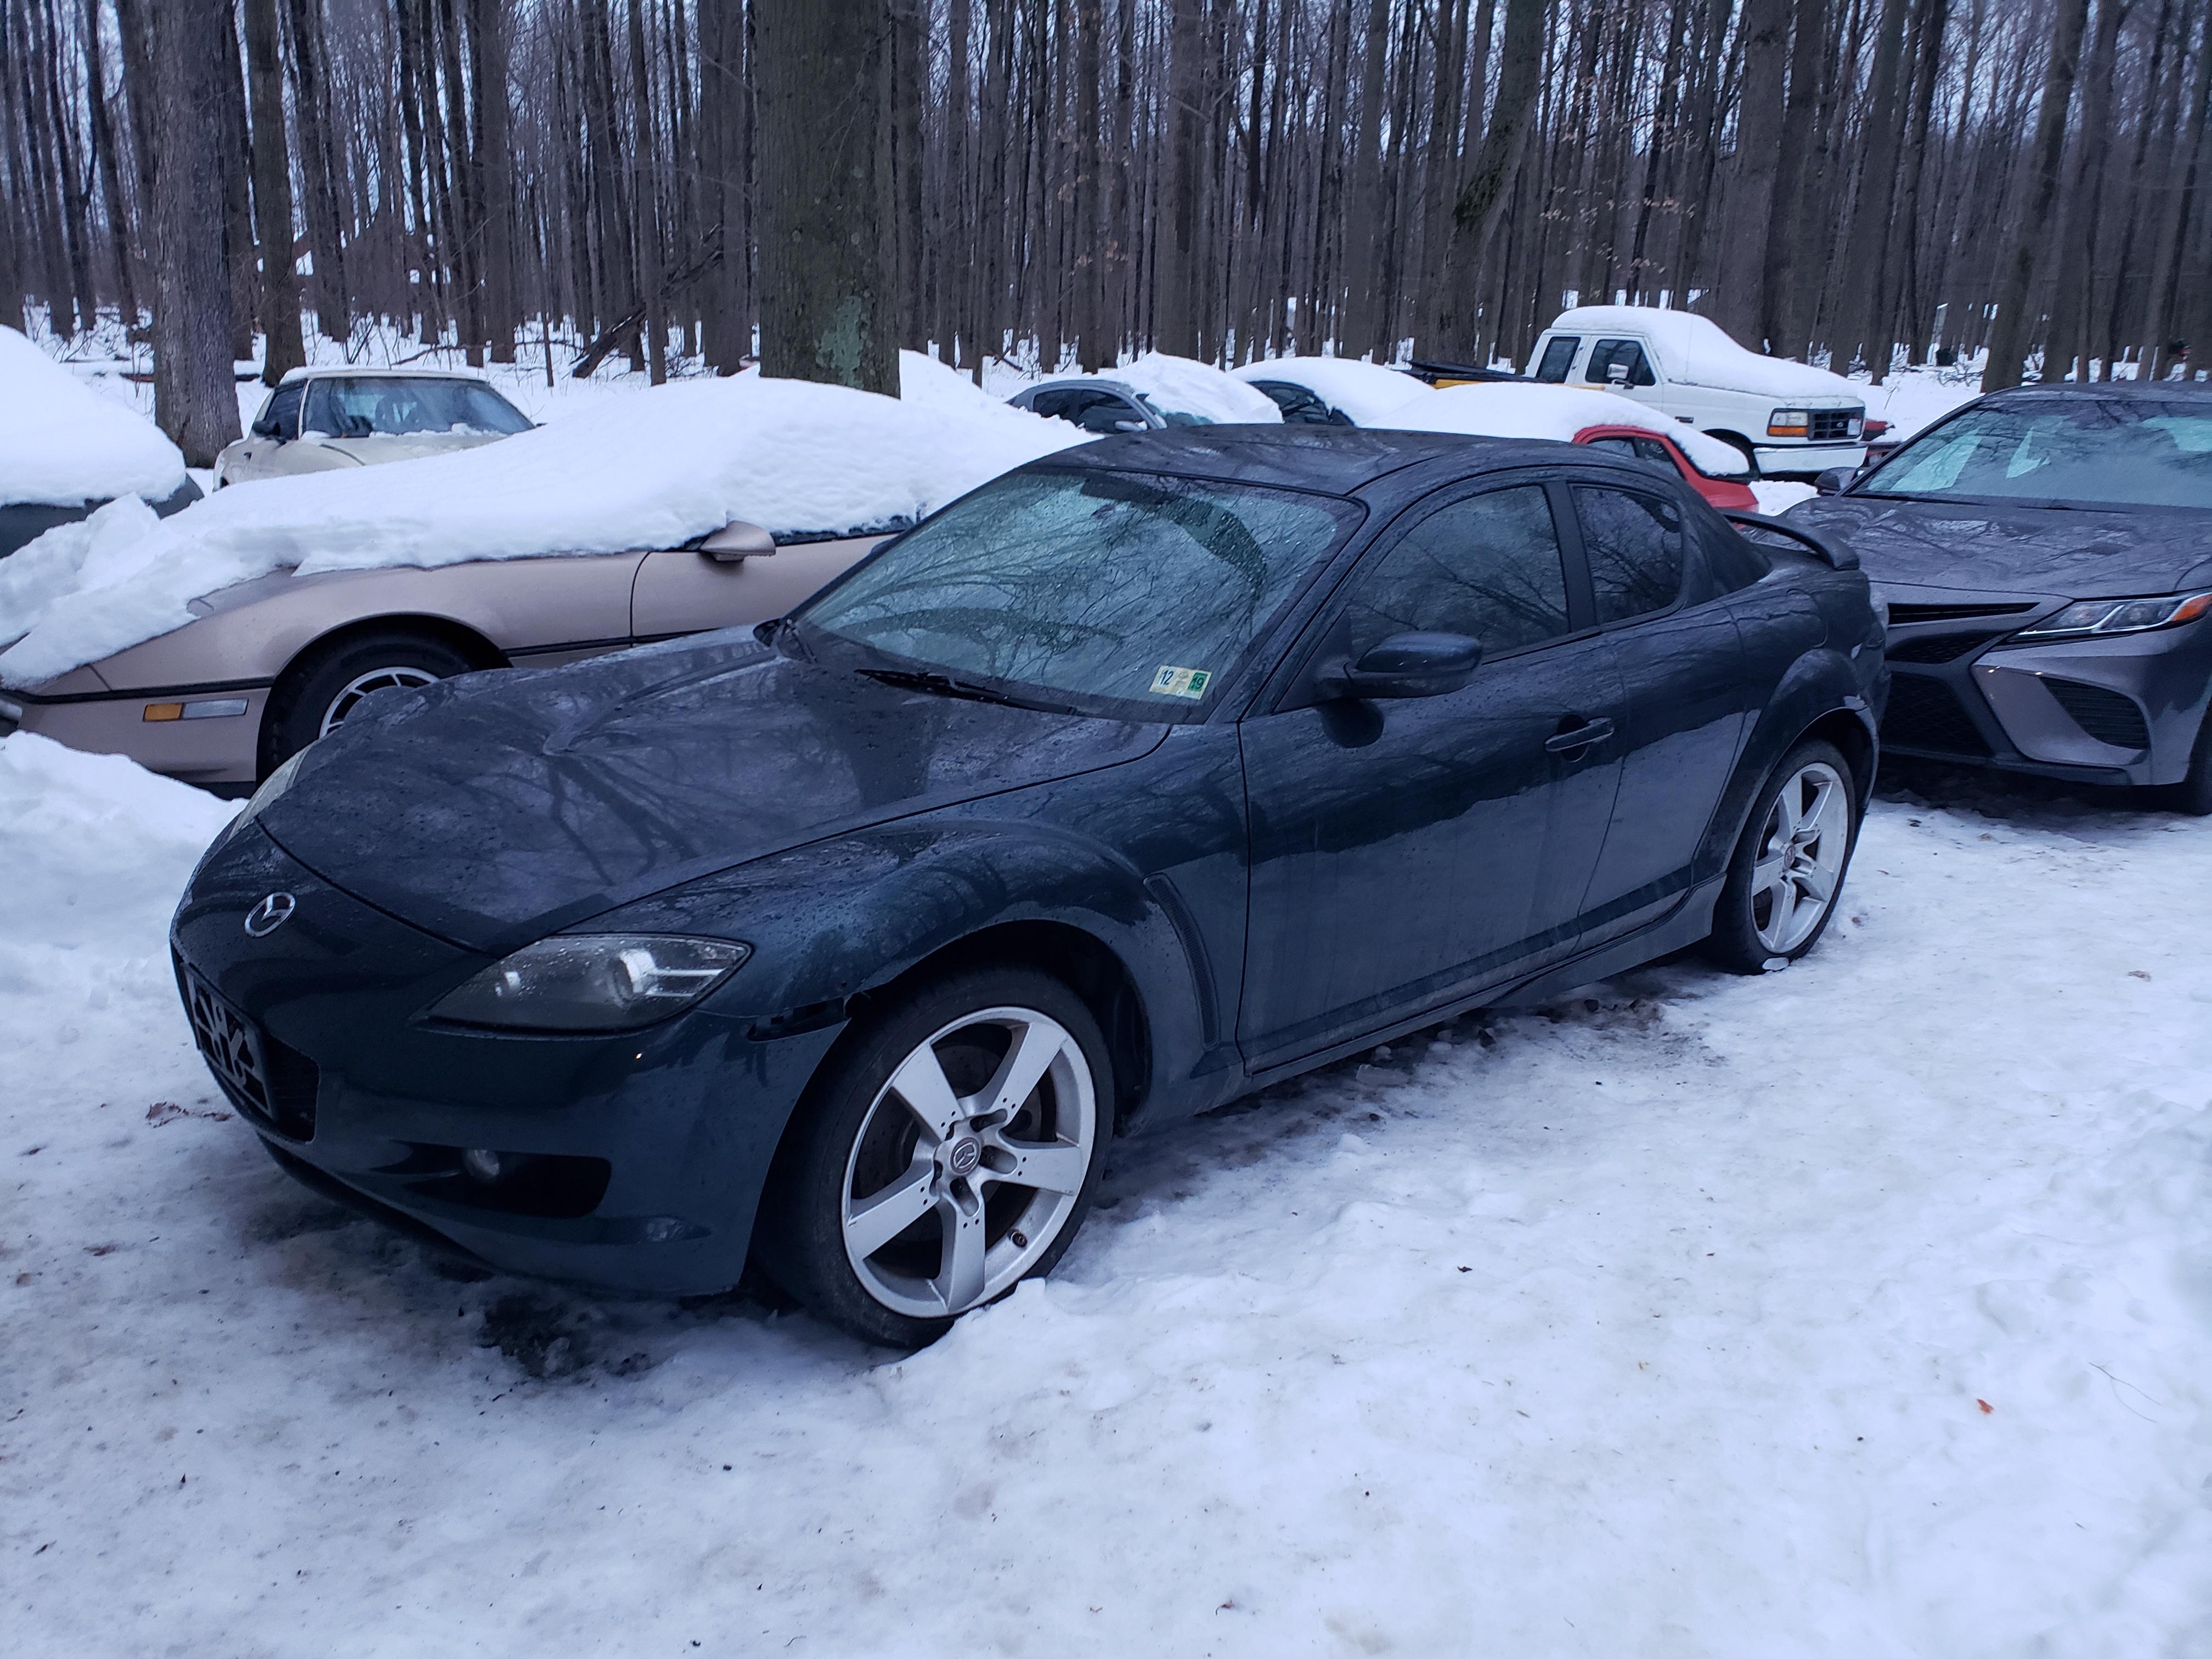
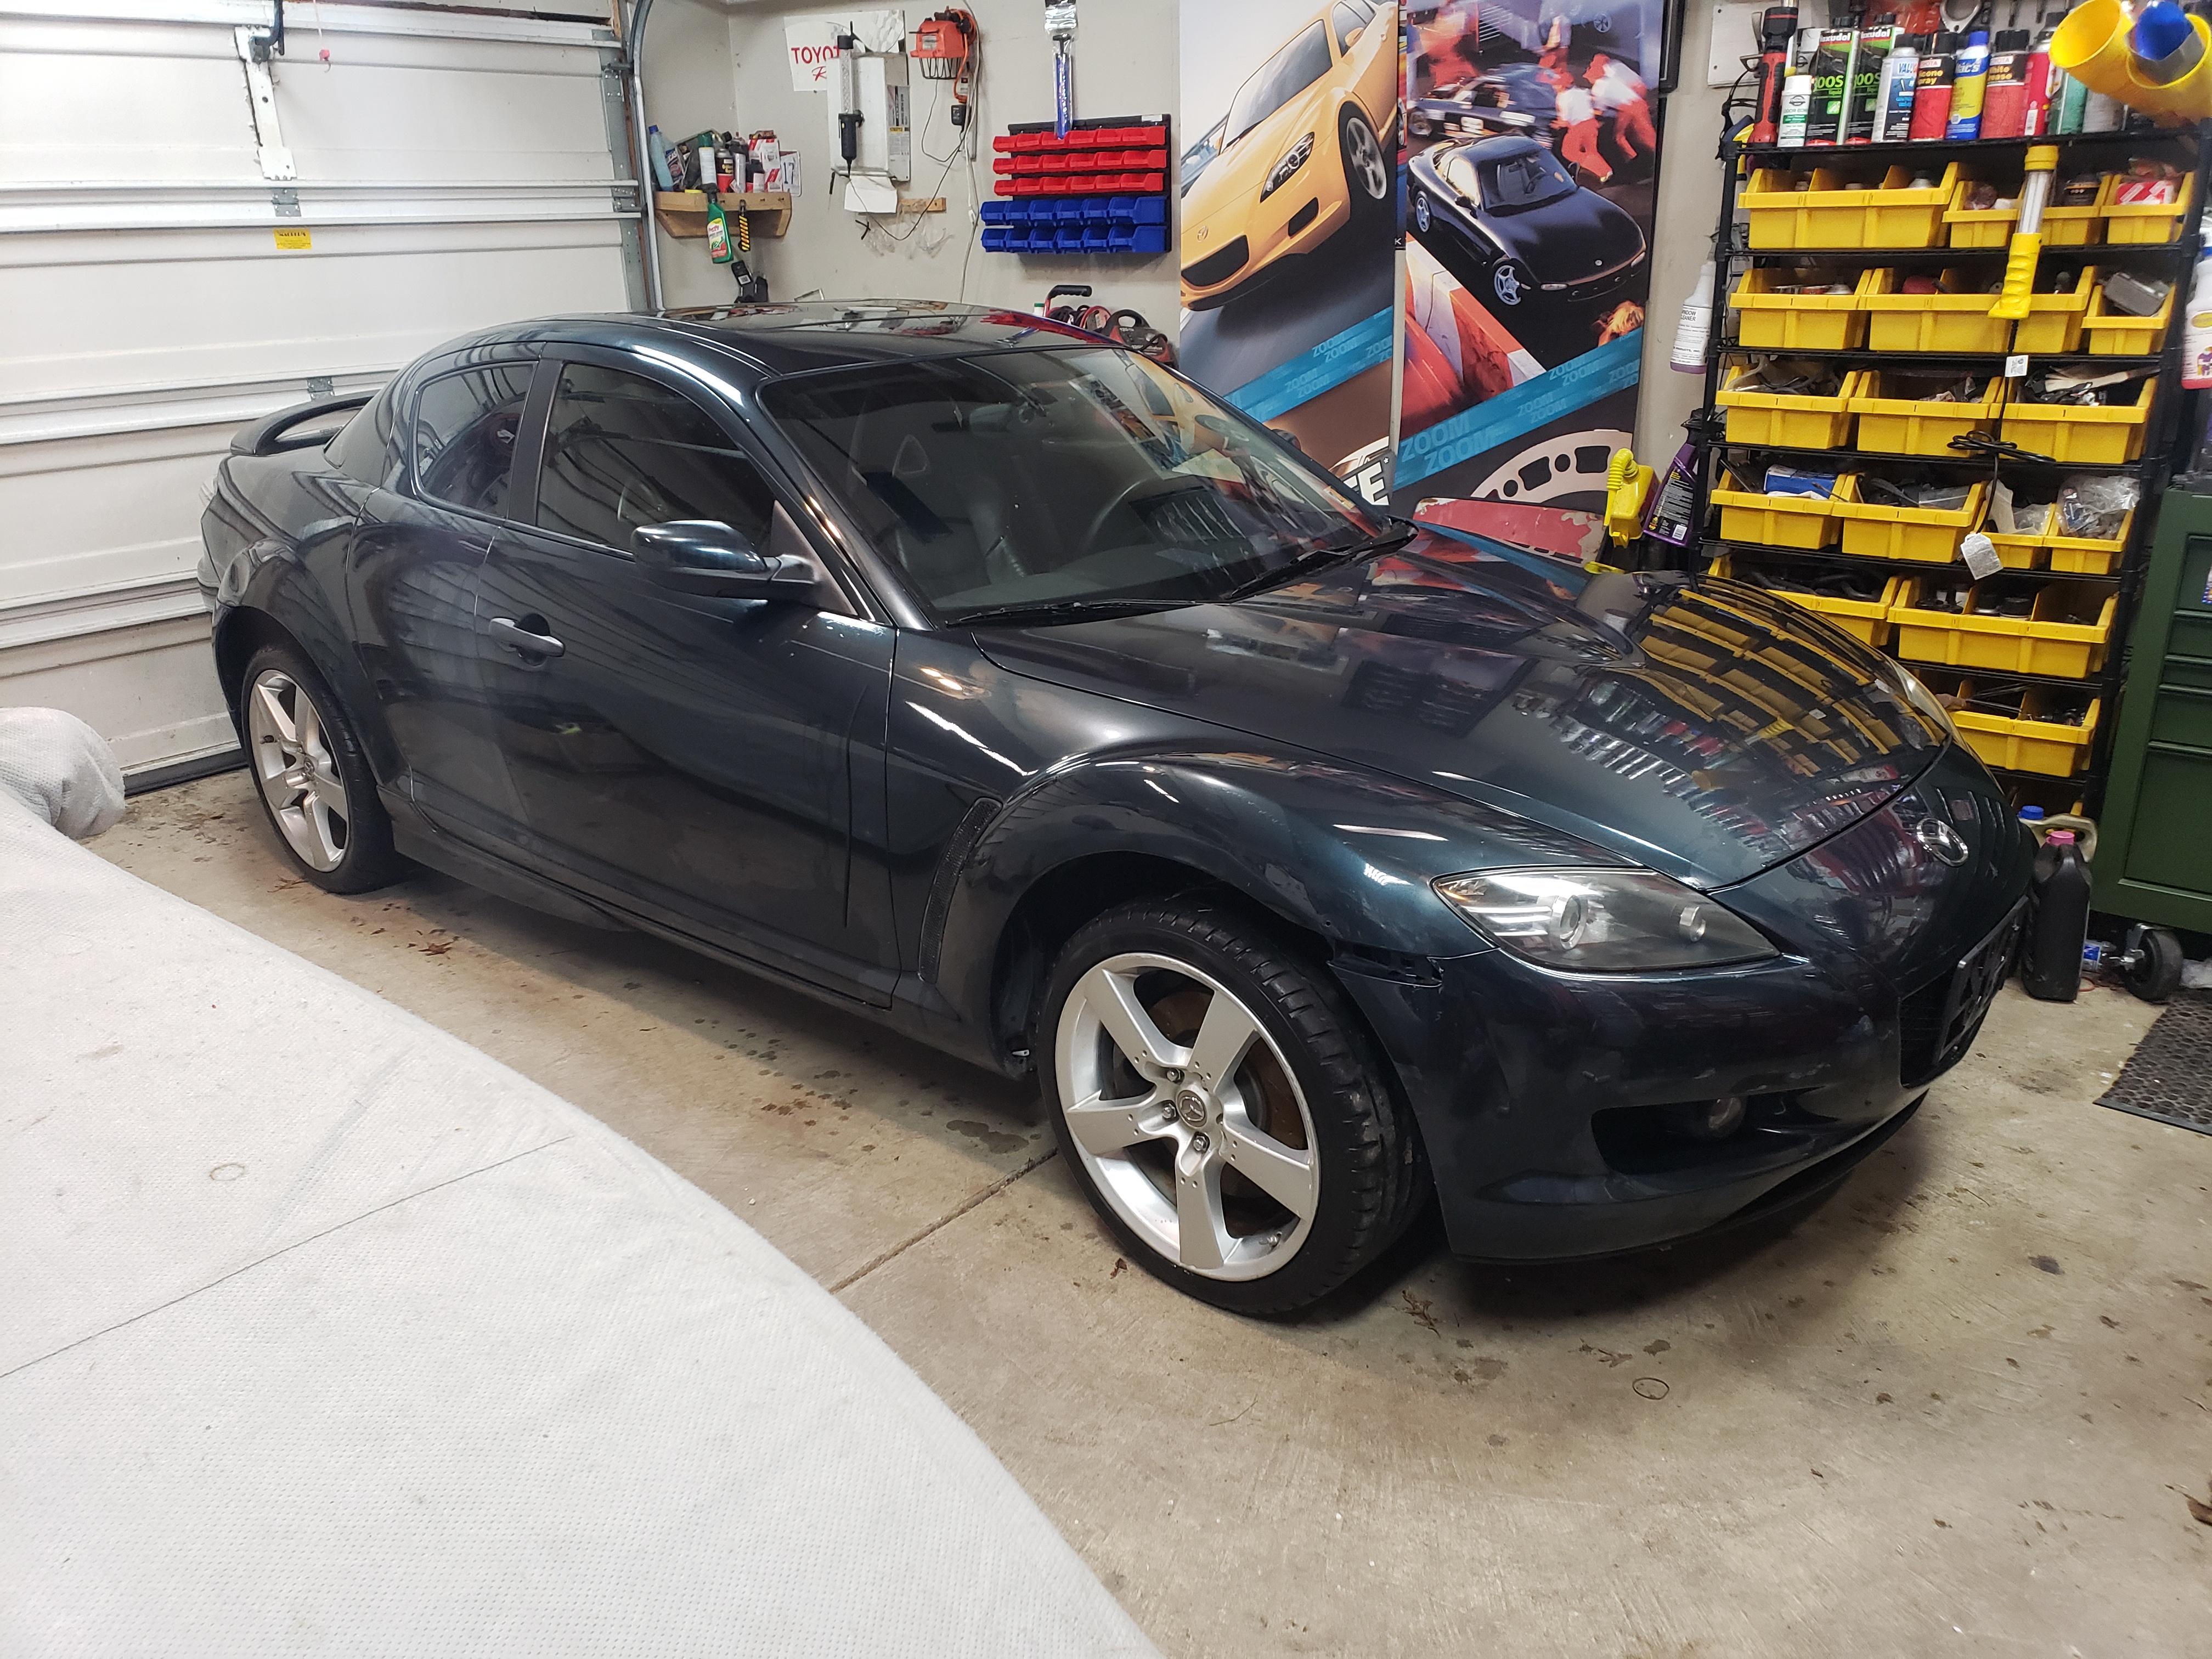
I cleared the snow off the car yesterday before ibleft for work and when I came home, what was left had melted and I was able to get its first picture at home without snow. Wanted to share:

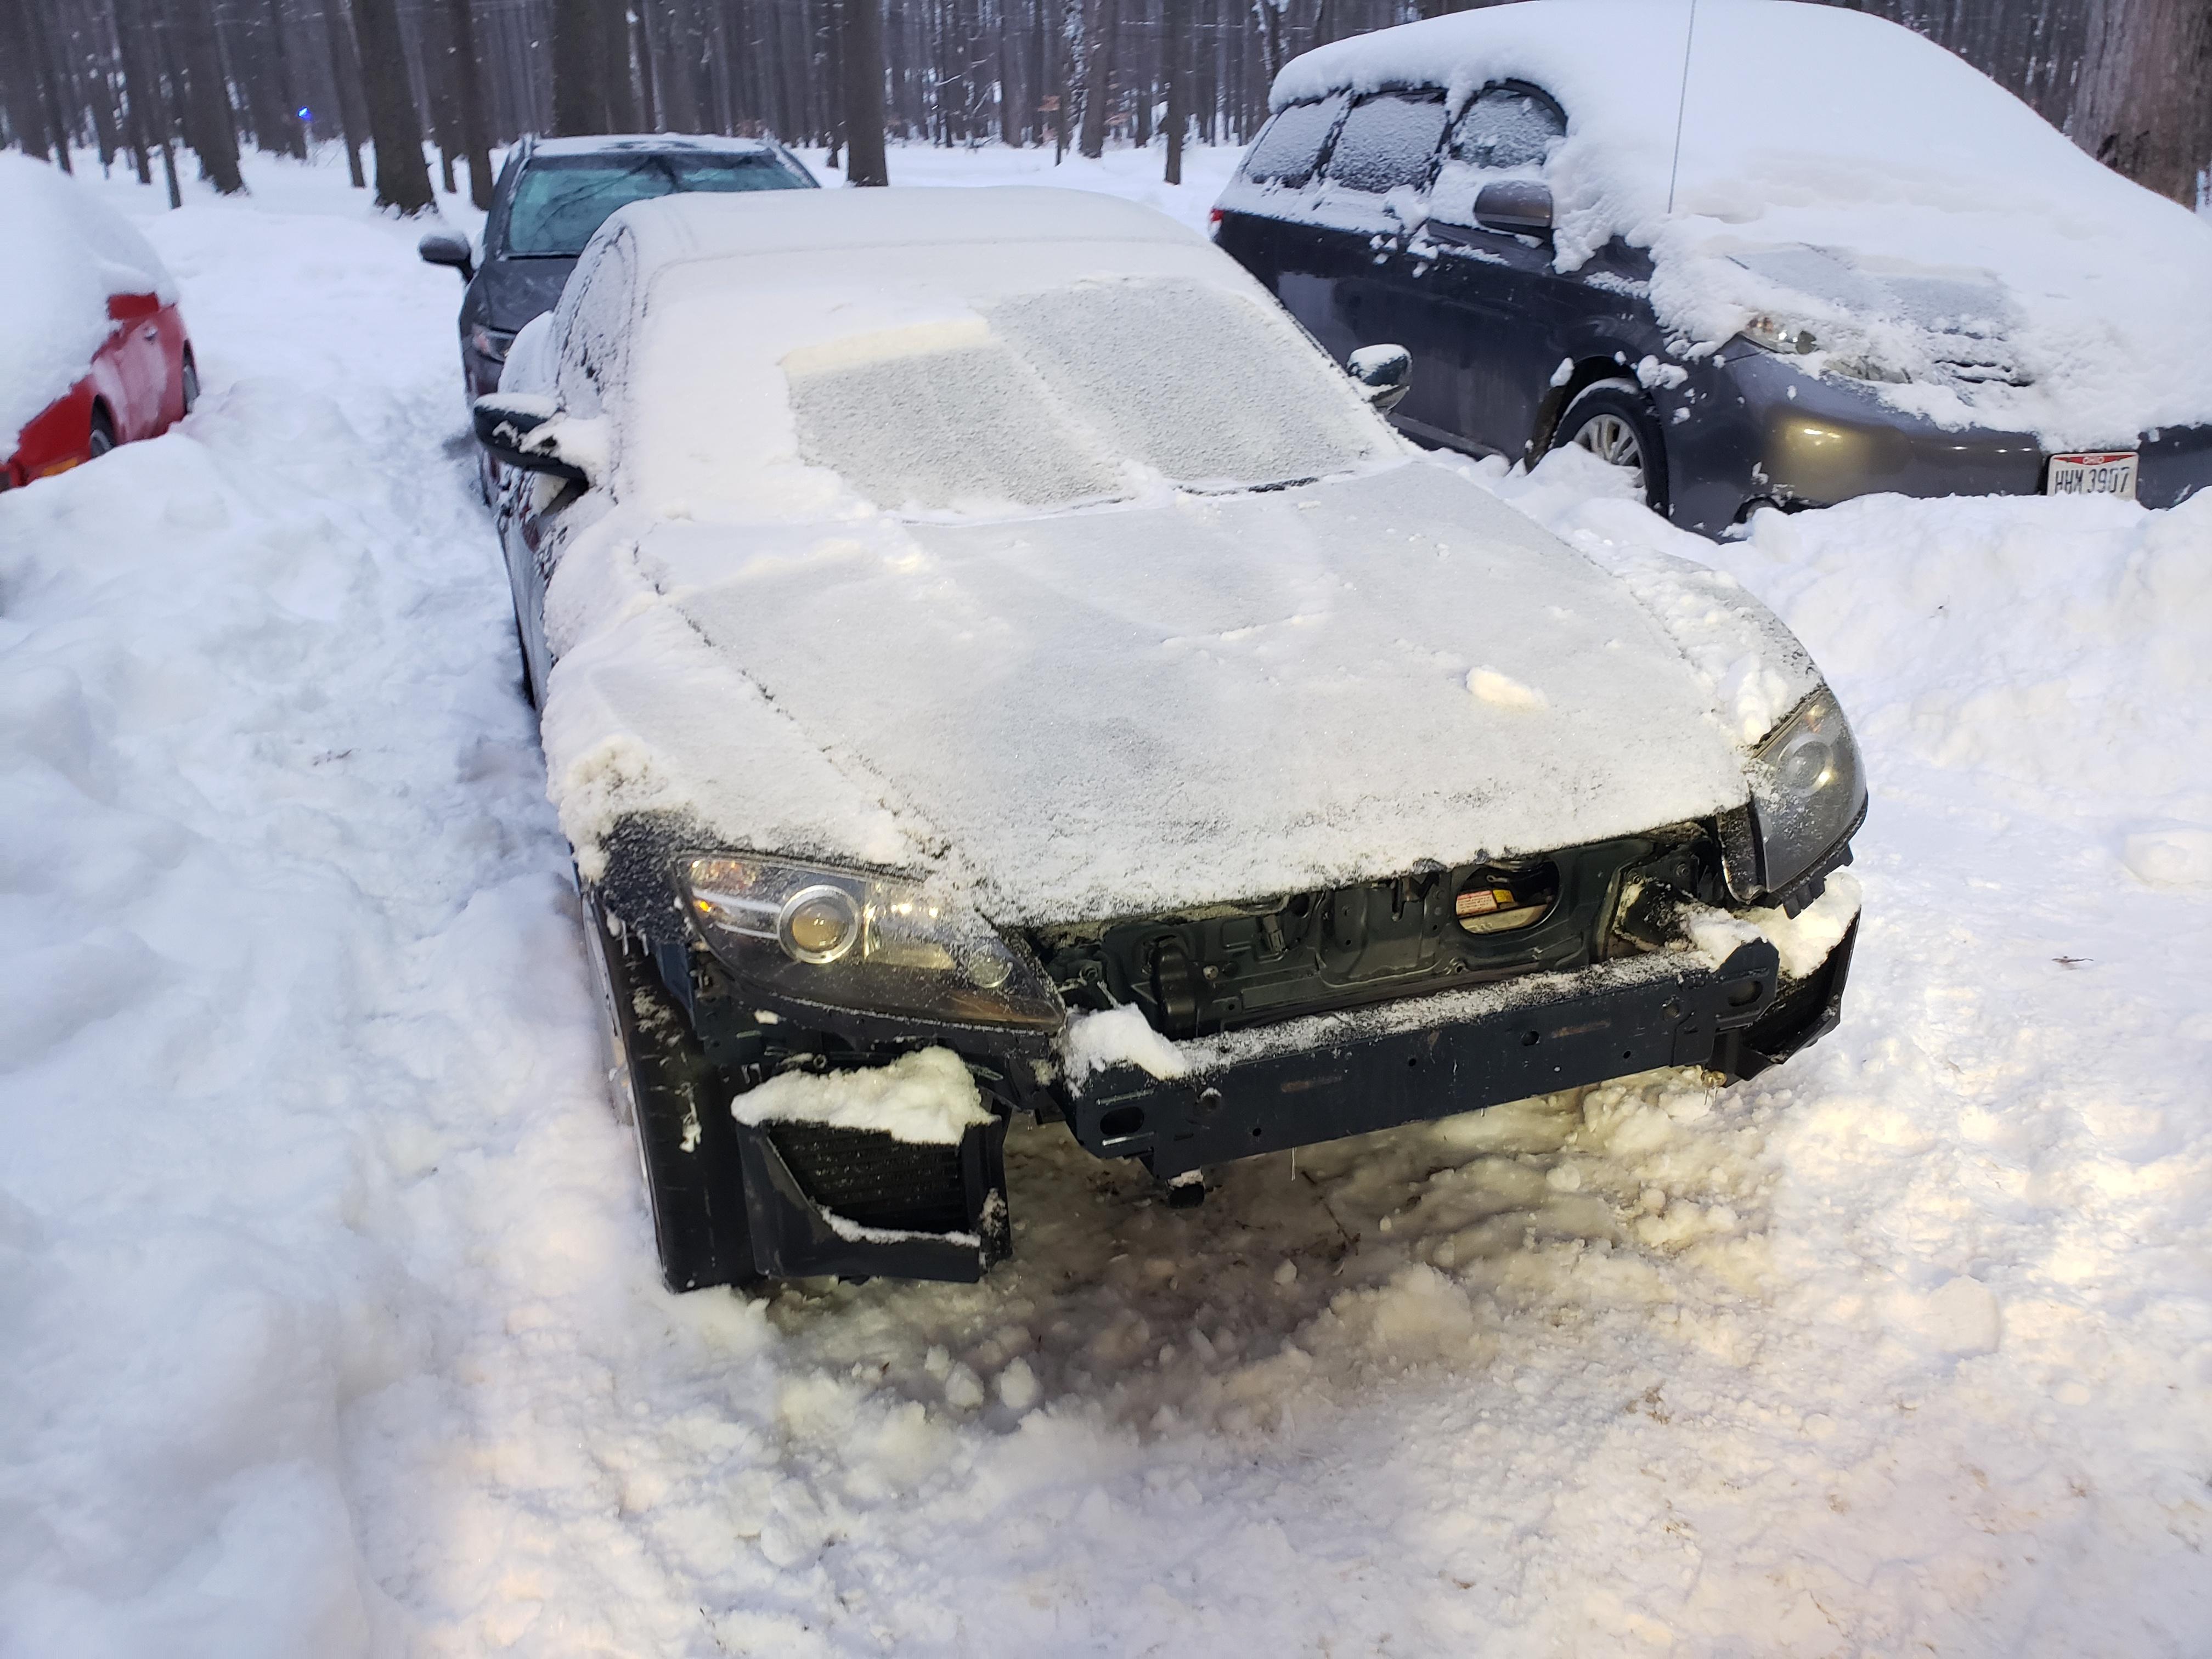
Unfortunately my other two project RX-8's are buried.. i can't wait for spring:
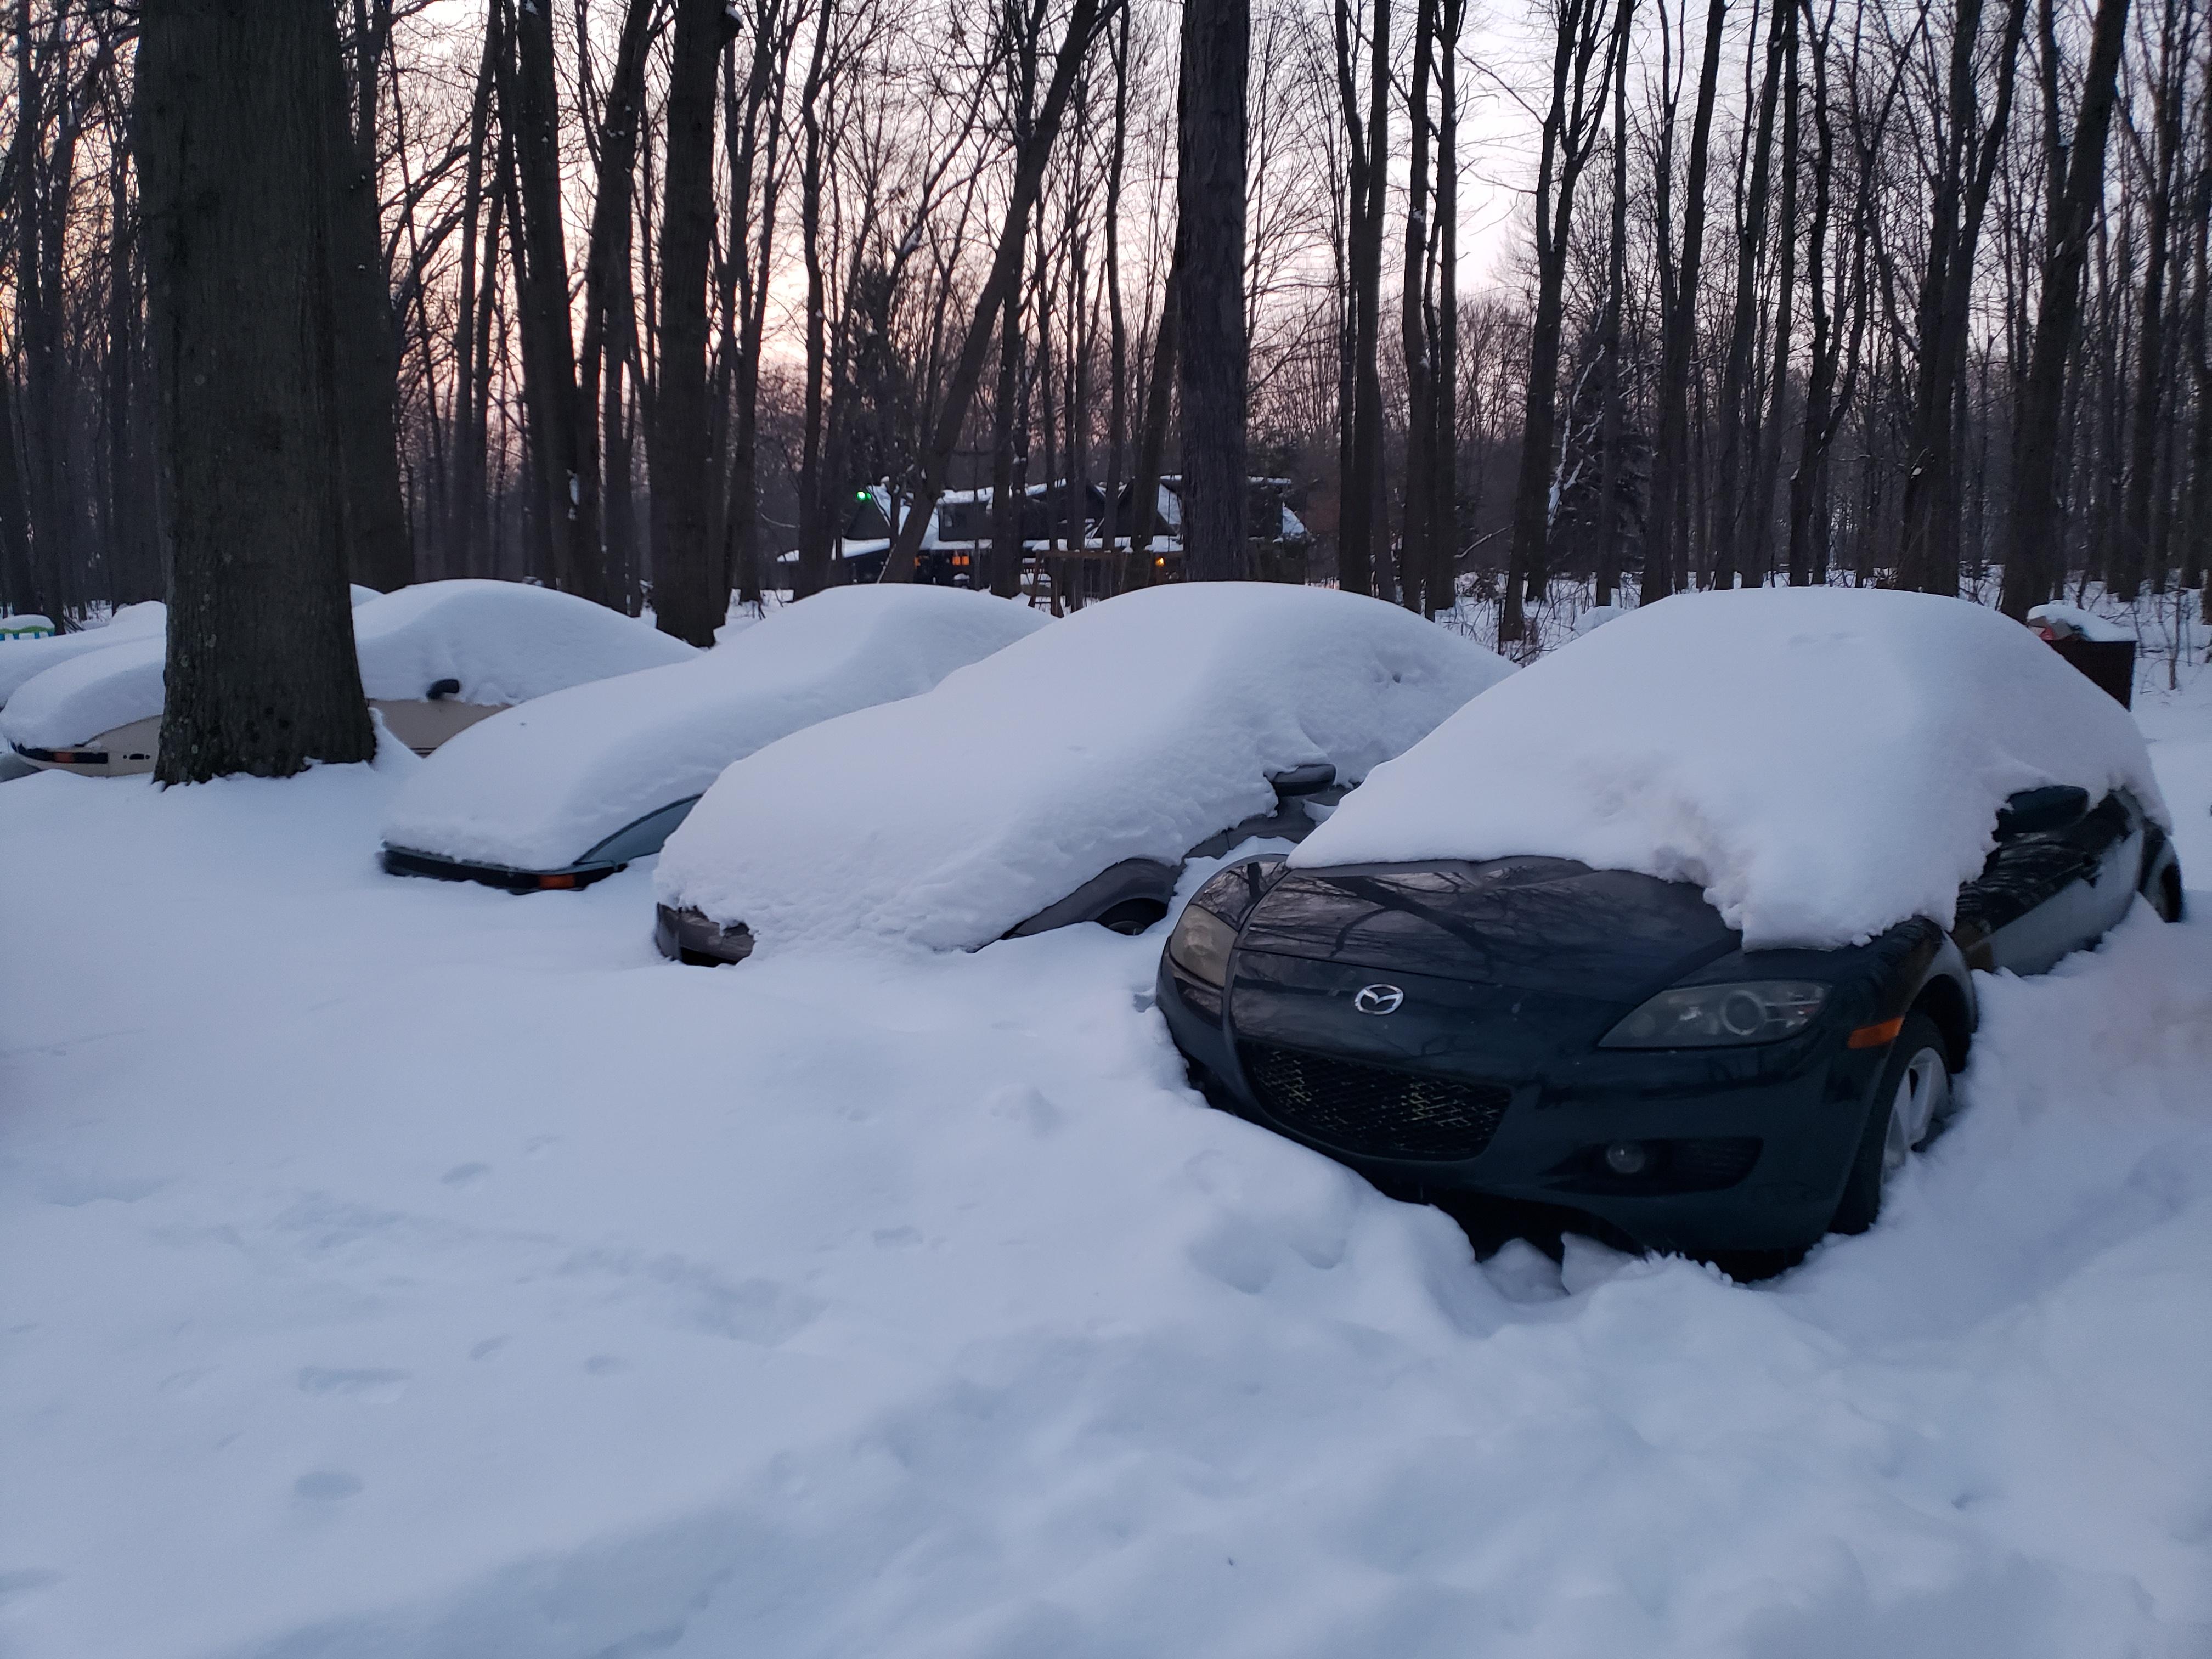
Unfortunately my other two project RX-8's are buried.. i can't wait for spring:
02-20-2021, 09:28 PM
#5
RX-Heaven
Thread Starter
iTrader: (6)
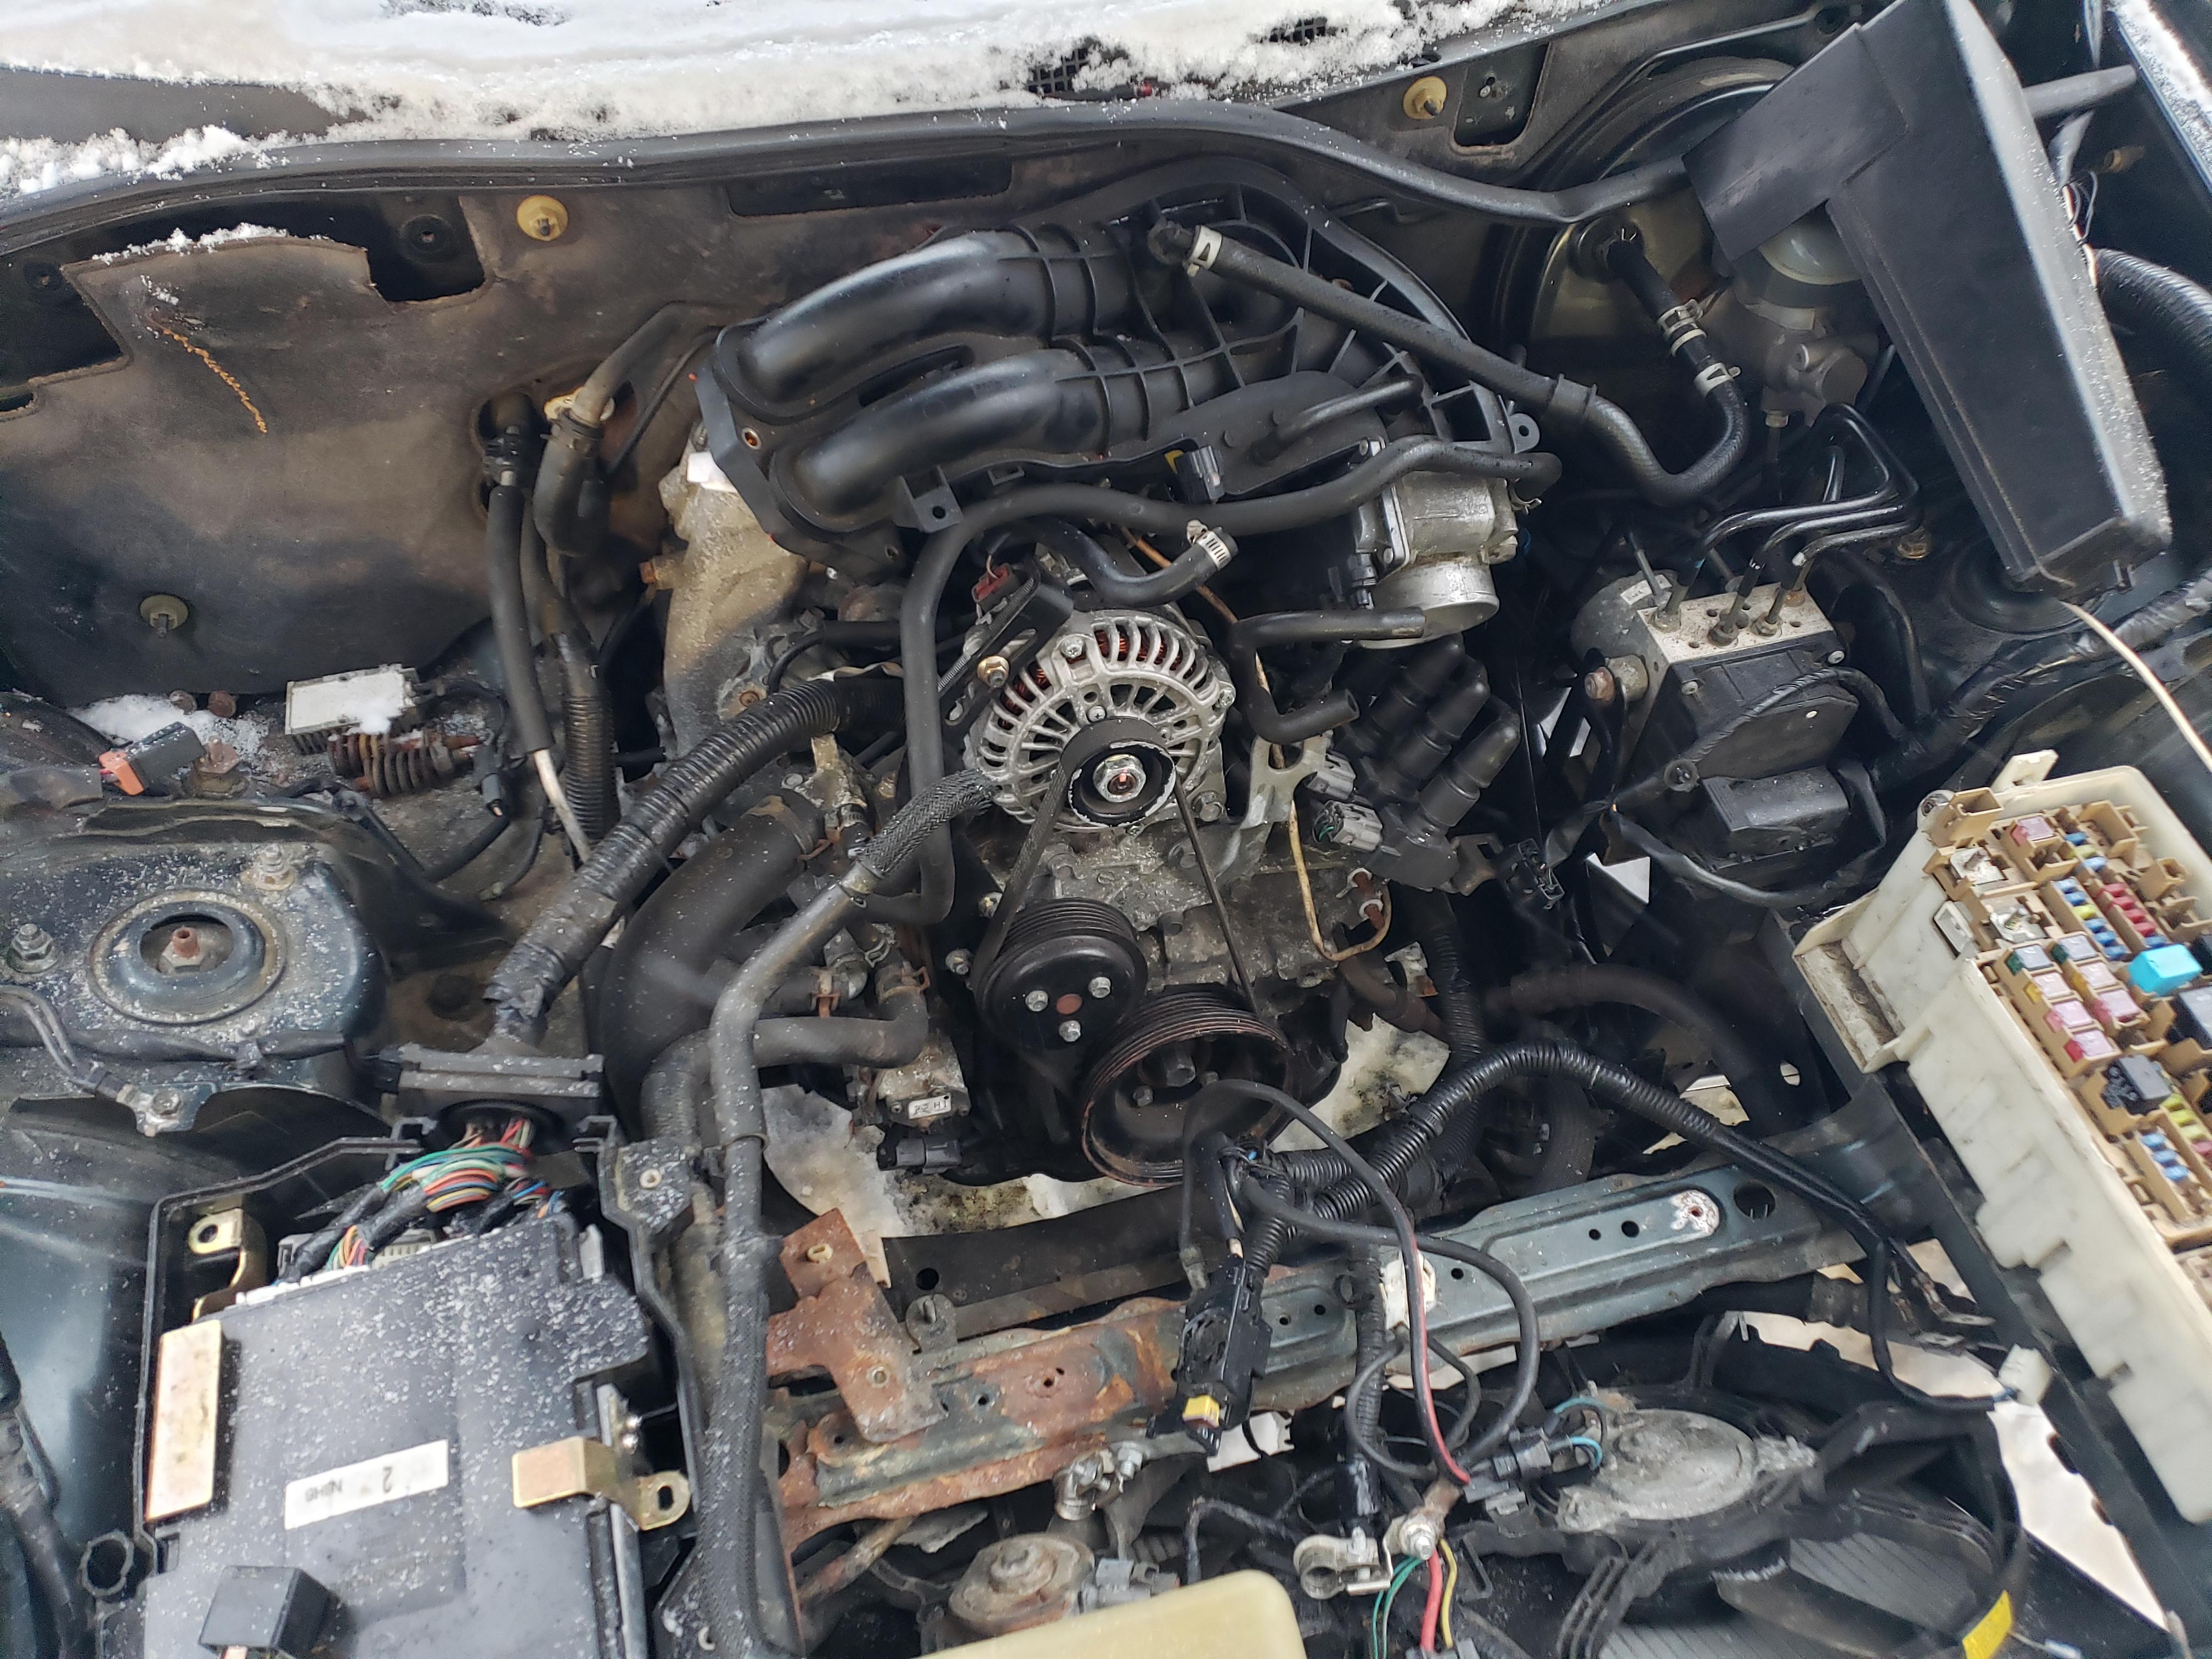
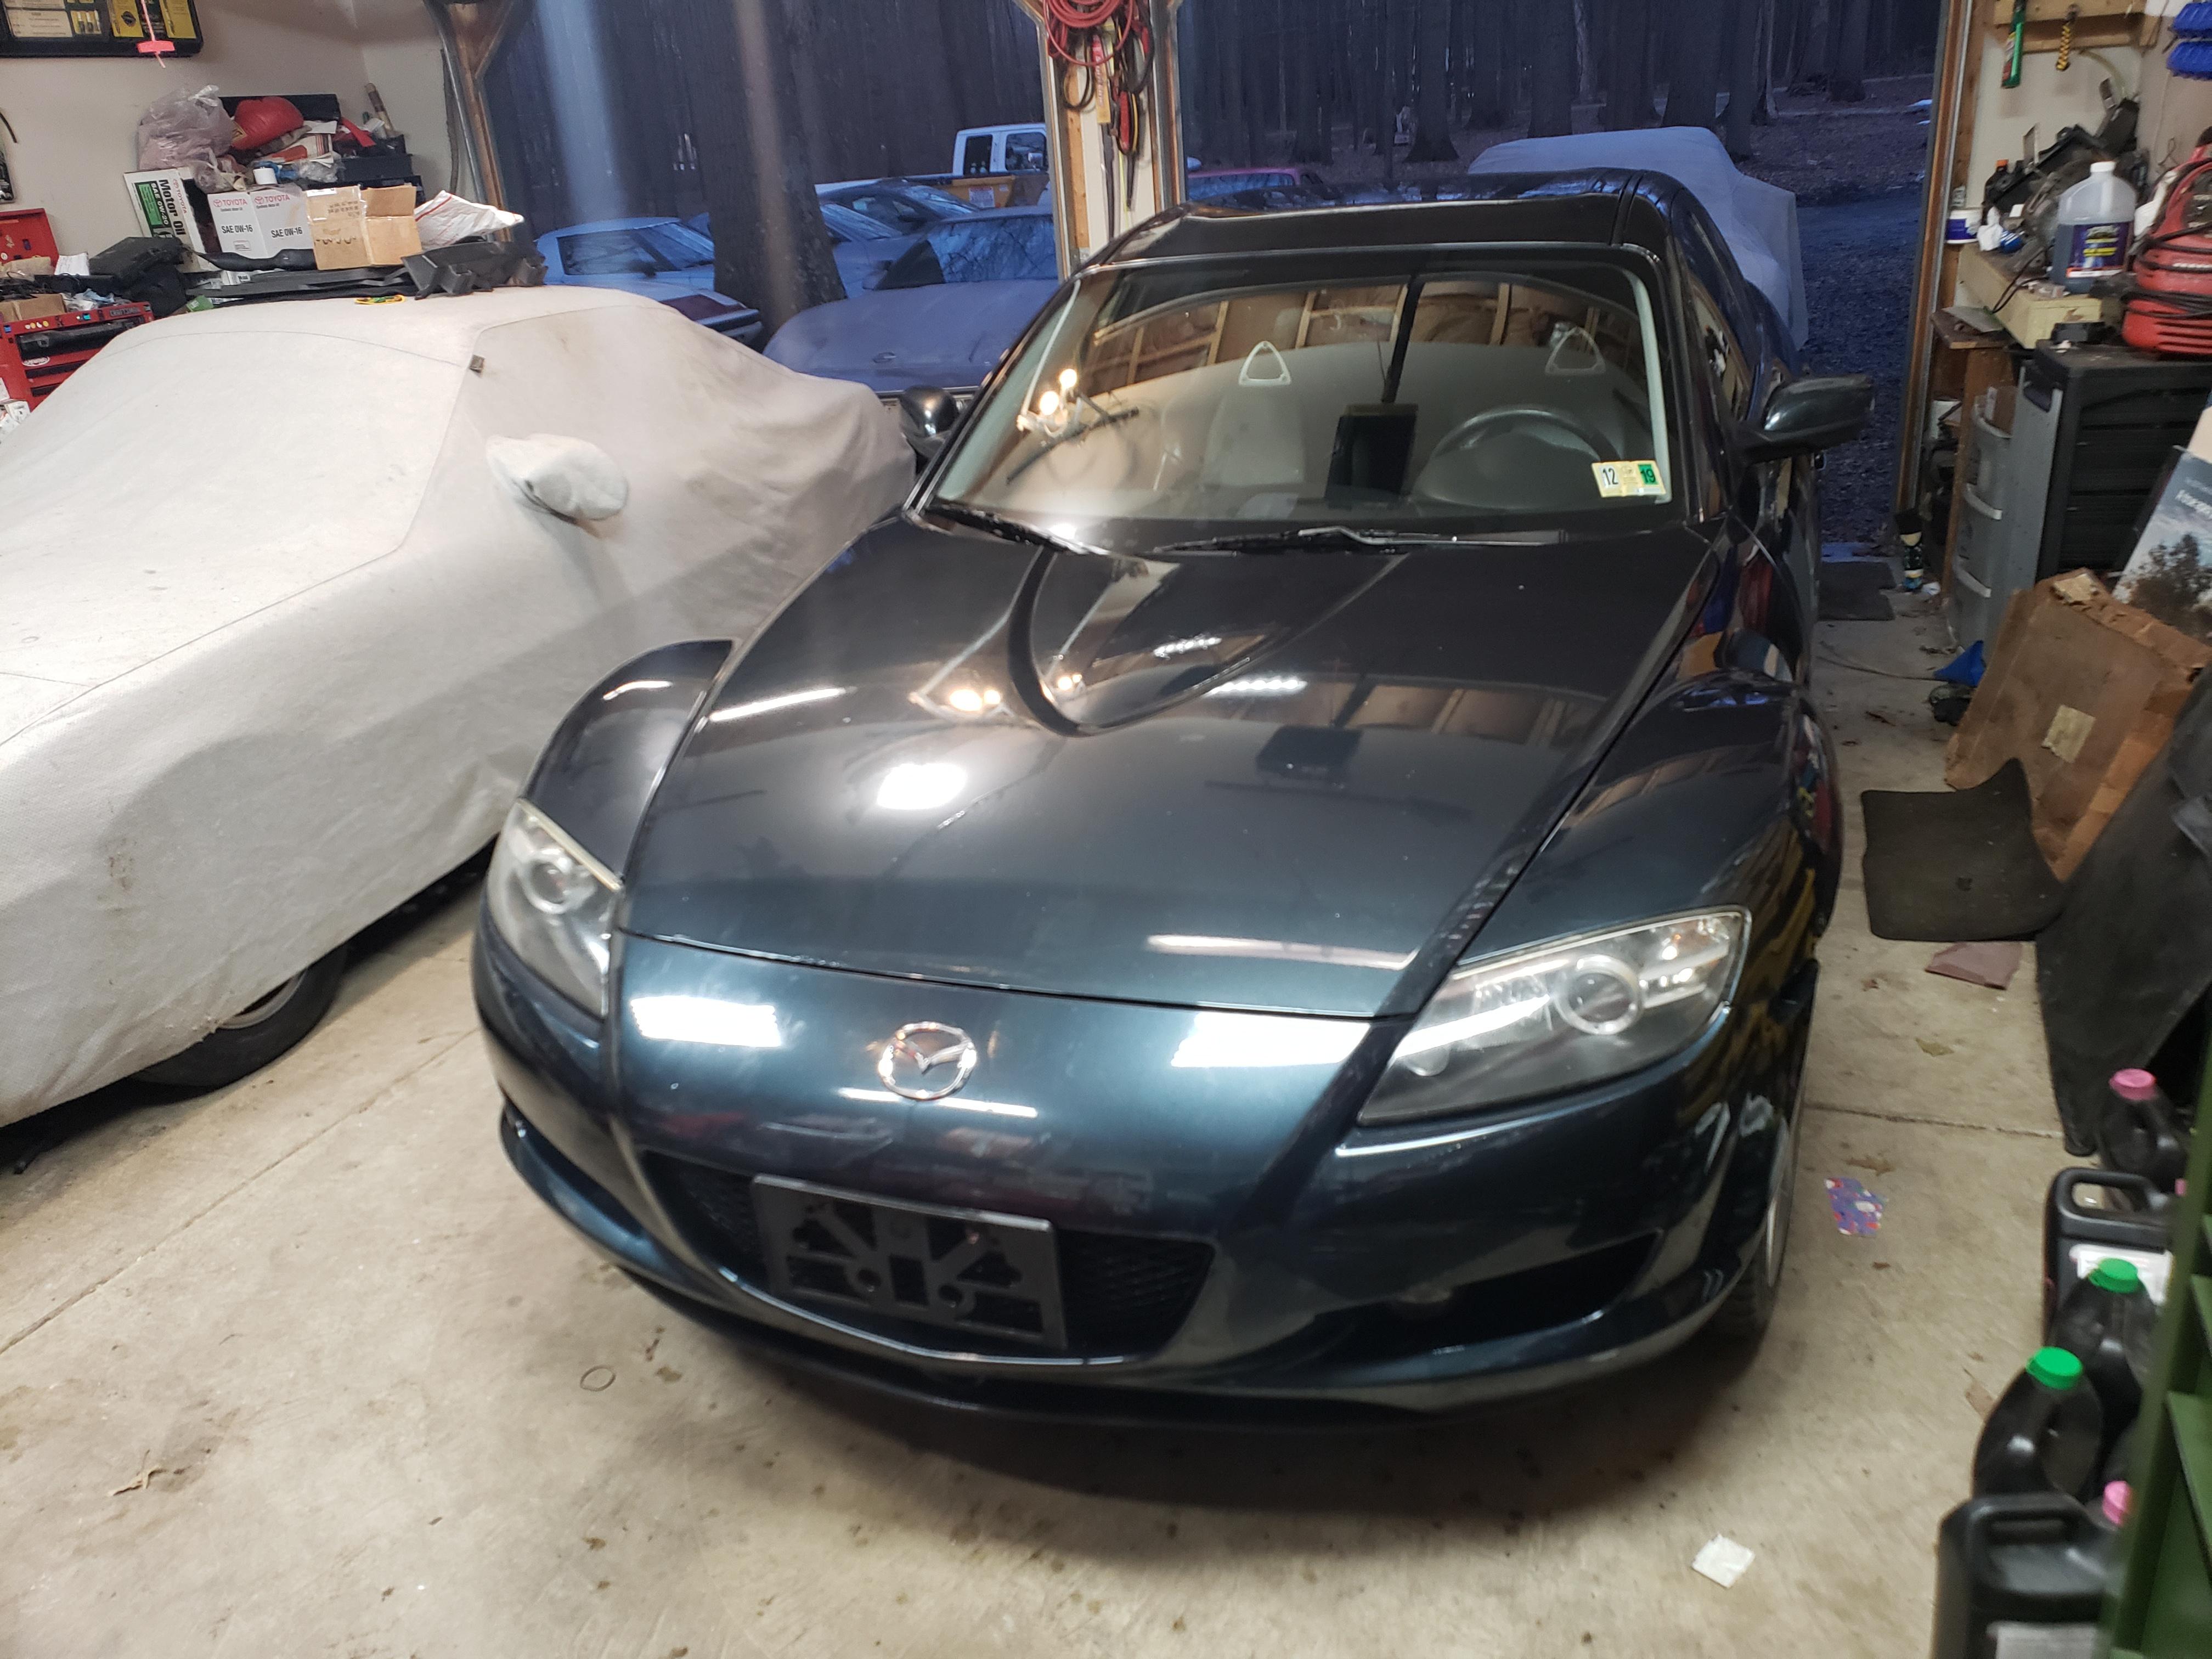
Tonight I managed to install the front bumper and diagnose some wiring that was cut and spliced. I also started getting the interior put back together. Overall a good start:
02-21-2021, 03:52 PM
#6
Administrator
iTrader: (7)

good start indeed
The following users liked this post:
mazdaverx7 (02-21-2021)
02-25-2021, 05:54 AM
#7
RX-Heaven
Thread Starter
iTrader: (6)
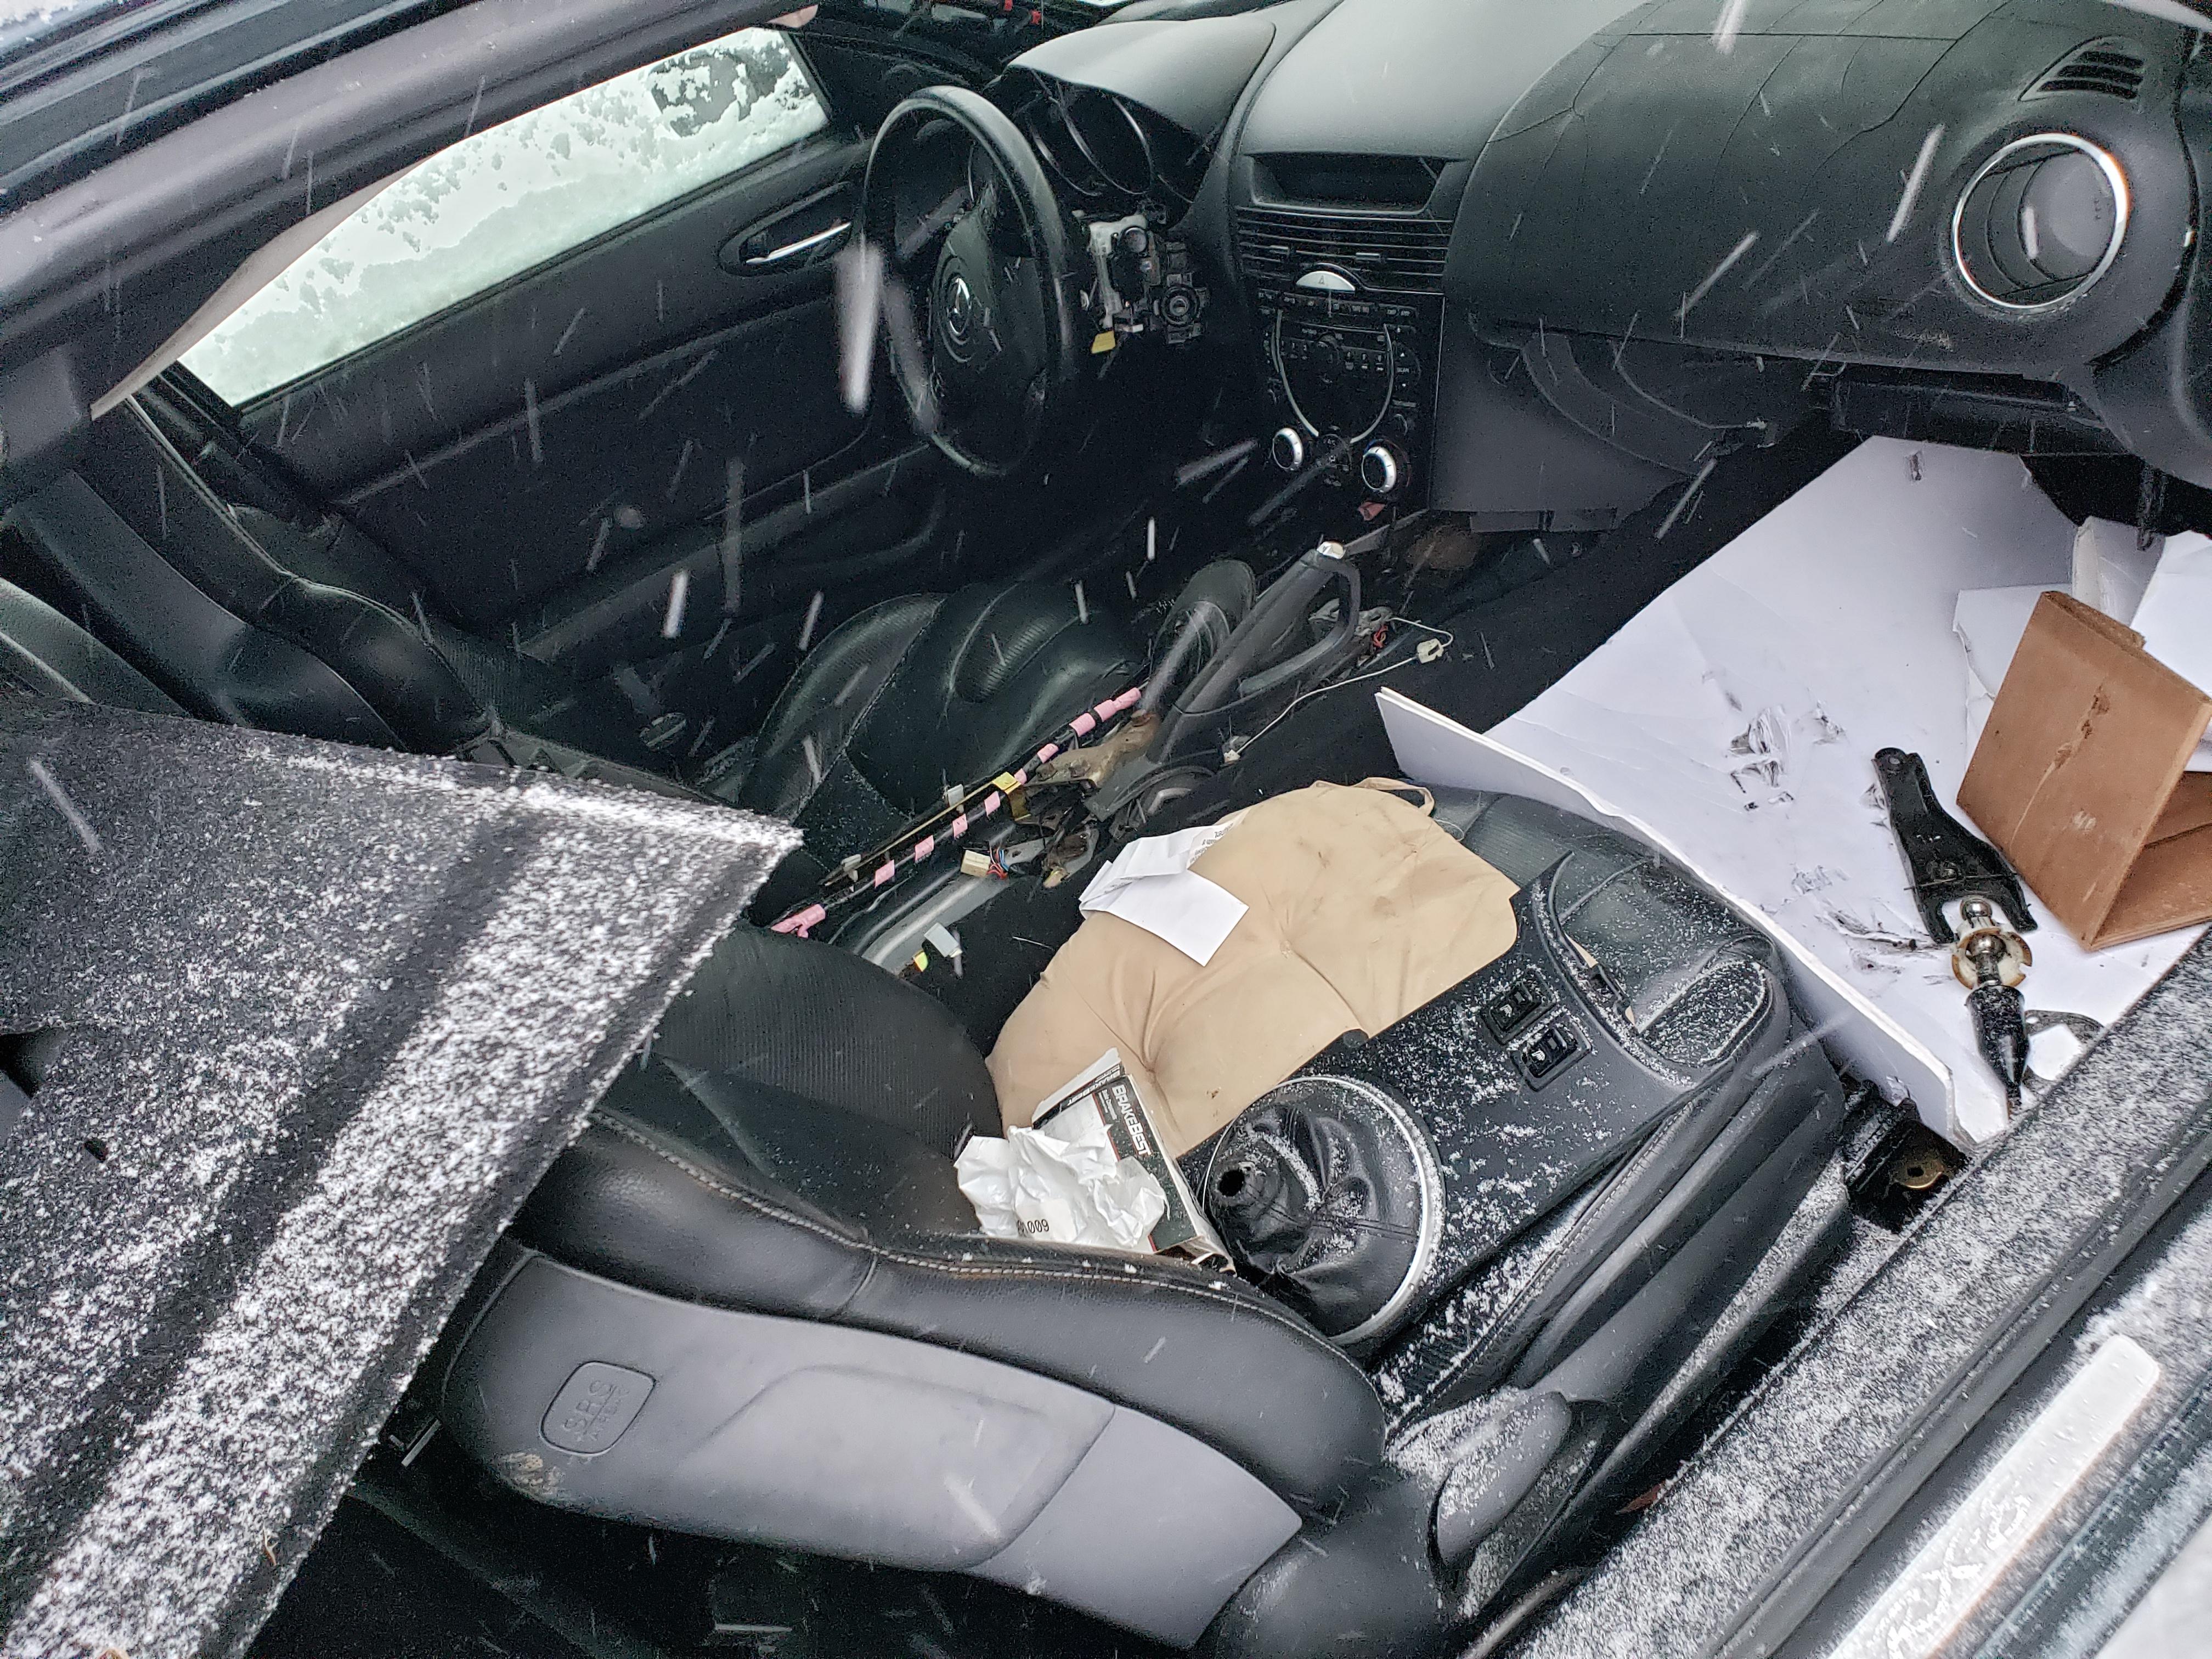
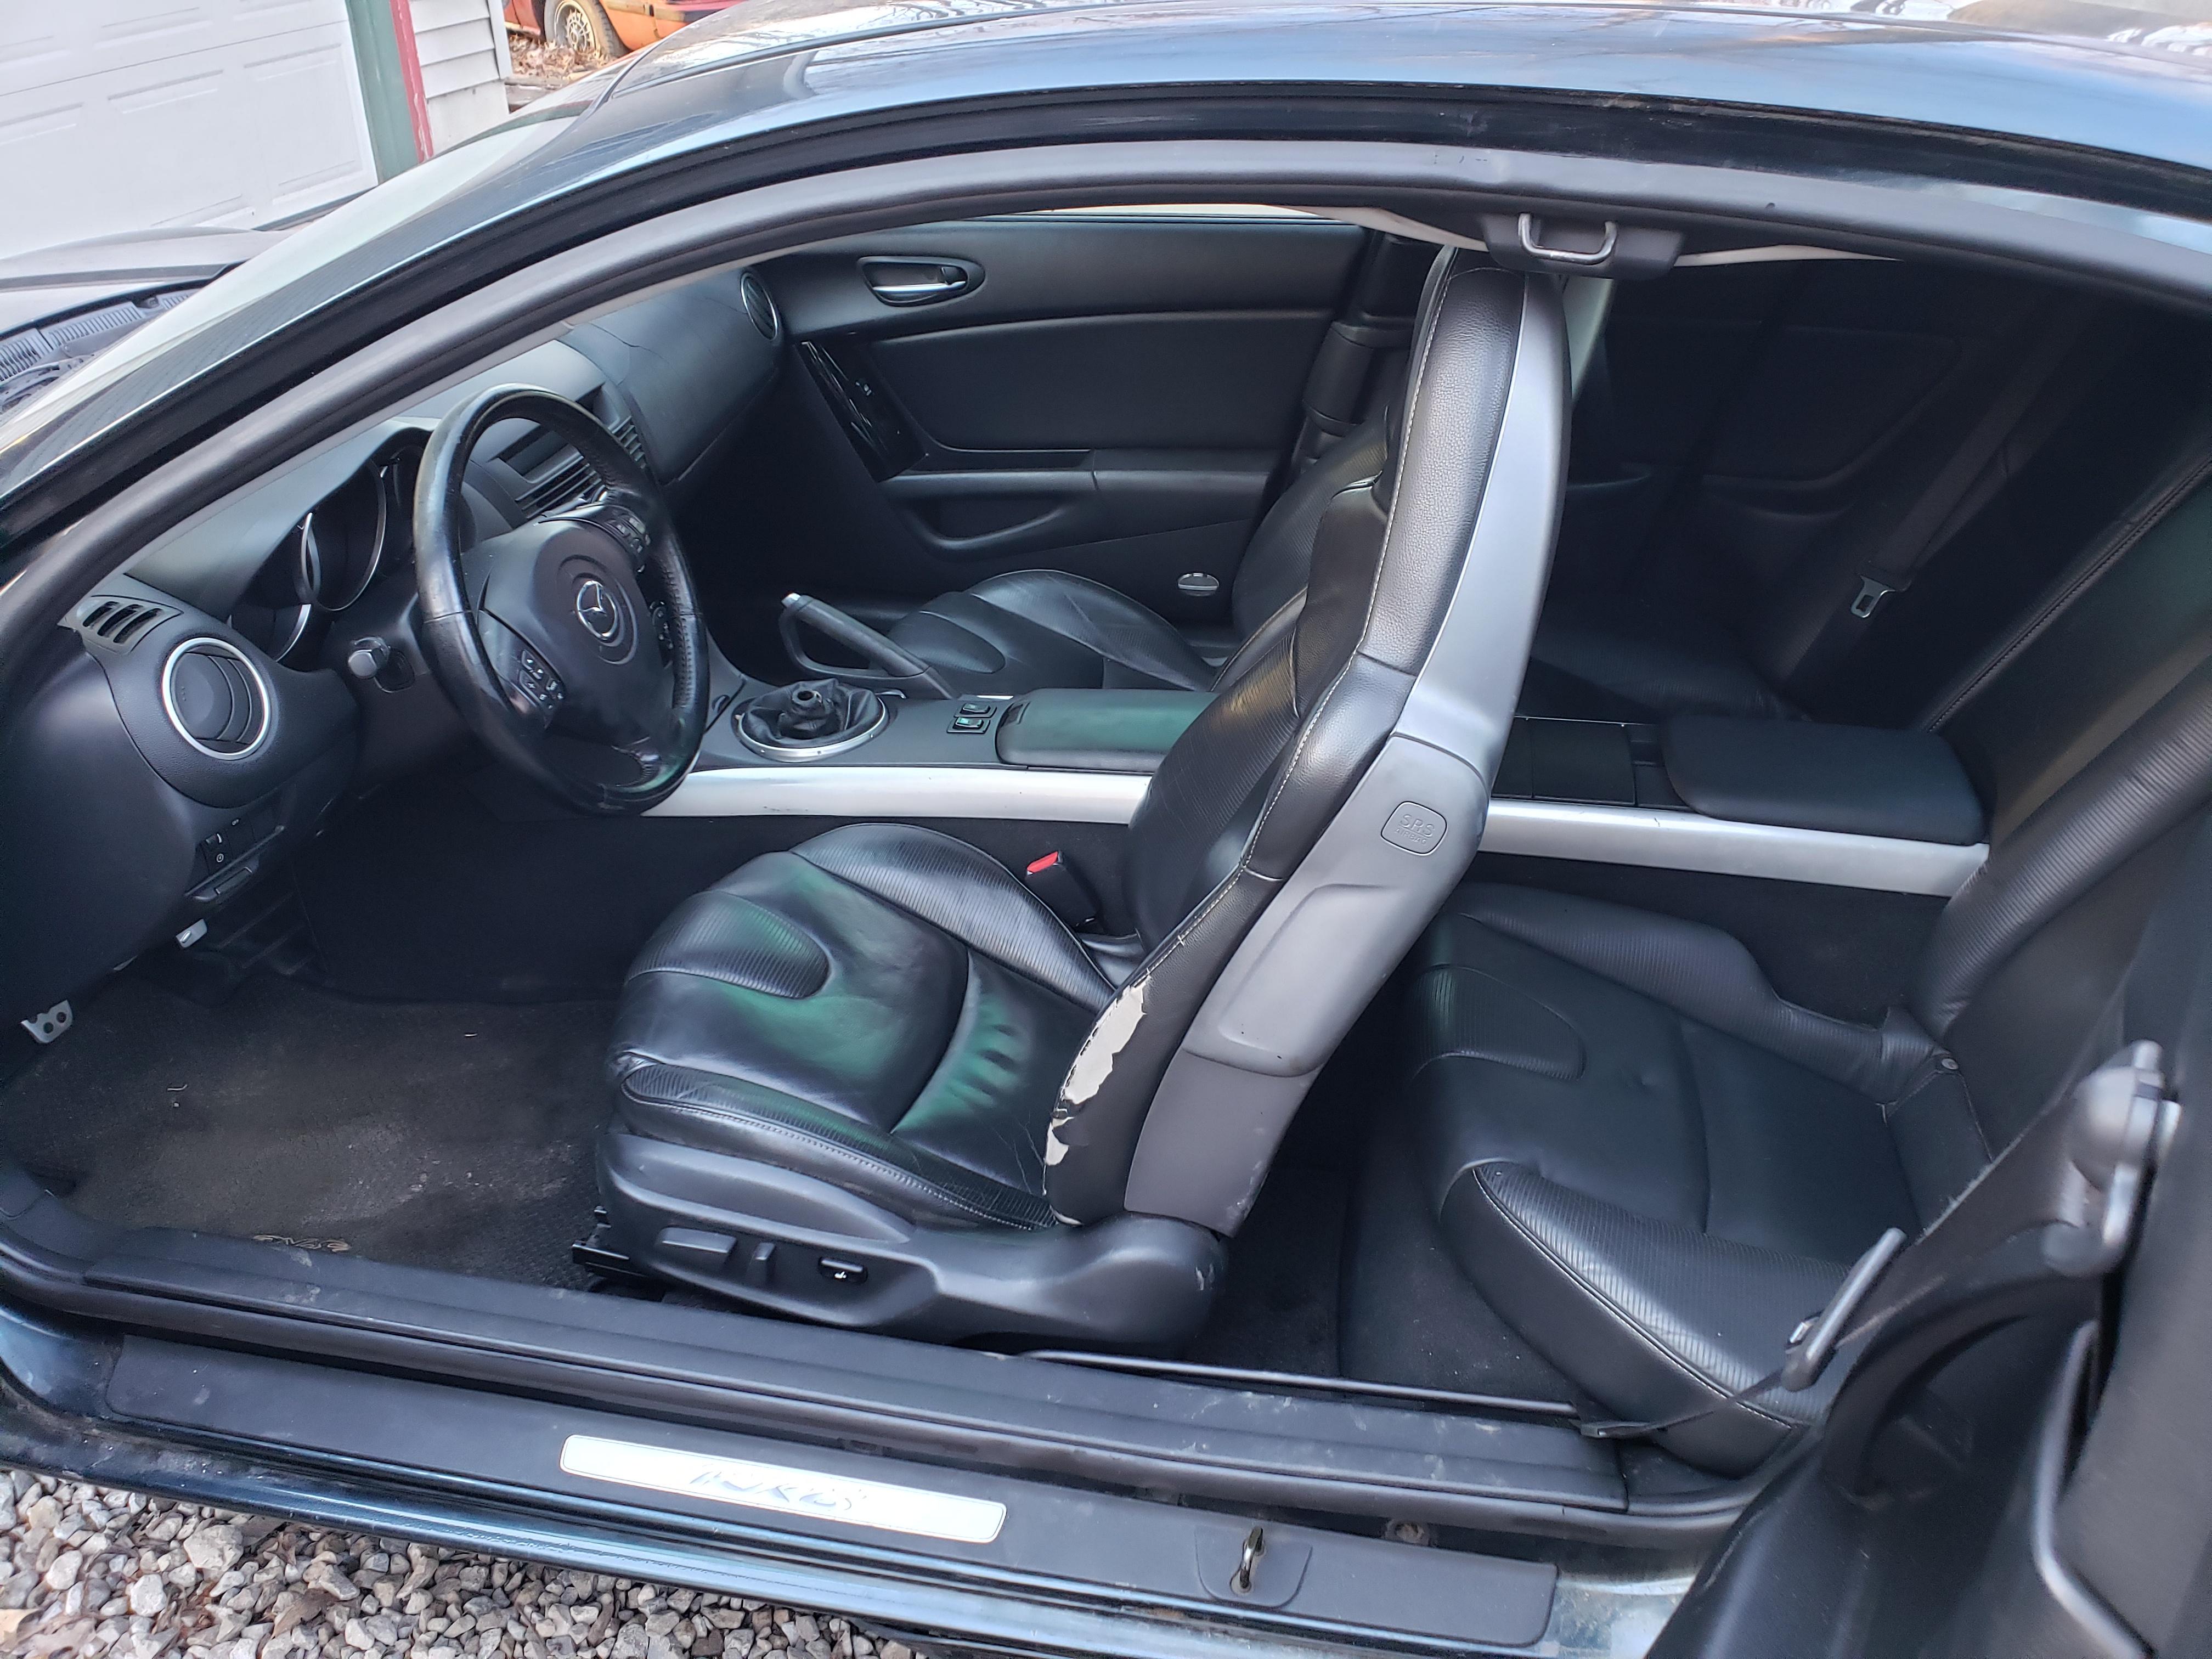
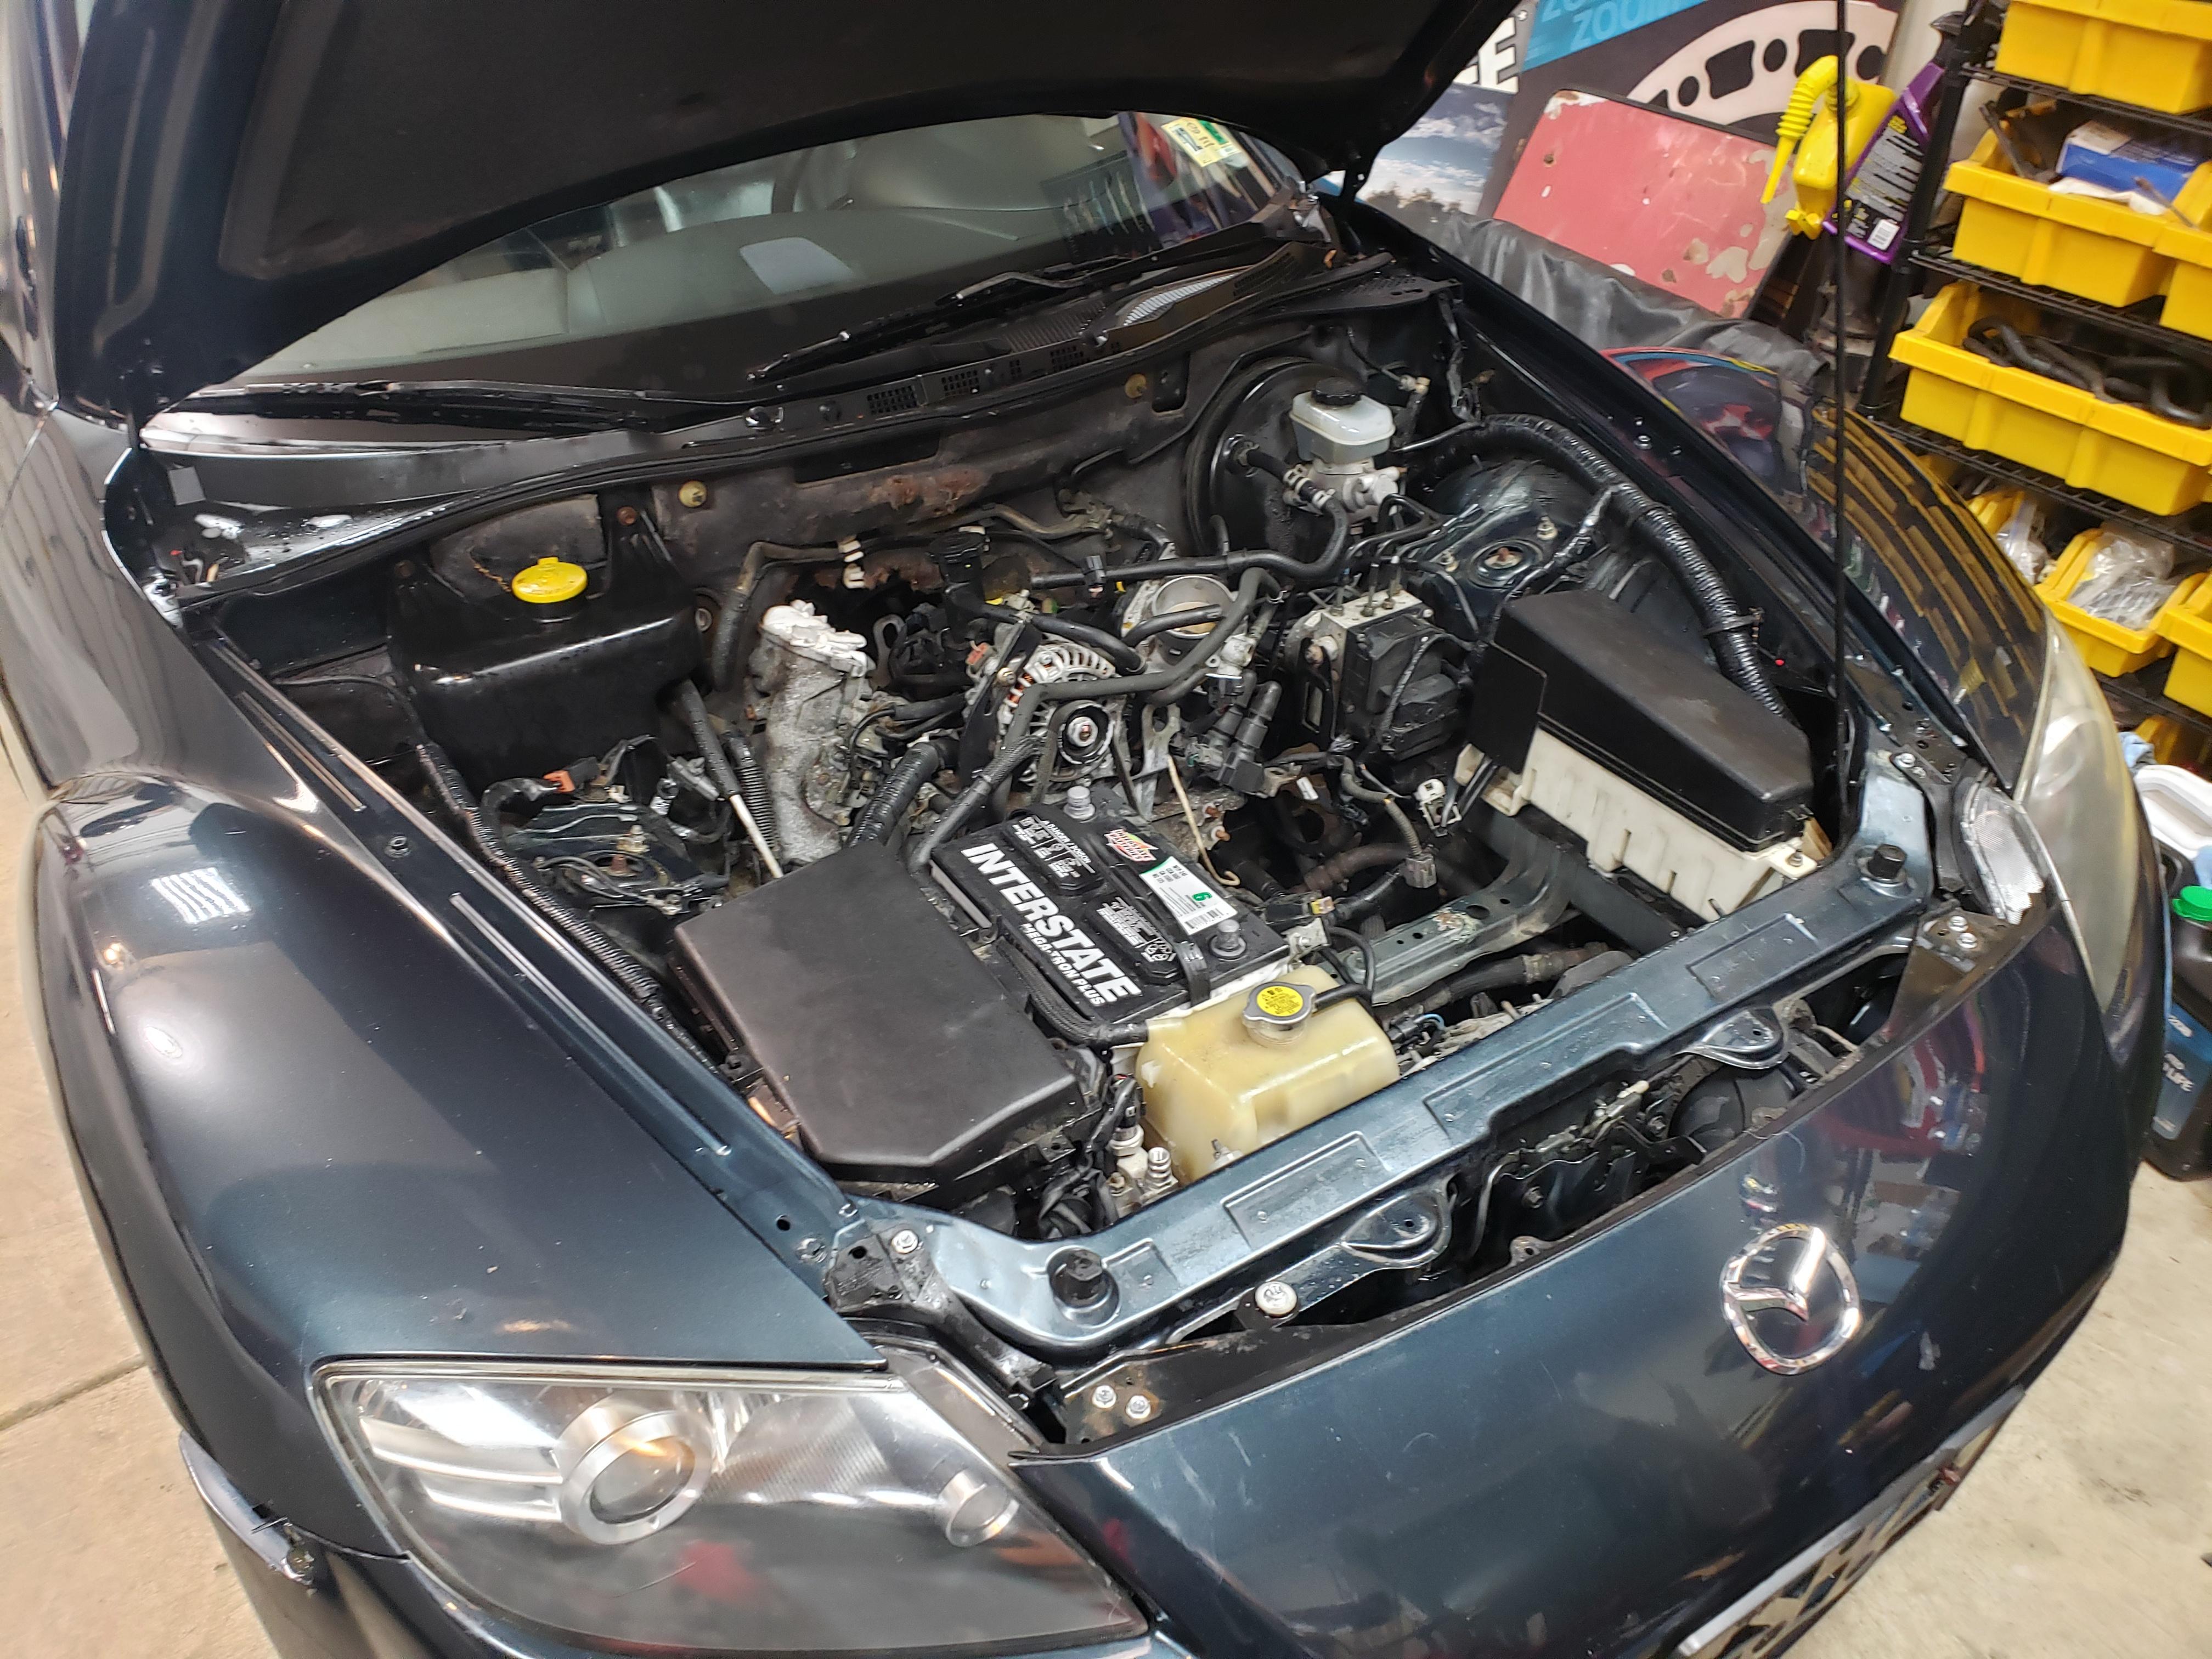
Figured I would toss up a couple more recent pictures. I have most of the wiring repaired and most of the interior back together. This weekend I should be able to clean the einterior and exterior and prep for the engine to come out.
This is how the interior stated out when the car arrived:
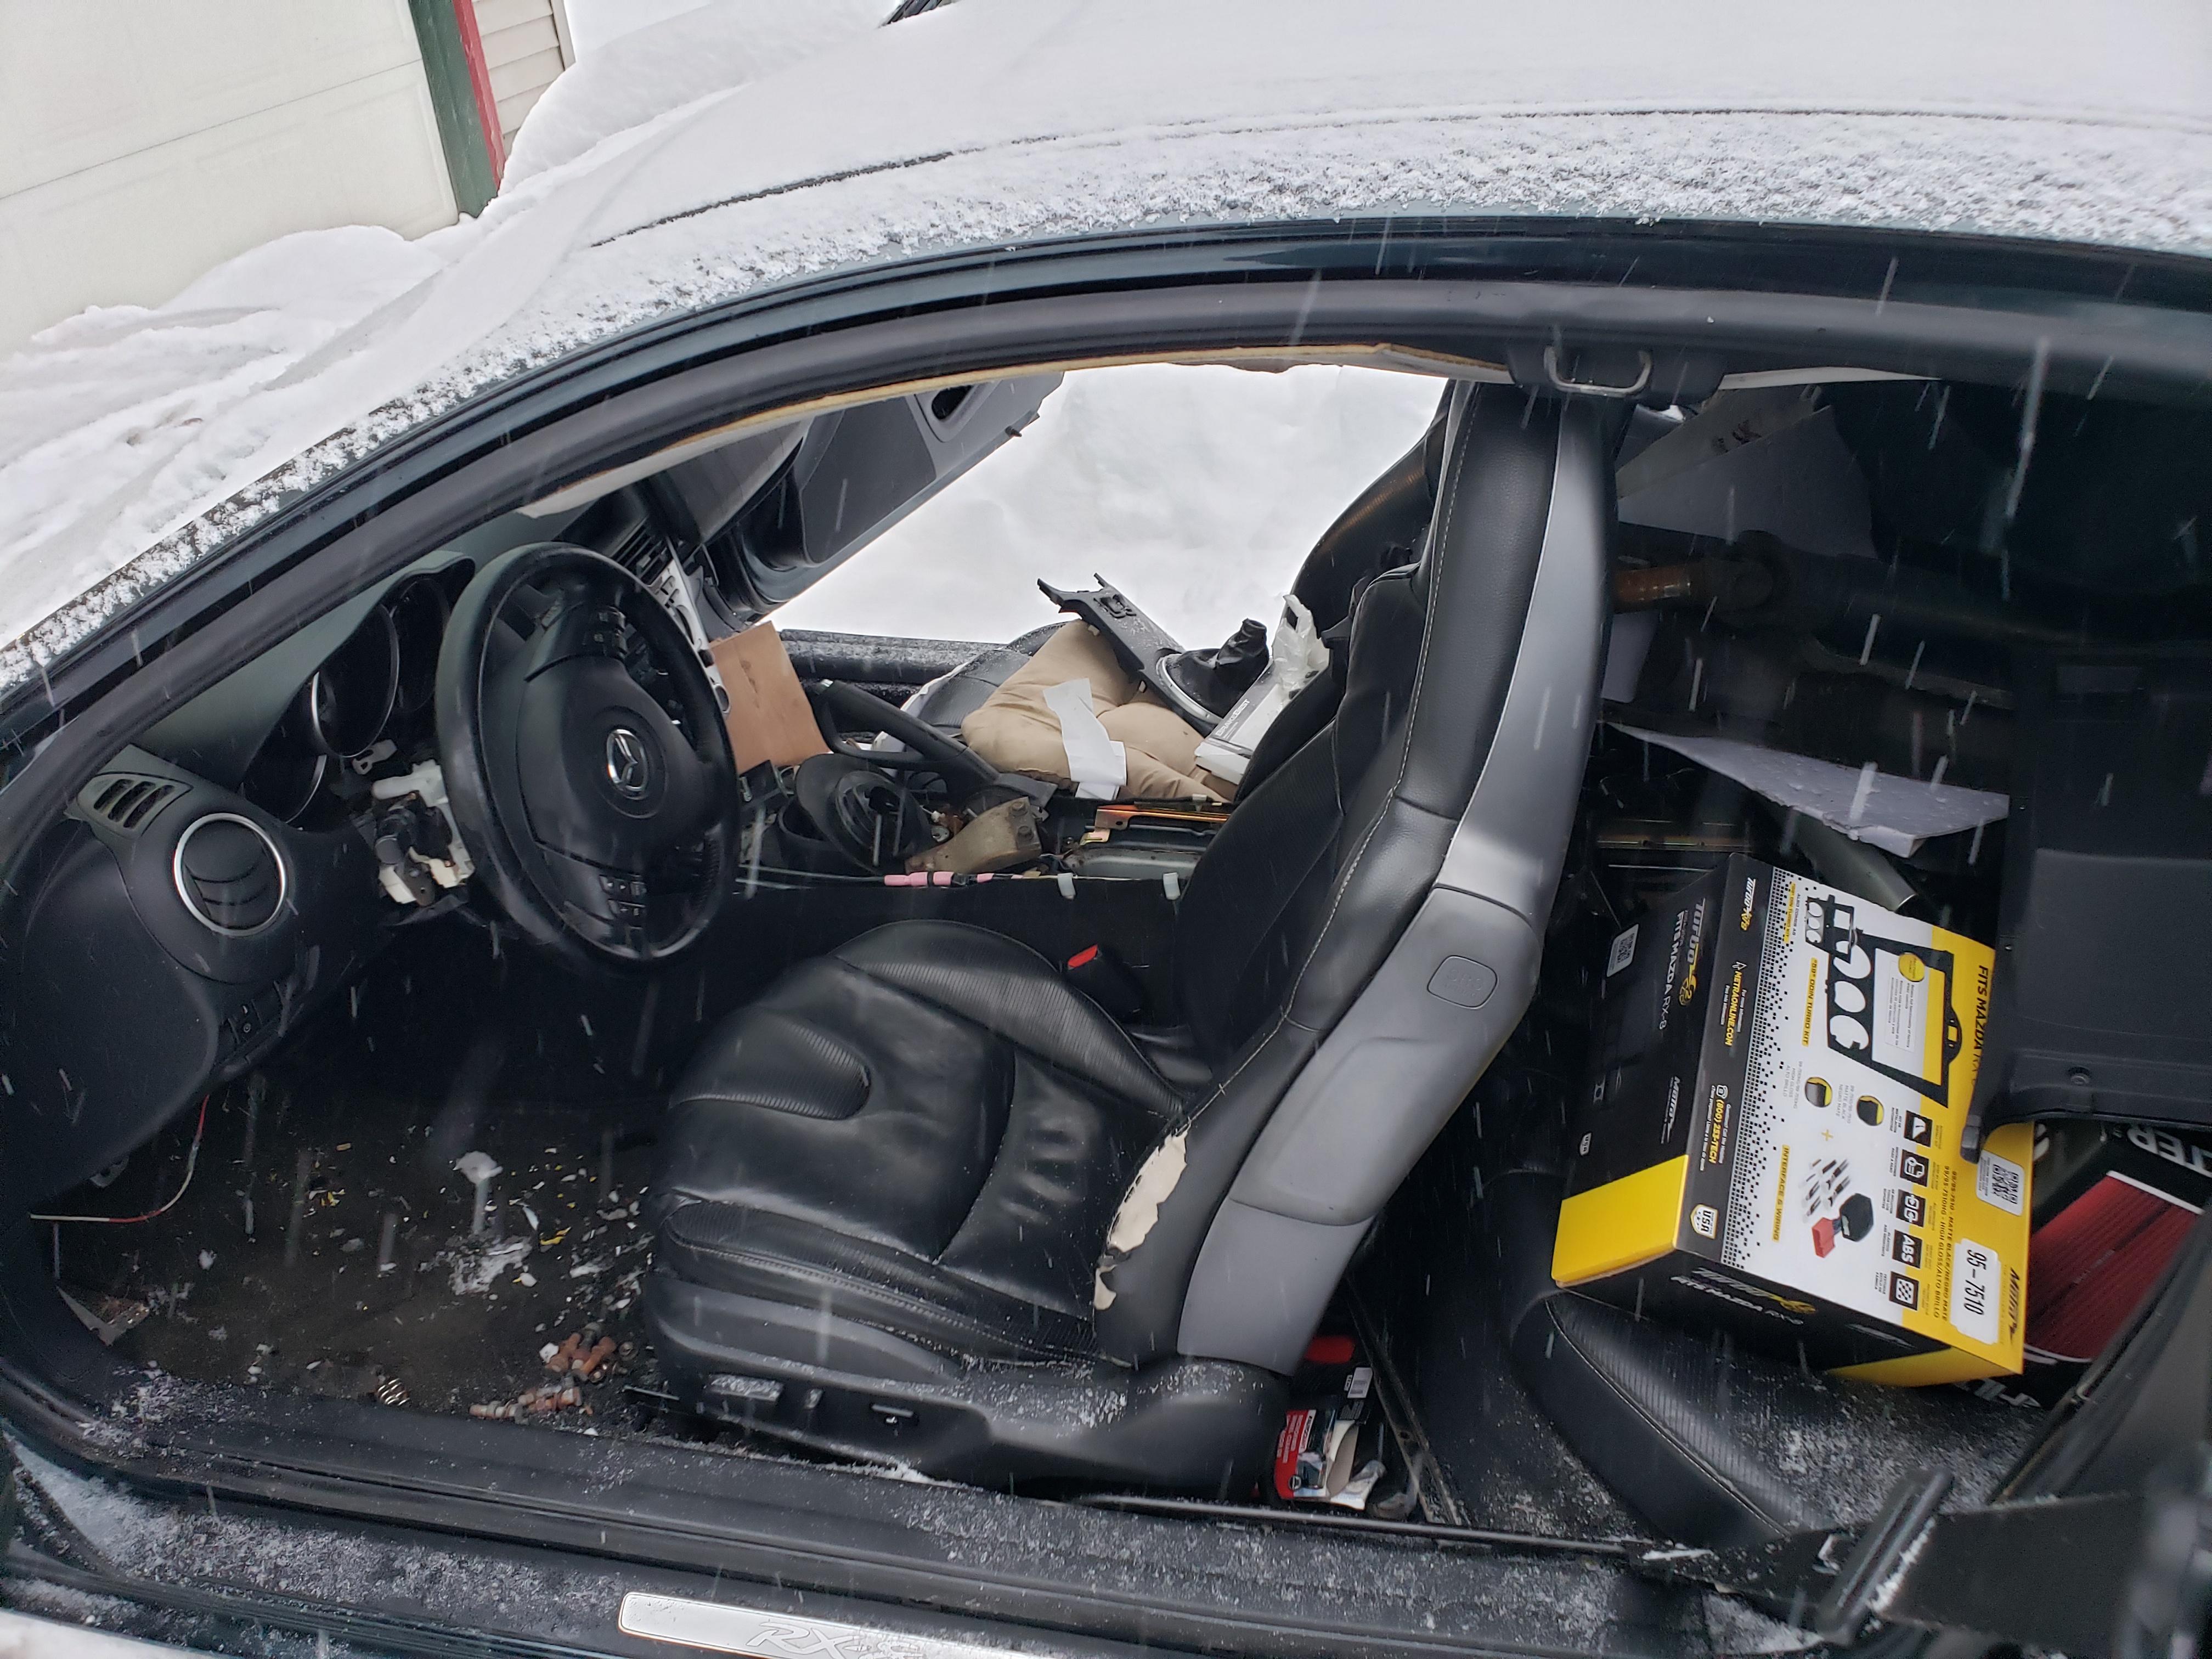

Here is where it currently sits:
Its dirty still but mostly complete. Once I finish fixing the harness that runs to the ignition switch, all of the interior wiring will be repaired and I can sweep the car out and wipe it down. Really looking forward to getting the engine out and prepping the new engine for install.
This is how the interior stated out when the car arrived:
Here is where it currently sits:
Its dirty still but mostly complete. Once I finish fixing the harness that runs to the ignition switch, all of the interior wiring will be repaired and I can sweep the car out and wipe it down. Really looking forward to getting the engine out and prepping the new engine for install.
03-02-2021, 05:42 AM
#8
RX-Heaven
Thread Starter
iTrader: (6)
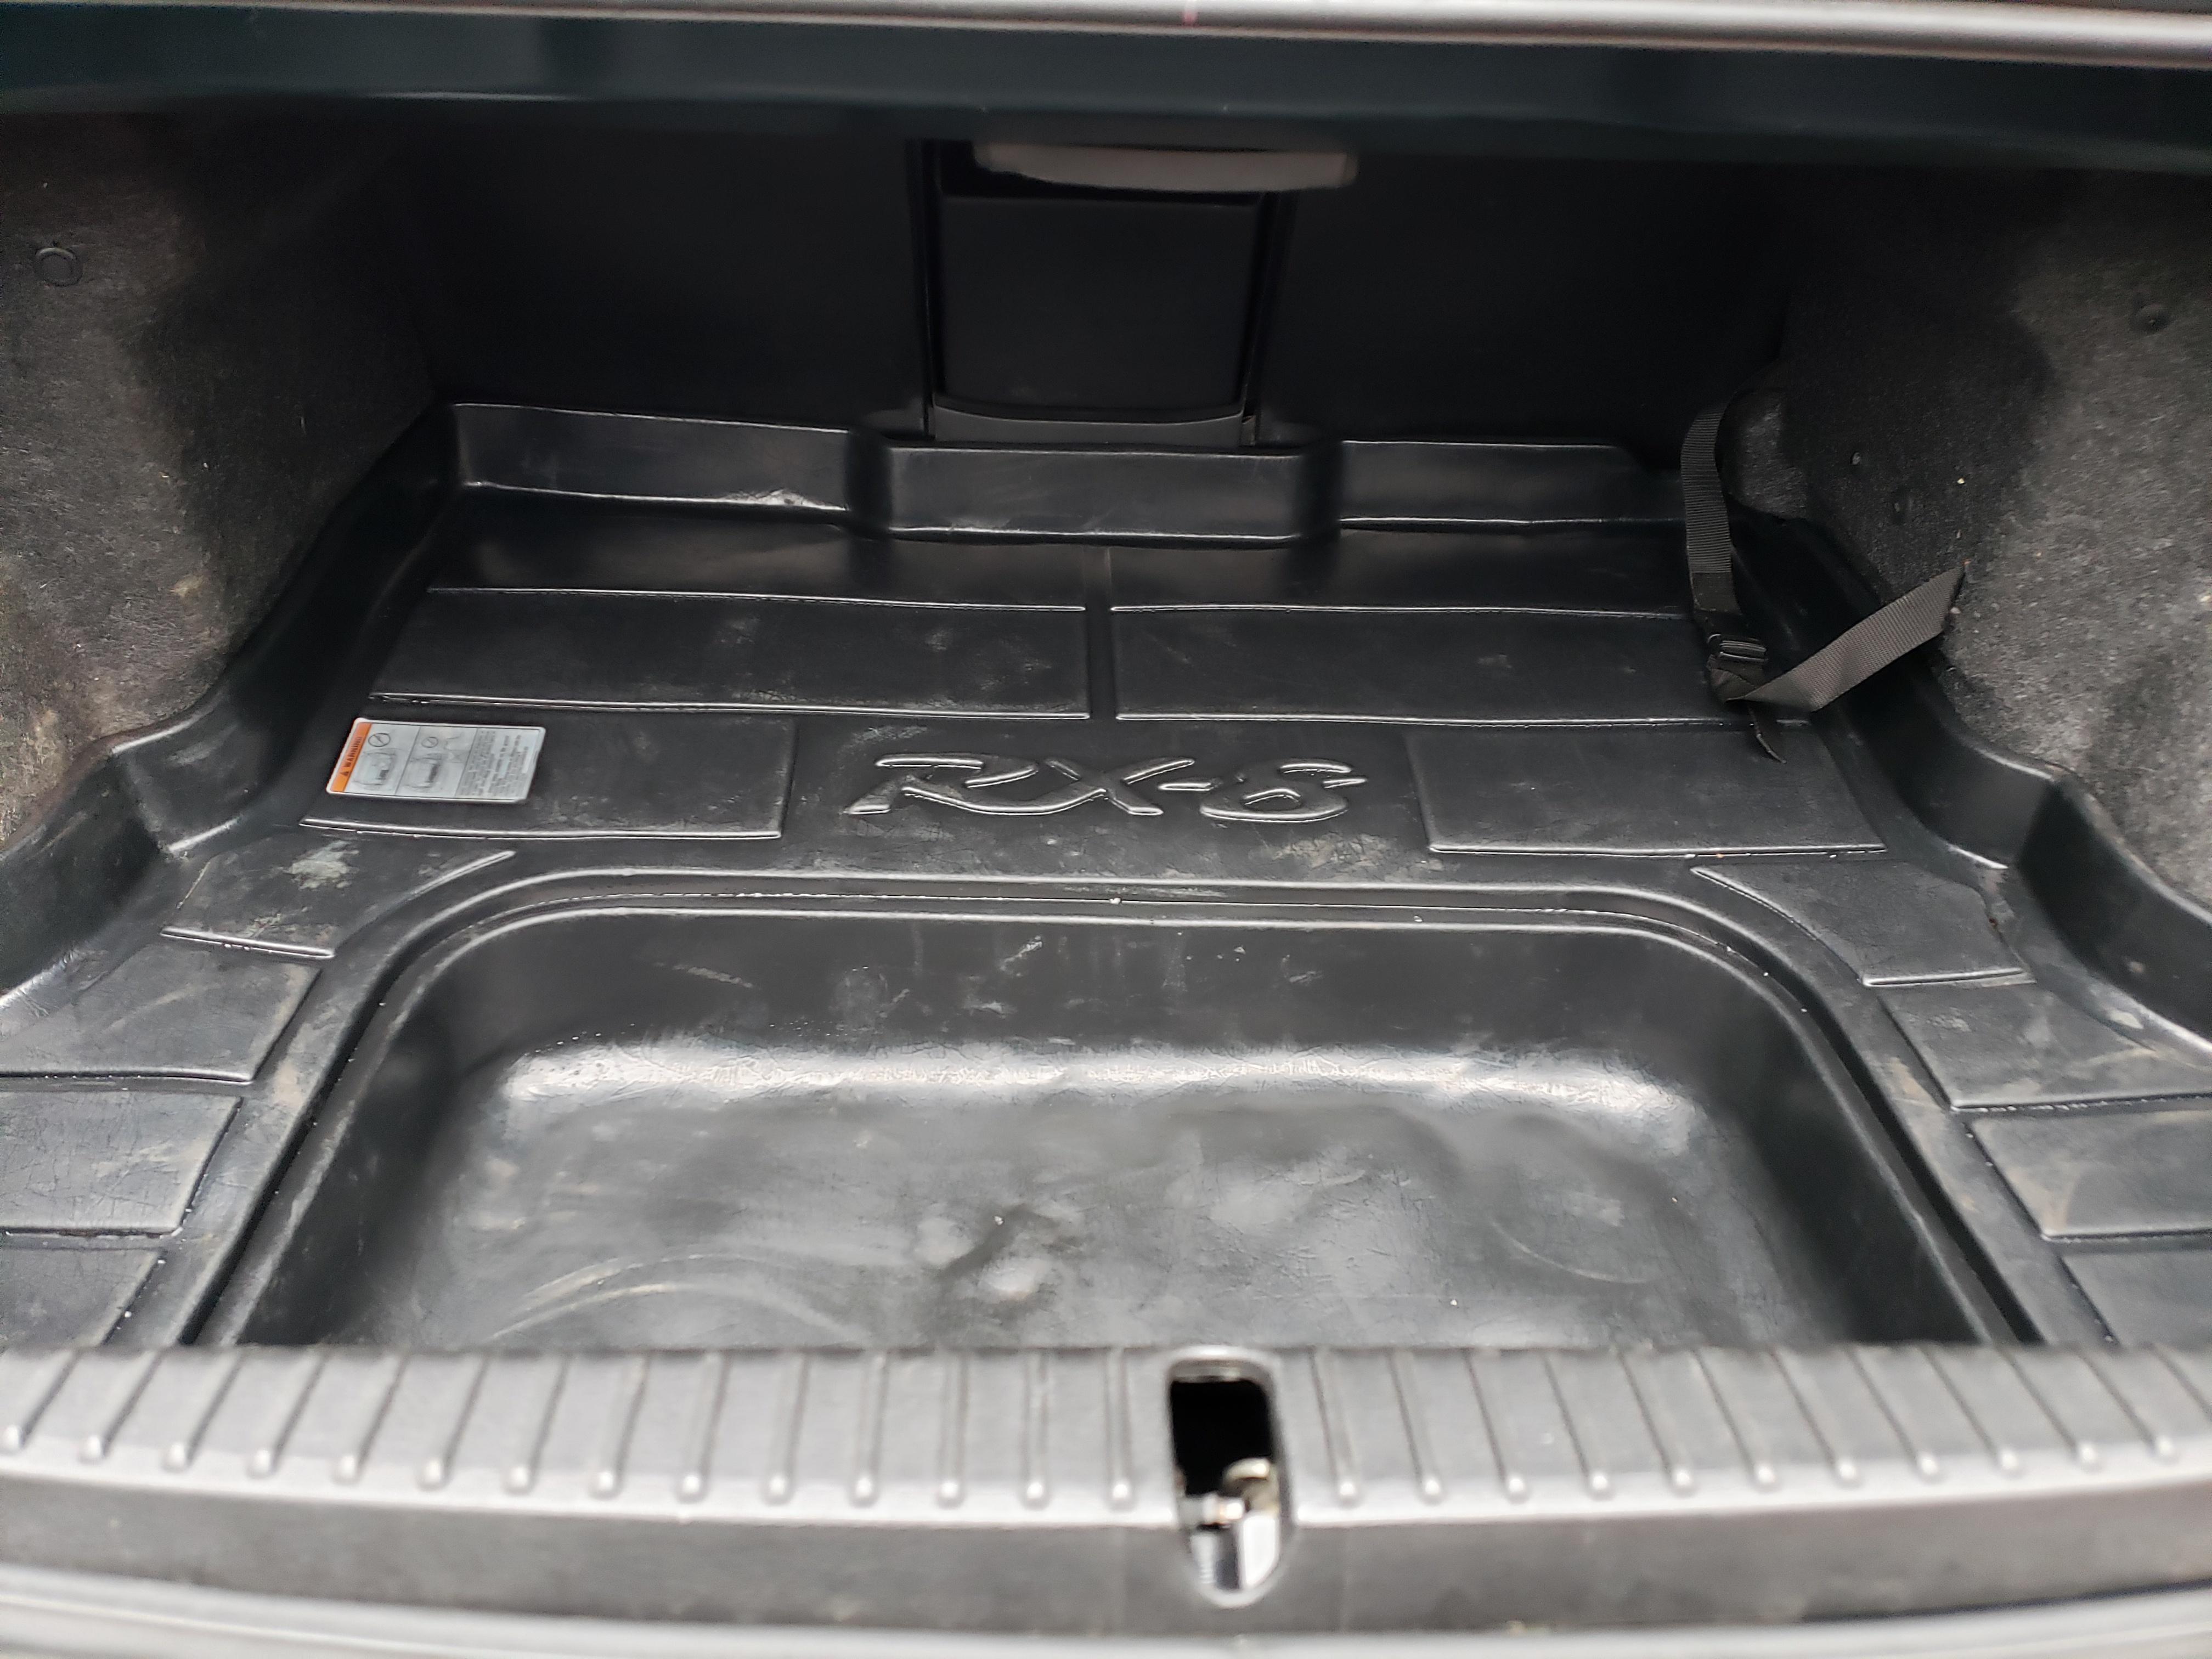
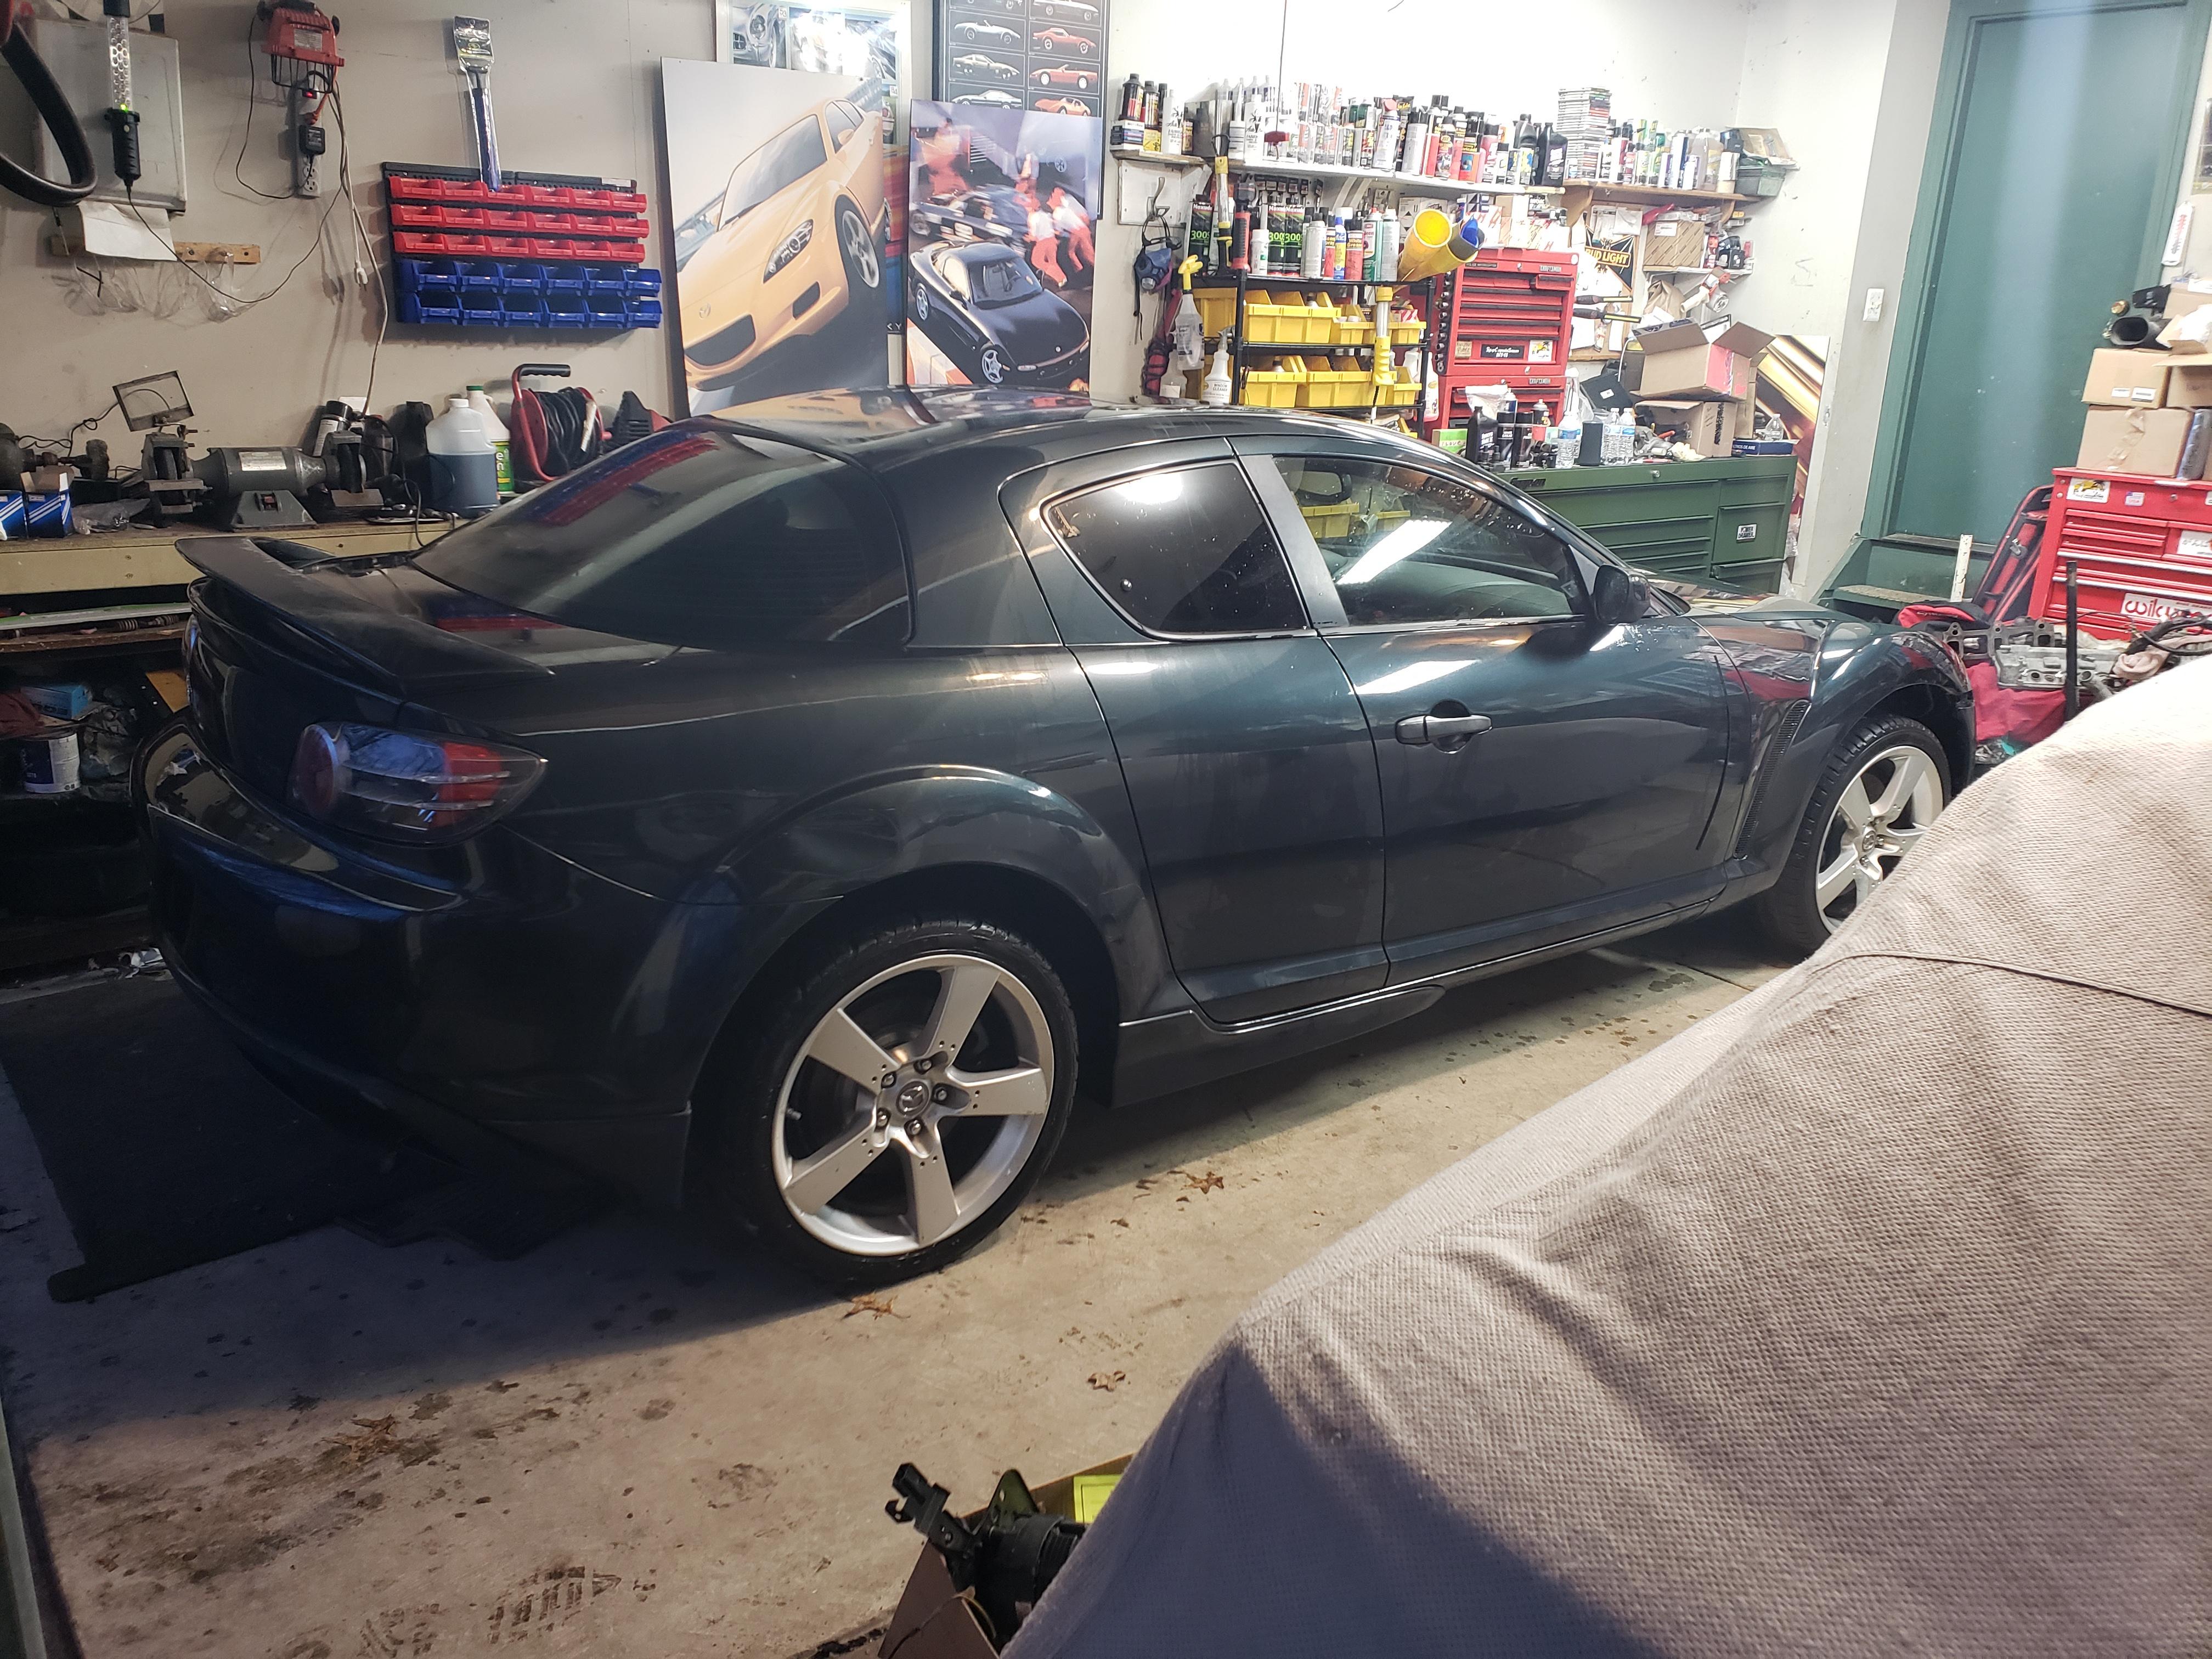
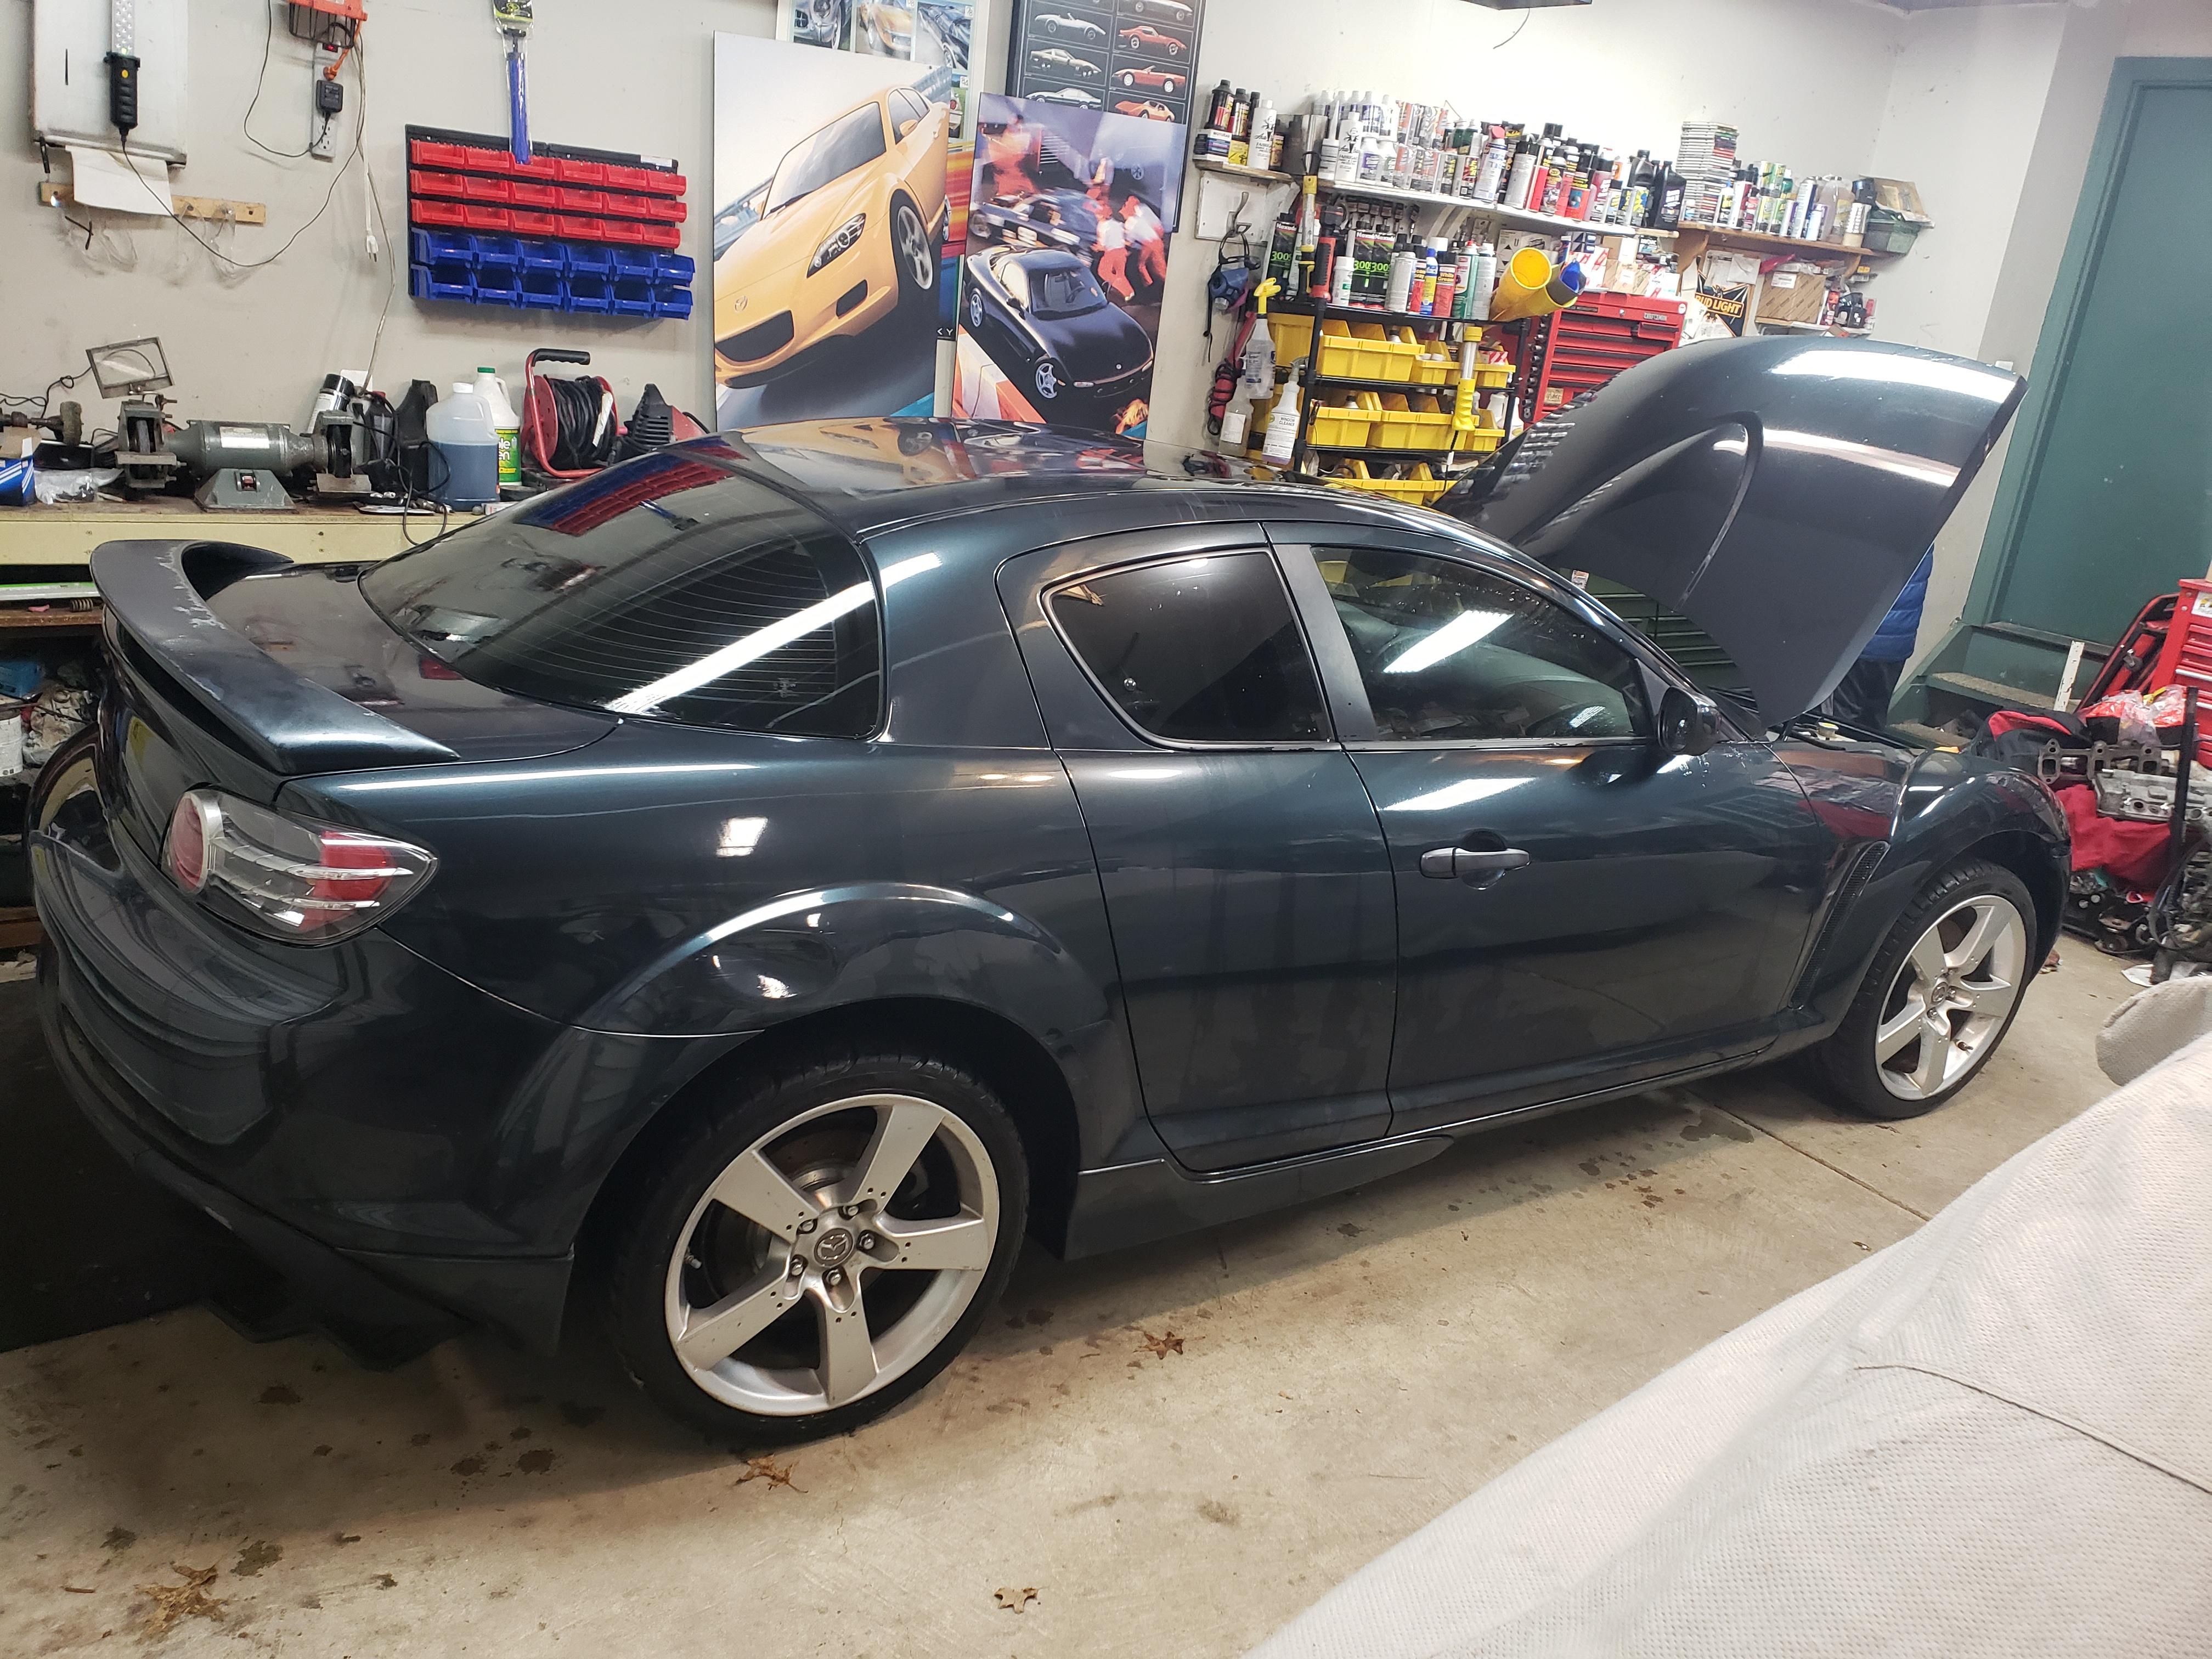
Over the weekend I got a few things done on the car that needed done. The first thing was to secure the rear suspension in the trunk that was left loose and install all of the carpeting and plastics that were missing from the car. Luckily I have quite a few parts laying around. I got the trunk all back to its original state and reached the trunk lock cylinder rod as well. The finishing touch was the addition of an oem cargo tray:
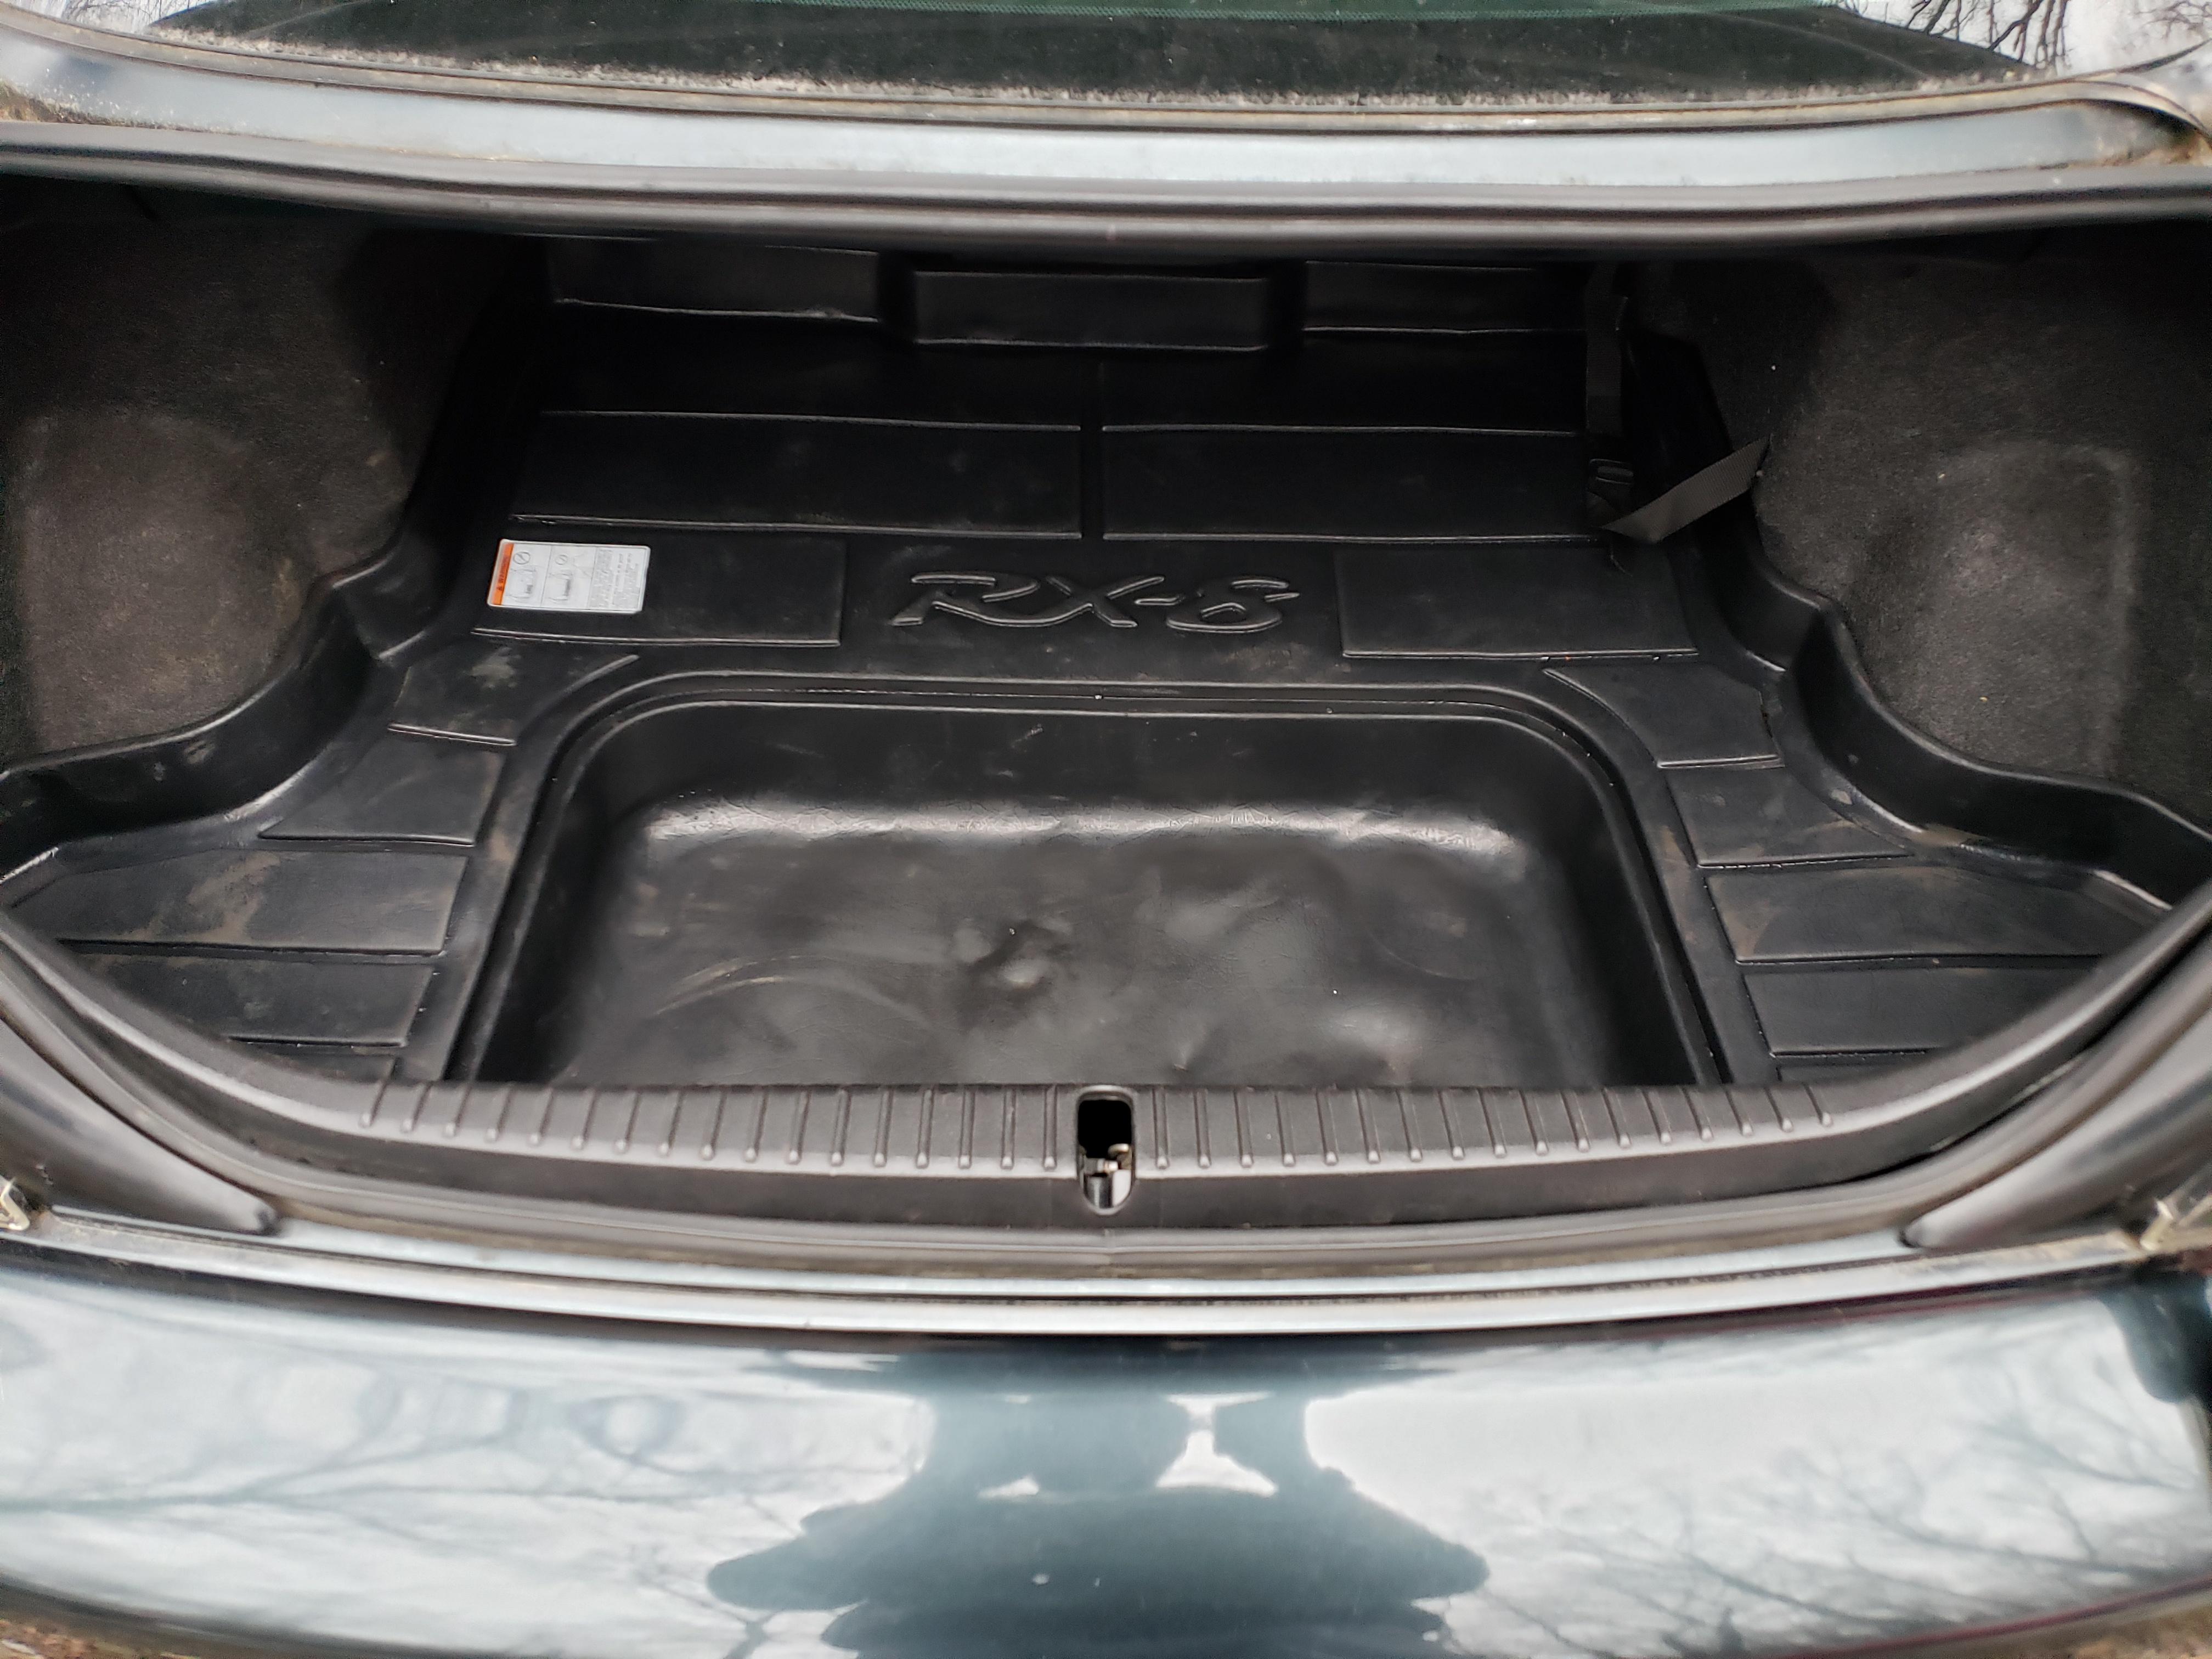
As for the exterior, I still have a lot to do. The biggest thing was getting rid of the aftermarket splined lug nuts and installing 20 new lug nuts. Plenty left here to do with the exterior, but for now I'm happy with the progress.
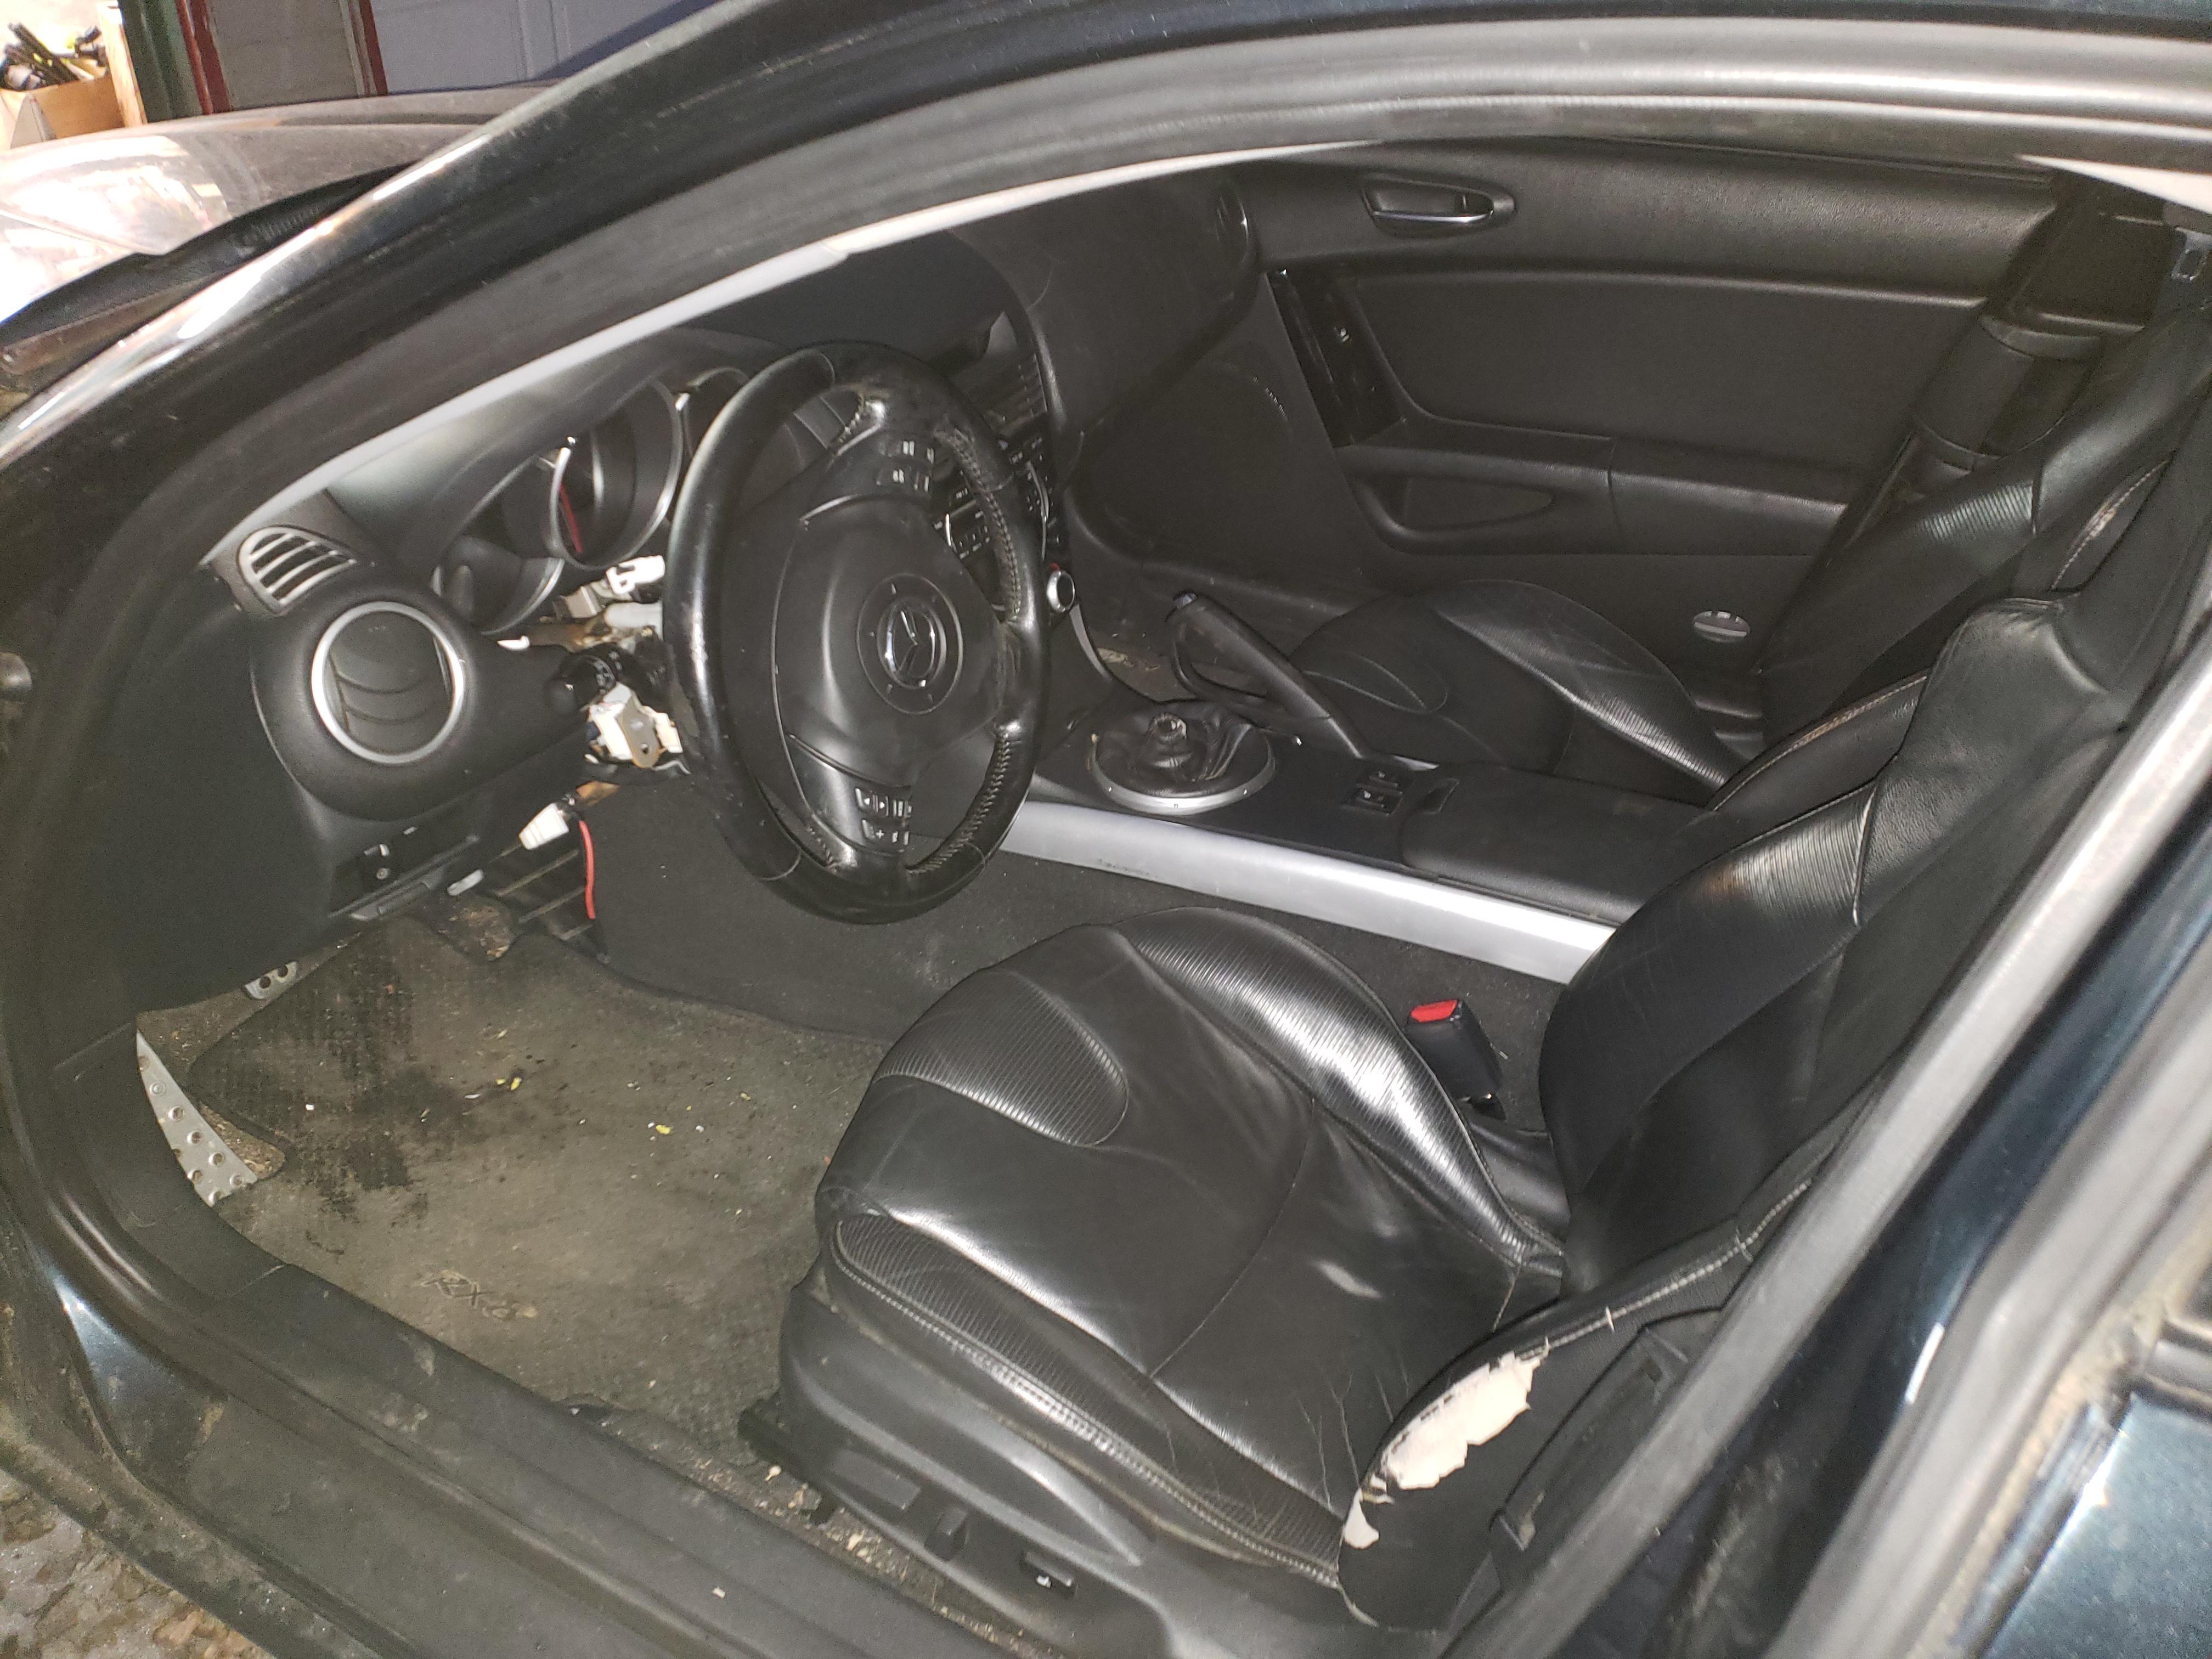
The interior is mostly together. I've repaired all of the wiring that i have found to have been cut, spliced or tampered with. I've also reinstalled every missing panel, nut, bolt, and screw that I've found missing. Not perfect but as with everything else, its getting there:
I've also been prepping the engine and making sure everything on it is clean and ready for install. I ordered new mounts for it yesterday and I still have to order a clutch kit. Pictures of the engine stuff to come soon!
As for the exterior, I still have a lot to do. The biggest thing was getting rid of the aftermarket splined lug nuts and installing 20 new lug nuts. Plenty left here to do with the exterior, but for now I'm happy with the progress.
The interior is mostly together. I've repaired all of the wiring that i have found to have been cut, spliced or tampered with. I've also reinstalled every missing panel, nut, bolt, and screw that I've found missing. Not perfect but as with everything else, its getting there:
I've also been prepping the engine and making sure everything on it is clean and ready for install. I ordered new mounts for it yesterday and I still have to order a clutch kit. Pictures of the engine stuff to come soon!
03-06-2021, 06:42 AM
#9
RX-Heaven
Thread Starter
iTrader: (6)
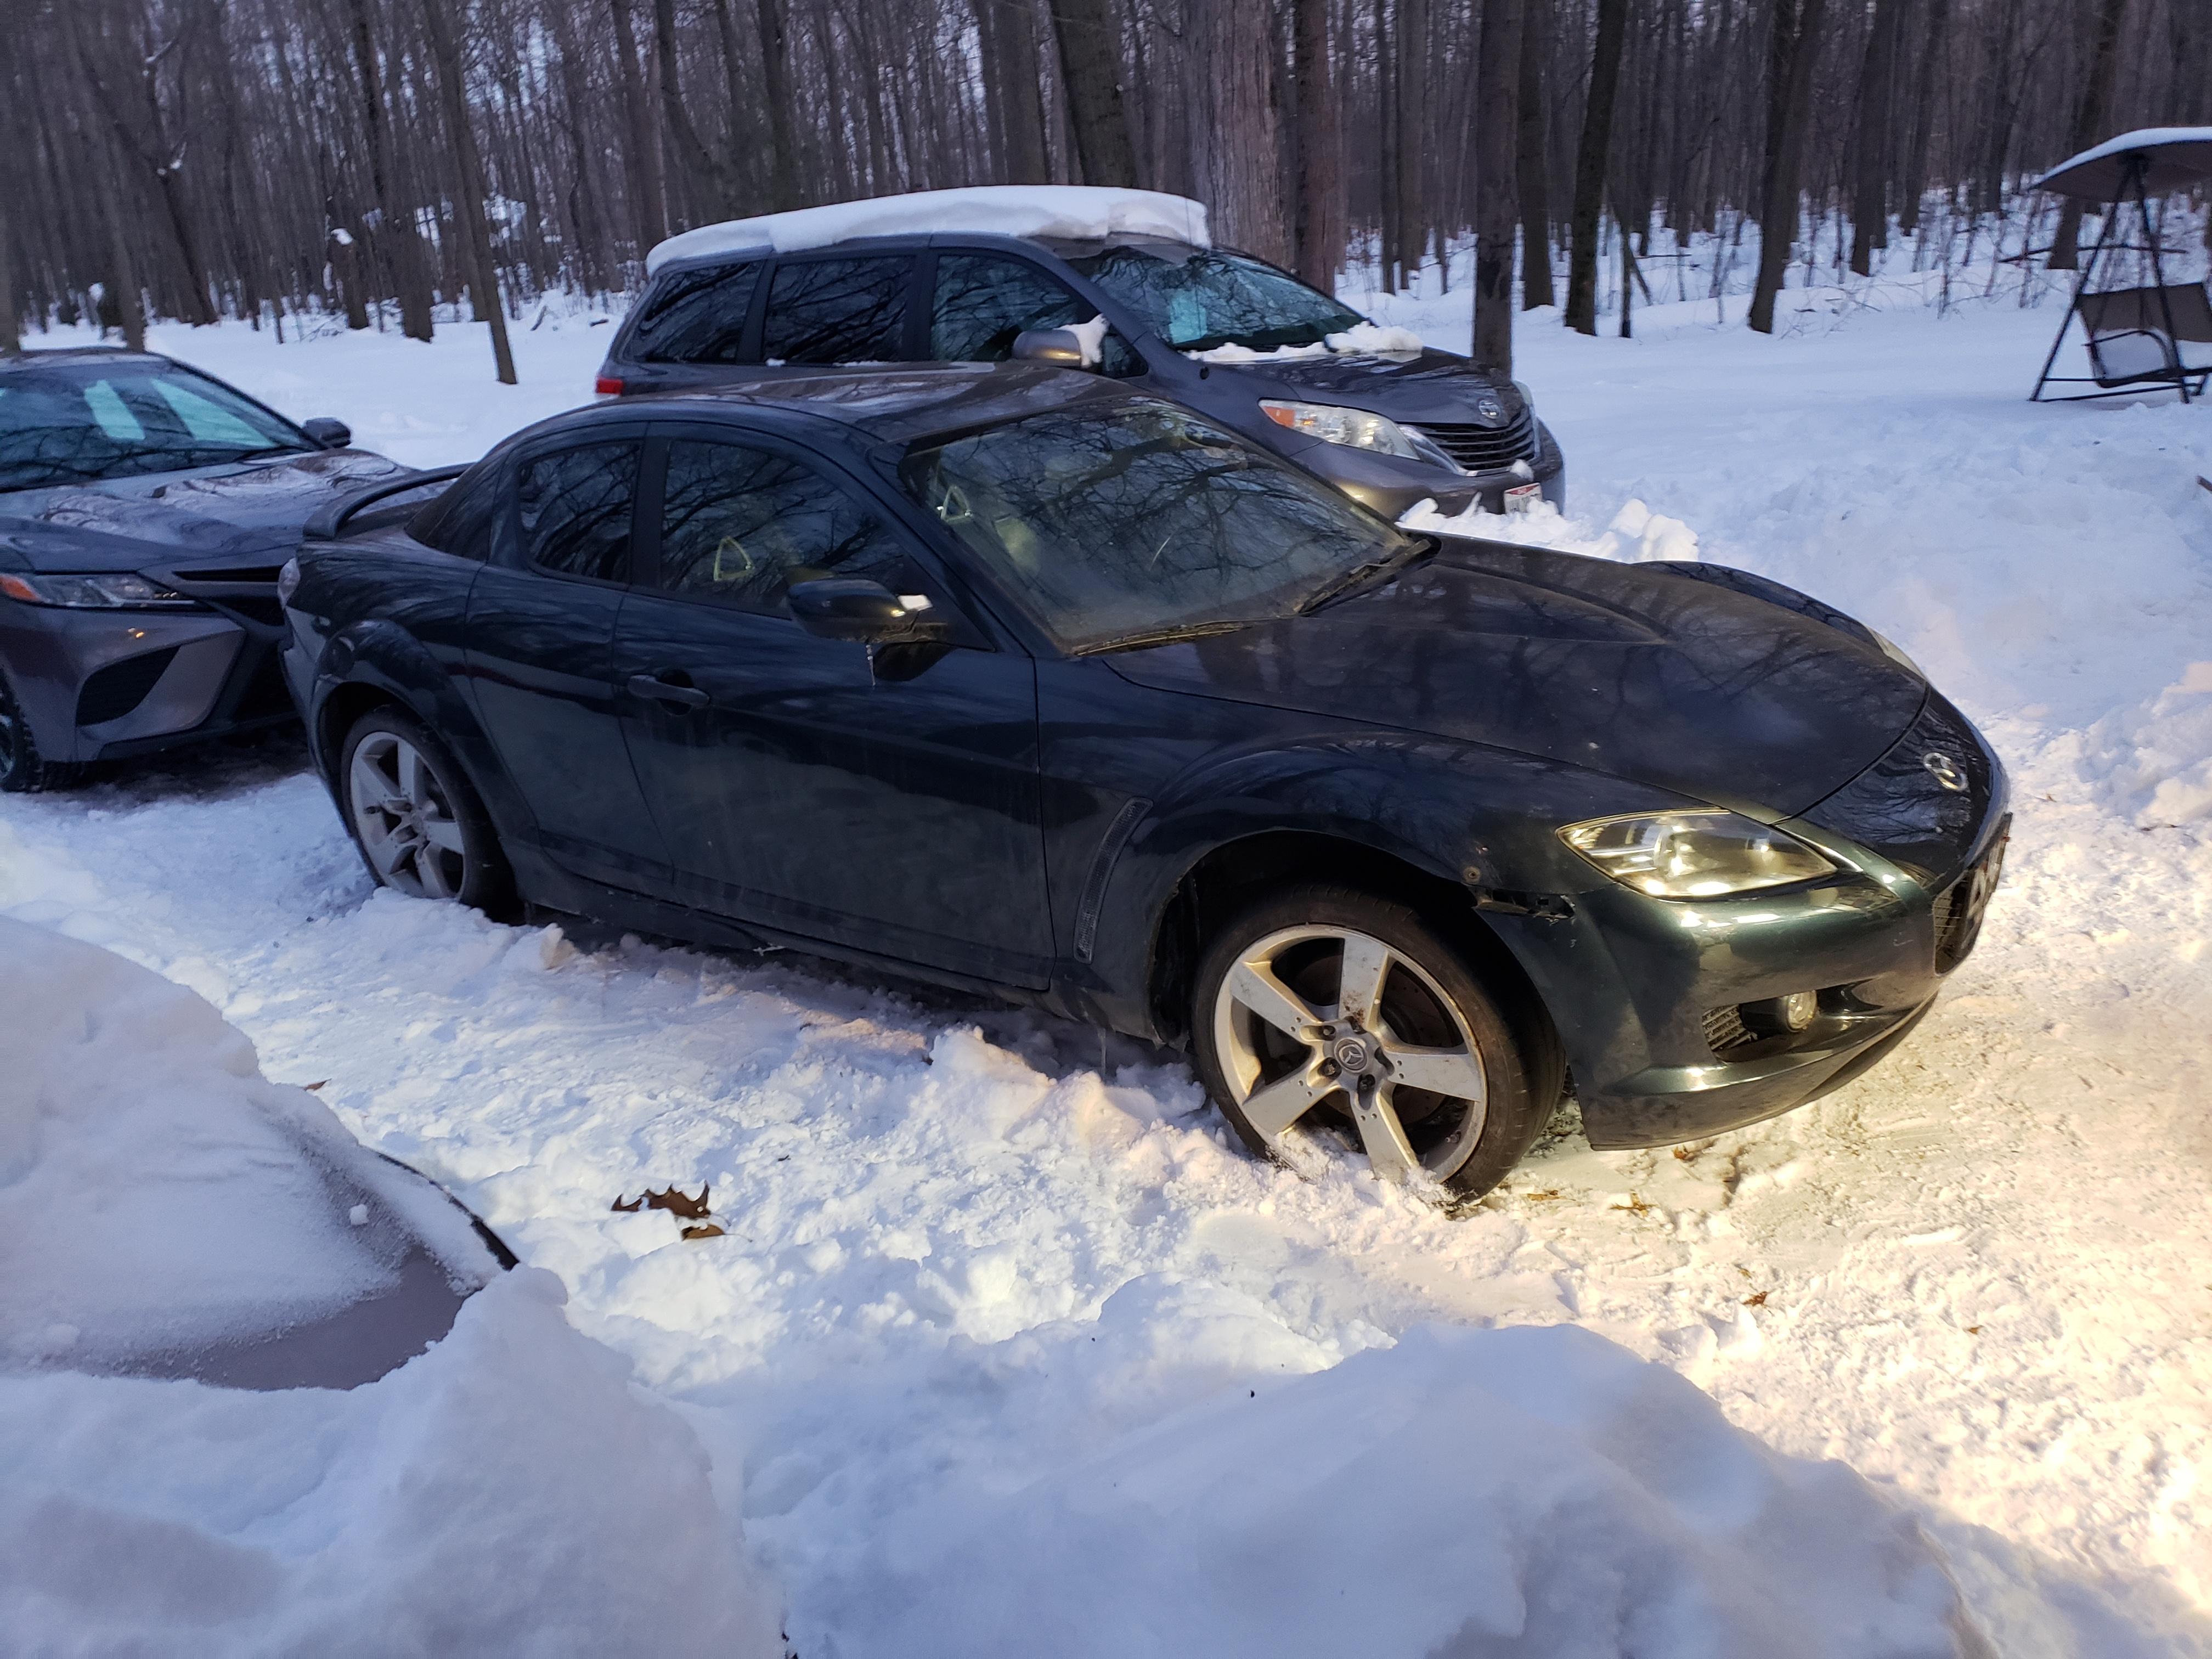
Got home last night from a three day work training and my youngest son and I washed the car and decided it was time to go in the garage. I am going to pull the engine this weekend and clean up a few other things on the car. Got a list of parts coming from Mazda to finish getting the engine together and once that's done, I will put it and the trans in the car. The paint isn't terrible despite the dents and scratches. Most of it seems original. The trunk has definitely been painted, but honestly, it will never ben a low mileage show car, so it's ok. The plan is to restore it and drive it and enjoy it:
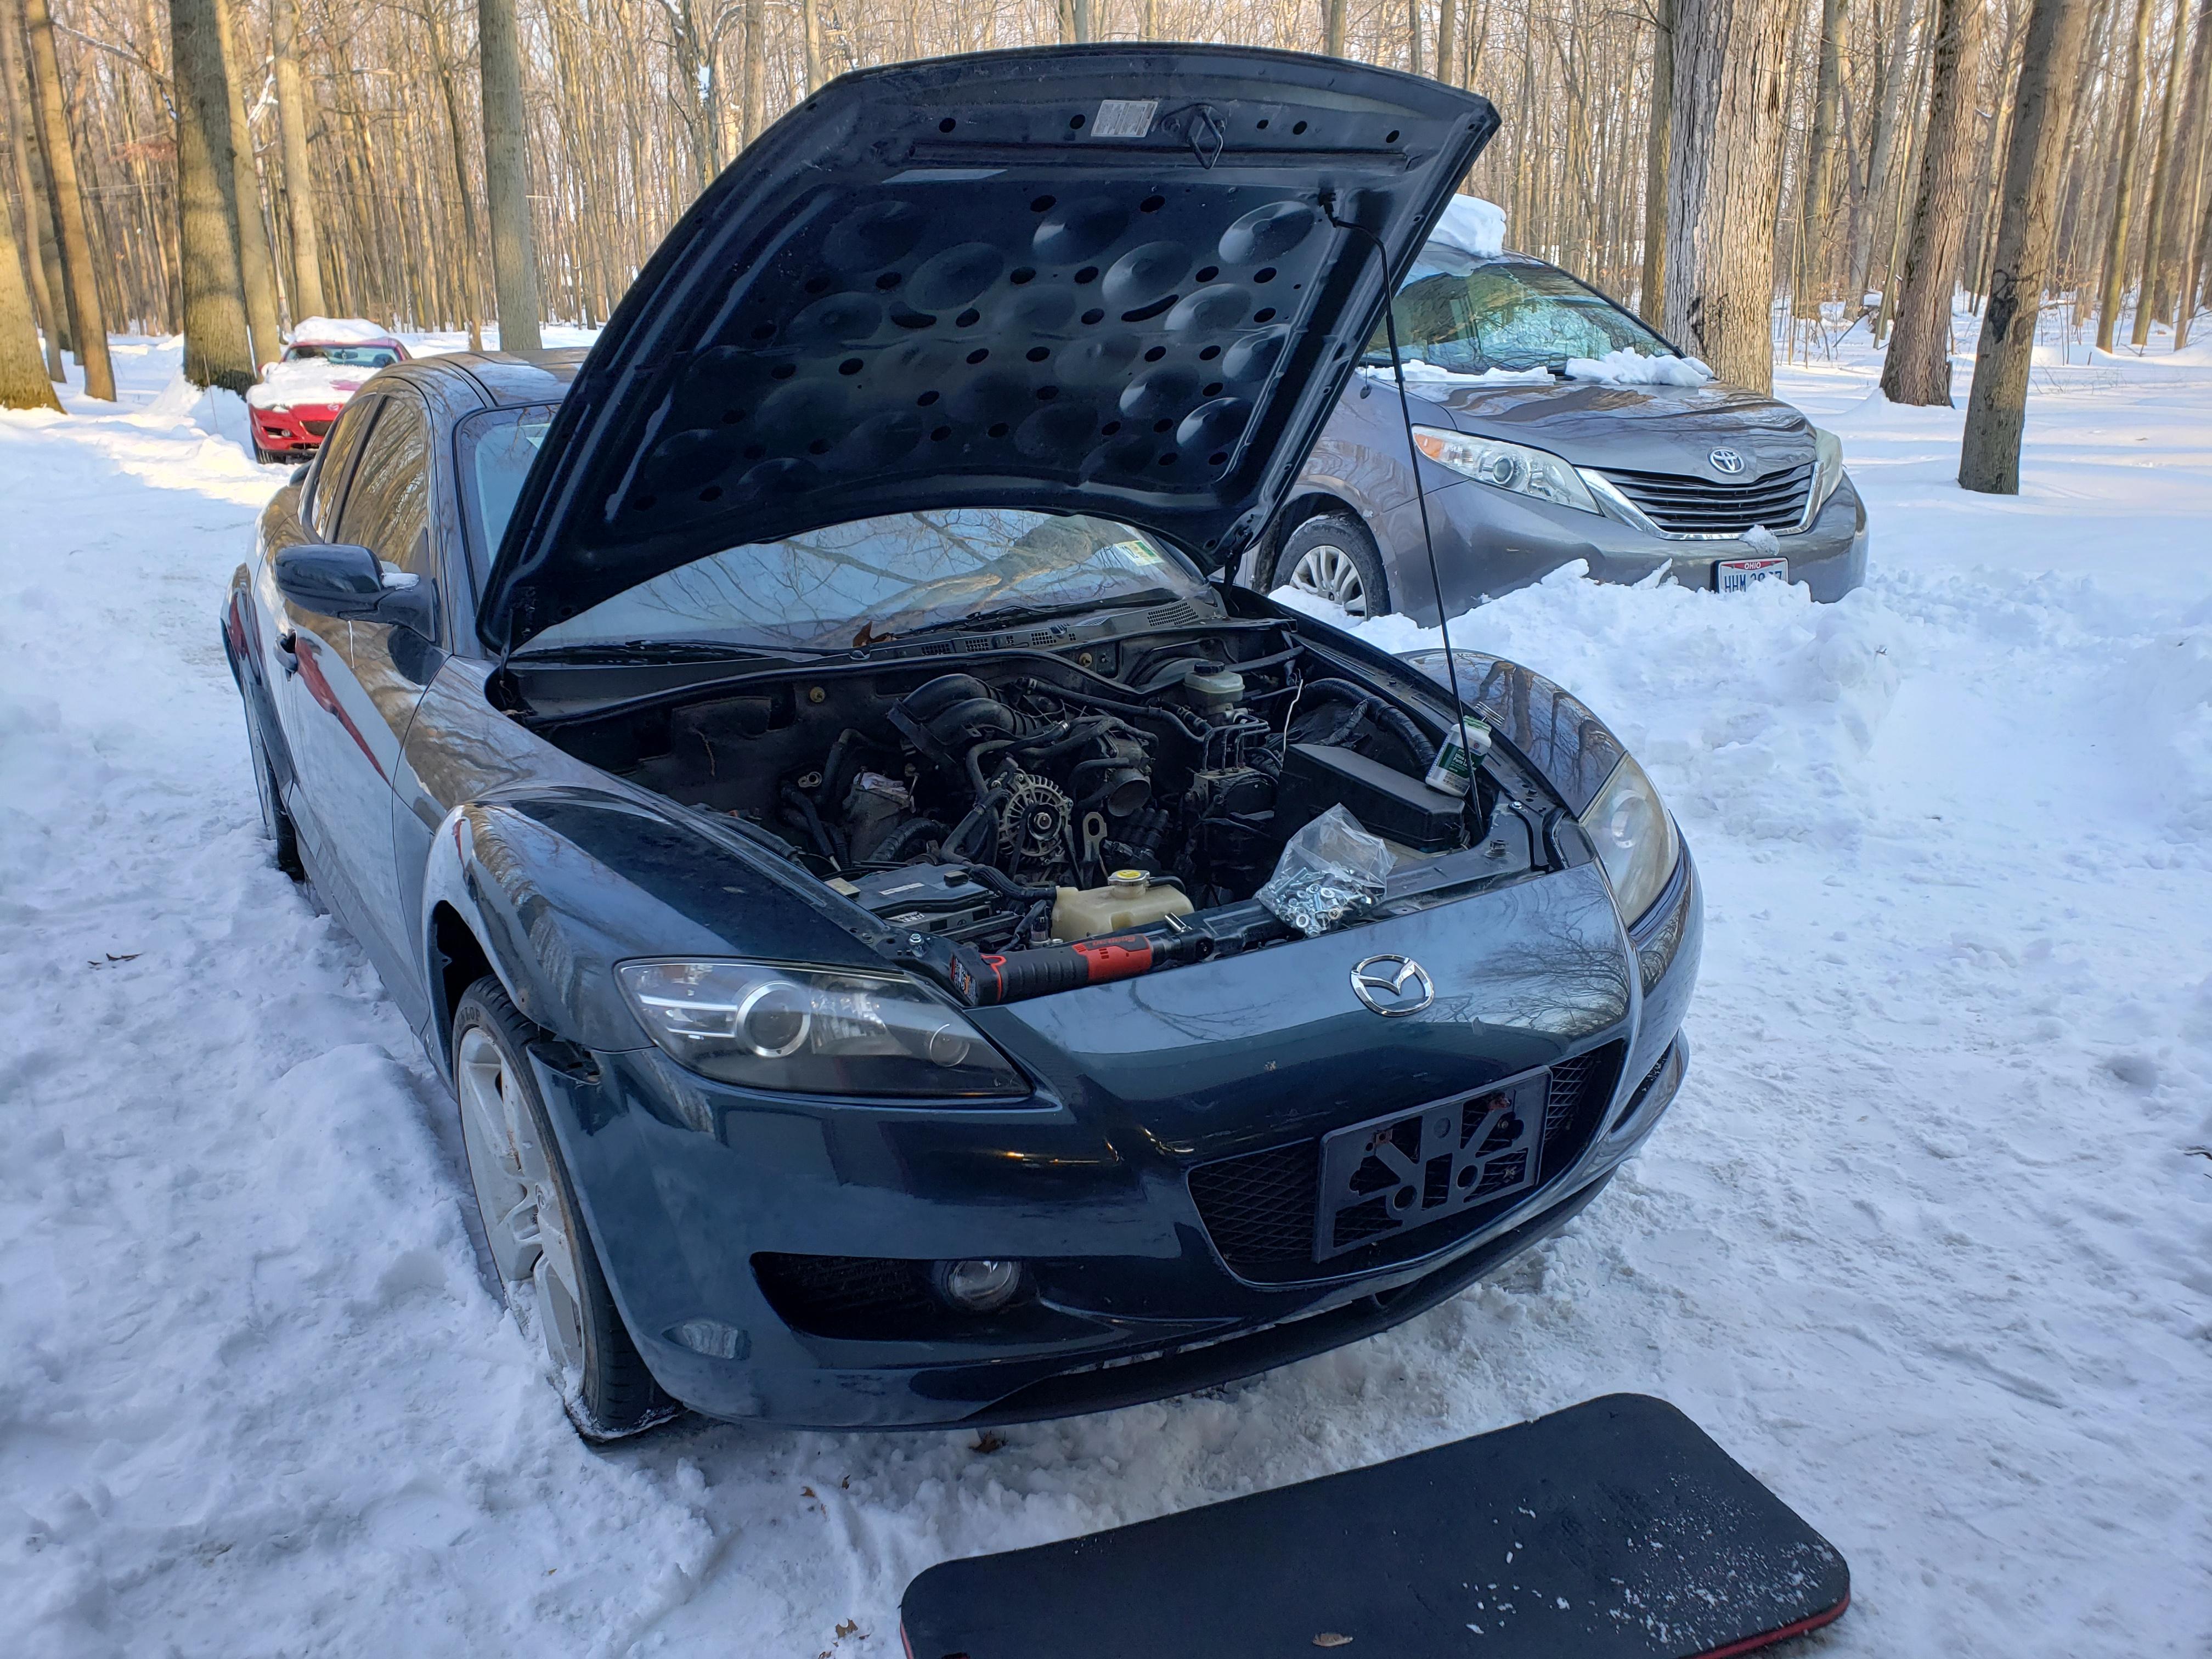
03-07-2021, 06:10 AM
#10
RX-Heaven
Thread Starter
iTrader: (6)
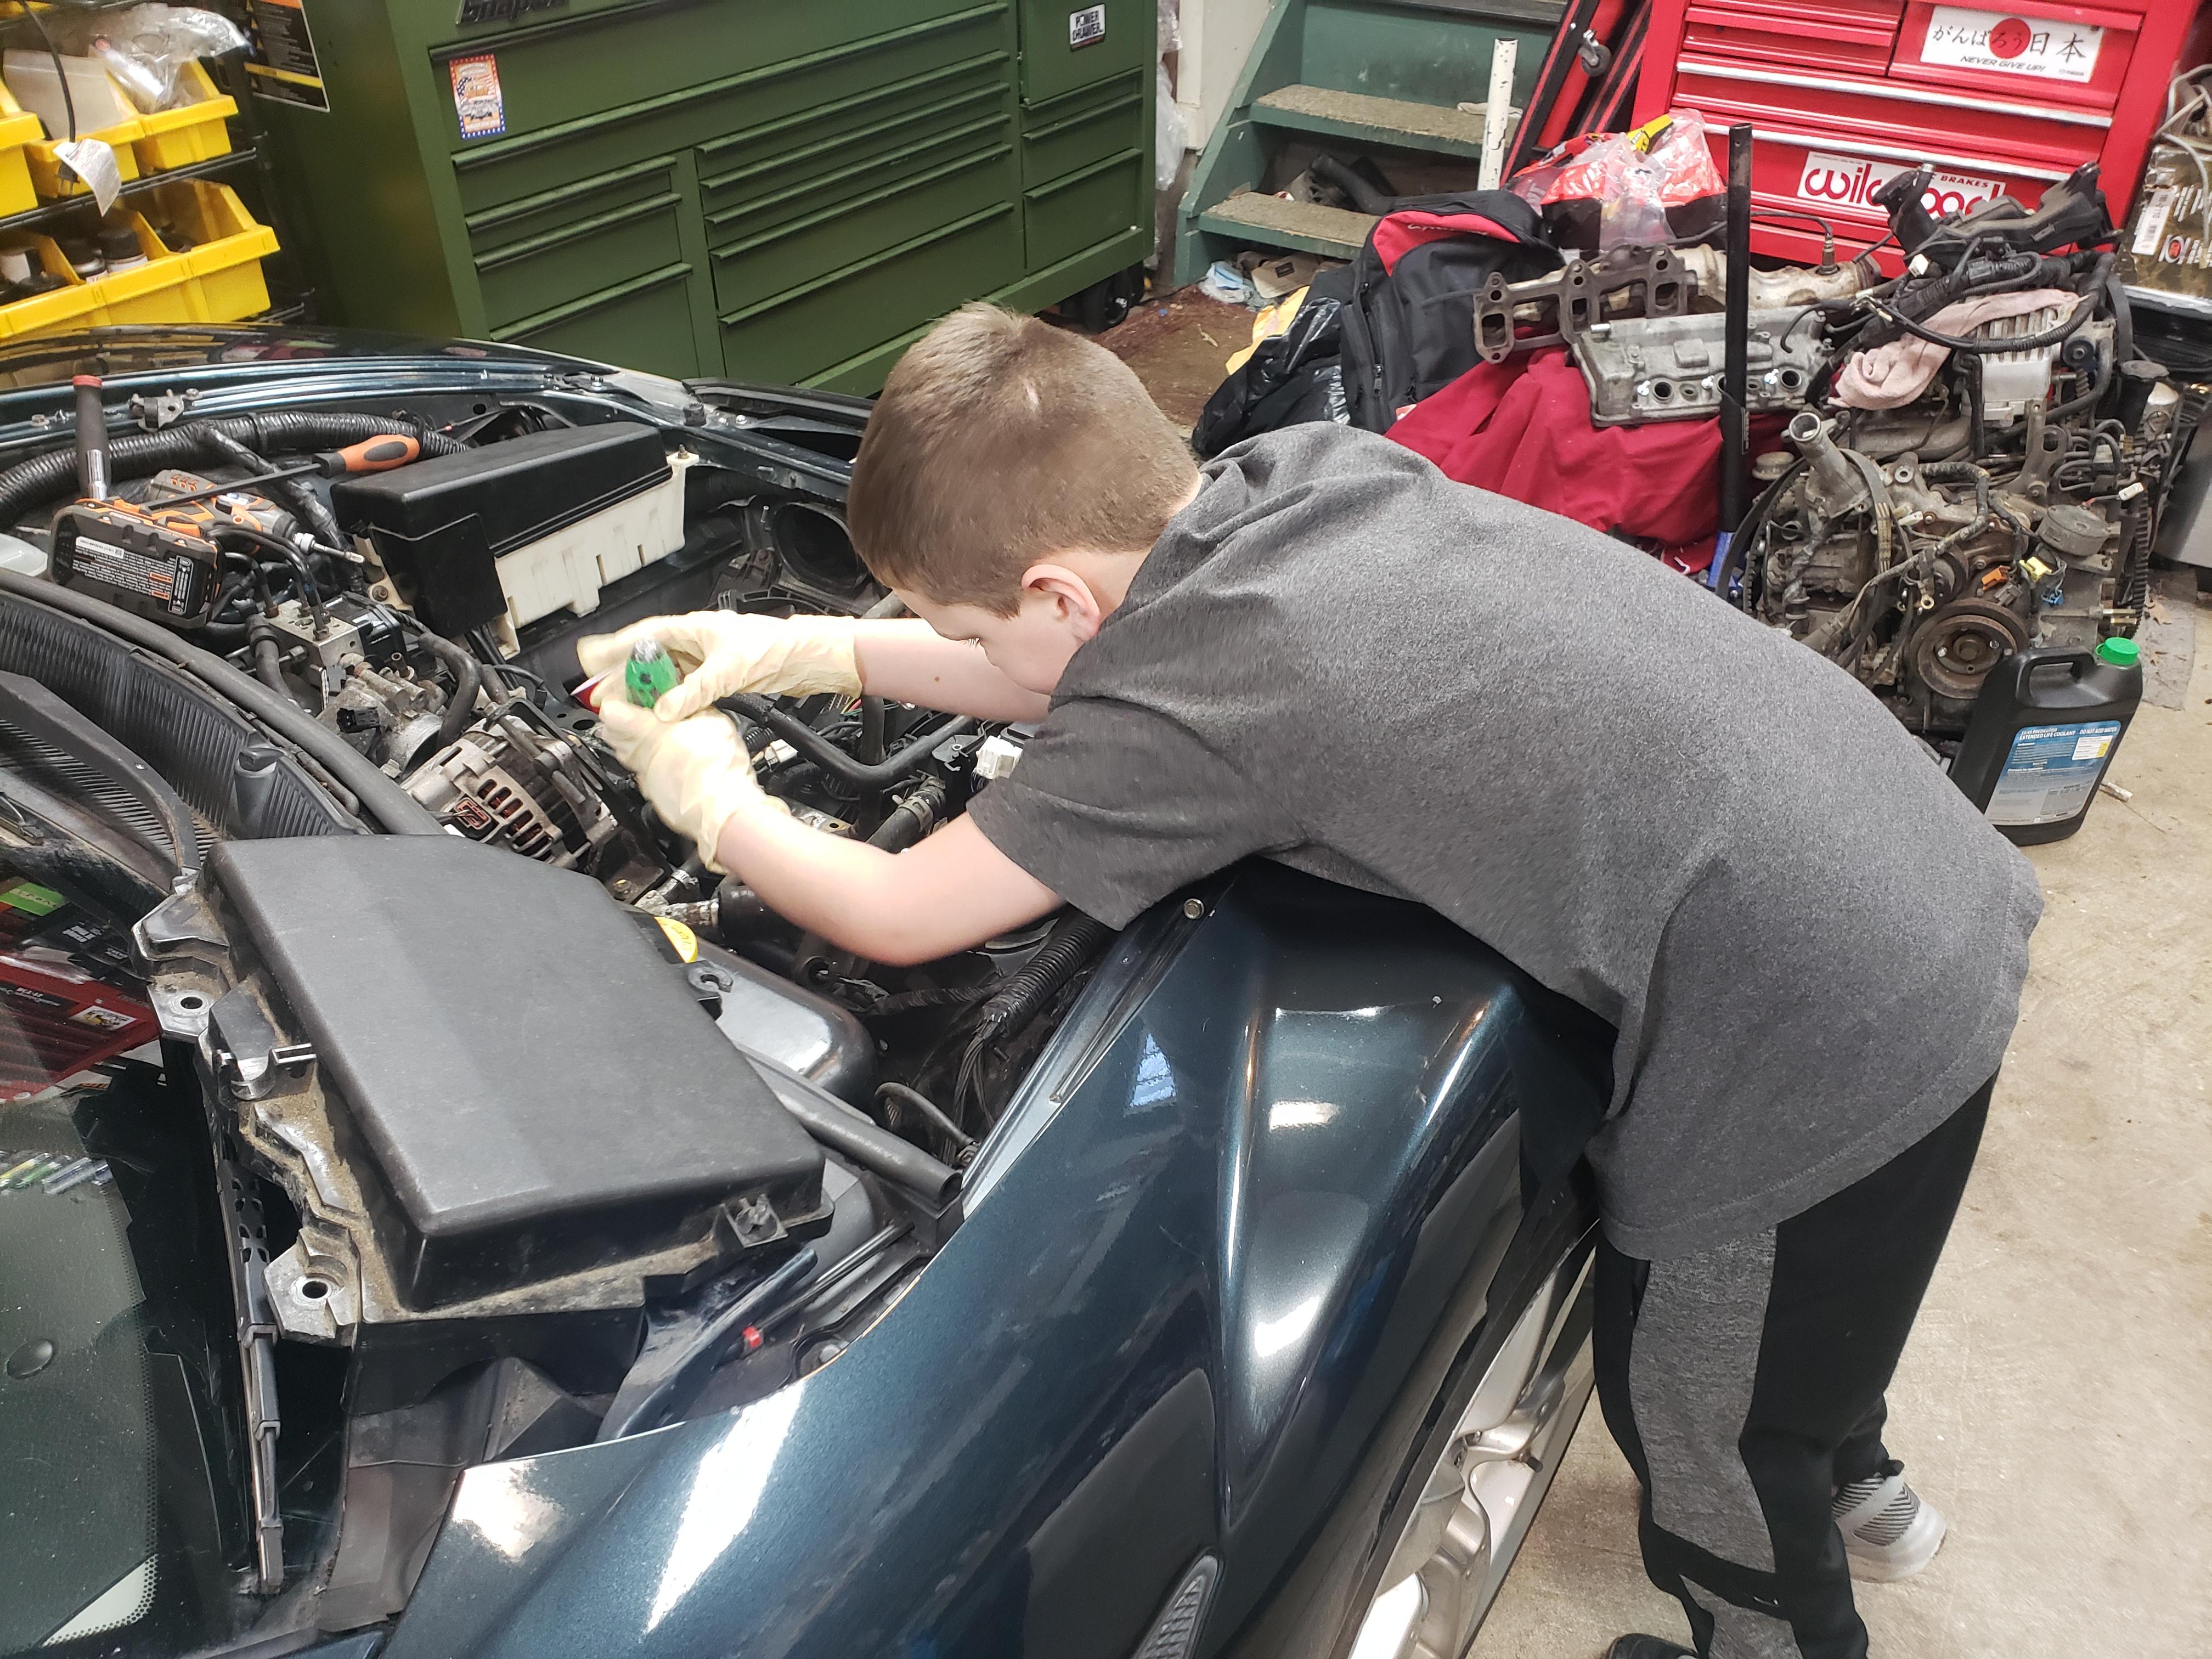
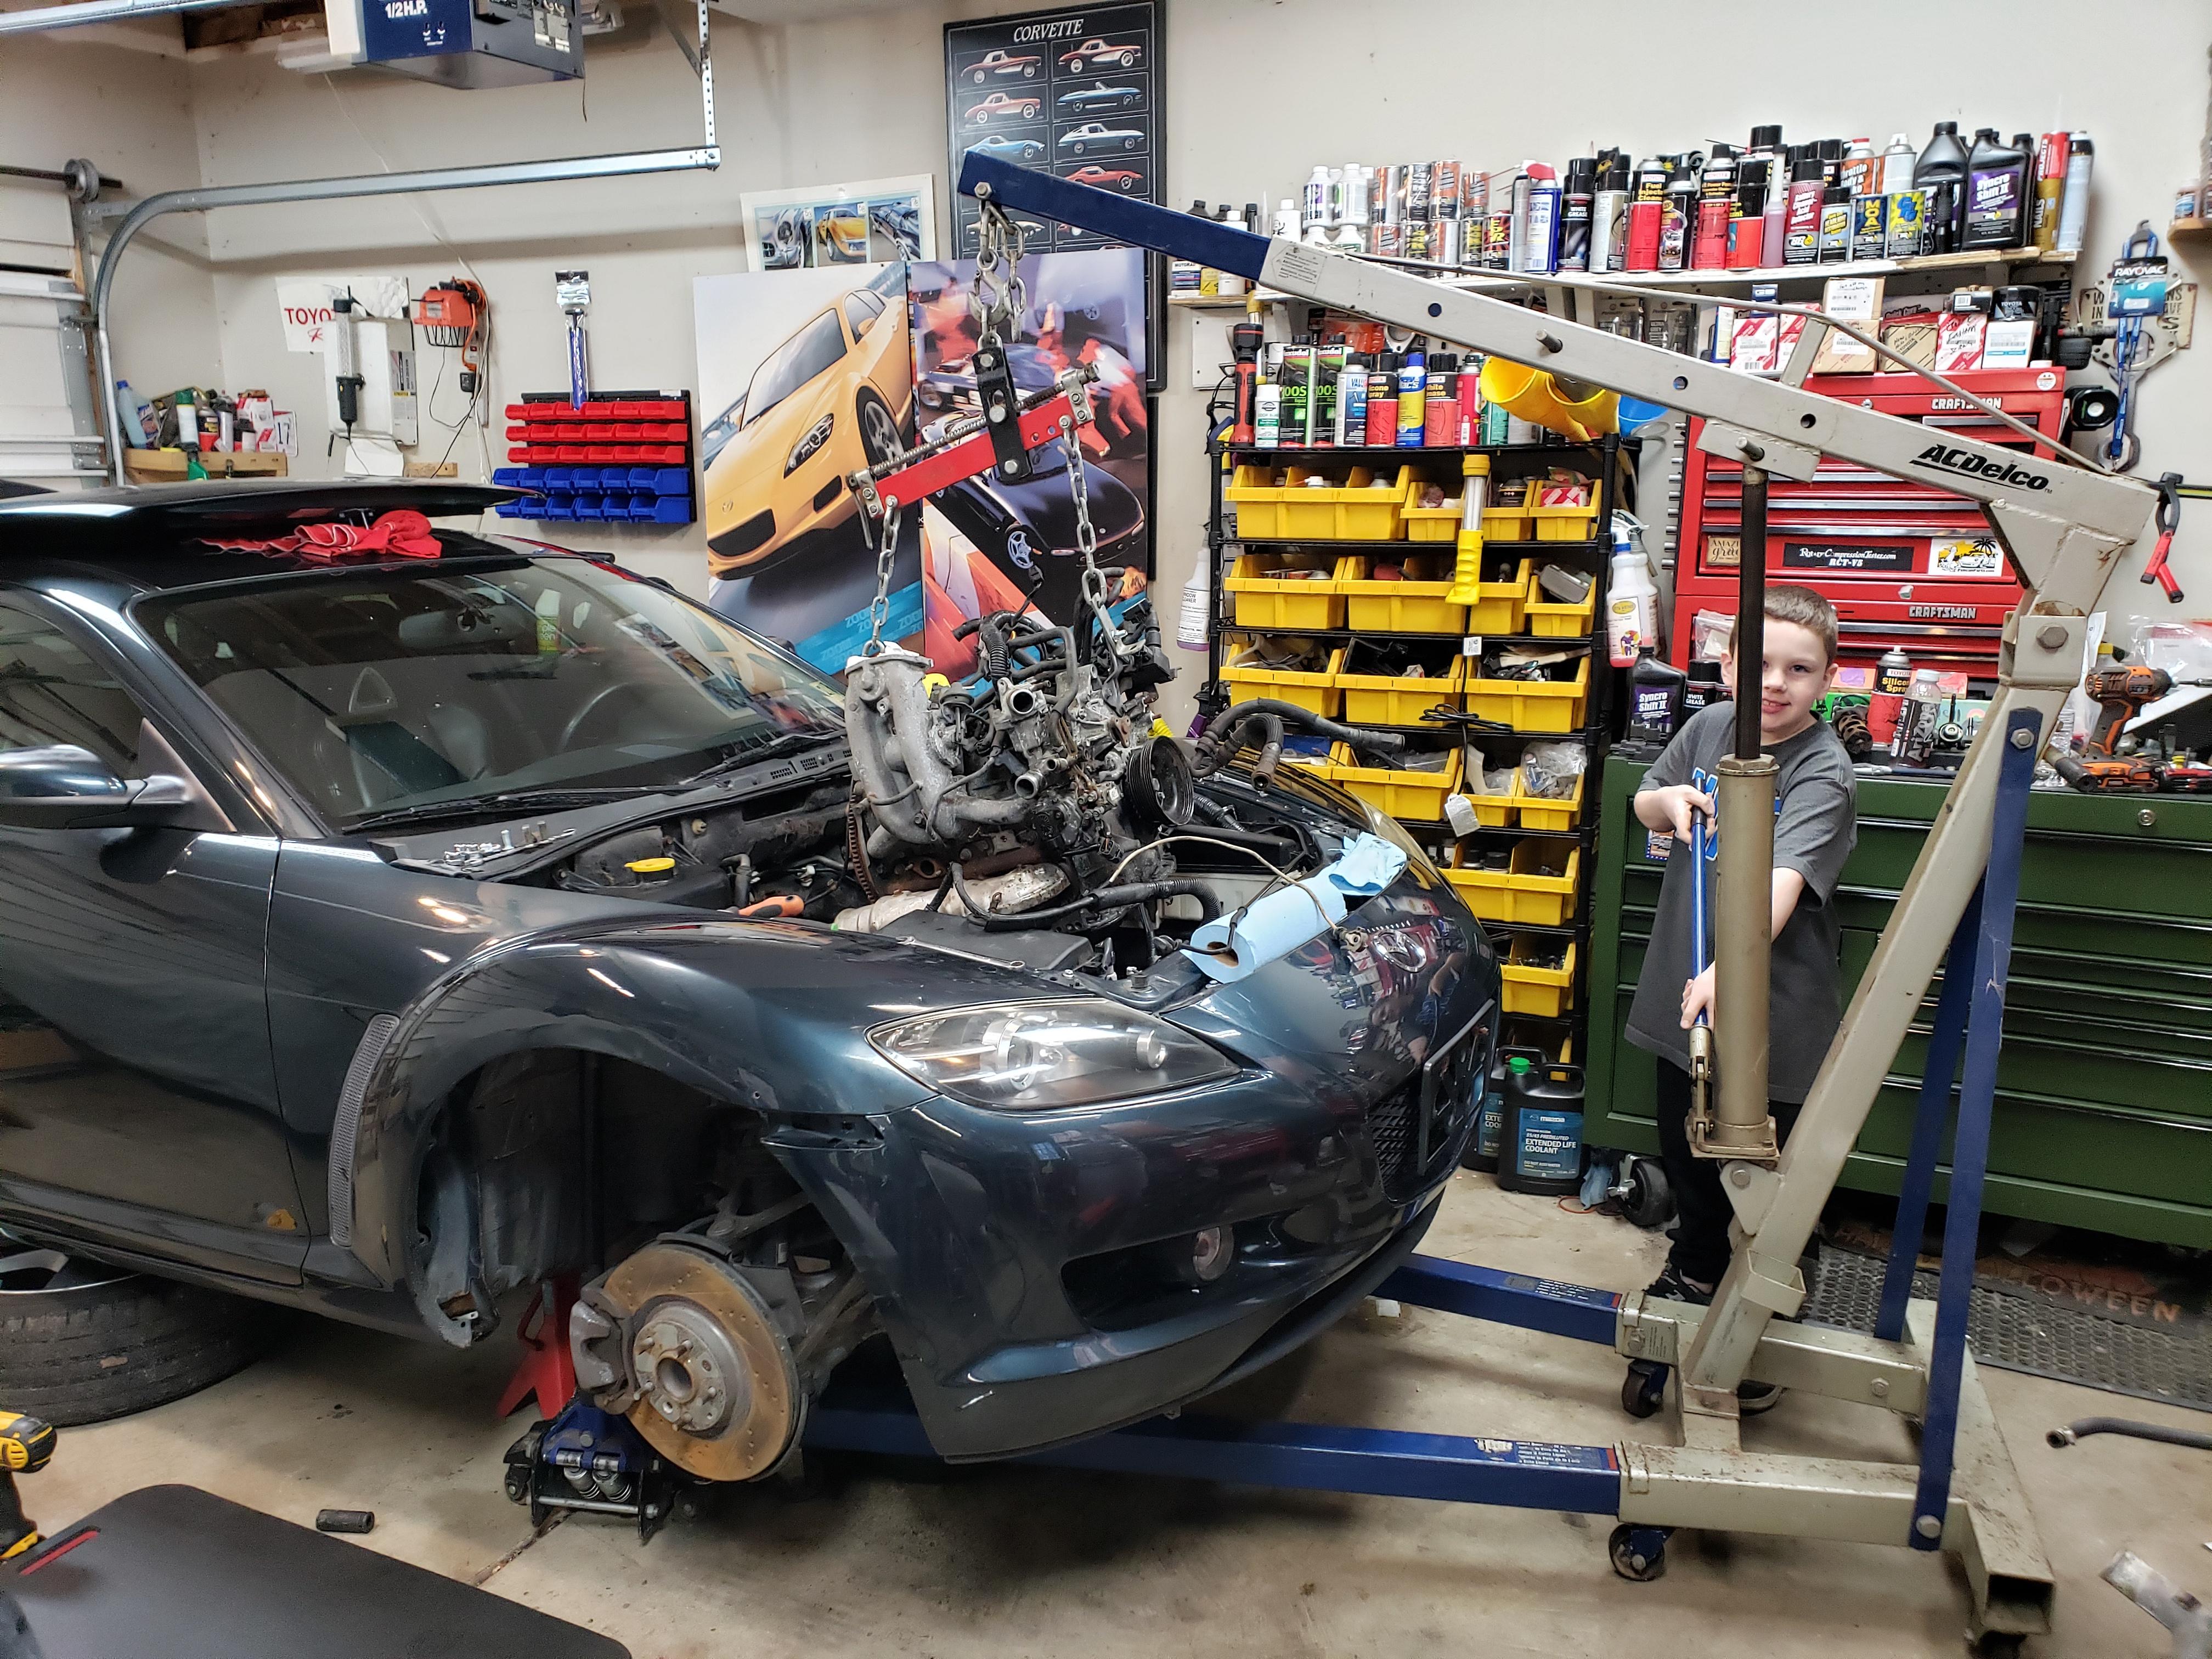
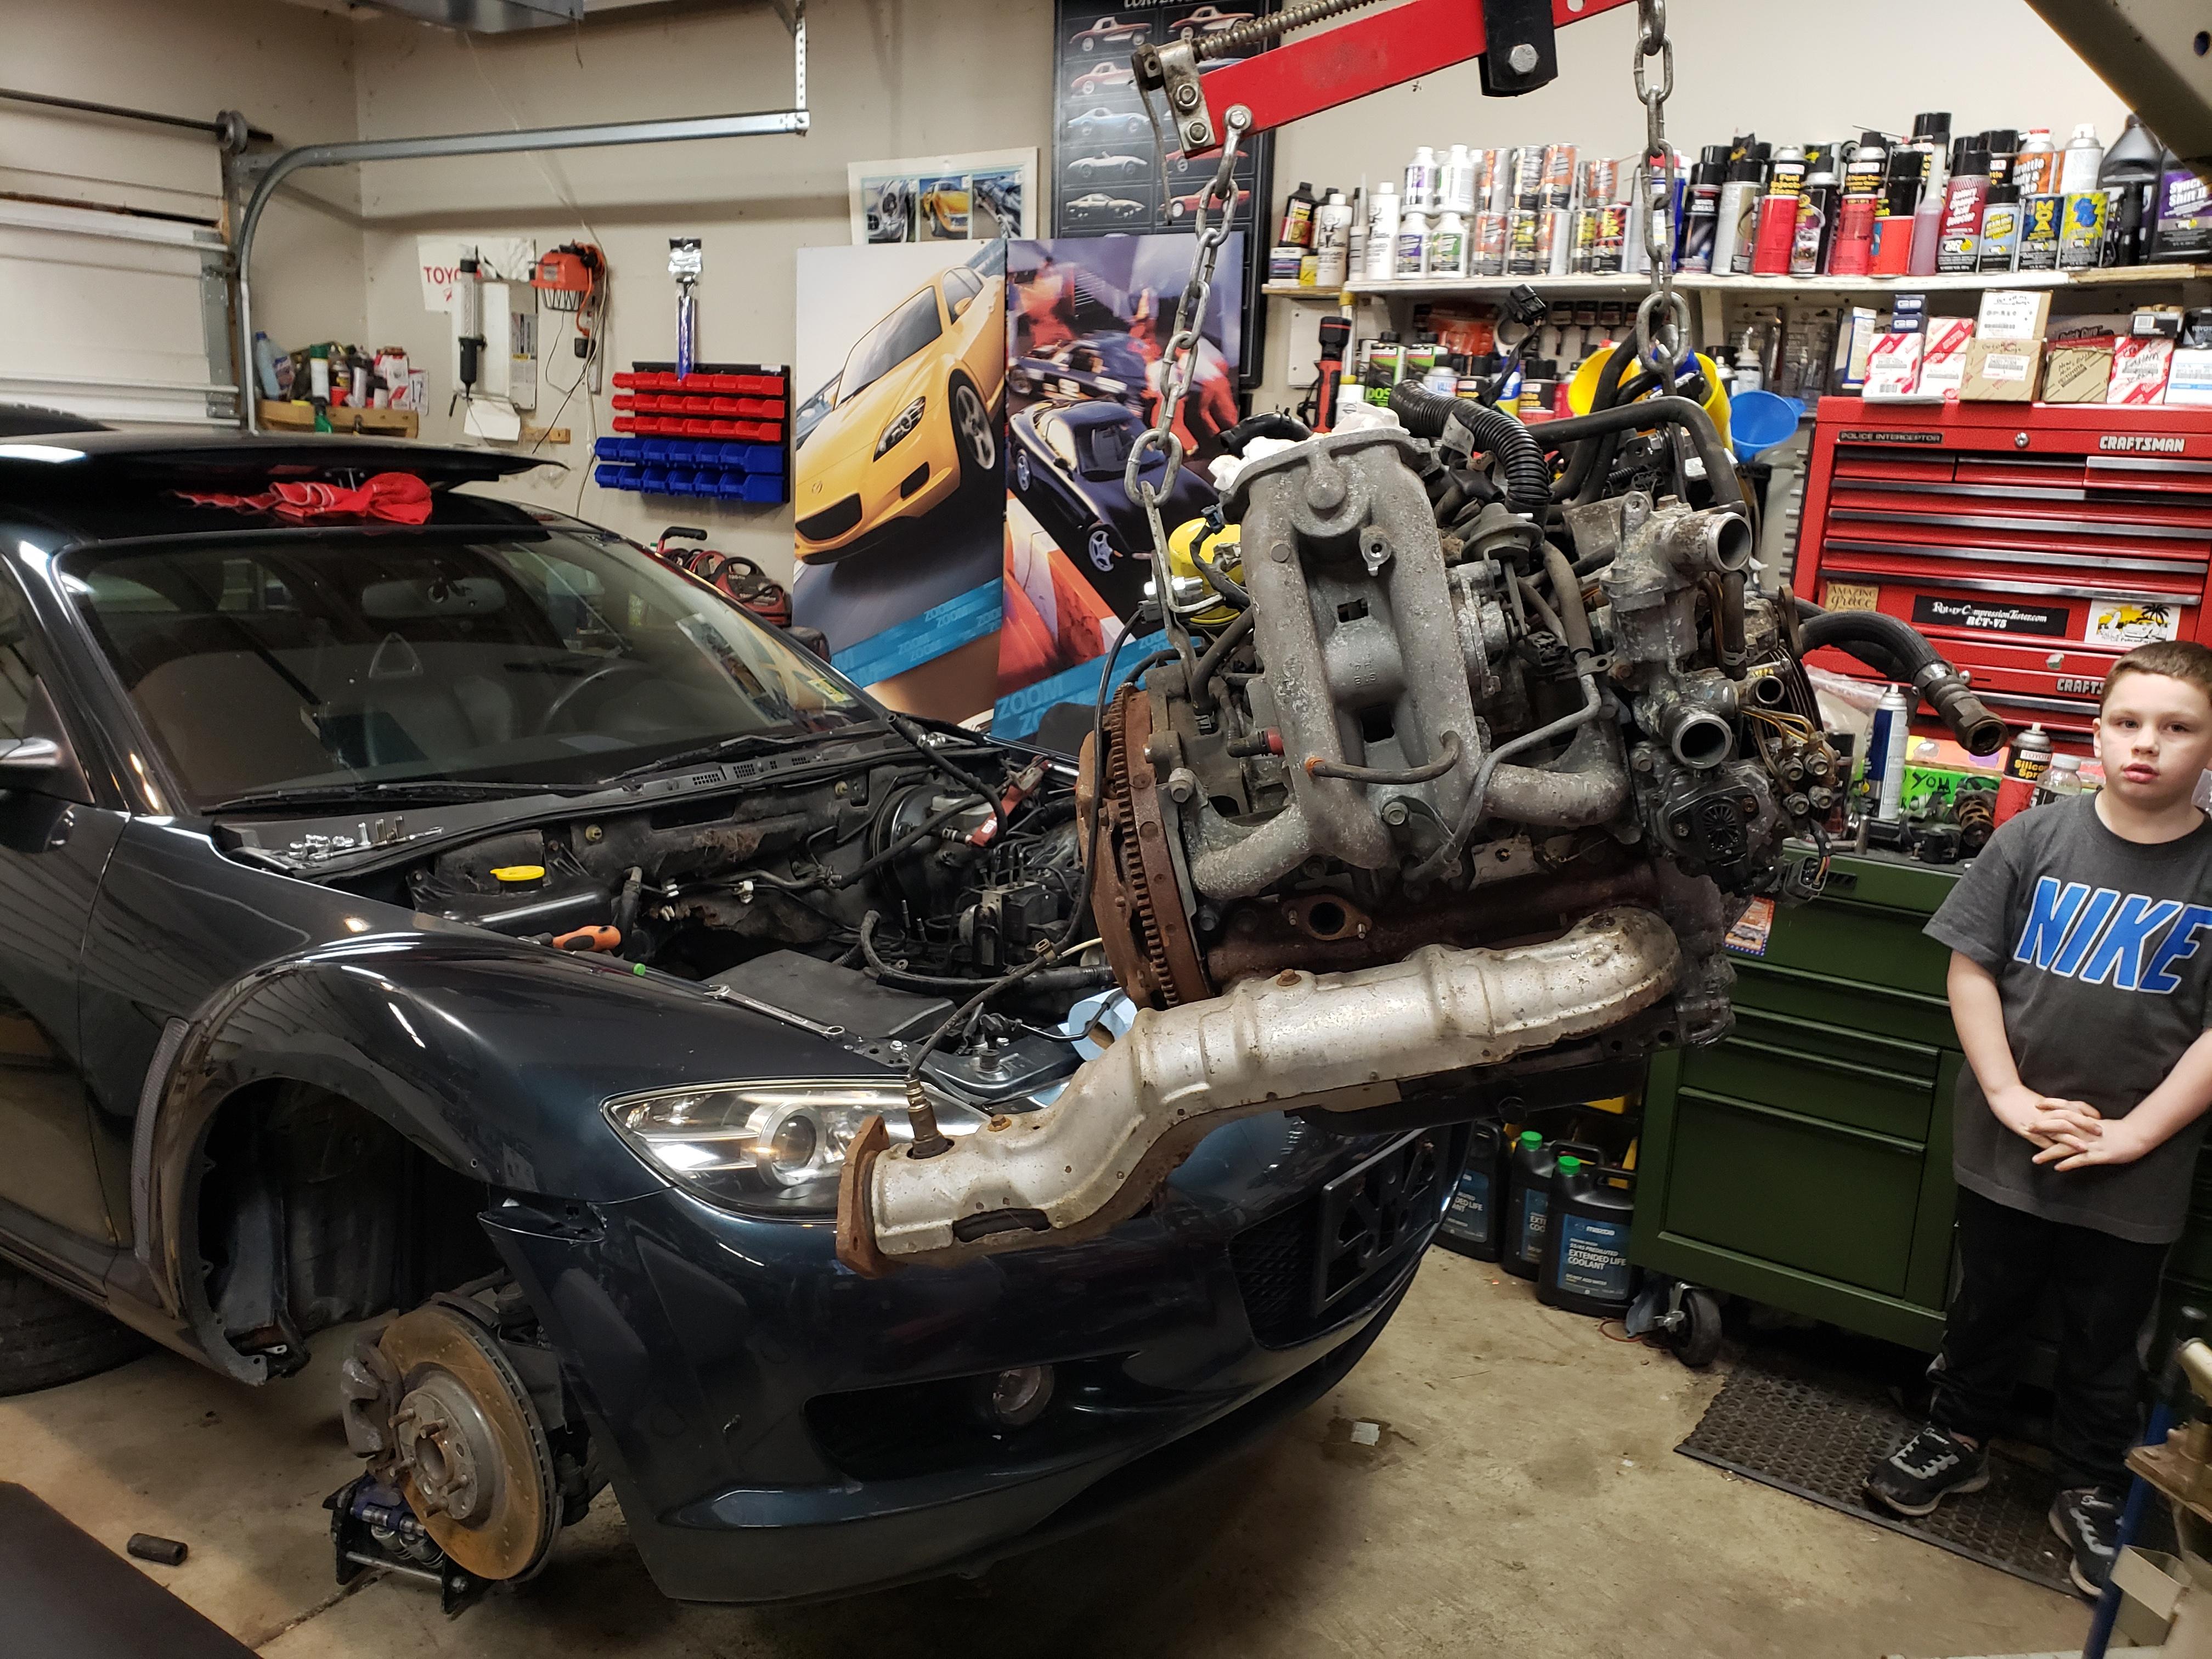
Yesterday was very successful. My youngest son Max and I removed the incorrect 4 port engine from the car. He was a big helper and he had a lot of fun helping and learning. Prepping the correct 6 port engine for install is the next objective. Wanted to share the pictures from yesterday!
The following 3 users liked this post by mazdaverx7:
03-25-2021, 06:02 AM
#11
RX-Heaven
Thread Starter
iTrader: (6)
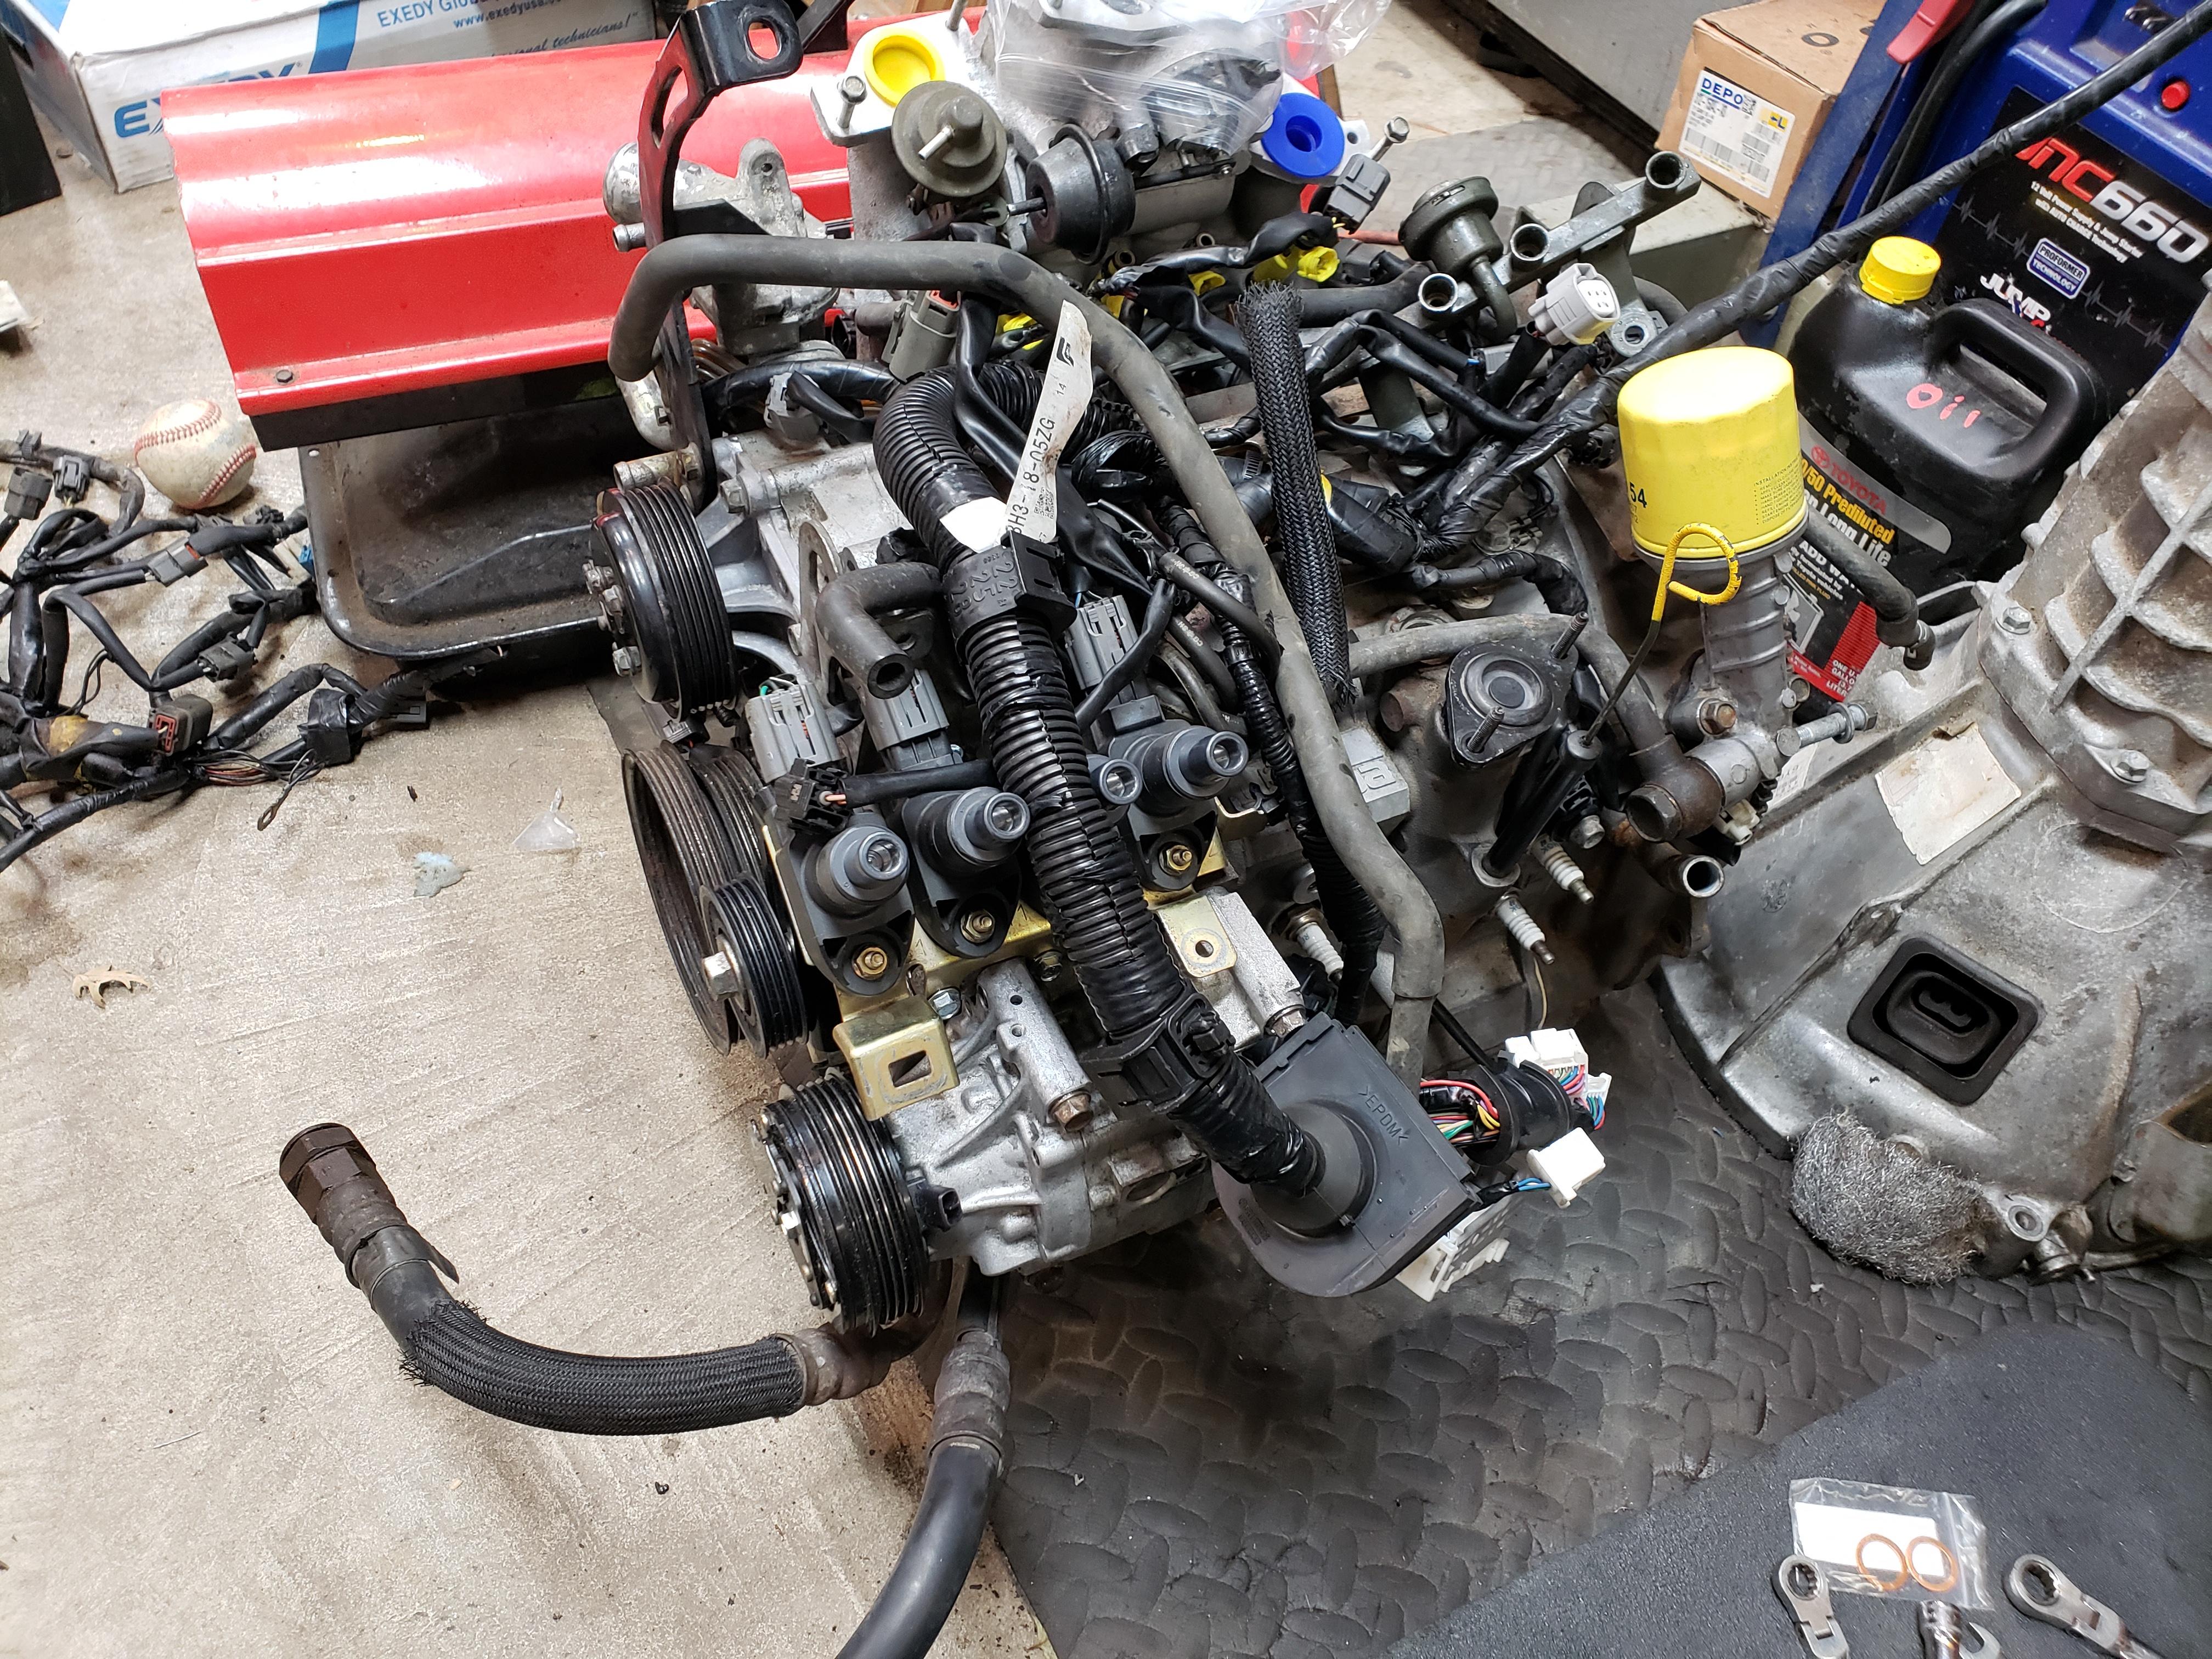
Currently prepping the "new" engine to go in the car. I've stripped it down and cleaned it and have run a cold compression 8on the engine to verify operation. Compression pulses sound strong and even with the spark plugs removed. This engine is a Mazda reman and has only 30k miles on it. I'm anticipating that it should last some time. I have more gaskets to pick up from Mazda on Friday and I'm hoping to have the engine in this weekend. Still have to figure out about the transmission leak. Seems to have a leak behind the input shaft. Looks like a cover that bolts to the bellhousing is leaking trans oil. I'll have to investigate further. Will be posting more pictures of all of the new parts the came in and some more progress thats been made!
 03-25-2021, 06:17 AM
#13
FULLY SEMI AUTOMATIC
iTrader: (9)

nice progress. i would tear out the engine bay insulation tho. it looks terrible, ive done it on a couple 8s and its easier with the motor out
03-31-2021, 05:59 AM
#14
RX-Heaven
Thread Starter
iTrader: (6)
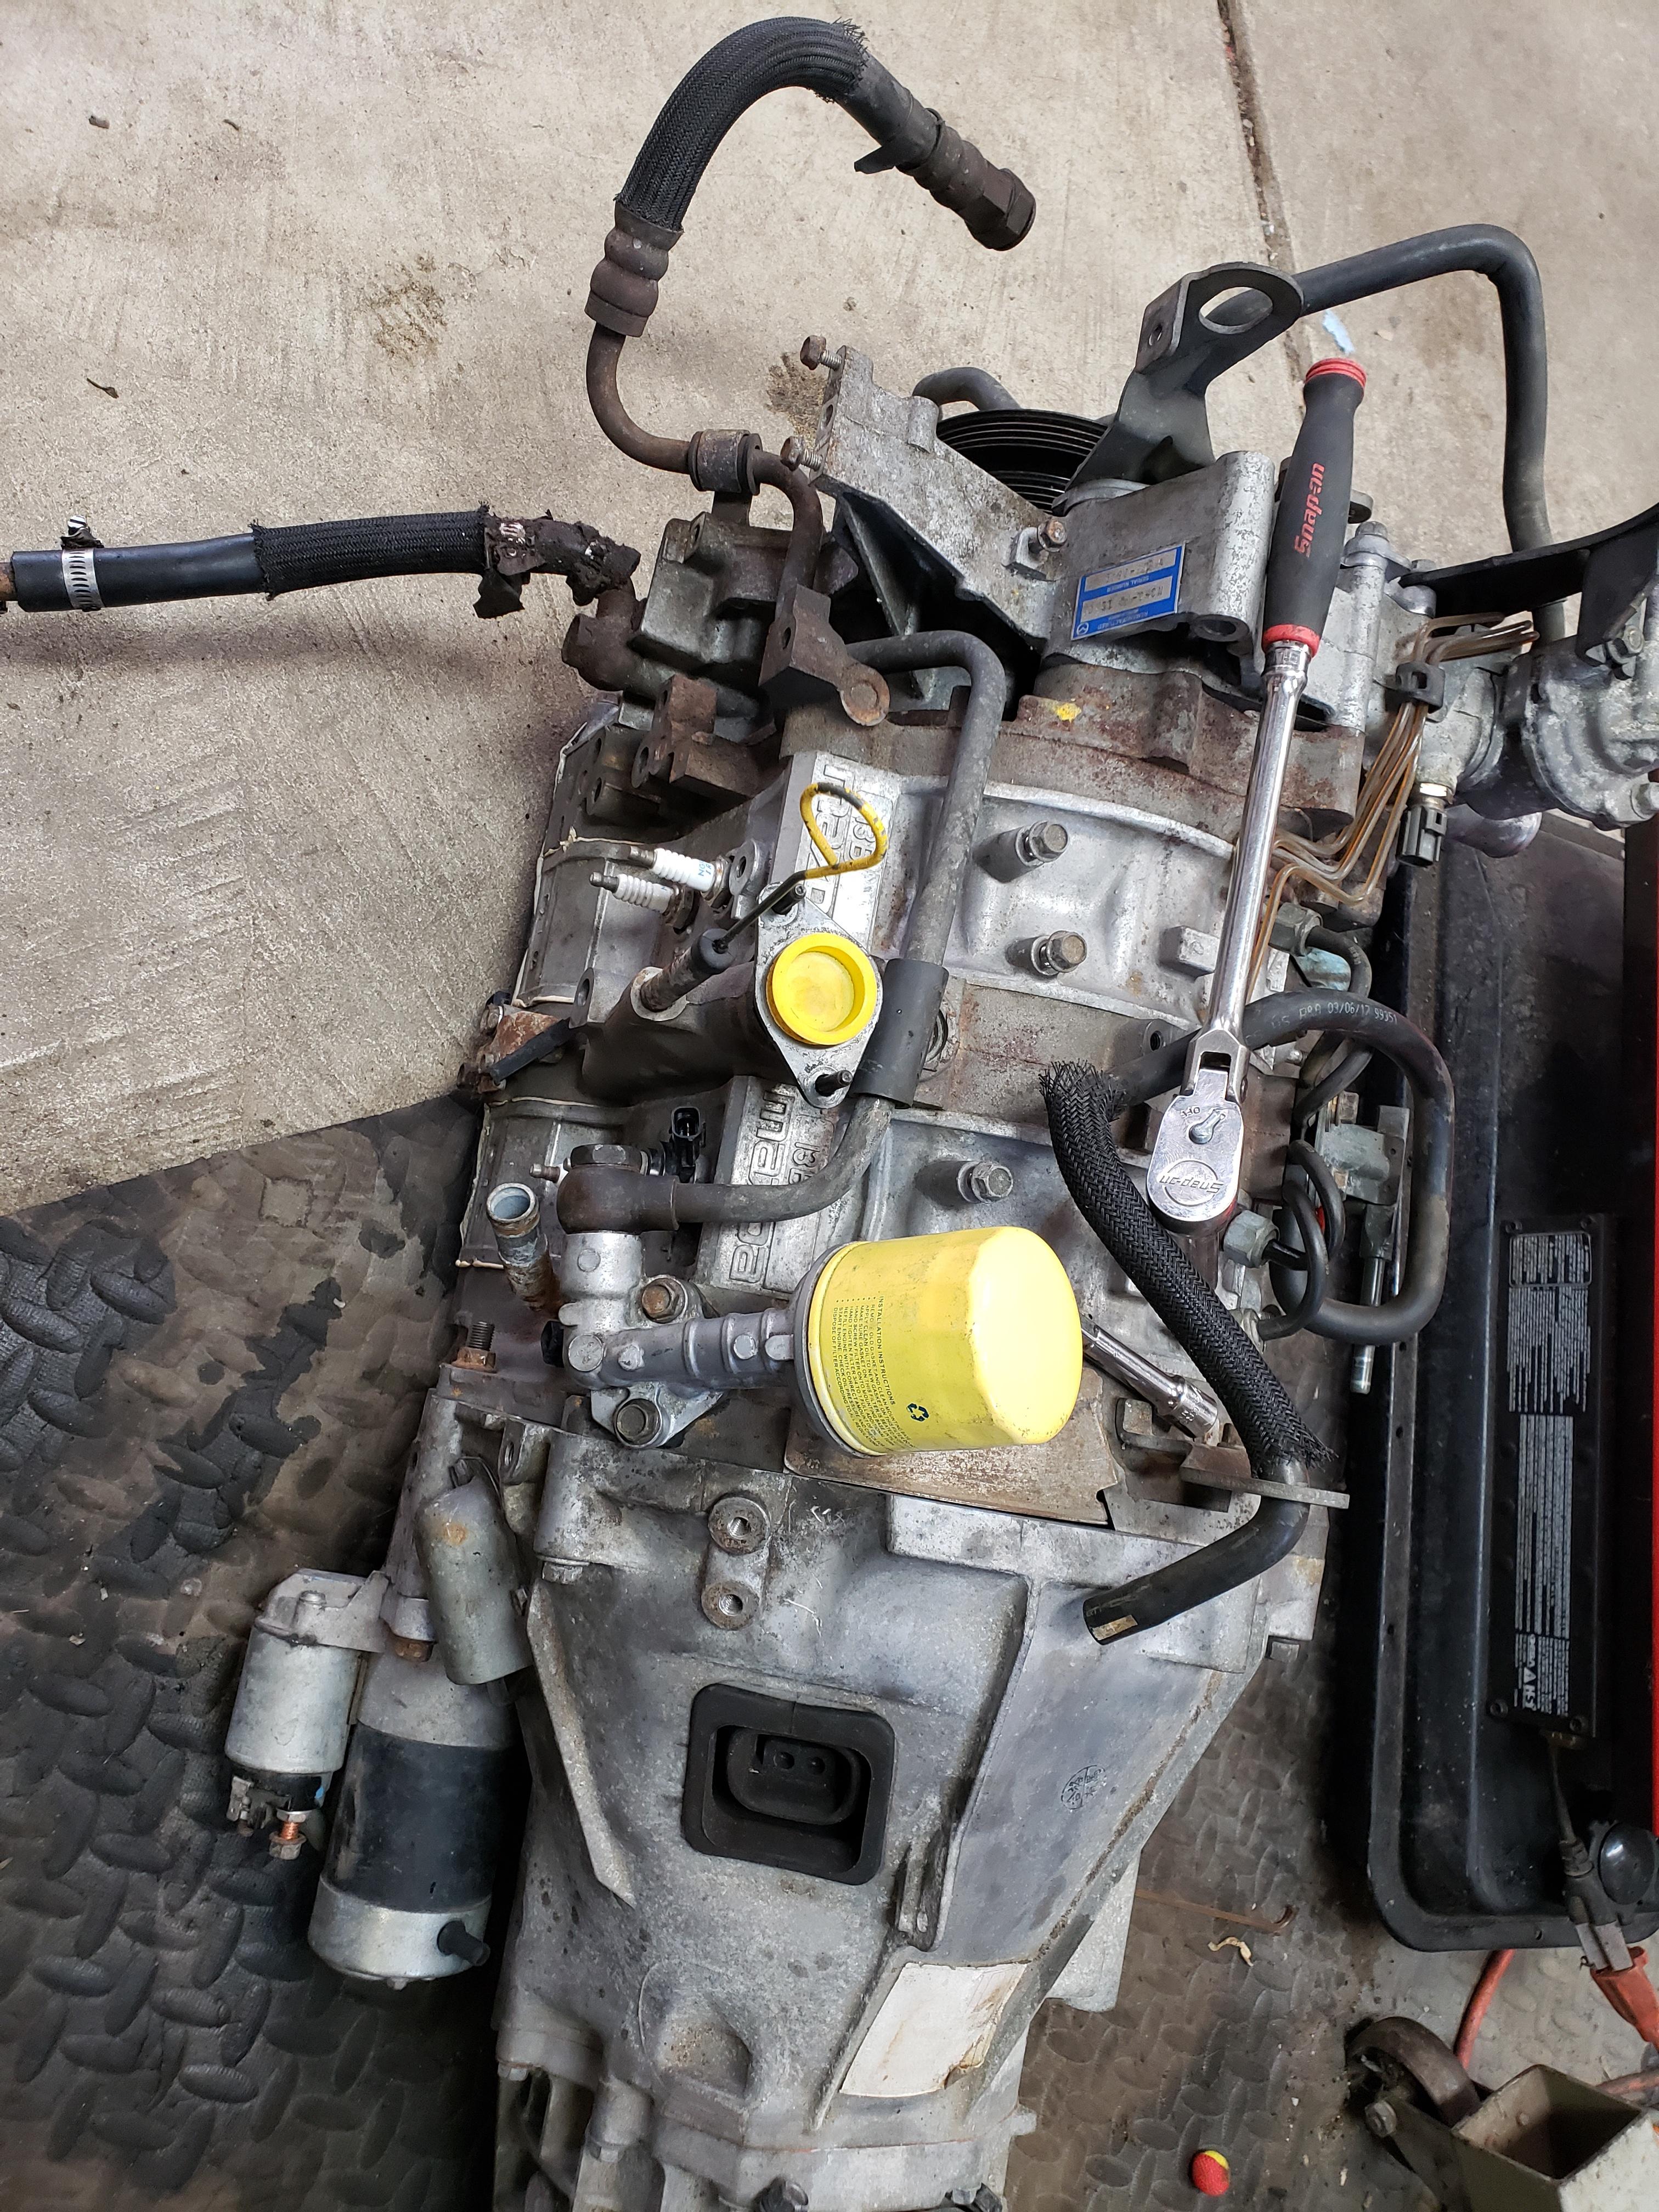
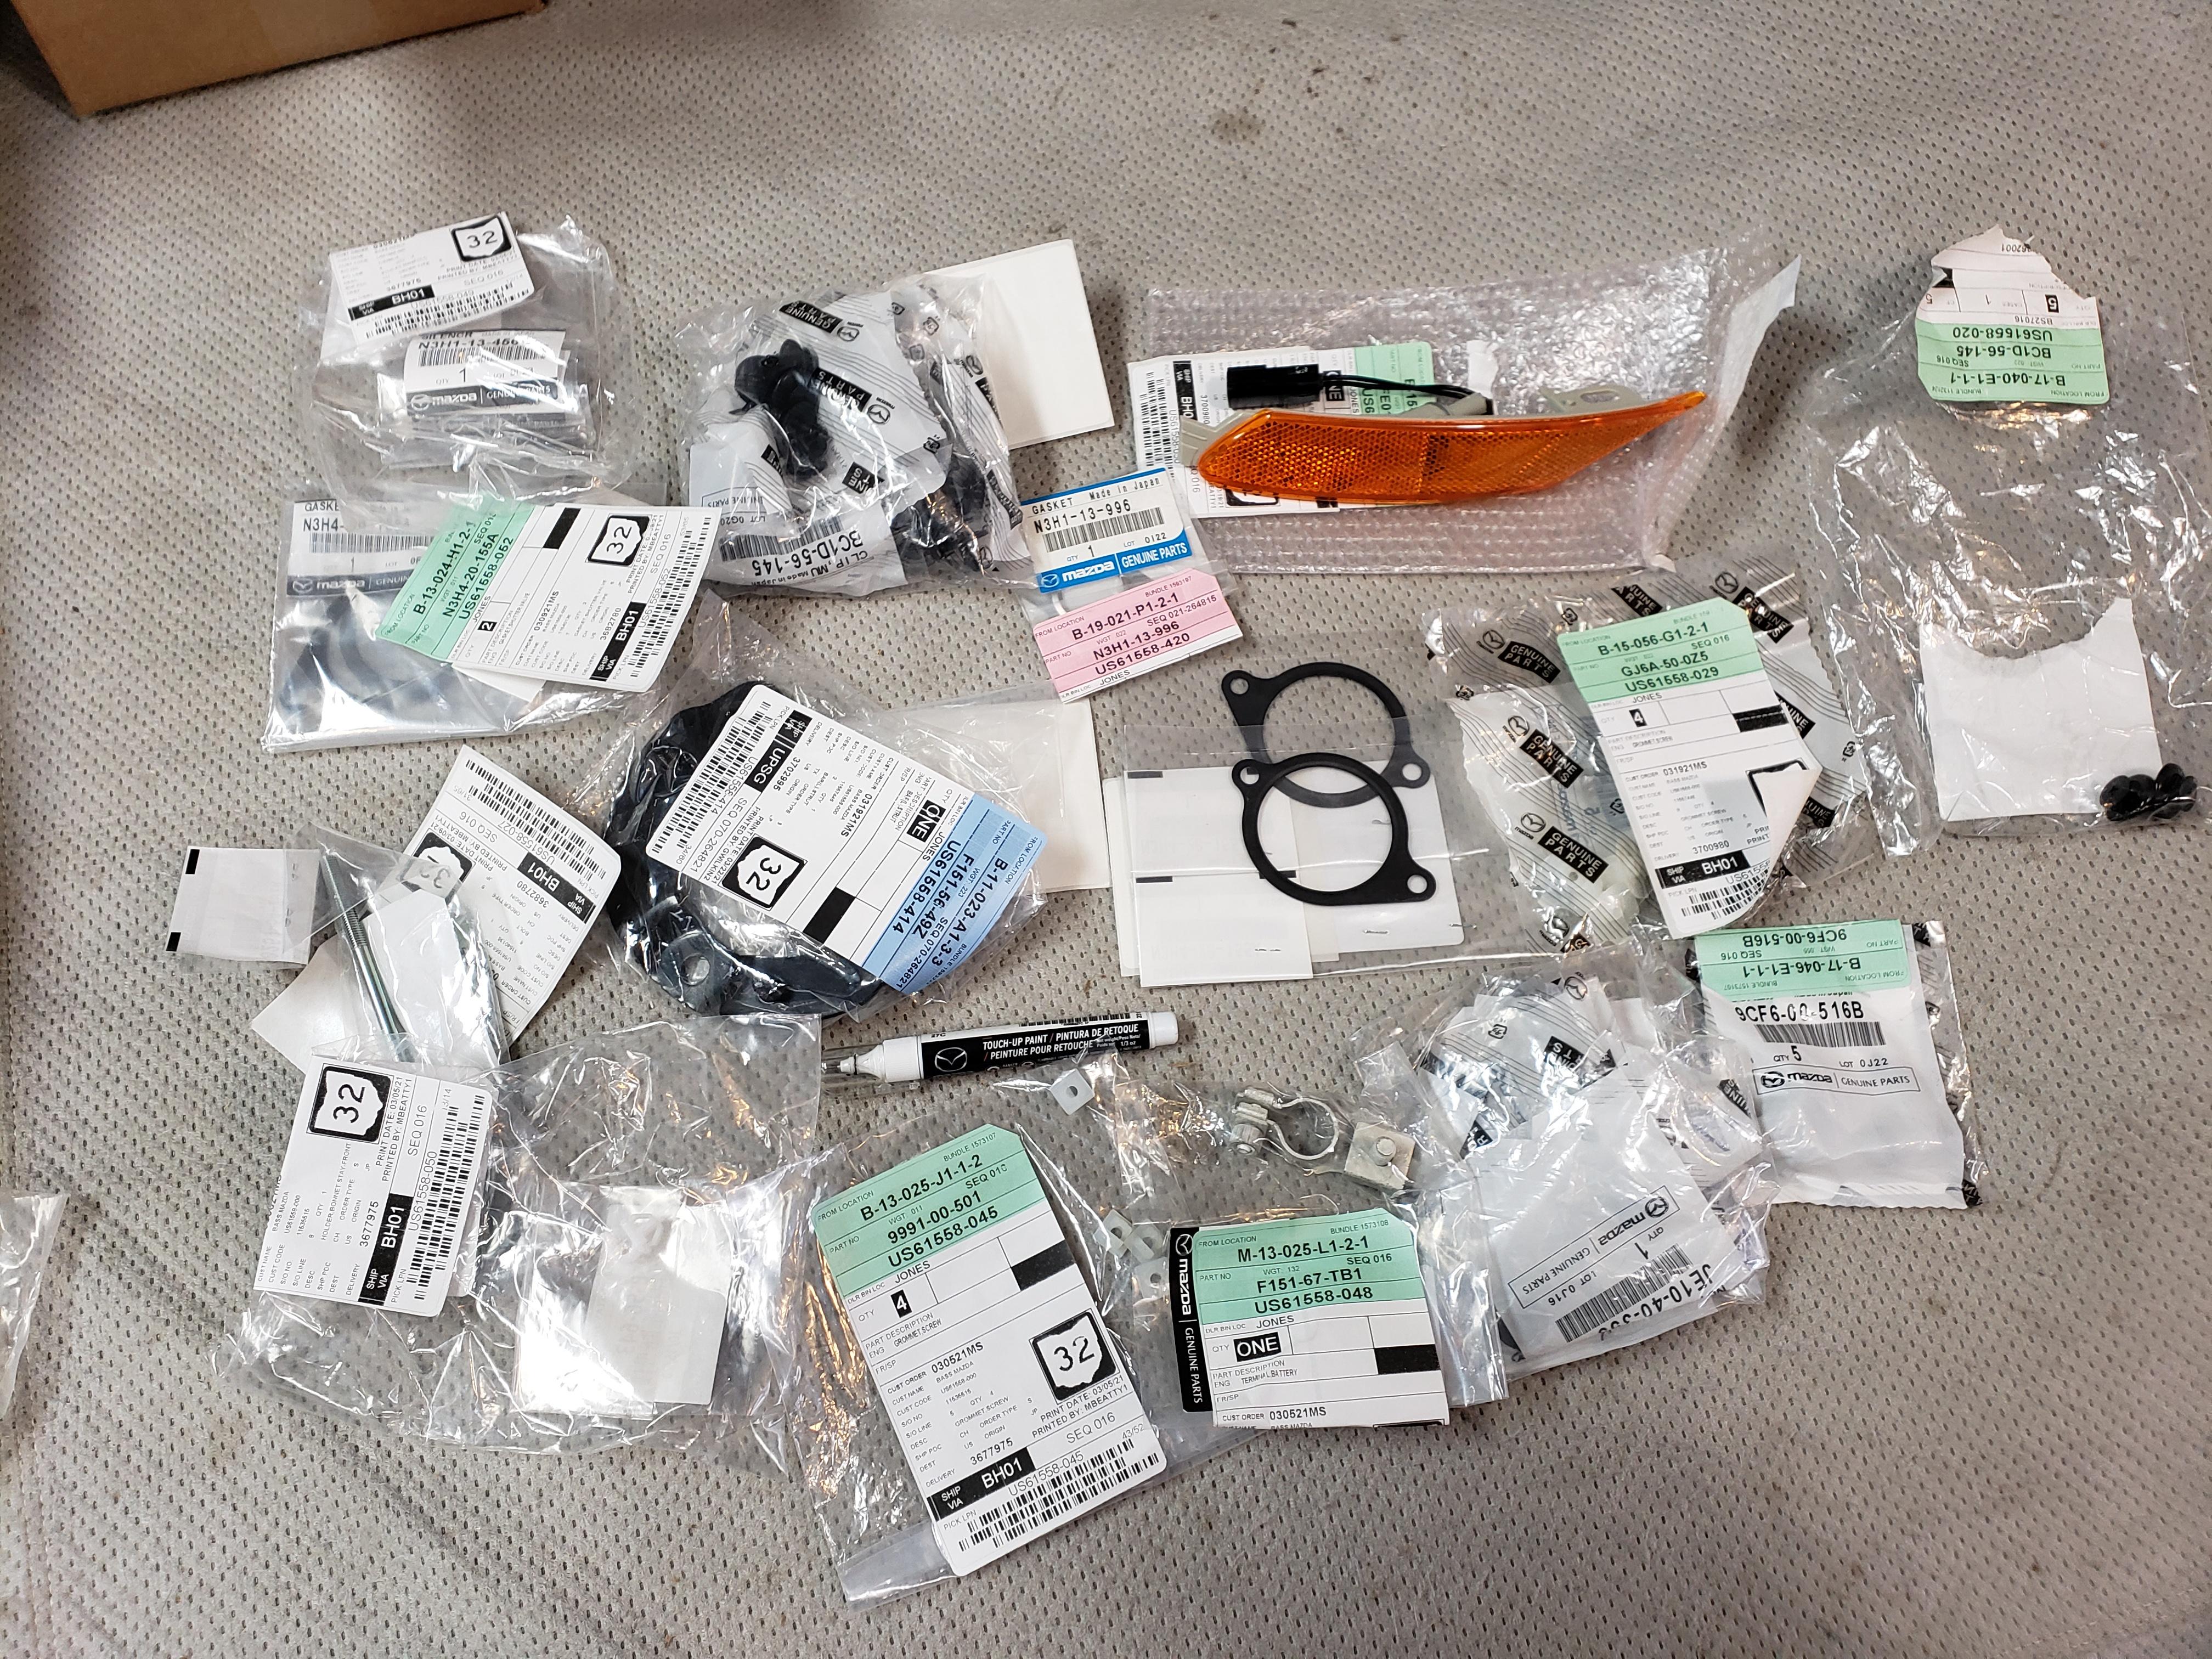
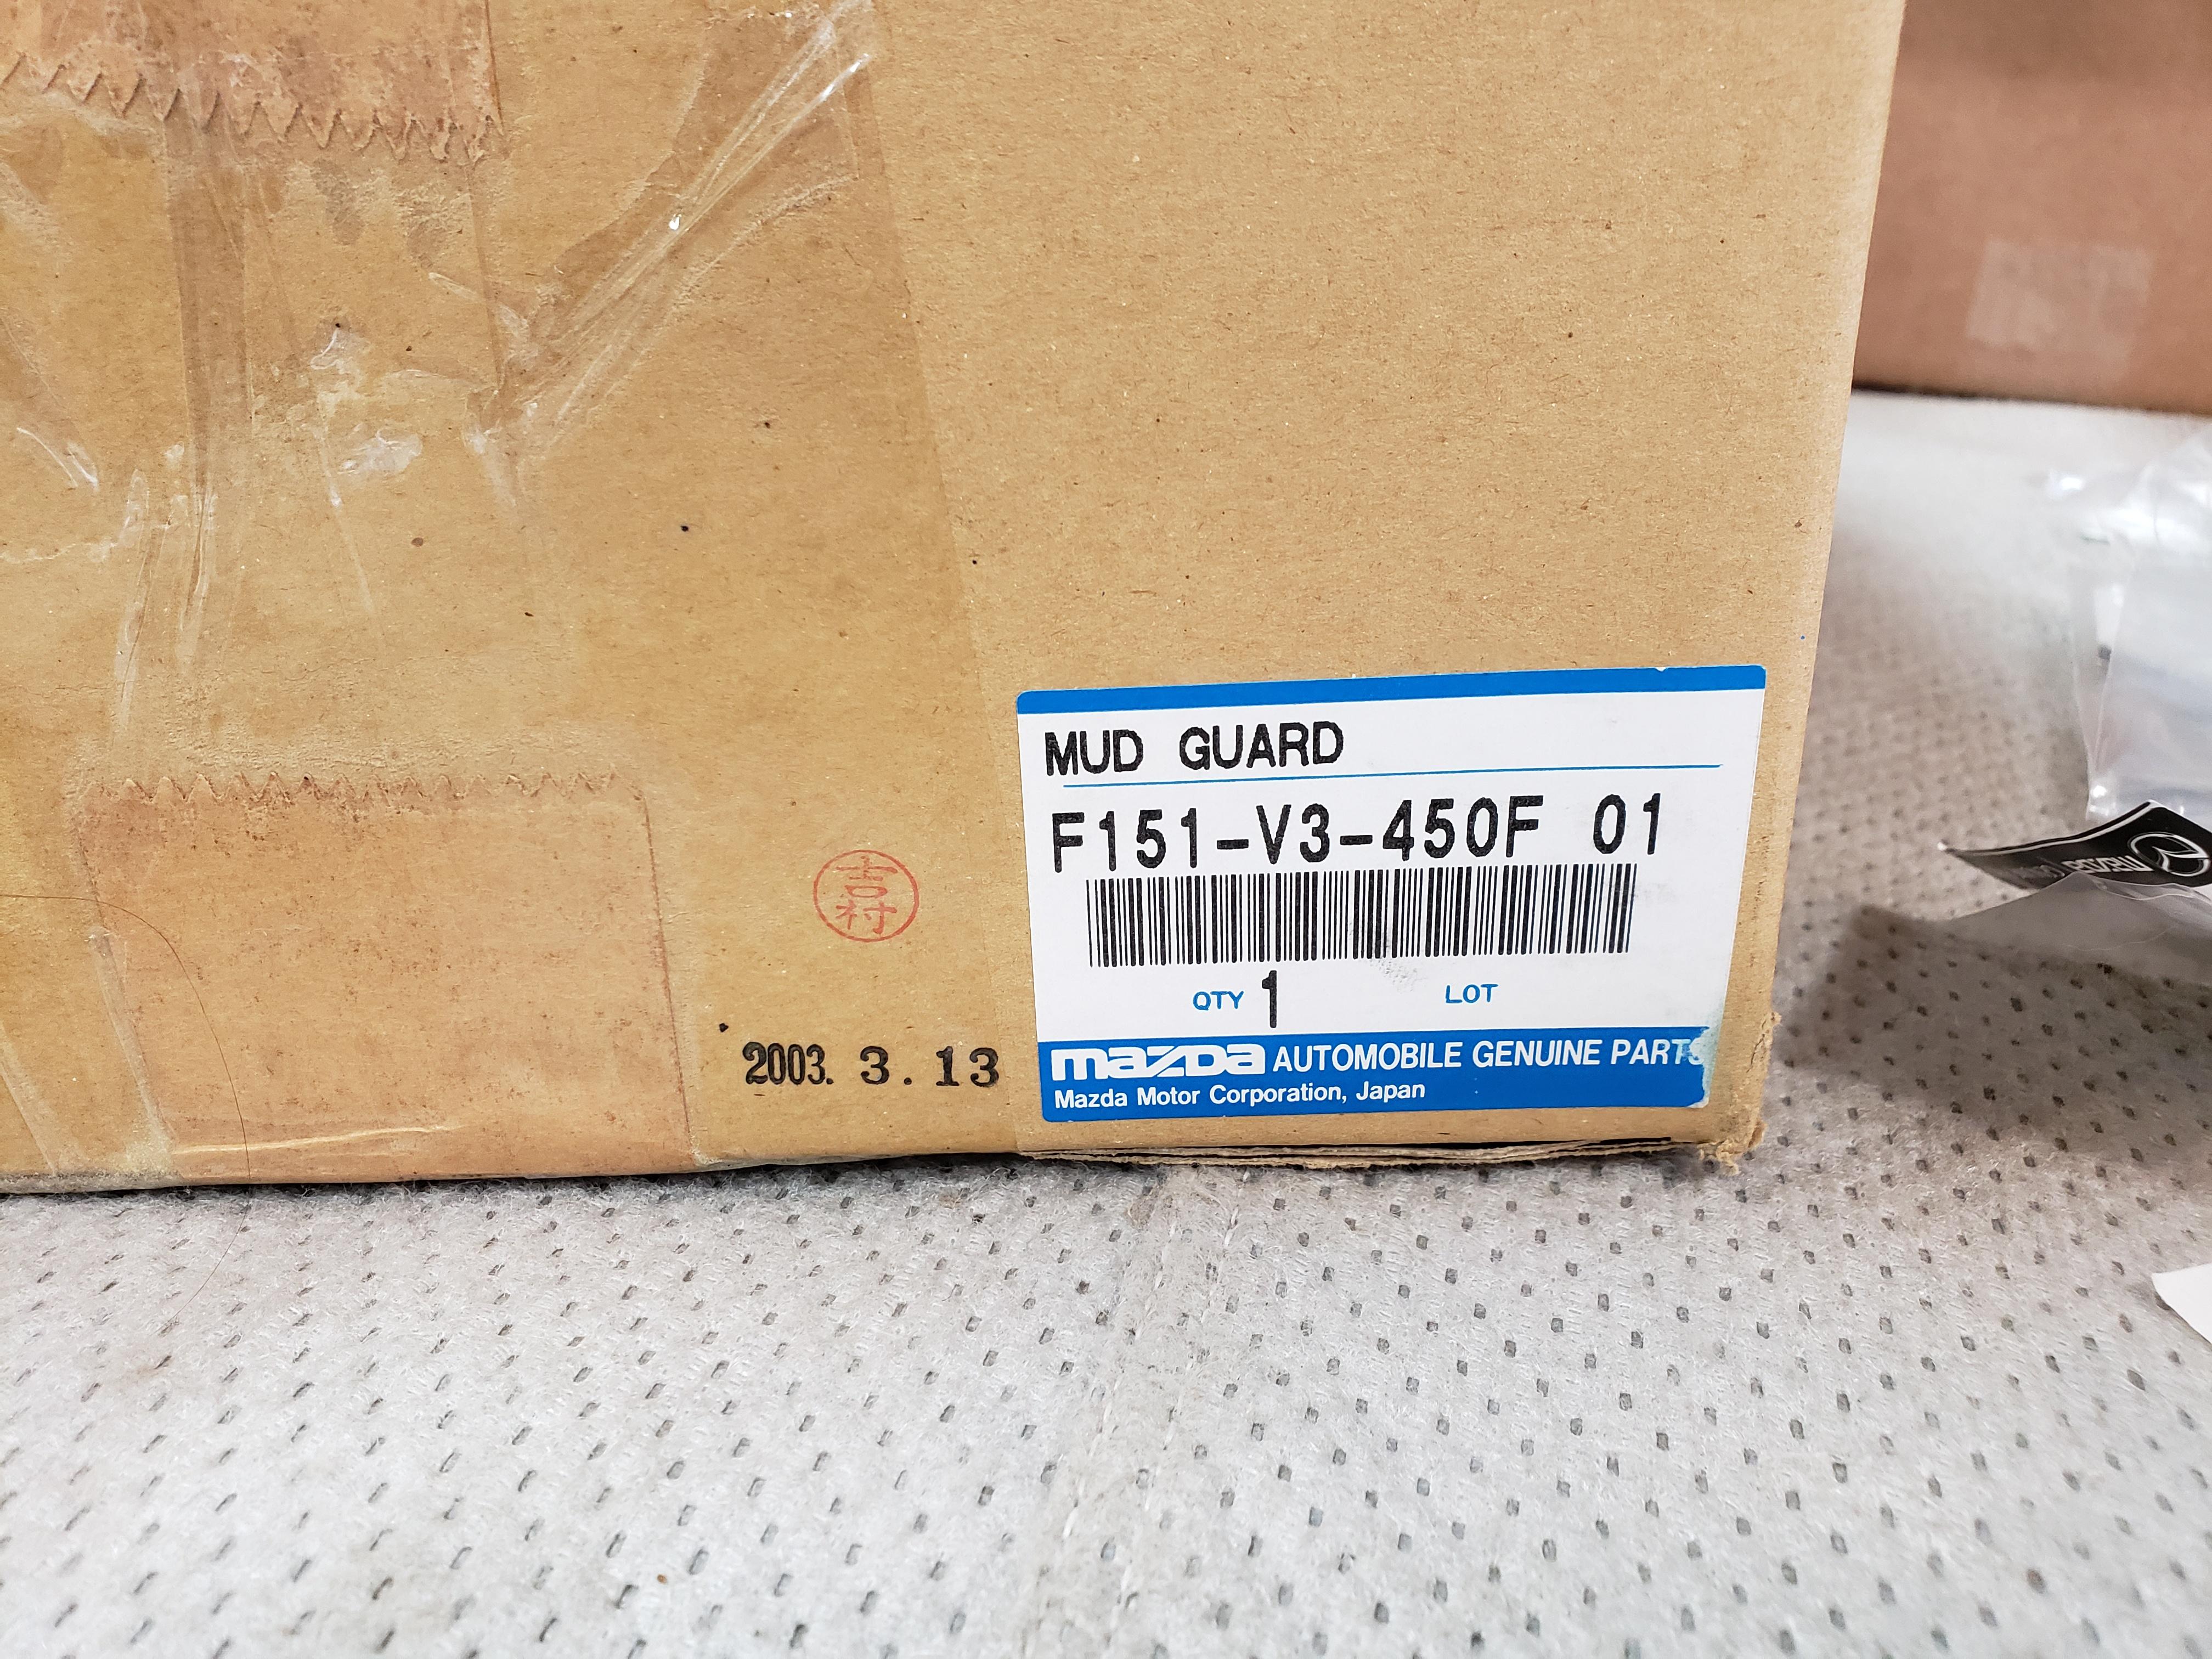
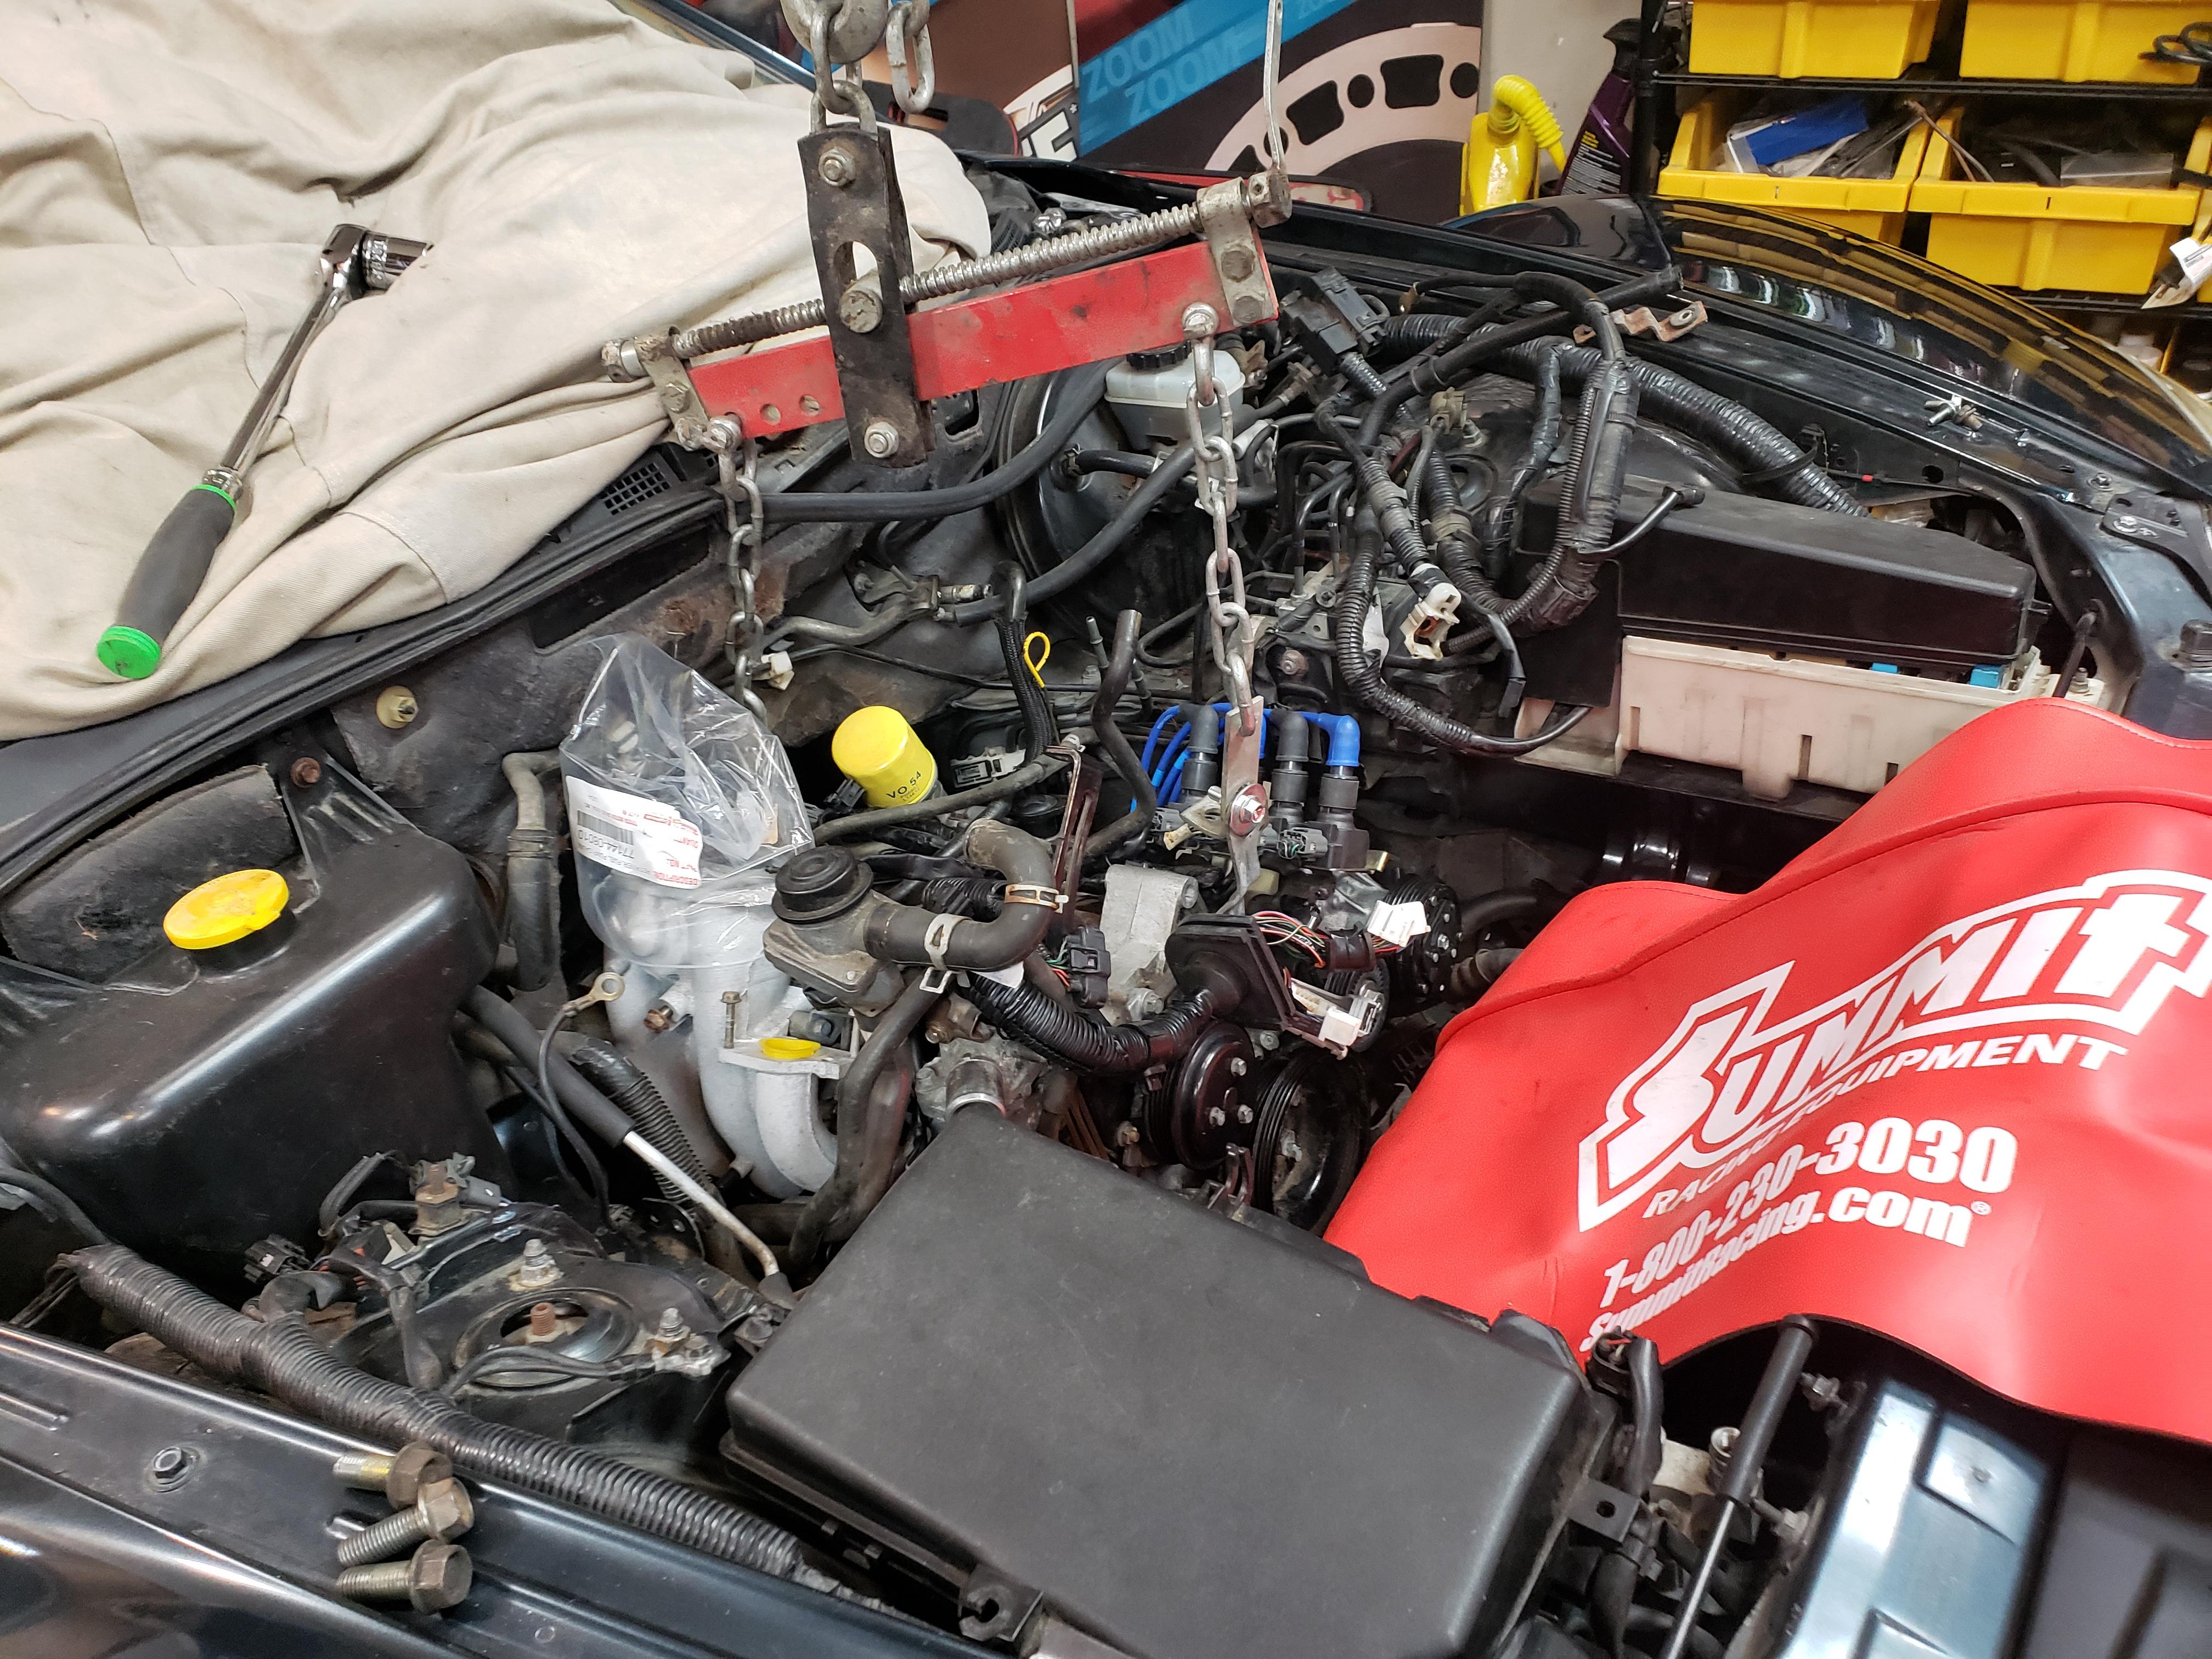
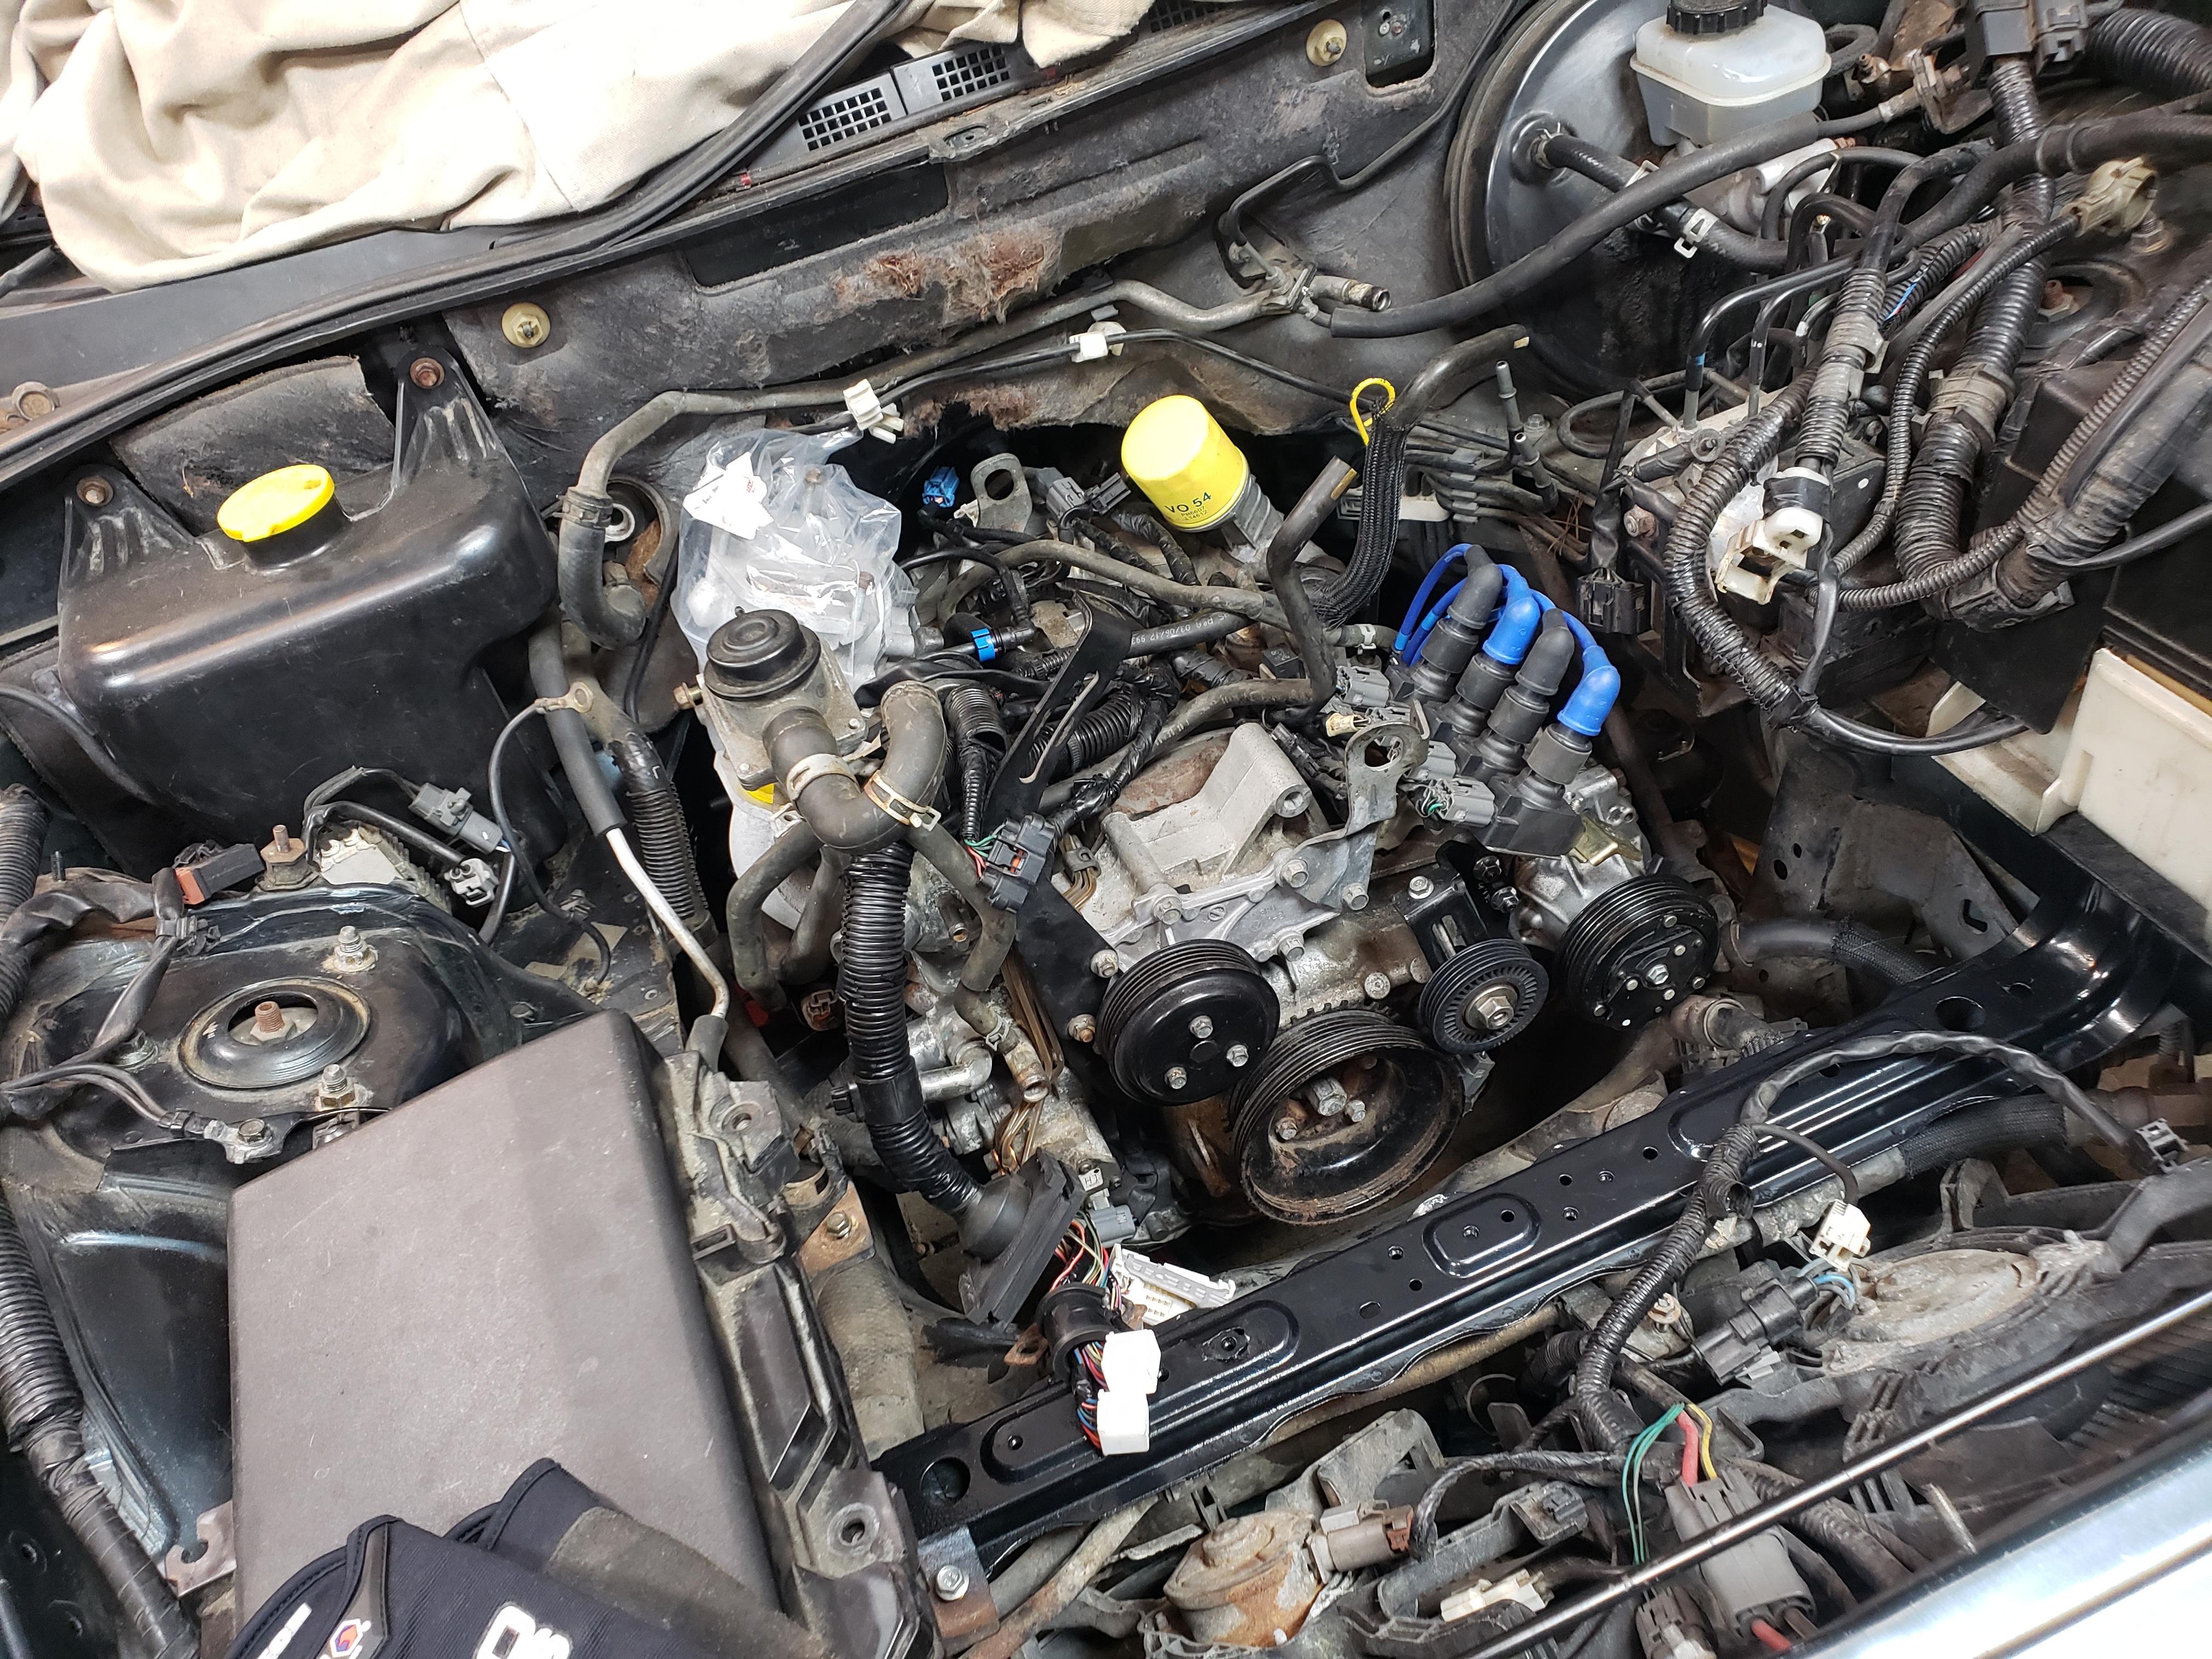
I've been plugging away every night after work. I removed the surface rust in the wheel wells, primed and undercoated them. I managed to find another 8 at a local junkyard and grabbed the wheel well liners and the under tray from it. I have one side installed and even installed one of my new oem from mud guards. The engine is nearing completion, just waiting on some seals for the transmission and I'll install the new clutch and mate them for installation!
engine is getting there:
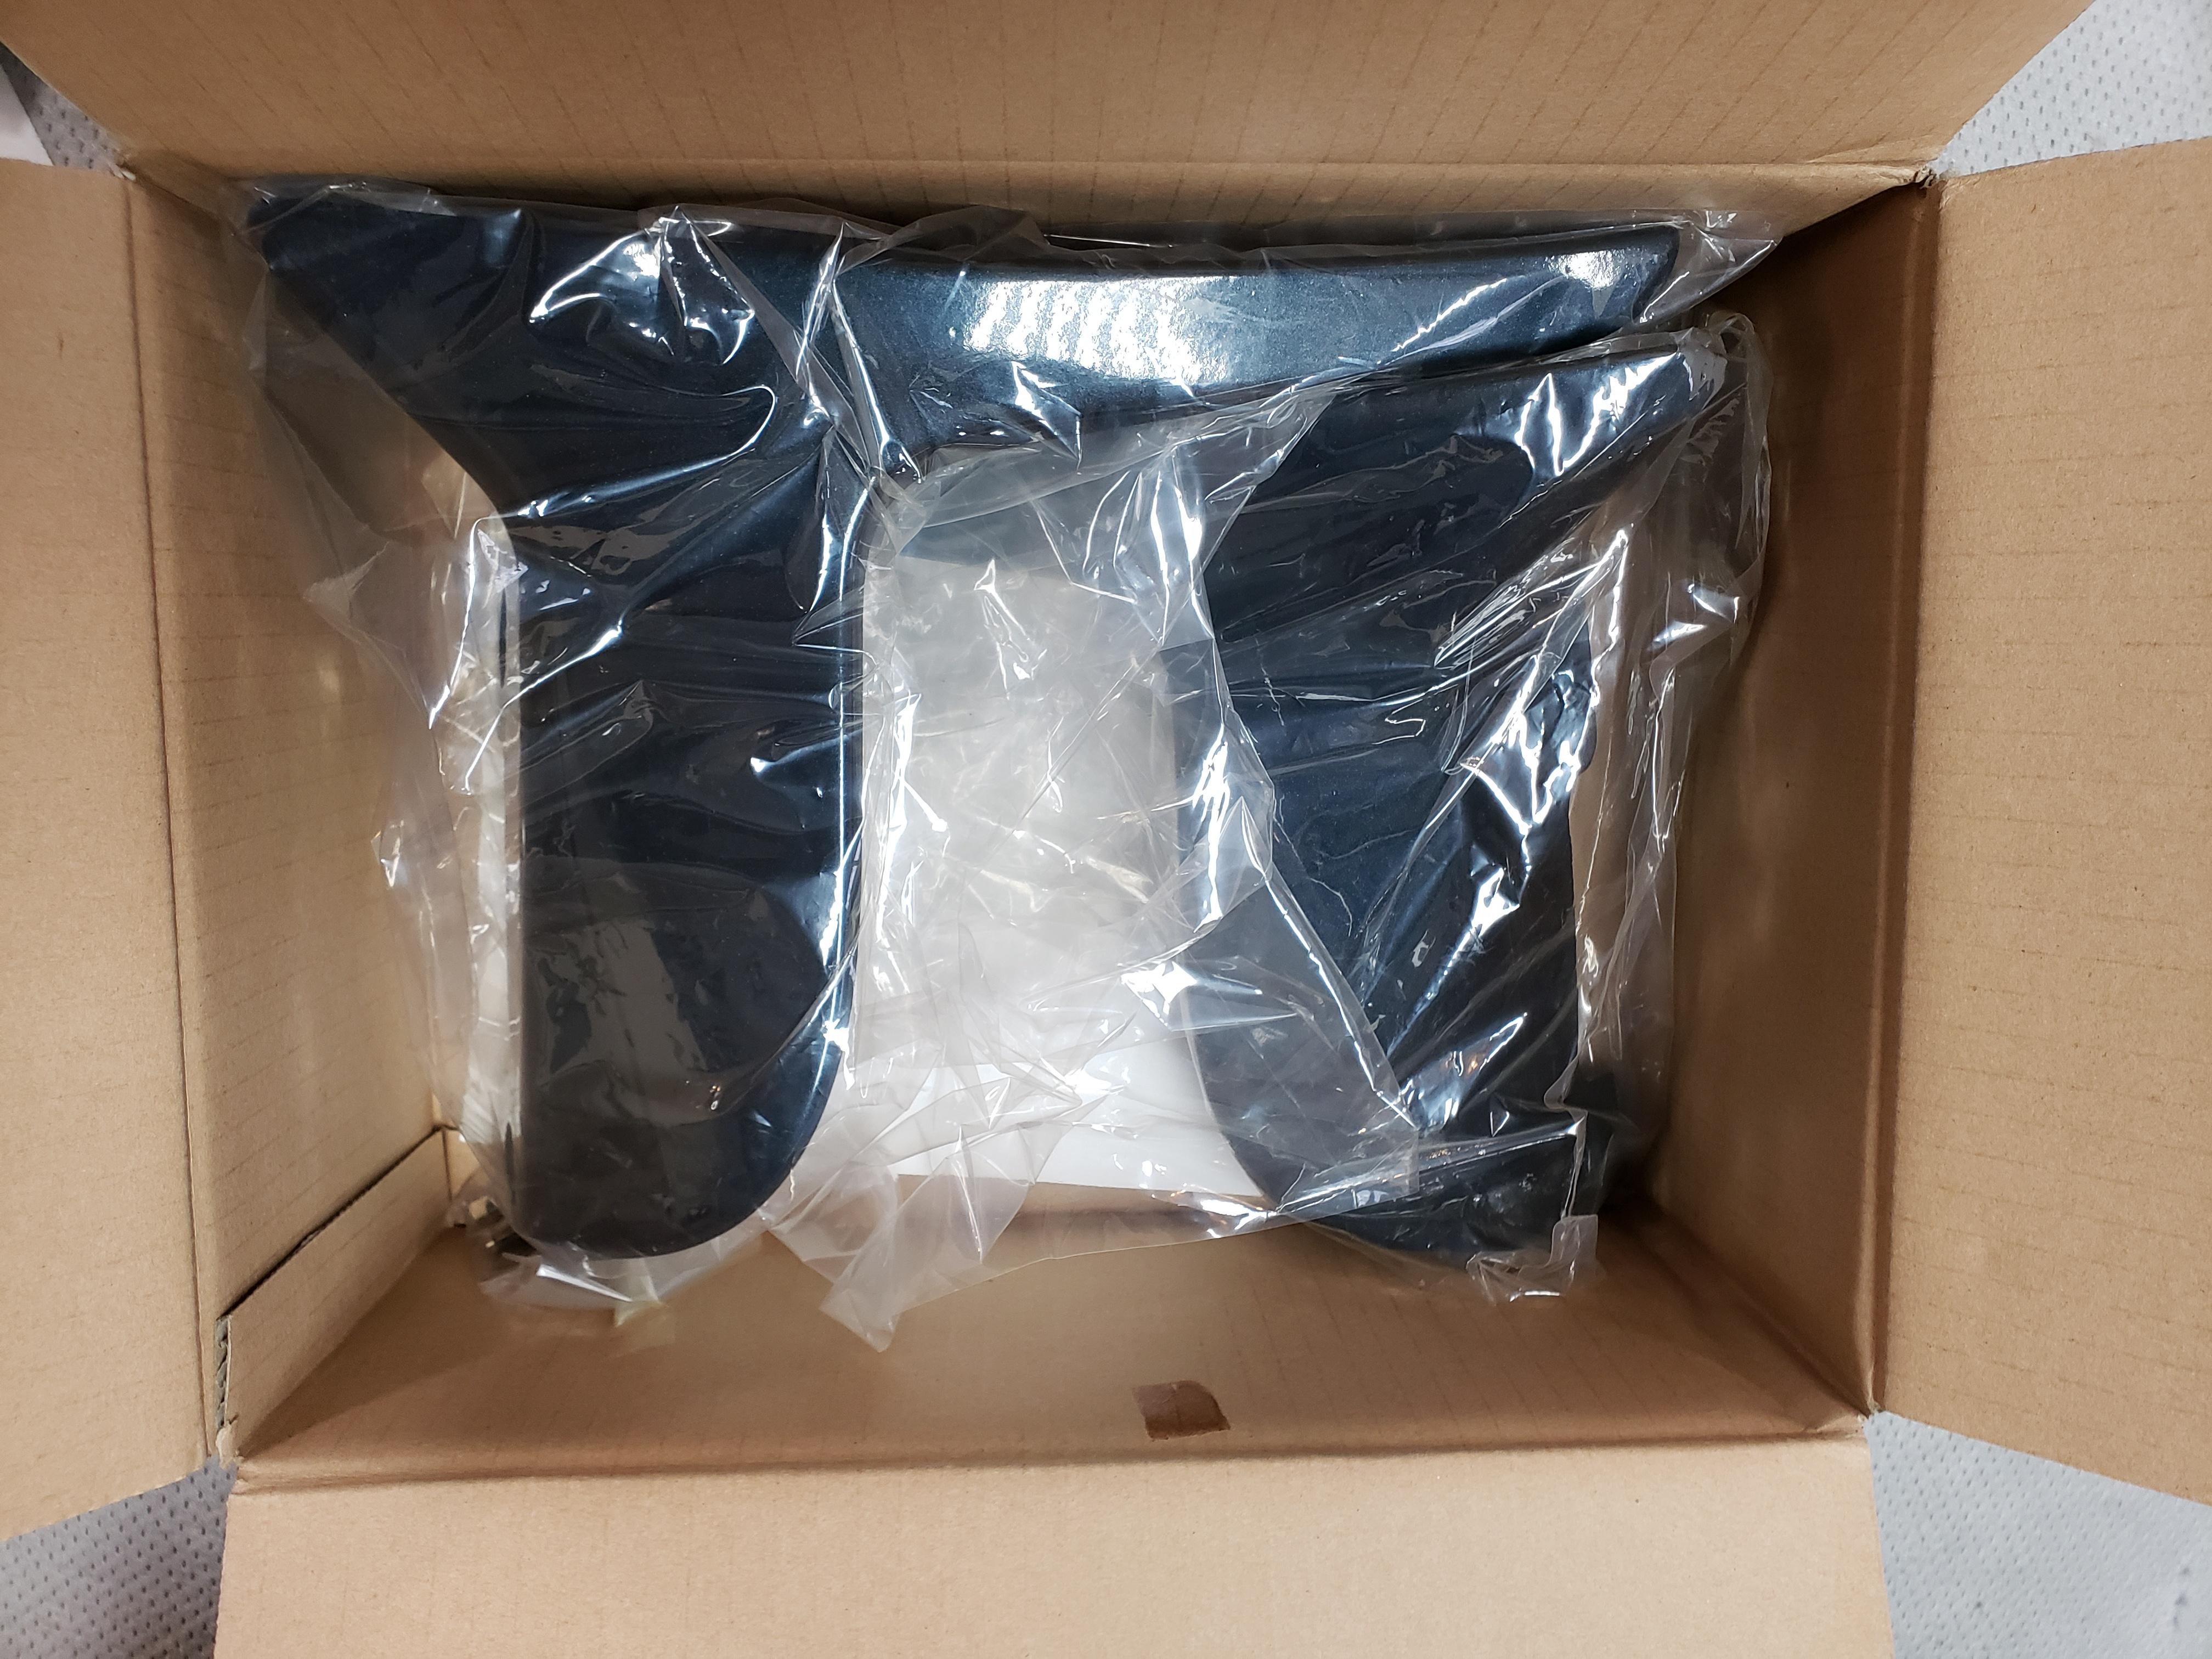
my last parts run the other day from Mazda:
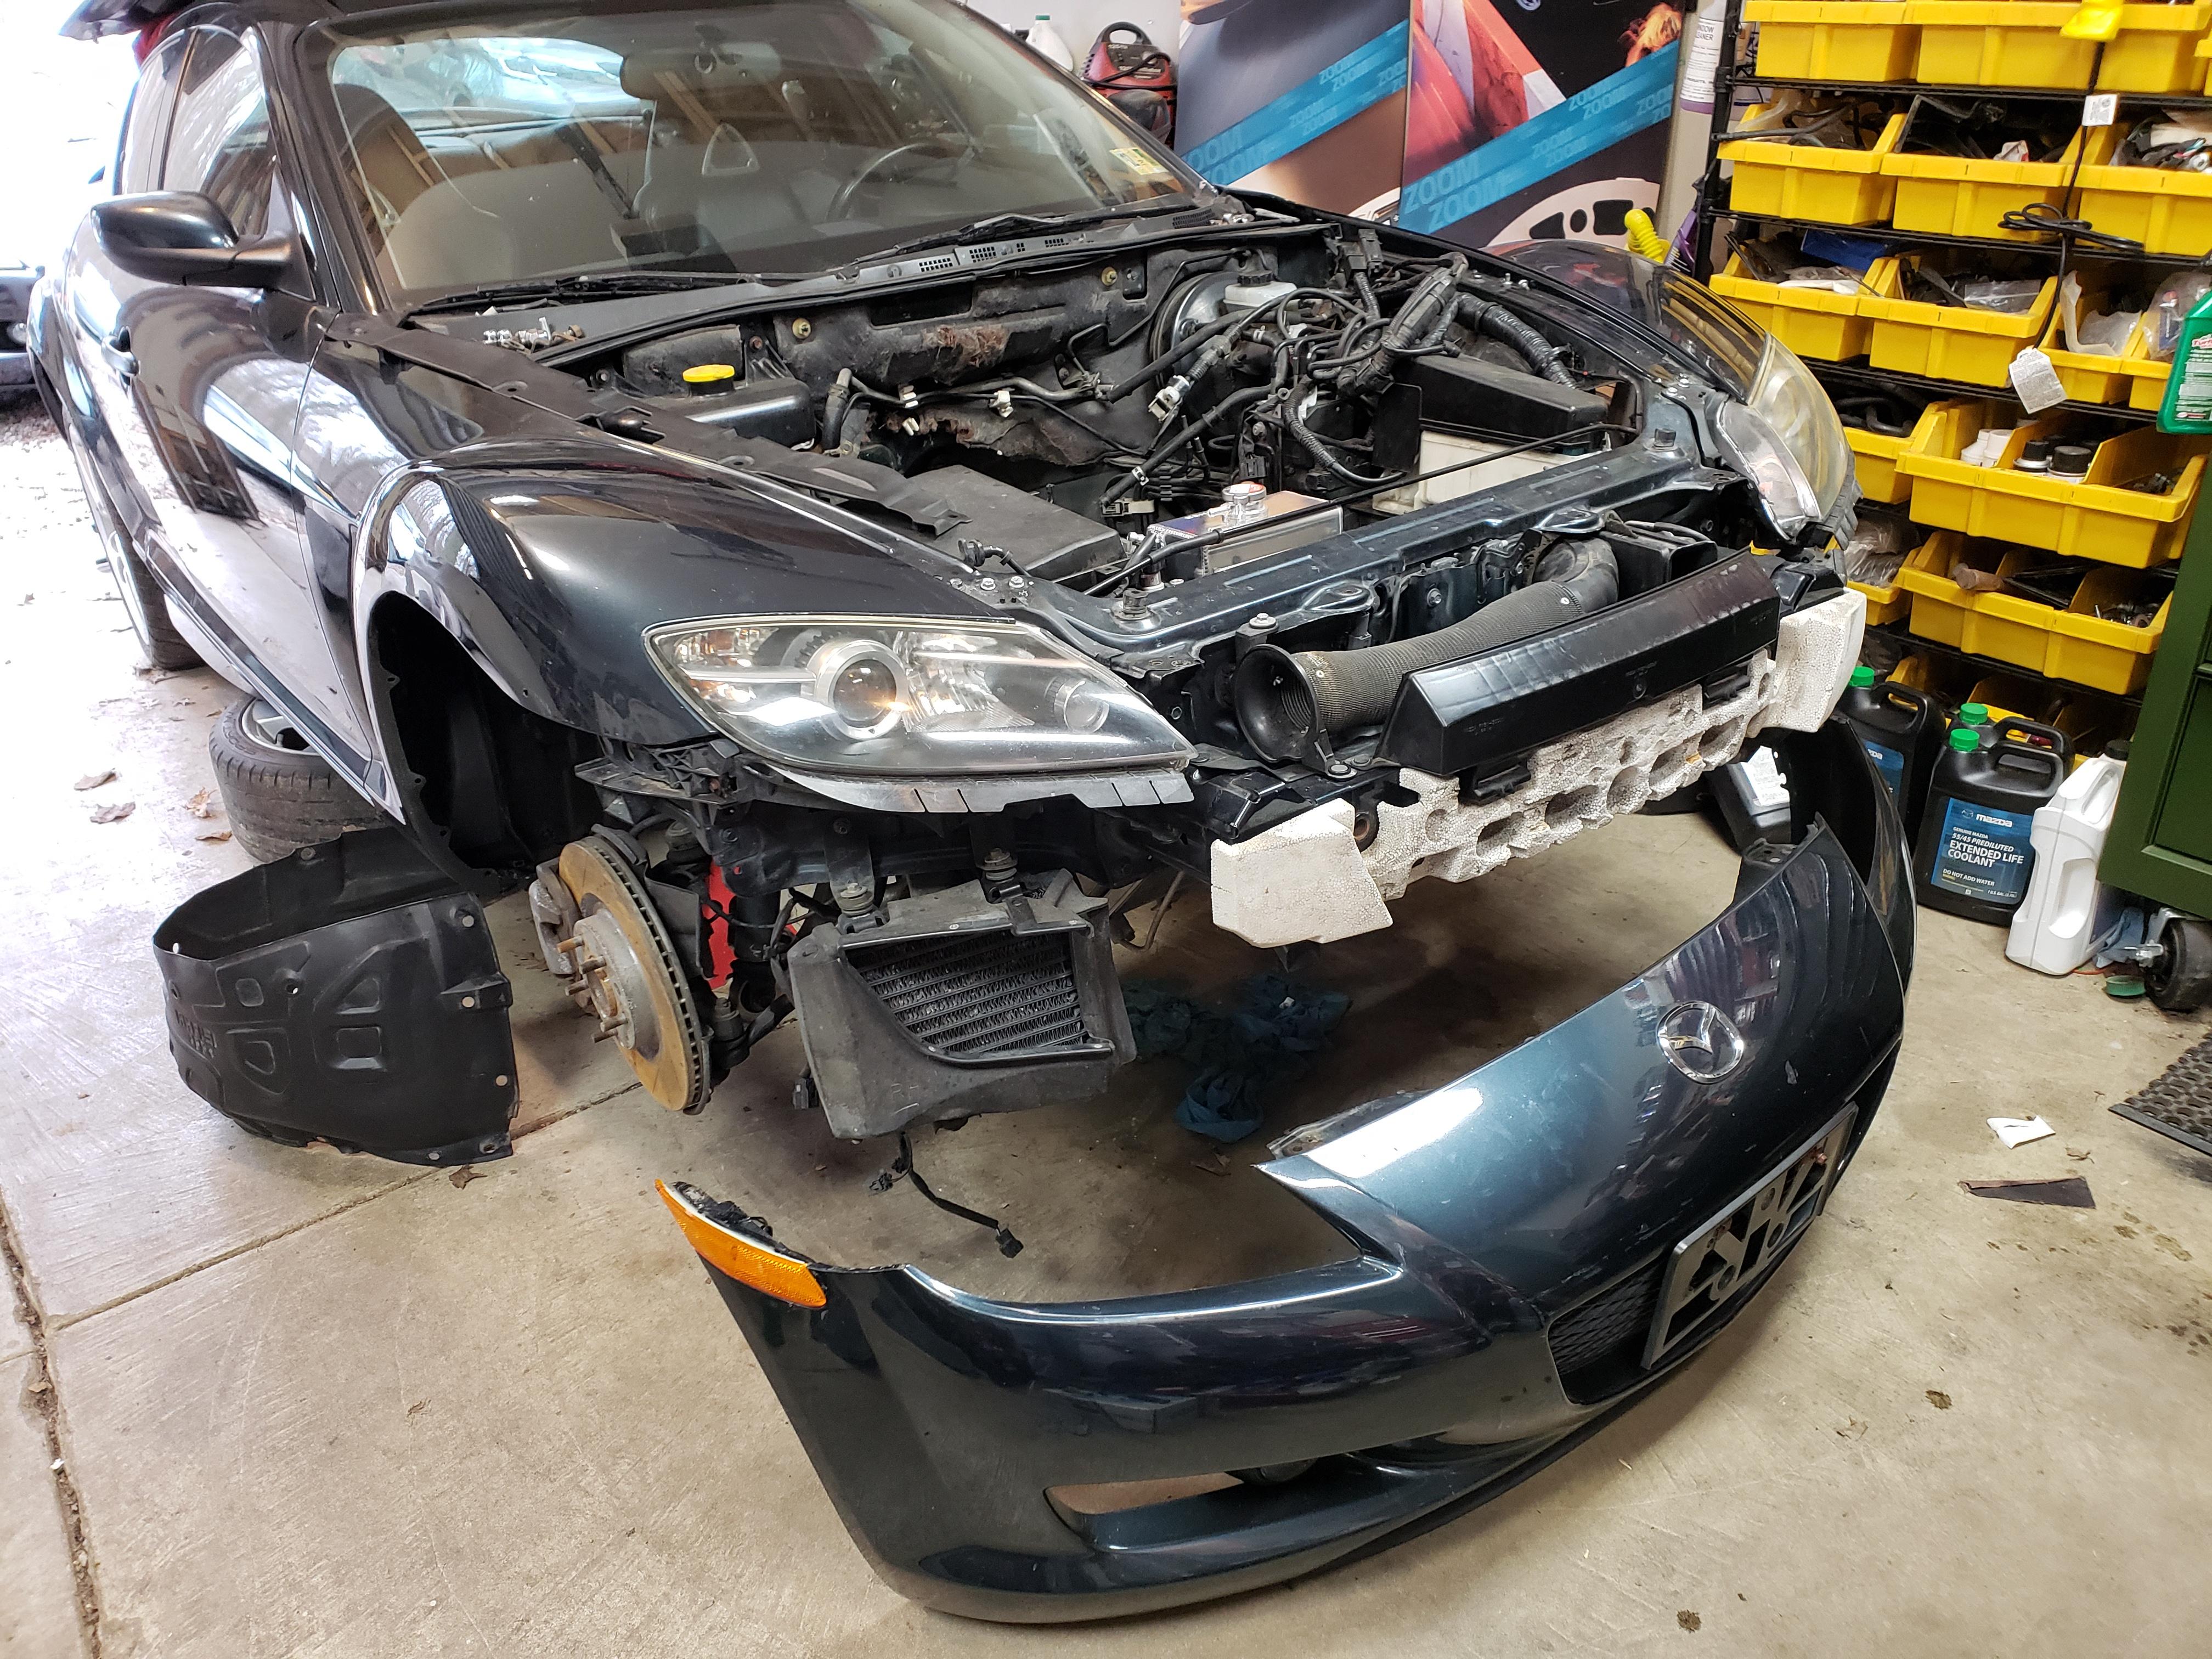
got the VFAD in place as well as the impact foam and new fender clips. Took this before I mounted the bumper:
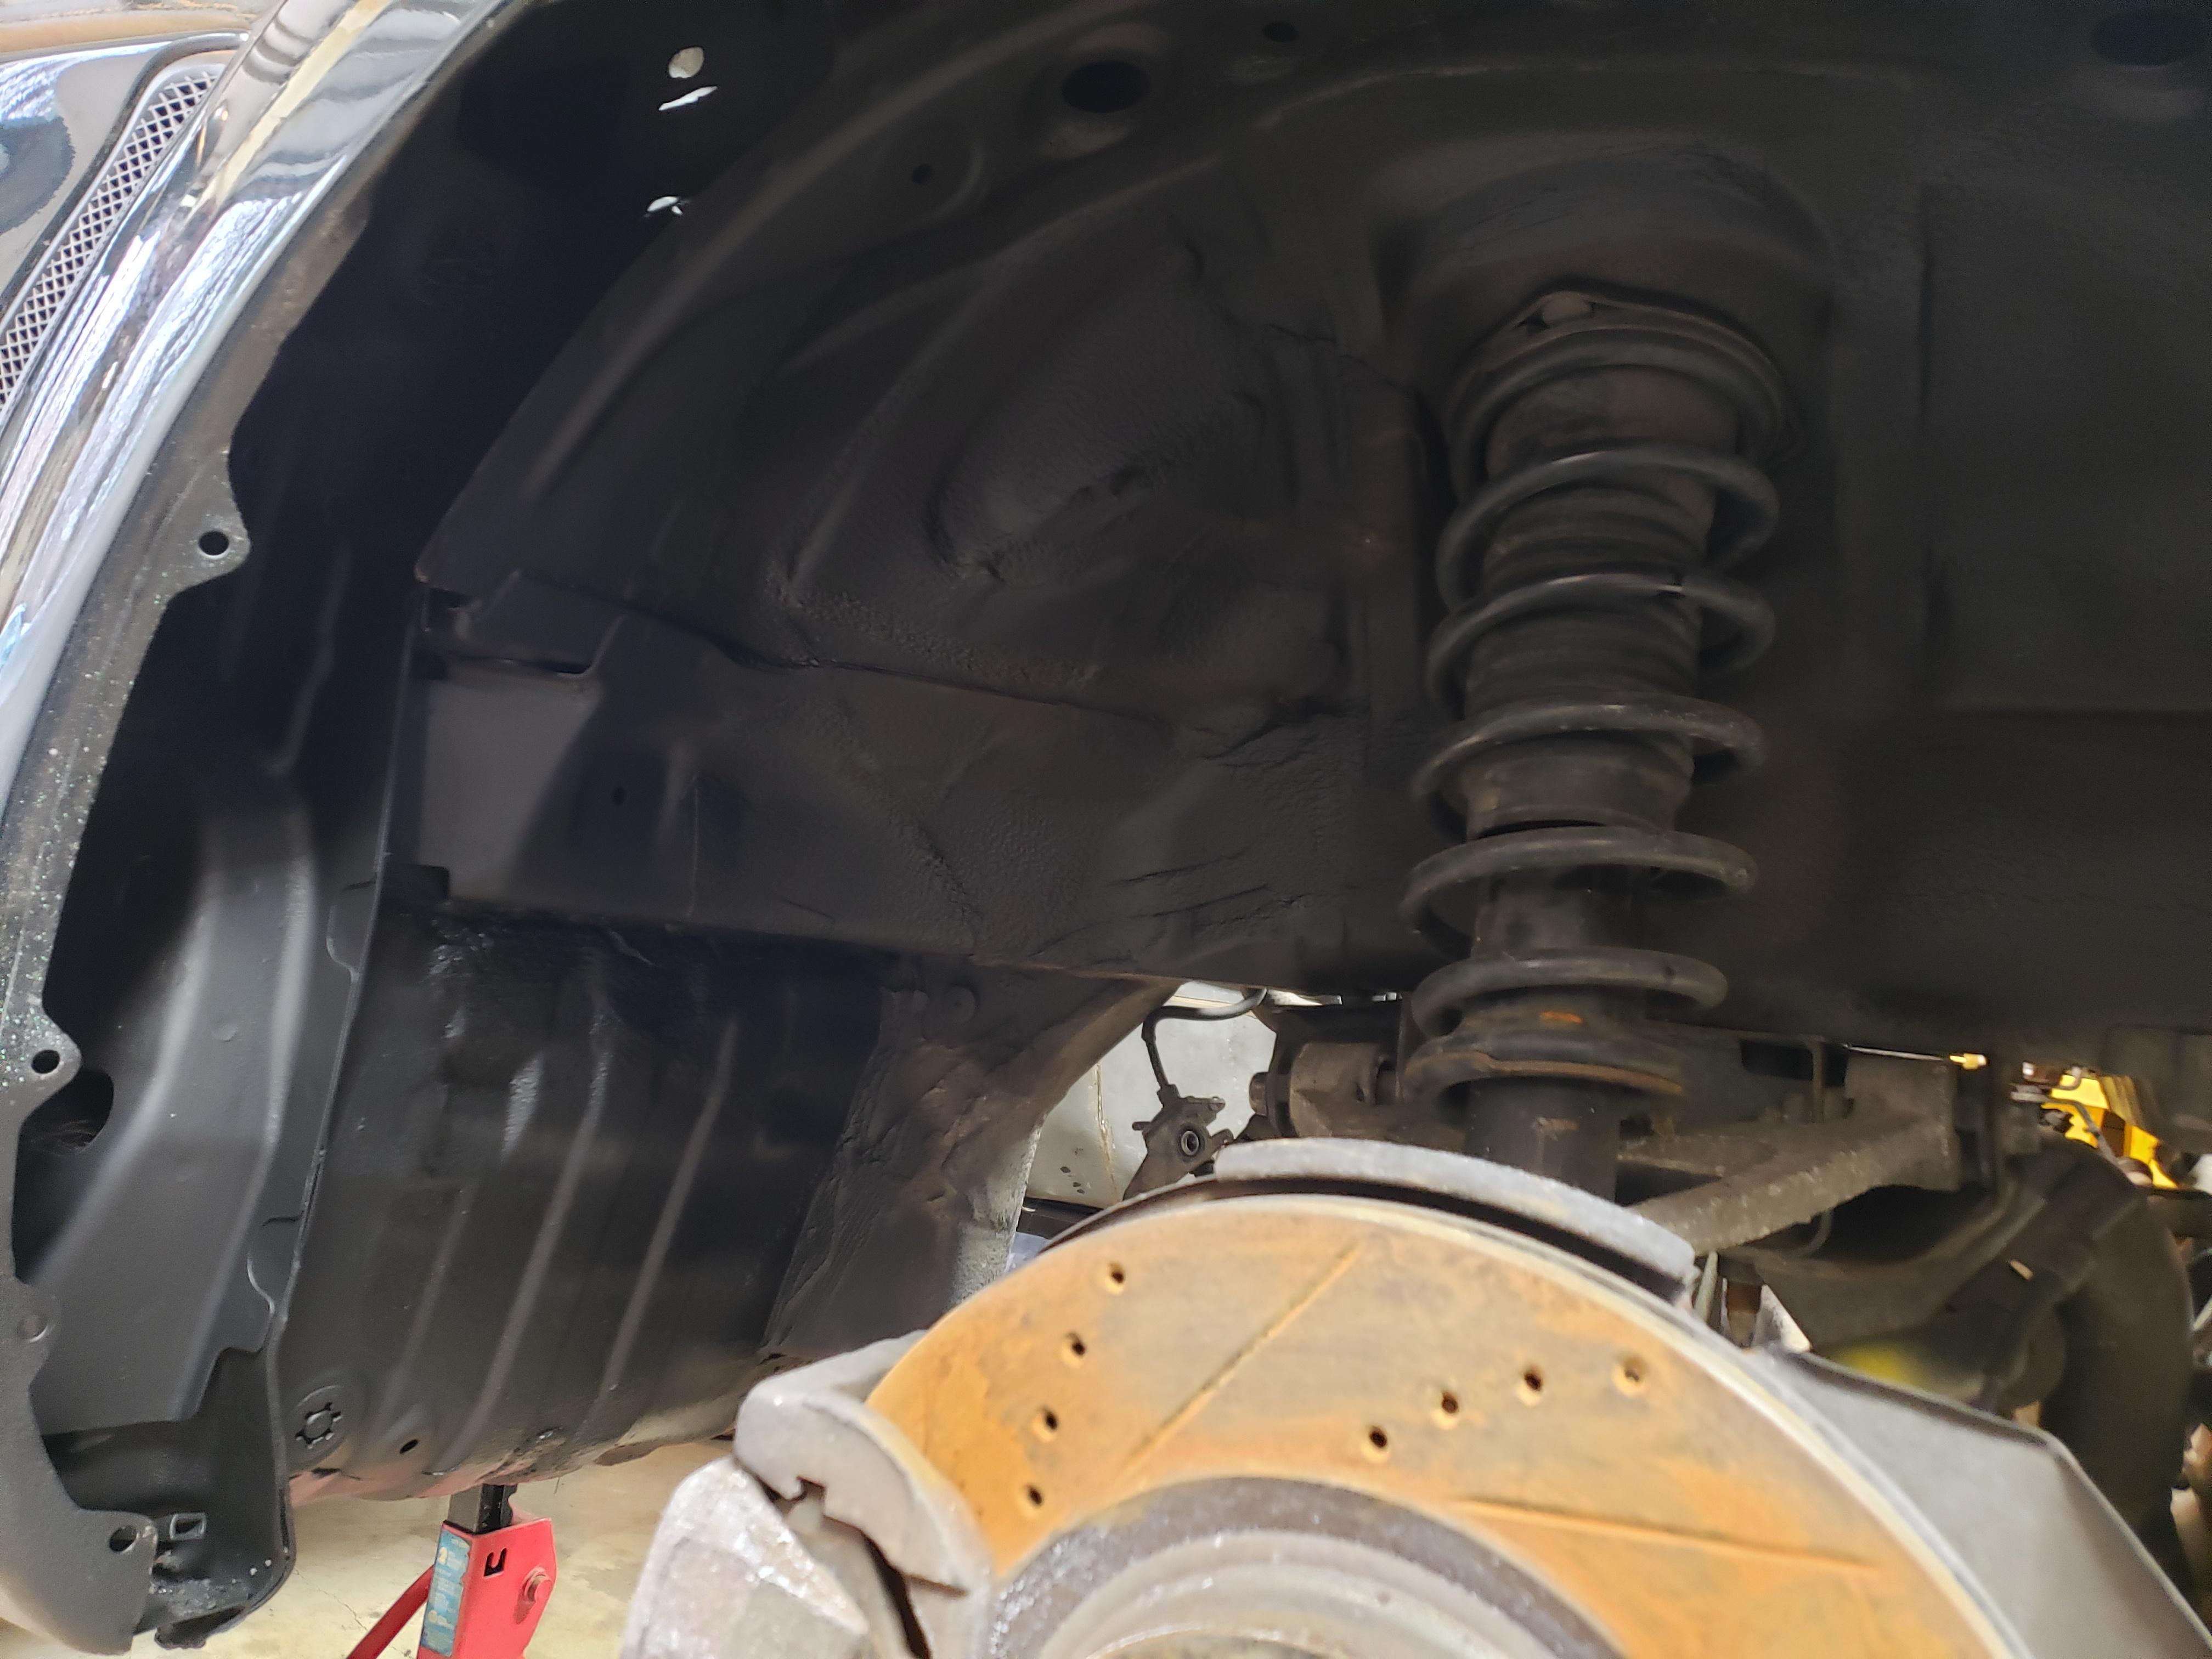
Took one pic of the wheel well before I mounted the liner and mud guard. I think it came out good. The other side is the same:
engine is getting there:
my last parts run the other day from Mazda:
got the VFAD in place as well as the impact foam and new fender clips. Took this before I mounted the bumper:
Took one pic of the wheel well before I mounted the liner and mud guard. I think it came out good. The other side is the same:
04-03-2021, 08:25 PM
#15
RX-Heaven
Thread Starter
iTrader: (6)
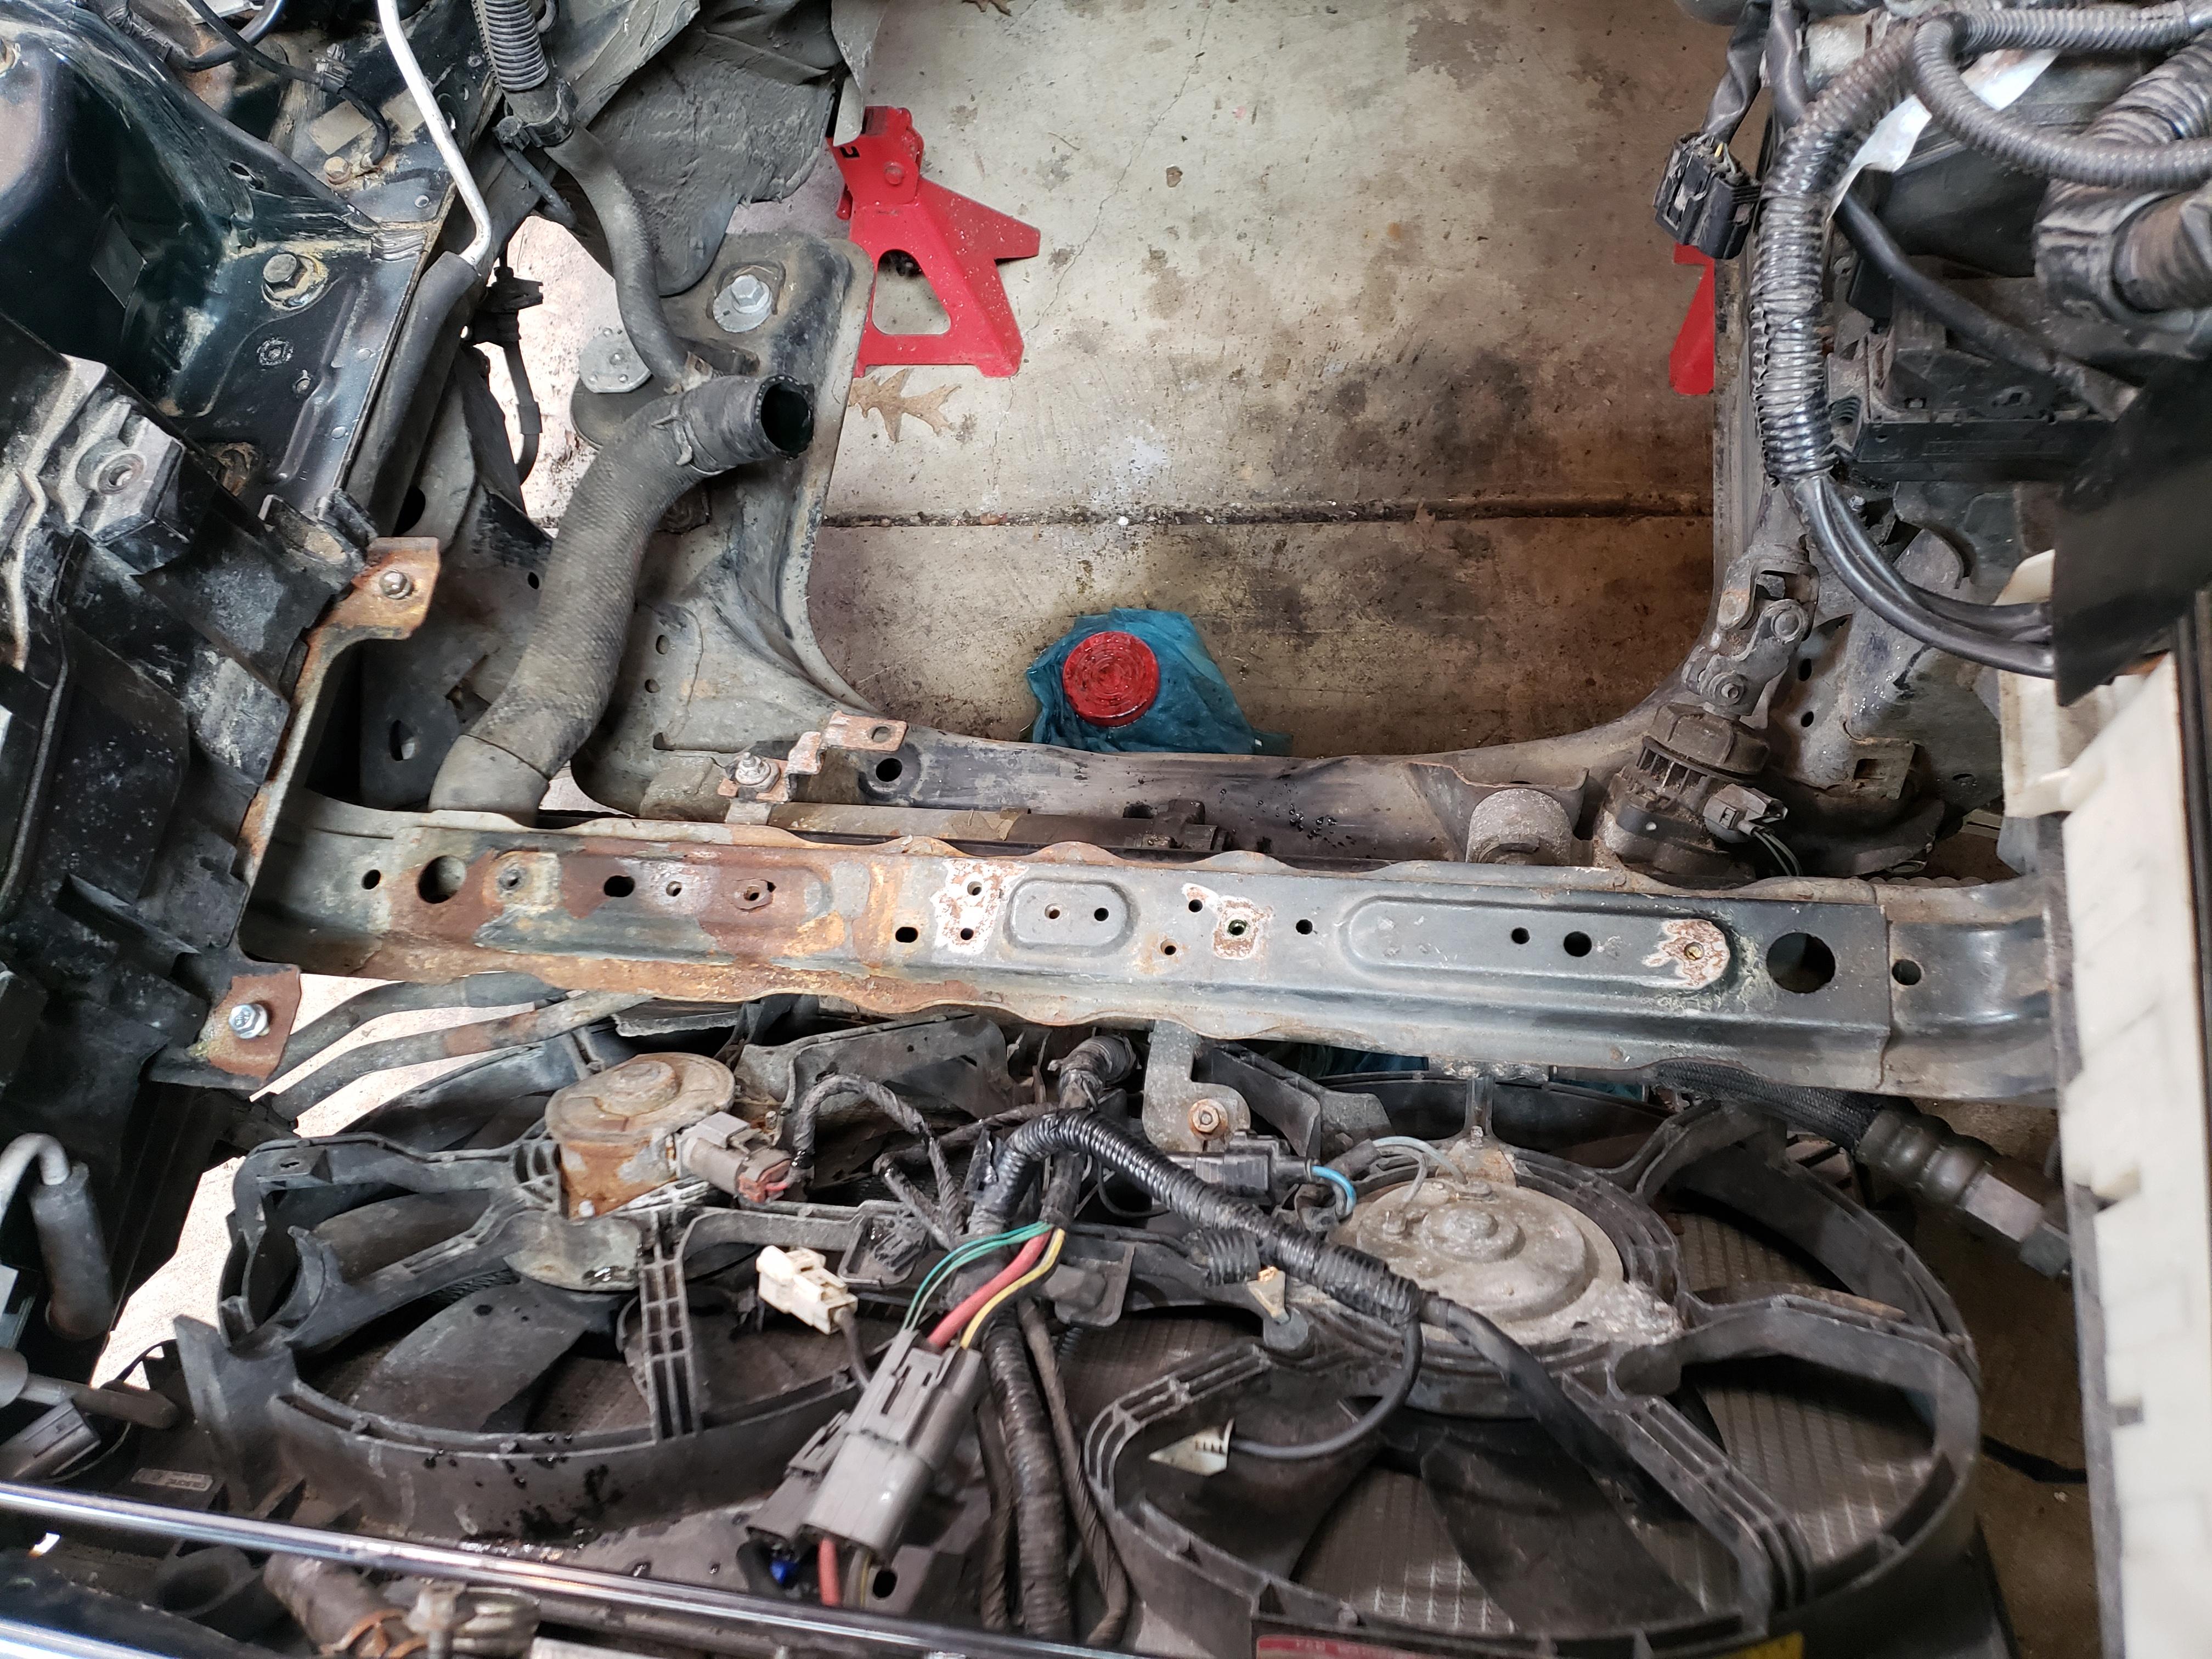
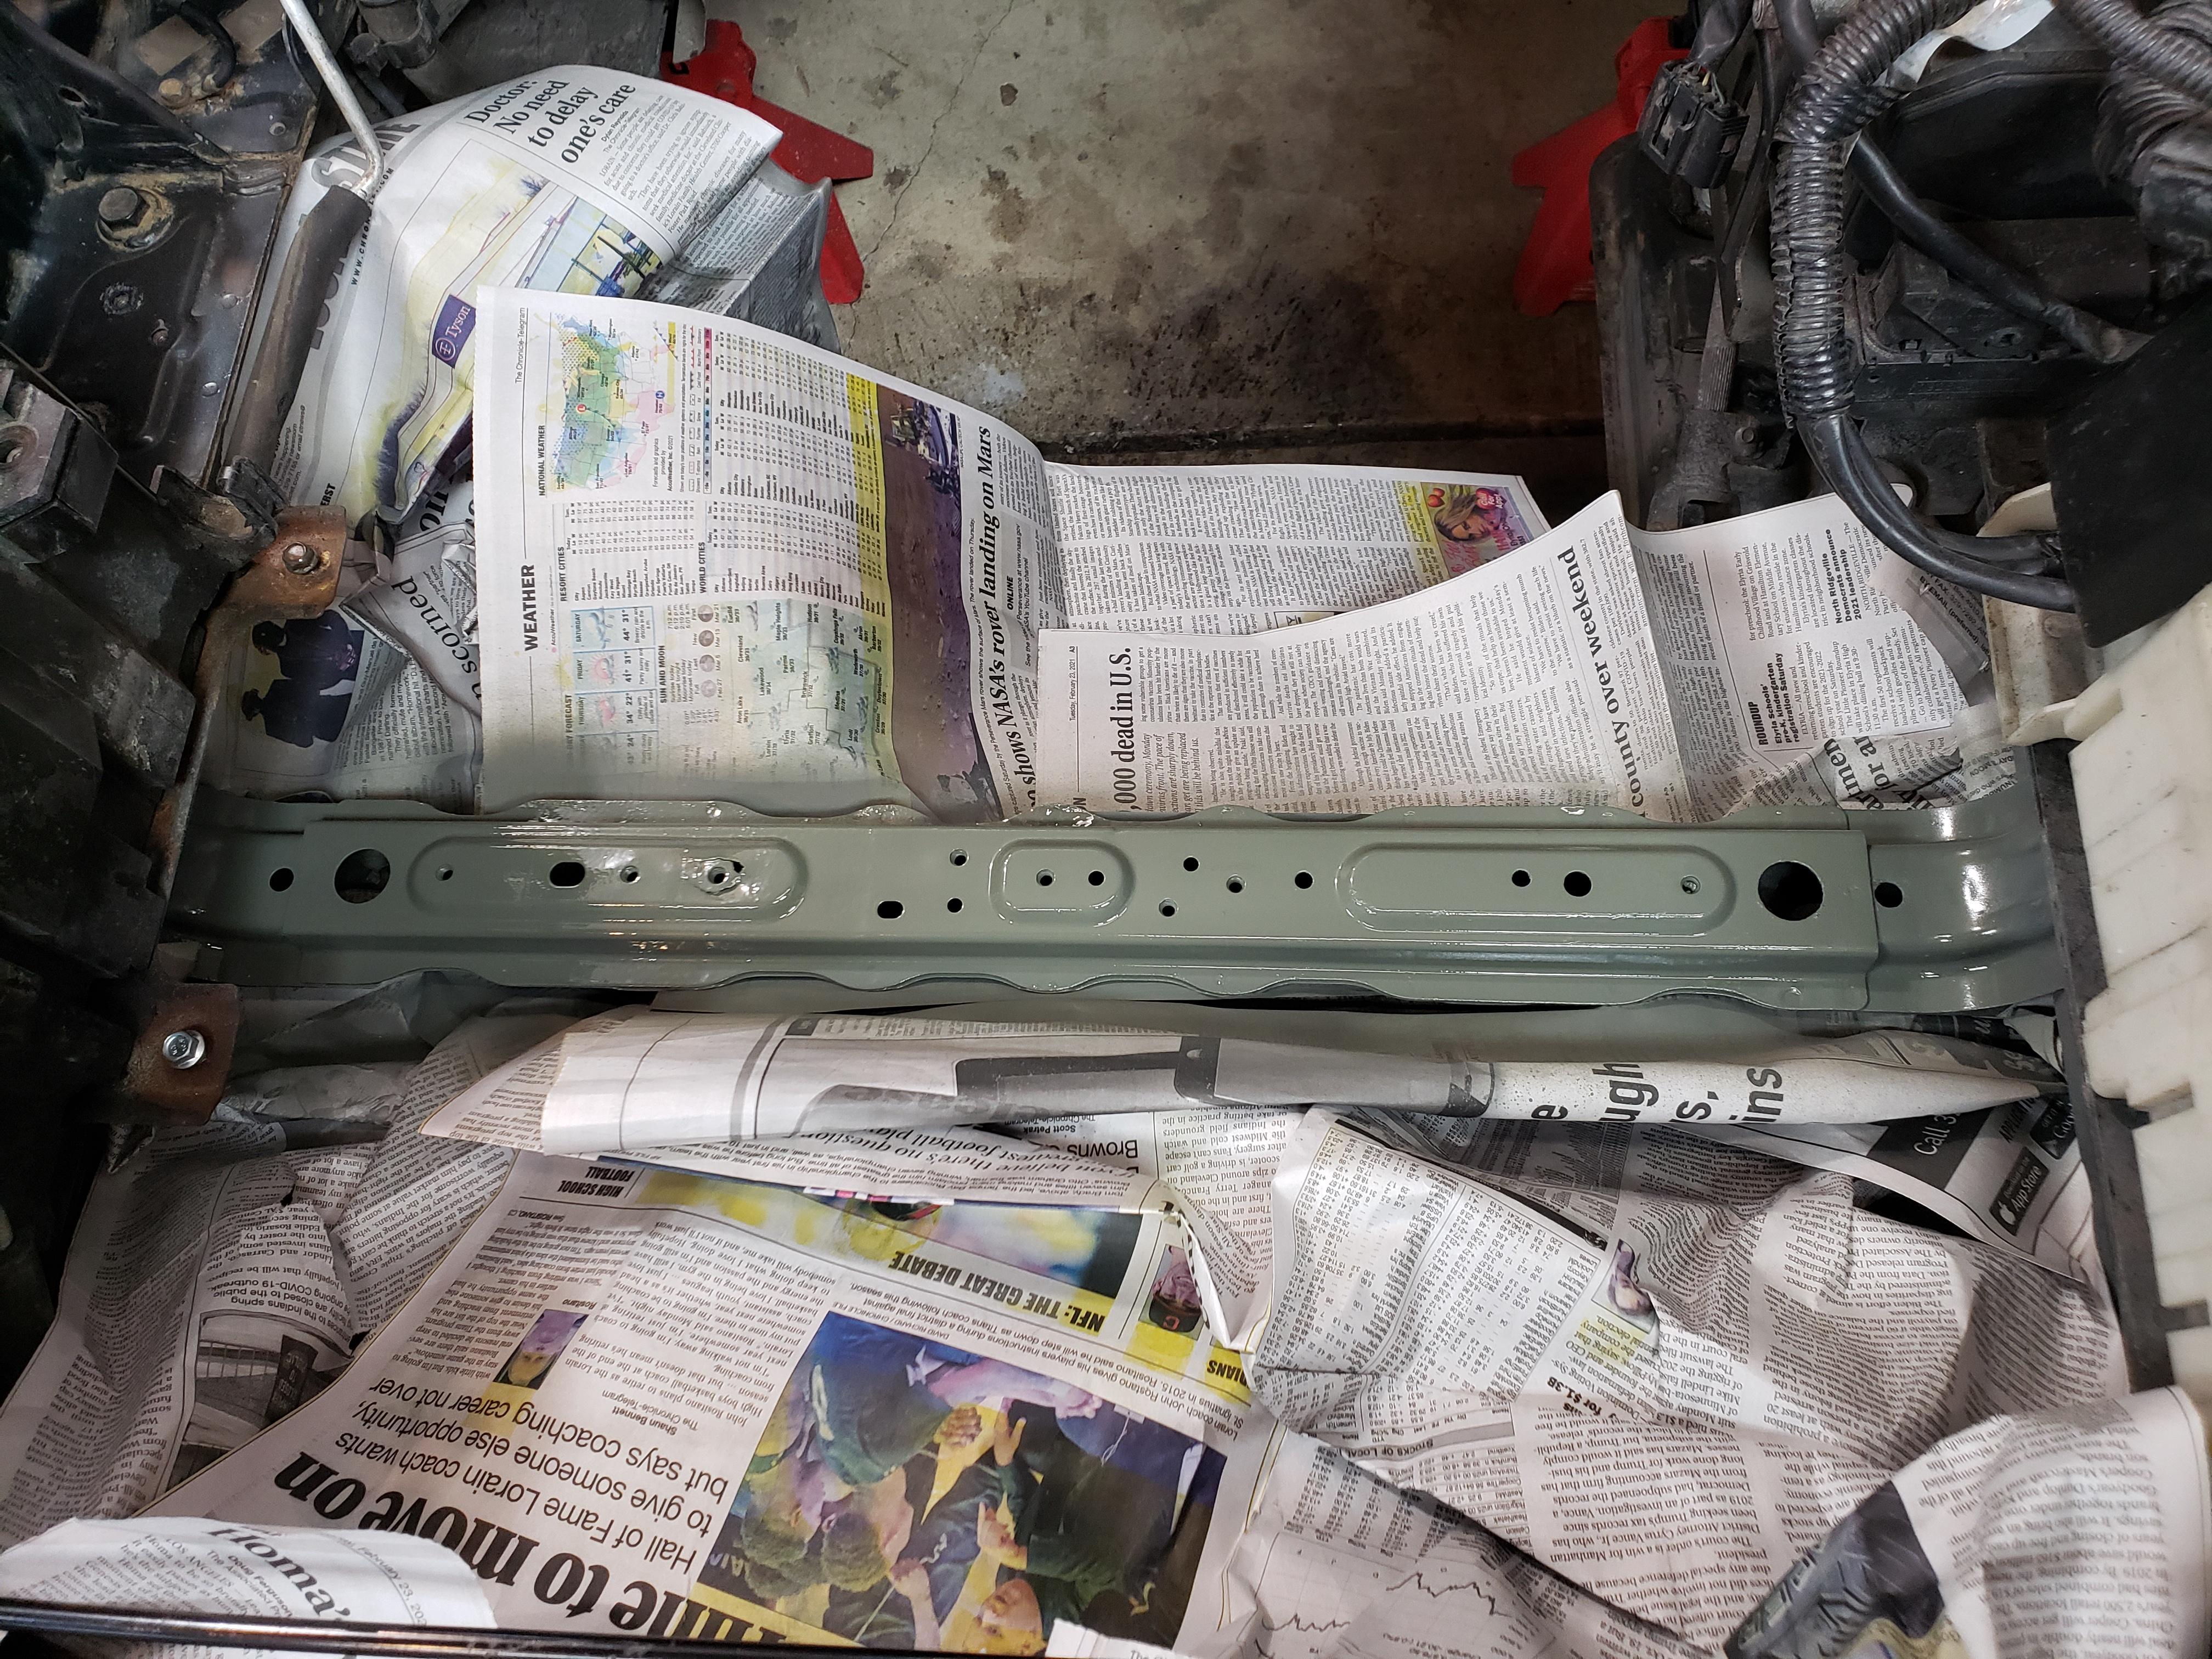
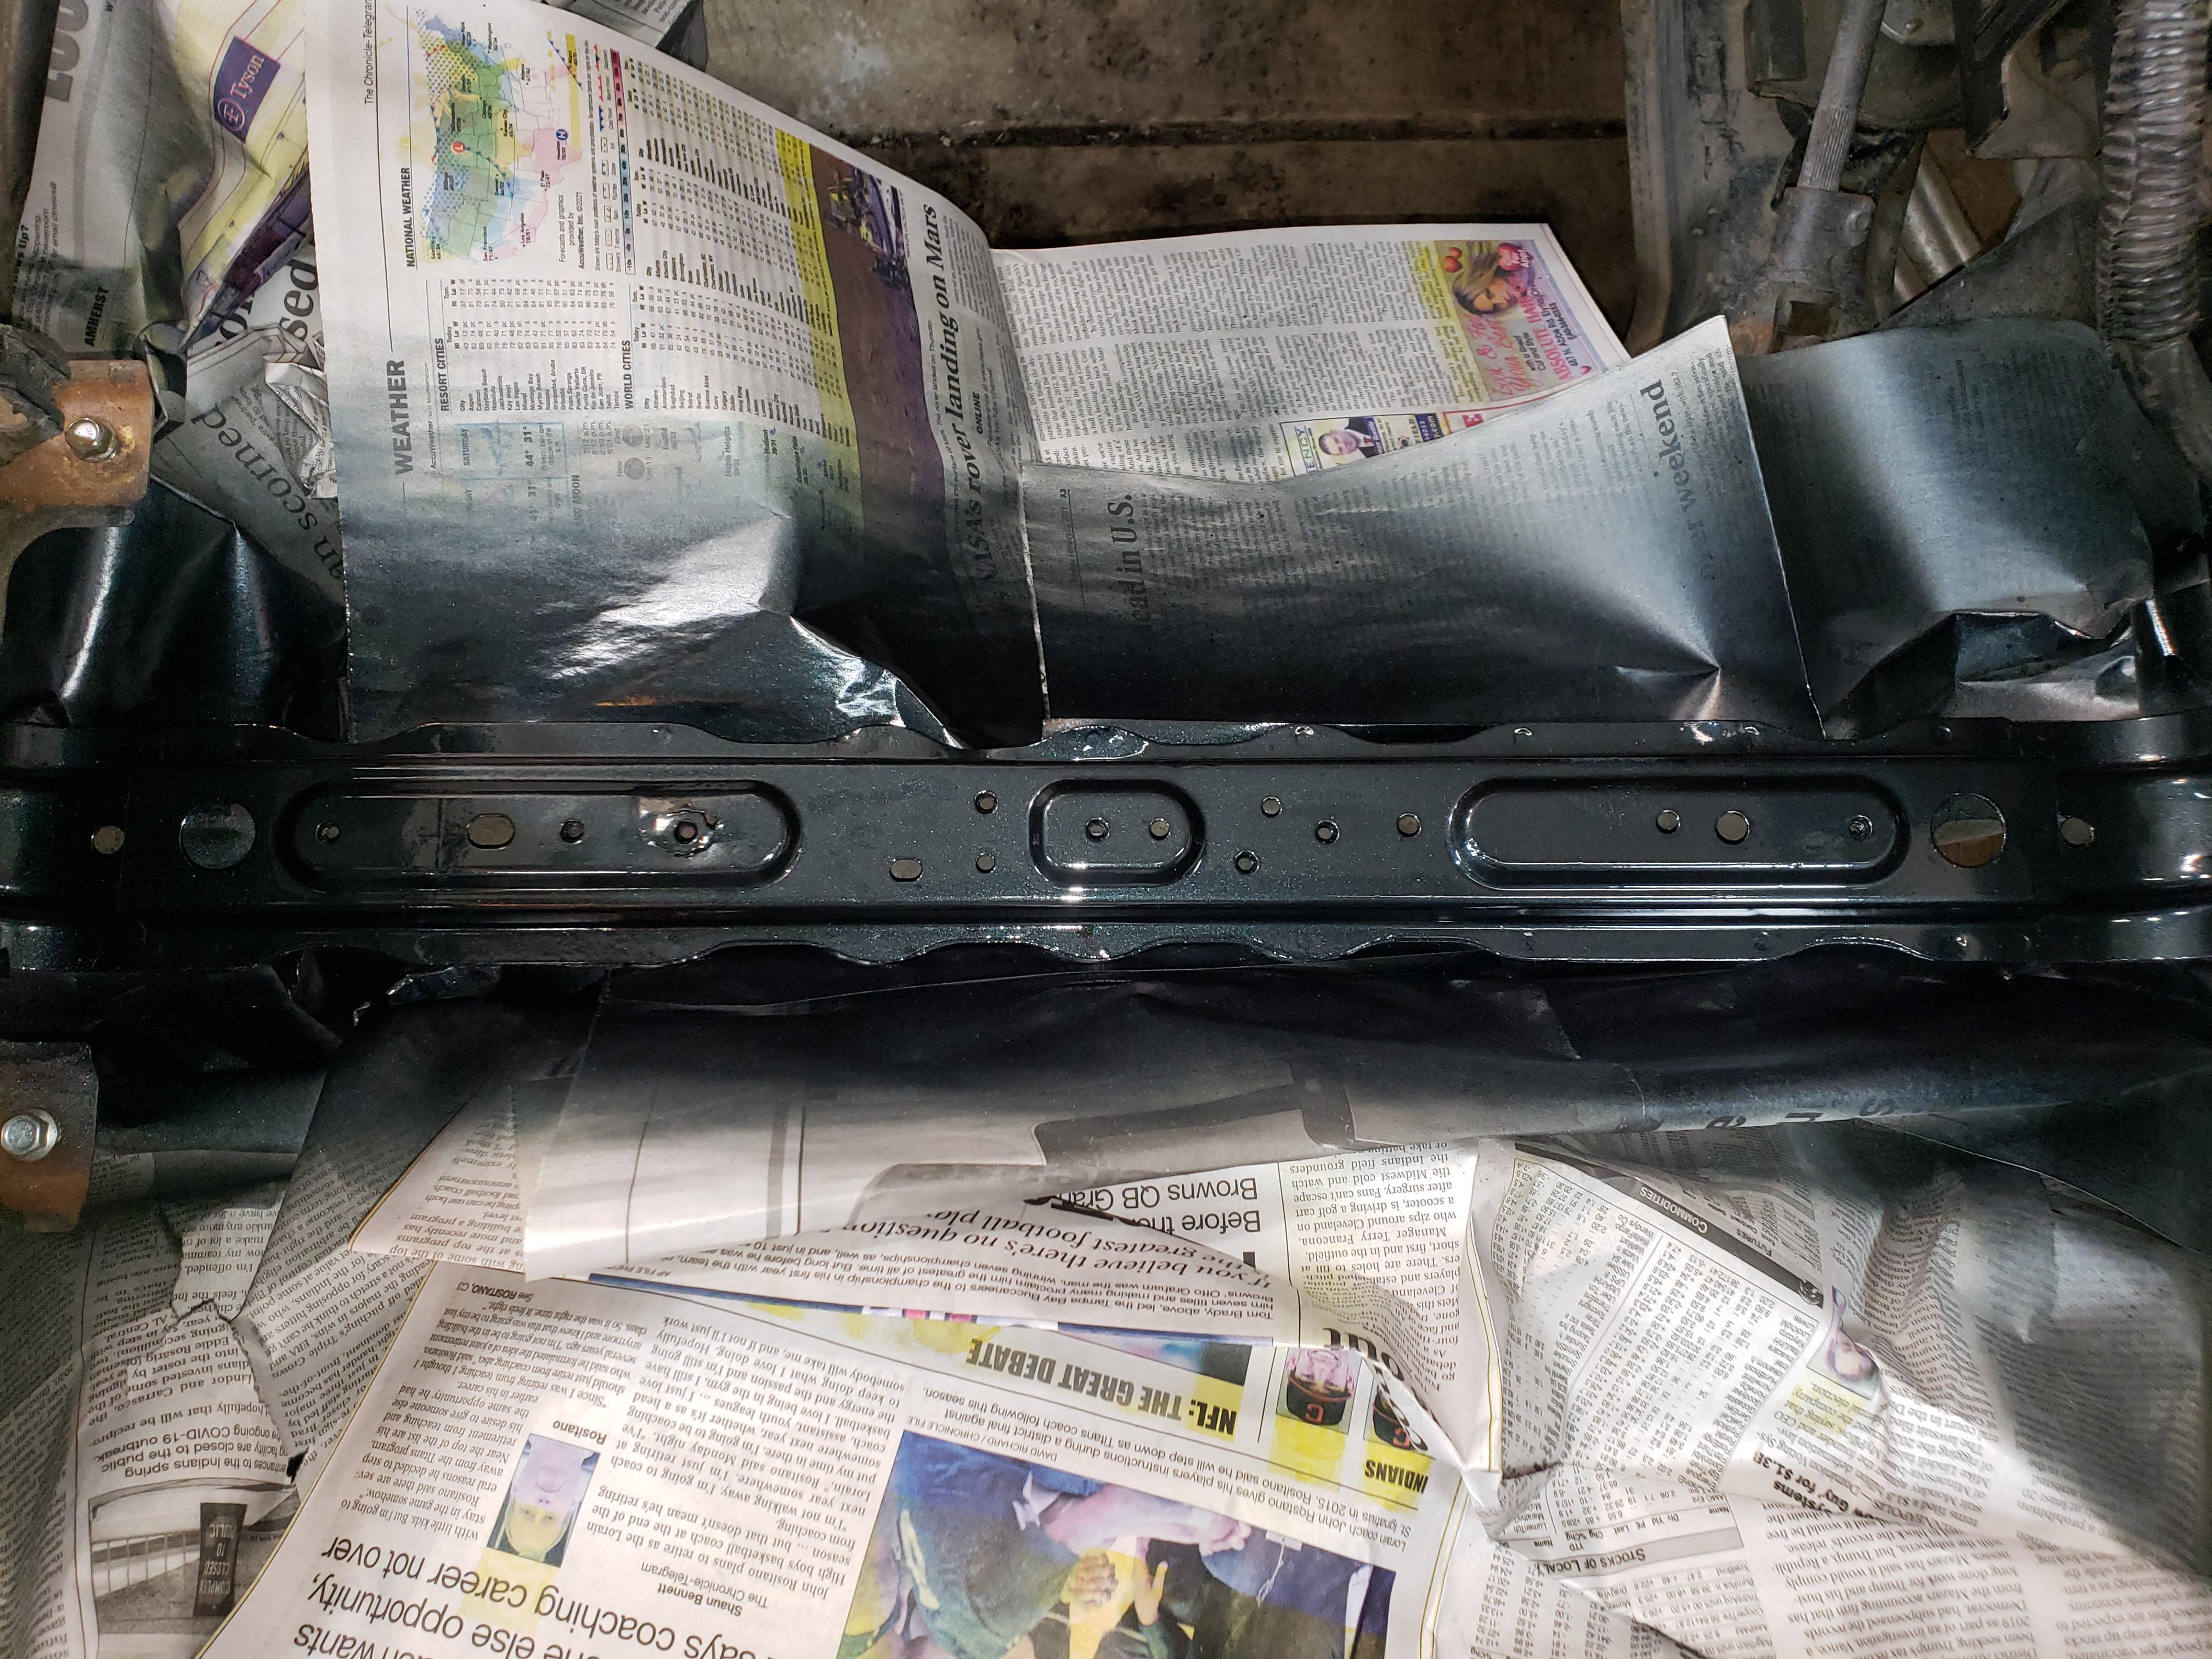
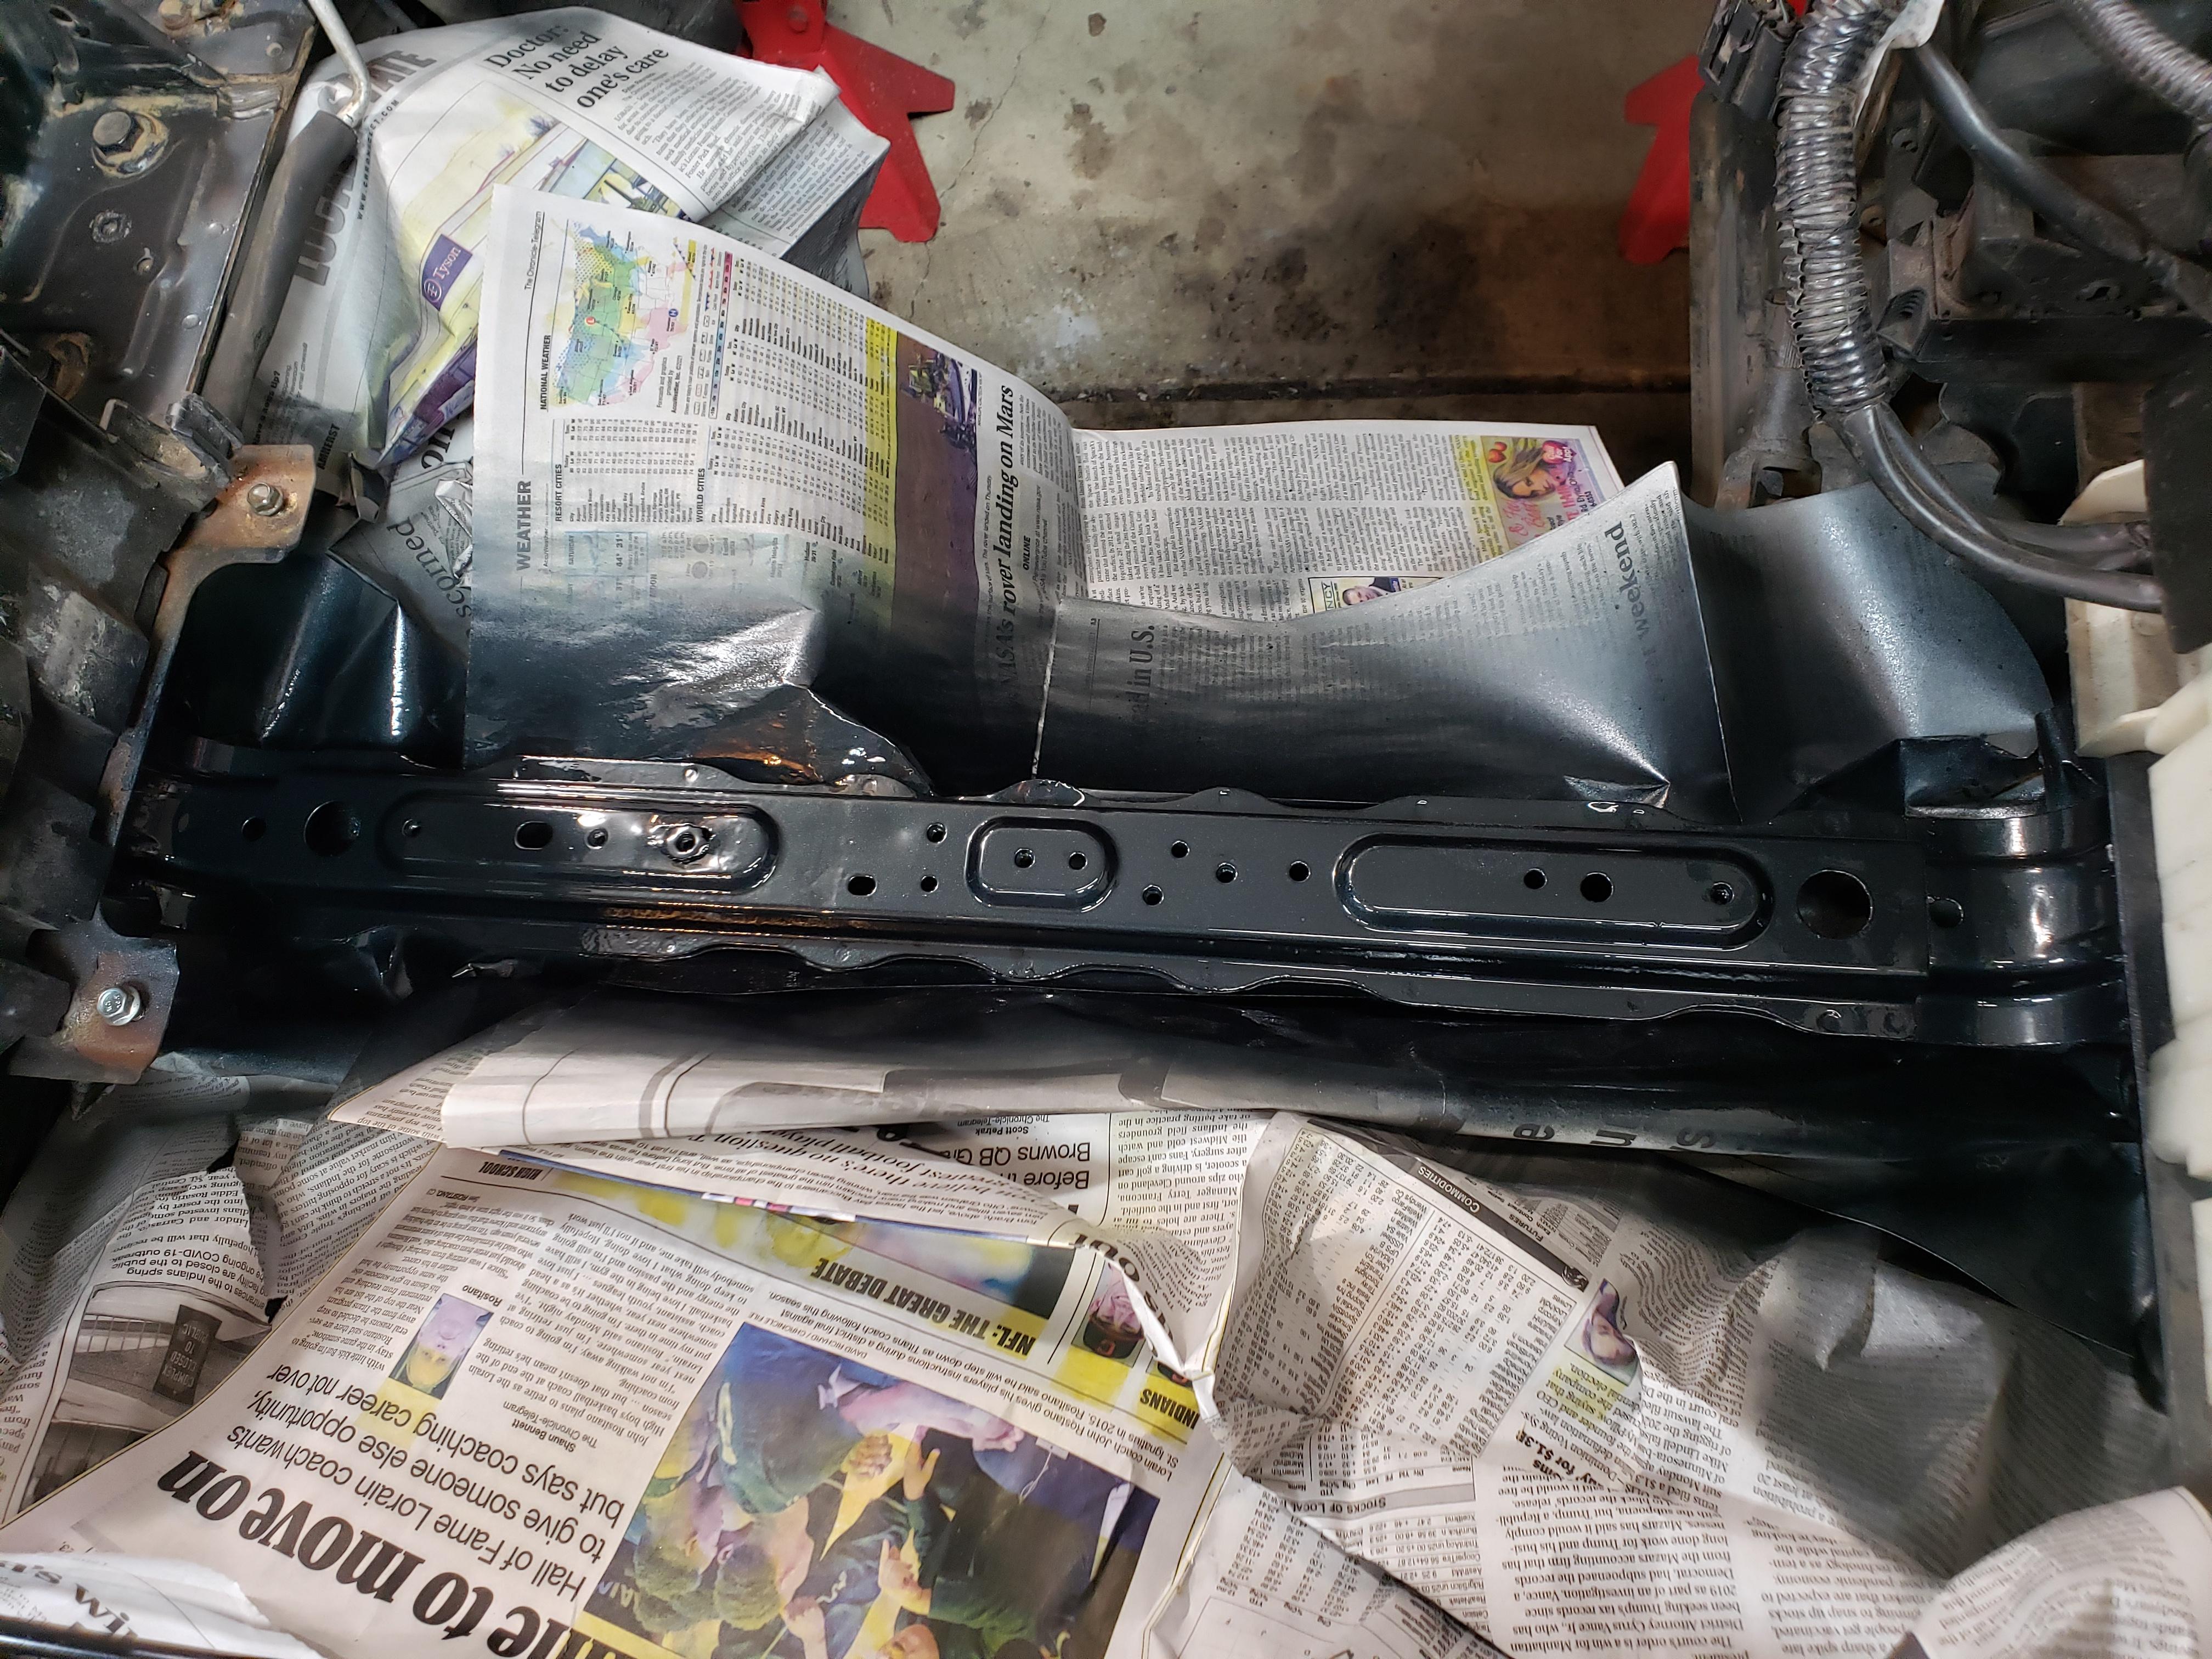
Engine and trans are nearing completion so I wanted to take some time and clean up and repaint the front engine bay support. I sanded it down to bare metal and primed it with etching primer and then three base coats of 27C and then three coats of clear. I think it turned out ok for something you'll never really see once its together:
04-05-2021, 06:01 AM
#16
RX-Heaven
Thread Starter
iTrader: (6)
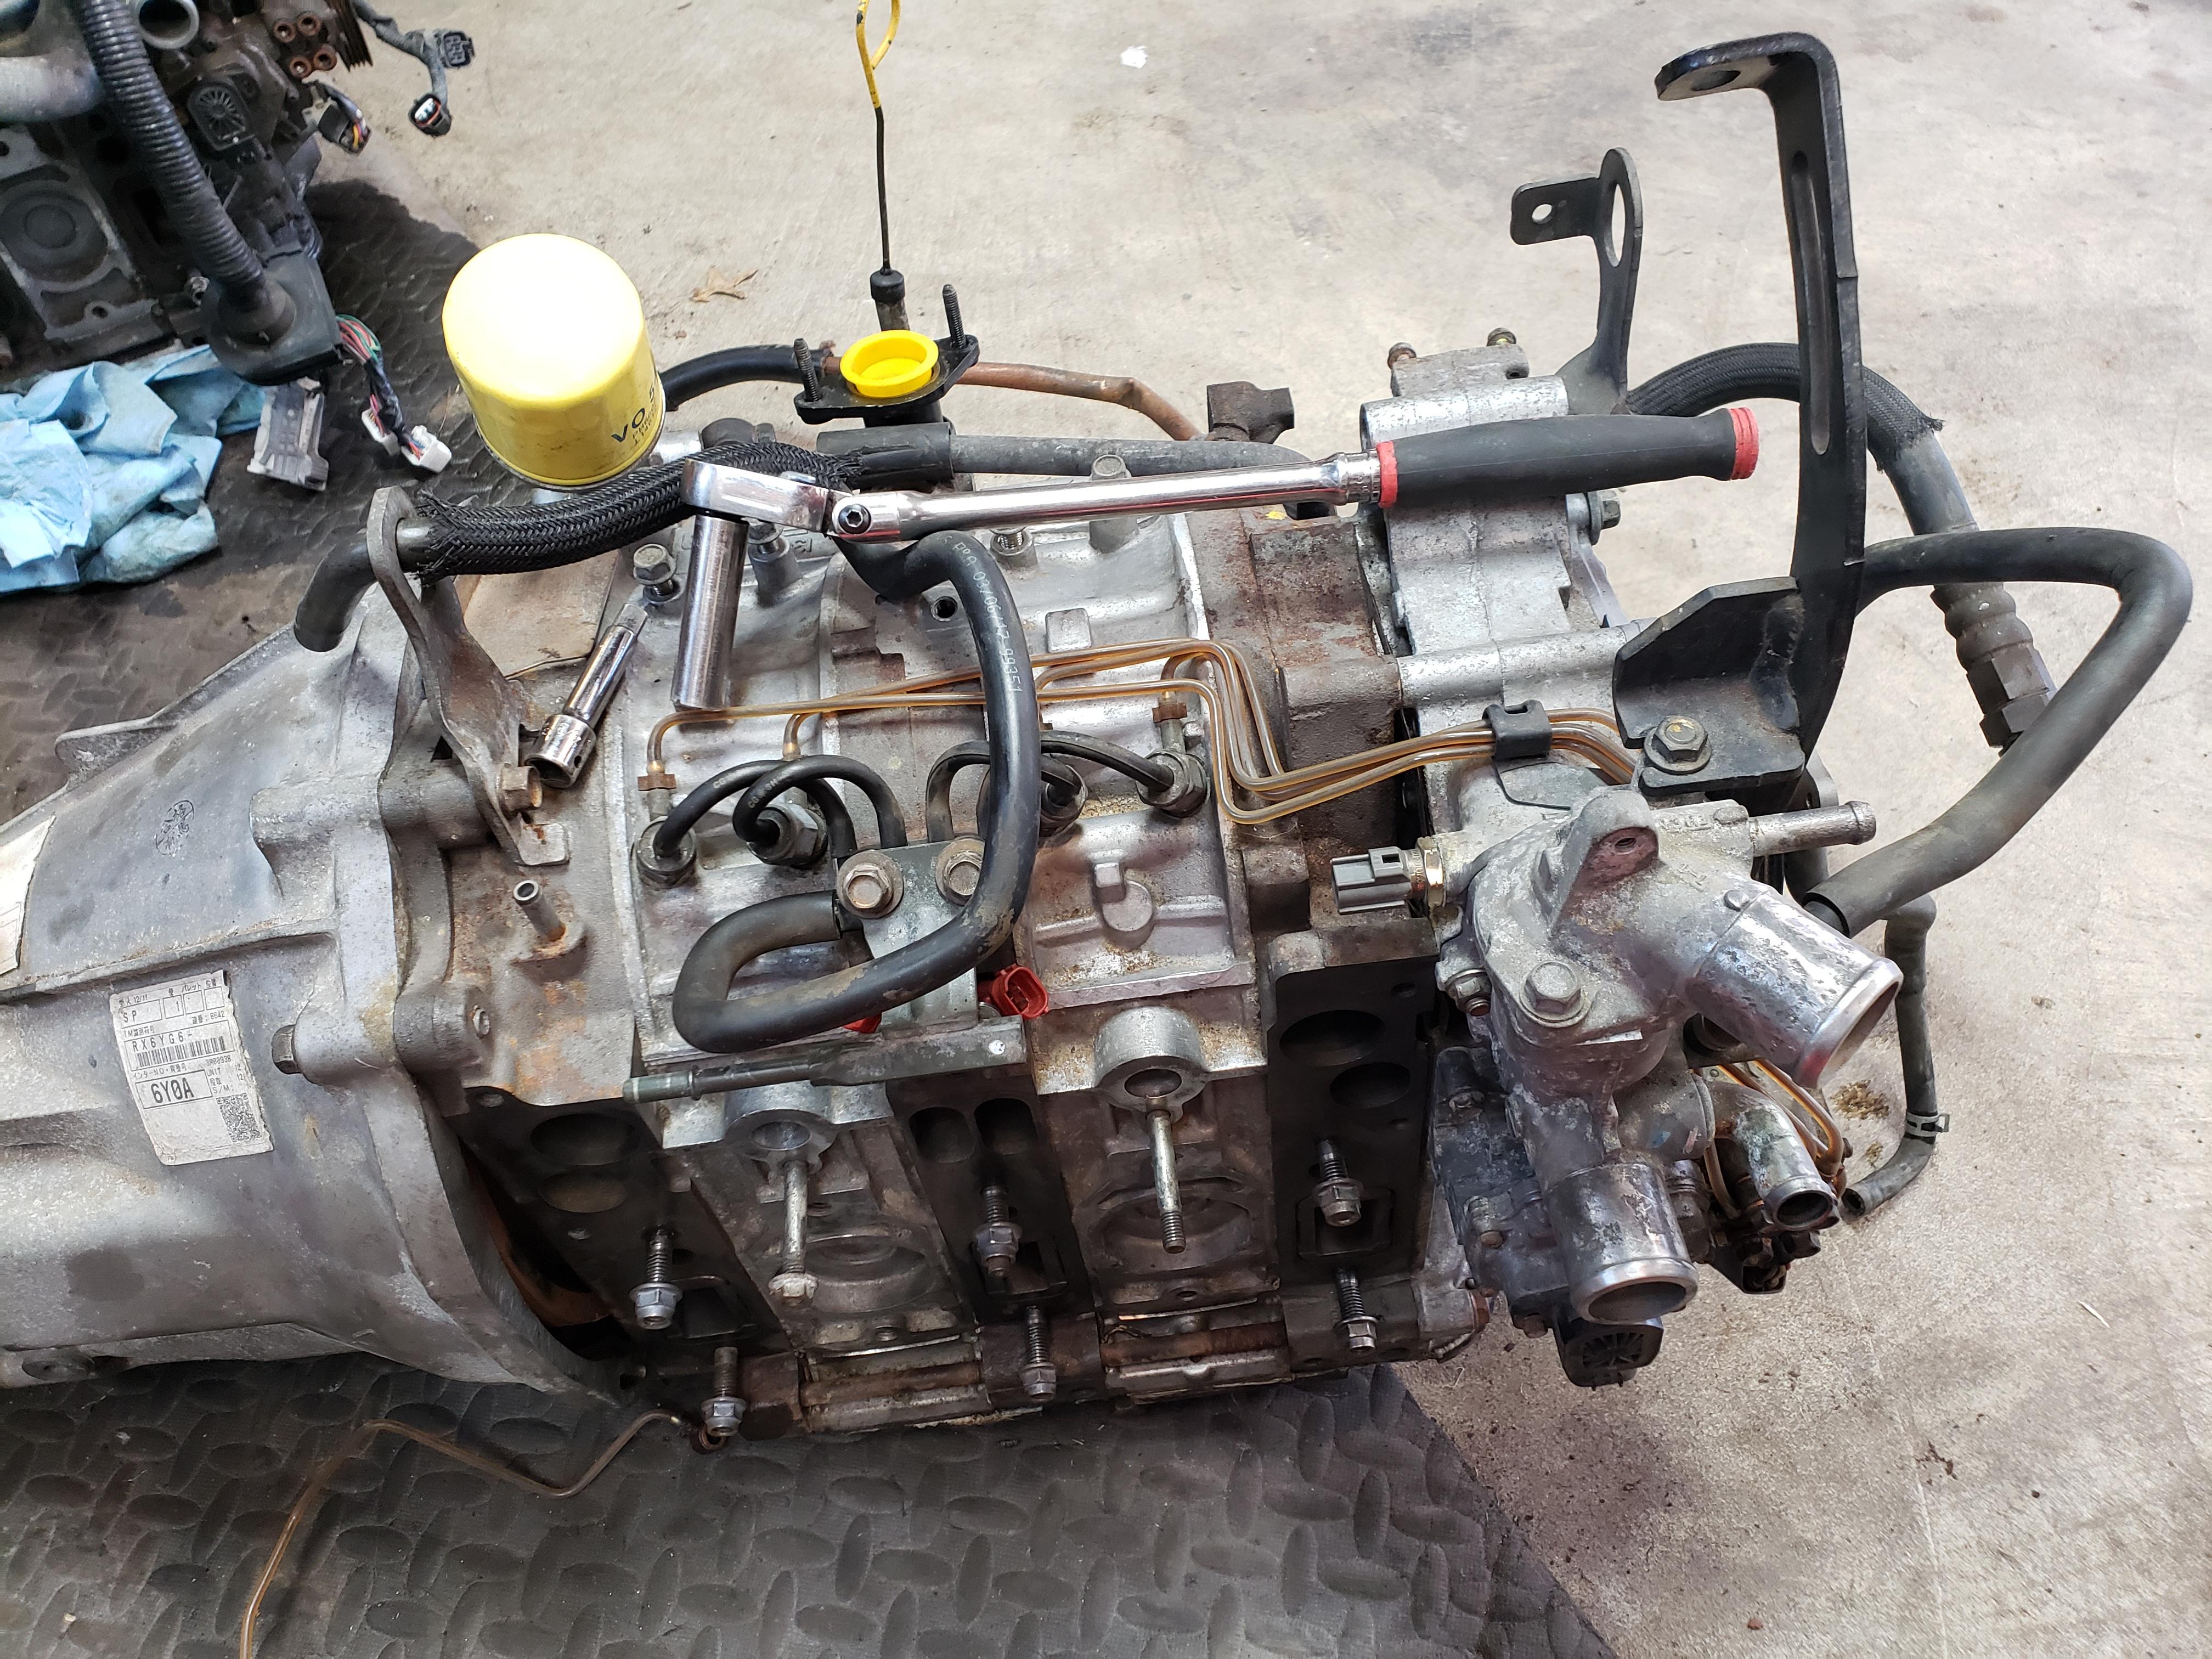
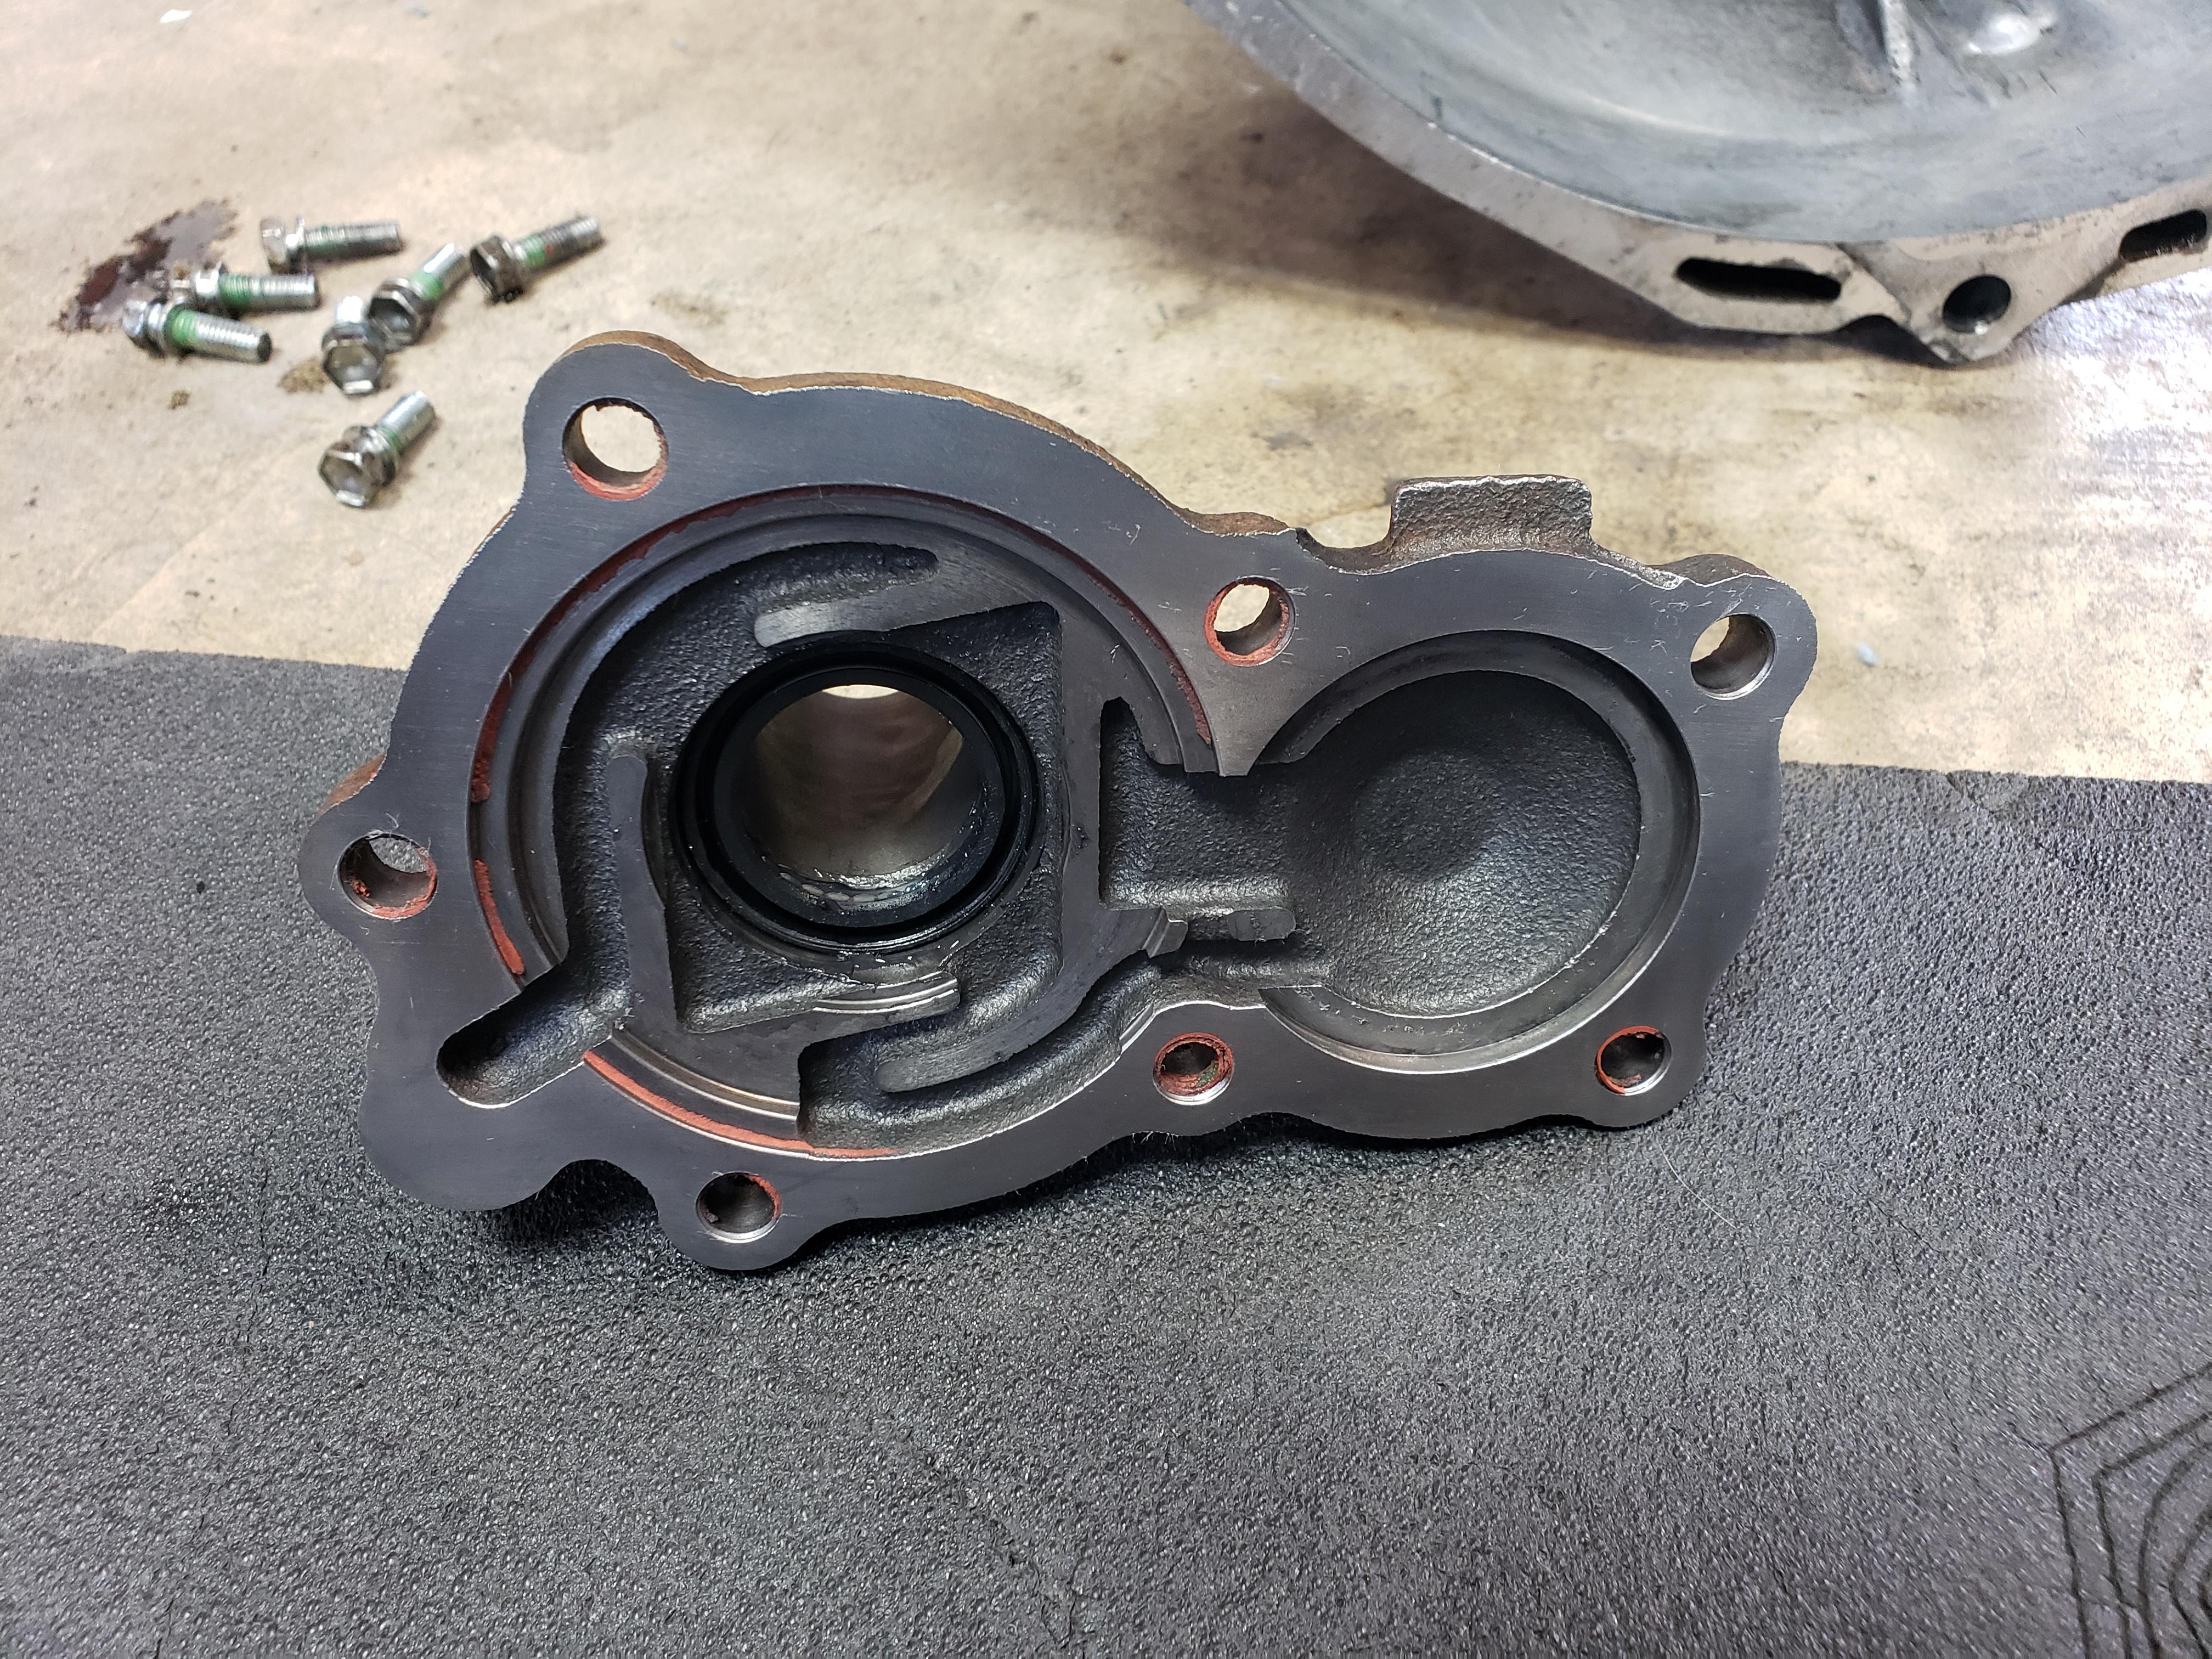
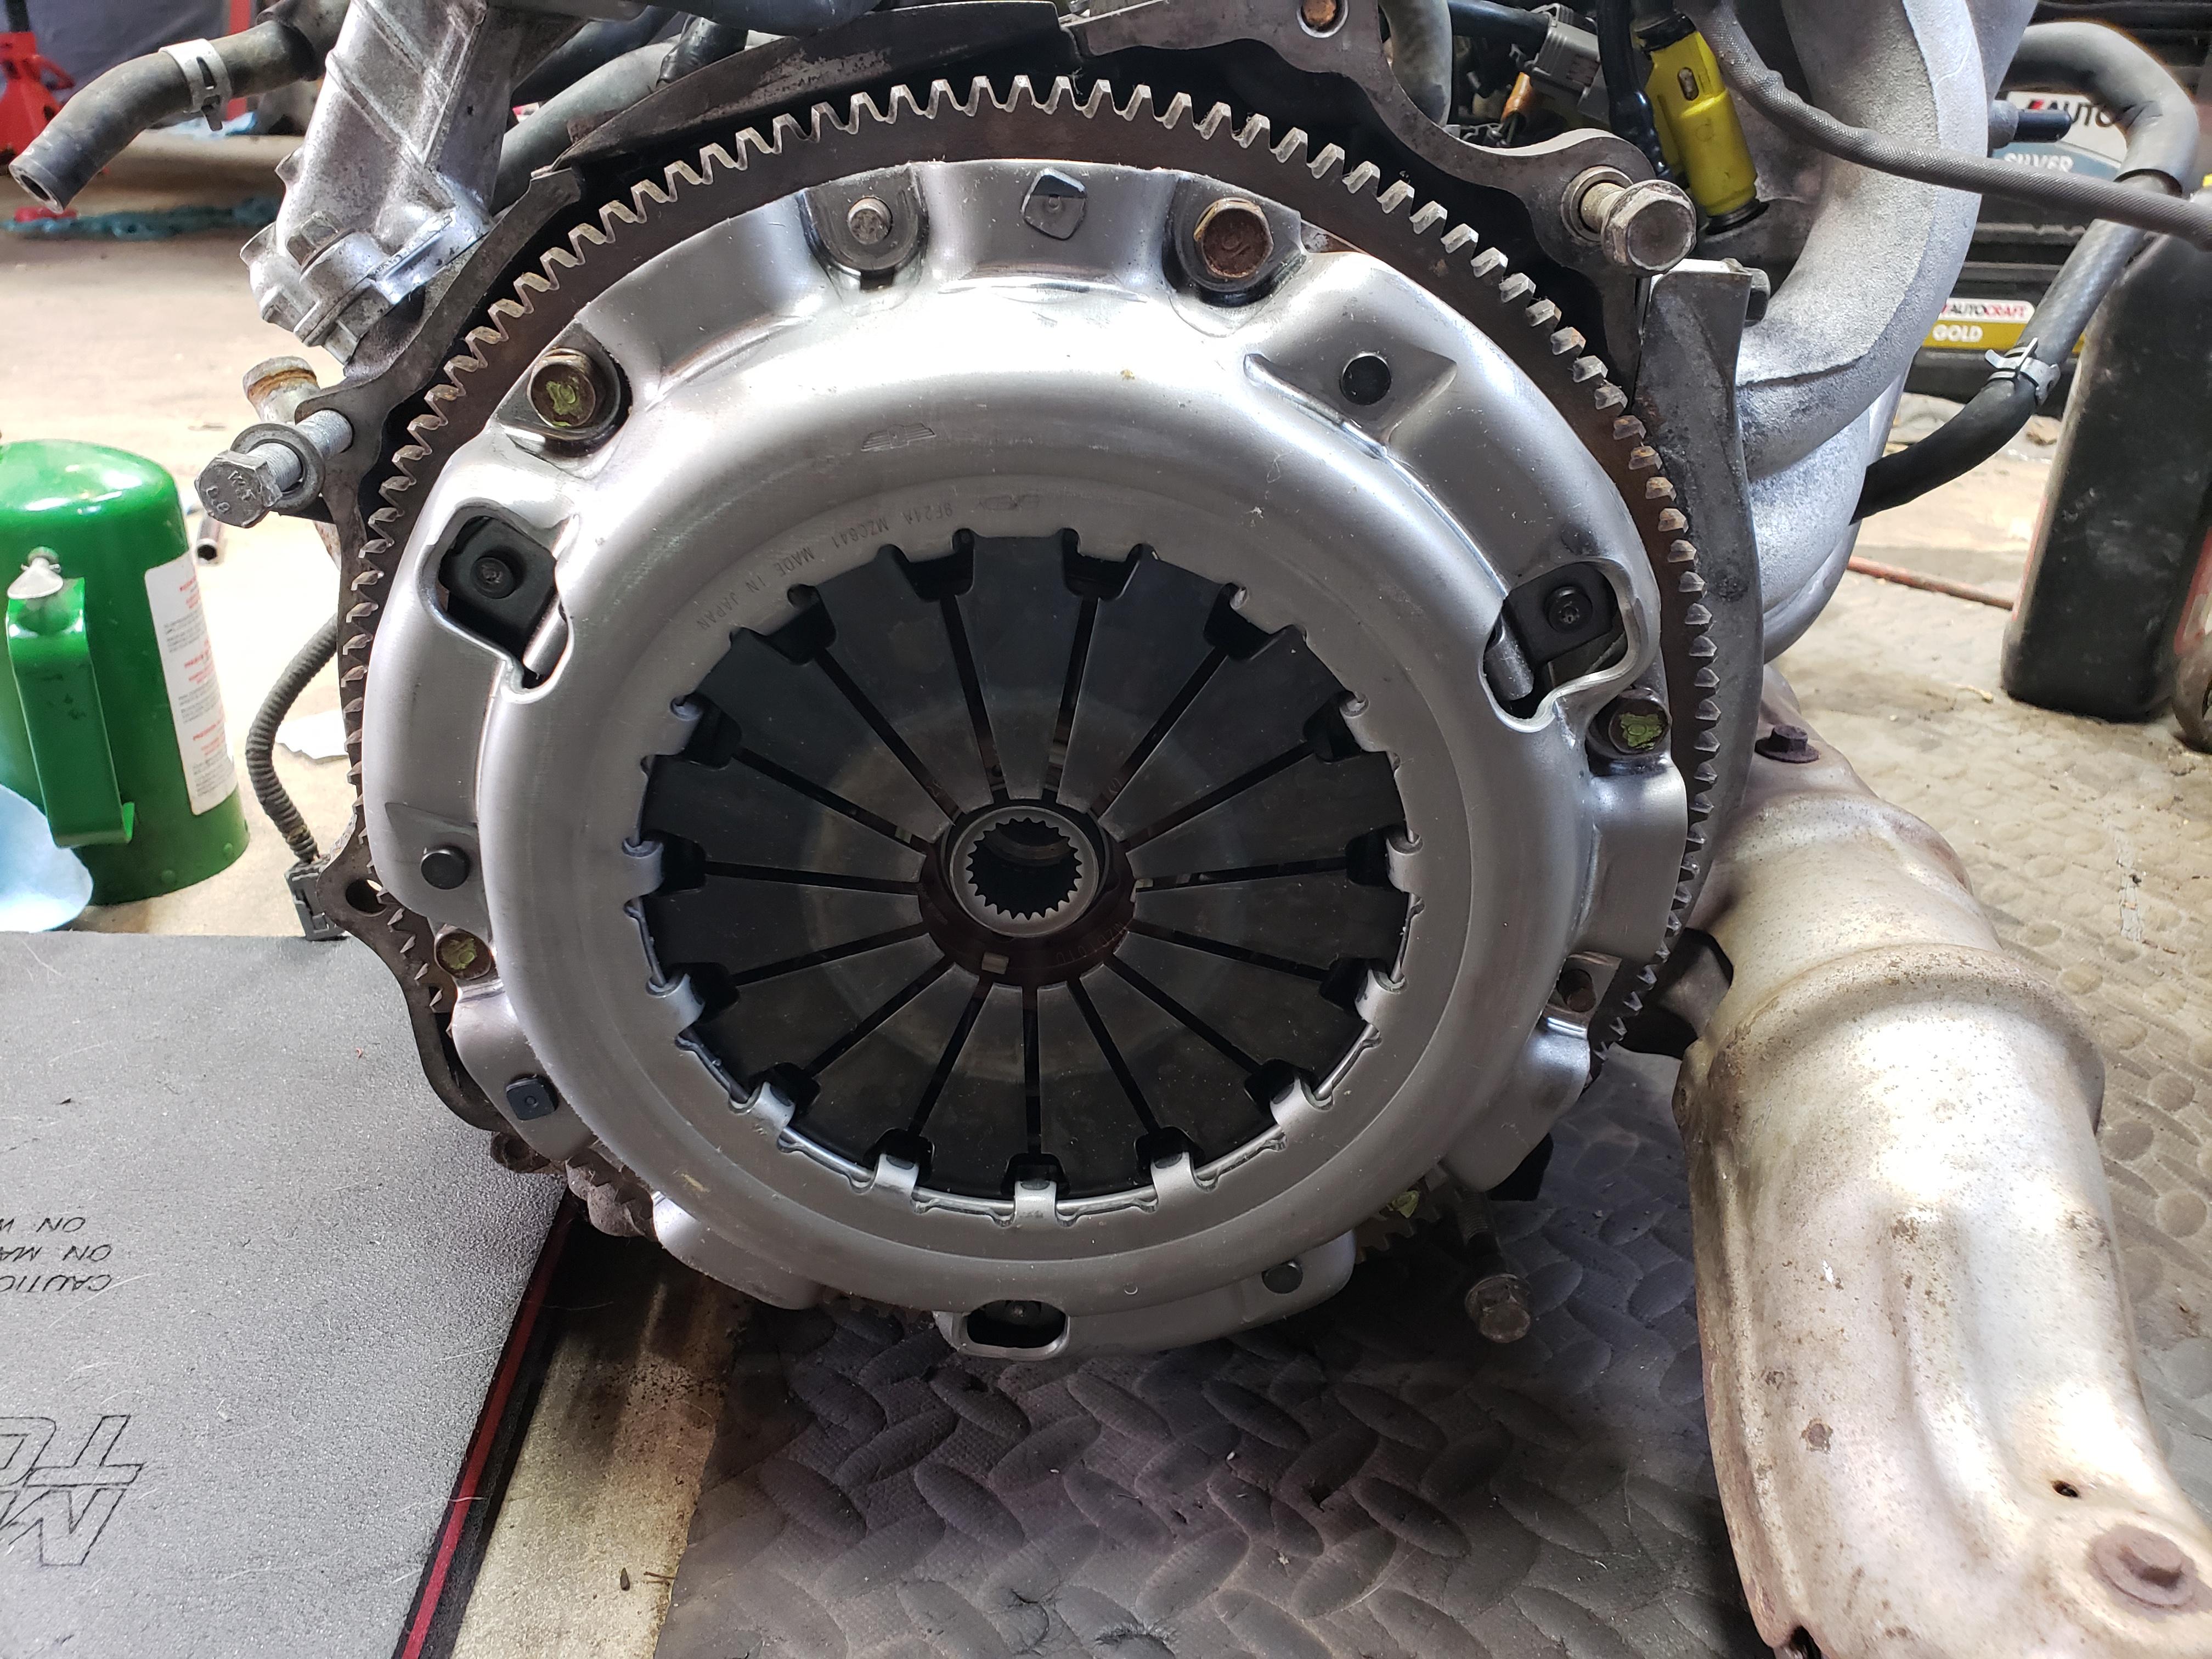
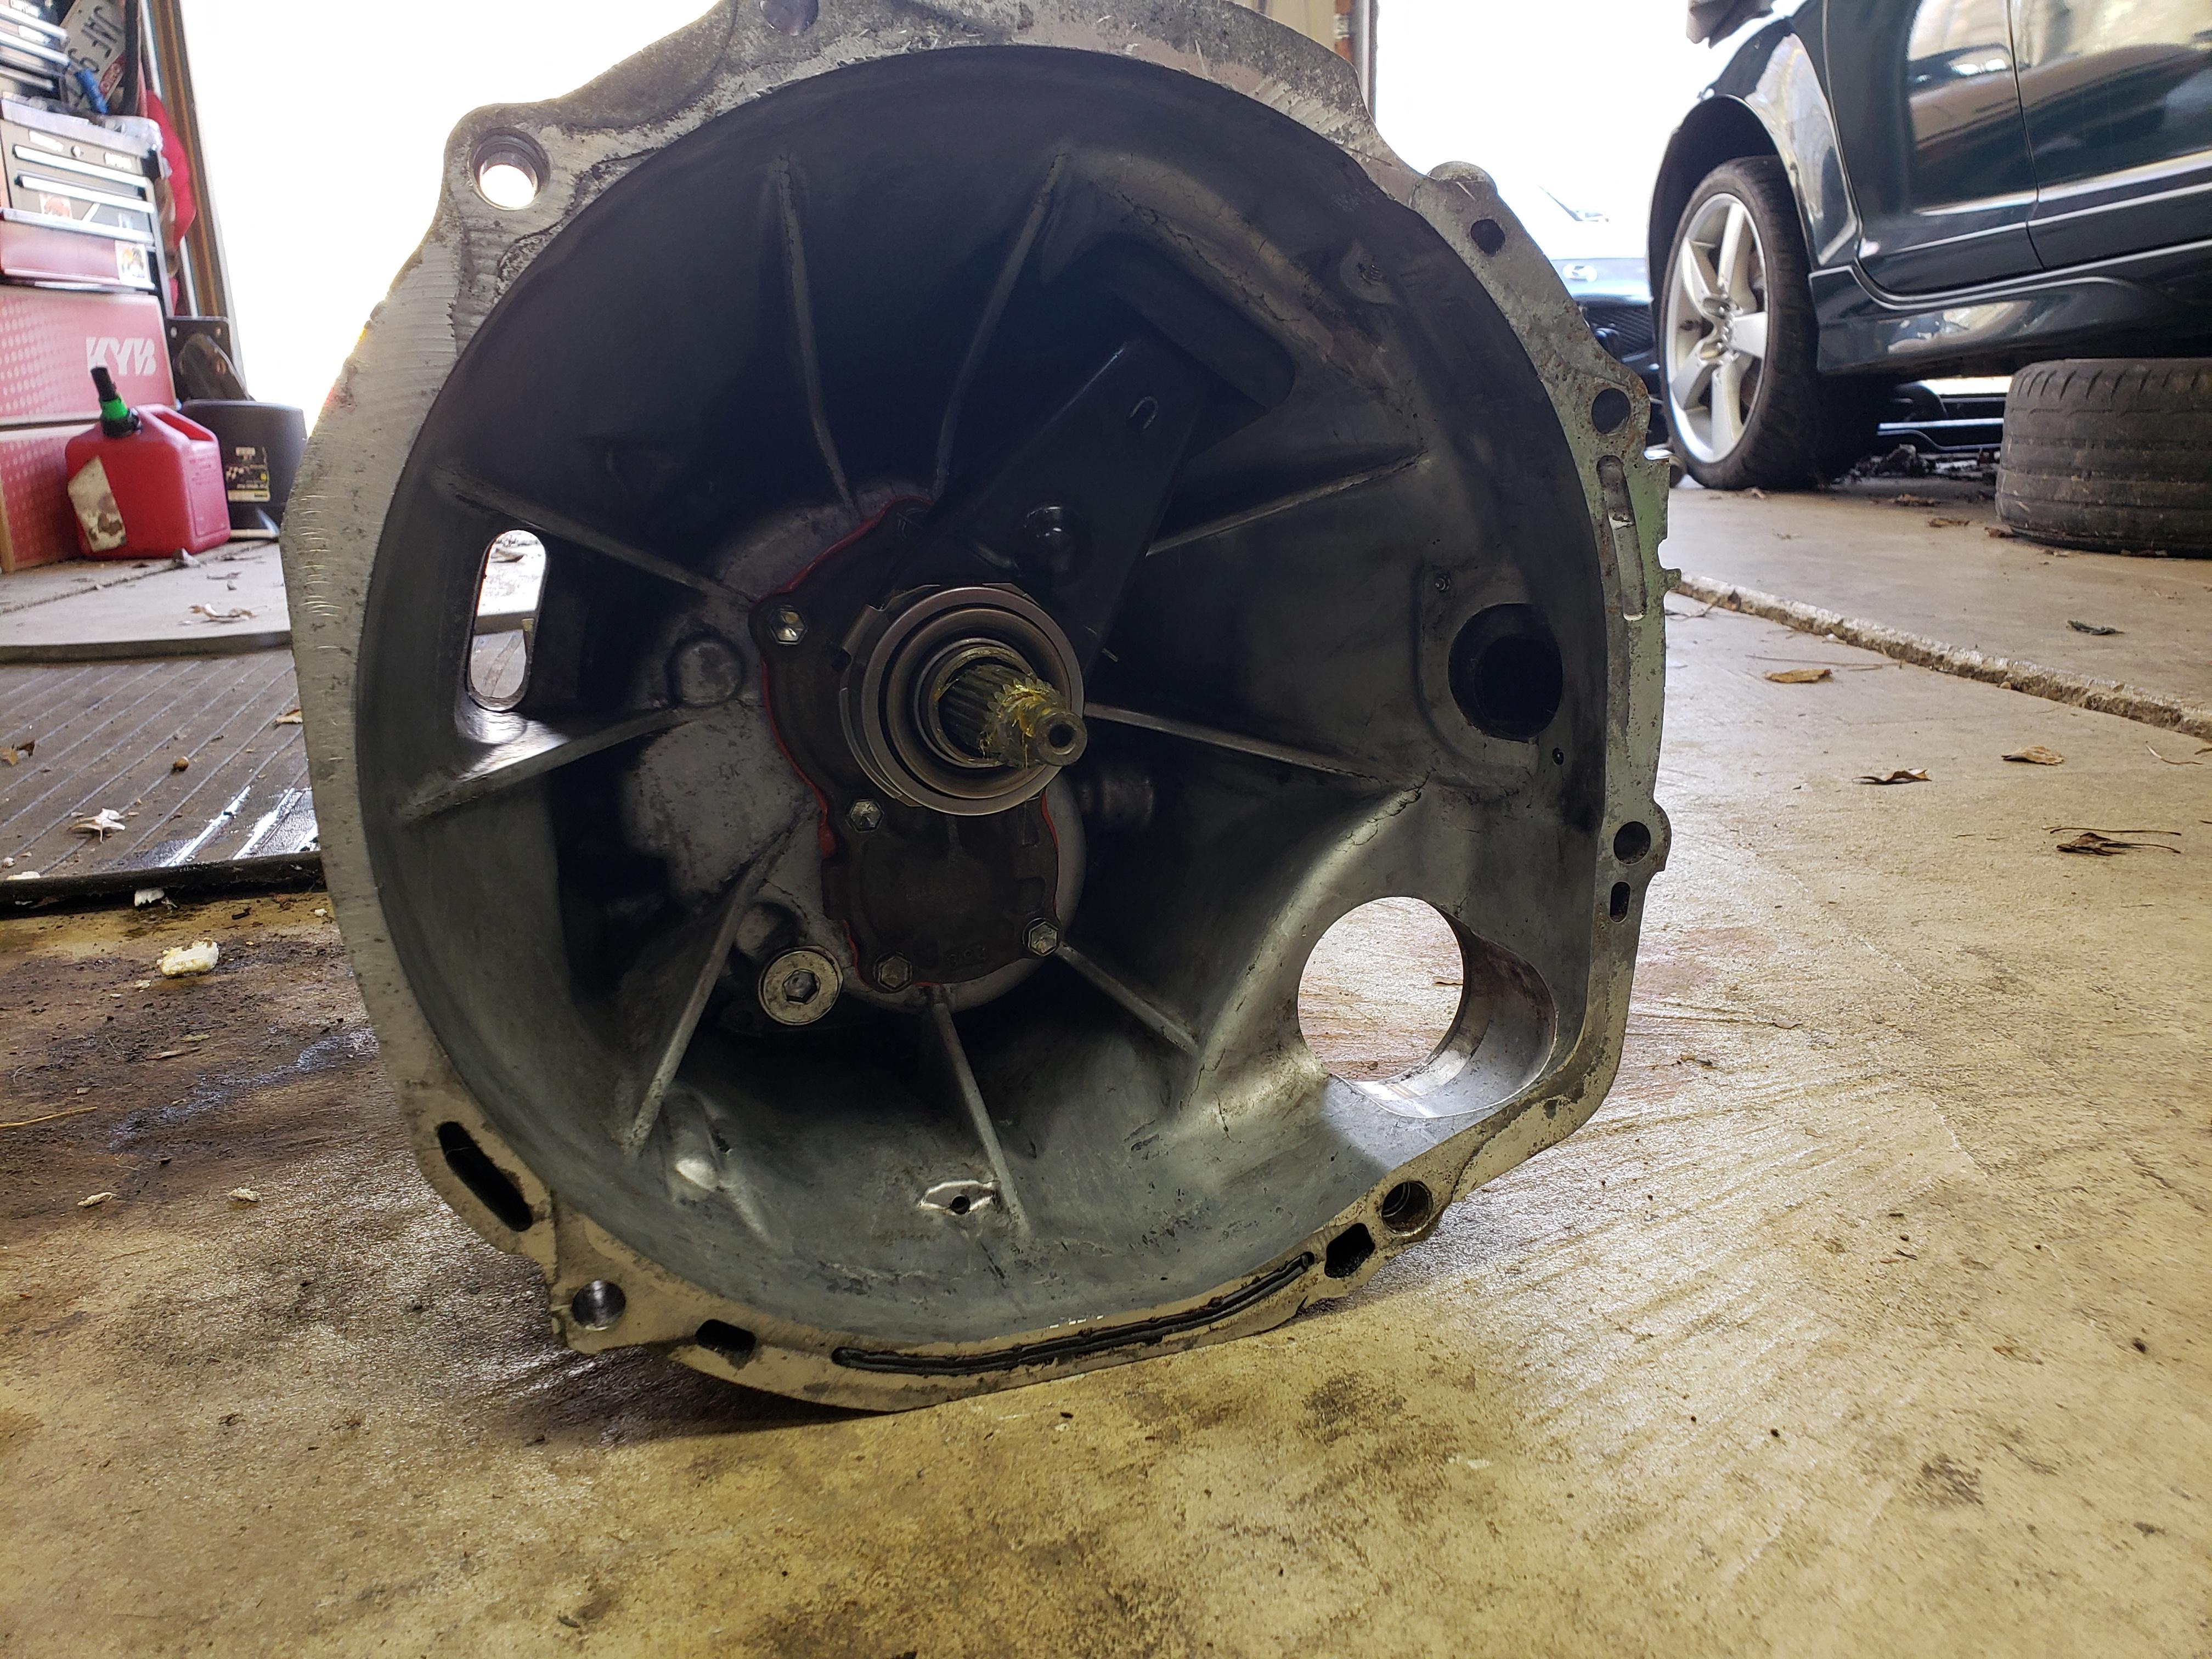
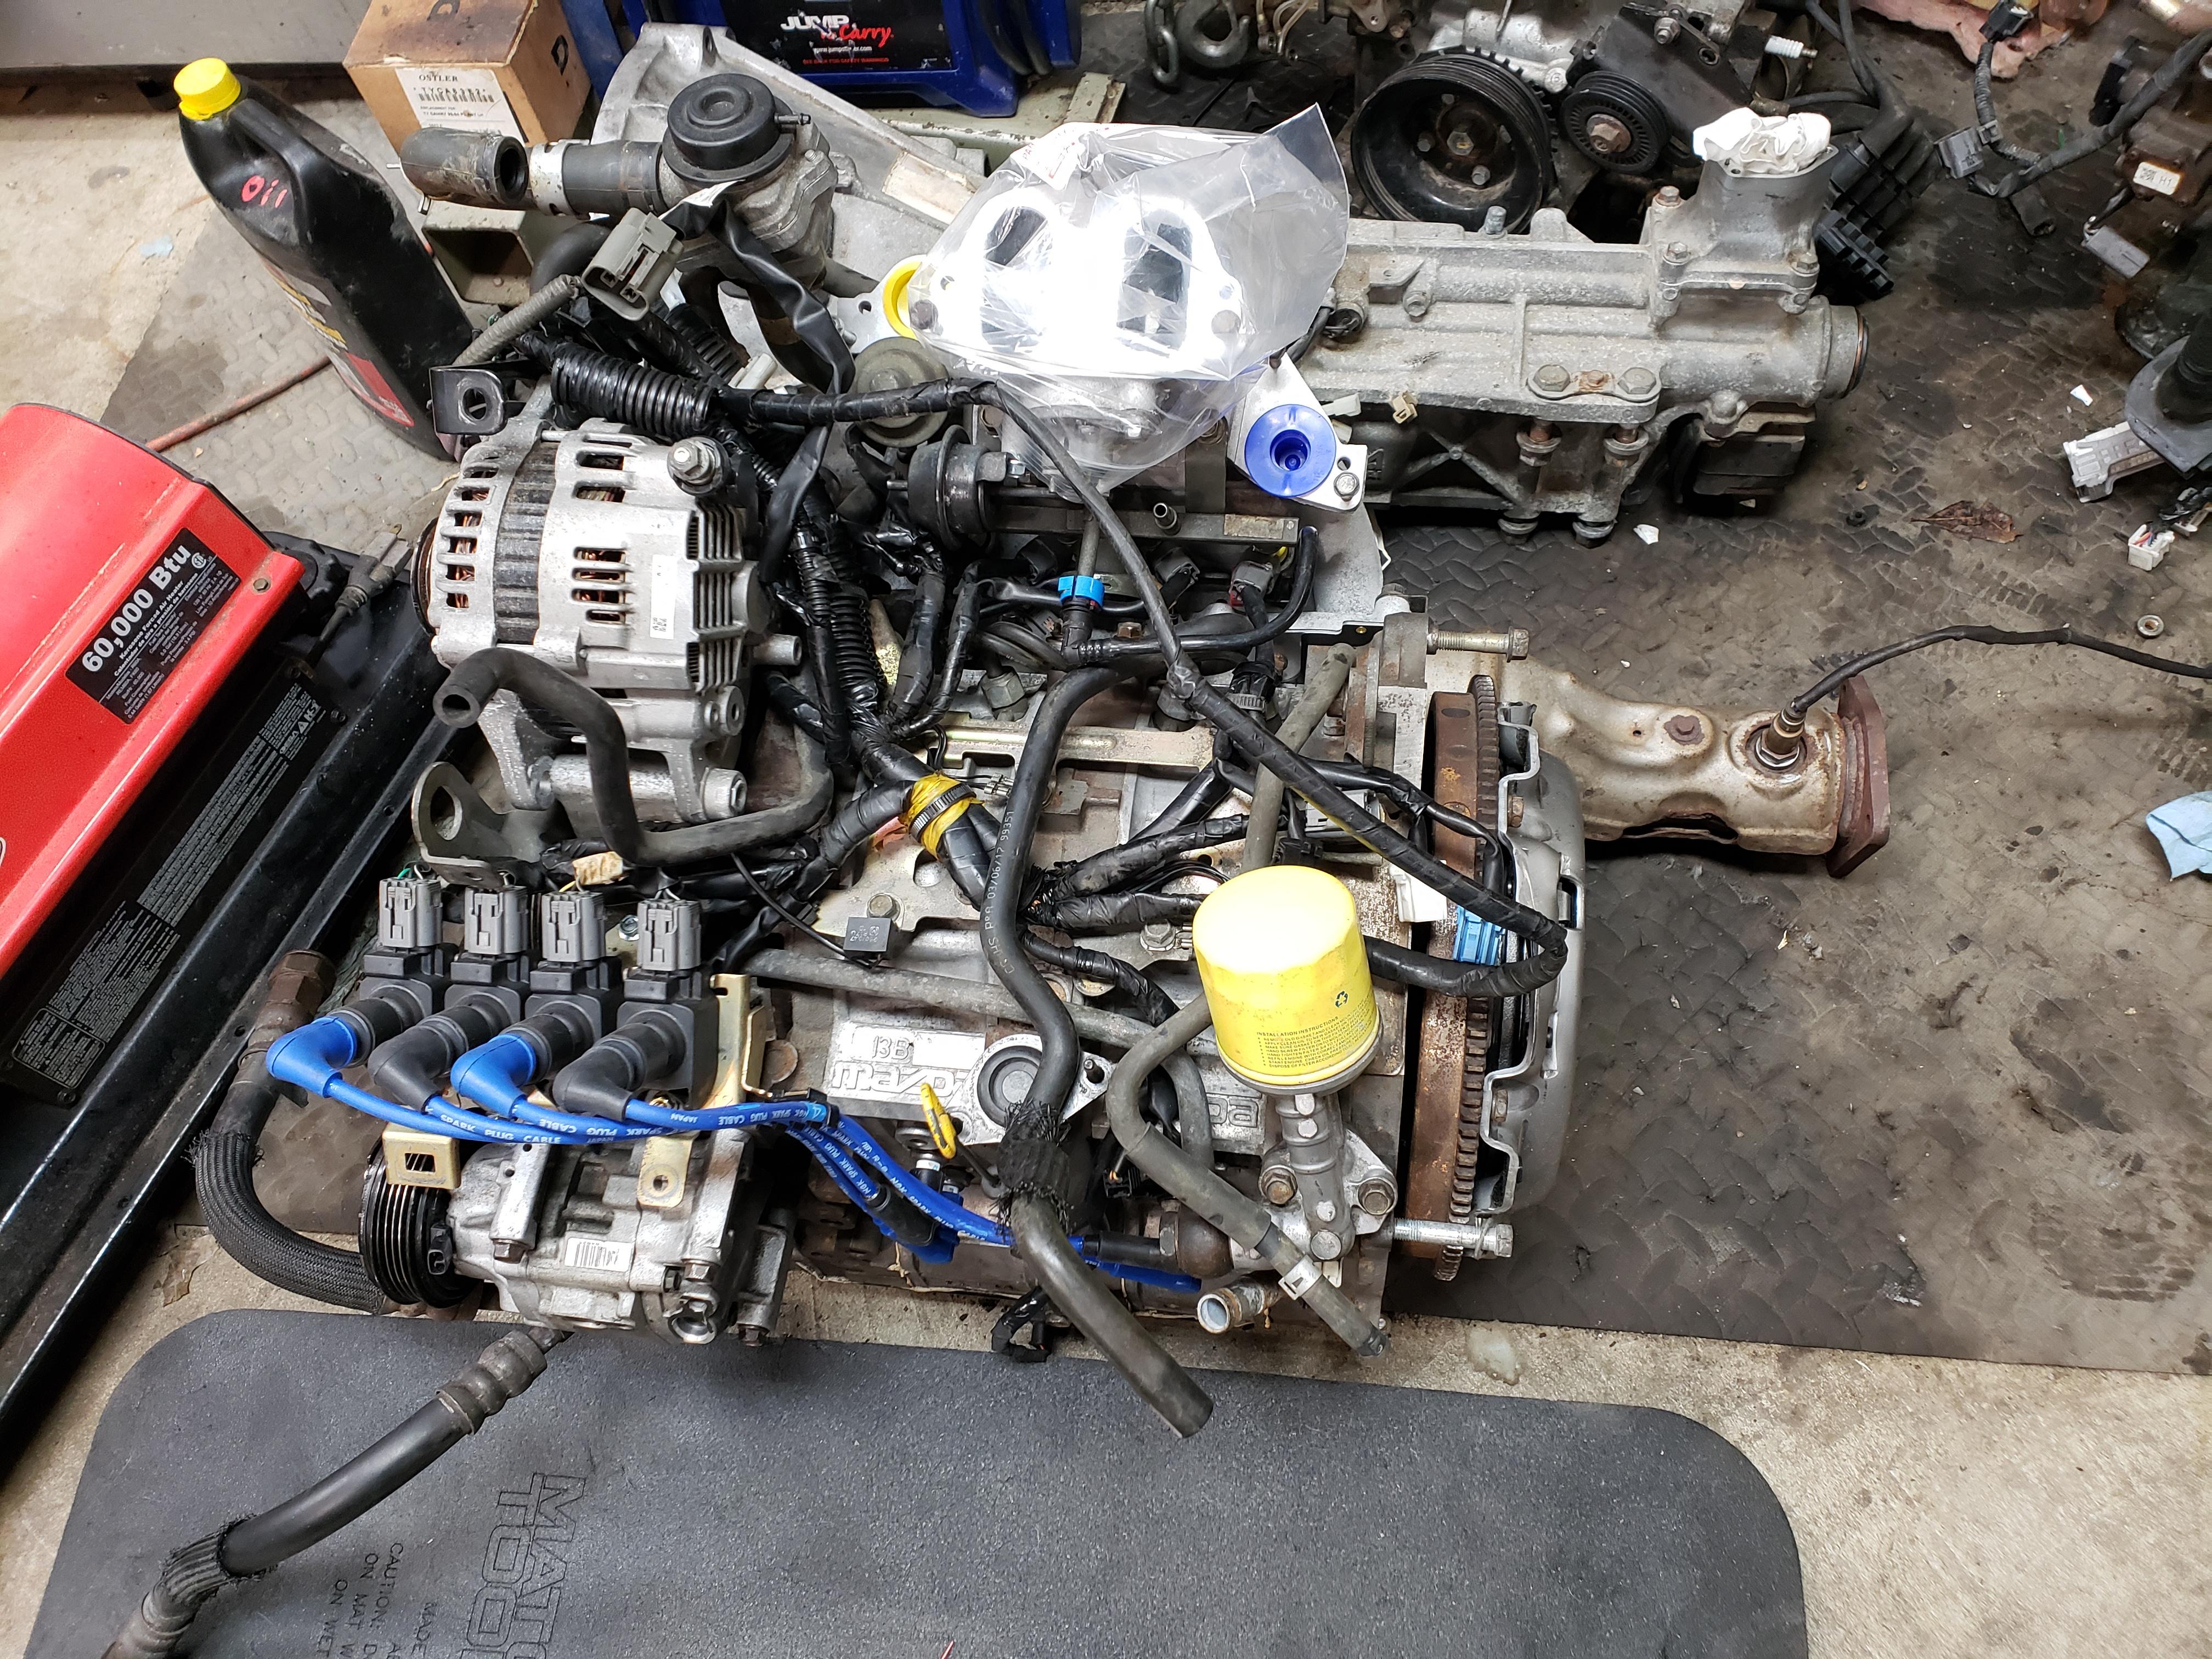
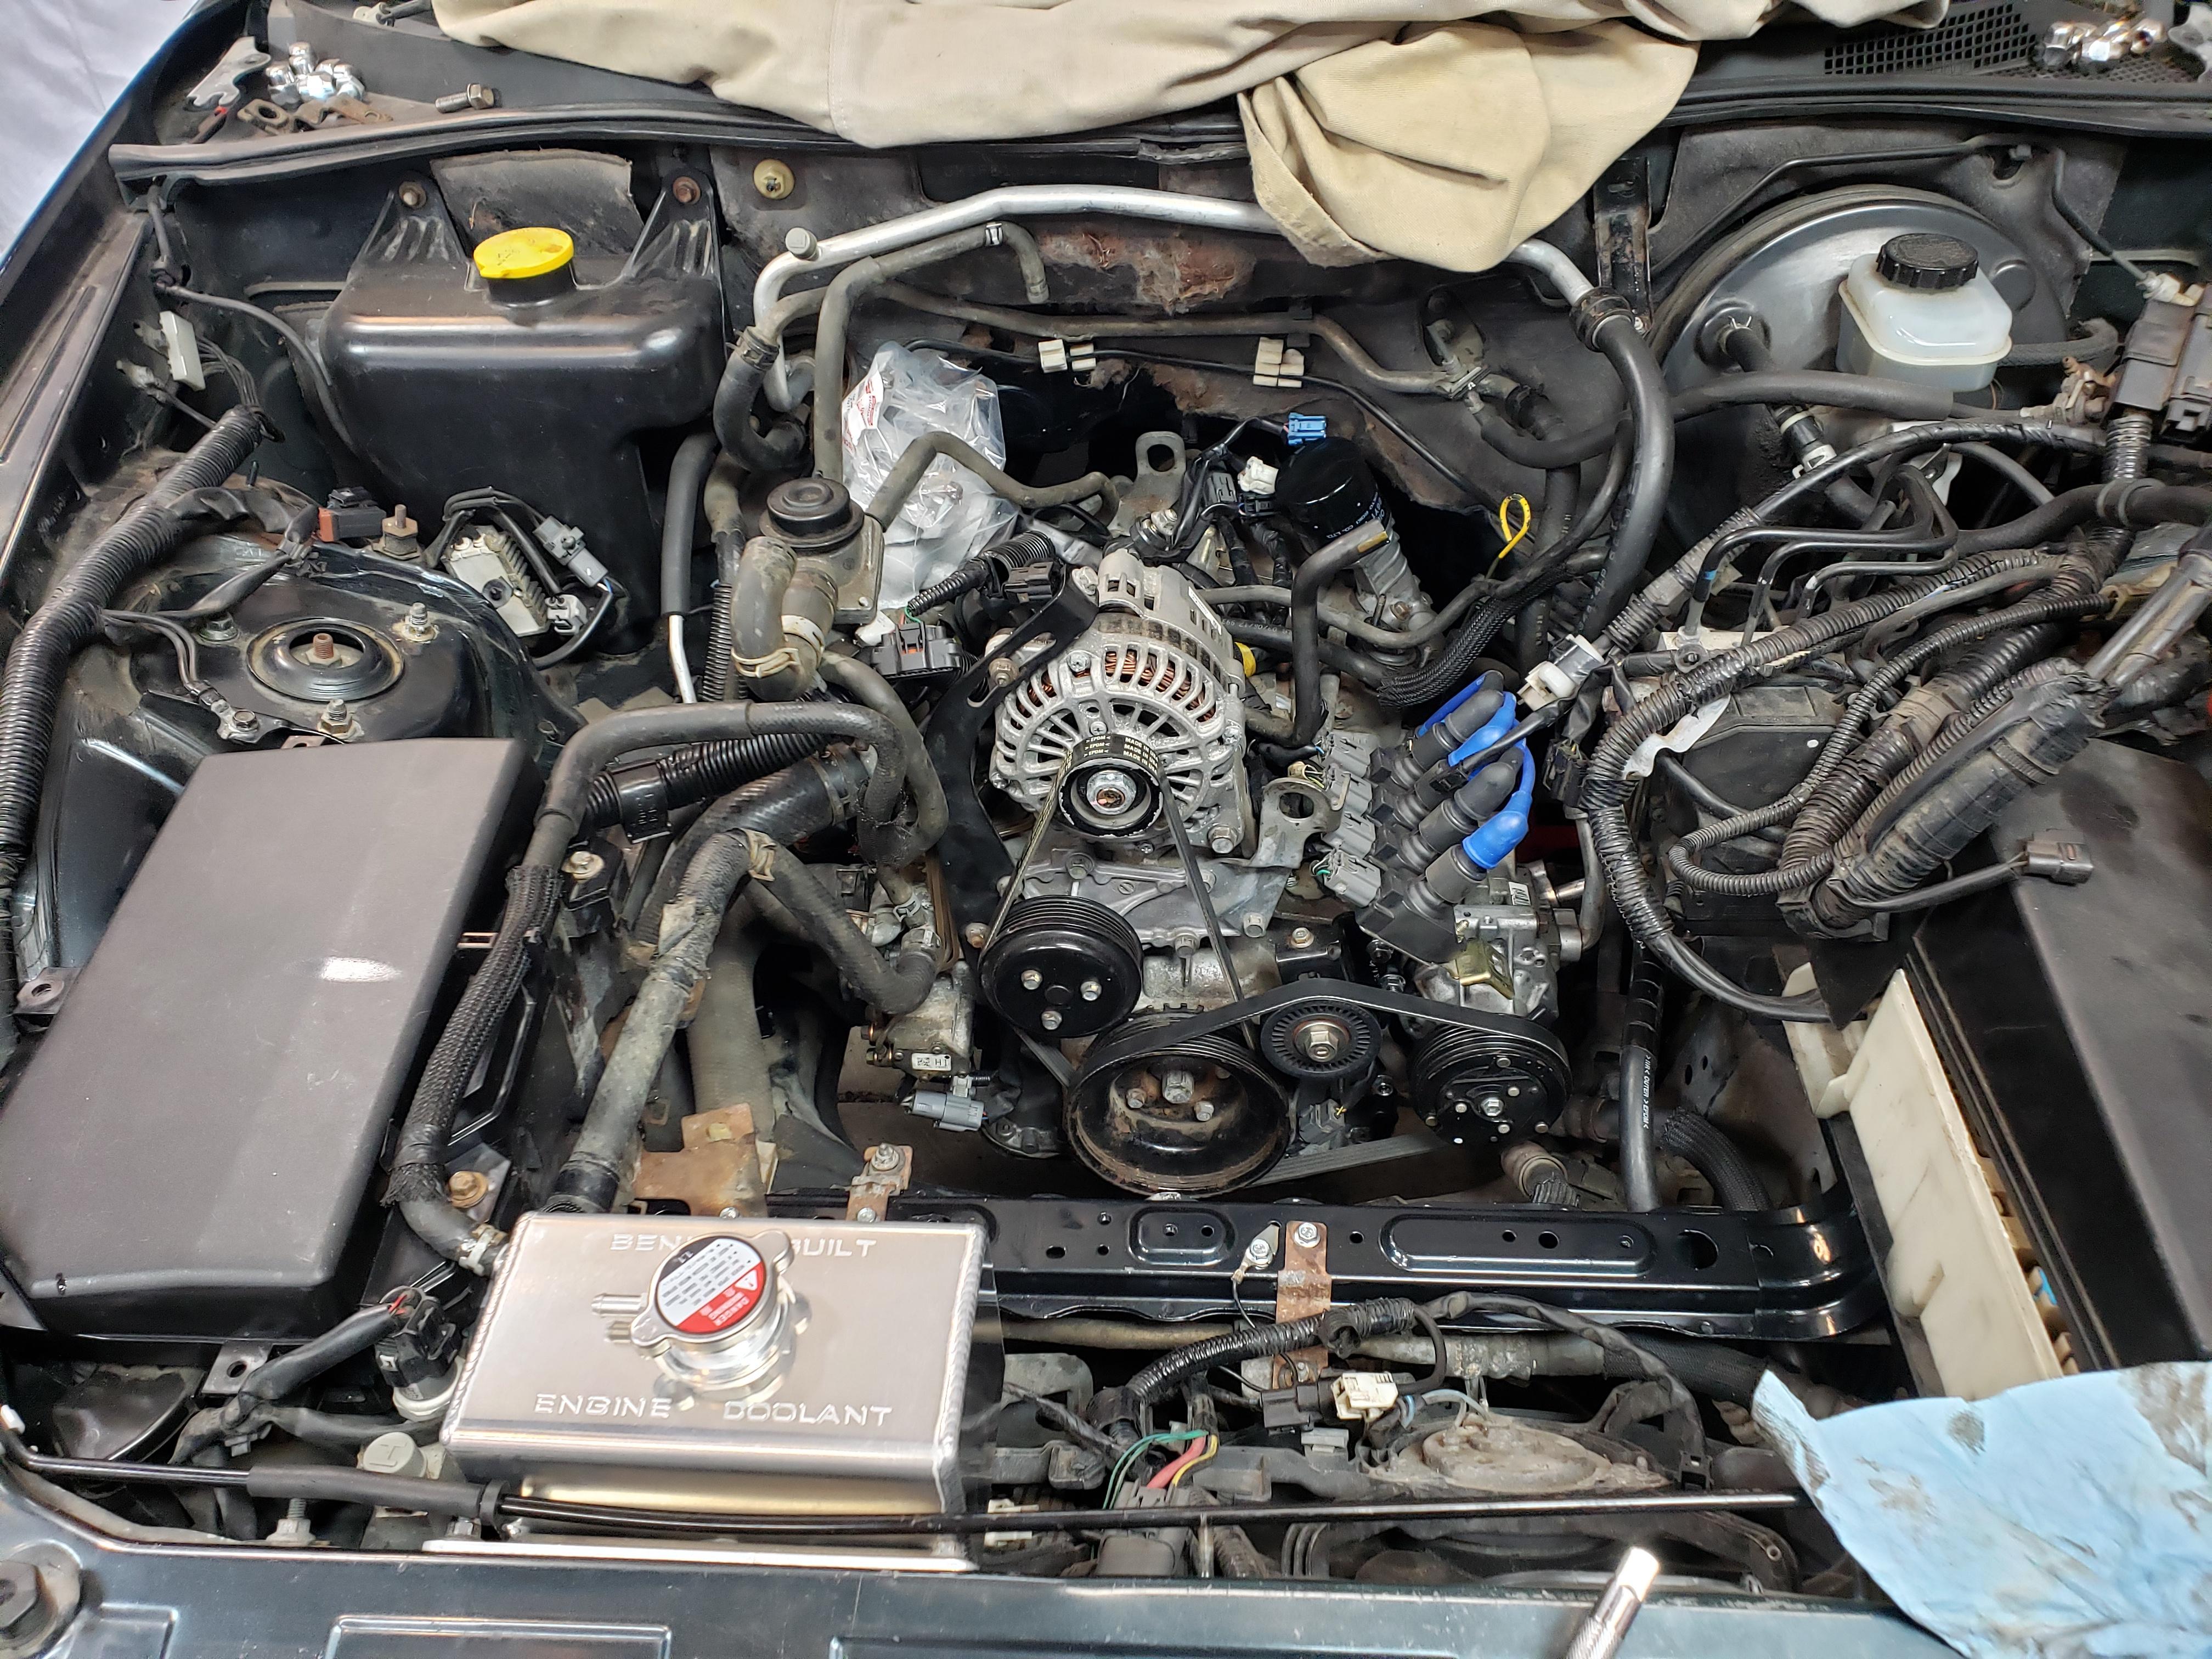
Put in a little time yesterday and replaced the front and rear seals in the transmission and prepped it for install, repaired some wiring on the engine harness, drilled and tapped a broken bolt for the eccentric shaft position sensor, and installed the new clutch. Took a couple pictures of the progress to share:
Sleeve and plate removed:
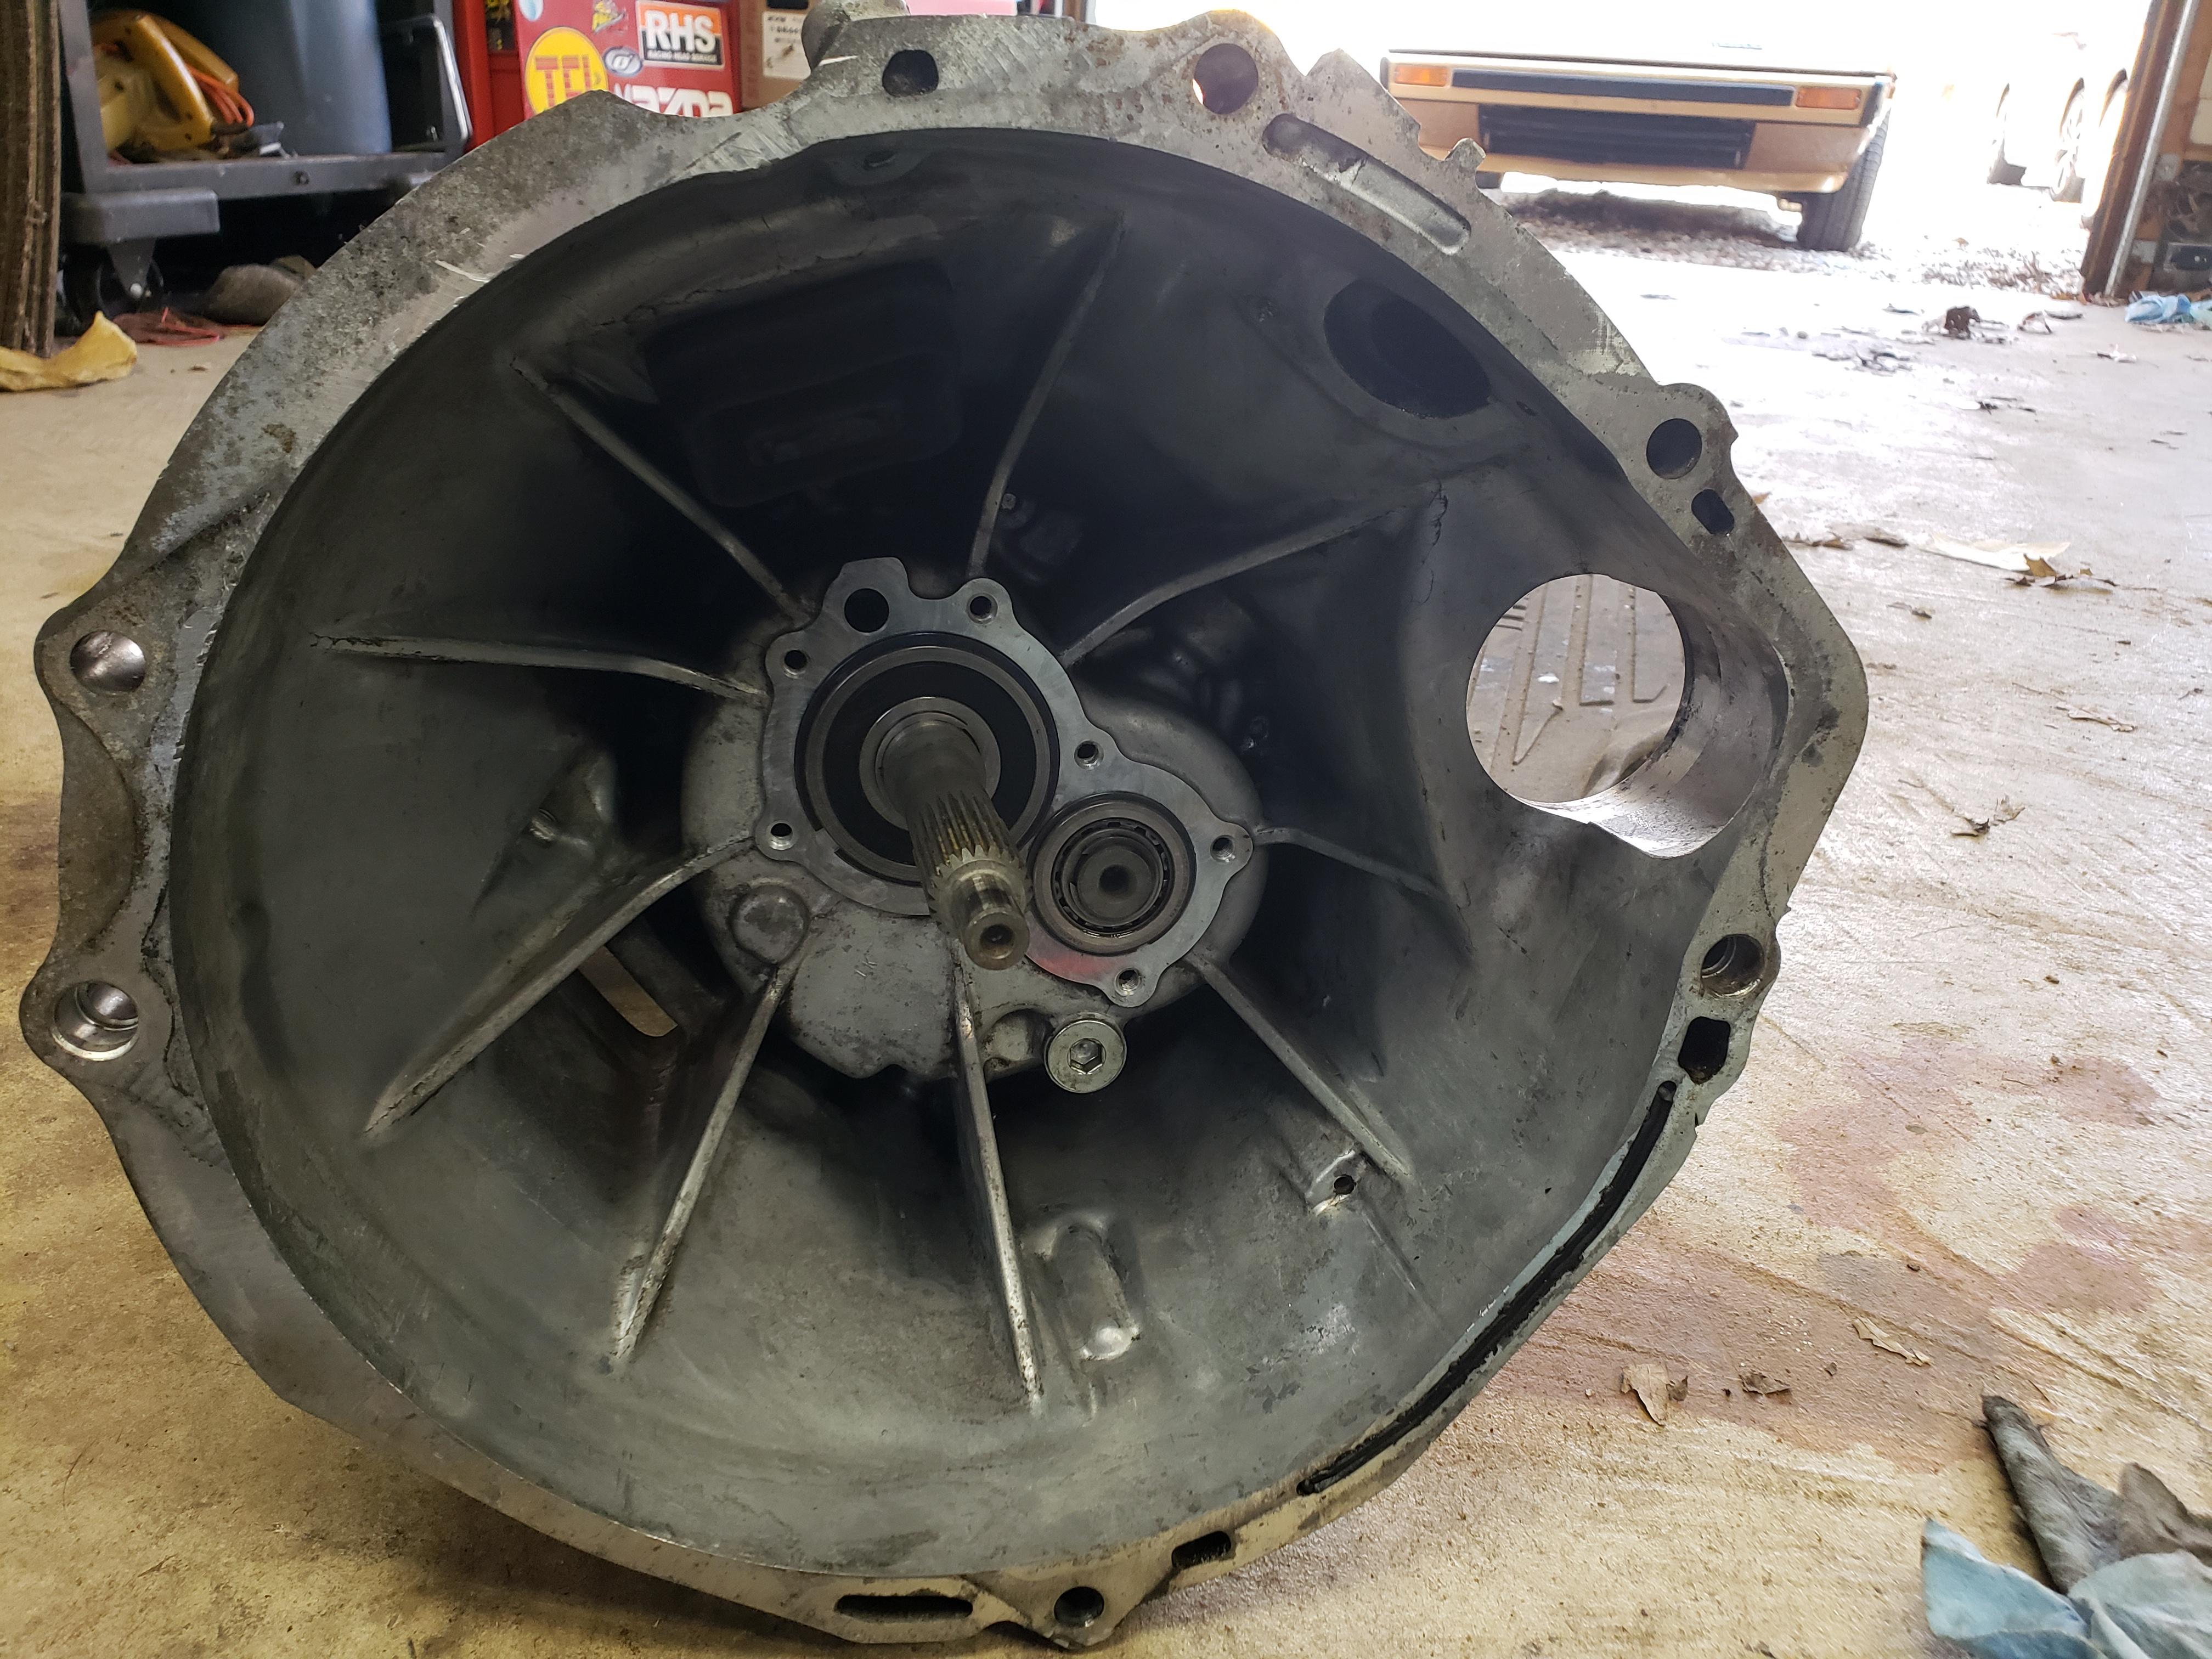
Cleaned with a new front cover seal installed:
New clutch installed and torqued to spec:
Trans back together:
As the engine sits currently:
Sleeve and plate removed:
Cleaned with a new front cover seal installed:
New clutch installed and torqued to spec:
Trans back together:
As the engine sits currently:
04-10-2021, 06:40 AM
#17
RX-Heaven
Thread Starter
iTrader: (6)
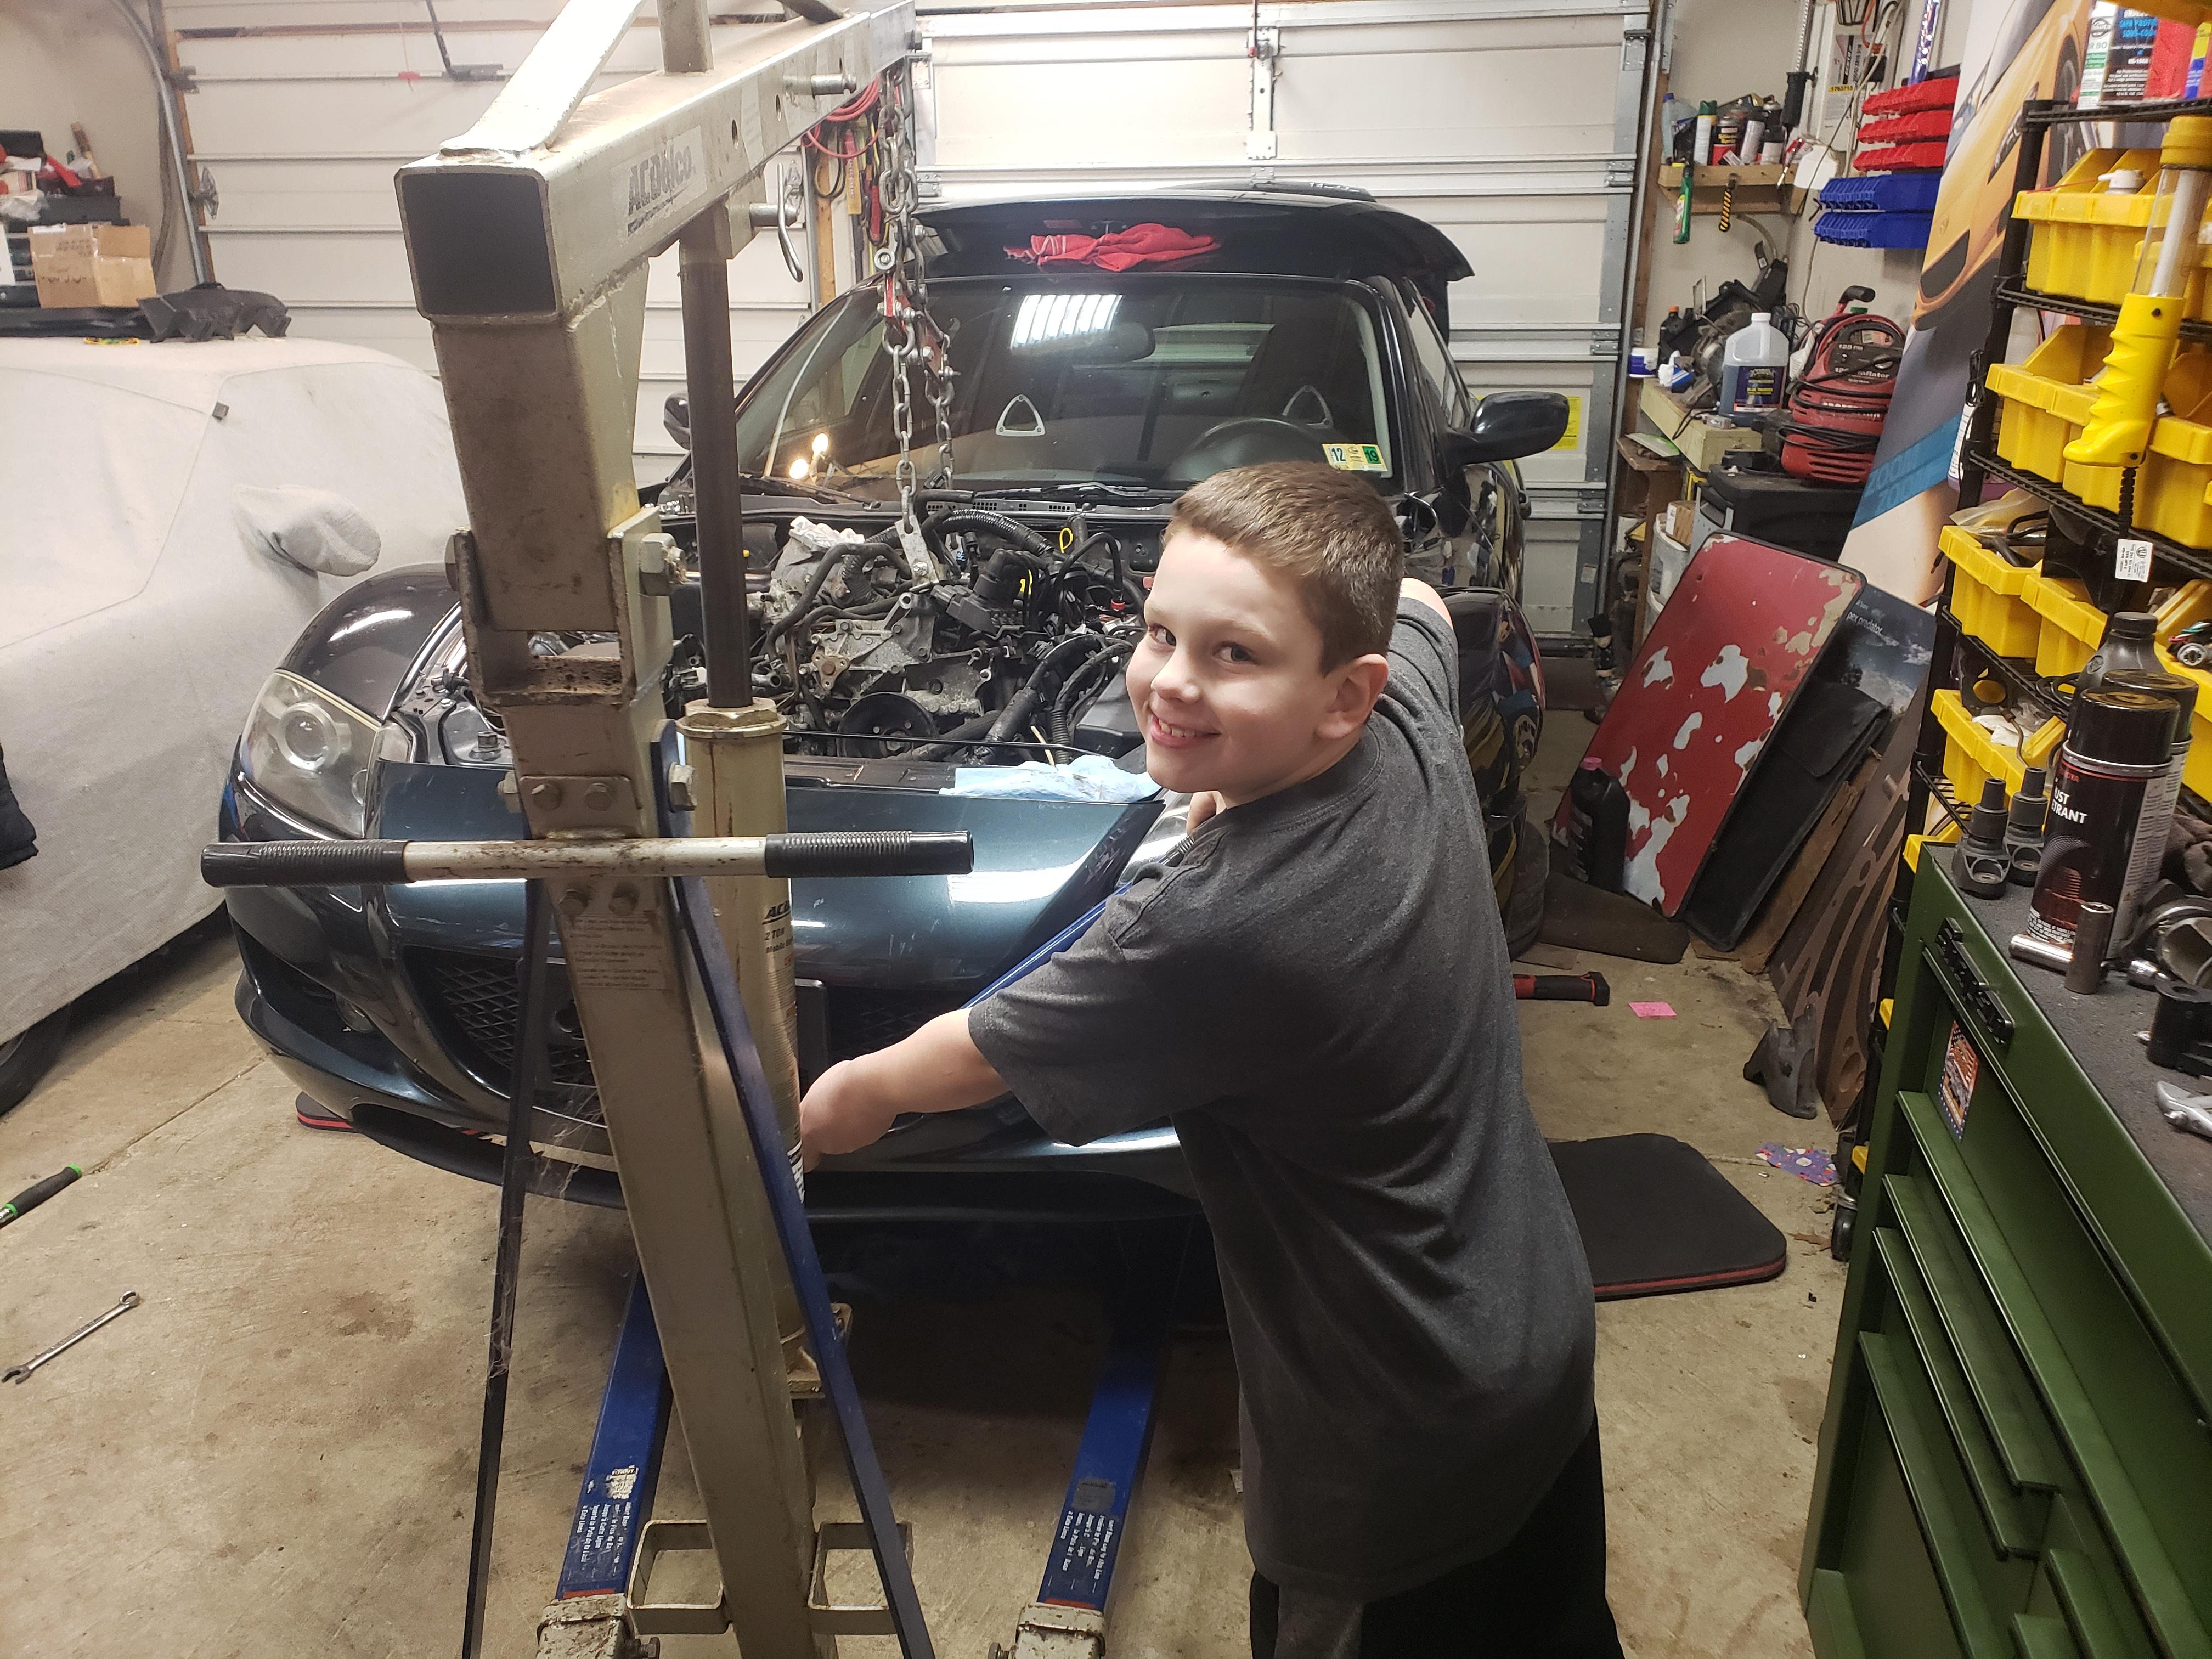
I got home from work last night and my oldest son and I decided to install the engine and trans. The engine is bolted in the car as it should be but the driveshaft and power plant frame are not currently installed. I have the trans supported on jack stands. Thr next step is to install the driveshadt and power plant frame. For now though I'm happy with the progress we've made thus far! Took a couple pictures to share:
My son picking the engine up:
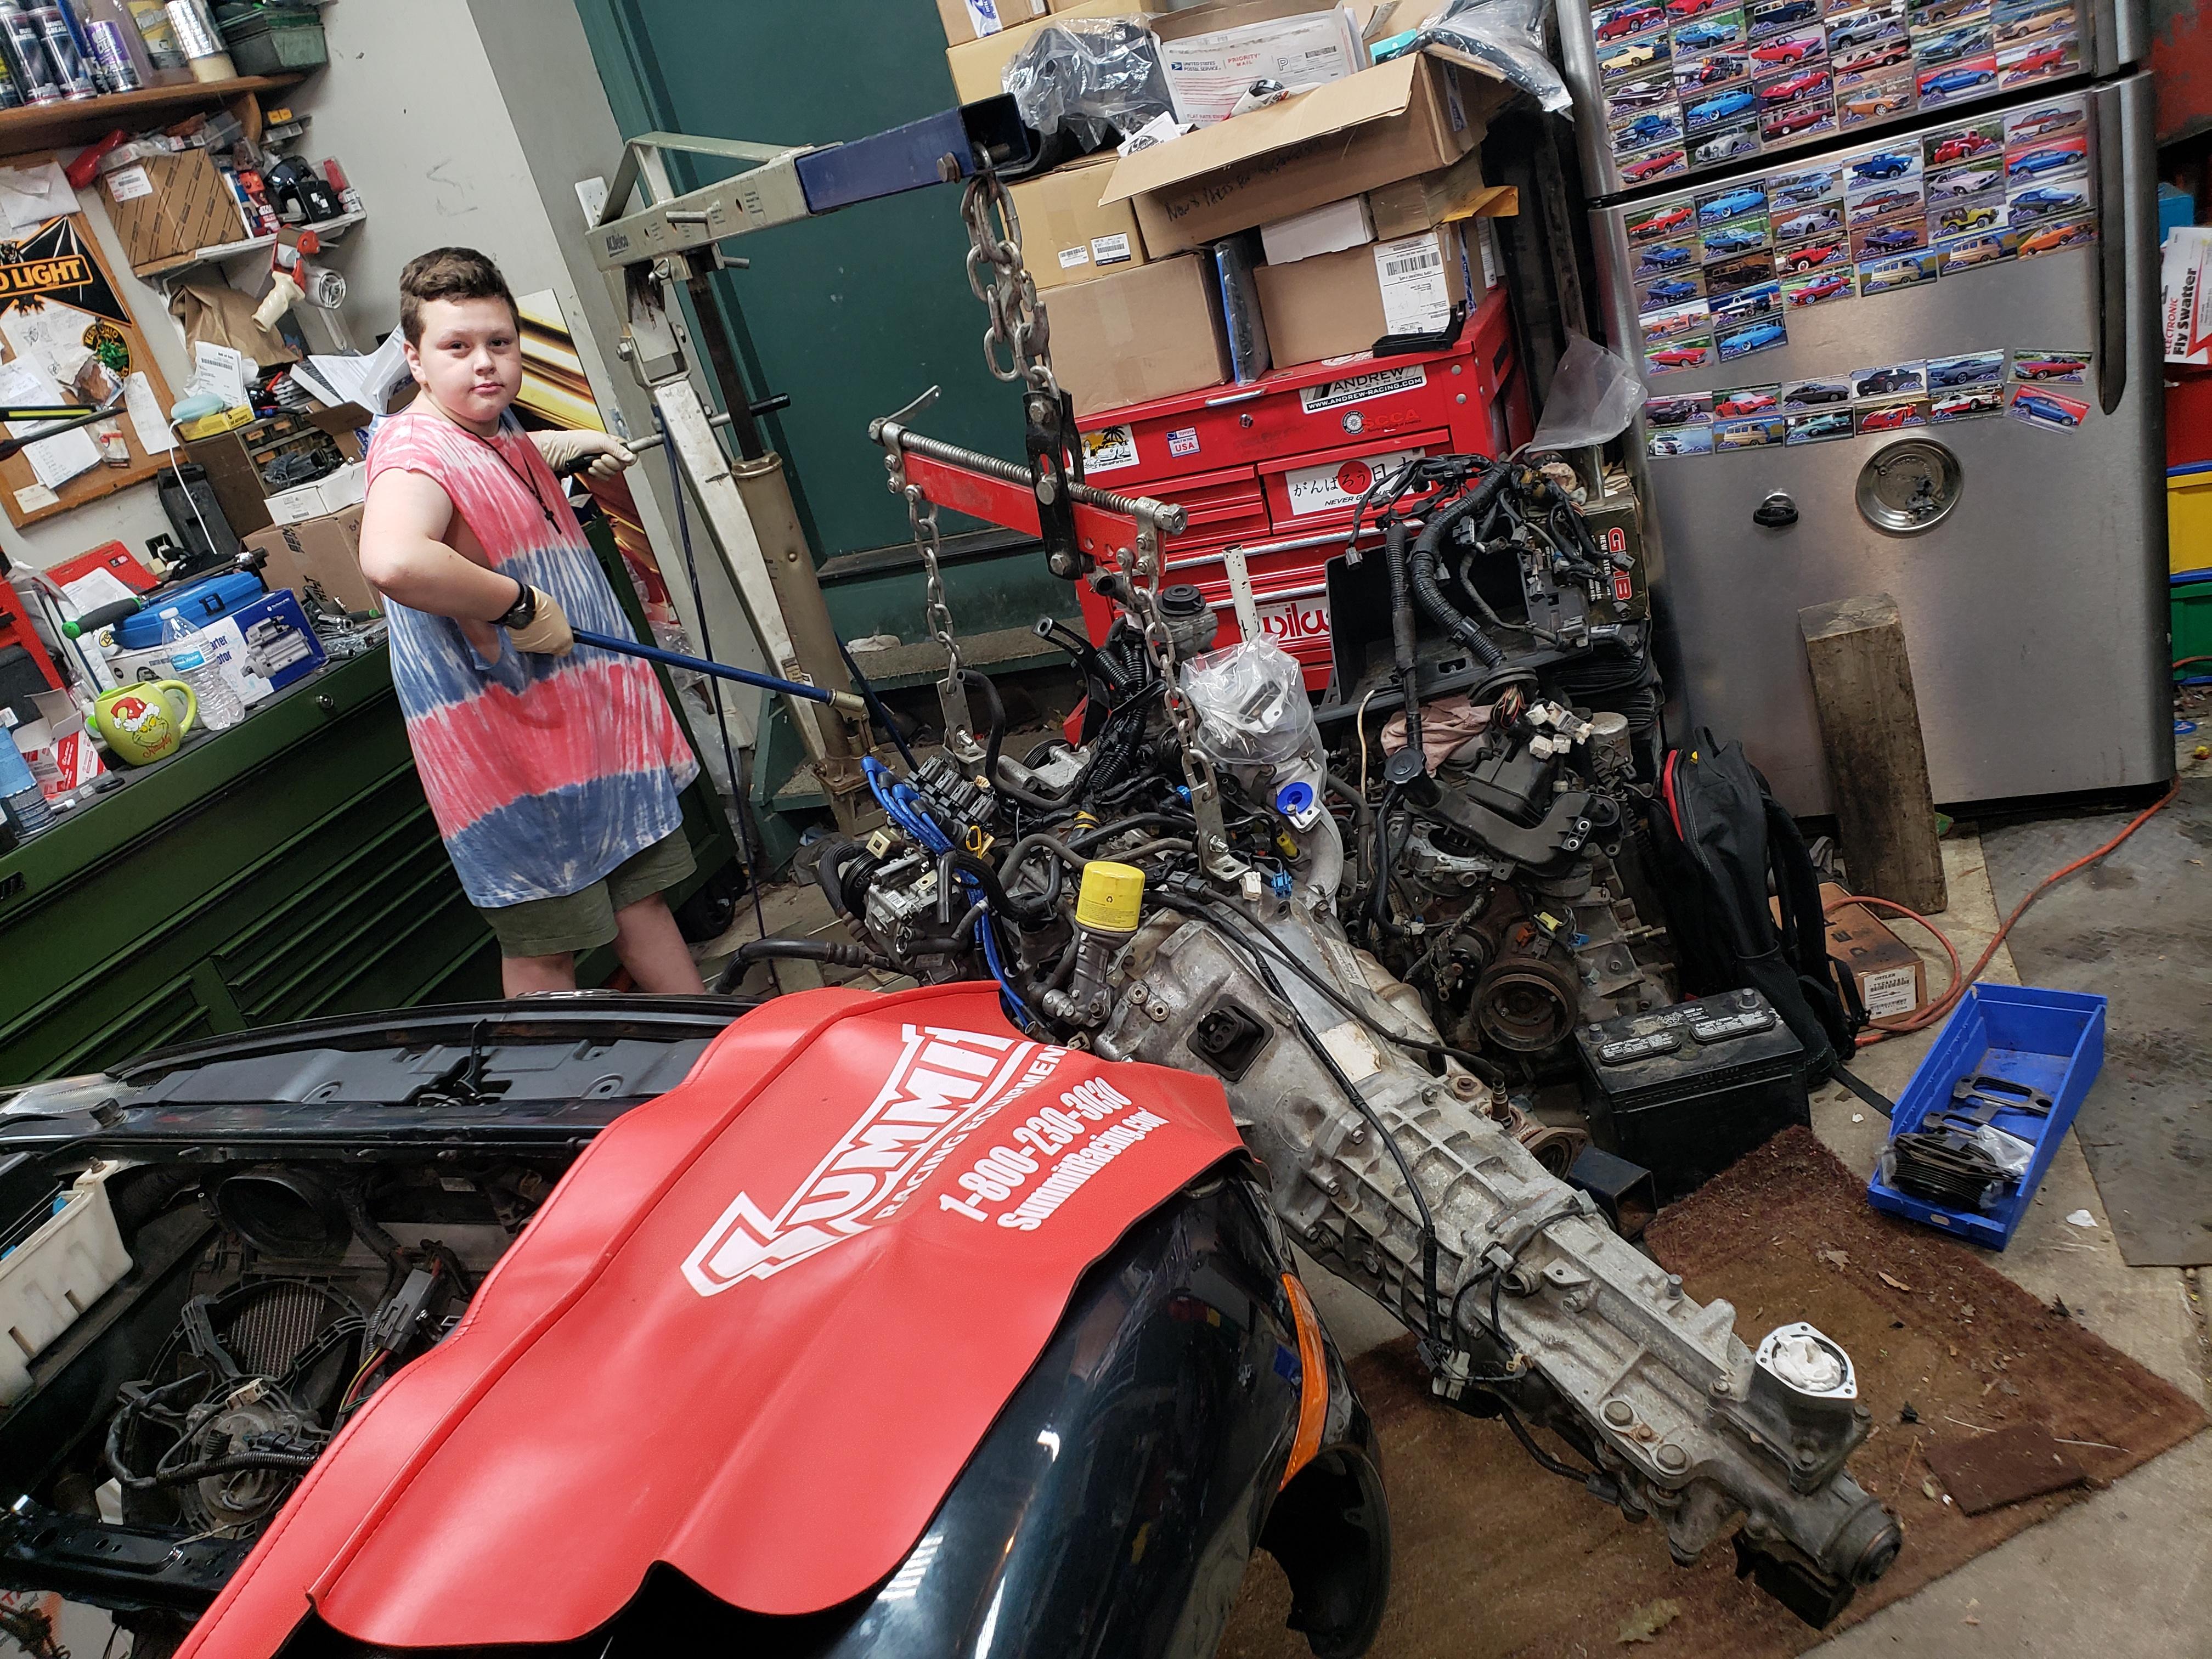
Almost there:
Bolted in place:
My son picking the engine up:
Almost there:
Bolted in place:
The following users liked this post:
wannawankel (04-10-2021)
04-12-2021, 05:49 AM
#18
RX-Heaven
Thread Starter
iTrader: (6)
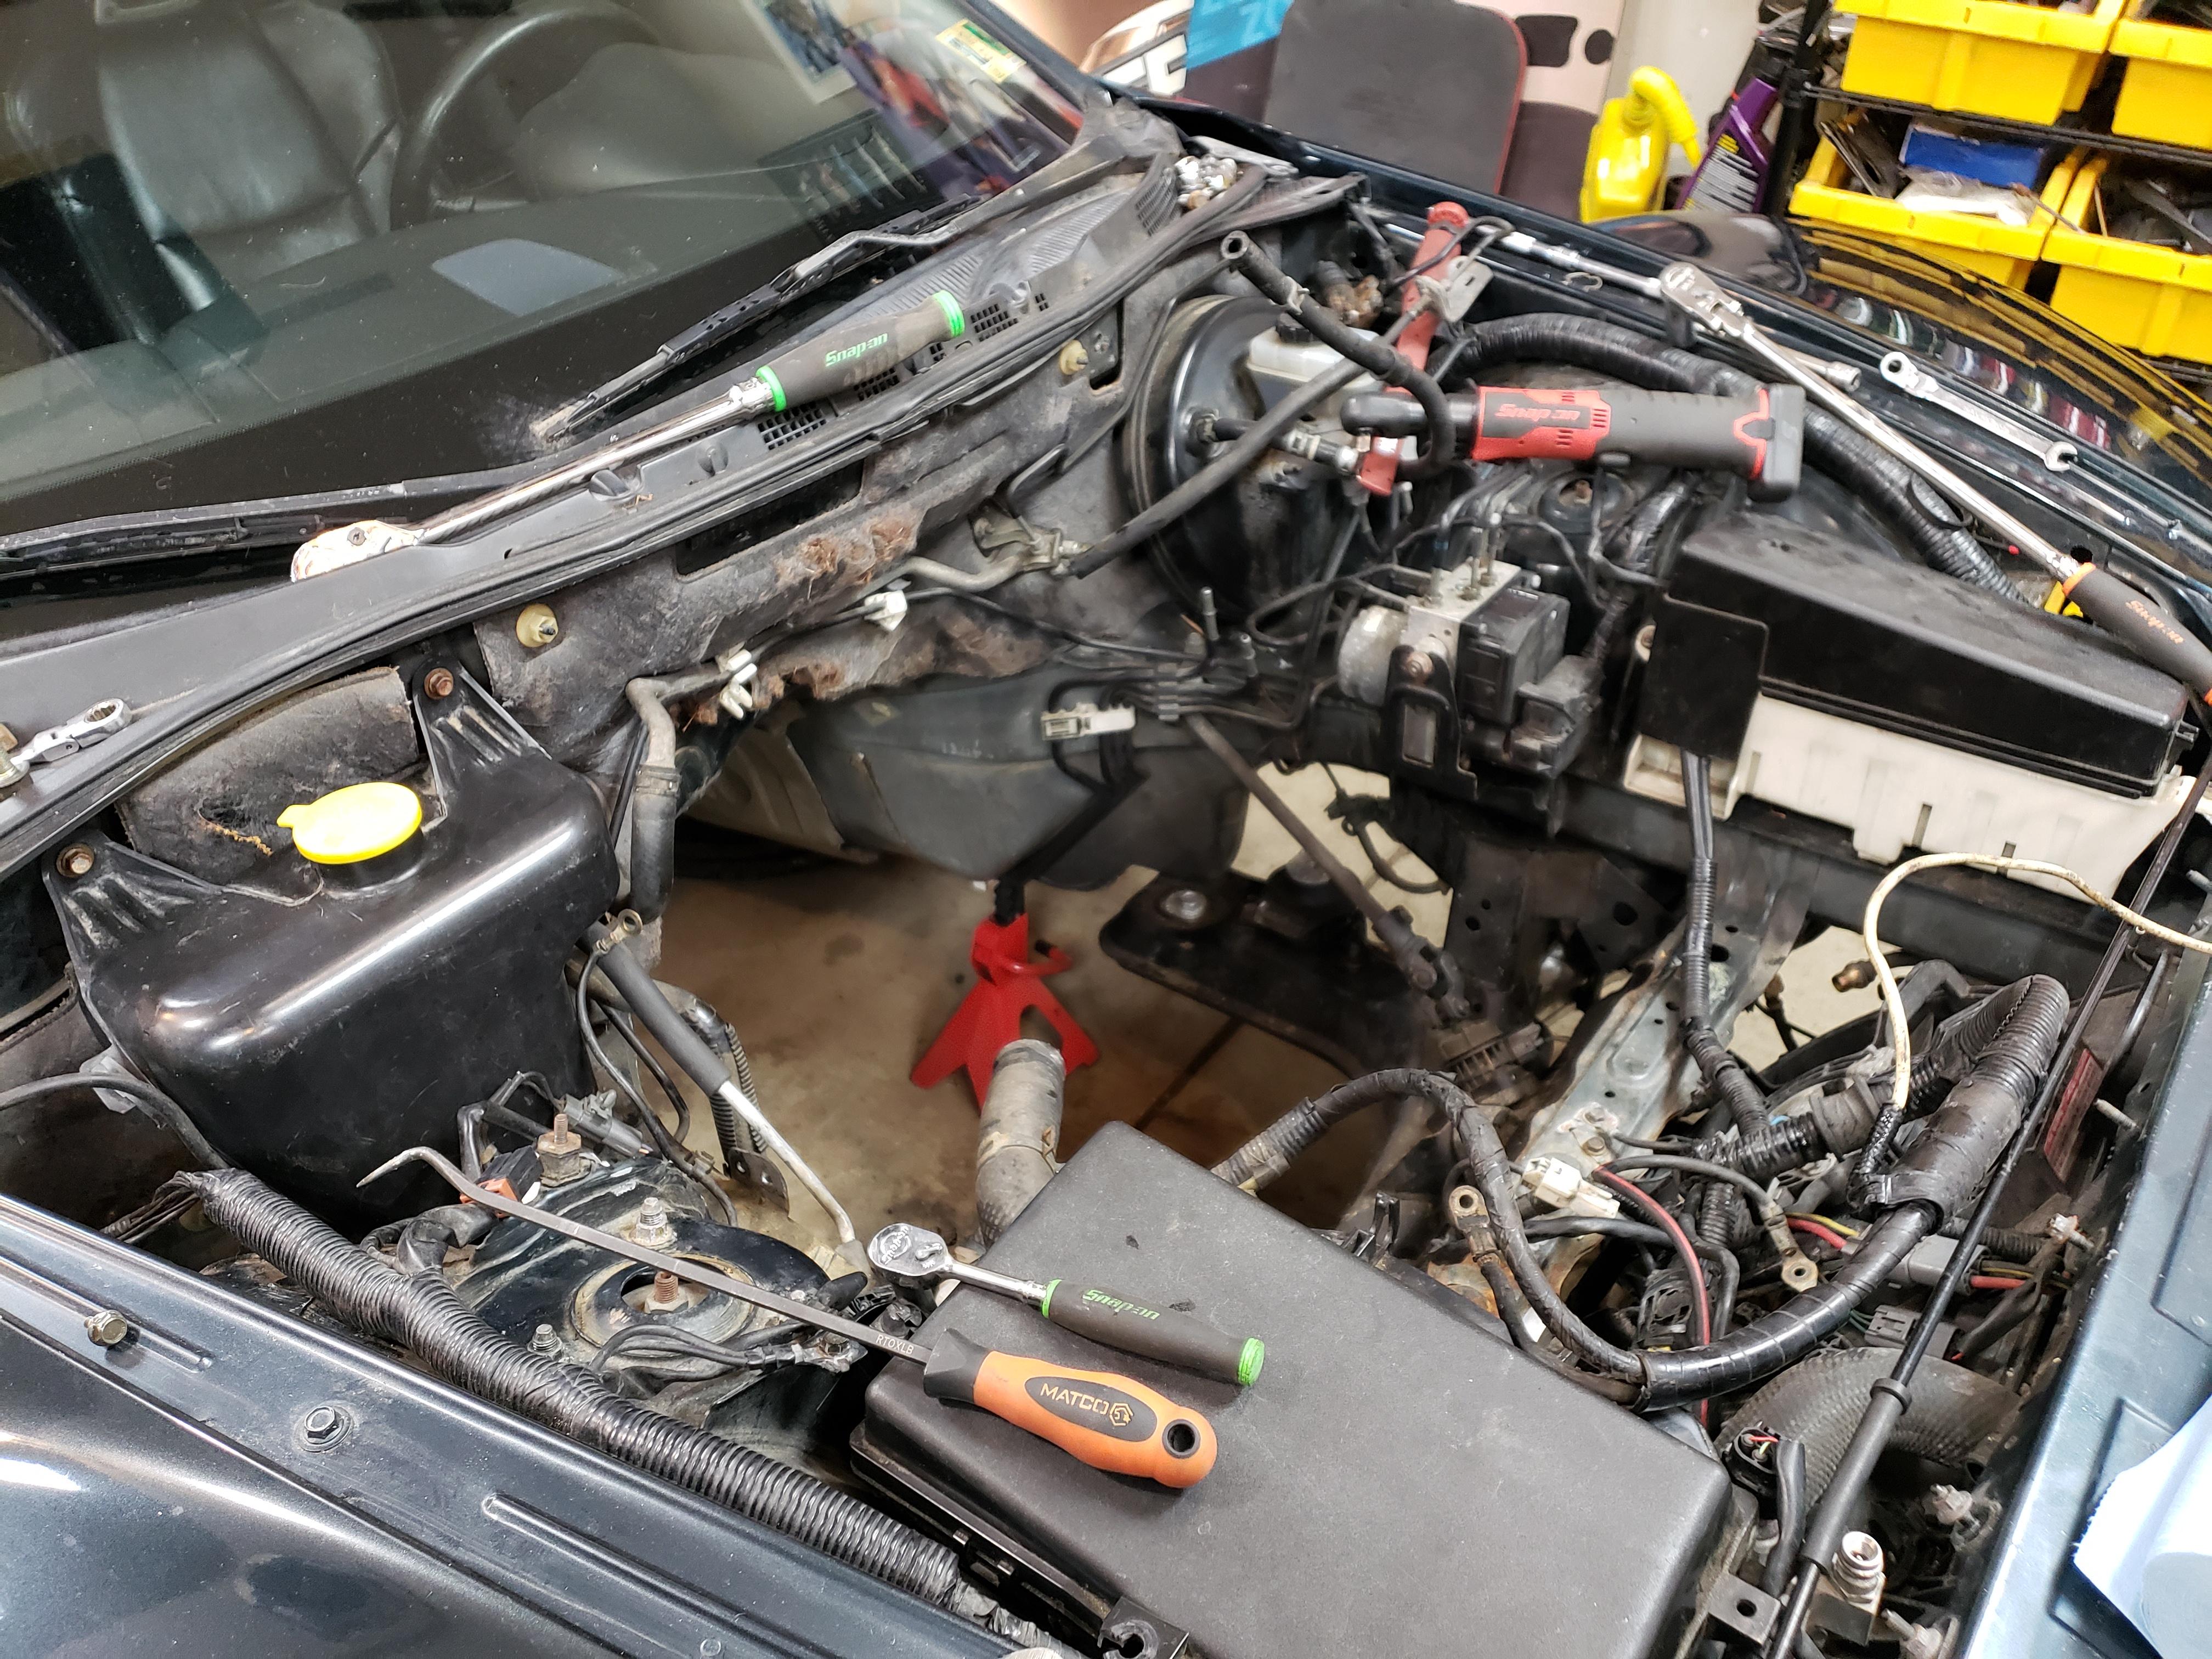
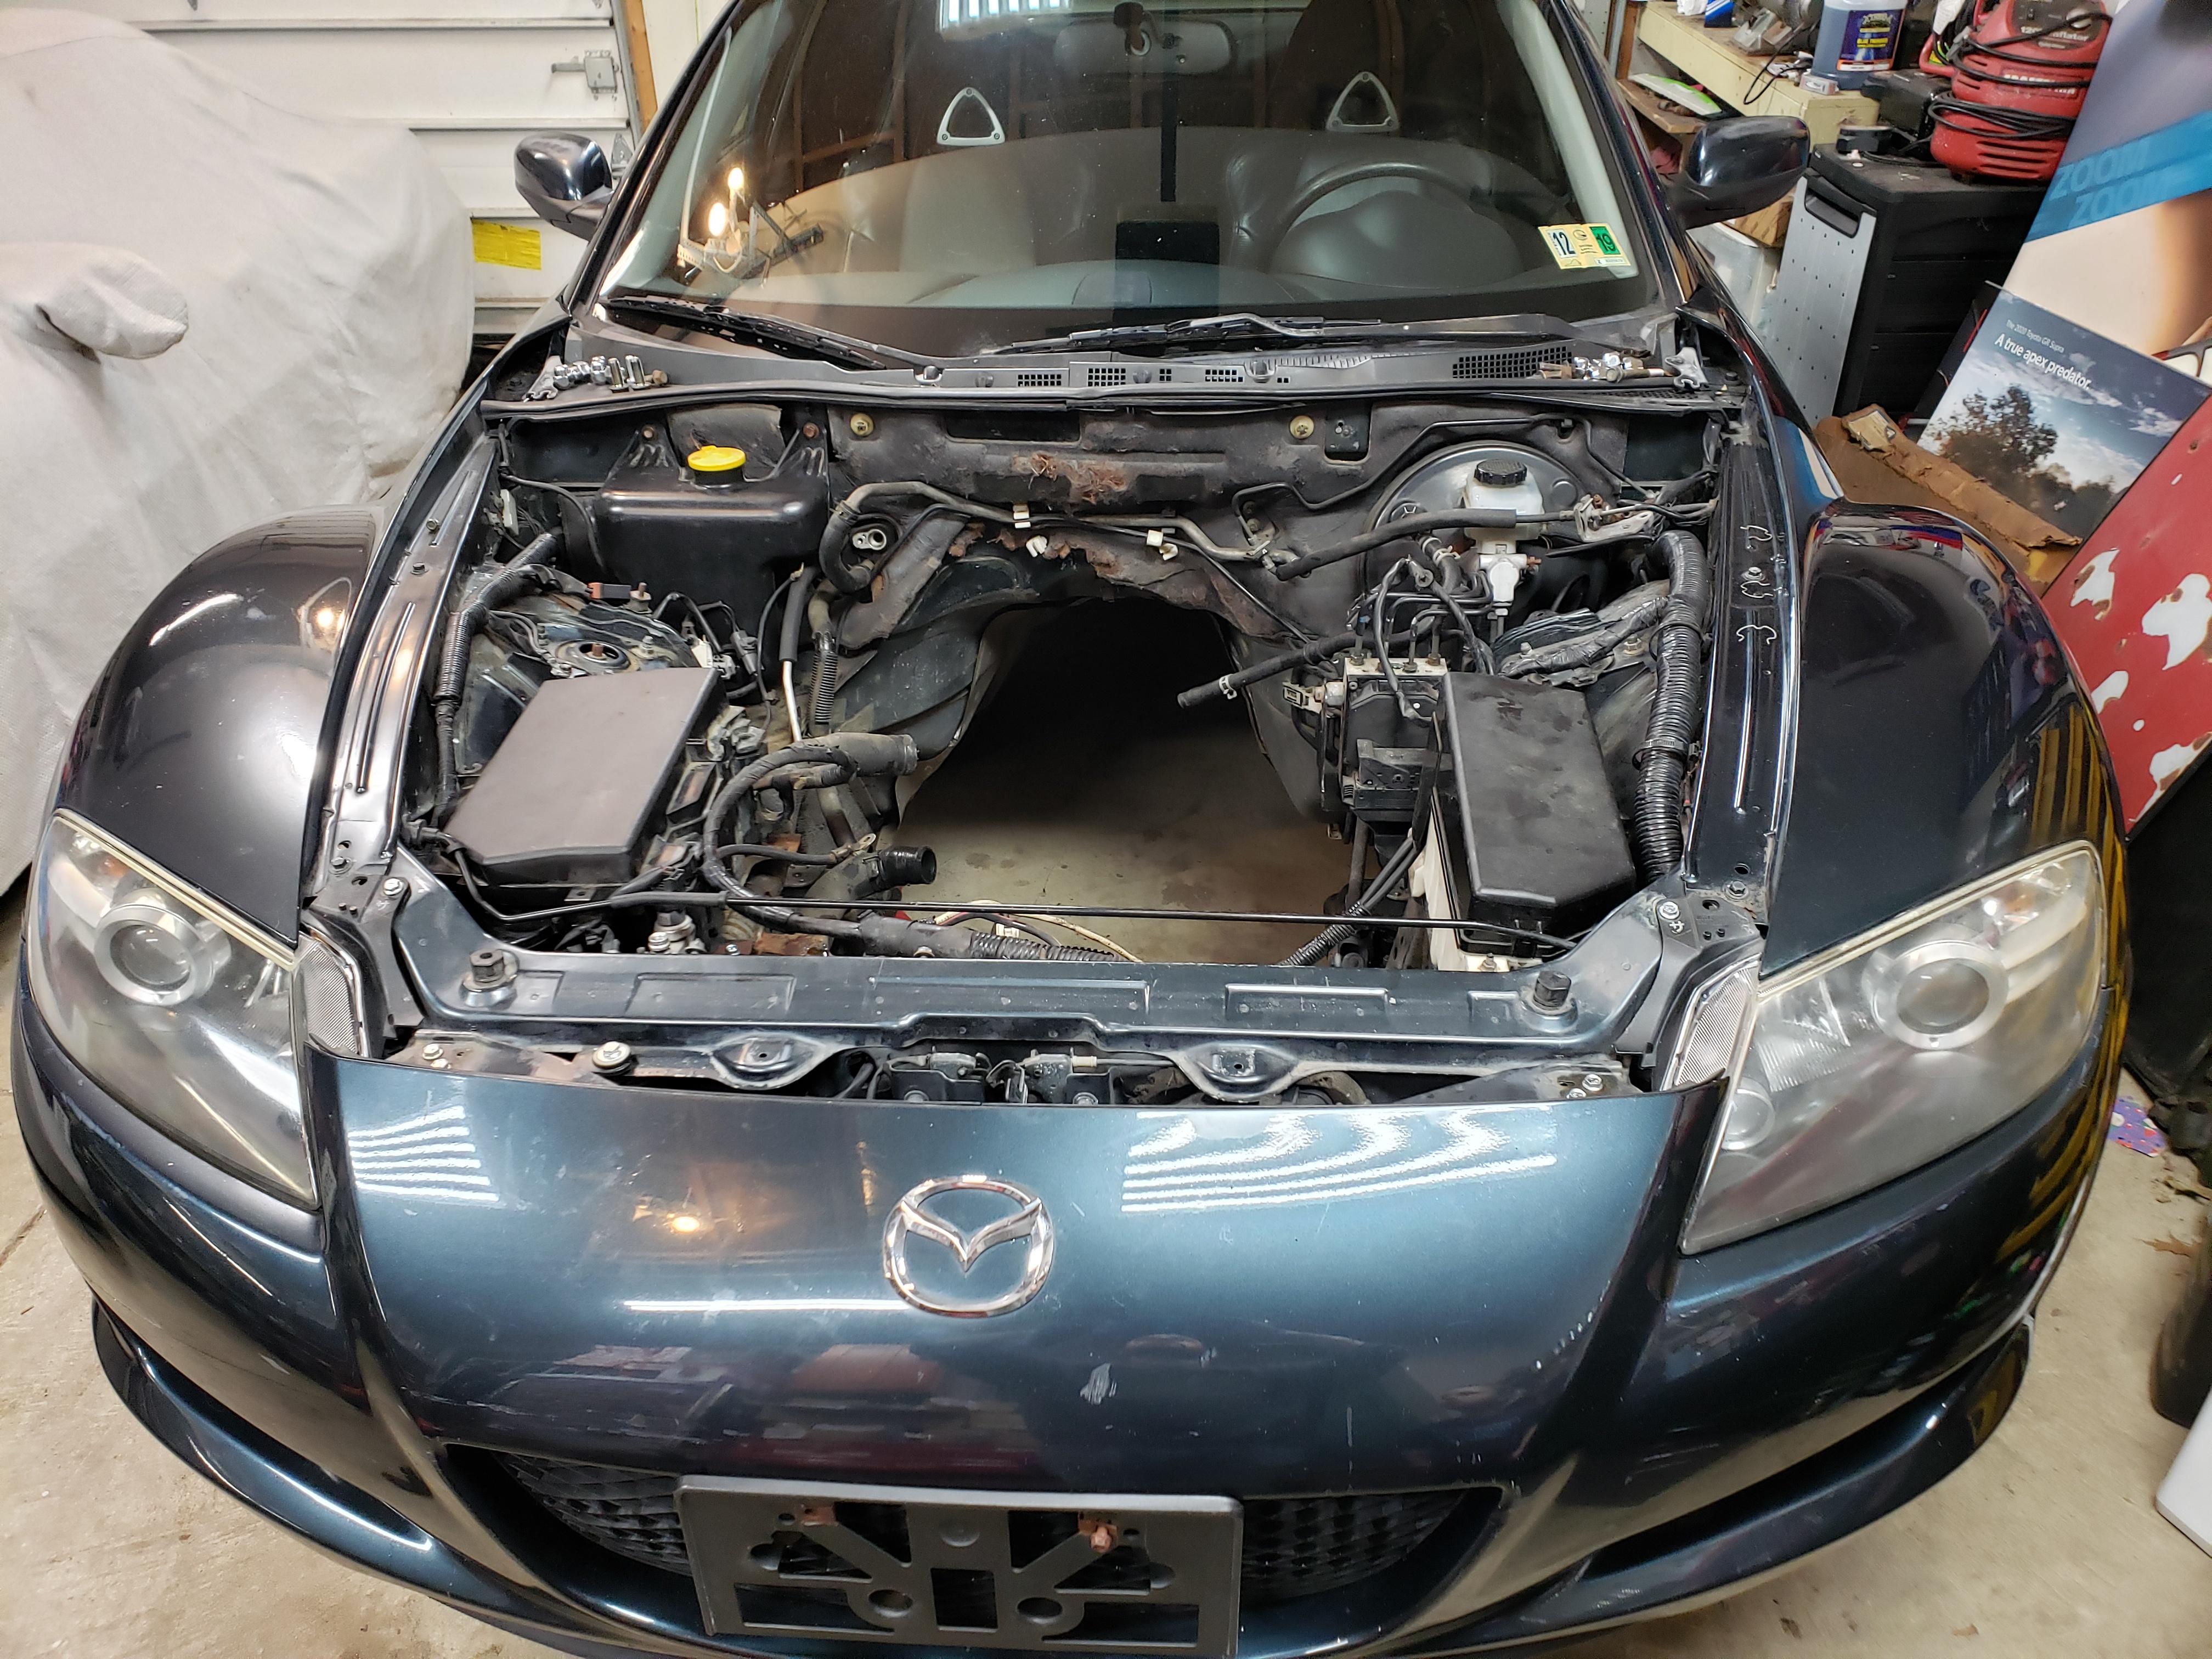
Engine and trans are in, driveshaft and power plant frame are all in place. The last thing left to install is the exhaust system. This weekend turned out to be very productive. I have some electrical gremlins to work out it seems as nothing powers up other than the hazard lights and parking lights.
Wanted to share a few pictures of the progress. Wish I had taken more but I wasn't thinking about it.
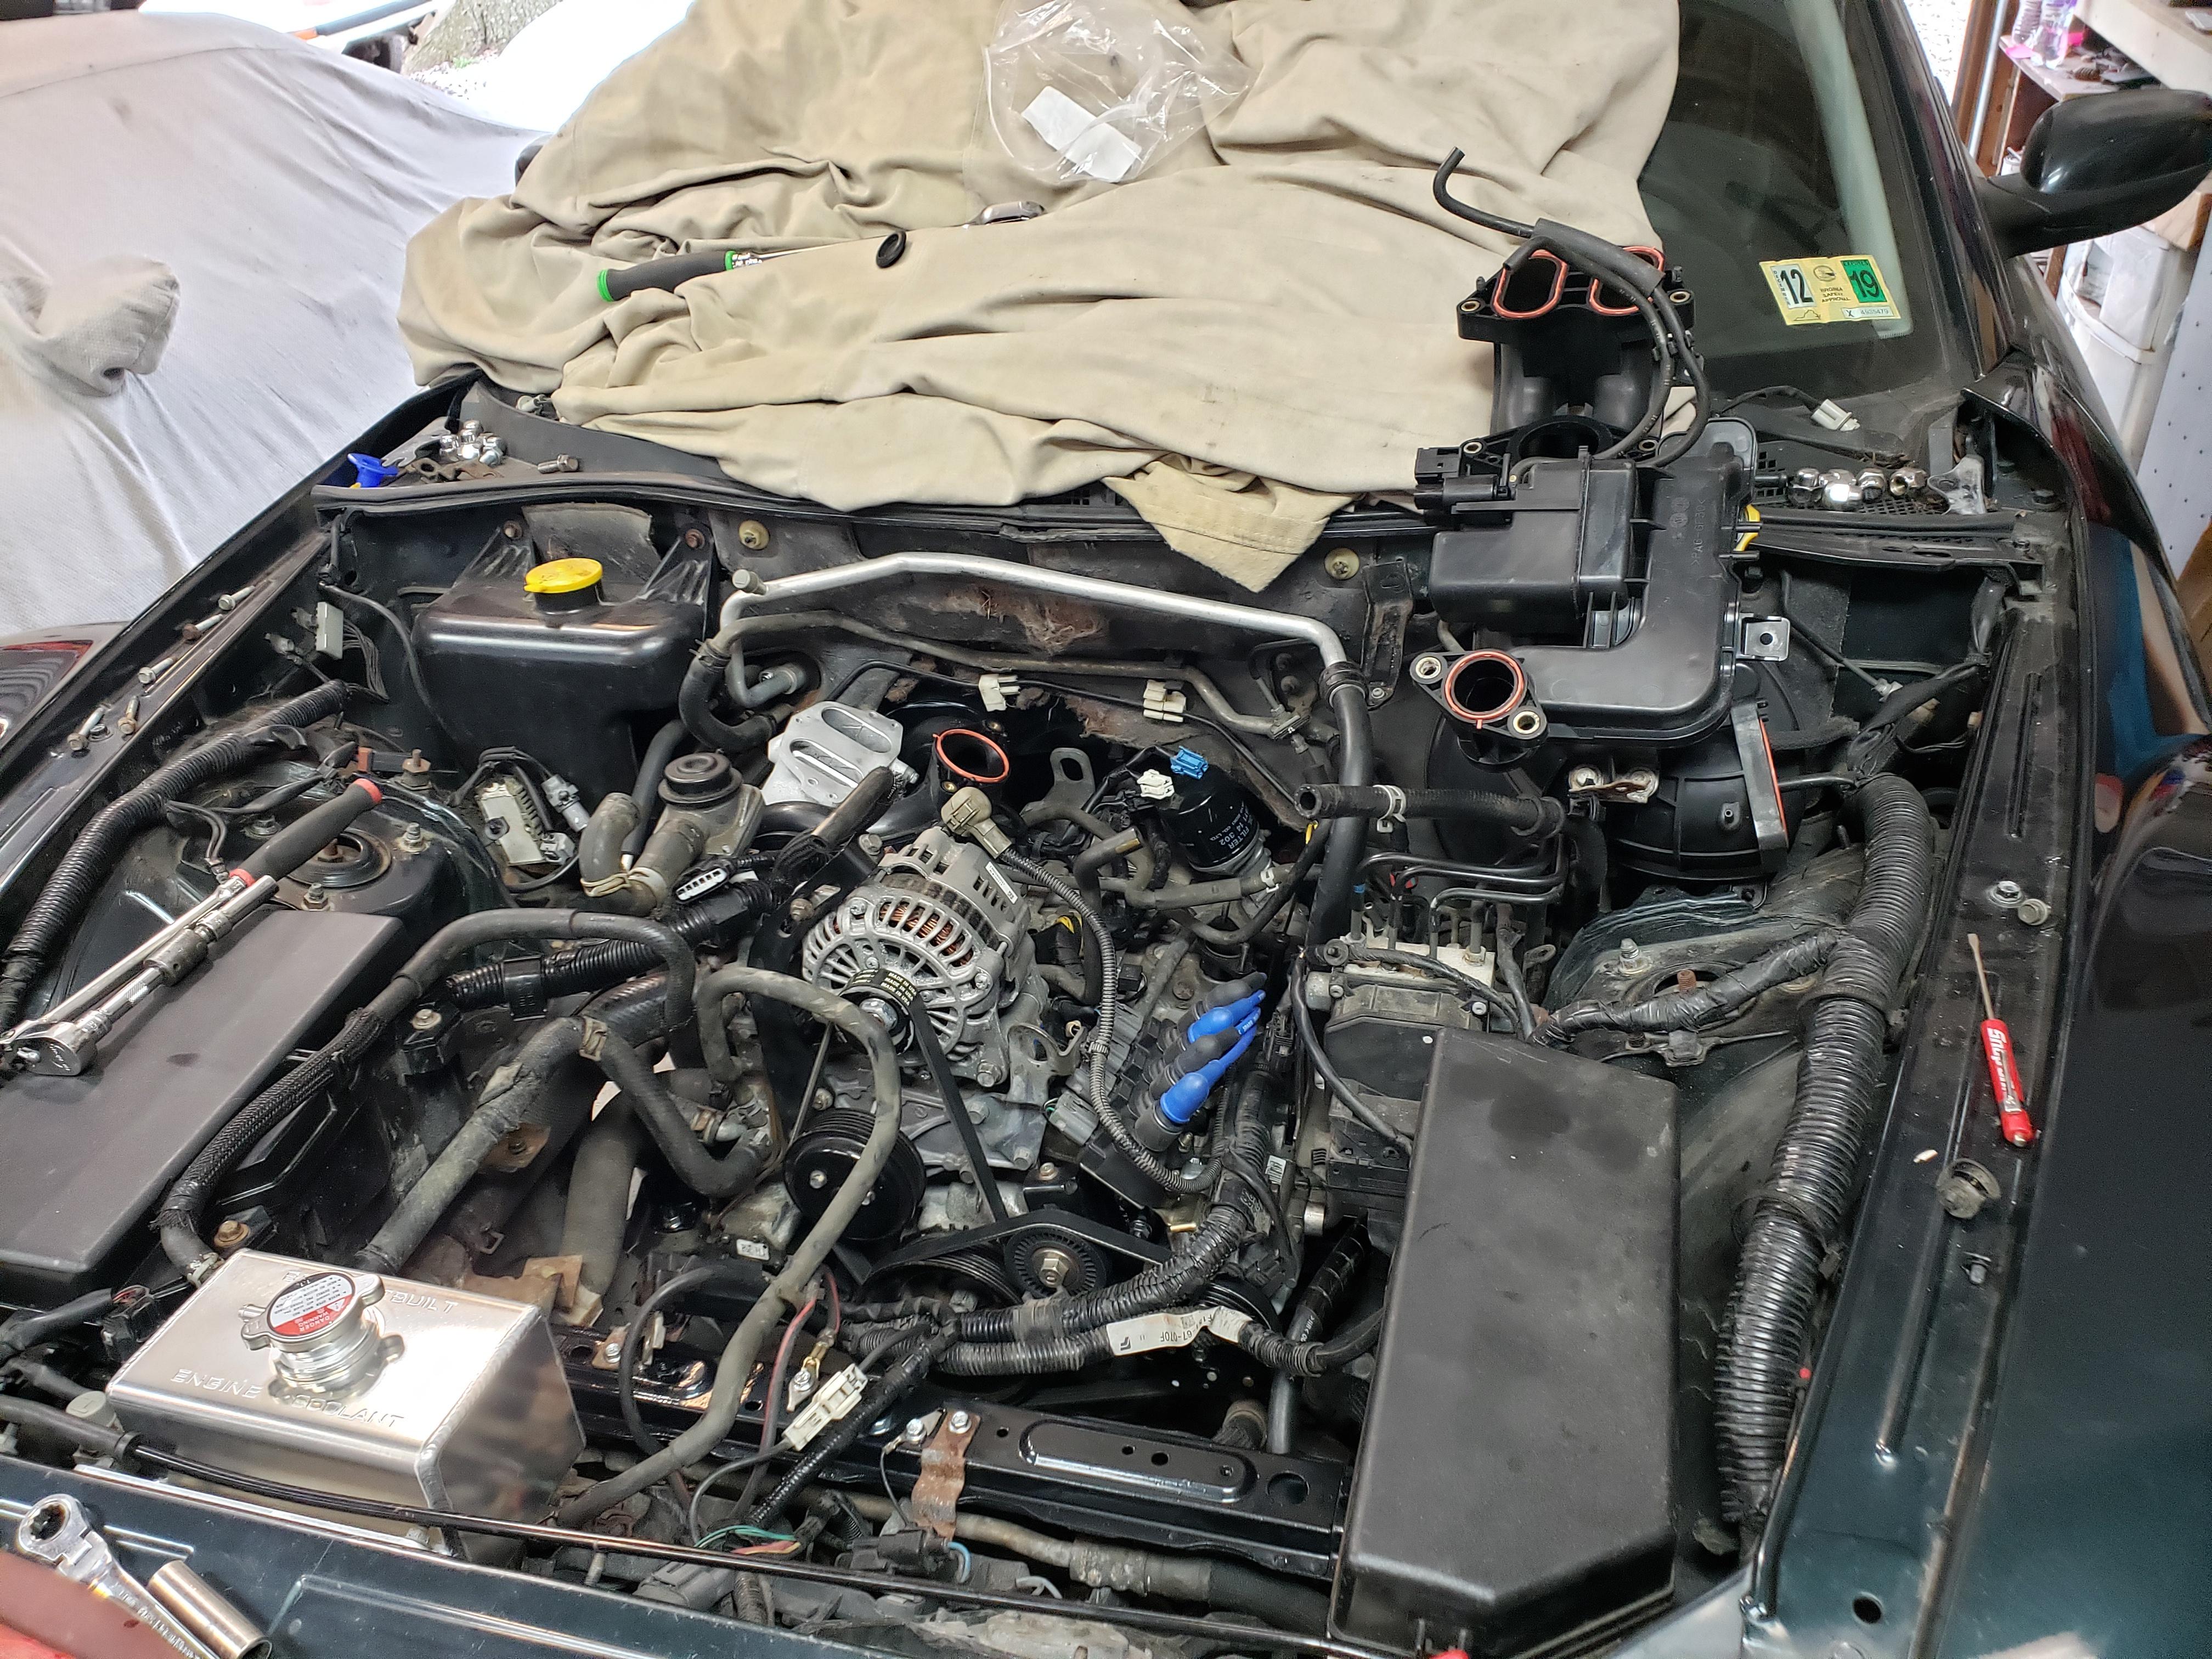
Wanted to share a few pictures of the progress. Wish I had taken more but I wasn't thinking about it.
04-14-2021, 05:51 AM
#19
RX-Heaven
Thread Starter
iTrader: (6)
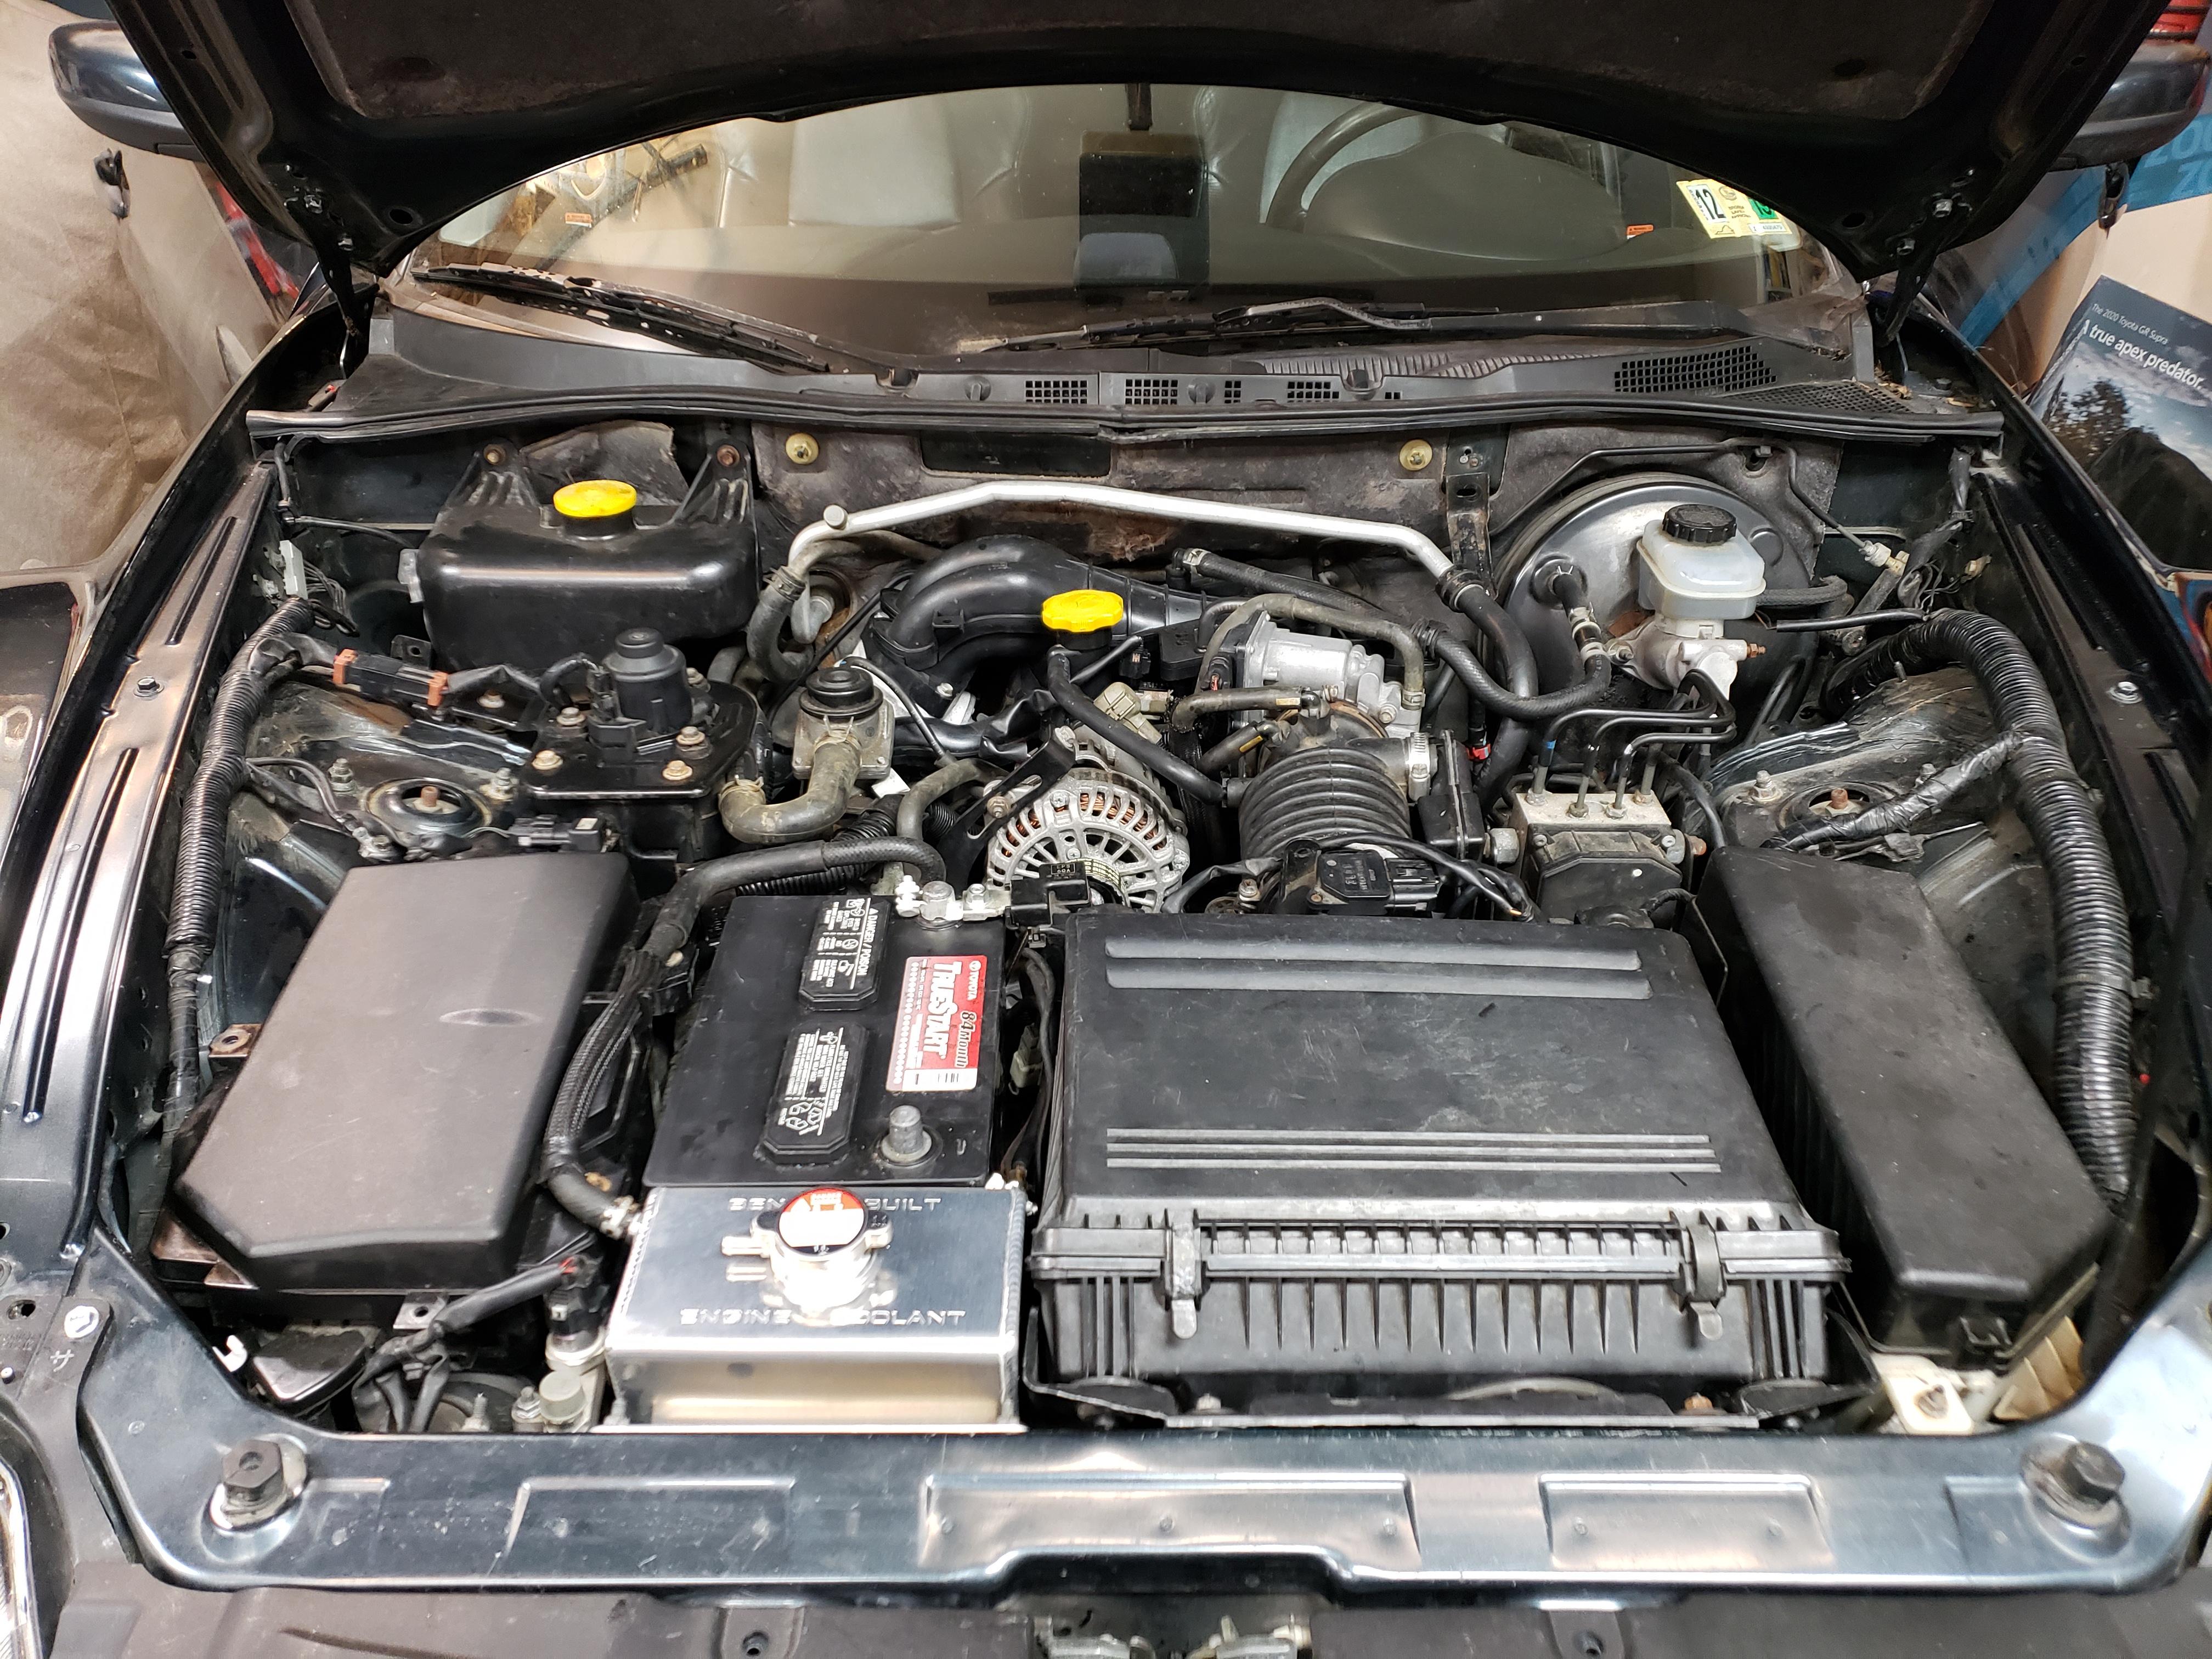
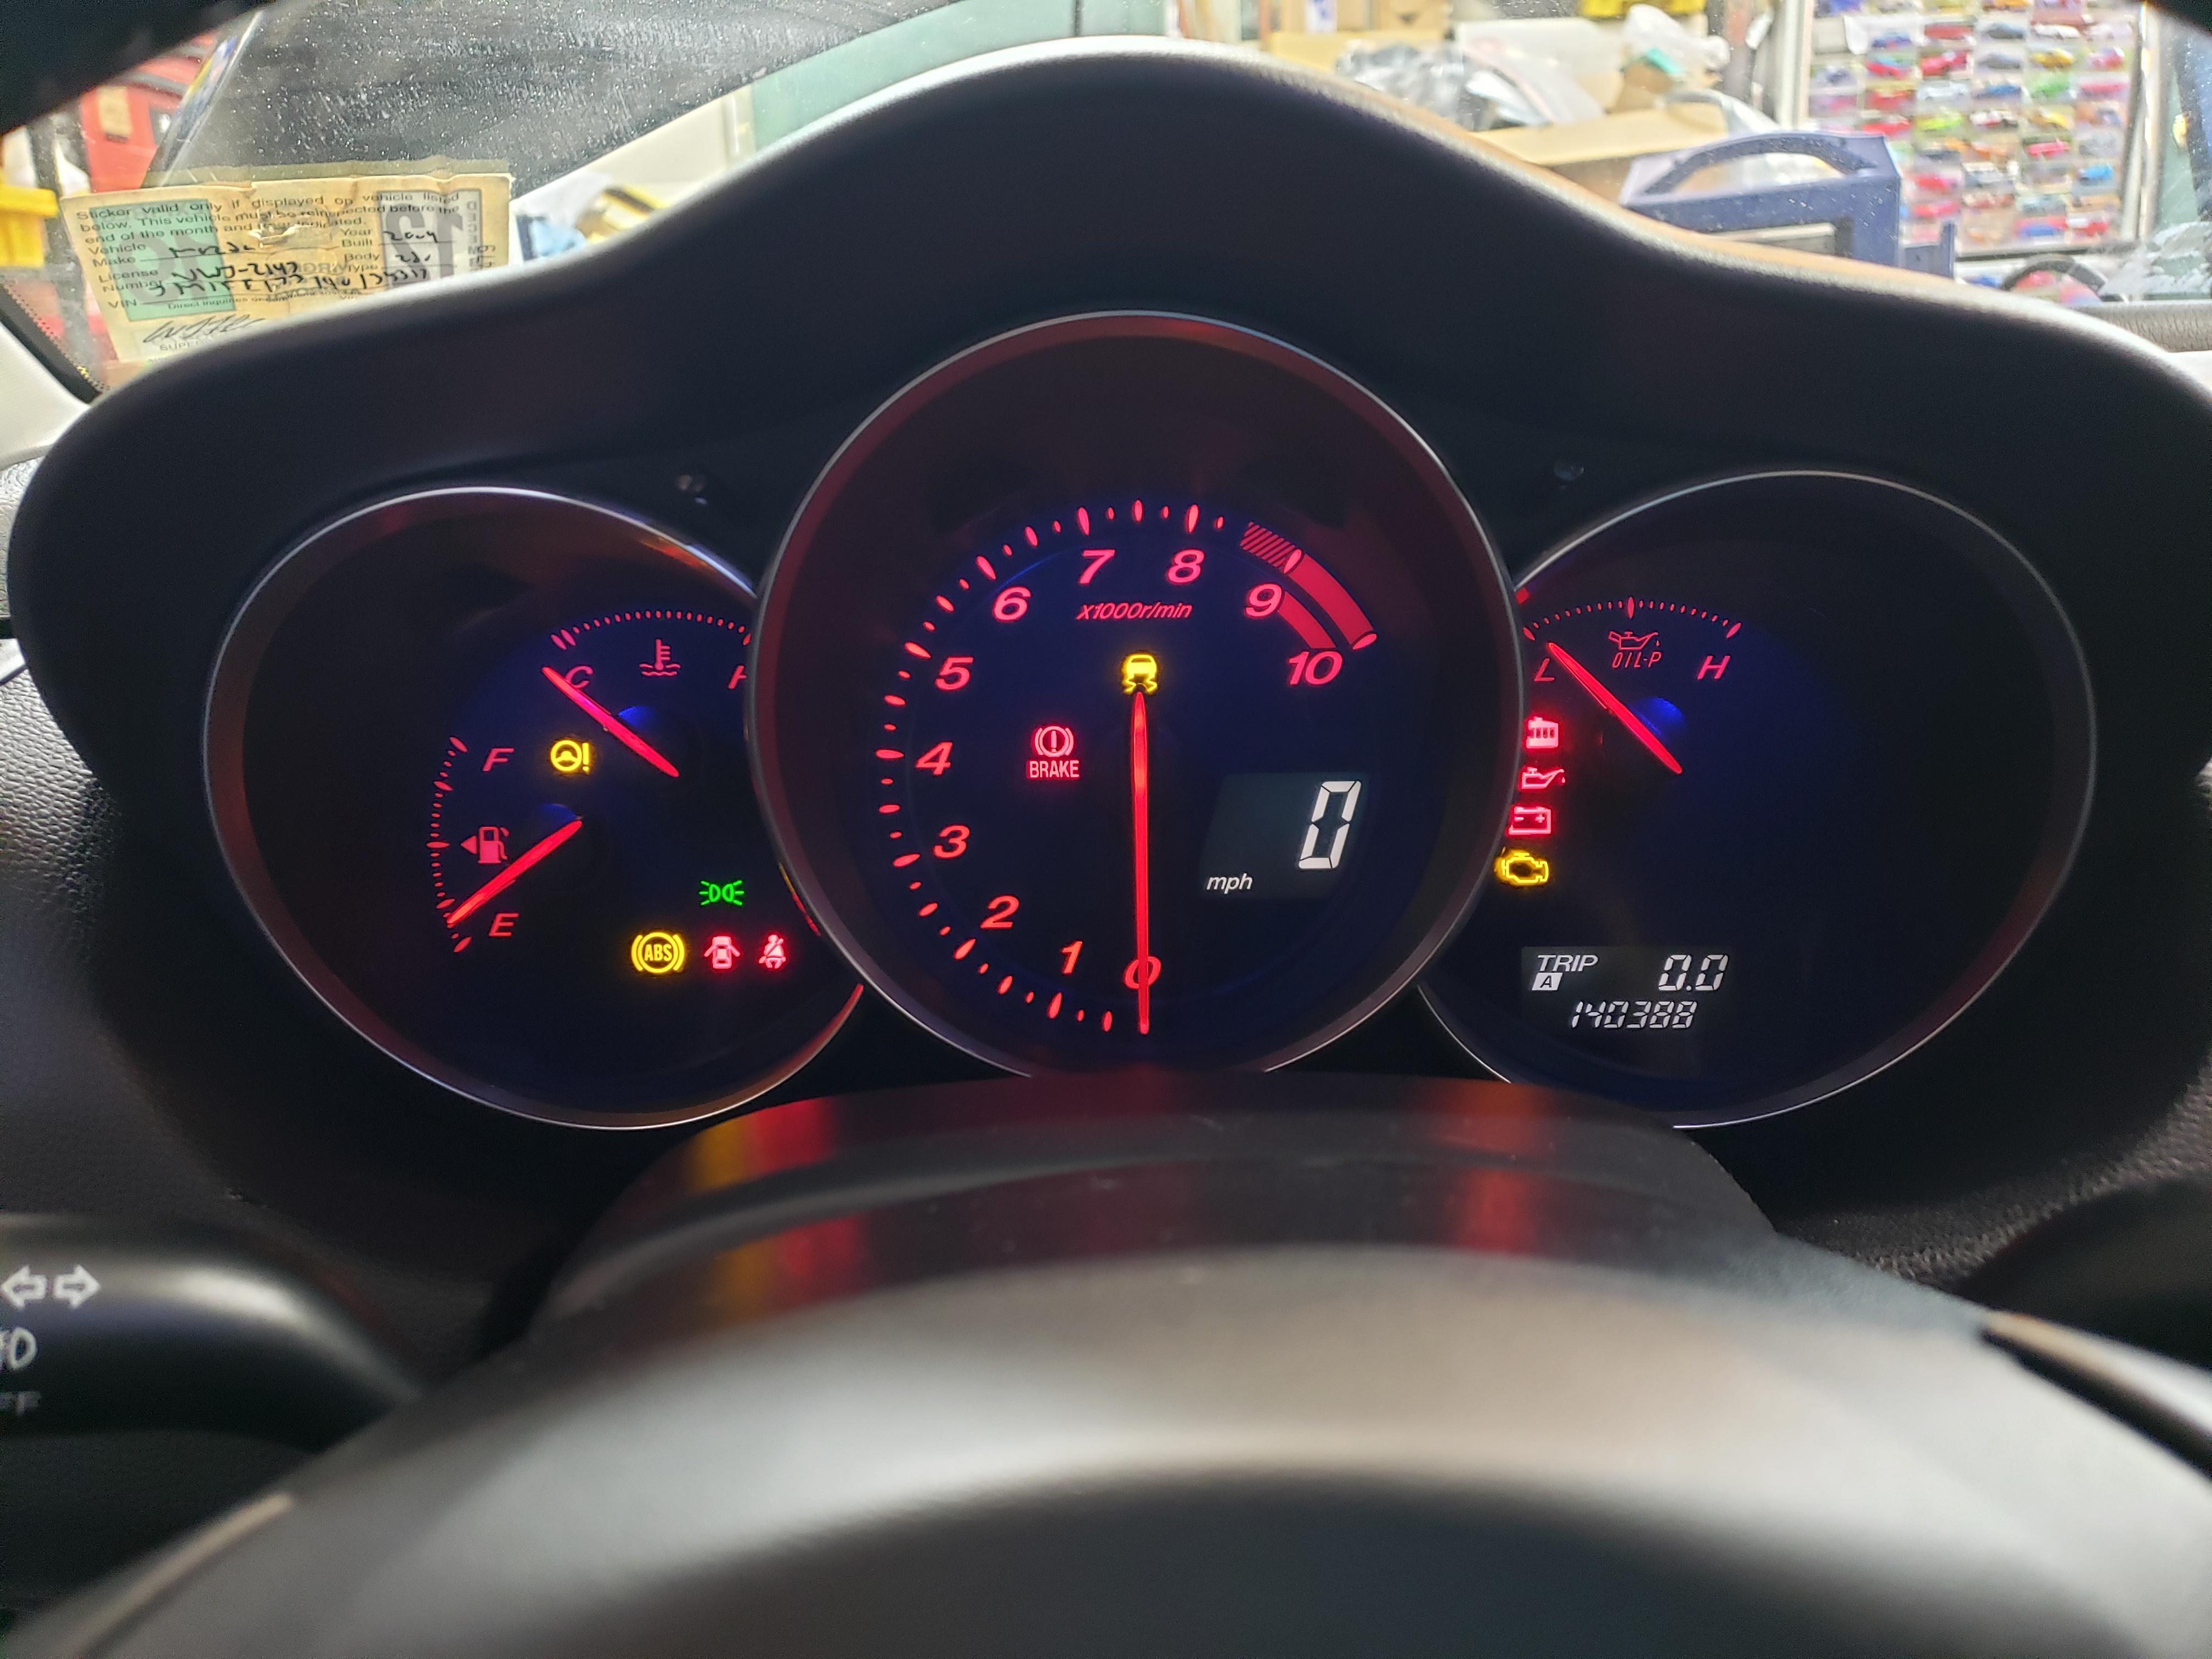
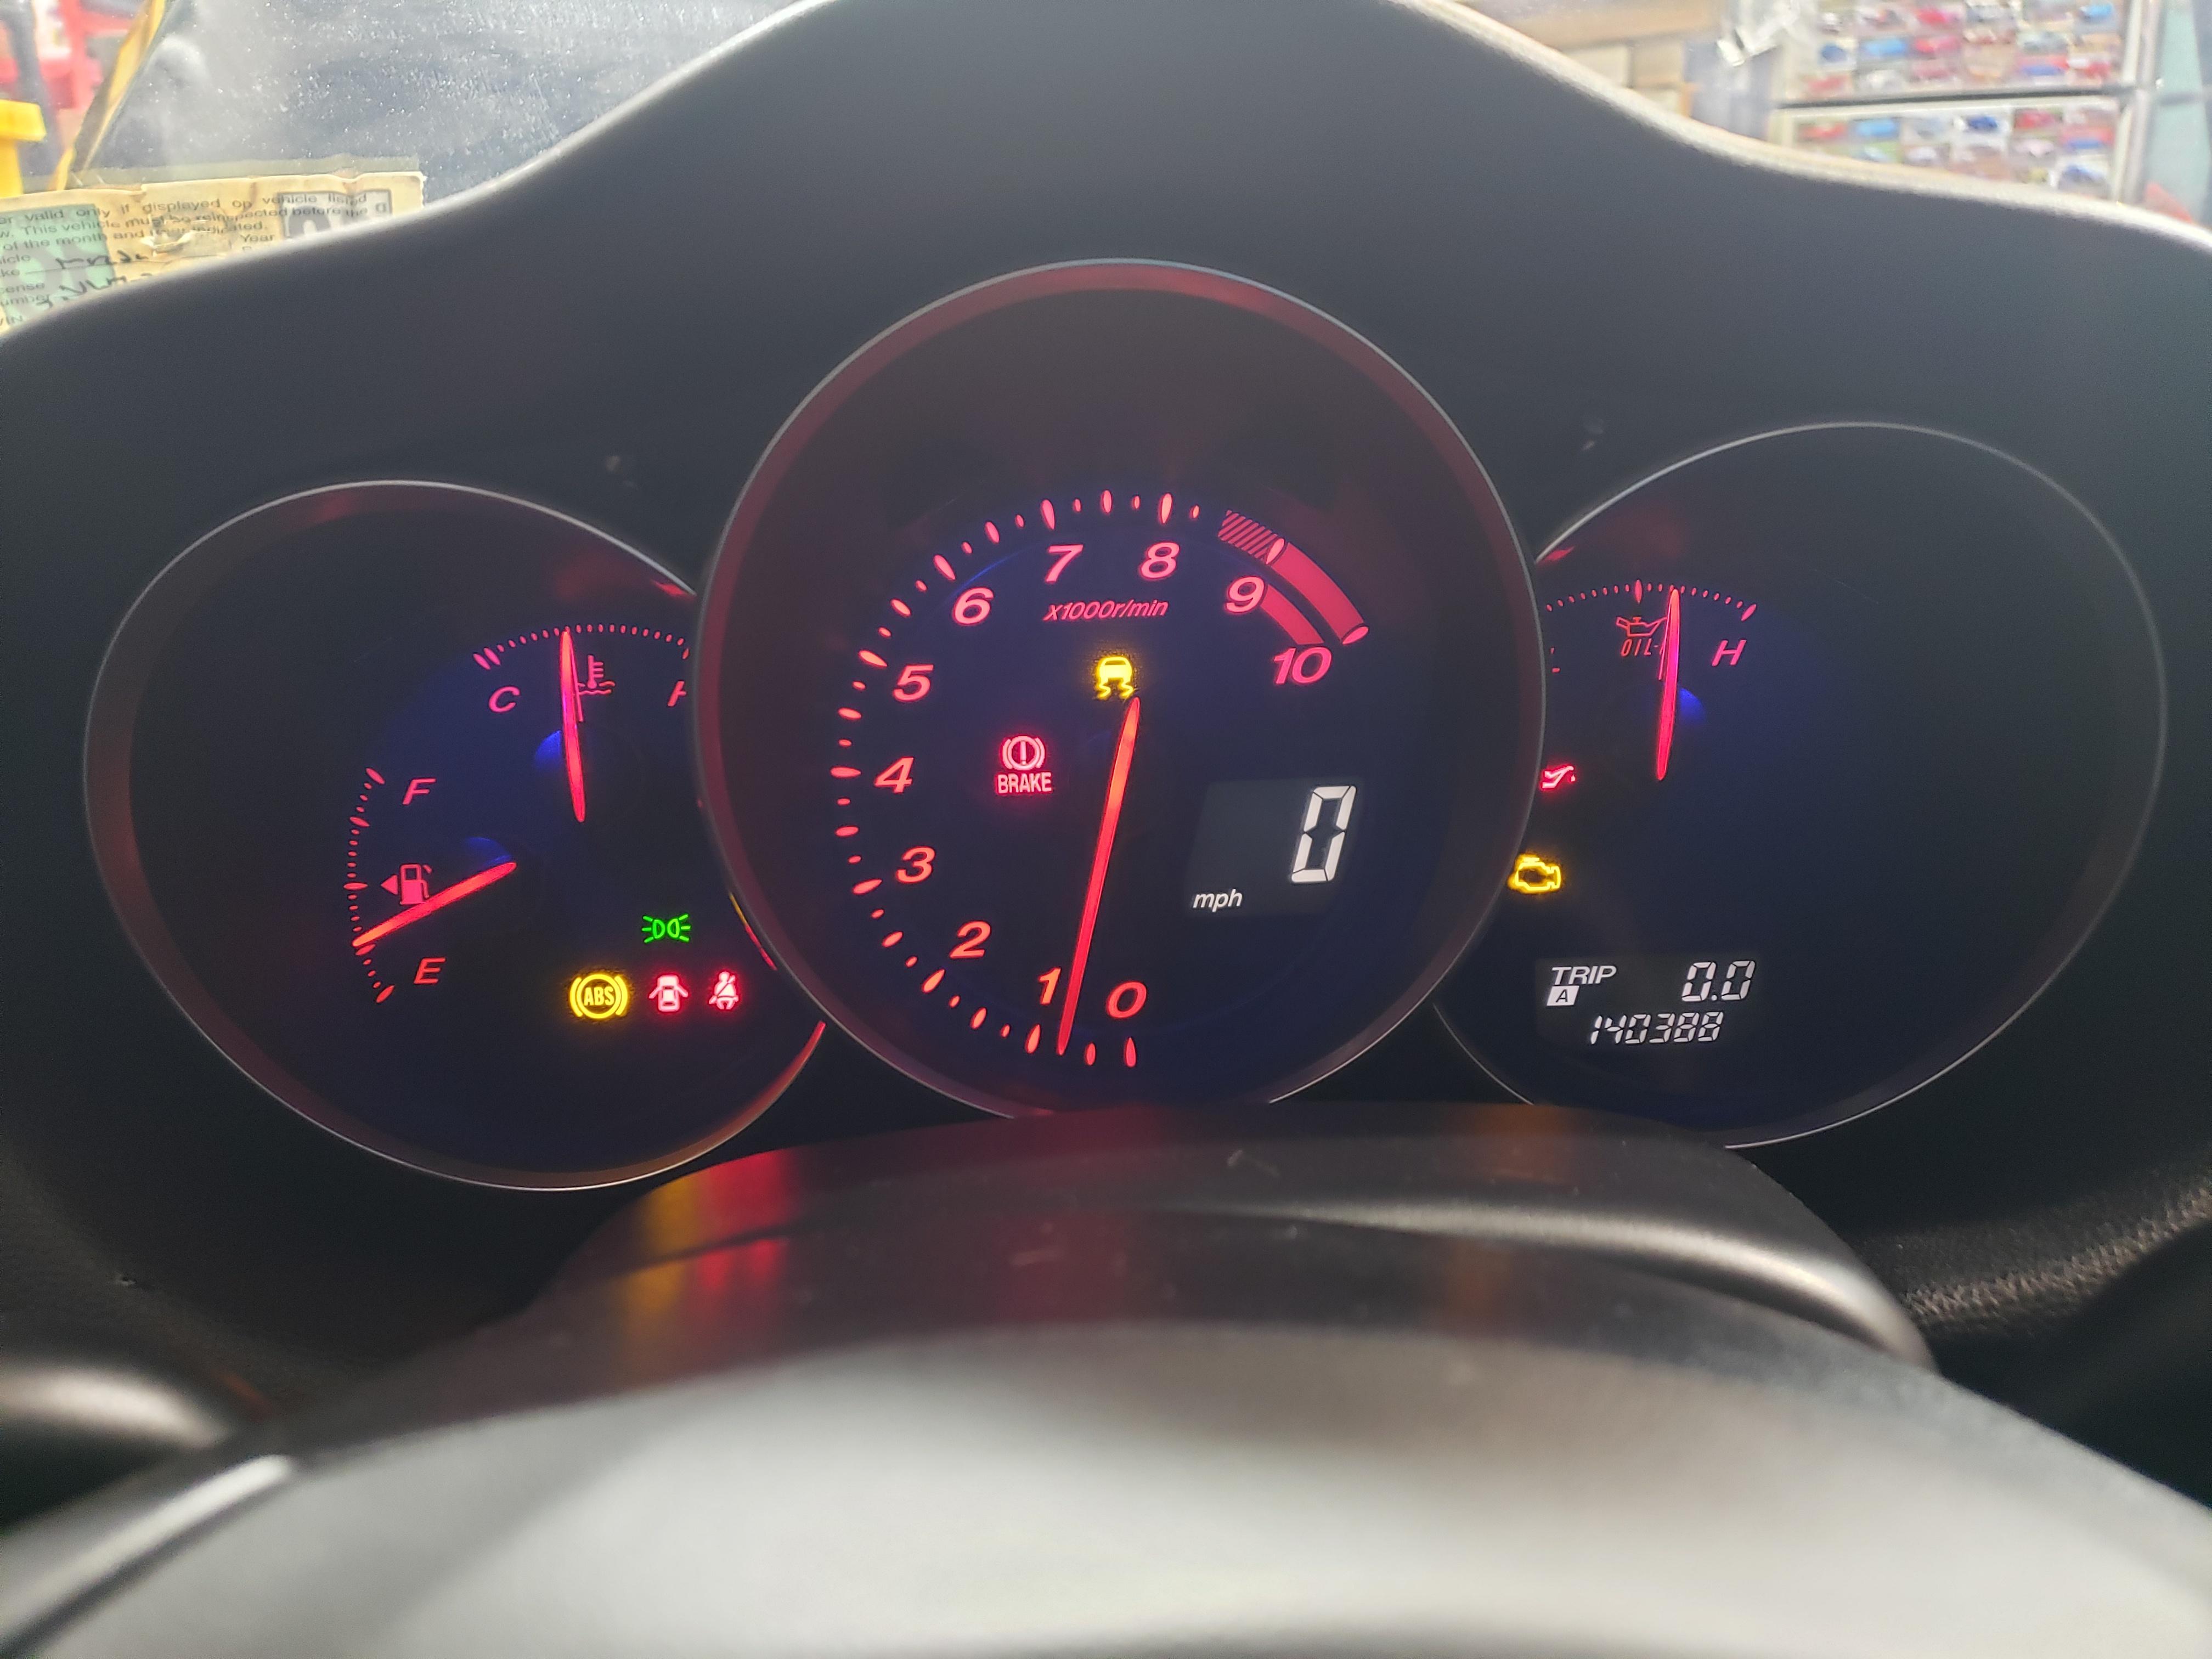
Got all of the wiring issues sorted out yesterday with the help of TeamRX8 and finally was able to power the car up for the first time! Its near ready to start and I'm excited to hear it run!
First time powered up:
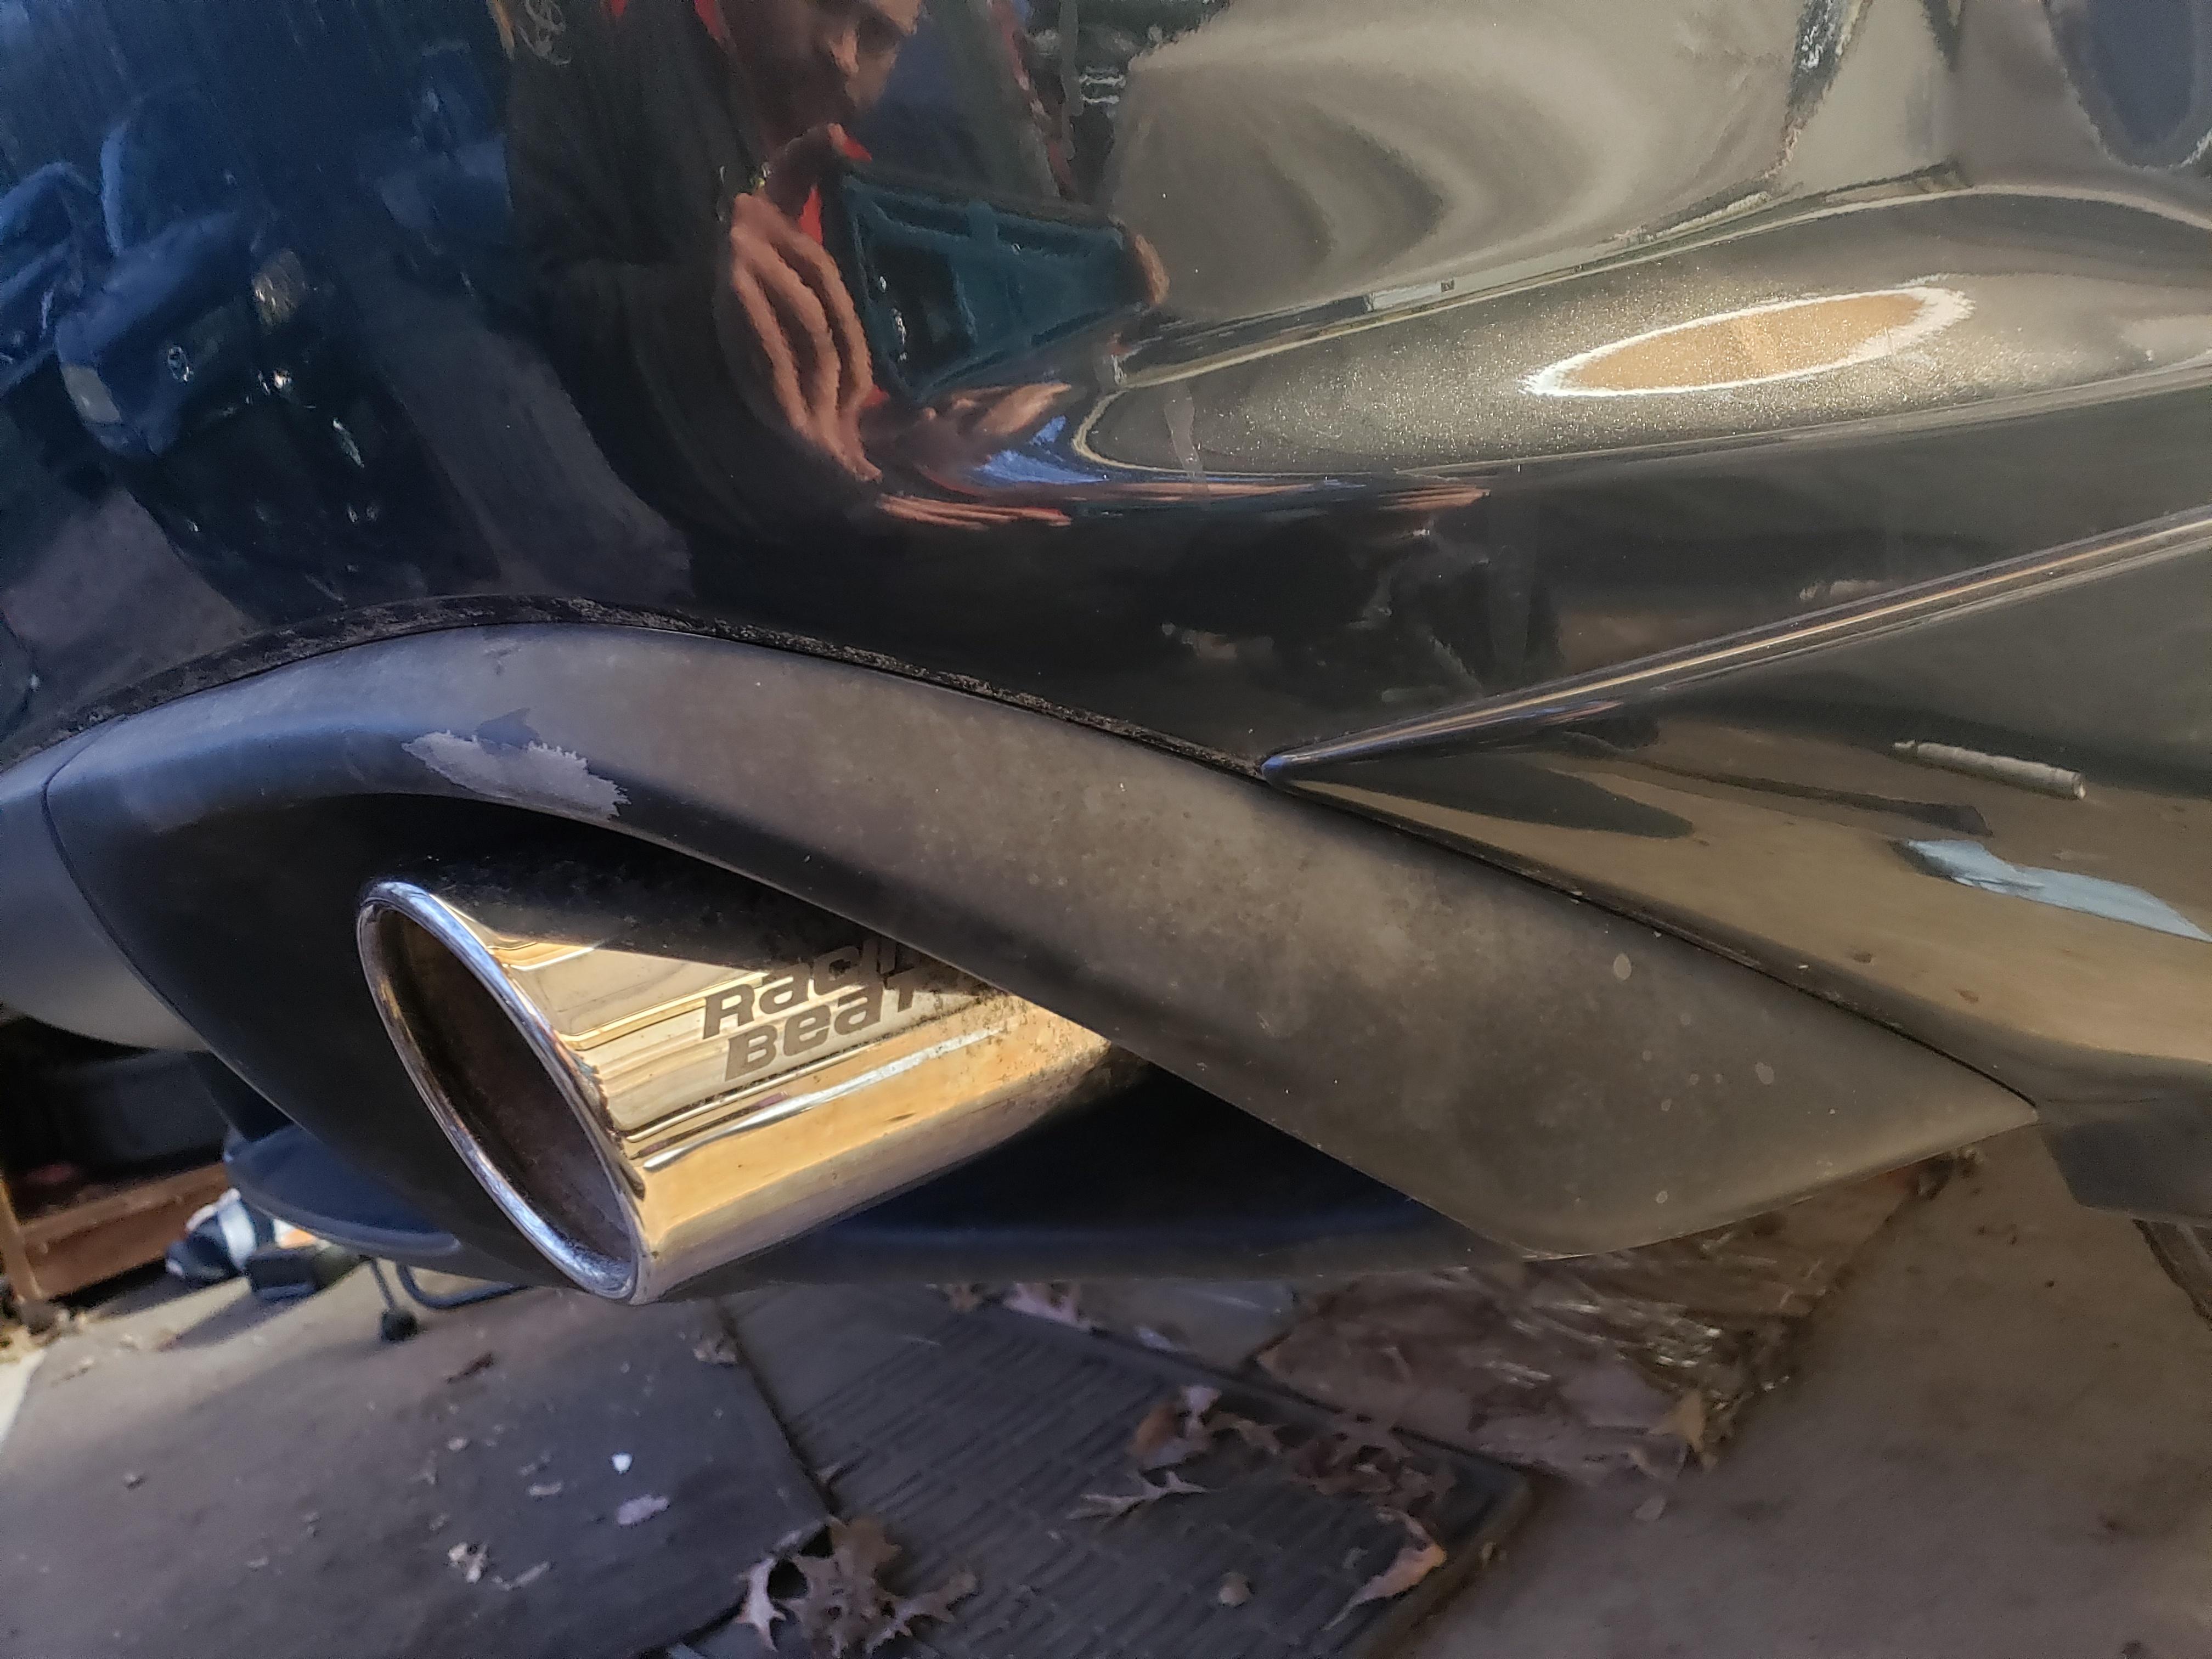
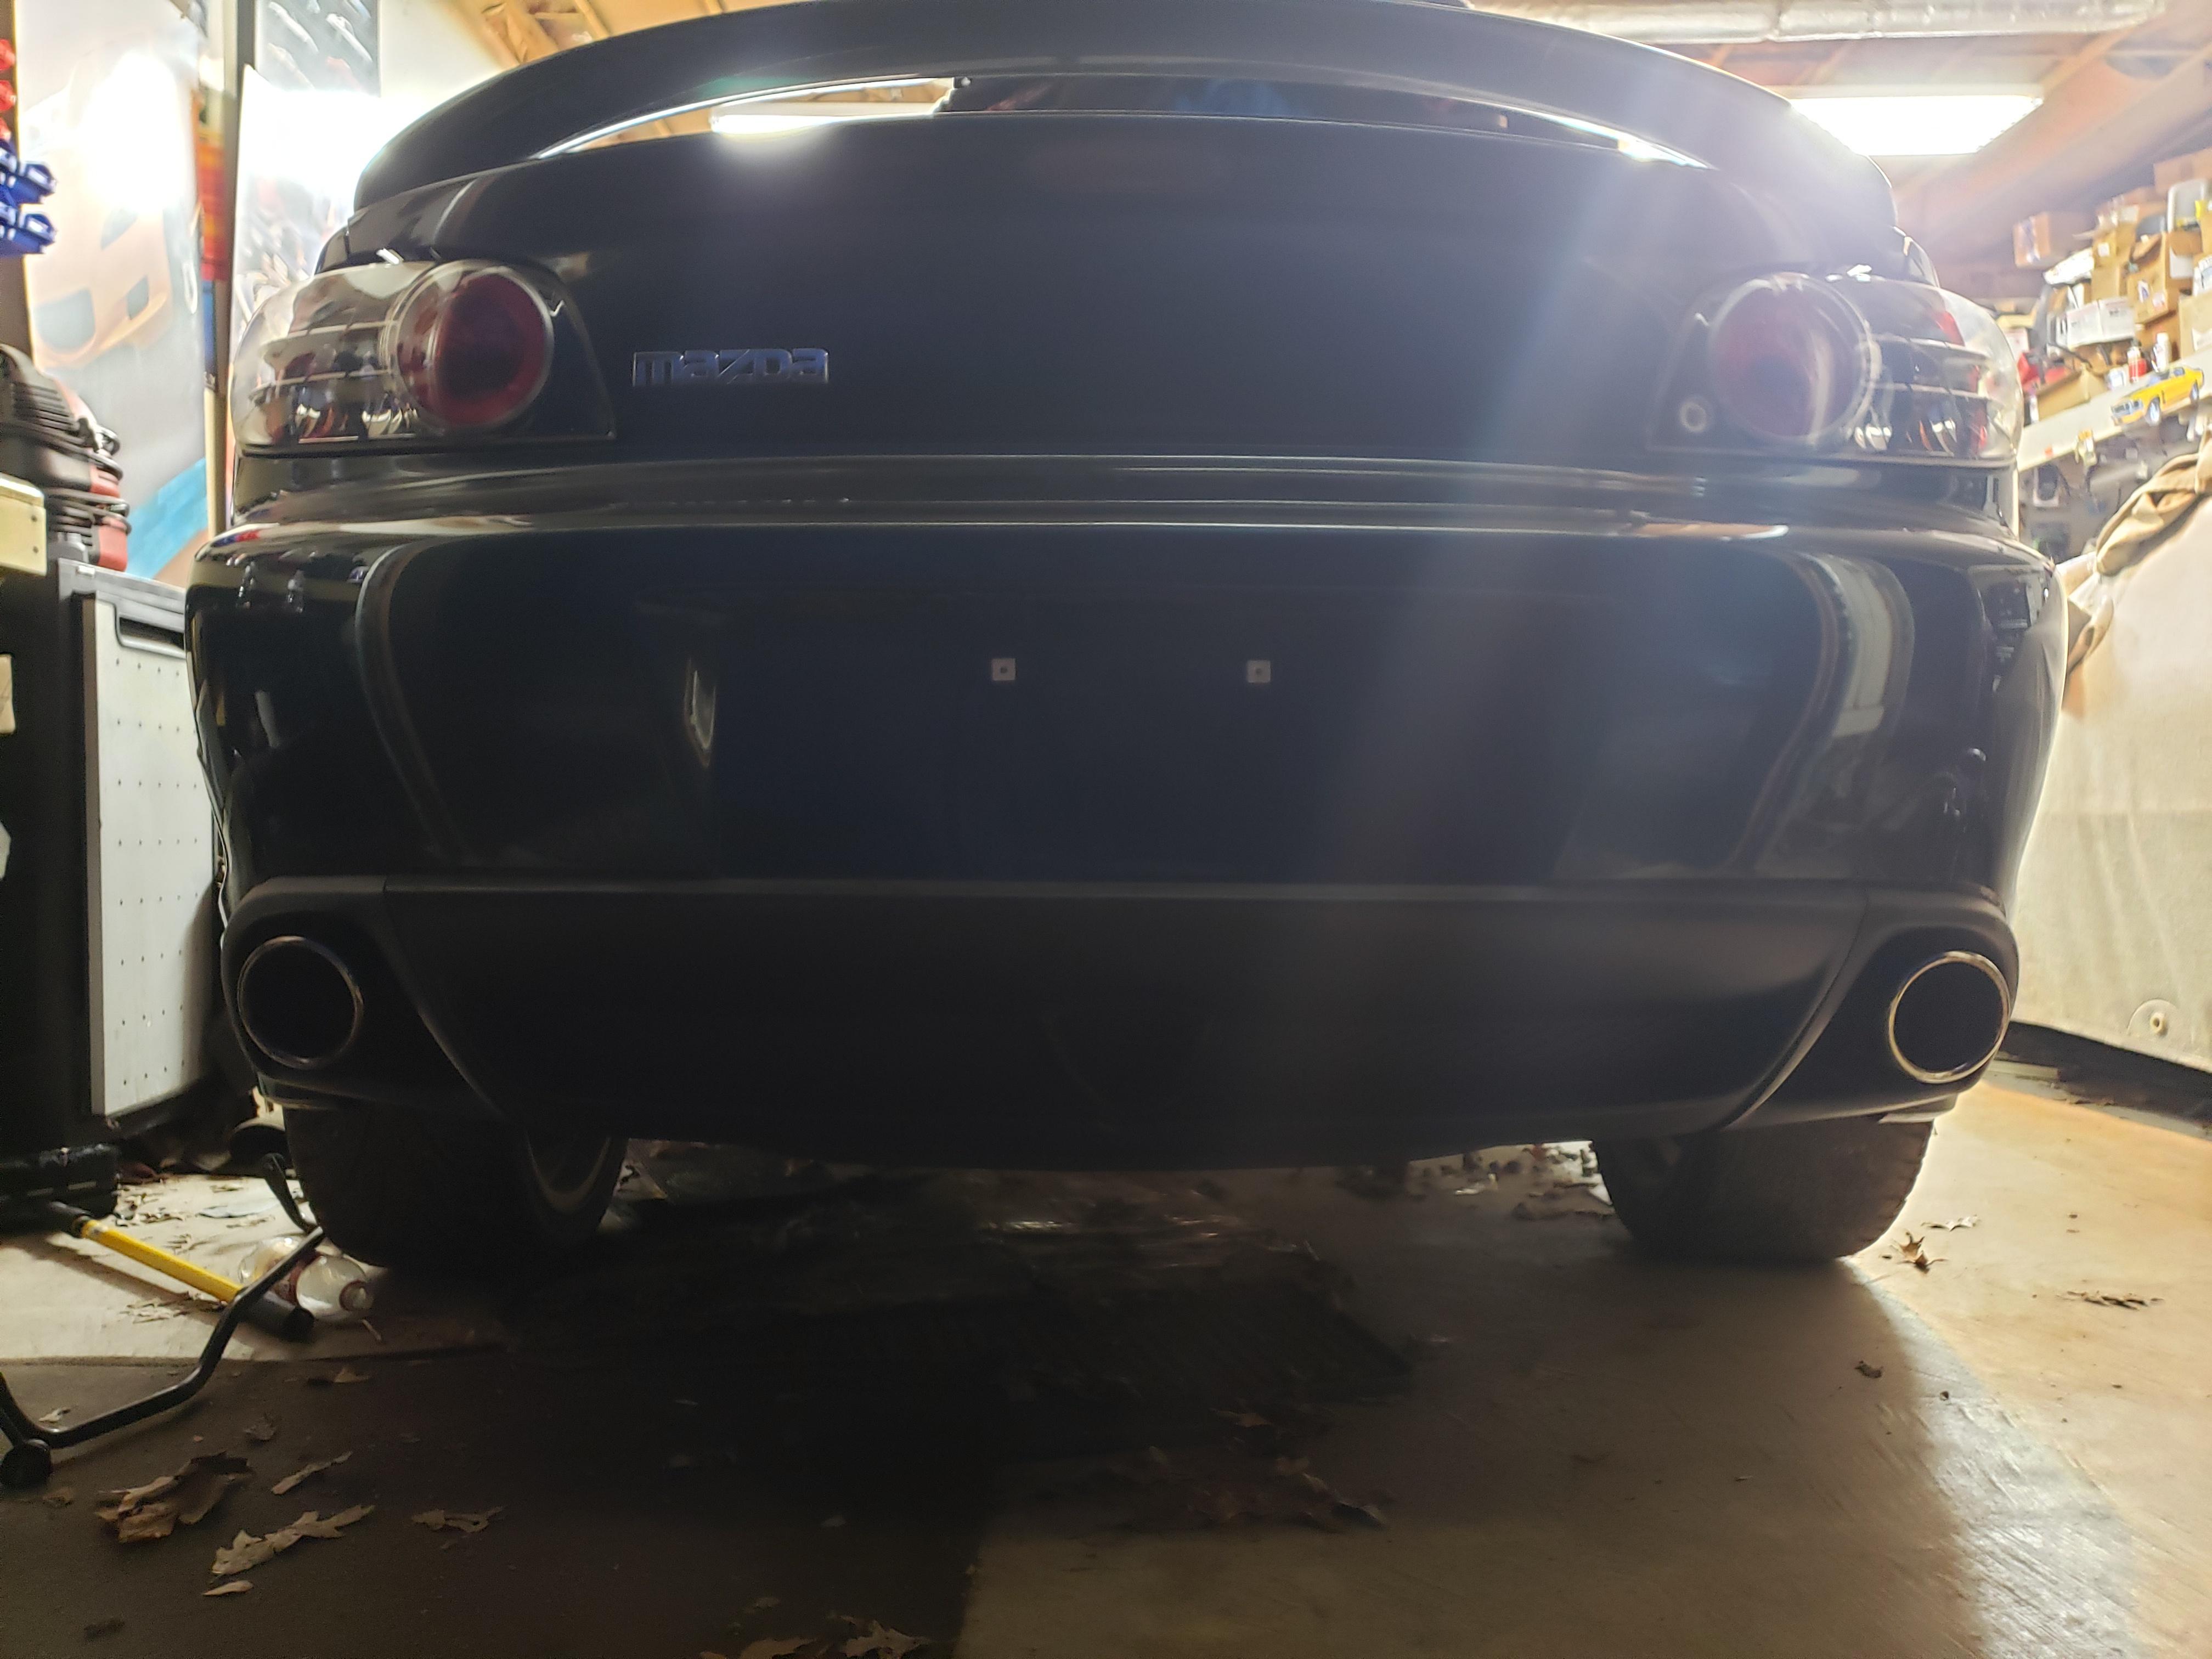
Installed a Racing Beat cat back exhaust on the car as well. Srill need to install a center section. I will either use an oem catalytic converter, buy the RB center section or order a new Magnaflow catalytic converter section:
First time powered up:
Installed a Racing Beat cat back exhaust on the car as well. Srill need to install a center section. I will either use an oem catalytic converter, buy the RB center section or order a new Magnaflow catalytic converter section:
The following users liked this post:
Joeyjoiner (04-14-2021)
04-16-2021, 05:53 AM
#20
RX-Heaven
Thread Starter
iTrader: (6)
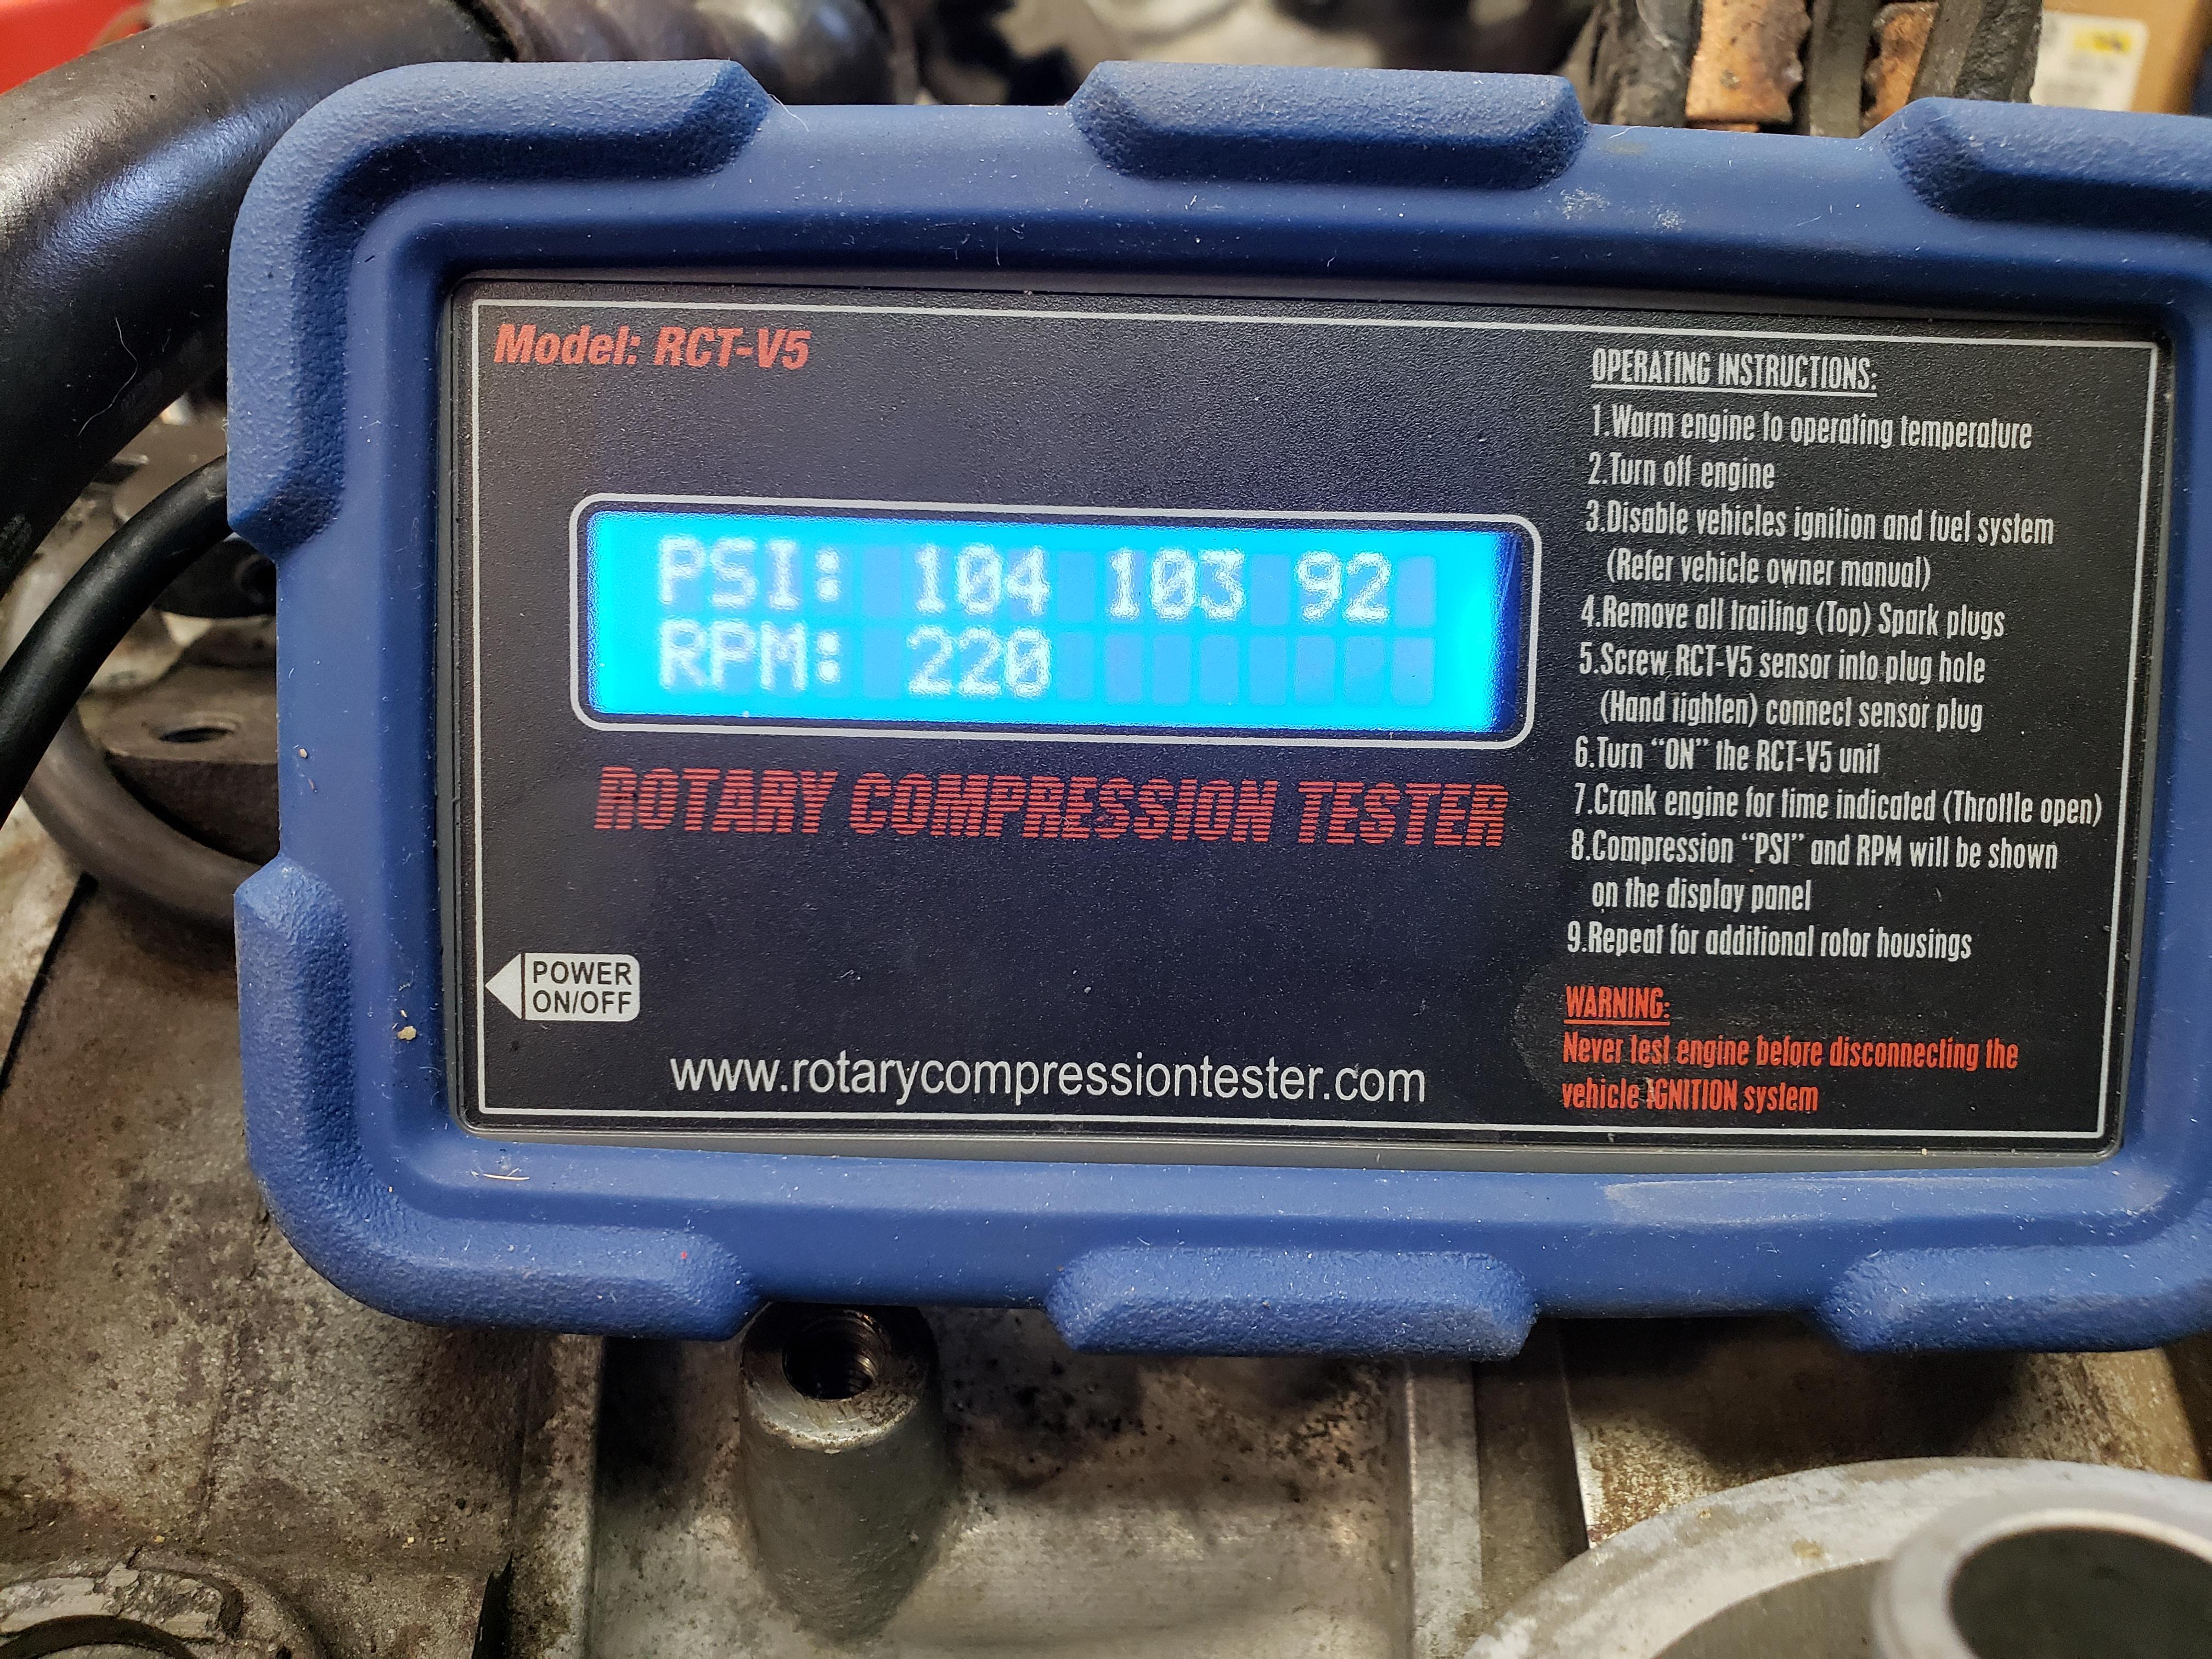
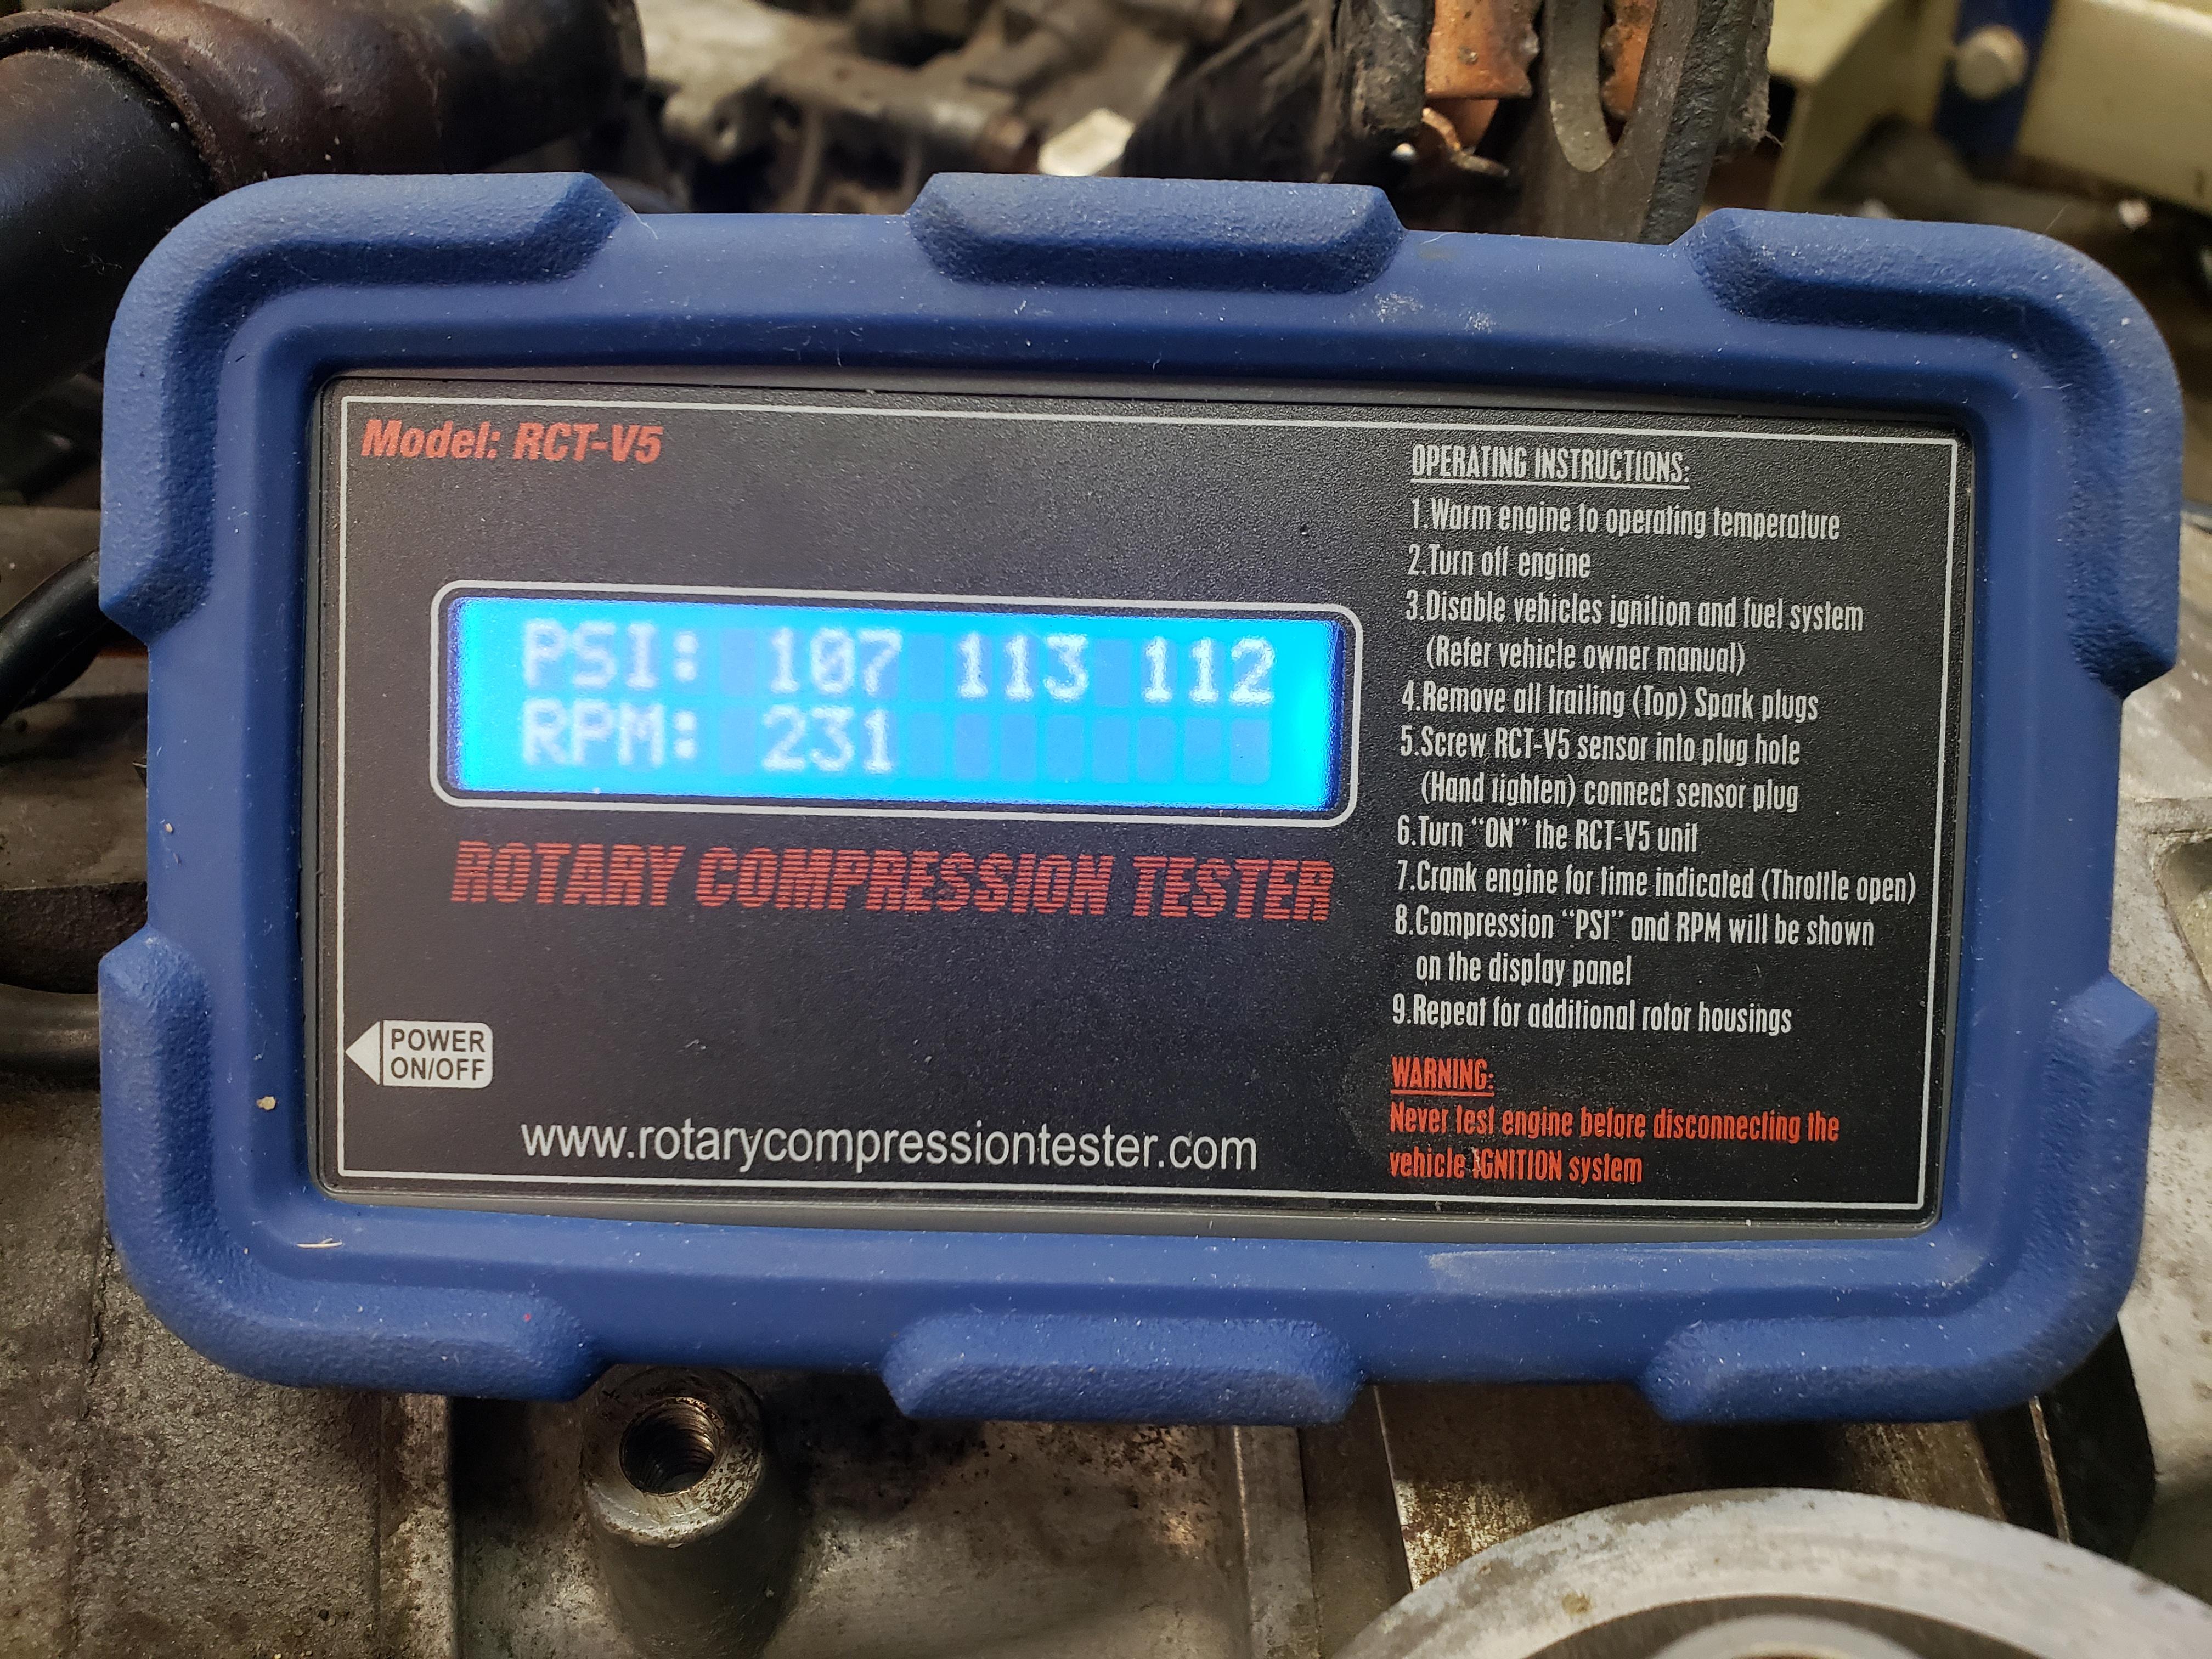
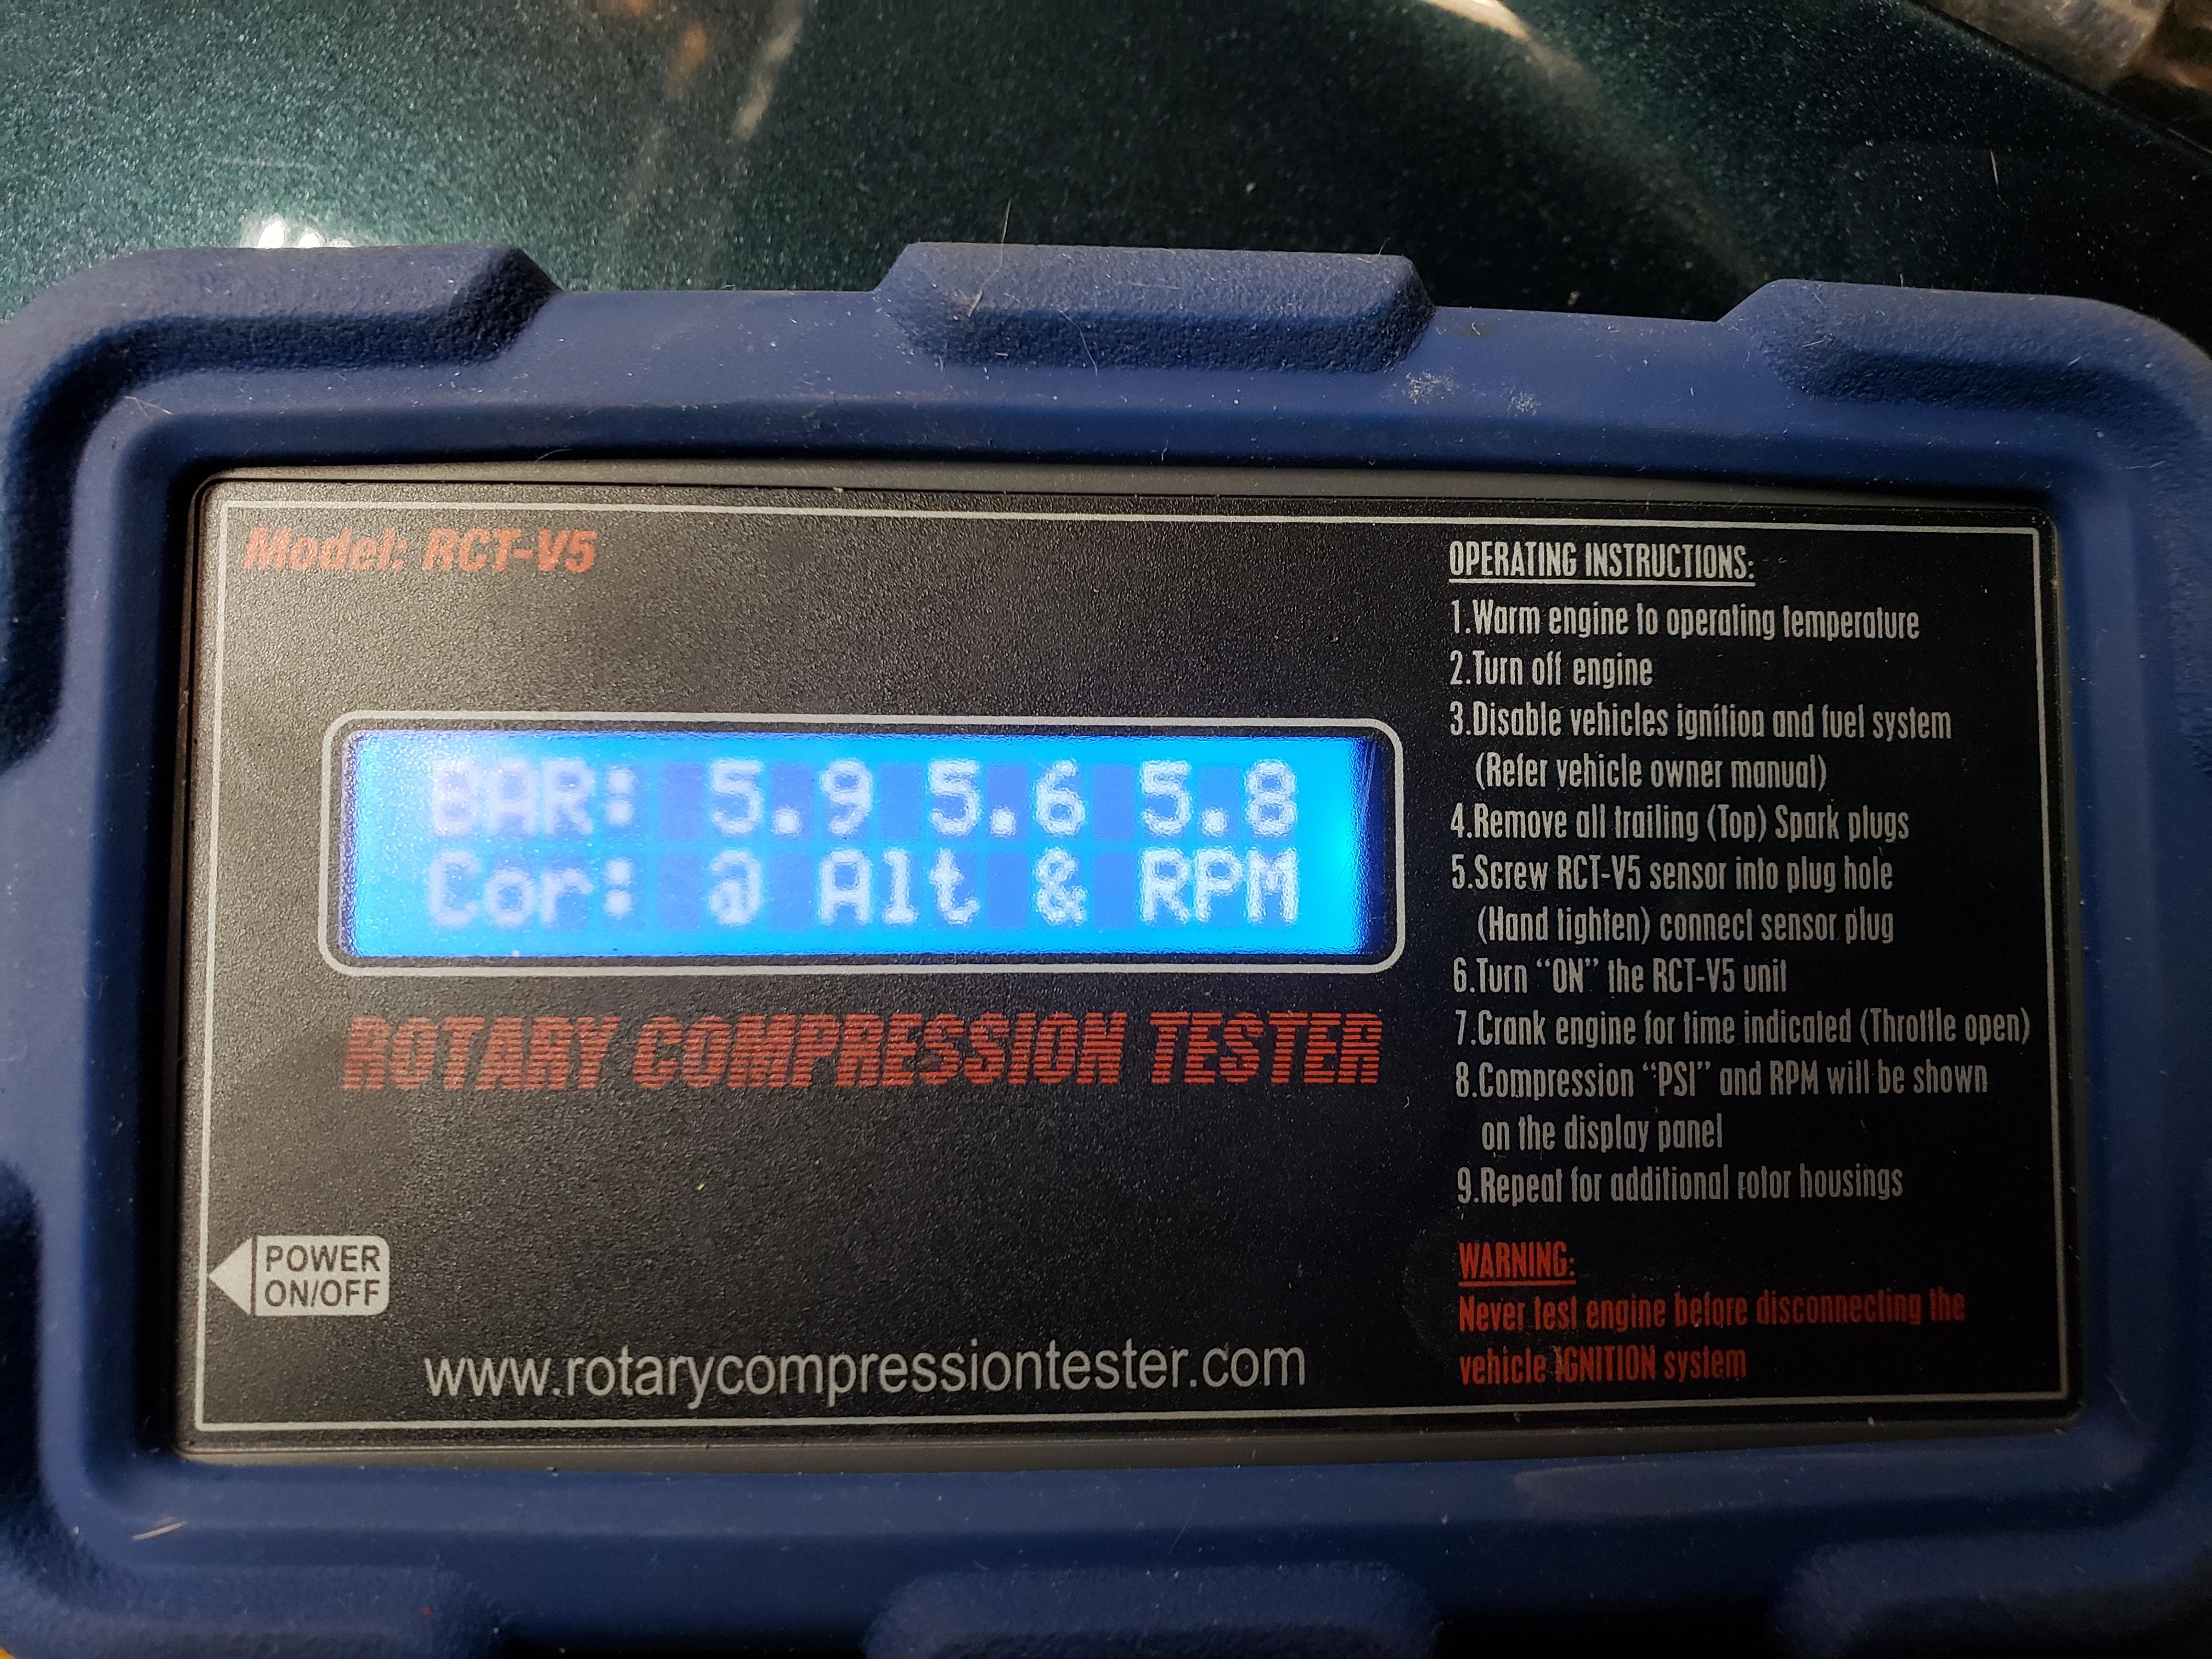
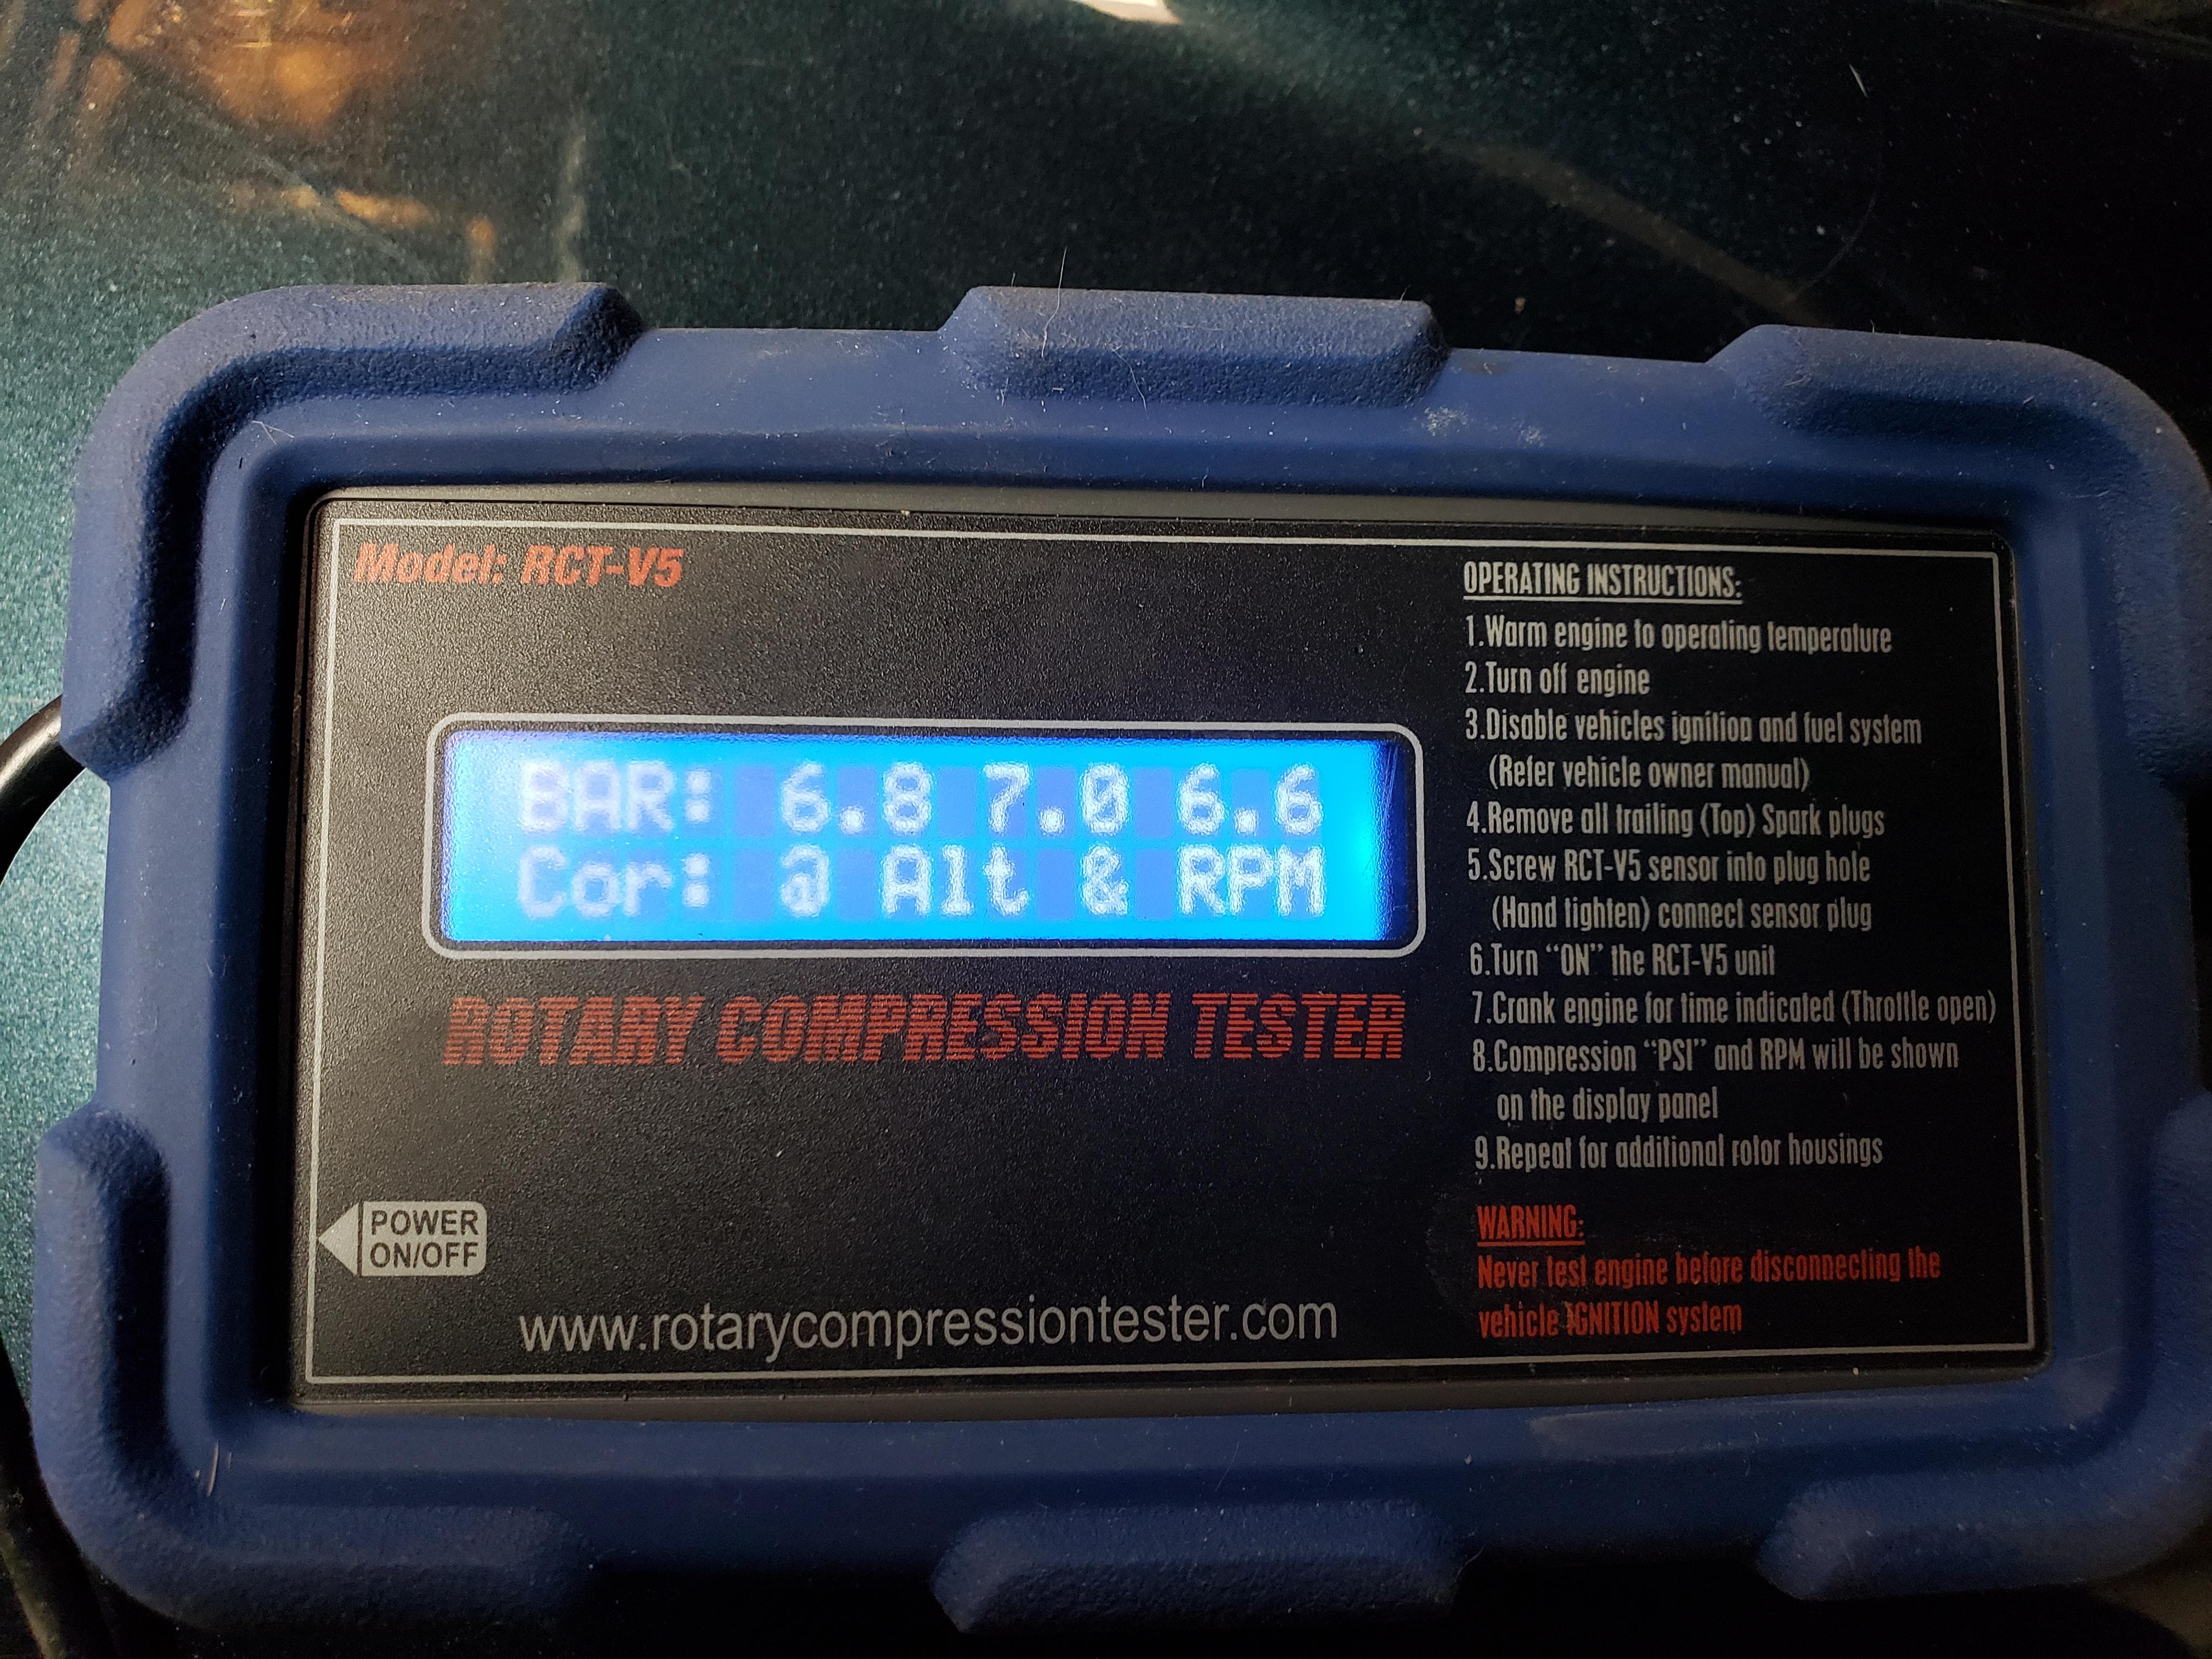
Got the engine started up the other night. It fired up quickly and ran well....until it got to normal operating temperature. Then it started to run rough and the idle would drop and increase over and over before stabilizing. So, knowing what was next, I ran a hot compression test. The engine is not good after all and failed the compression test. This engine is a Mazda reman with about 30k miles on it.
Its crazy how much compression drop these engines have when at normal operating temperature over when they're cold.
The plan is to continue fixing everything on the car and in the mean time, save a little bit and buy a reman engine. I had considered rebuilding another 6 port engine i have that has low compression and installing it. Depending on how the internals look, that's an option as well. I'll open it up and see what I have. That engine is also a Mazda reman engine with 55k miles.
Front rotor:
Rear rotor:
04-17-2021, 06:55 AM
#21
RX-Heaven
Thread Starter
iTrader: (6)
I drove the car about a half of a mile yesterday and it did drive fine. My bots were really excited to finally get a ride in the car. It did stall when after I parked it. Still no change in the compression issue of course, though I did suck some Seafoam into the engine yesterday and let it run and then sucked more in until it stalled. I bled the clutch and fired it up and it seemed to run a little better but likely will not help the low compression. What sucks is that the engine is a Mazda reman with only 30k miles on it.
I've still been going through everything and I'll continue to update this thread as I continue to progress on the car's restoration.
I've still been going through everything and I'll continue to update this thread as I continue to progress on the car's restoration.
04-21-2021, 05:49 AM
#22
RX-Heaven
Thread Starter
iTrader: (6)
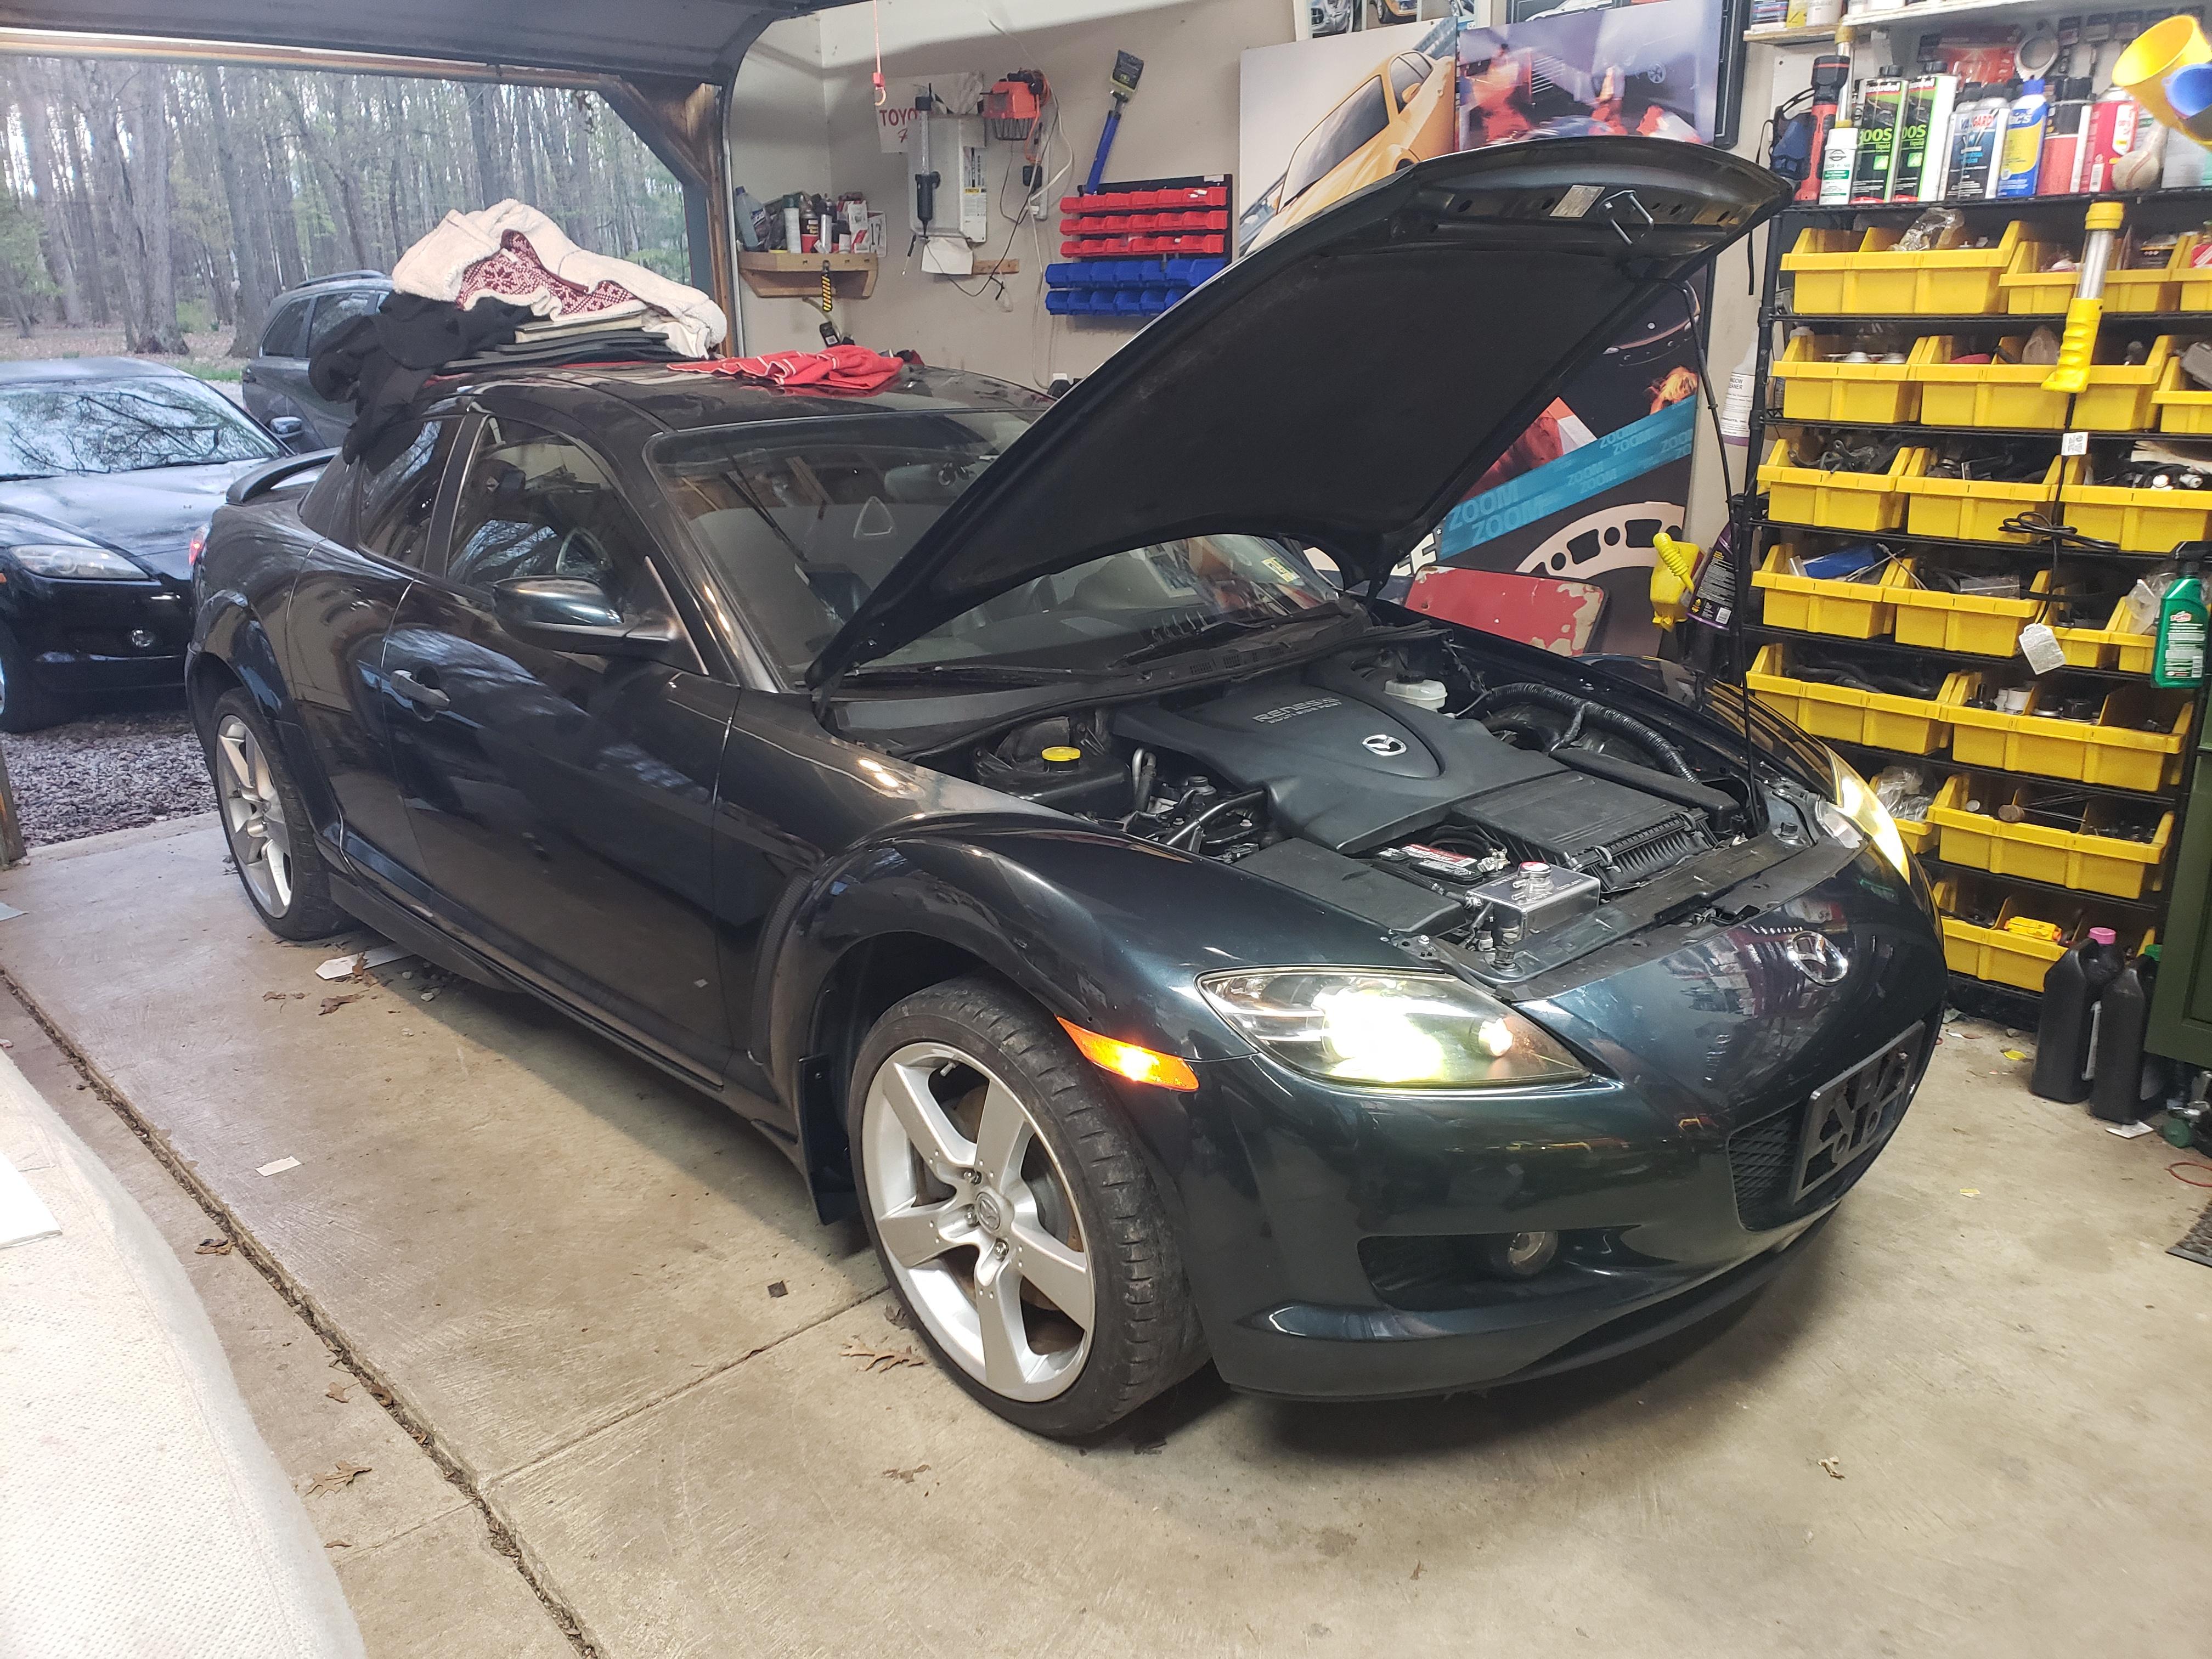
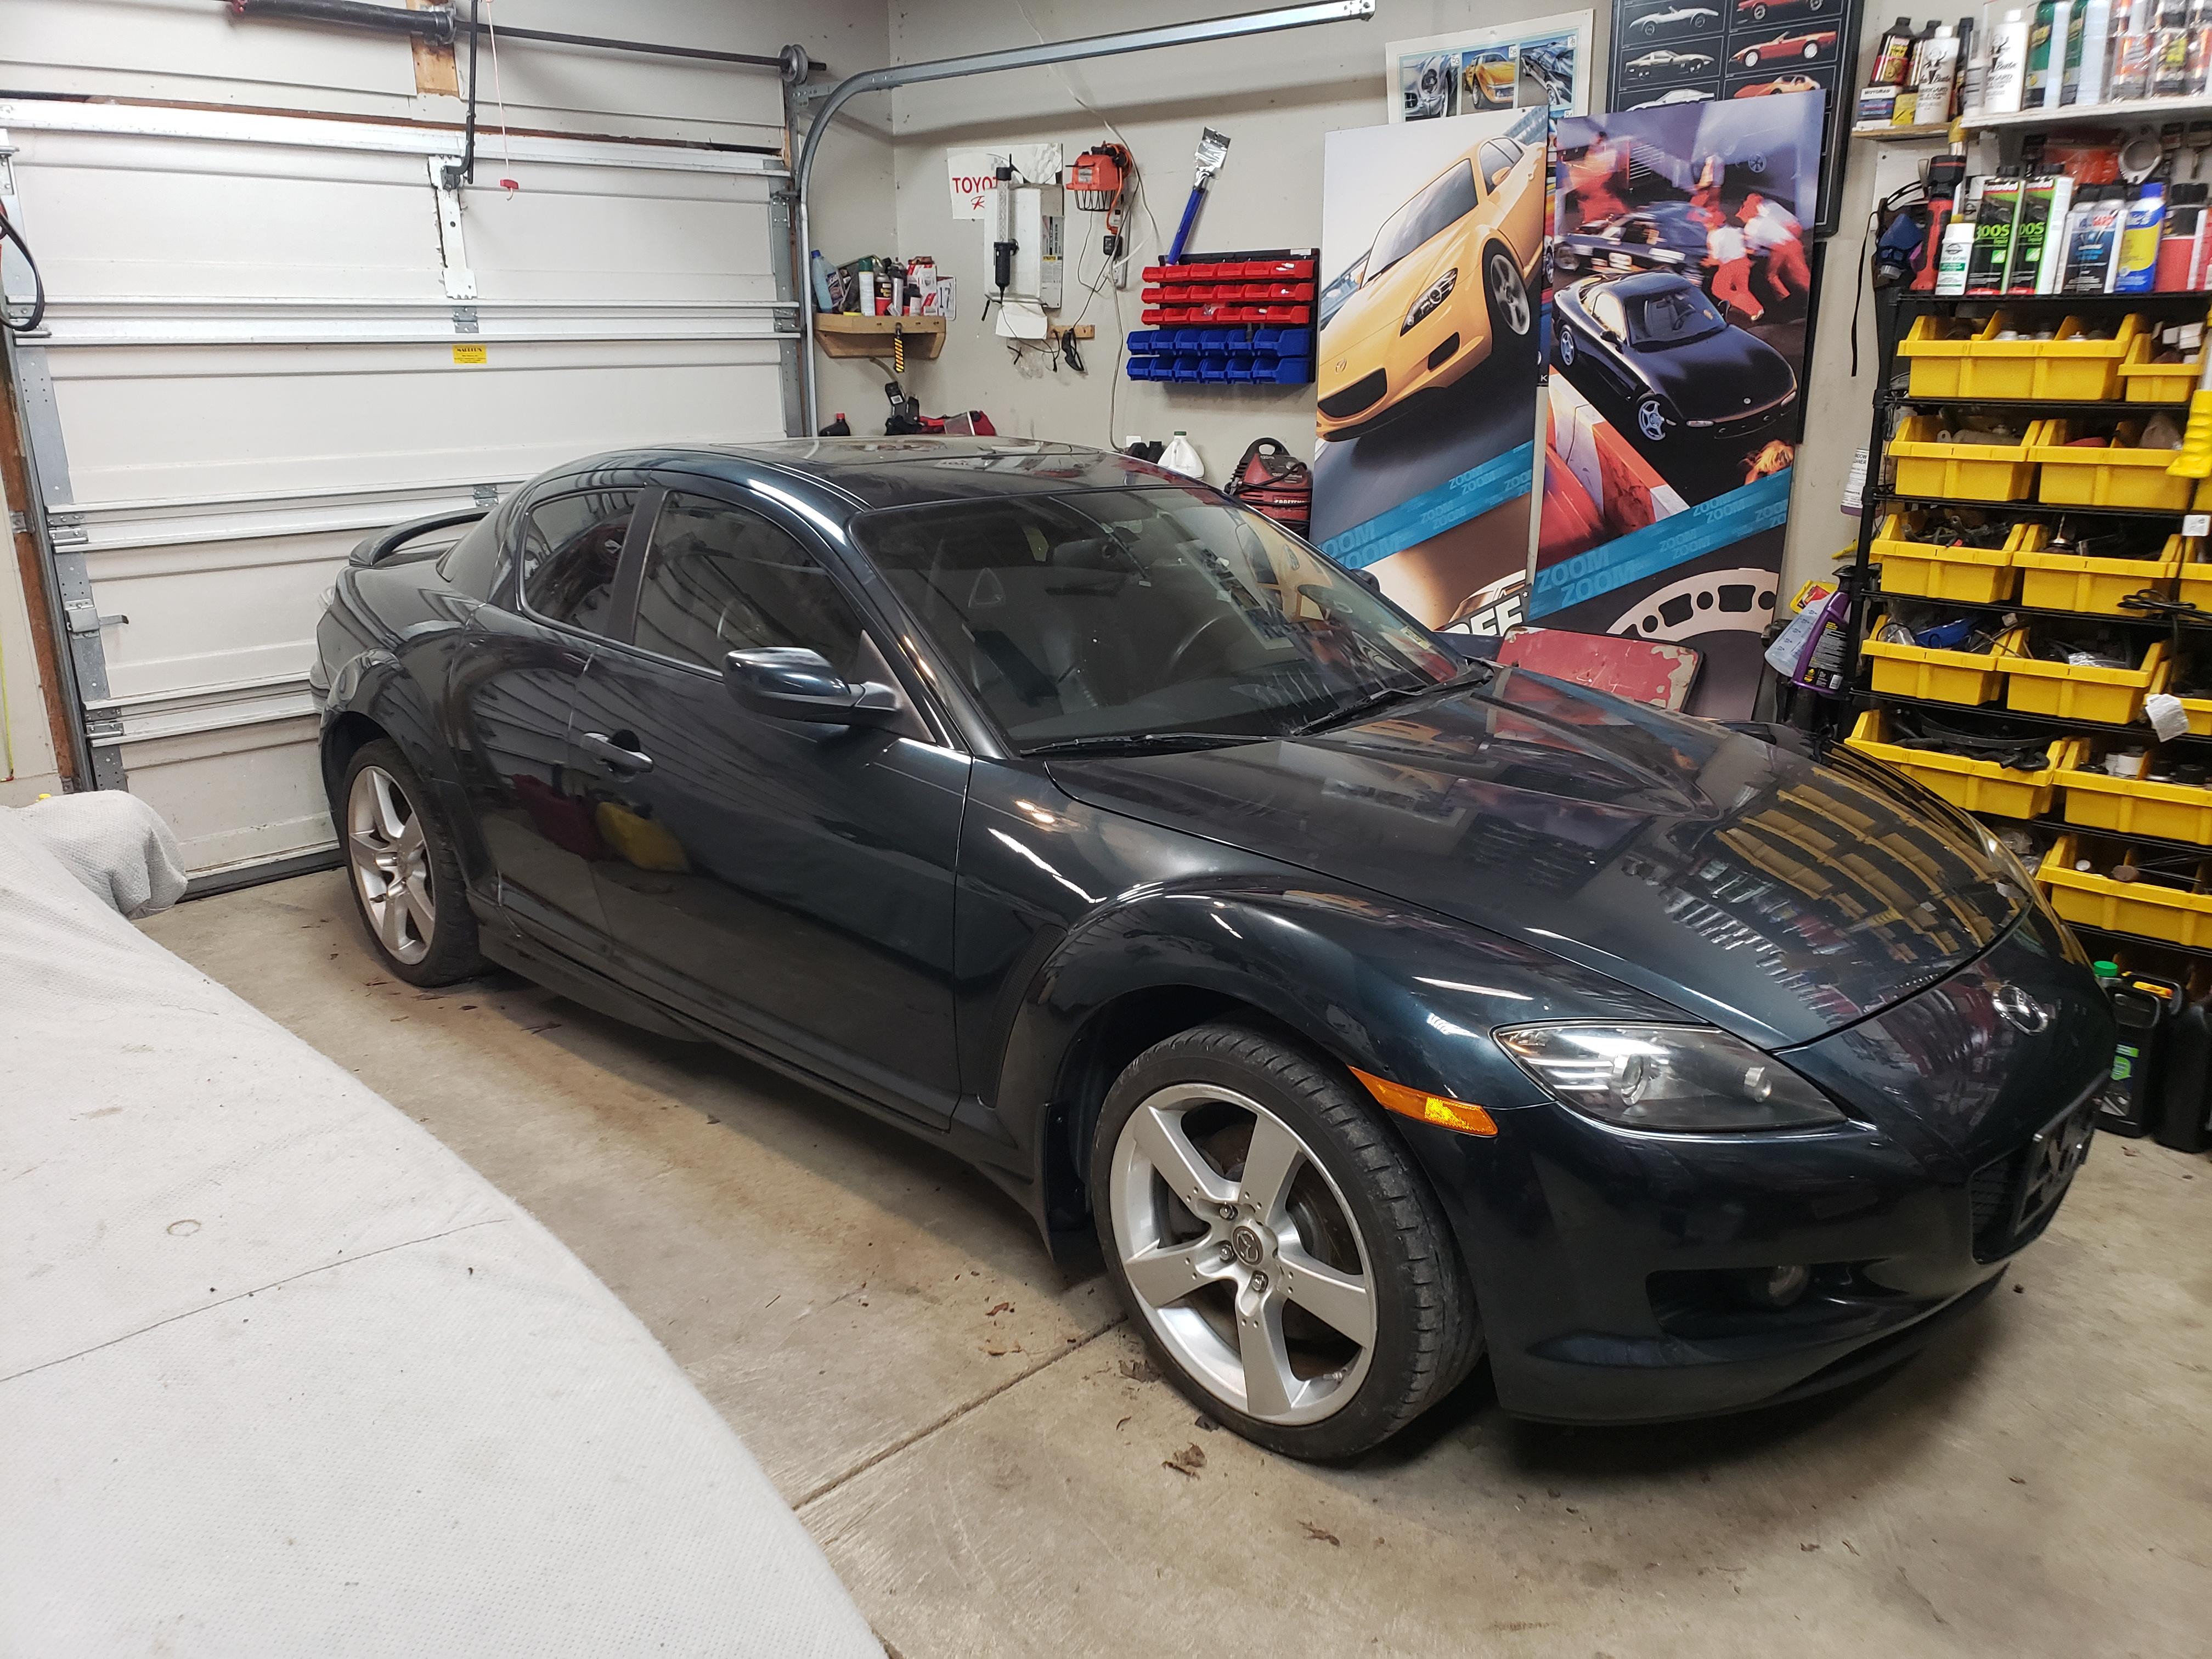
Was in the garage last night fixing little things on the car and snapped a pic before I went in. Still love the car even though we are working through a plethora of small issues on top of low compression:
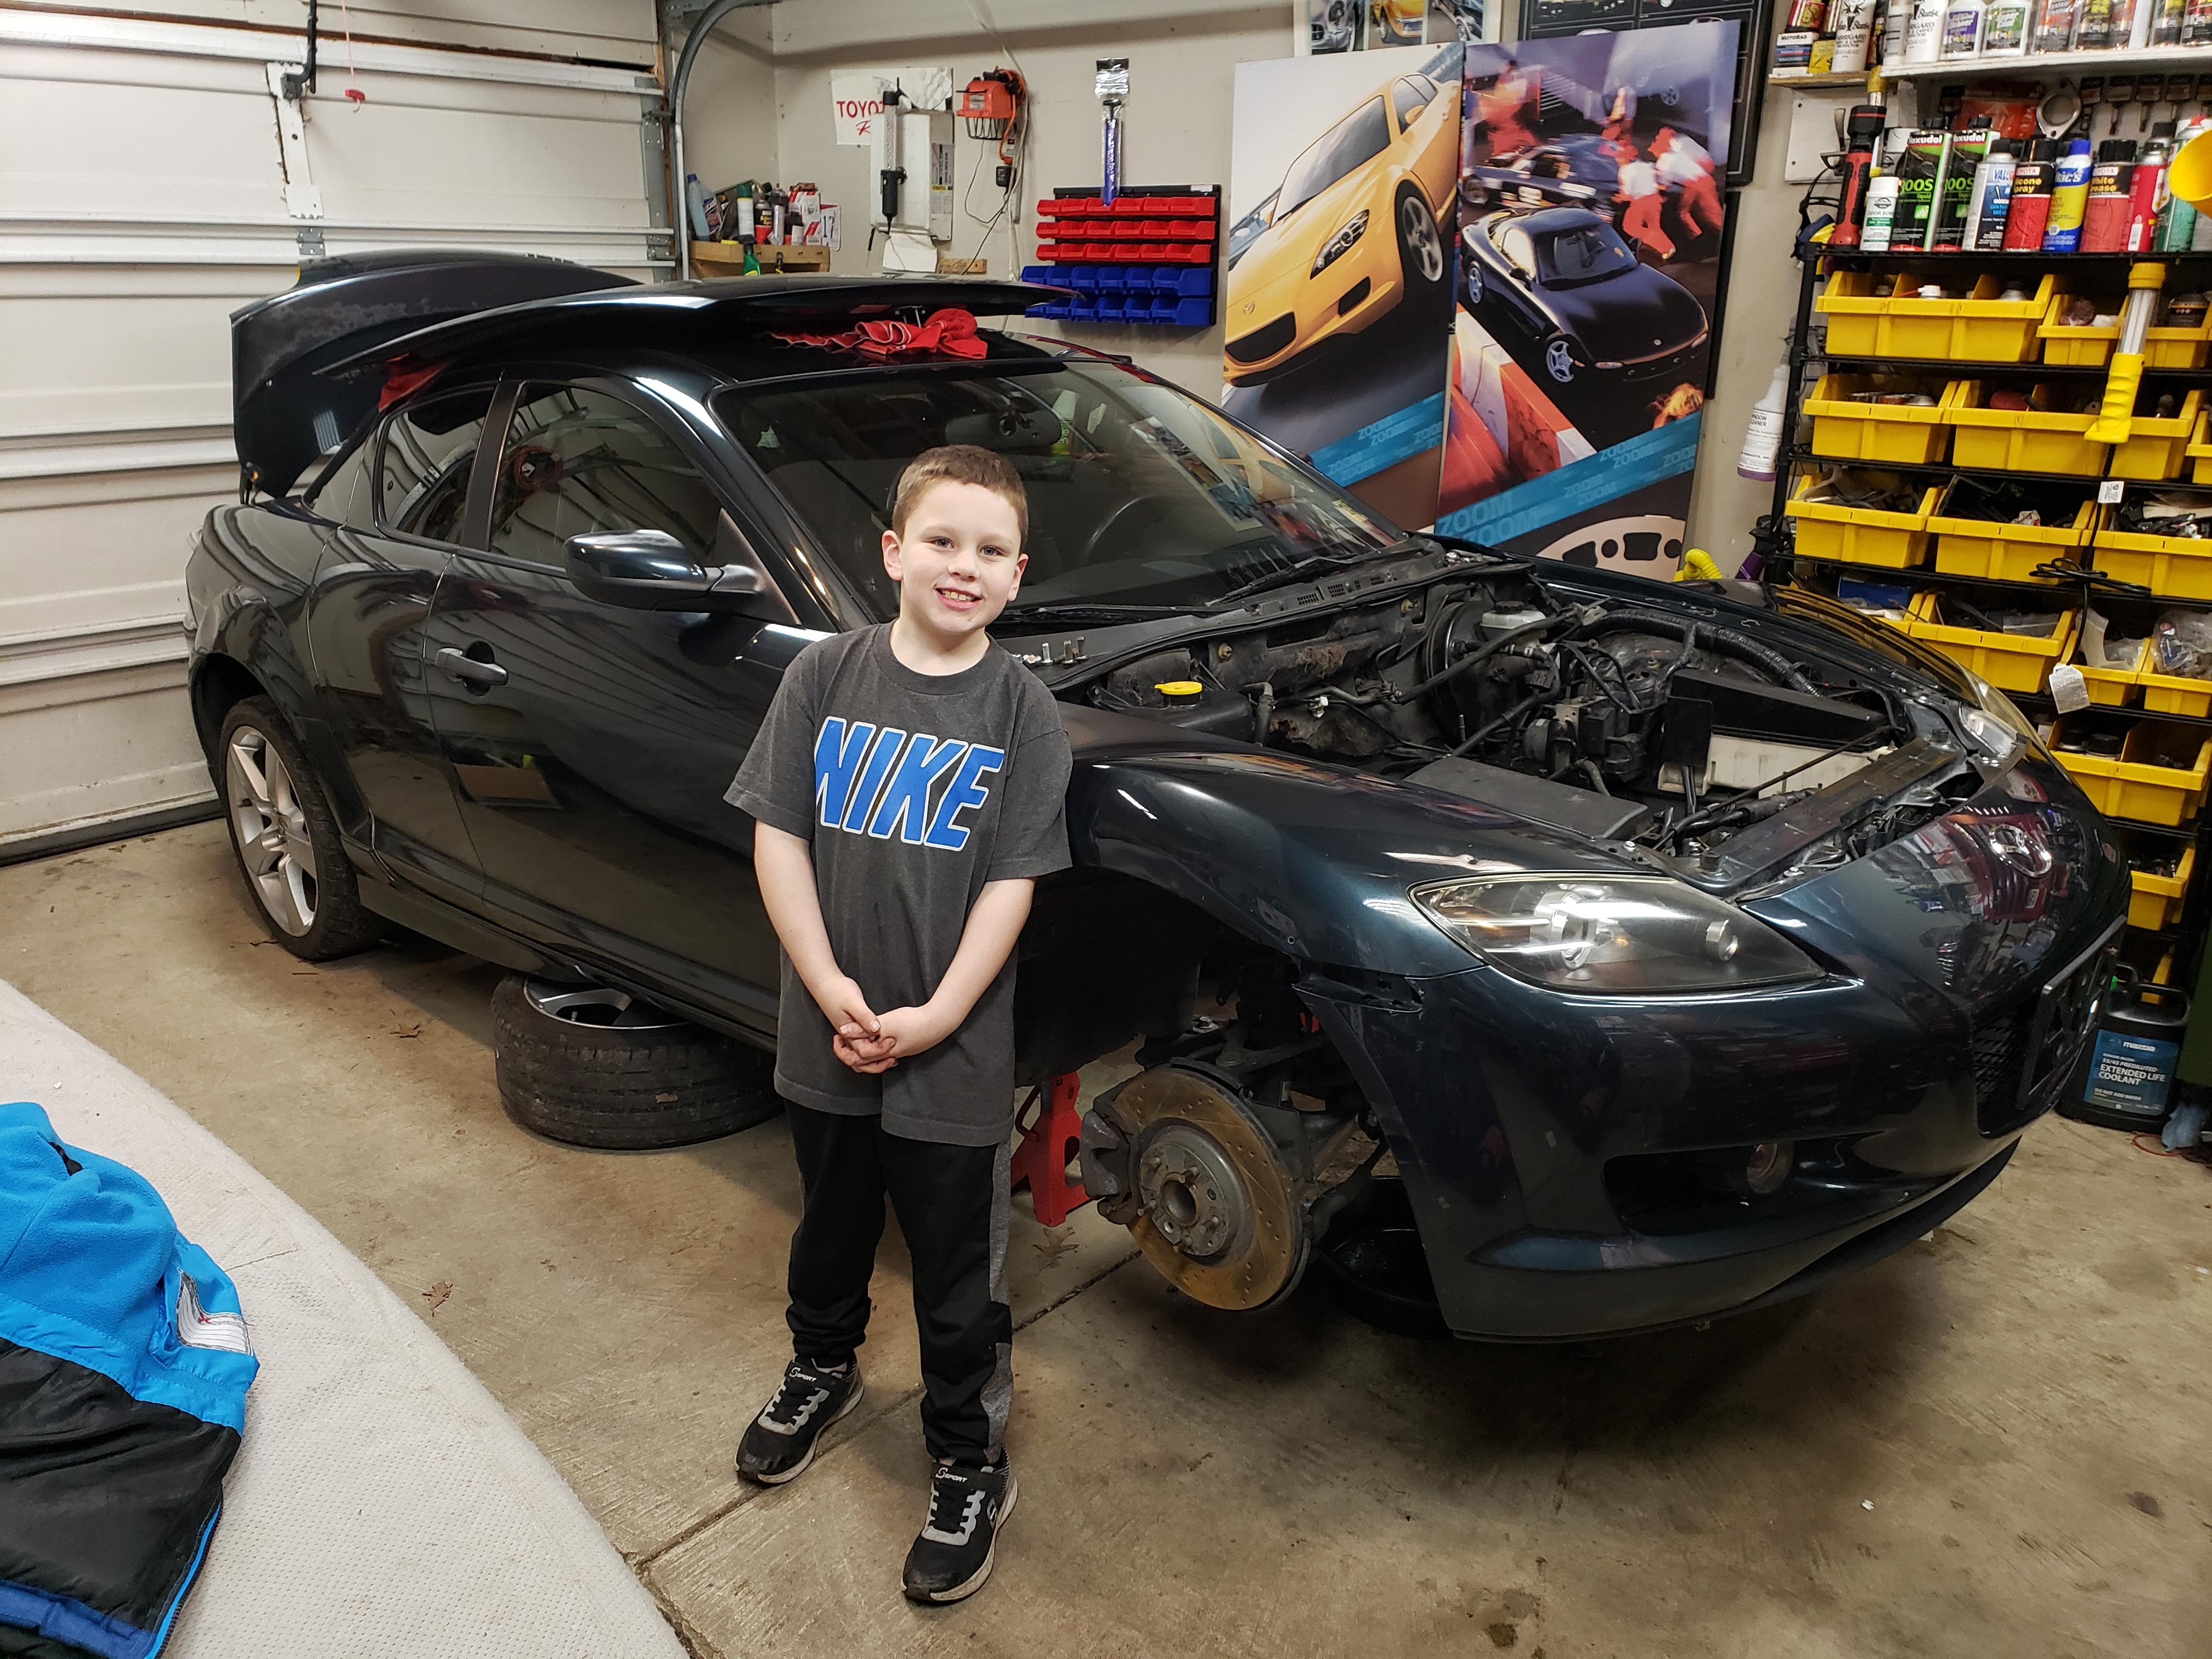
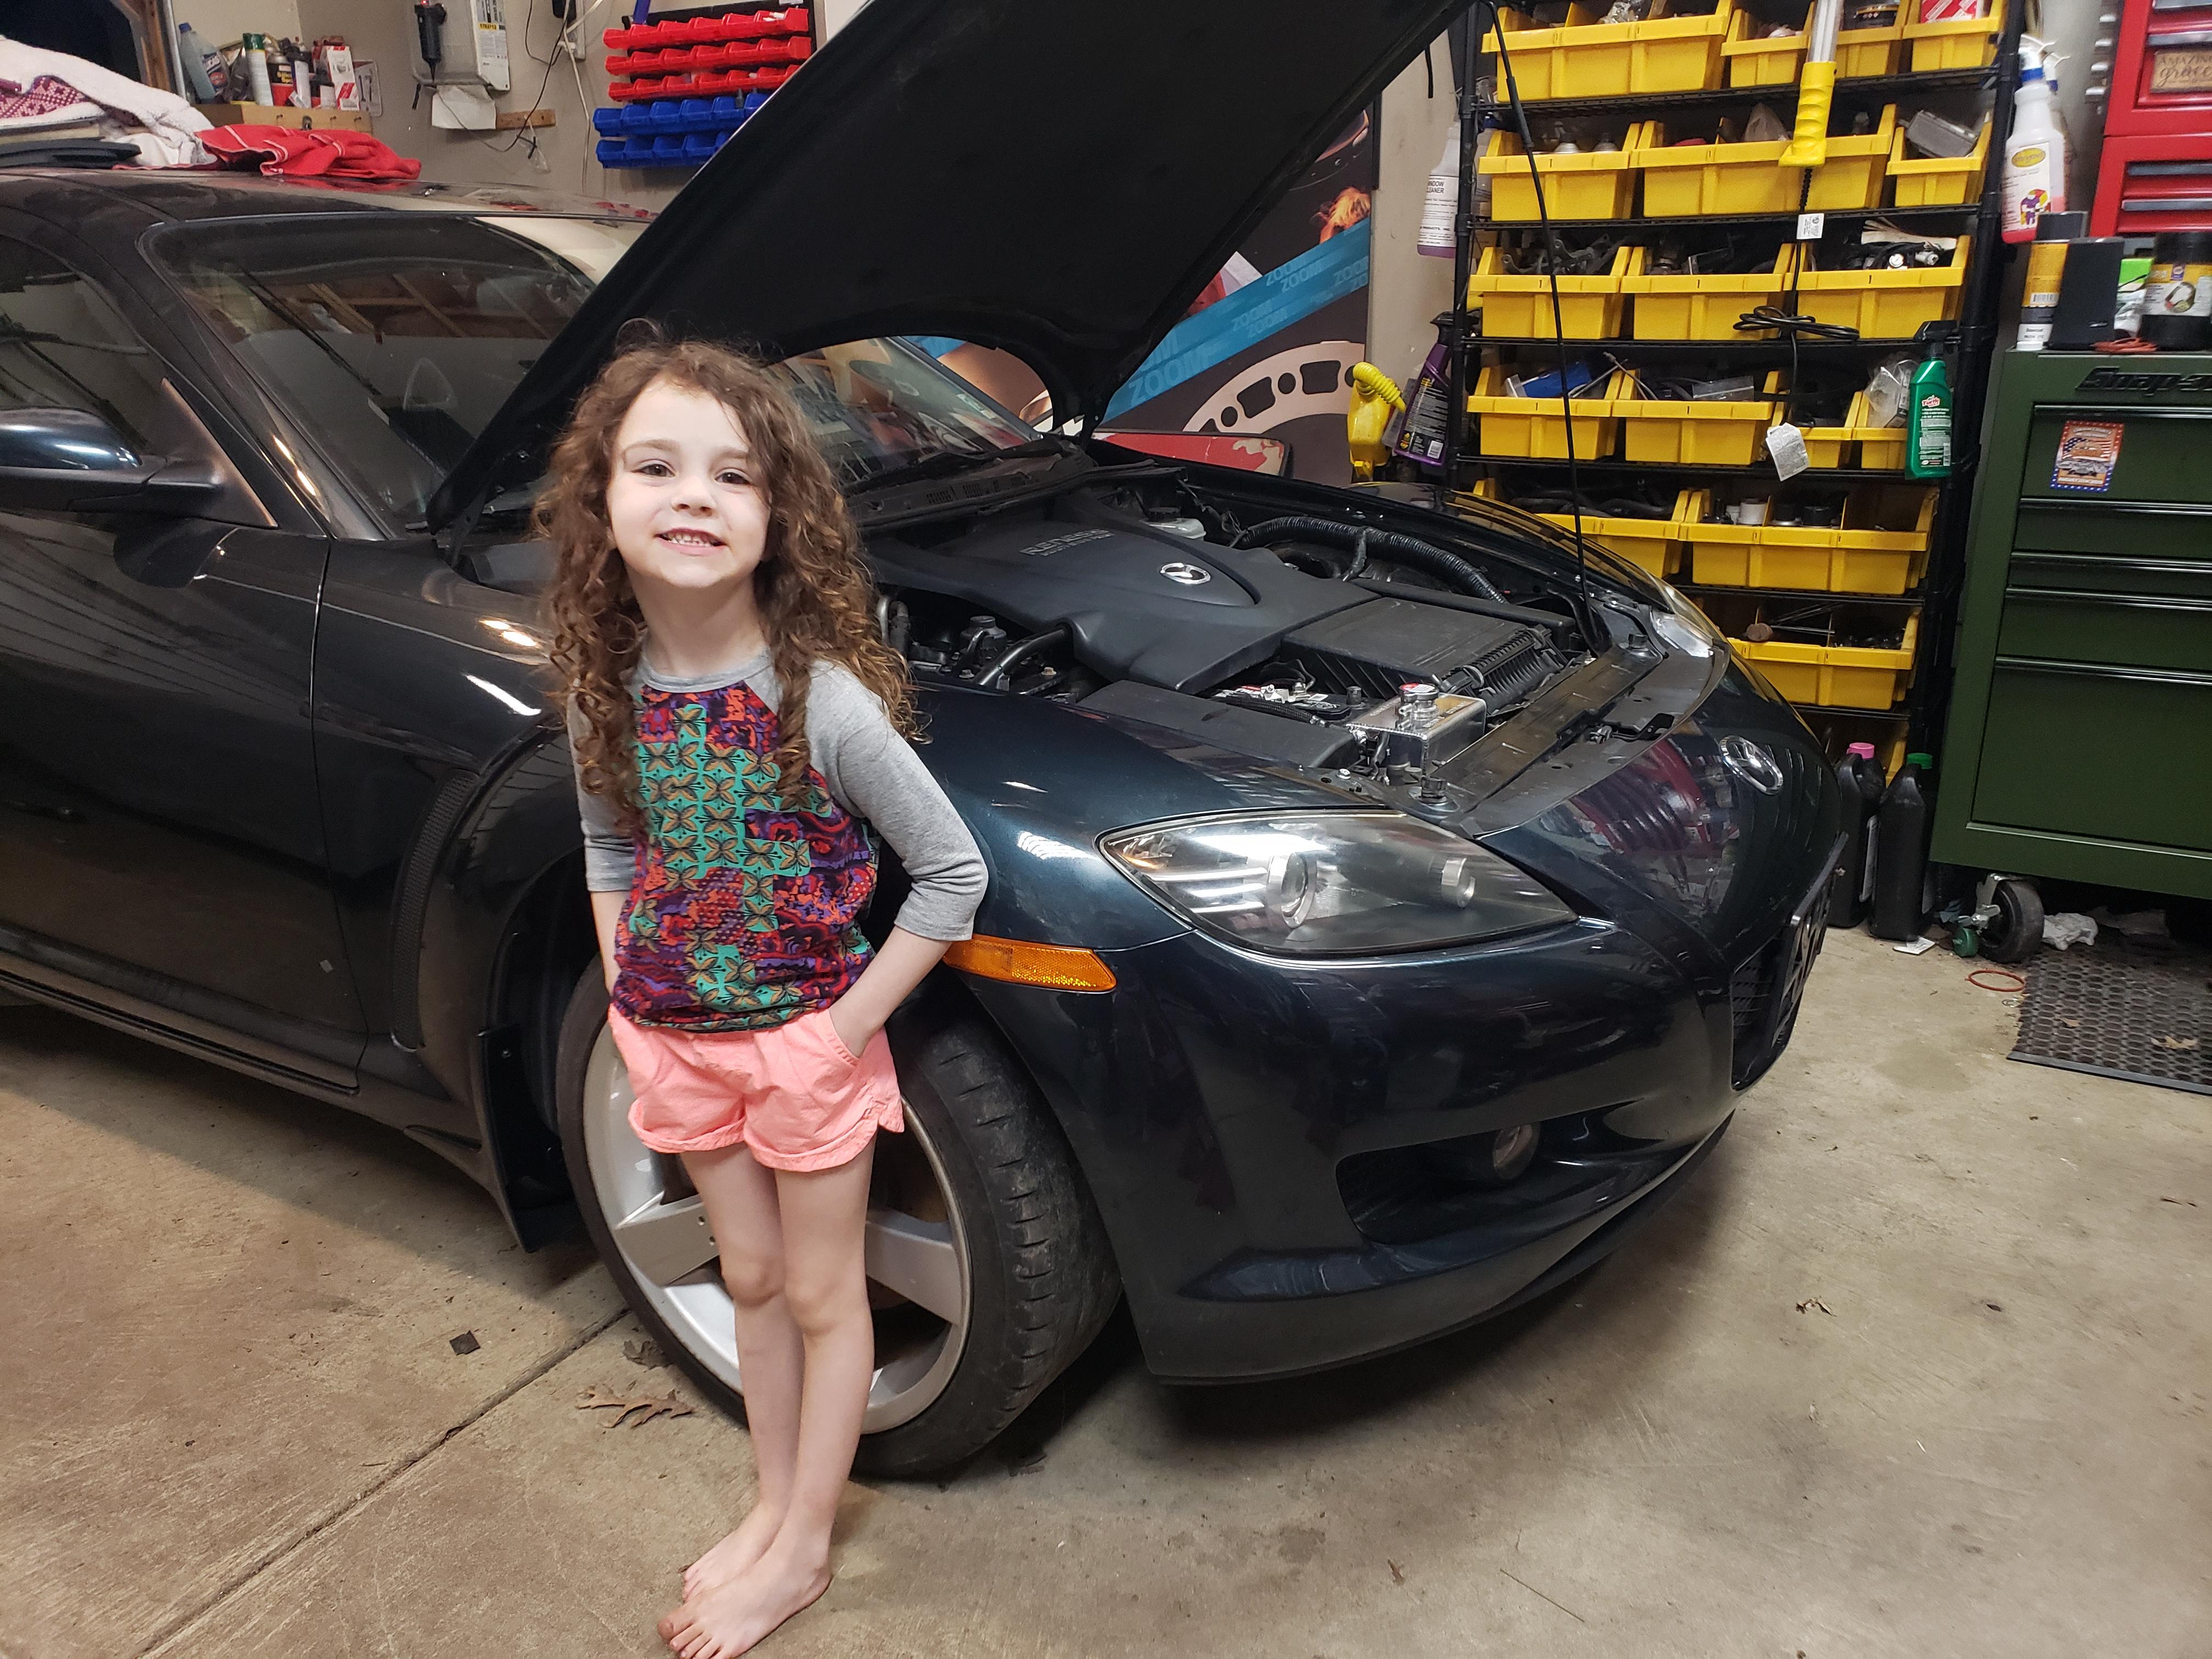
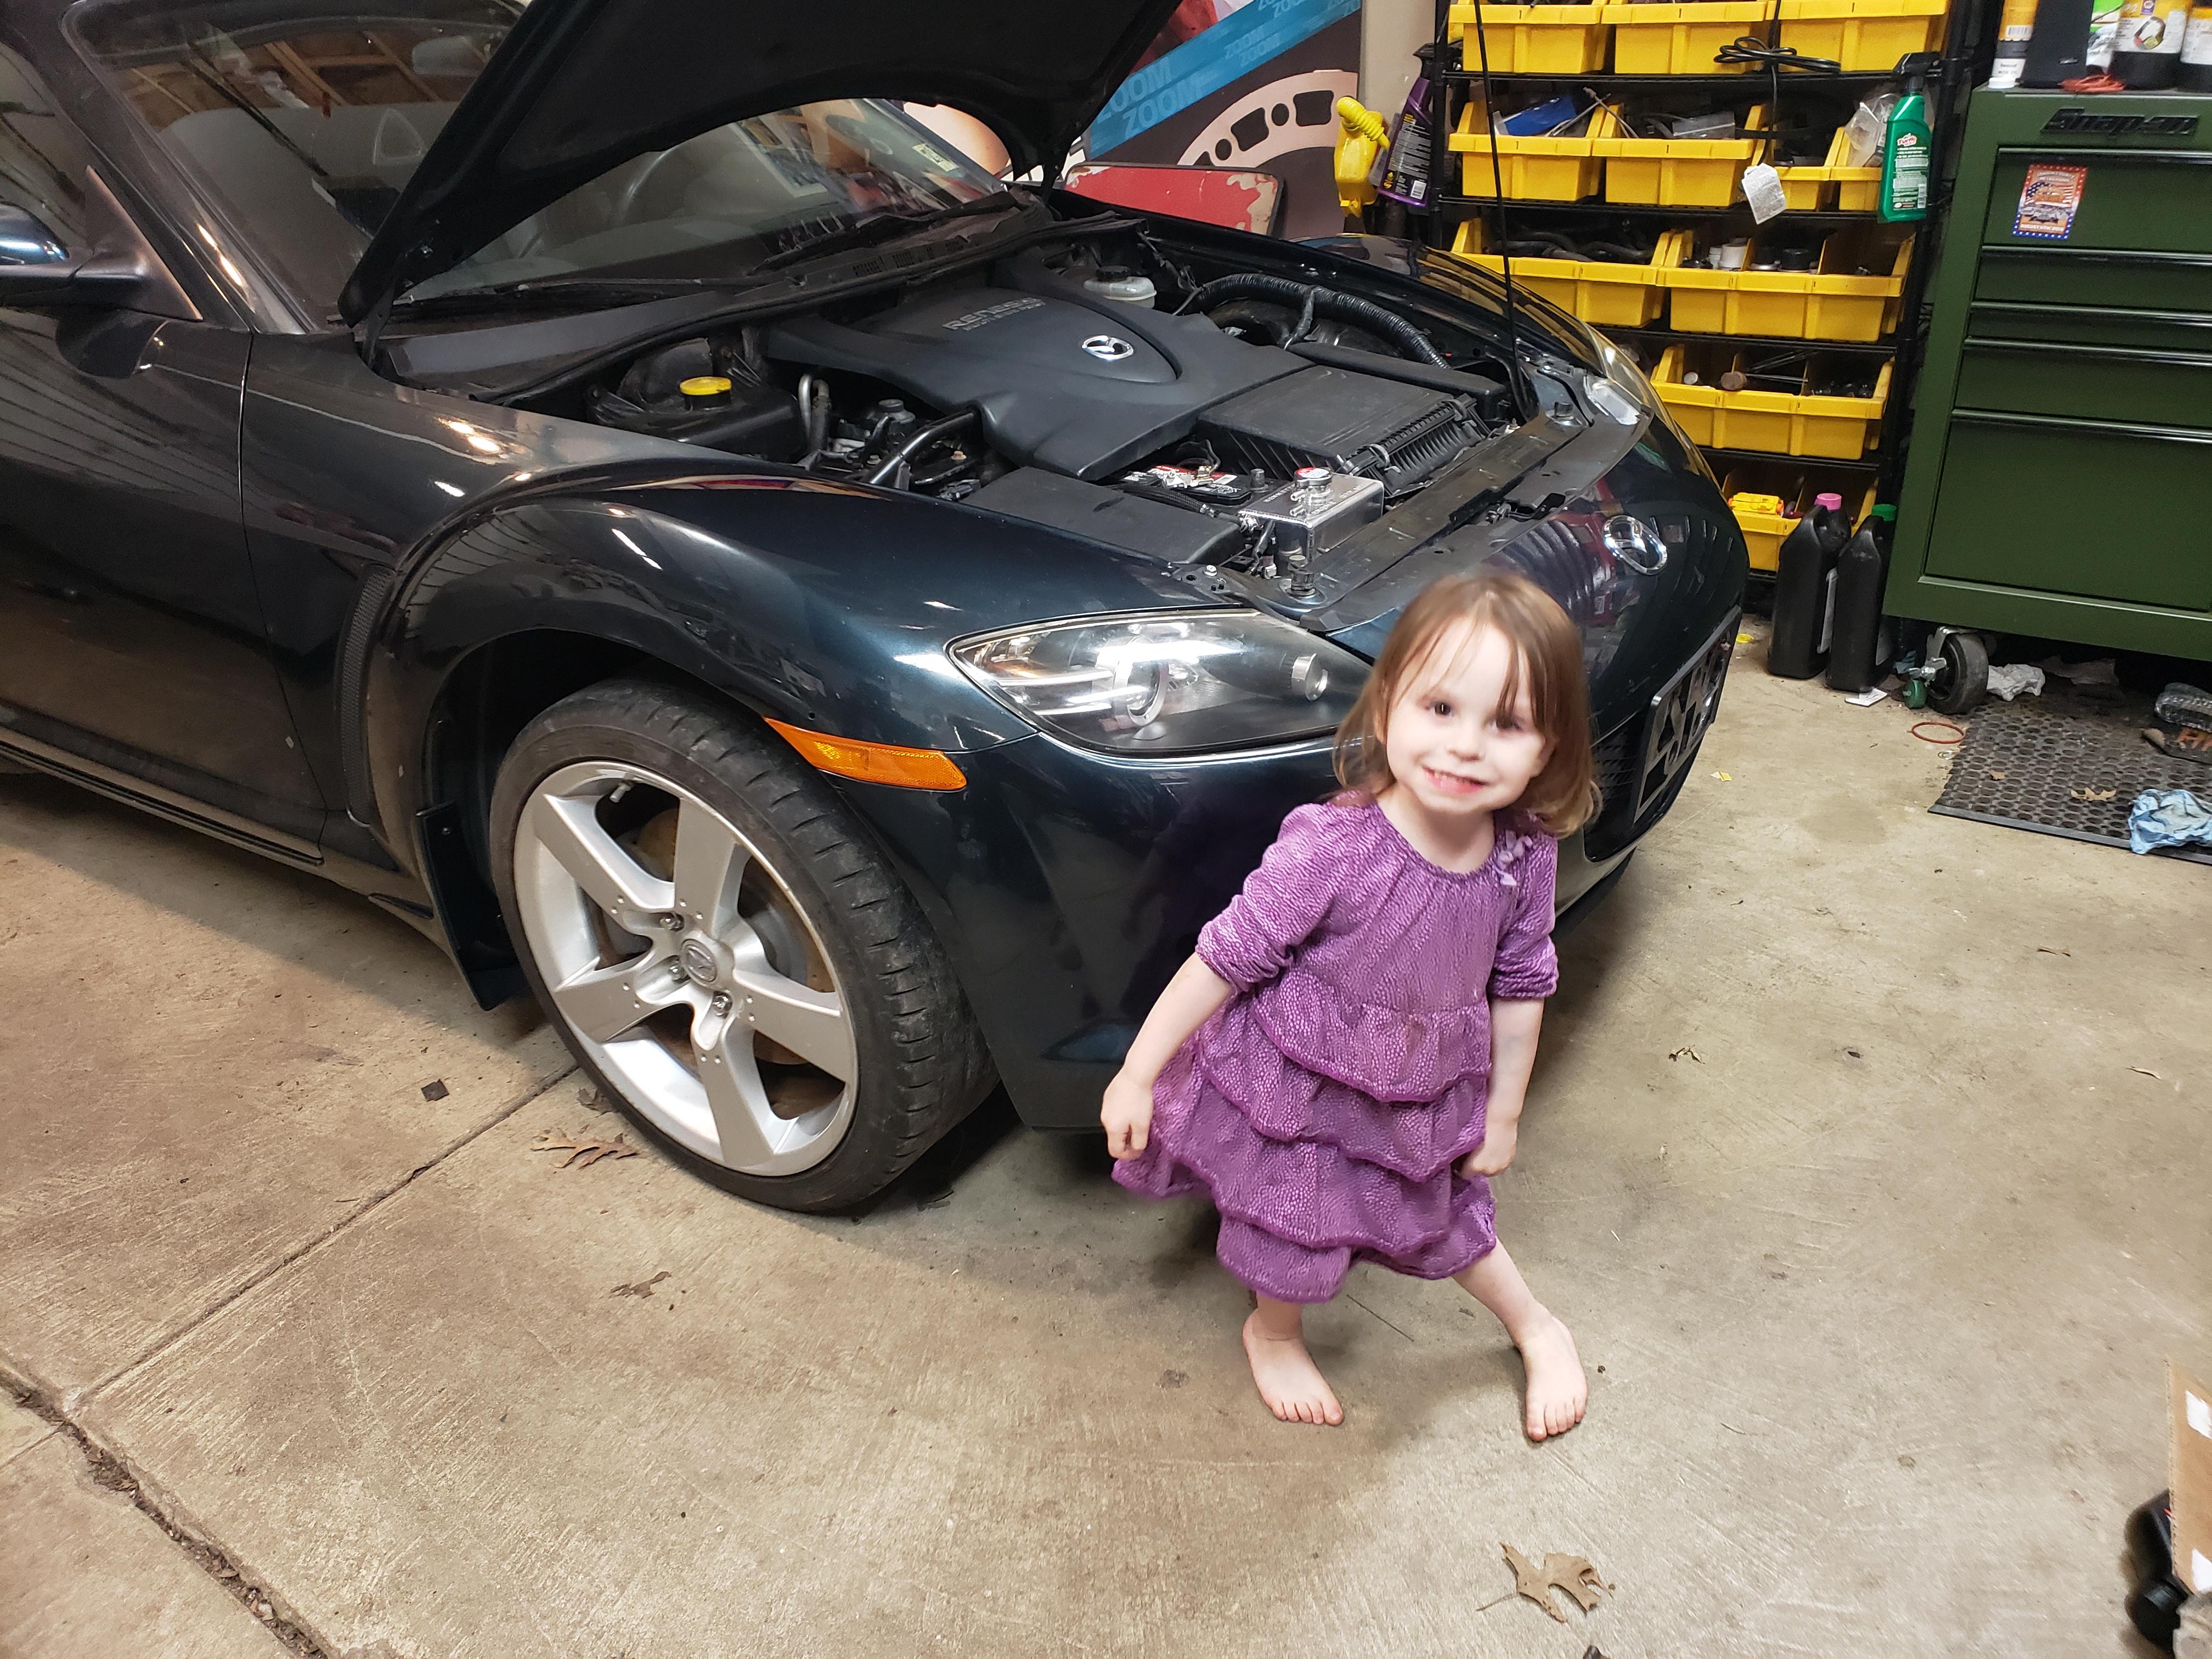
A few nights ago I was taking my youngest two for rides in my other 8's and since they are a fan of those cars, they wanted their picture taken with daddy's newest 8. They were very excited! Plus, this car has been a family project with all of the kids lending a hand at some point throughout. Having it as a family project has just made the car that much more enjoyable:
A few nights ago I was taking my youngest two for rides in my other 8's and since they are a fan of those cars, they wanted their picture taken with daddy's newest 8. They were very excited! Plus, this car has been a family project with all of the kids lending a hand at some point throughout. Having it as a family project has just made the car that much more enjoyable:
04-22-2021, 05:51 AM
#23
RX-Heaven
Thread Starter
iTrader: (6)
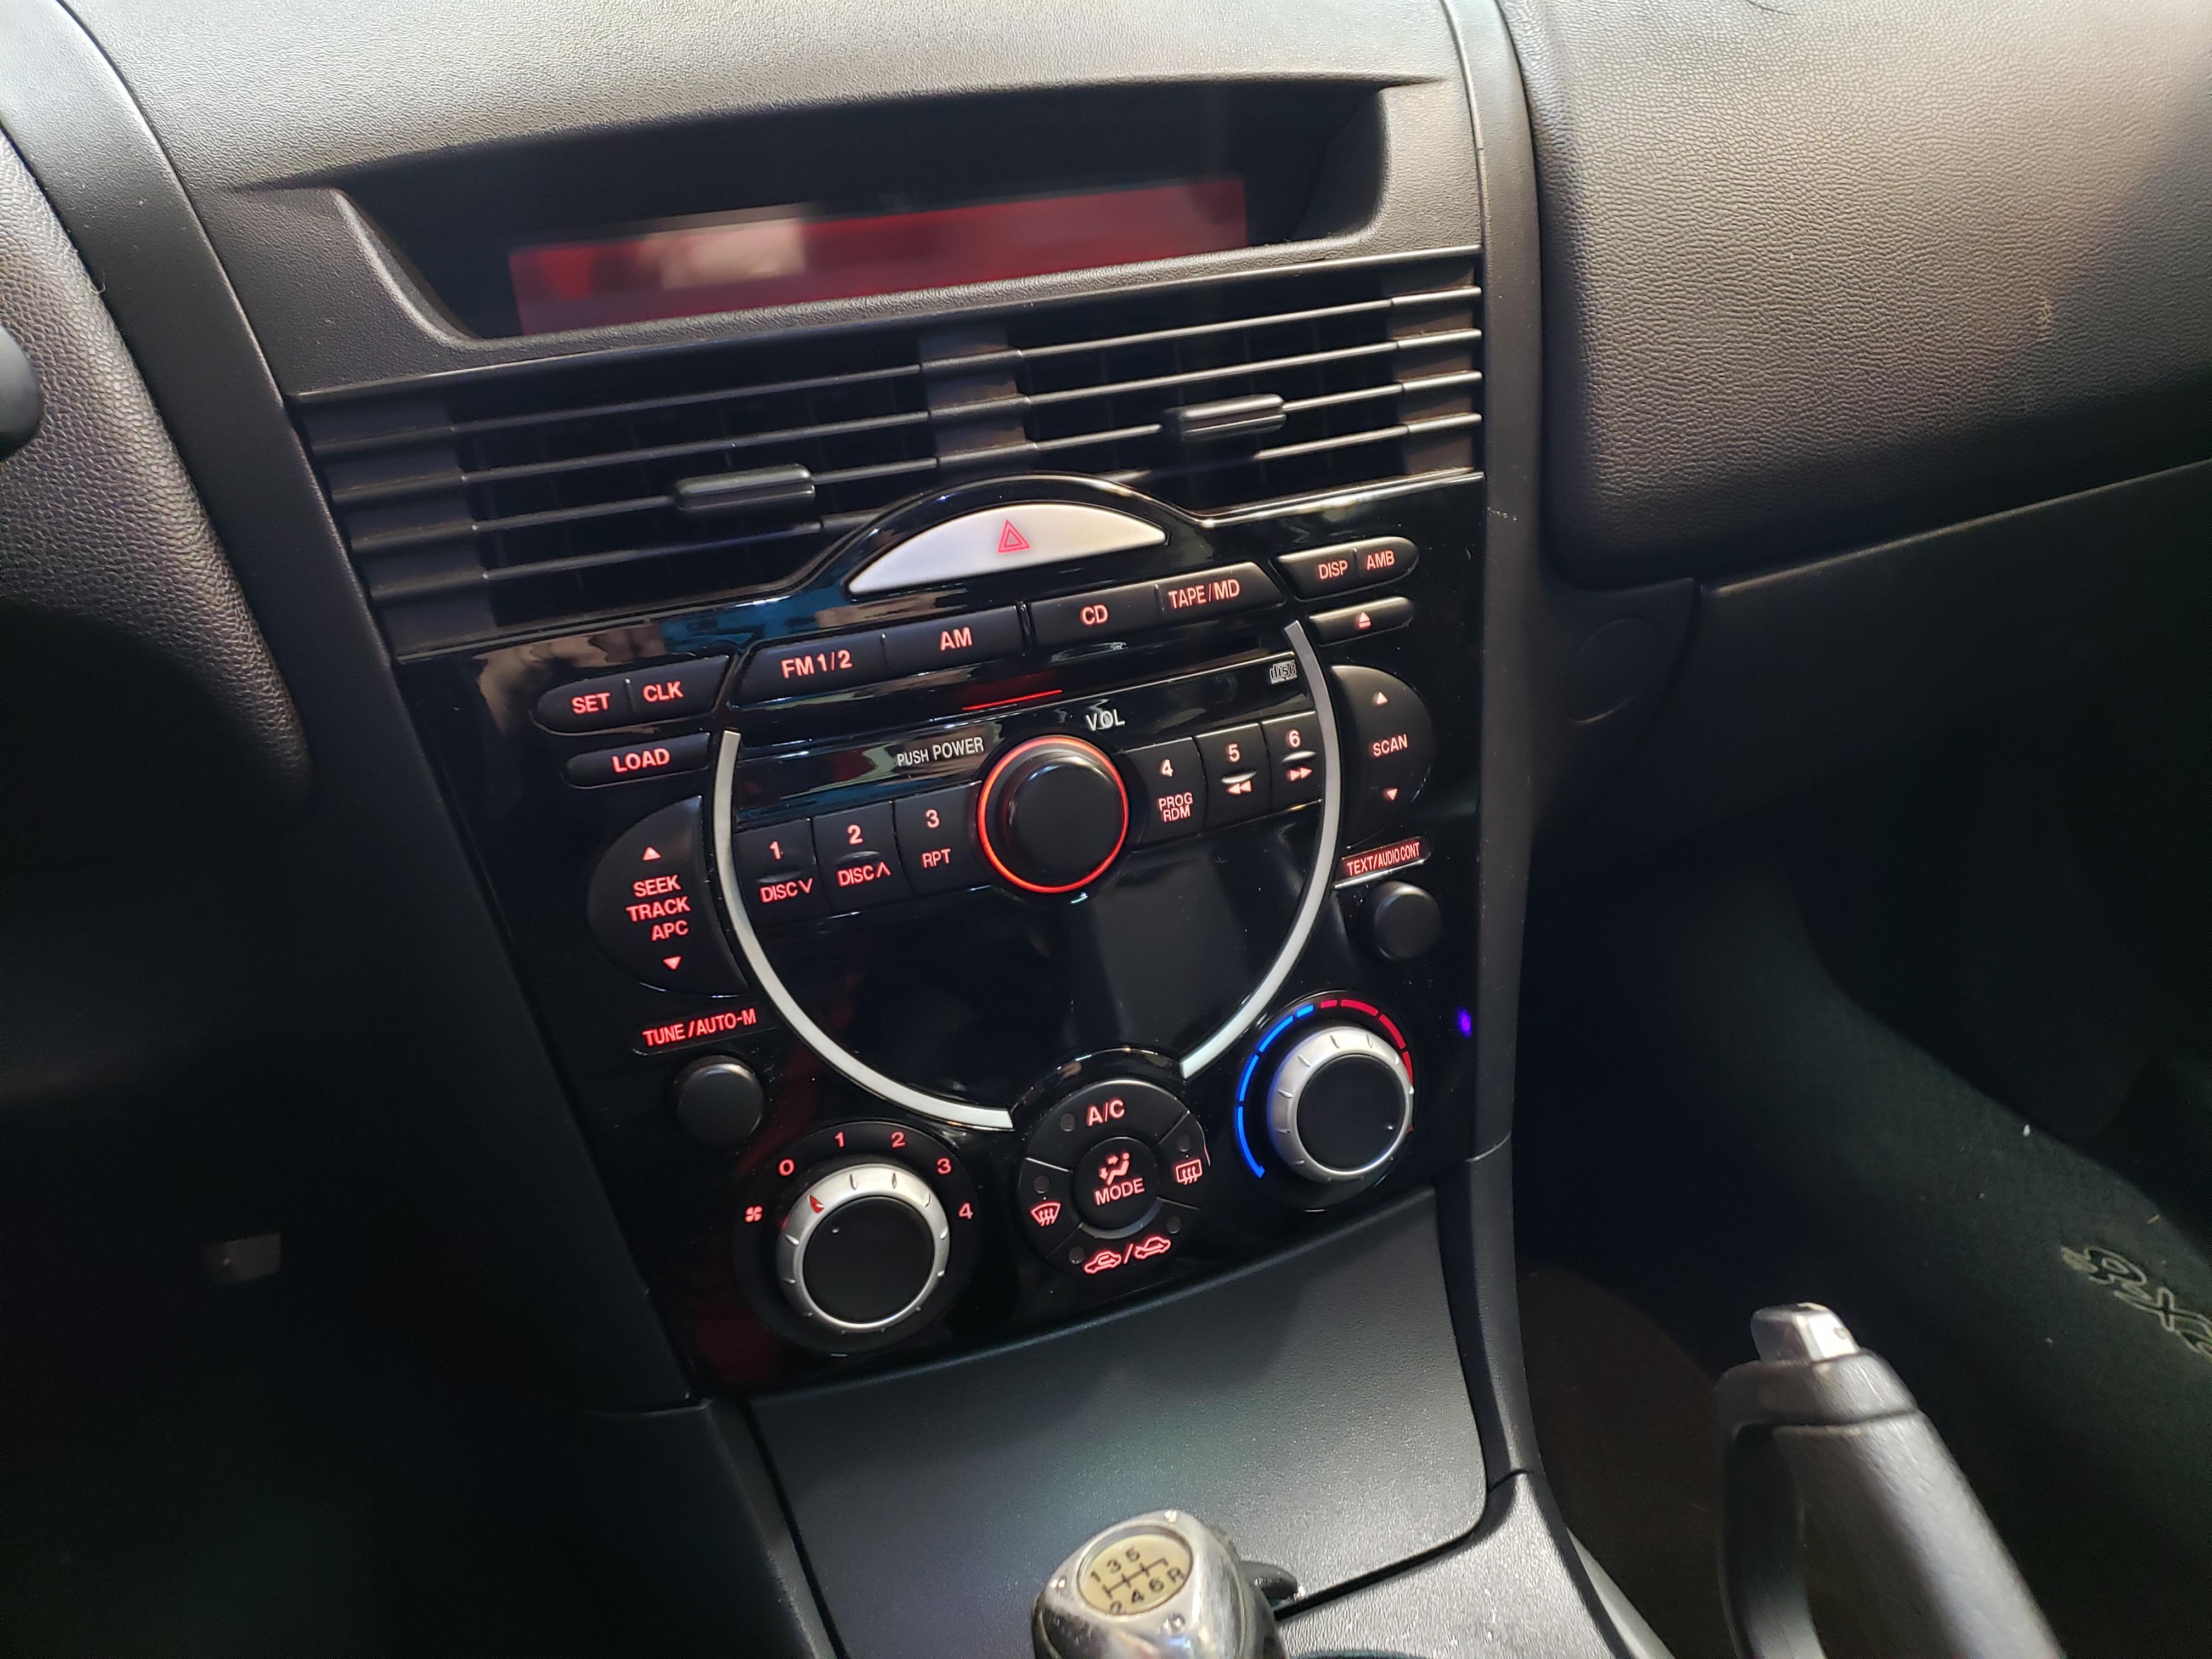
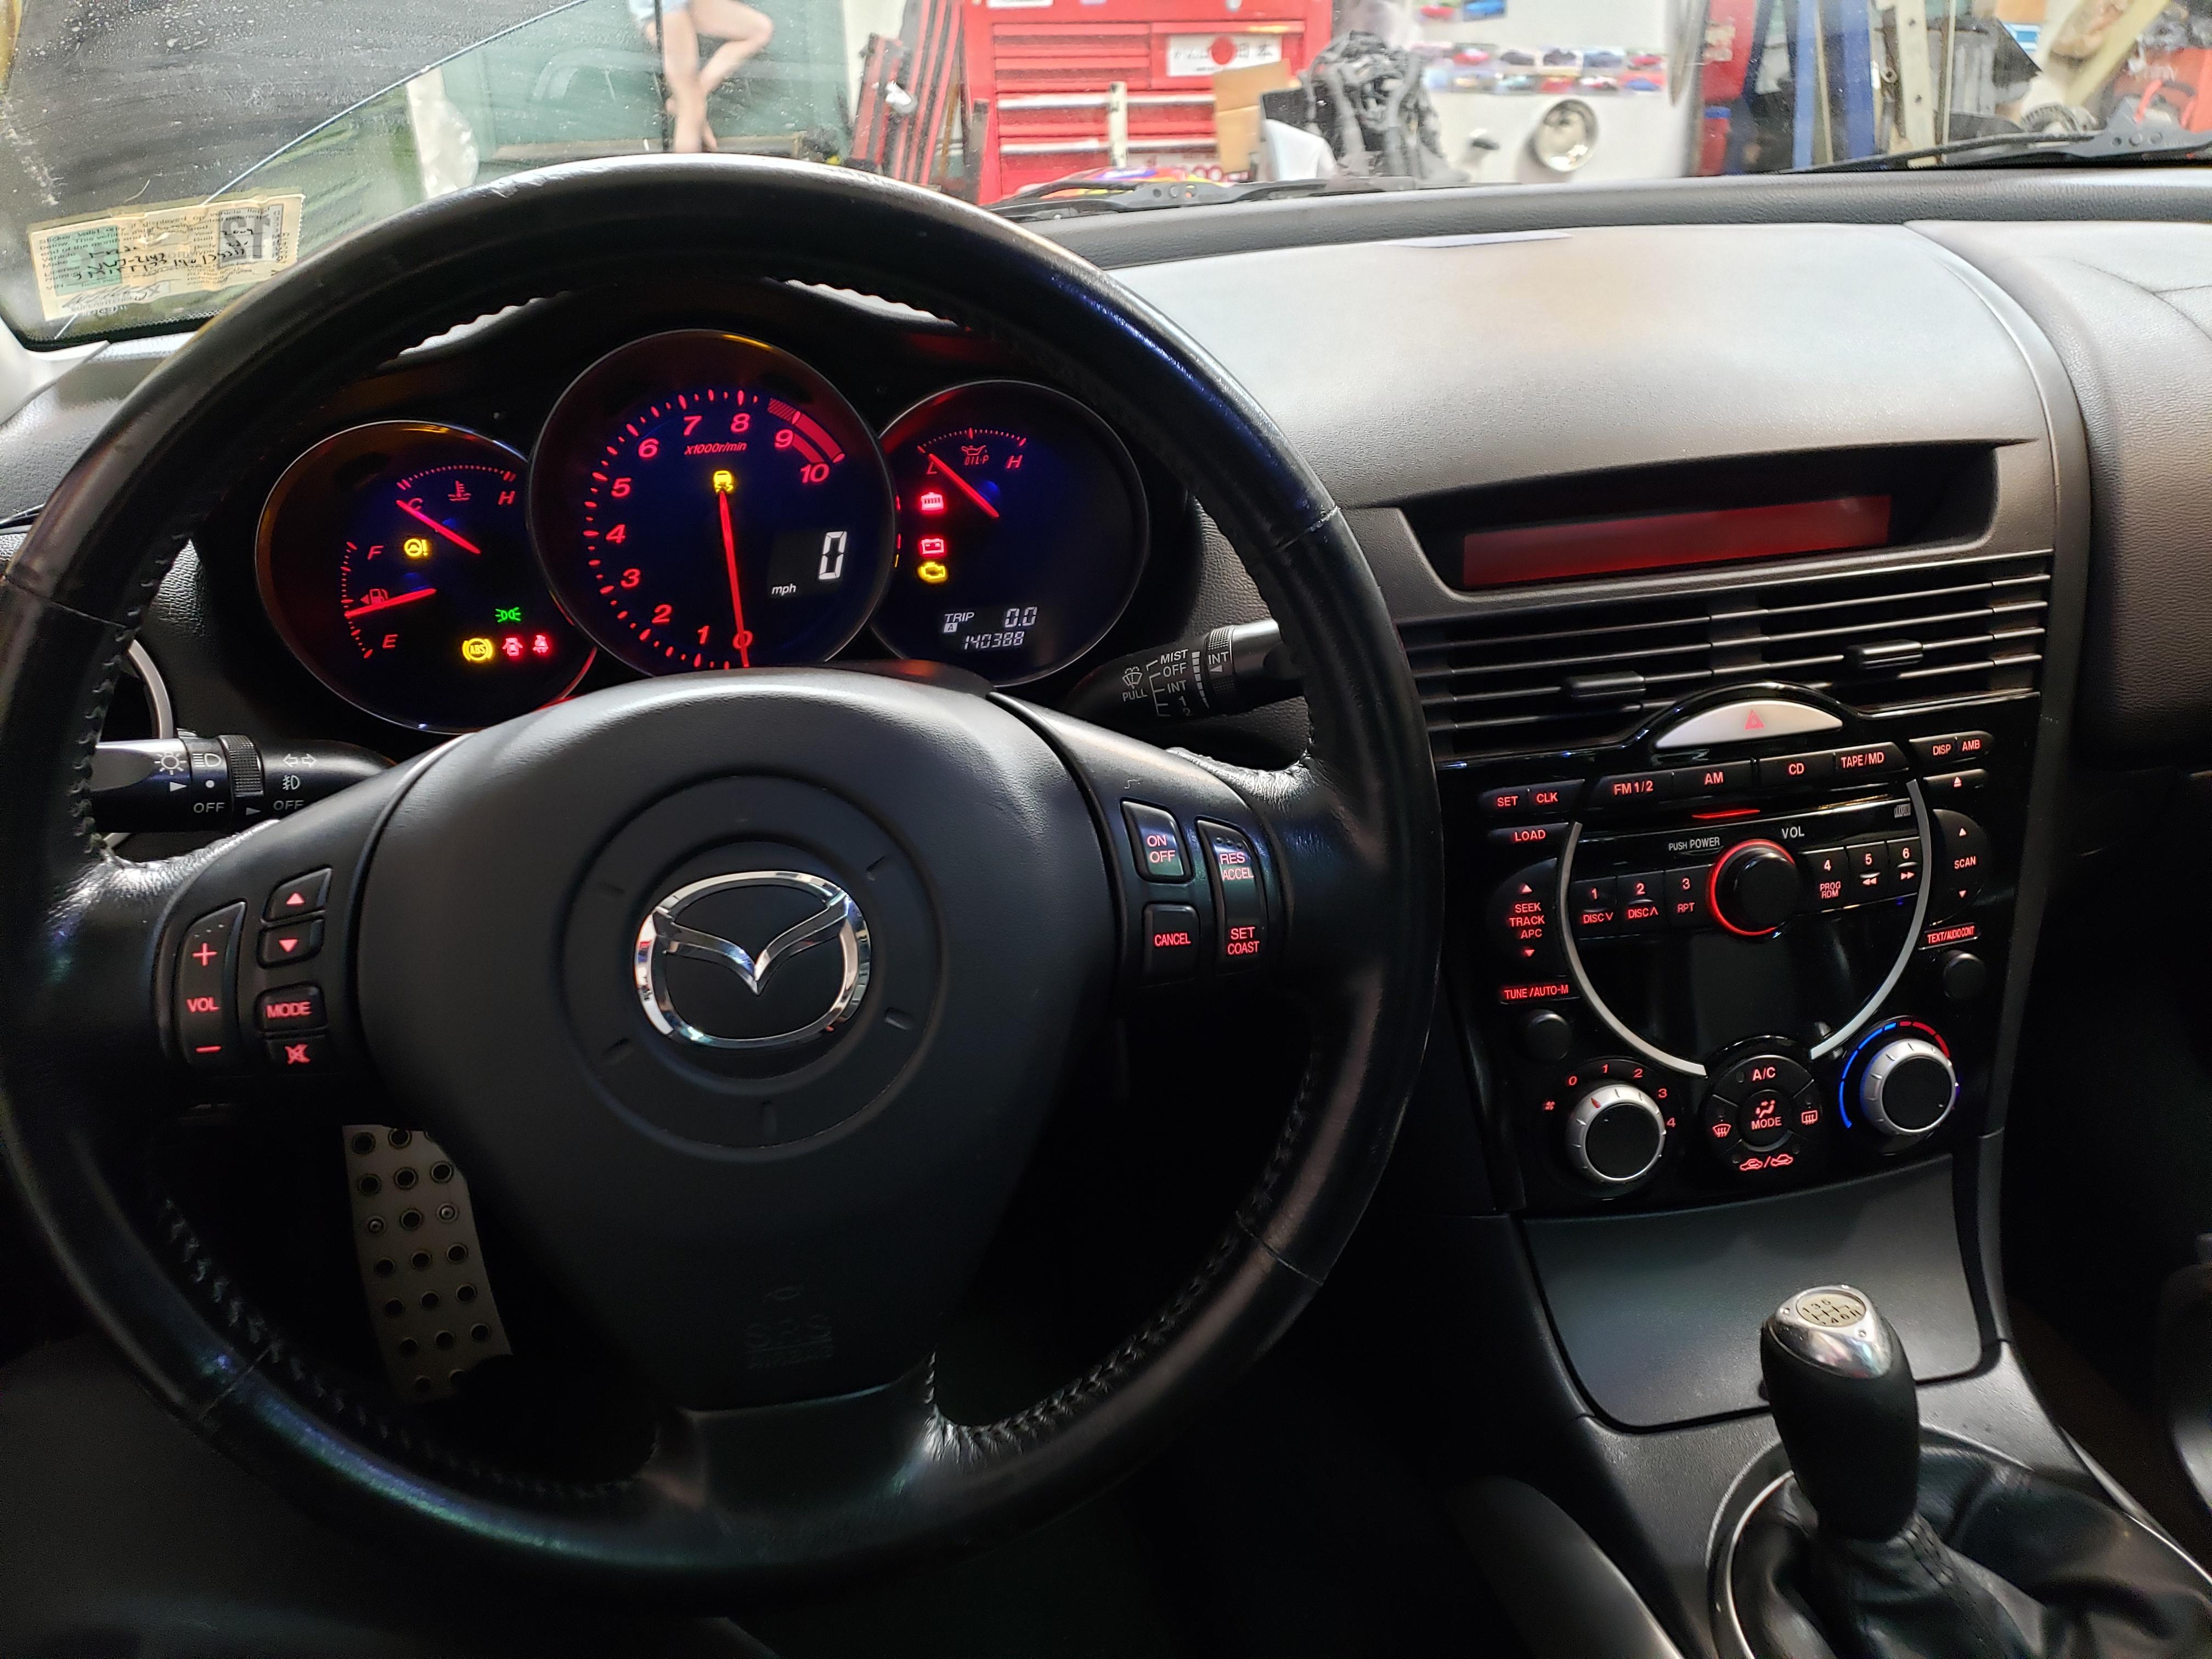
The next step is sorting out the non functioning radio and information display. Since they were inop previously, I replaced them with known good units and I have the same result. Mode selector controls are also out. This is the next area I'm focusing on. Once its up and running I will likely have to repair the Bose amps in the door speakers as I have never had a fully functioning Bose system in any of my 8's. They all seem to need at least one of the amps soldered in the door speakers.
 05-10-2021, 12:59 PM
#25
///// Upscale Zoom-Zoom

The next step is sorting out the non functioning radio and information display. Since they were inop previously, I replaced them with known good units and I have the same result. Mode selector controls are also out. This is the next area I'm focusing on. Once its up and running I will likely have to repair the Bose amps in the door speakers as I have never had a fully functioning Bose system in any of my 8's. They all seem to need at least one of the amps soldered in the door speakers.

