DIY: HID Projector Assembly Swap
 10-25-2013, 10:41 PM
#1

DIY: HID Projector Assembly Swap
Intro
One thing that many people do not know, is that there are significant differences between
a HID headlight assembly and a Halogen assembly. A lot of people decide to upgrade their
OEM Halogen systems to HID without considering these differences. The result is an HID
system that doesn't properly project the HID light. This poses a danger as the light's
projection may cause a glare to oncoming drivers as well as not properly light up the road.
The best practice is to replace your OEM projection assembly with one that is designed to
project HID lighting.
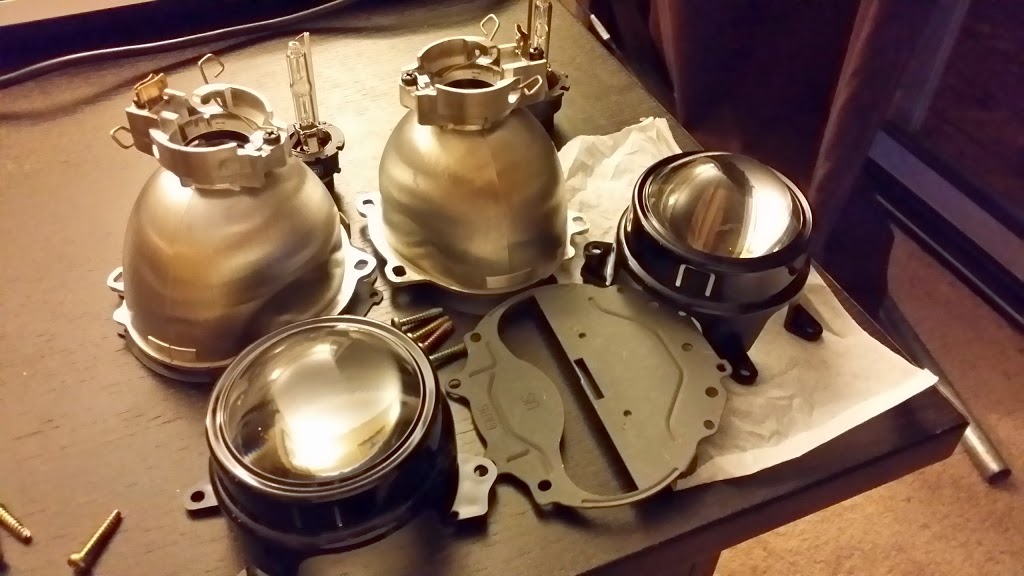
Donor Parts
To start the process, we must grab an assembly from an HID system. In this case, I purchased
a used headlight assembly from a 2004-2008 RX8. Because the first series and the second series
RX8 share the same projection components, this is a very cost effective solution. The assembly
simply consists of a HID projection bowl, HID projection lens, and HID projection cutoff sheild.
Headlight Disassembly
Disassembly of a headlight is a somewhat lengthy process that I wont go into great detail.
There are a ton of tutorials online that can go into detail, but the basic procedure is as follows: Simply preheat your oven to 225F. While the oven is preheating, you want to remove the screws and bulbs from the headlight assembly. Bake the headlights in the oven for 10 - 20
minutes. After the desired time, remove the headlights from the oven, and gently start to
pry open the headlights. Be aware that the headlight is going to be hot, so use some oven
mitts.
As the silicon starts to cool down, it will harden again, so you will need to reheat the
headlight again.
Part Differences

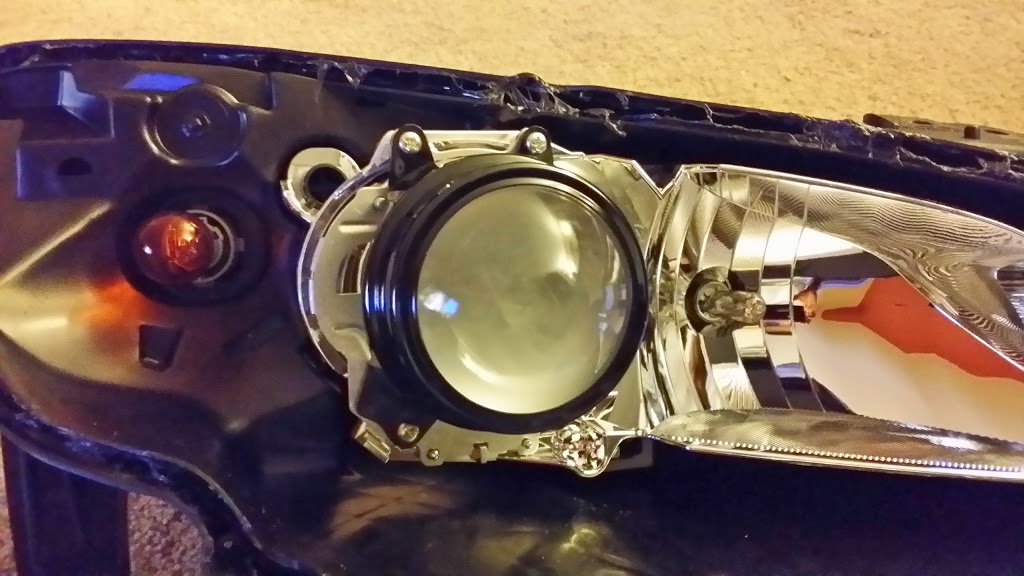
In the image above you can see the differences between the HID system on the left, and the
Halogen system found on the right.

One thing that many people do not know, is that there are significant differences between
a HID headlight assembly and a Halogen assembly. A lot of people decide to upgrade their
OEM Halogen systems to HID without considering these differences. The result is an HID
system that doesn't properly project the HID light. This poses a danger as the light's
projection may cause a glare to oncoming drivers as well as not properly light up the road.
The best practice is to replace your OEM projection assembly with one that is designed to
project HID lighting.
Donor Parts
To start the process, we must grab an assembly from an HID system. In this case, I purchased
a used headlight assembly from a 2004-2008 RX8. Because the first series and the second series
RX8 share the same projection components, this is a very cost effective solution. The assembly
simply consists of a HID projection bowl, HID projection lens, and HID projection cutoff sheild.
Headlight Disassembly
Disassembly of a headlight is a somewhat lengthy process that I wont go into great detail.
There are a ton of tutorials online that can go into detail, but the basic procedure is as follows: Simply preheat your oven to 225F. While the oven is preheating, you want to remove the screws and bulbs from the headlight assembly. Bake the headlights in the oven for 10 - 20
minutes. After the desired time, remove the headlights from the oven, and gently start to
pry open the headlights. Be aware that the headlight is going to be hot, so use some oven
mitts.
As the silicon starts to cool down, it will harden again, so you will need to reheat the
headlight again.
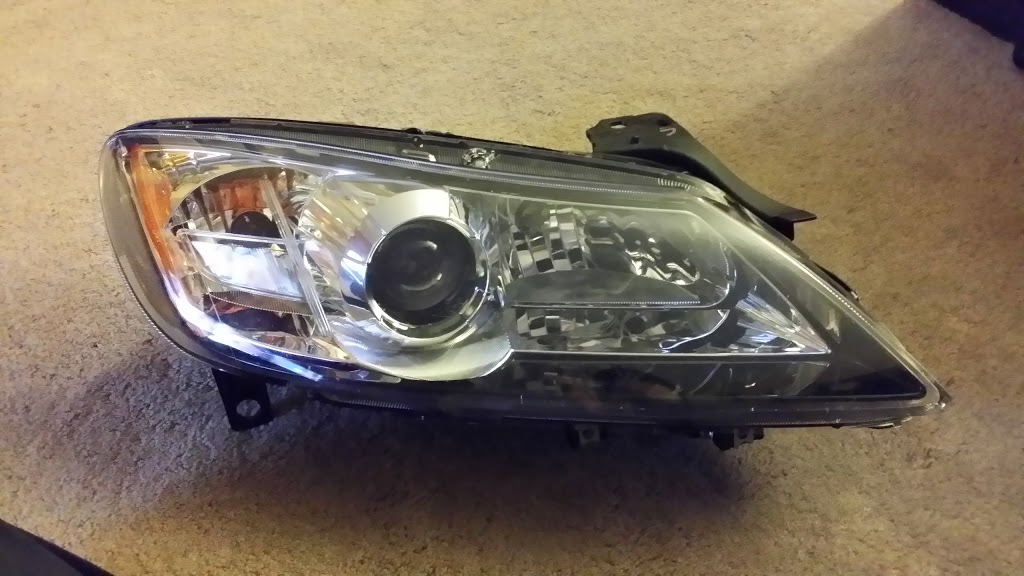
Part Differences
In the image above you can see the differences between the HID system on the left, and the
Halogen system found on the right.
 10-25-2013, 10:44 PM
#2
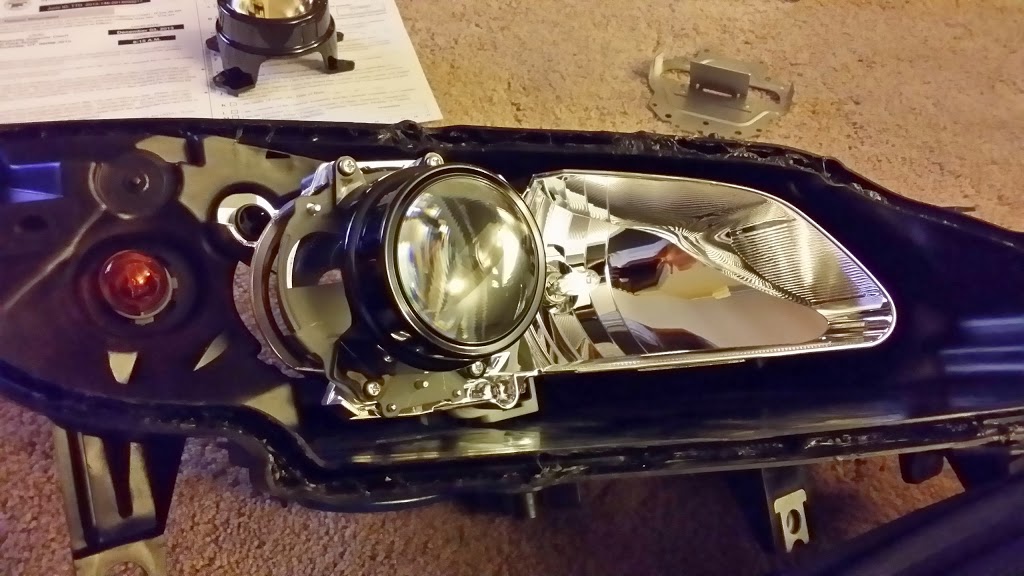
Take note of the two major differences here, the bowl and the cutoff shield. The HID bowl
is much more oval shaped, and the cutoff doesn't have a sharp rectangular cutout.
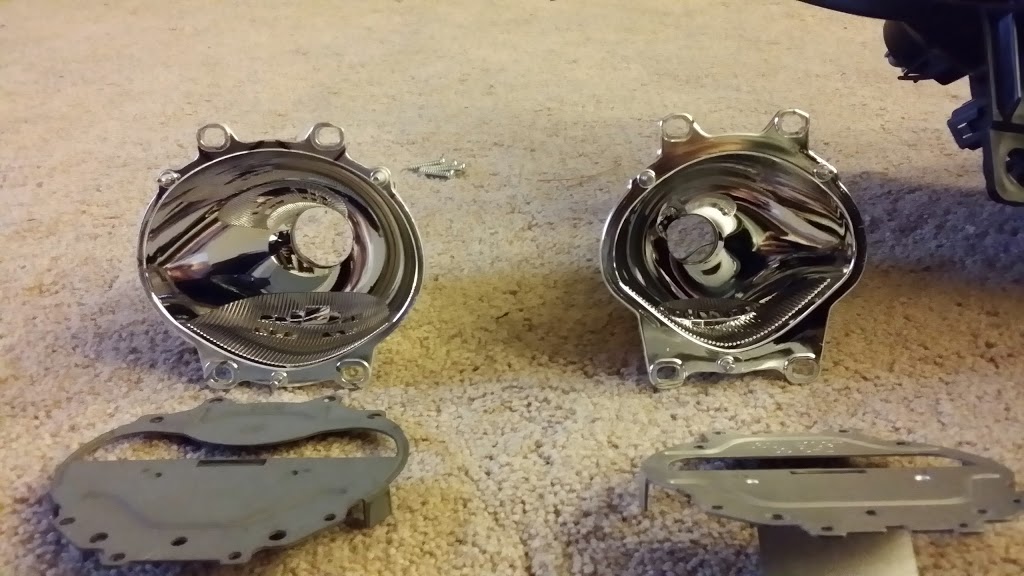
Projection Assembly Swap
Now that the headlight assembly is open, you will want to remove the four screws that hold
the lens and bowl in place.
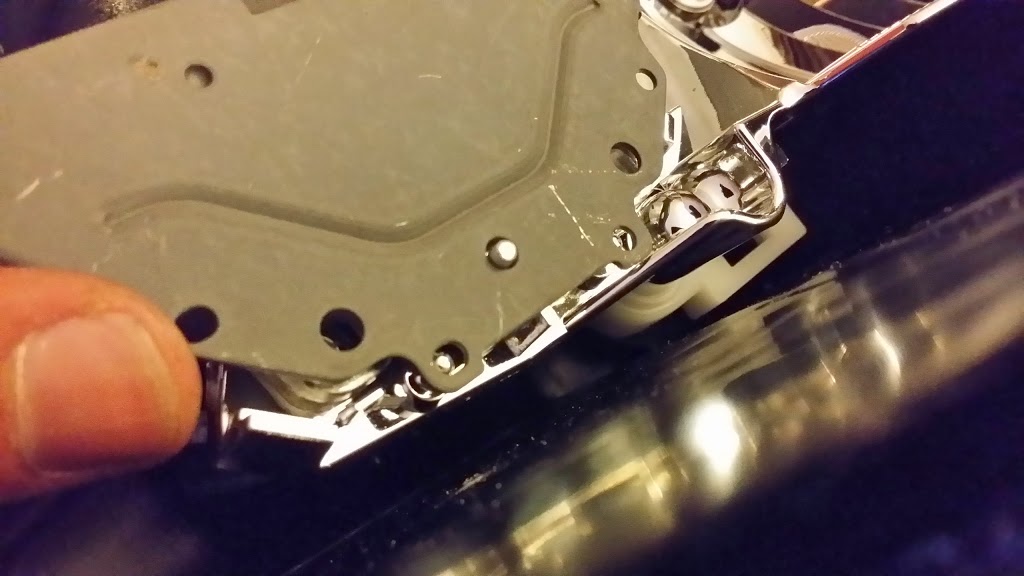
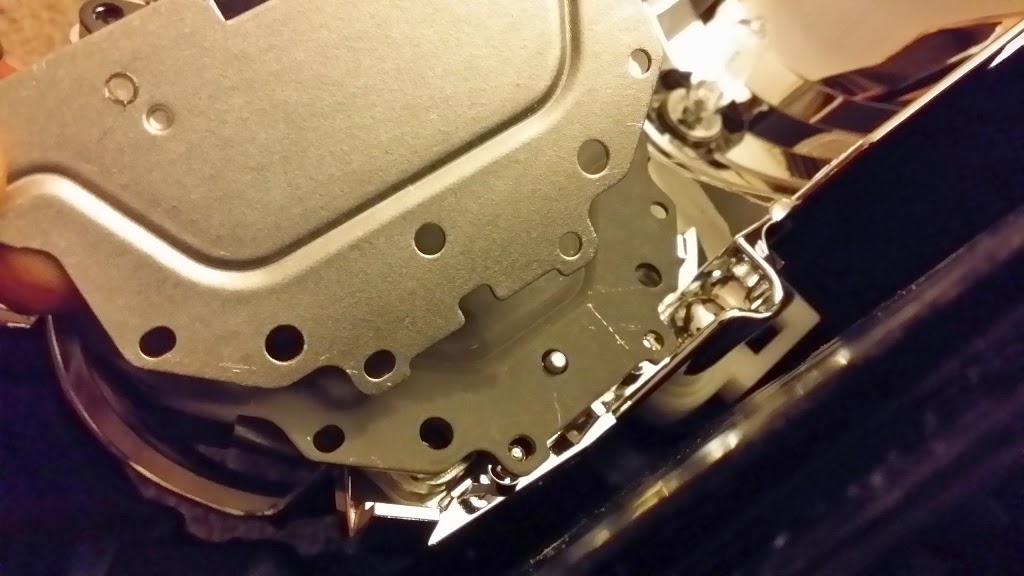
The next step is to replace the halogen components with their respective HID counterparts.
There is however one caveat that needs to be accounted for and that is the notching that
exists on the S2 headlight assembly. You can simply remedy this by cutting or grinding
the notch out.
is much more oval shaped, and the cutoff doesn't have a sharp rectangular cutout.
Projection Assembly Swap
Now that the headlight assembly is open, you will want to remove the four screws that hold
the lens and bowl in place.
The next step is to replace the halogen components with their respective HID counterparts.
There is however one caveat that needs to be accounted for and that is the notching that
exists on the S2 headlight assembly. You can simply remedy this by cutting or grinding
the notch out.
10-25-2013, 10:45 PM
#3
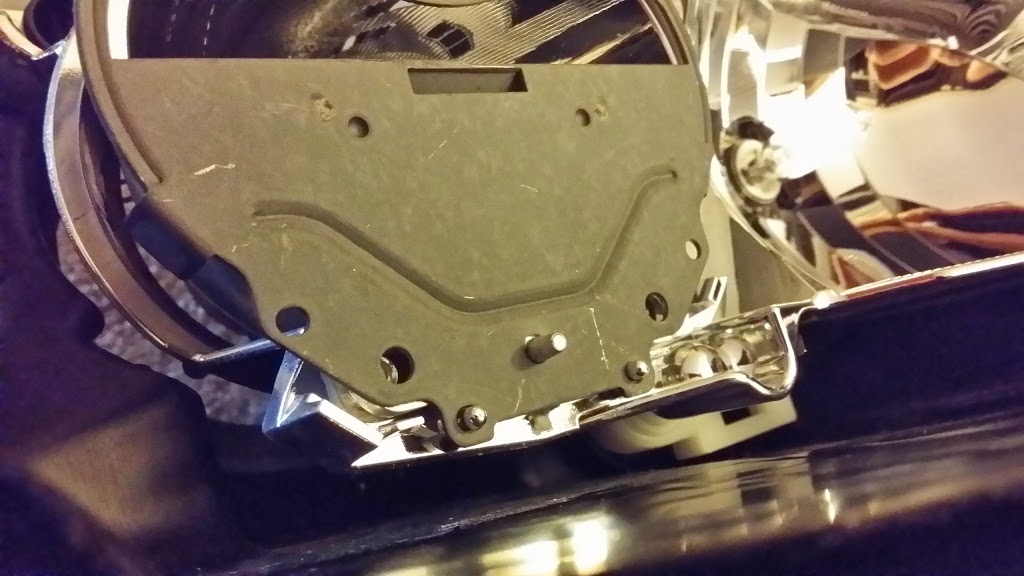
Once the notch is filed off and the cutoff shield can be seated without interference, install
the lens, and reuse the four screws.
Assembling the Headlight
To reassemble the headlight, you will need to place the headlight assembly back in the oven.
The purpose is to reheat the bonding agent so that you could reassemble the headlight. I personally do this in
a few steps where I head up the headlight, then gently place
the pieces together, reheat, then apply force to really get
the pieces nice and snug. Then reinstall the screws that hold
the assembly together, reheat, and make sure the screws are nice and tight.
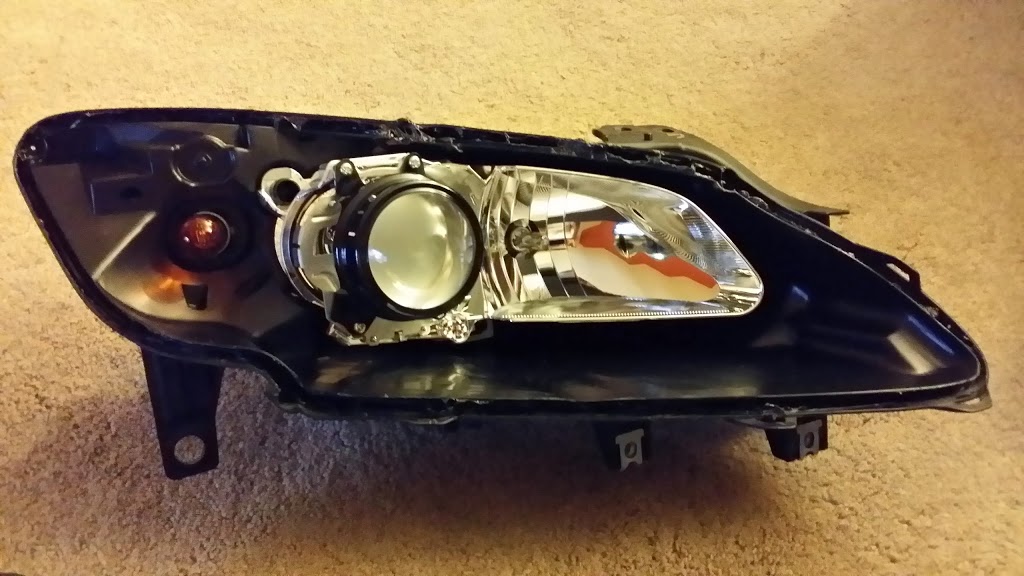
Results
The results of this swap is a nicely projected light with a sharp cutoff
and no stray light beams. In the picture below you can partially see the difference
between the Halogen light assembly with an HID light(left) and the HID assembly (right).
Here is a shot against a wall that shows the resulting light output
* Coming Soon *
the lens, and reuse the four screws.
Assembling the Headlight
To reassemble the headlight, you will need to place the headlight assembly back in the oven.
The purpose is to reheat the bonding agent so that you could reassemble the headlight. I personally do this in
a few steps where I head up the headlight, then gently place
the pieces together, reheat, then apply force to really get
the pieces nice and snug. Then reinstall the screws that hold
the assembly together, reheat, and make sure the screws are nice and tight.
Results
The results of this swap is a nicely projected light with a sharp cutoff
and no stray light beams. In the picture below you can partially see the difference
between the Halogen light assembly with an HID light(left) and the HID assembly (right).
Here is a shot against a wall that shows the resulting light output
* Coming Soon *


Thread
Thread Starter
Forum
Replies
Last Post
{WTB/WTT} WTB Right Undertray Riser and Guard
archon
RX-8 Parts For Sale/Wanted
3
10-01-2015 06:08 AM
jasonrxeight
RX-8's For Sale/Wanted
2
09-30-2015 01:53 PM