When you click on links to various merchants on this site and make a purchase, this can result in this site earning a commission. Affiliate programs and affiliations include, but are not limited to, the eBay Partner Network.
Awesome!lookin good so far! Lol I'm just starting to rebuild also, what's your total so far if you don't mind me asking?
You don't want to know, hahaha. Seriously, you don't.
If you need/want to rebuild it yourself the best way to go about it, in my opinion, would be to buy a remanufactured engine to break down and rebuild as you see fit. That's what I'll be doing if I ever do this again. It took three cores and lots of new parts for me to get what I was looking for.
Too hard to see from Pics, but the journals/e shaft bearings and oil control rings look a little 'dry', you are lubricating with engine oil?...be generous.
This has got me thinking and now I'm concerned enough that I didn't lube everything up enough, I'm considering breaking it down again to start over. I oiled the shaft lightly, otherwise I basically smeared vasoline on all the housing surfaces, rotors, bearings, and journals. The oil control rings were not splashed with some oil, that's what's getting to me. How paranoid should I be? Don't want to burn up those rings on the first startup...
This has got me thinking and now I'm concerned enough that I didn't lube everything up enough, I'm considering breaking it down again to start over. I oiled the shaft lightly, otherwise I basically smeared vasoline on all the housing surfaces, rotors, bearings, and journals. The oil control rings were not splashed with some oil, that's what's getting to me. How paranoid should I be? Don't want to burn up those rings on the first startup...
Look I am not trying to alarm you, just an observation.
Why are you putting vasoline on BEARINGS/Journal surfaces?...they don't normally run engines with vasoline in oil pan..(only reading what you have in this quote here).
Yes vasoline (minimal) is used on water jacket (housing) black and orange 'o rings', basically just to hold them there in Rotor Housings while assembly (for no other purpose).
The OIL Control Ring 'O rings' are normally hand assembled inside the OCR's with lots of engine oil (hand rubbed all over 8 o rings) not vasoline, before pressing the OCR's into Rotors, as I said vasoline does not run in oil galleries...does it.
Basically plenty of engine oil where engine oil runs when assembling, you should be using an "Oil Can" and squirt around when assembling.
Look it should be fine...
Take the OCR's (assembled) normally I would see liberal amounts (puddles of) ENGINE OIL between OCR's on rotor face as this is a dry area on side IRON contact when starting up for first time.
What assembly instructions are you using..
Don't use vasoline on metal to metal moving engine parts..
Basically I think I just plain forgot to add oil to those spots...I've been mostly the Mazdatrix DVD which they use mostly oil to lubricate everything during assembly whereas the Atkin's guys are the ones that smear vasoline on all surfaces like I did. They also squirt some oil on the OCR's and adjacent iron surfaces, thats what I skipped.
So in those photos, everywhere you marked on the rotors/OCR's there's a layer of vasoline. I was under the impression the vasoline serves as a good startup lube and will burn off as well.
The Mazdatrix guy mentioned several times to not use too much oil during assembly otherwise it'd reach the water seals, and then god knows what happens. This freaked me out too and made me use next to no oil as well.
I think I f'd up, so I'm not at all opposed to breaking this thing down and doing it right. I've got another O-ring kit on its way. If anything it'll be good practice. It wasn't until my second rotor housing/rotor that I really had a good method of applying the hylomar well and getting everything just right.
Lets say I didn't take it apart, and started it with just some vaseline on the OCR's, whats worst case? Doesn't oil get there almost immediately?
On first start up , Pull fuel pump fuse and ESS and crank engine over to prime oil . 2-3 ccs of oil into each rotor if in doubt ... that should do it should it not ?
On with the build! Gotta stop second guessing myself here. Can't wait to rebuild my second engine someday, there's gotta be 1001% less anxiety involved...
Stack housings, check! New rear stationary gear came with the rear main seal in place.
Flywheel lost a little weight since I took it off 2 years ago too. ACT flywheel w/ OEM mazda automatic CW
Last edited by Smutterbutter; 03-29-2015 at 02:30 PM.
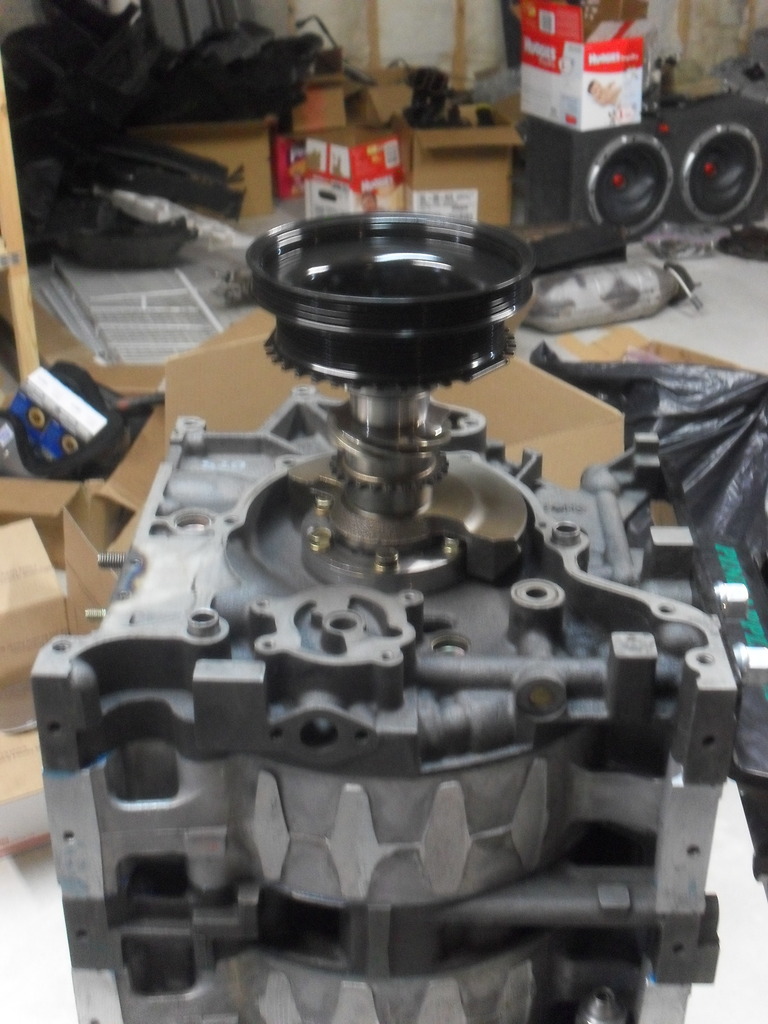
New oil pump. Must say I had a helluva time getting that gear to slide over the woodruff key in the oil pump. The key was very loose and would fall out with the slightest touch. Eventually had to use a pick to wedge the key in place as I lowered the drive gears and chain, not easy...
Gee those needle rollers look dry, sorry pics don't reveal, I do wish you well.
Did you read the factory (Mazda) engine manual?
Here is part of the .pdf manual on RE Assembly, see oil can and where to lube.
Oiled everything pretty well. I think I've just been posting pics in their pre-lubed state. Oiled up the new oil pump and every layer of the front stack.
Oiled everything pretty well. I think I've just been posting pics in their pre-lubed state. Oiled up the new oil pump and every layer of the front stack.
Good to see
Those needle roller bearings should never be run dry, they will chop out (cut out, wear out, break) very quickly as the small needle rollers spin very fast.
BTW, have not read entire thread, how many miles did the old REnny do?
Mine had 100k miles. None of the irons or housings from that car are part of the rebuild however. Actually very little of that engine other than some accessories are being re-used.
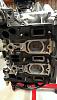
Need some help making sure I have all the studs right here. If I remember right the lower stud holes on the rotor housings go unused, the six large studs on the irons are for the header, the large upper stud on the front rotor housing is for the engine mount bracket. It's that large upper stud on the rear rotor housing that I can't seem to find a reason for its existence. Can somebody confirm whether or not I've got these right? Thanks
Yeah most likely they were both front rotor housings, that makes sense. So no large studs in rear rotor housing then. I took plenty of pics every step of the process but never got a good one with all the studs in because there were a few that had become one with their nuts...
Last edited by Smutterbutter; 04-02-2015 at 09:45 PM.
Btw.. Before you install and while the 'barrel' is in normal horizontal position squirt a mil of oil in each of 4 oil injector openings and a mil through each leading spark plug. Then hand turn fly wheel...
Front cover is on with the help of a little more hylomar, starting to really love that stuff, OEM metal front cover gasket and new front main seal too.
Upgrades so far:
Mazmart Oil pressure mod
Mazmart Thermostat
Mazmart Water Pump
Atkins Eshaft Pellet
Going with S2 oil filters, got a pair of Corksport modified banjo bolts I'll use for oil pressure/temp gauges
Primary Injectors back in. I broke one of the nipples coming of the fuel distributor spacer that gives vacuum to the oil injectors...Luckily I totally anticipated that and had a new one ready to go!! Just need to find some new vacuum tubing to replace the rock hard stuff on there now.
Had all six injectors spiffed up at DeutschWerks. The lower grommet fits but was about half the length of the OEM ones. I stuck to my "When in doubt, go OEM" mantra and put the larger ones on instead.
That white G6Y0-14-302-P1 is not an original S2 Oil Filter, but a locally sourced (USA) oil filter (for MNAO only) for a 1995 2.5 V6 GE Mazda 626...while it will work, I don't know it's rating.
N3R1-14-302 is the only S2 Oil Filter which is genuine from Japan, and the only filter still supplied by Mazda for all S2's, I just don't want the wrong info getting out there for anyone else.
BTW:Throw in a magnet inside the Oil Pan while you are at it?
Yeah, that Mazdaspeed website is so far off the mark when it comes to correct parts interpretation (on many listings).
From what I have read from others over the years who use it much of the Series 2 RX-8 parts iterations are not even listed or are said to be identical to Series 1, which is incorrect.
Plus some users think they know how to interpret OEM Mazda parts when they don't.
Anyway, if you wish I can find out more info, like flow rate and by pass rating of the G6Y0-14-302A Mazda 626 V6 Oil Filter..?
This is the correct OEM S2 Filter from Japan.
S2 Oil Filter By Pass rating is 20.3—26.1 PSI
S1 Oil Filter By Pass rating is 11.4—17.1 PSI
 03-26-2015, 10:00 AM