Jesse A's GReddy Turbo Build
 09-12-2010, 08:22 PM
#1
SPOOLN8
Thread Starter
iTrader: (1)

Join Date: Nov 2008
Location: Edmonton, Alberta, Canada
Posts: 2,225
Received 208 Likes
on
156 Posts
Jesse A's GReddy Turbo Build
Basic description of build:
- GReddy Rx8 Turbo Kit w/ fixes
- GReddy Front Strut Tower Brace
- GReddy PRofec B-Spec II Electronic Boost Controller
- GReddy SE 2.75" Catback Exhaust
- GReddy Feed Oil Filter Adapter
- HKS SSQV BOV
- Black Halo Racing 3" Resonated Midpipe
- Agency Power Underdriven Crank Pulley
- AEM UEGO AFR Gauge
- Revolution Fuel Pressure Gauge
- Autometer Mech. Boost Gauge
- Cobb AccessPORT with Custom Tuning by Brettus
- Catchcans.com Oil Catch Can
- Tein S-Tech Springs
- Koni Yellow Struts
- EBC Pads and Slotted Rotors
- Deatschwerks DW200 255lph Fuel Pump
- BHR Ignition Coils
- Authentic MS Front and Sides
- Enkei Kojin 18x9.5 +30mm w/ 255/35/R18 Rubber and a fender roll on all 4 corners
Turbo Build:
Okay so I finally started my turbo install today. I've got mostly all of the required stock components removed. All I need to do is remove the manifold and front O2 sensor. I am doing the build completely alone and this is the first turbo install I have ever done so please put up with some of the questions I may ask as I would like to get everything installed within the next 7 days (and I'm also in school so).
My first questions is, what size of wrench will fit the front O2 sensor (21mm?) and how did most people get at it? I'm assuming removing the manifold from the block will free up some room to get a wrench on it.
Secondly, kind of non turbo related but I noticed the threads for the tow hooks were inaccessable with the stock front bumper on. I was wondering what the deal with that is as they seem to be right behind the solid black part of the grill in the front bumper. Also I've read of people cutting the black mesh out to allow better airflow to the intercooler, what part of the mesh do you guys recommend cutting out?
Thirdly do most people keep the styrofoam piece under the front crash bar or do most turbo guys remove it? What is it's function?
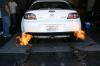
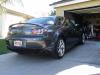
Here are some pics... I am going to get started on the removal of the manifold; Thanks in advance for any feedback.
- GReddy Rx8 Turbo Kit w/ fixes
- GReddy Front Strut Tower Brace
- GReddy PRofec B-Spec II Electronic Boost Controller
- GReddy SE 2.75" Catback Exhaust
- GReddy Feed Oil Filter Adapter
- HKS SSQV BOV
- Black Halo Racing 3" Resonated Midpipe
- Agency Power Underdriven Crank Pulley
- AEM UEGO AFR Gauge
- Revolution Fuel Pressure Gauge
- Autometer Mech. Boost Gauge
- Cobb AccessPORT with Custom Tuning by Brettus
- Catchcans.com Oil Catch Can
- Tein S-Tech Springs
- Koni Yellow Struts
- EBC Pads and Slotted Rotors
- Deatschwerks DW200 255lph Fuel Pump
- BHR Ignition Coils
- Authentic MS Front and Sides
- Enkei Kojin 18x9.5 +30mm w/ 255/35/R18 Rubber and a fender roll on all 4 corners
Turbo Build:
Okay so I finally started my turbo install today. I've got mostly all of the required stock components removed. All I need to do is remove the manifold and front O2 sensor. I am doing the build completely alone and this is the first turbo install I have ever done so please put up with some of the questions I may ask as I would like to get everything installed within the next 7 days (and I'm also in school so).
My first questions is, what size of wrench will fit the front O2 sensor (21mm?) and how did most people get at it? I'm assuming removing the manifold from the block will free up some room to get a wrench on it.
Secondly, kind of non turbo related but I noticed the threads for the tow hooks were inaccessable with the stock front bumper on. I was wondering what the deal with that is as they seem to be right behind the solid black part of the grill in the front bumper. Also I've read of people cutting the black mesh out to allow better airflow to the intercooler, what part of the mesh do you guys recommend cutting out?
Thirdly do most people keep the styrofoam piece under the front crash bar or do most turbo guys remove it? What is it's function?
Here are some pics... I am going to get started on the removal of the manifold; Thanks in advance for any feedback.
Last edited by RotaryMachineRx; 06-13-2017 at 08:53 AM.
 09-12-2010, 08:23 PM
#2
SPOOLN8
Thread Starter
iTrader: (1)
Join Date: Nov 2008
Location: Edmonton, Alberta, Canada
Posts: 2,225
Received 208 Likes
on
156 Posts
Okay to keep the build all in these first few pages I'll continue on from what I had removed in the first post...... Next I removed the right engine mount to get to the stock manifold (make sure to support the engine with a 2x4 and a jack). I had to purchase a set of offset wrenches which came in extremely handy not only with the manifold bolts but with the rest of the build as well. Once the manifold was removed I unclipped the front O2 sensor (connector loacted just on top of the transmission). This allowed for extremely easy access to the O2 sensor rather than trying to get on it from my back under the car.
Next I mounted the GReddy exhaust manifold and turbo. I fit the turbo up by the manifold... you don't need to bolt the manifold to the block at this point. You can easily rest the turbo on the frame in the wheel well. From here I attached the oil feed line to the turbo and reinstalled the wastegate actuator. After these were mounted I installed the manifold using the offset wrench and then mounted the turbo to the manifold.
Next I mounted the GReddy exhaust manifold and turbo. I fit the turbo up by the manifold... you don't need to bolt the manifold to the block at this point. You can easily rest the turbo on the frame in the wheel well. From here I attached the oil feed line to the turbo and reinstalled the wastegate actuator. After these were mounted I installed the manifold using the offset wrench and then mounted the turbo to the manifold.
Last edited by RotaryMachineRx; 10-21-2010 at 08:47 PM.
09-12-2010, 08:23 PM
#3
SPOOLN8
Thread Starter
iTrader: (1)
Join Date: Nov 2008
Location: Edmonton, Alberta, Canada
Posts: 2,225
Received 208 Likes
on
156 Posts
I then installed my GReddy oil filter adapter plate and connected the oil feed line to this rather than try and get to where the GReddy instructions say (100x's easier with the adapter).
I then when back under the car and with the front O2 sensor installed in the downpipe I bolted it to the the turbo outlet. After the downpipe was installed I ran the air pump hose over the turbo and bolted it to the downpipe. I had one issue here where the top bolt for the air hose sheared off. The bottom bolt was already tightly bolted down so I just left it withought the top one... but now with the turbo installed it may be causing a minor issue which I will talk about at the end of this thread rather than here.
After the downpipe install I attached my BHR midpipe with AEM UEGO AFR sensor.
Last edited by RotaryMachineRx; 10-21-2010 at 08:59 PM.
09-12-2010, 08:24 PM
#4
SPOOLN8
Thread Starter
iTrader: (1)
Join Date: Nov 2008
Location: Edmonton, Alberta, Canada
Posts: 2,225
Received 208 Likes
on
156 Posts
Next came all of the GReddy hard piping, intercooler and BOV.... this truely was a very simple task to install; just followed the GReddy instructions and had it done in no time.
After the hardpiping was installed I had a friend come and do the wiring of my gauges for me; Revolution fuel pressure gauge, AEM UEGO AFR and Autometer mechanical boost gauge. The fuel pressure gauge gets it's signal from the red quick connect up by the brake/clutch reservior; I used the Aeromotive fuel line adapter ordered from BHR which was very simple to install; except I had to buy a 7/16" hydraulic plug to fill one of the ends of the adapter as it has two sizes of fittings. The adapter didn't come with a plug for the obscenely large NPT fitting but Charles mentioned that he may start providing one with the adapter. As for the boost signal I tee'd into the BOV signal line between the air filter for the BOV, and the manifold. I plumbed into the manifold using the nipple where the VFAD used to plug into. AFR gauge was pretty straight forward.
After the hardpiping was installed I had a friend come and do the wiring of my gauges for me; Revolution fuel pressure gauge, AEM UEGO AFR and Autometer mechanical boost gauge. The fuel pressure gauge gets it's signal from the red quick connect up by the brake/clutch reservior; I used the Aeromotive fuel line adapter ordered from BHR which was very simple to install; except I had to buy a 7/16" hydraulic plug to fill one of the ends of the adapter as it has two sizes of fittings. The adapter didn't come with a plug for the obscenely large NPT fitting but Charles mentioned that he may start providing one with the adapter. As for the boost signal I tee'd into the BOV signal line between the air filter for the BOV, and the manifold. I plumbed into the manifold using the nipple where the VFAD used to plug into. AFR gauge was pretty straight forward.
Last edited by RotaryMachineRx; 09-22-2015 at 04:31 PM.
09-12-2010, 08:25 PM
#5
SPOOLN8
Thread Starter
iTrader: (1)
Join Date: Nov 2008
Location: Edmonton, Alberta, Canada
Posts: 2,225
Received 208 Likes
on
156 Posts
So that is pretty much my install in a nutshell. Please read through the rest of my thread to get the nitty gritty details. I am using Royal Purple 5w30 synthetic oil and am going to start possibly using some 2 stroke oil to start premixing 4oz per tank of gas.
After my first start up I checked for any leaks and found none. Things went relatively smooth minus a few delays on GReddy's part which put my build time from a week to a month (read through the thread to hear more about that).
http://www.youtube.com/watch?v=4LXgIgcYEVQ
After my first start up I checked for any leaks and found none. Things went relatively smooth minus a few delays on GReddy's part which put my build time from a week to a month (read through the thread to hear more about that).
http://www.youtube.com/watch?v=4LXgIgcYEVQ
Last edited by RotaryMachineRx; 10-21-2010 at 09:27 PM.
09-12-2010, 08:31 PM
#6
Okay so I finally started my turbo install today. I've got mostly all of the required stock components removed. All I need to do is remove the manifold and front O2 sensor. I am doing the build completely alone and this is the first turbo install I have ever done so please put up with some of the questions I may ask as I would like to get everything installed within the next 7 days (and I'm also in school so).
My first questions is, what size of wrench will fit the front O2 sensor (21mm?) and how did most people get at it? I'm assuming removing the manifold from the block will free up some room to get a wrench on it.
My first questions is, what size of wrench will fit the front O2 sensor (21mm?) and how did most people get at it? I'm assuming removing the manifold from the block will free up some room to get a wrench on it.
good luck with the project, you will needd a 22mm for the 02 sensor, i use a box end wrench to get to it..shouldnt need to remove the exhaust manifold to remove the 02 sensor.
09-12-2010, 08:35 PM
#7
SPOOLN8
Thread Starter
iTrader: (1)
Join Date: Nov 2008
Location: Edmonton, Alberta, Canada
Posts: 2,225
Received 208 Likes
on
156 Posts
Okay thanks Greg.... Any other odd ball tools you'd recommend me picking up? Right now I have a basic wrench and socket set. I am thinking about buying an angle wrench for the manifold as I read that that made it easier to get at all the bolts
 09-12-2010, 10:36 PM
#10
n0 pants

Join Date: Aug 2009
Location: NYC Metro
Posts: 268
Likes: 0
Received 0 Likes
on
0 Posts
Hmmm..I've uninstalled and installed a GReddy turbo over 4 or 5 times..
Besides having a full socket and wrench set, the only thing I could also recommend would be a 1/2" drive, some long extensions and some 1/2" sockets. The bolts on the exhaust manifold were a PITA the first time I did it, a 1/2" drive definately helped. A double thumbs up on the swivel socket, one bolt on the left hand side of the manifold I don't think you could get to without one (Next to the factory EGR)
PITA parts that I remember:
Tightening rear bolt on turbo outlet elbow (Closest to engine)
Oil feed line
The stupid retarded passenger side engine mount. I hate that thing.
Good luck to ya!
09-13-2010, 01:04 AM
#11
SPOOLN8
Thread Starter
iTrader: (1)
Join Date: Nov 2008
Location: Edmonton, Alberta, Canada
Posts: 2,225
Received 208 Likes
on
156 Posts
Okay thanks everyone, I didnt have too much trouble getting the right engine mount out, bracket and rubber, and I tried a 14mm wrench and a 14mm socket with a half in drive, I kept slipping off of the manifold bolts. I didnt want to strip them so I doused them in WD-40 for over night and tomorrow after I'm done class I'm going to buy an angle wrench for the manifold (picture attached), a 22mm wrench for the O2 sensor and a 1/2" swivel socket.
Also wouldn't mind your guys' opinions on these questions:
I noticed the threads for the tow hooks were inaccessable with the stock front bumper on. I was wondering what the deal with that is as they seem to be right behind the solid black part of the grill in the front bumper. (How do you get the tow hooks in without removing the bumper would be a more fitting questions to this. Do I need to cut through the solid black plastic to get to the two hook threads?). Also I've read of people cutting the black mesh out to allow better airflow to the intercooler, what part of the mesh do you guys recommend cutting out?
Thirdly do most people keep the styrofoam piece under the front crash bar or do most turbo guys remove it? What is it's function?
.
Thanks again guys!
09-13-2010, 06:08 PM
#12
Rex-Plode
Join Date: Nov 2008
Location: Miramar\Socal
Posts: 43
Likes: 0
Received 0 Likes
on
0 Posts
i just got done installing my like a week or two ago, the biggest problems i had was the 02 sensor that i stripped due to using a wrong size wrench, mounting the turbo and manifold, u will need to take them both apart and reassemble them once they are in the passenger side mount spot. also use a peice of wood when u jack up the engine, DO NOT jack up the motor from the oil pan. when installing the oil feed line i found it easiest to put the peices on one at a time (may seem kinda obvious, but at that time i just wanted to finish).
most of these things are easy fixes but when i went thru it alone i found myself constantly frustrated. try to have atleast 1 other person there and have music, music always makes things go easier.
EDIT: as for the plastic grill, its up to u if u wanna keep it in or not, if u do keep it in cut out the solid plastic and leave the mesh there, might need a dremel tool or some sort of exact cutting tool. i took off my foam because i dont have the grill in and it looks pretty weird with the foam showing
Last edited by RXPLODE; 09-13-2010 at 06:11 PM.
09-13-2010, 07:39 PM
#13
SPOOLN8
Thread Starter
iTrader: (1)
Join Date: Nov 2008
Location: Edmonton, Alberta, Canada
Posts: 2,225
Received 208 Likes
on
156 Posts
Okay so I went out and bought some tools... the swivel 3/8" socket and the offset 14mm wrench are key for getting that manifold off. So I got it off; but I have no clue how you guys get your front oxygen sensor off without detaching it and removing the entire manifold... either way I ended up stripping the O2 sensor as it twisted out about half way out then seized up on me... so I had to go buy a new one to go in the GReddy downpipe. Gonna start working on that rear oil feed line tonight, which is going to be an outright B*tch to reach. Any pointers for making that easier would be a bonus too!
Last edited by RotaryMachineRx; 09-22-2010 at 06:43 PM.
09-13-2010, 07:44 PM
#14
SPOOLN8
Thread Starter
iTrader: (1)
Join Date: Nov 2008
Location: Edmonton, Alberta, Canada
Posts: 2,225
Received 208 Likes
on
156 Posts
also use a peice of wood when u jack up the engine, DO NOT jack up the motor from the oil pan. when installing the oil feed line i found it easiest to put the peices on one at a time (may seem kinda obvious, but at that time i just wanted to finish).
EDIT: as for the plastic grill, its up to u if u wanna keep it in or not, if u do keep it in cut out the solid plastic and leave the mesh there, might need a dremel tool or some sort of exact cutting tool. i took off my foam because i dont have the grill in and it looks pretty weird with the foam showing
EDIT: as for the plastic grill, its up to u if u wanna keep it in or not, if u do keep it in cut out the solid plastic and leave the mesh there, might need a dremel tool or some sort of exact cutting tool. i took off my foam because i dont have the grill in and it looks pretty weird with the foam showing
as for putting the pieces on one at a time I'm not sure what you mean, like don't construct the T fitting prehand.. just mount in the first piece and go from there?
As for removing the foam, does it allow for the IC to be mounted any higher so there is less flow restriction to the Rad?
And I know what you mean about the Music... It's key, I'm working alone on my back and **** gets frustrating haha
09-13-2010, 08:51 PM
#15
SPOOLN8
Thread Starter
iTrader: (1)
Join Date: Nov 2008
Location: Edmonton, Alberta, Canada
Posts: 2,225
Received 208 Likes
on
156 Posts
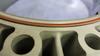
So just to clarify before I make a bad decision... This is the oil pressure switch where I fit the GReddy T fitting right? The bottom fitting with the steel hose coming out of it? The last 2 pics are from under the car.


 09-14-2010, 12:31 AM
#23
SPOOLN8
Thread Starter
iTrader: (1)
Join Date: Nov 2008
Location: Edmonton, Alberta, Canada
Posts: 2,225
Received 208 Likes
on
156 Posts
Oil Filter Adapter? The only thing really holding me back right now is this damn oil feed line haha, I have the manifold and turbo sitting up beside the engine but I didn't want to actually mount anything until I got the feed line over there. If this makes things a ton easier I thing I'm gonna have to go ahead and buy one... although shipping here may set me back a week or two. How does this work with the oil feed line, directly connect the braided line to the sandwich?
Thanks for all the help from everyone and I hope you guys can put up with all my questions as I have done alot of research but now that I am getting down to the dirty work, and I'm trying to sort through all the fittings and whatnot reality sets in as to how large of a job this is for one newb lol

Last edited by RotaryMachineRx; 09-14-2010 at 01:21 AM.
 09-14-2010, 02:30 AM
#25
SPOOLN8
Thread Starter
iTrader: (1)
Join Date: Nov 2008
Location: Edmonton, Alberta, Canada
Posts: 2,225
Received 208 Likes
on
156 Posts
Thanks Brett, a little hard to tell but looks like 3 'diamonds' from the top of the bumper are cut out. Do you know if they white styrofoam was removed from the front of this car or if the grill was cut to just mask it?