Samsung Galaxy Tablet 2 7.0 Installed in NaviHood - Completed!
 04-25-2013, 11:39 AM
#101

I wonder what would it take to mount a tablet somehow utilizing the Metra kit instead of getting the nav hood assembly.
I realize that the location is better using the nav hood, but the Metra would be a cheaper solution and wouldn't require having to mess with the open/close mechanism, Arduino or something similar and whatnot. On the other hand, the Metra itself seems like a potential PITA...
And of course it would probably require some more elaborate custom fabbing to hold the tablet securely in place, let alone finding the optimal tablet that fits. This route sounds a bit complicated... oh well.
 04-25-2013, 12:52 PM
#102
Plus One...
iTrader: (1)

Join Date: Apr 2011
Location: Frederick, MD
Posts: 501
Likes: 0
Received 0 Likes
on
0 Posts
I wonder what would it take to mount a tablet somehow utilizing the Metra kit instead of getting the nav hood assembly.
I realize that the location is better using the nav hood, but the Metra would be a cheaper solution and wouldn't require having to mess with the open/close mechanism, Arduino or something similar and whatnot. On the other hand, the Metra itself seems like a potential PITA...
And of course it would probably require some more elaborate custom fabbing to hold the tablet securely in place, let alone finding the optimal tablet that fits. This route sounds a bit complicated... oh well.
I realize that the location is better using the nav hood, but the Metra would be a cheaper solution and wouldn't require having to mess with the open/close mechanism, Arduino or something similar and whatnot. On the other hand, the Metra itself seems like a potential PITA...
And of course it would probably require some more elaborate custom fabbing to hold the tablet securely in place, let alone finding the optimal tablet that fits. This route sounds a bit complicated... oh well.
04-25-2013, 01:07 PM
#103
Registered

Join Date: Jan 2013
Location: Alliston Ontario
Posts: 146
Likes: 0
Received 0 Likes
on
0 Posts
i the galaxy tab in my car too. but its exposed and not tucked away.
Ive noticed on hot days if i leave the tablet on stand by (always plugged into constant power)
the tablet over heats ( even with sunroof cracked)
how do you guys turn off and turn on the tablet while its tucked away and not accessible.
I know theres an application to get a turn off button on the android screen. But to turn on?
heres my setup.

Last edited by Carbon Fibr; 04-25-2013 at 01:10 PM.
04-25-2013, 01:59 PM
#105
Registered
Join Date: Jan 2013
Location: Alliston Ontario
Posts: 146
Likes: 0
Received 0 Likes
on
0 Posts
04-25-2013, 05:10 PM
#106
Registered

Join Date: Apr 2013
Posts: 48
Likes: 0
Received 0 Likes
on
0 Posts
I did mine in about a day. If you can get the stock hood, and surround with all the electronics and motor in place, have a tablet and a dremel it's really not hard at all.
I did it slightly different, I cut out the motherboard to front panel connectors from an old computer and just used those on the pins on the back of the nav controller (was easier than soldering or any of that).
I did it slightly different, I cut out the motherboard to front panel connectors from an old computer and just used those on the pins on the back of the nav controller (was easier than soldering or any of that).
It's really not much harder than putting a aftermarket radio into a car. You will need to understand basic wiring diagrams, how to solder, and how to use a dremel.
It took me about 3 months start to finish for this project, but that included getting the hood, which took awhile to find. About 3 weeks for the stupid "L" shaped headphone jack to come in from china, and probably a week of me not wanting to give up the tablet to the car.
It took me about 3 months start to finish for this project, but that included getting the hood, which took awhile to find. About 3 weeks for the stupid "L" shaped headphone jack to come in from china, and probably a week of me not wanting to give up the tablet to the car.
04-26-2013, 05:02 AM
#107

I soldered 5 wires on the back of the hood (+12v, acc, ground, and 2 to light up the buttons).
I drilled a small hole (the size of your average reset button) at the top of the hood to access the power button via toothpick.
Tablet is not accessible once installed, well unless you remove the hood and disassemble it.
Mine only charges with the key.
I drilled a small hole (the size of your average reset button) at the top of the hood to access the power button via toothpick.
Tablet is not accessible once installed, well unless you remove the hood and disassemble it.
Mine only charges with the key.
 04-27-2013, 02:58 AM
#110
Retarded Spark Plug
Join Date: Jan 2013
Location: The Netherlands
Posts: 12
Likes: 0
Received 0 Likes
on
0 Posts
Press the option "Enable Anti Aliasing" 6 times and your license problem is gone.
I've contacted the developer (who also changed the orientation for "sensor based" as mine is build in "upside down").
I made a custom screen like the 787B...:-)

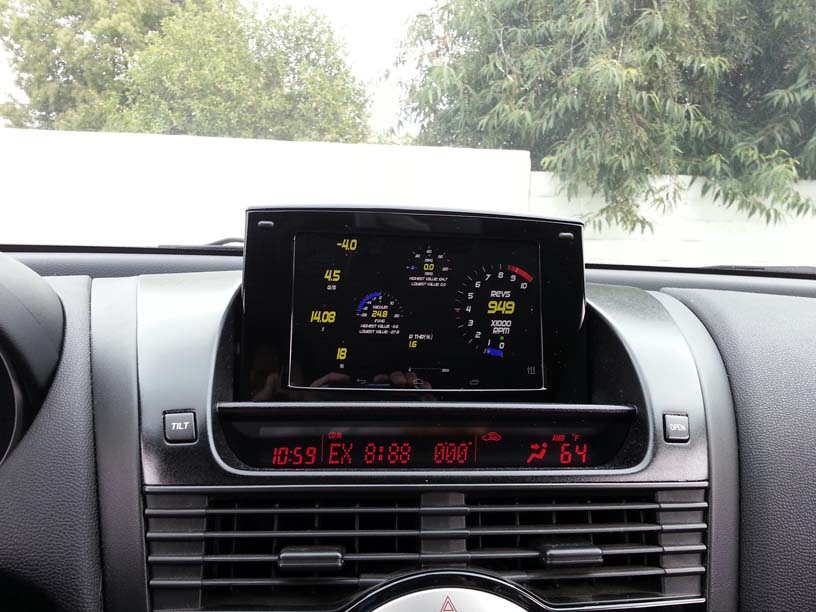
Here are the settings for the gear indicator, which works like a charme btw! :-)
@2000rpm in km/h: 1st 15, 2nd 24, 3rd 34, 4th 45, 5th 56, 6th 65.
Grtz Dee.
I've contacted the developer (who also changed the orientation for "sensor based" as mine is build in "upside down").
I made a custom screen like the 787B...:-)
Here are the settings for the gear indicator, which works like a charme btw! :-)
@2000rpm in km/h: 1st 15, 2nd 24, 3rd 34, 4th 45, 5th 56, 6th 65.
Grtz Dee.
Last edited by Rennis; 04-27-2013 at 03:04 AM. Reason: sure
05-16-2013, 10:04 PM
#111

Just recently finished the install of the nexus 7 in the navigation housing. Works using the pogo pins for power and audio so no wires are connected to it. It is removable if I leave the screws for the lid off. Had to do quite a bit of cutting and trimming with the top and bottom of the nav screen opening because of the tablet's display aspect ratio.
Tablet is automated with tasker tasks to shutdown after display has been off for a certain time and fastboot adjusted to auto boot when power is supplied.
The screen will turn off when the nav housing closes and turn on when opened using the magnetic sensor of the tablet.
Tablet is automated with tasker tasks to shutdown after display has been off for a certain time and fastboot adjusted to auto boot when power is supplied.
The screen will turn off when the nav housing closes and turn on when opened using the magnetic sensor of the tablet.
05-18-2013, 07:02 PM
#113
Plus One...
iTrader: (1)
Join Date: Apr 2011
Location: Frederick, MD
Posts: 501
Likes: 0
Received 0 Likes
on
0 Posts
Did you paint the face of the Nav hood gloss black? Do you have a picture of it further away?
Just recently finished the install of the nexus 7 in the navigation housing. Works using the pogo pins for power and audio so no wires are connected to it. It is removable if I leave the screws for the lid off. Had to do quite a bit of cutting and trimming with the top and bottom of the nav screen opening because of the tablet's display aspect ratio.
Tablet is automated with tasker tasks to shutdown after display has been off for a certain time and fastboot adjusted to auto boot when power is supplied.
The screen will turn off when the nav housing closes and turn on when opened using the magnetic sensor of the tablet.
Tablet is automated with tasker tasks to shutdown after display has been off for a certain time and fastboot adjusted to auto boot when power is supplied.
The screen will turn off when the nav housing closes and turn on when opened using the magnetic sensor of the tablet.
05-18-2013, 07:33 PM
#114
You gonna eat that?
iTrader: (1)

Hi all,
I would like to do something like this, but I'm afraid to try it because I am not very adept at any kind of electrical work.
Does anyone have an opinion on the degree of difficulty for this project?
I would much rather pay someone who knows what they are doing to do it for me, as I don't want to screw anything up.
I was wondering if a shop that installs stereos & alarms could do it.
Thanks for any input on this.
05-18-2013, 08:02 PM
#115
Plus One...
iTrader: (1)
Join Date: Apr 2011
Location: Frederick, MD
Posts: 501
Likes: 0
Received 0 Likes
on
0 Posts
I guess I will have to take a video of mine tonight since everyone is posting them
It really isn't that hard if you have any electronic / technical inclination.
Hi all,
I would like to do something like this, but I'm afraid to try it because I am not very adept at any kind of electrical work.
Does anyone have an opinion on the degree of difficulty for this project?
I would much rather pay someone who knows what they are doing to do it for me, as I don't want to screw anything up.
I was wondering if a shop that installs stereos & alarms could do it.
Thanks for any input on this.
I would like to do something like this, but I'm afraid to try it because I am not very adept at any kind of electrical work.
Does anyone have an opinion on the degree of difficulty for this project?
I would much rather pay someone who knows what they are doing to do it for me, as I don't want to screw anything up.
I was wondering if a shop that installs stereos & alarms could do it.
Thanks for any input on this.
05-18-2013, 08:13 PM
#116
You gonna eat that?
iTrader: (1)
I have very little Tech/elect. skills.
I think I'll ask around town if I can find someone.
05-18-2013, 09:11 PM
#118
You gonna eat that?
iTrader: (1)
I have never used it since I bought it in July.
I have the dongle & Torque app, but I don't like having my phone in my field of view.
I really think that popup hood would be cool with the Torque.
Do you know if you can use it to stream music too?
Thanks for the input.
05-28-2013, 05:40 PM
#120
Plus One...
iTrader: (1)
Join Date: Apr 2011
Location: Frederick, MD
Posts: 501
Likes: 0
Received 0 Likes
on
0 Posts
Well I'm starting to get the battery overheating/can't charge thing now too... I was thinking about drilling a hole down into the a/c tube below and putting a tube or something to funnel air into the hood... any thoughts on whether that might work? Anyone else have any solutions for this?
07-21-2013, 09:26 AM
#122
Registered

Join Date: Oct 2010
Location: Aussie in London
Posts: 10
Likes: 0
Received 0 Likes
on
0 Posts
Hi all.. first post in here and unfortunately it's because Ive hit a snag.
First off, massive big ups to 1.3 Litters of Furry and everyone else that has contributed input.. What an absolutely brilliant idea!
I've taken snaps of my install with the intention to do a DIY. However here's the issue.
I've put it together however the issue lies here. The open and tilt buttons no longer work. I must manually lift the hood.
Now it is wired in.I know this as when i hit the "open" button it shuts. It also shuts when the ingition is removed as it was when standard.
Can anyone pass on any advice? i have read that the motor for the tilt mechanism has a sensor however it appeared when i took it out to examine that all was well visibly on that front.
07-21-2013, 09:31 AM
#123
Registered
Join Date: Oct 2010
Location: Aussie in London
Posts: 10
Likes: 0
Received 0 Likes
on
0 Posts
Secondly.. to all those that may be adverse to cutting the hole in the side of the navi hood because the samsung charger does not fit...word of advice.... DON'T!
There is no need to have the wire come out the side as i found out AFTER i cut the hole to suit.
The Samsung plug is bulked up with plastic. If you remove this cover from the samsung charge plug (carefully break it away) you can pass the wire back at 90 degrees and it fits in snugly.
Atleast i now have a ventilation hole..hmm
07-21-2013, 09:40 AM
#124
Registered
Join Date: Oct 2010
Location: Aussie in London
Posts: 10
Likes: 0
Received 0 Likes
on
0 Posts
oh and since i'm here..
i purchased the "monster" cable for the 90 degree 3.5mm jack off ebay. works a treat. however what i have discovered that unlike the previous mods that involved an earth and live for both left and right input wires the monster cable infact only runs 3.
whats even more baffling on first inspection is that the wires themselves are simple encased in the plastic wire touching. ?!?!
turns out that the green and red wires are infact coated in enamel giving them the colour and insulation they require to operate.
it's a right beaaatch to remove the enamel as if you supply heat for too long it will remove the enamel further down the line rendering it useless..
you need to give it high heat to burn the enamel off but not for too long.
Get your hands on a "jet" lighter or butane blow torch to remove. give it enough heat till it glows and then you can supply solder (however being so bloody fiddly it's no easy task)
07-21-2013, 10:06 AM
#125
Hi all.. first post in here and unfortunately it's because Ive hit a snag.
First off, massive big ups to 1.3 Litters of Furry and everyone else that has contributed input.. What an absolutely brilliant idea!
I've taken snaps of my install with the intention to do a DIY. However here's the issue.
I've put it together however the issue lies here. The open and tilt buttons no longer work. I must manually lift the hood.
Now it is wired in.I know this as when i hit the "open" button it shuts. It also shuts when the ingition is removed as it was when standard.
Can anyone pass on any advice? i have read that the motor for the tilt mechanism has a sensor however it appeared when i took it out to examine that all was well visibly on that front.
First off, massive big ups to 1.3 Litters of Furry and everyone else that has contributed input.. What an absolutely brilliant idea!
I've taken snaps of my install with the intention to do a DIY. However here's the issue.
I've put it together however the issue lies here. The open and tilt buttons no longer work. I must manually lift the hood.
Now it is wired in.I know this as when i hit the "open" button it shuts. It also shuts when the ingition is removed as it was when standard.
Can anyone pass on any advice? i have read that the motor for the tilt mechanism has a sensor however it appeared when i took it out to examine that all was well visibly on that front.
Edit* BTW I'm talking about the black gear with the white mark on it. not the white gears in the hood itself.
Last edited by 1.3_LittersOfFurry; 07-21-2013 at 10:16 AM.