DIY: Stainless Steel Brake Lines/ Replacing Brake Lines
 01-17-2011, 06:10 PM
#1

DIY: Stainless Steel Brake Lines/ Replacing Brake Lines
READ ALL INSRUCTIONS BEFORE STARTING PROJECT!!!
How to Bleed a Brake System. Recommended if you have never done it: https://www.rx8club.com/showthread.p...89#post3851589
Time to completion is 1-3 hours depending on skill level.
This removes the spongy feeling in the brakes. Over time and with heat the rubber hoses start to flex diminishing braking capacity. This restores those properties and the strength in the braking system. It also is a good chance to remove any bad fluid from the system. Do not use DOT5 fluid on ABS systems.
I recommend that this project be a weekend project done in coordination with others. I recommend these are done in this order:
Brake Caliper Painting (If you plan on it):https://www.rx8club.com/rx-8-discussion-3/brake-caliper-painting-205503/
Performance Break Pads
Stainless Steel Clutch Line:https://www.rx8club.com/series-i-do-yourself-forum-73/diy-stainless-steel-clutch-line-clutch-bleeding-210174/
Stainless Steel Brake Lines
If you have painted calipers never allow brake fluid to touch the paint. It will destroy your paint.
The photo album for these images can be found here:http://s151.photobucket.com/albums/s...Brake%20Lines/
This is an image of the old vs new front lines(simpler is better right):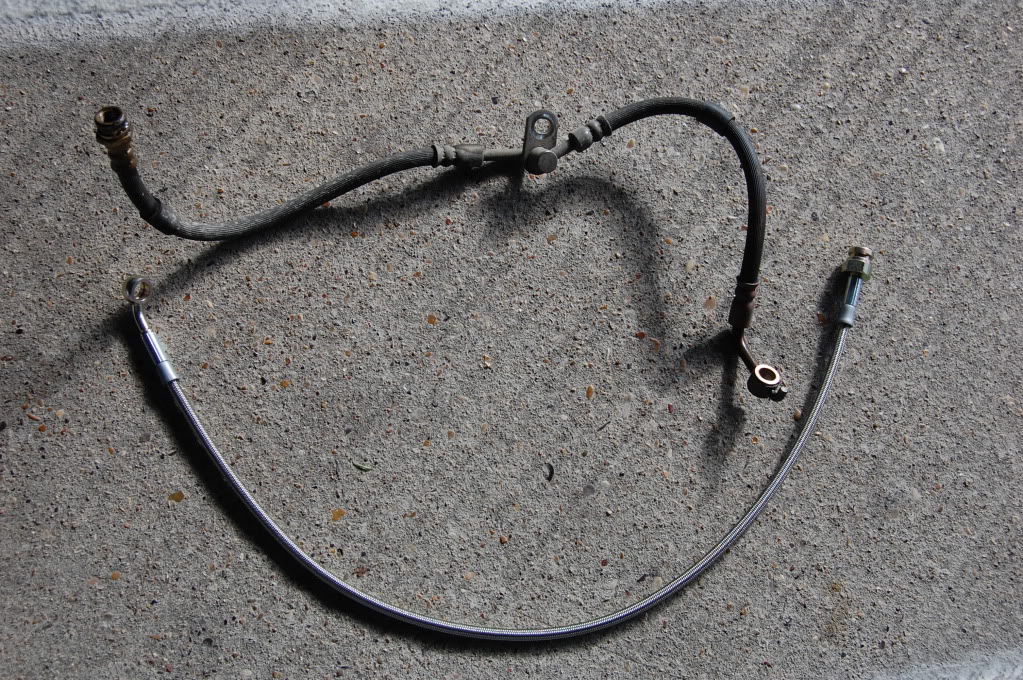
Step 1: As always you will need to make sure you have the correct parts. You can use any brake line kit, but for warranty reasons and fitment reasons I recommend you use the Mazda Speed Kit # 0000-03-8201: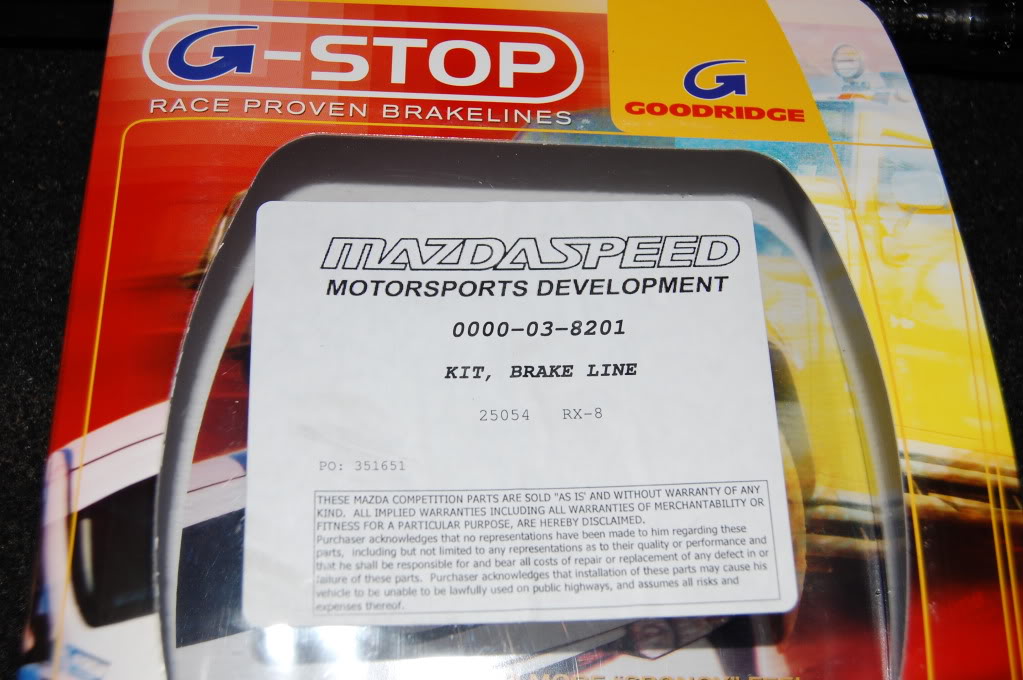
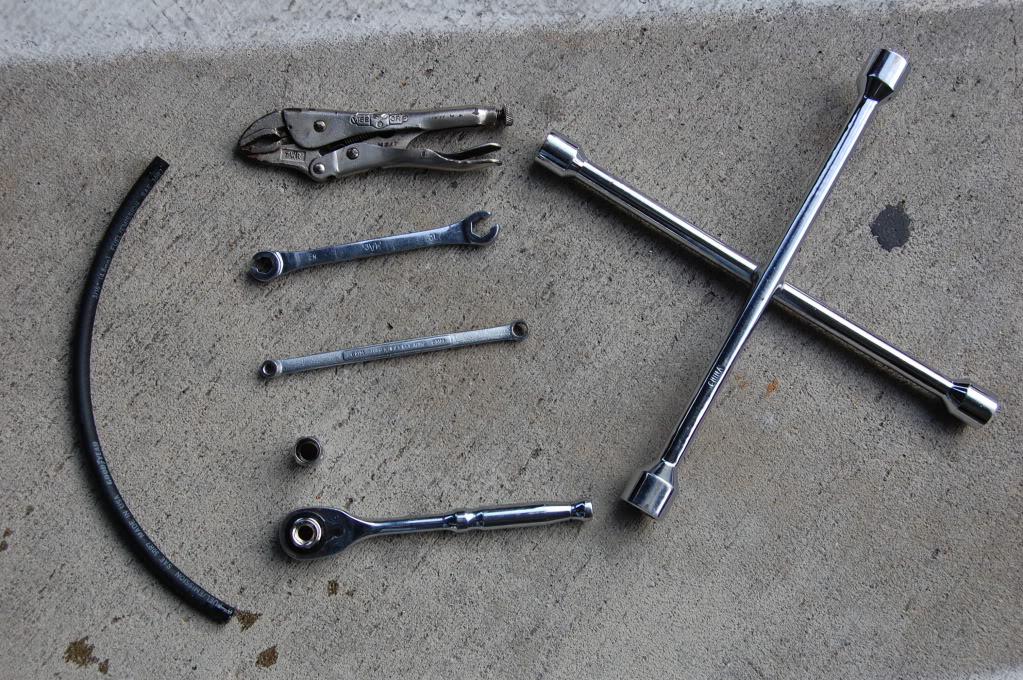
Step 2: Make sure you have all the proper tools. The tools you need will be:
This job should only be completed using line wrenches. Do not substitute an open end wrench for a line wrench.
1. 4 way with a 21mm end.
2. 10mm and 12mm Line wrench
3. 8mm/10mm brake bleeding wrench. Either a combo like I have or individuals
4. Ratchet with 12mm and 14mm sockets
5. Vice Grips
6. 3/16th vacuum or fuel line for bleeding
7. Portable Drill
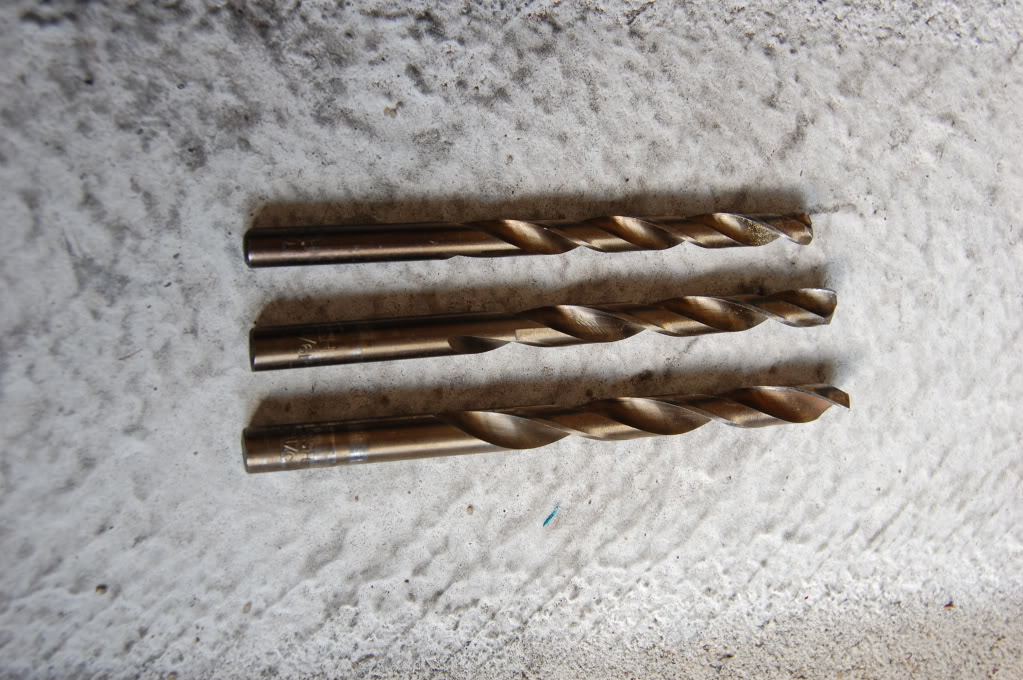
8. 17/64th 19/64th and 5/16th drill bits
9. Dot 4 Brake fluid 32 oz bottle.
10. Torque wrench with 21mm socket.
Step 3: Make sure you have all the proper parts. Two long, and two short stainless brake lines. Also 8 washers, 4 bolts, and 2 brackets. The two short lines are for the rear, the two long lines are from the front.
This is the order the washers go on the new lines: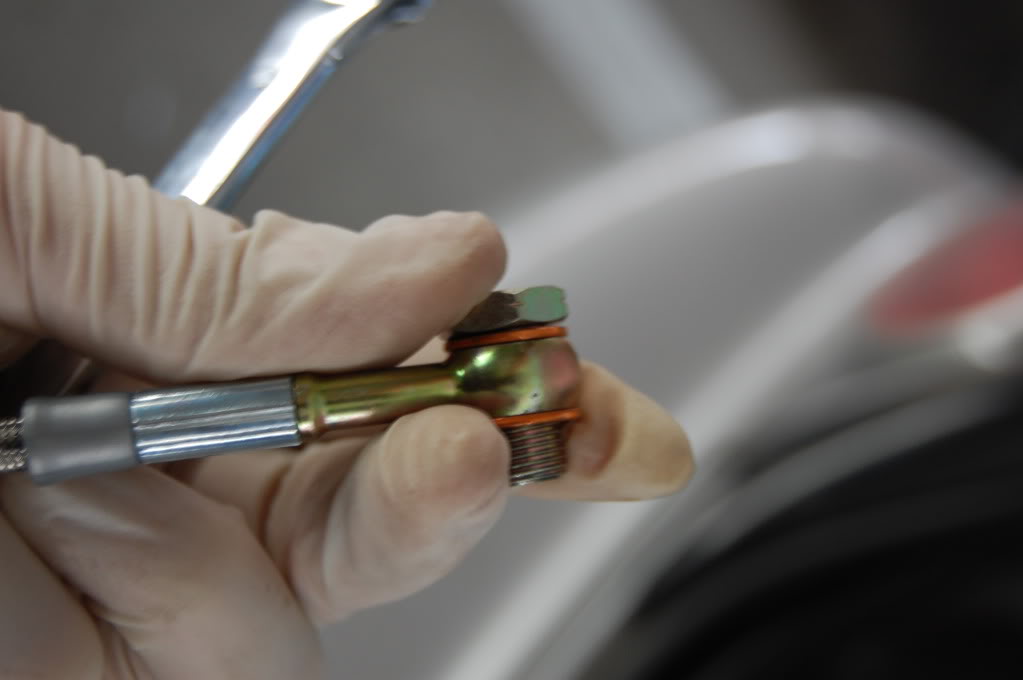
This is a photo of the old and new lines side by side:
On the end of the brake lines you will see that they are specifically shaped to fit into the holding bracket. Here is a photo of that shape. They will only fit in one way so make sure you have the left and right sides properly separated. This is important to make sure you don't twist the lines to hard: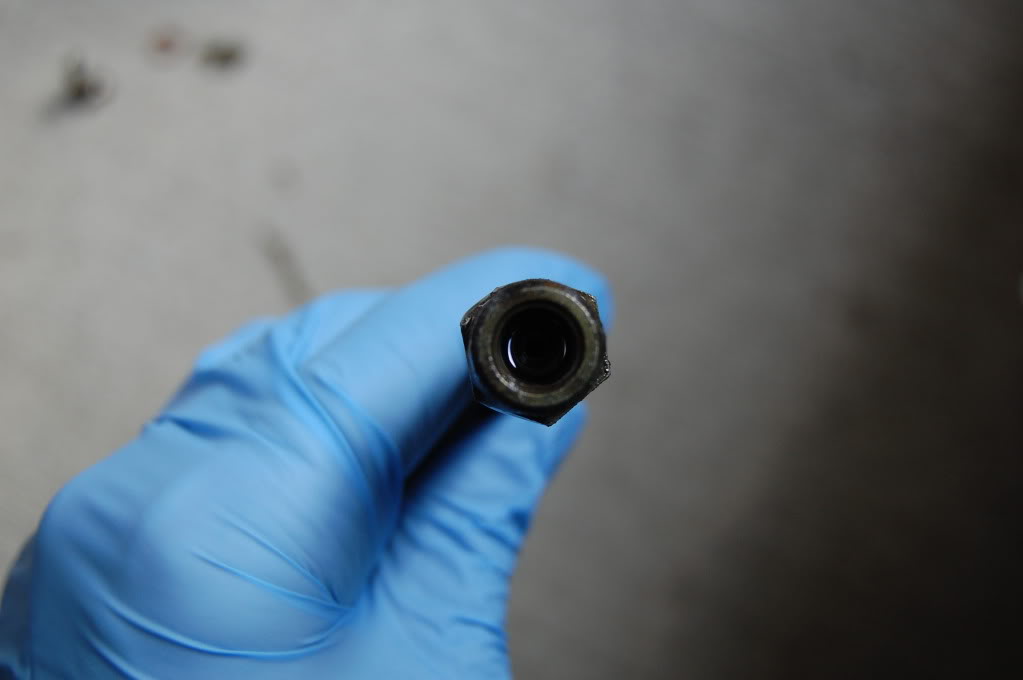
Step 4: You will remove the brake lines in this order. Right Rear, Left Rear, Right Front, Left Front. First thing you will do is top off the brake fluid. Its ok to over fill it at this point since you will be bleeding the system. Go ahead and replace the cap, its not necessary to block it off the cap has a rubber diaphragm in it to prevent fluid loss.
Rear Brakes:
Locate the Brake Lines before starting the project
This is a photo of before you start: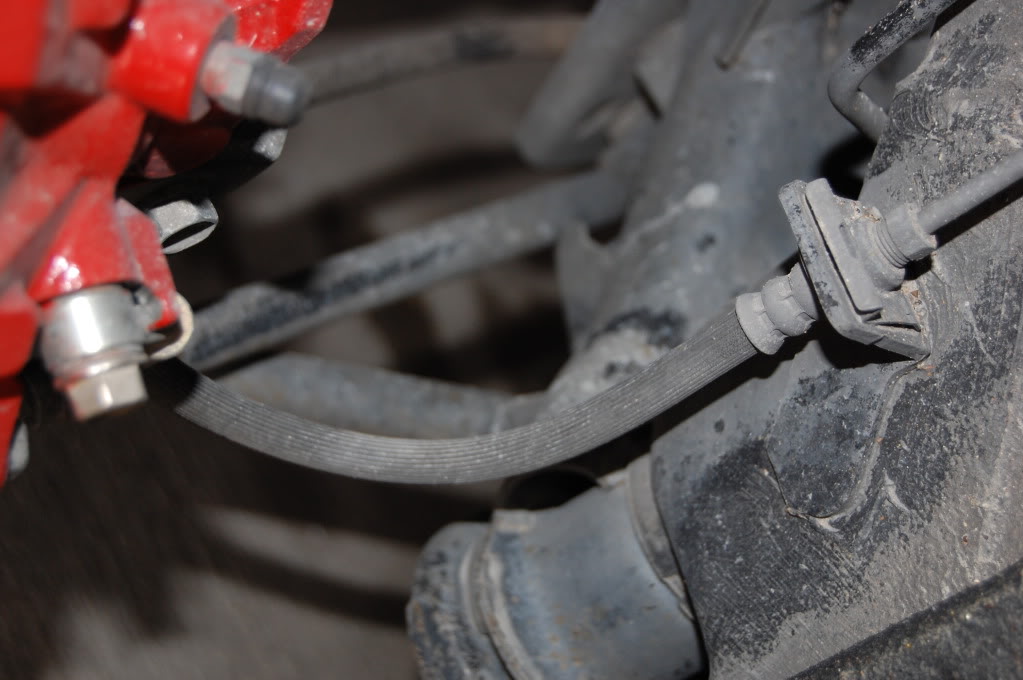
Step 5: Jack the vehicle up and remove the tire. Once the tire is out of place remove the bleeder valve rubber cap. You will need this later on.
Step 6: With the 10mm Line Wrench go ahead and remove the end connected to steel hose.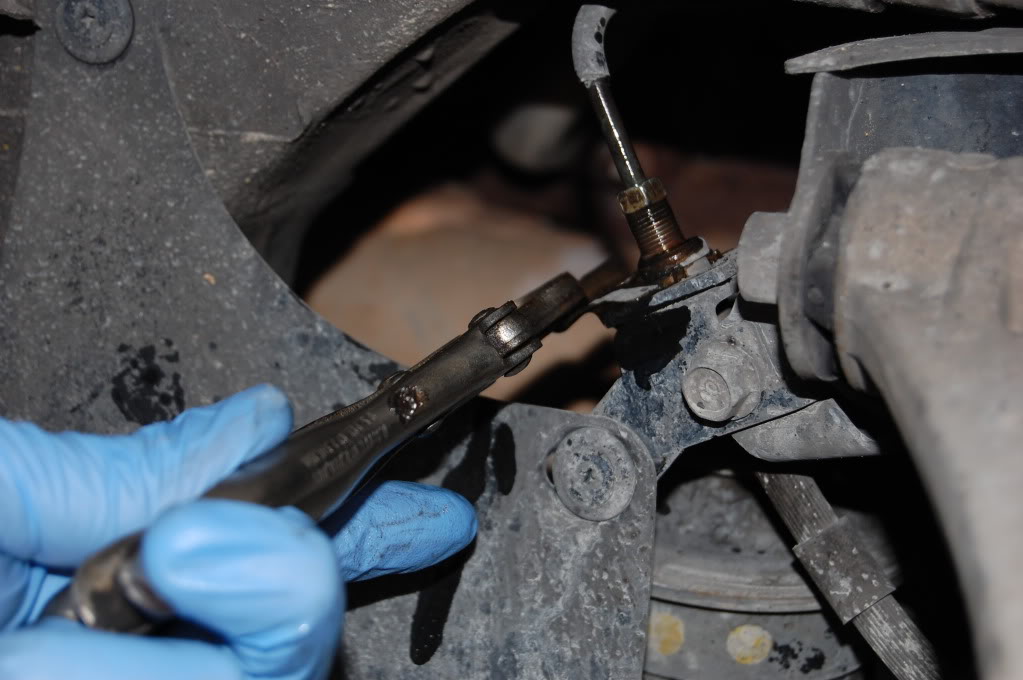
Step 7: With the vice grip go ahead and remove the steel spring clip. Once the clip is off remove the rubber hose and place the valve bleeder cap over the end of the metal line. The point of the vice grip is to keep the spring clip from flying off under tension.
Step 8: With the 12mm socket on the ratchet go ahead and remove the end of the brake line that is attached to the caliper. Make sure you account for both copper washers when removing the old line.
Step 9: Once the brake line has been fully removed go ahead and fit the new brake line through the bracket that is by the steel hose.
Step 10: Once the line is fit into the bracket but before replacing the spring clip fit the steel hose into the new stainless line. Once you have threaded the steel hose place the spring clip back on. You can go ahead and tighten all of these parts together to complete the line at this end. It will look like this when done: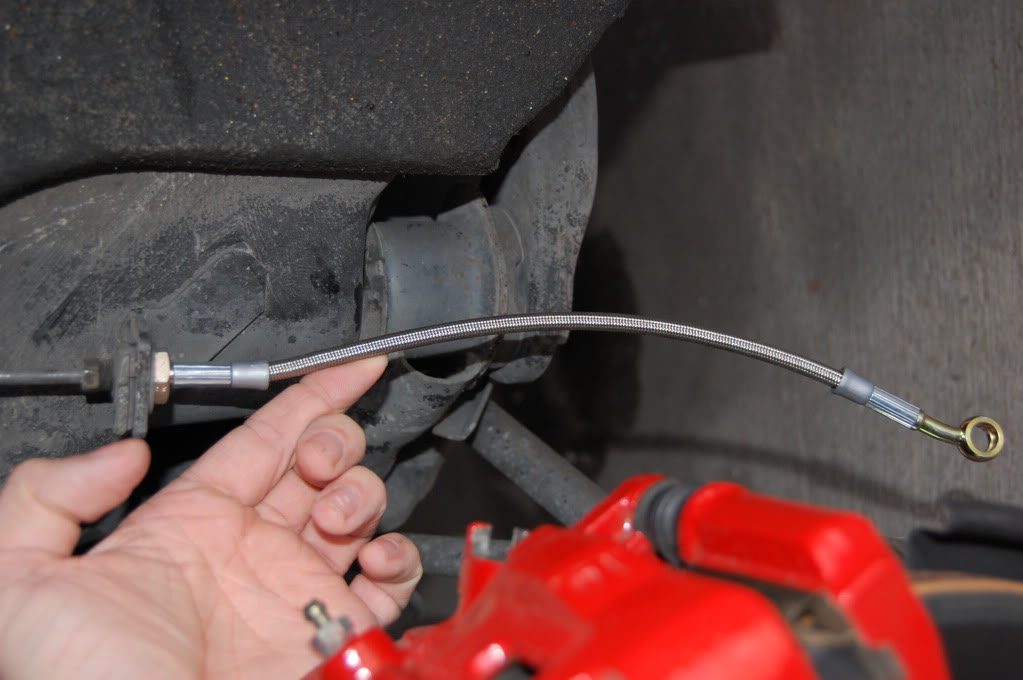
Step 11: Bleed the new SS Brake Line. You can gravity bleed this line, just make sure you remove the cap from the brake reservoir: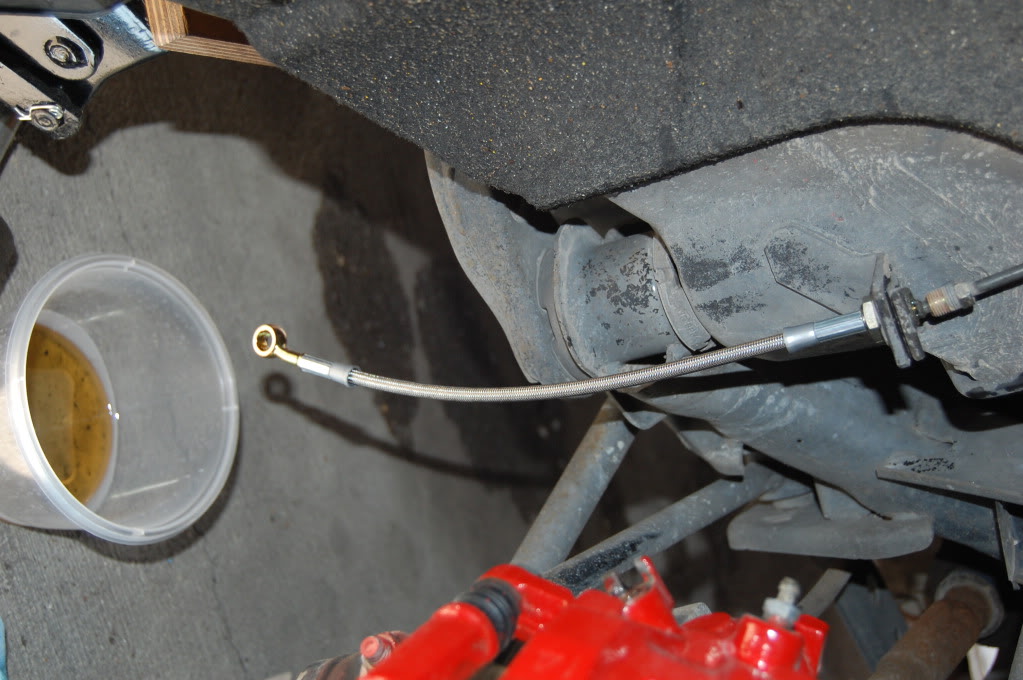
Before moving on make sure you account for both washers off the old line. The copper washers are actually gaskets and cannot be double stacked. Do not proceed without accounting for both washers they commonly get stuck to the caliper!
Step 12: Route the brake line properly and then assemble the end of the brake line to the caliper. Its assembled with a washer on each side of the banjo like so:
Photo properly routed: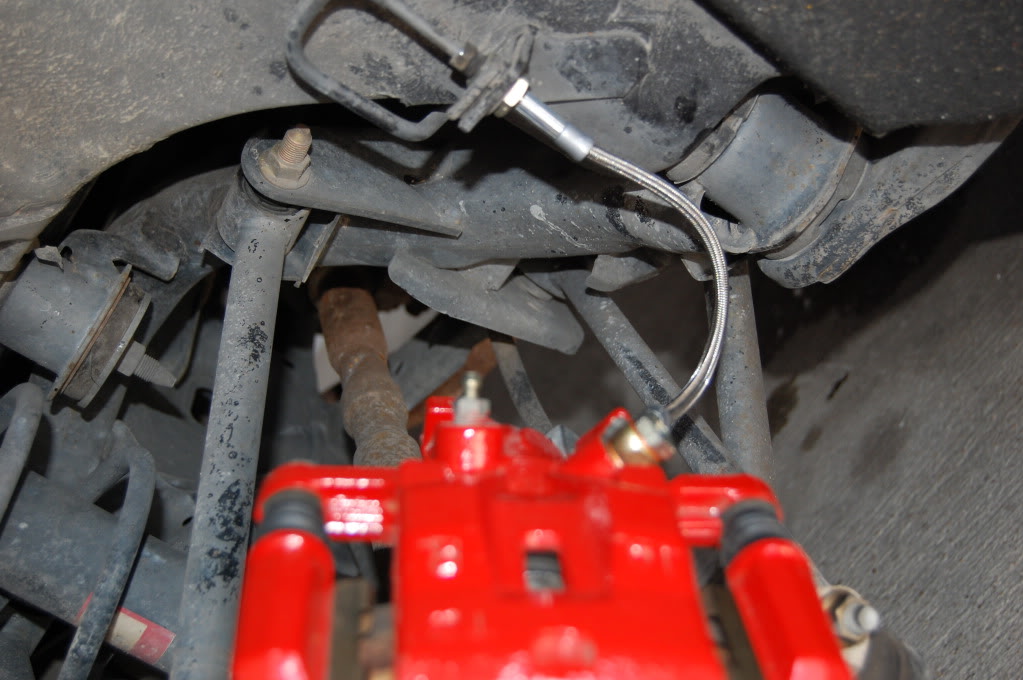
Step 13: Using a 14mm socket on the ratchet you want to clamp the washers, they are actually copper gaskets.
Step 14: Now that this is assembled go ahead and bleed the system. On the rear calipers it takes a 10mm bleeder wrench. Make sure you watch the fluid level. Each time you do this it should take about half your brake fluid down. Don't just bleed the air out, bleed the old fluid out as well. It will be clear when your to fresh new clean fluid.
These are photos of what bleeding looks like. If you don't know how to bleed find someone that does. You will need a small cup, 10mm bleeding wrench, and a 3/16ths hose: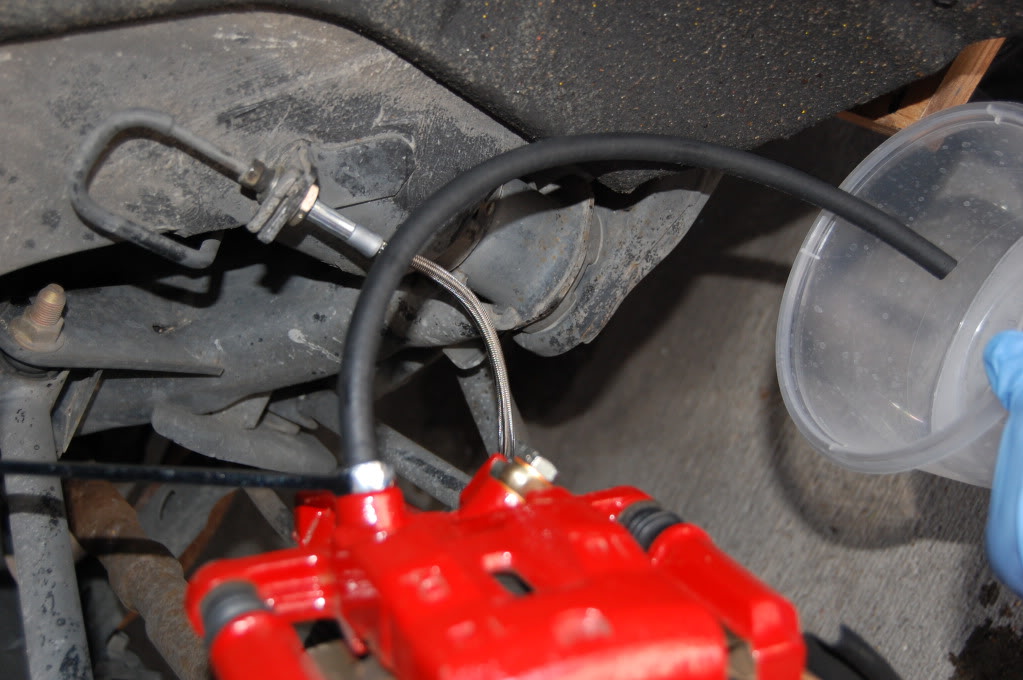
Step 15: The clean up step. With soap and water wash all parts to include the caliper. Rinse vey well. The tires can sling the brake fluid onto the cars paint and you do not want this. Here is a photo of what it looks like completed: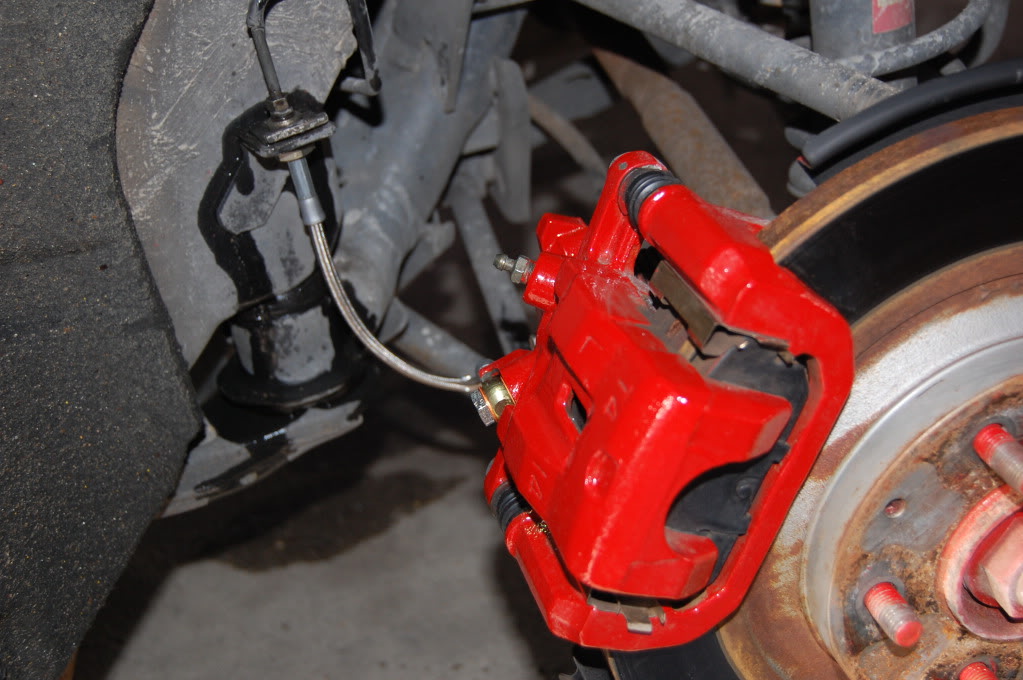
Repeat these steps for the left rear brake system.
Front Brakes:
Make sure the brake reservoir is full before starting a new line!
It helps to turn the wheels to make the job easier if you so wish.
Locate all parts to the front brake system. You will have two hoses, a center bracket, and two washers per line.
Photo1:
Photo2: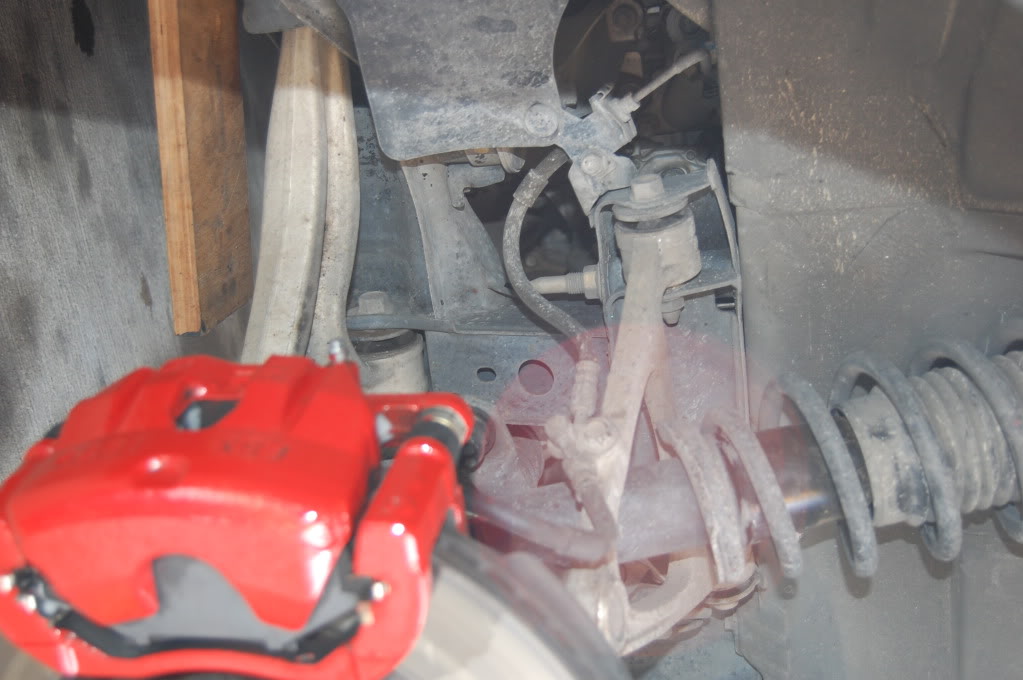
Step 1: With the vice grips your going to drill the brake line holding bracket stepping up in drill bit sizes. Very carefully (the metal is extremely soft) you will use the drill bits starting with the smallest and drill the hold on both mounting brackets like so: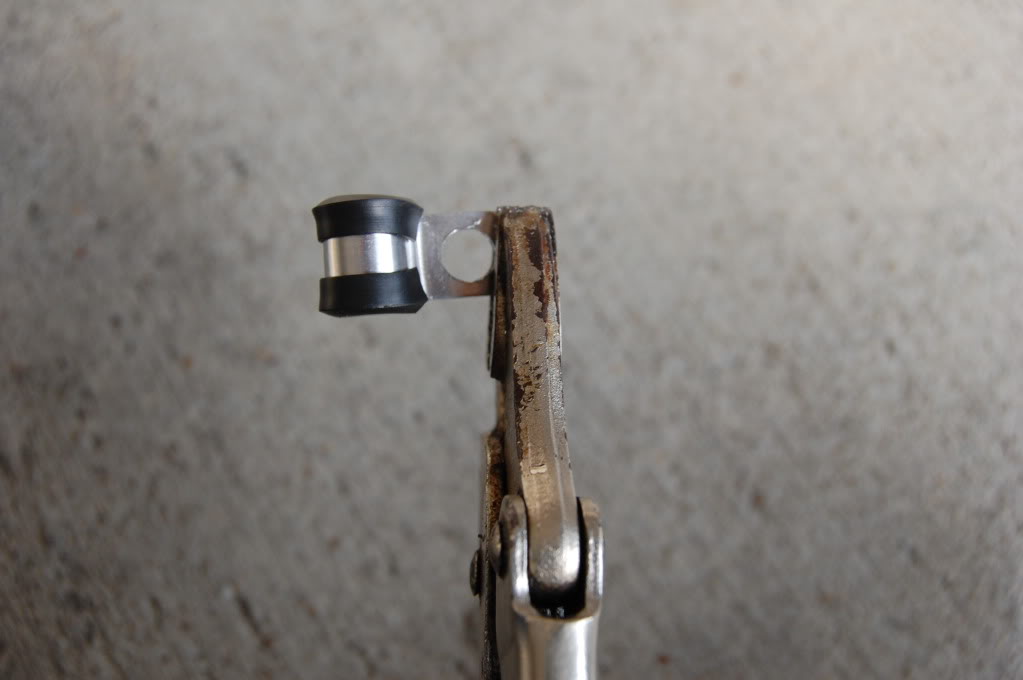
Step 2: Remove the bolt holding the center of the hose. Keep this bolt for later on. Its the only piece of the old system that you keep. It will look like this once removed: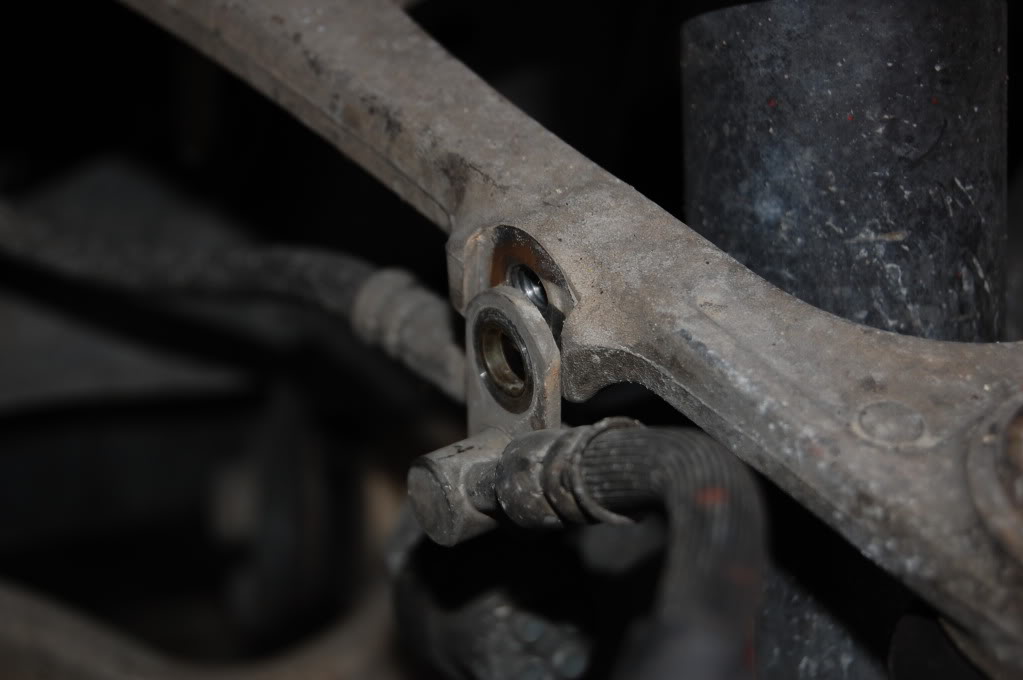
Step 3: With the valve bleeder cap from the brake caliper close by go ahead and remove the steel hose from the rubber hose with the 10mm line wrench. Then remove the spring clip with the vice grips and cap the steel line:
Step 4: Remove the caliper end of the old line with the 12mm ratchet and socket. You can go ahead and throw the old line away. Make sure you account for both copper washers and the center bolt!
Step 5: This is where it gets different from the rears. Your going to attach the caliper side first. So place the pieces together in the order of this photo with the angle facing the correct way: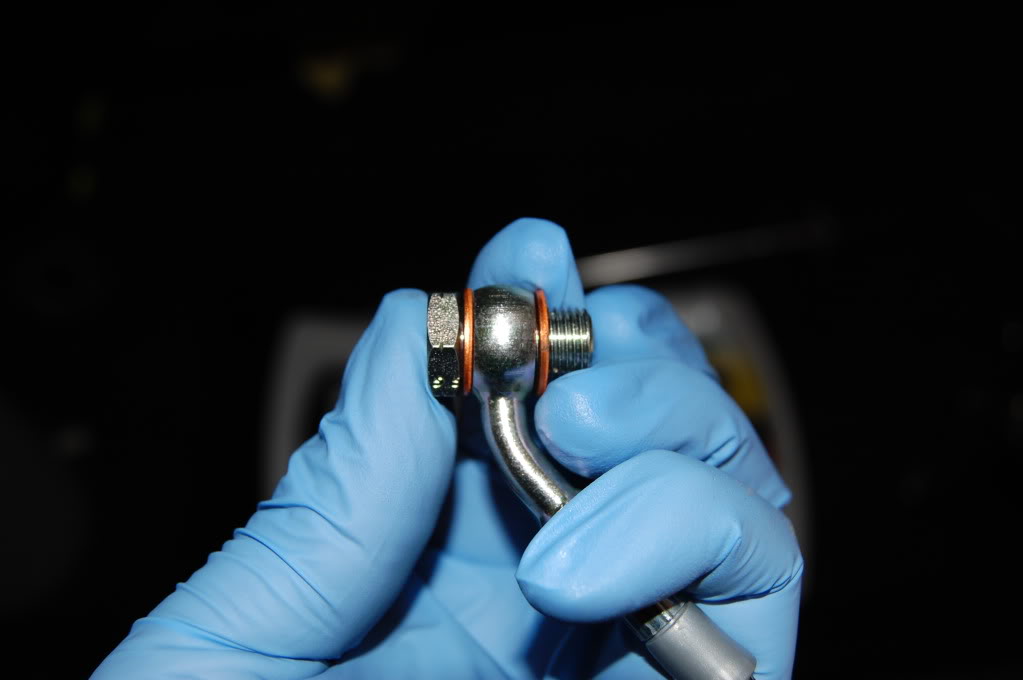
Step 6: Go ahead and with the 14mm socket on the ratchet tighten down the fitting to the caliper.
Step 7: Route the steel line the proper way. Make sure the steel line stays below the level of the control arm. This prevents suspension interference. It will look like this: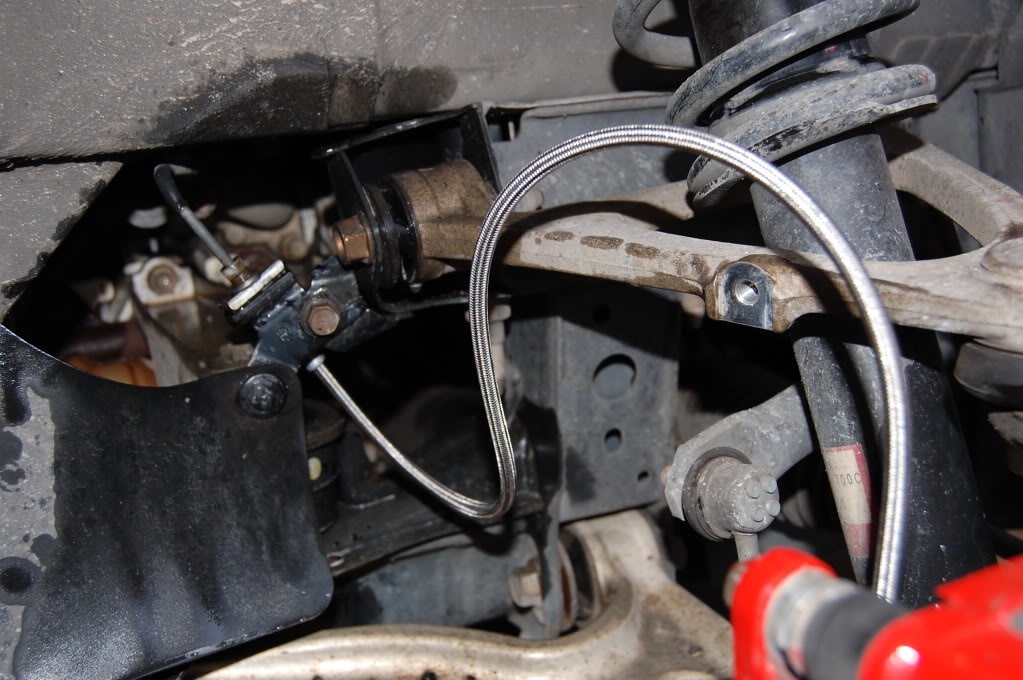
Step 8: Once you have fit the steel hose into the bracket, you will finger tighten the hose to the brake line. Once they are attached just barely go ahead and replace the spring clip. After thats replaced properly tighten the entire assembly. This way you know you put the right line on the right side.
Step 9: Mount the center piece allowing for the proper amount of line before and after the center bracket. It will look like so when completed: http://s151.photobucket.com/albums/s...t=DSC_0072.jpg
Step 10: Bleed the system. The front will take longer but do the same thing. Bleed out all the old discolored fluid you can get out of the system. Bleeding will look like so: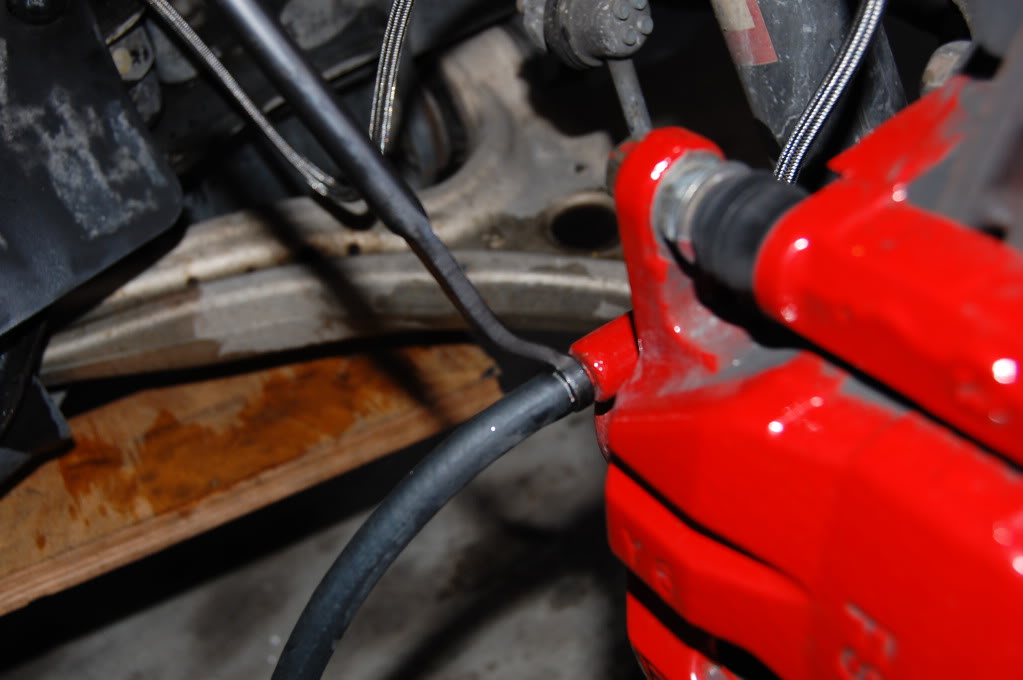
The completed front lines will look like this:
Repeat this on the driver side.
After project completion:
Once you have all 4 lines back on and the tires are torqued to 102lbs its time to test the system. Go out for a drive, braking for about 20 mins. Off and on at different speeds. Park the vehicle, check for leaks and check the fluid level in the reserve. If all things check out then you are complete.
How to Bleed a Brake System. Recommended if you have never done it: https://www.rx8club.com/showthread.p...89#post3851589
Time to completion is 1-3 hours depending on skill level.
This removes the spongy feeling in the brakes. Over time and with heat the rubber hoses start to flex diminishing braking capacity. This restores those properties and the strength in the braking system. It also is a good chance to remove any bad fluid from the system. Do not use DOT5 fluid on ABS systems.
I recommend that this project be a weekend project done in coordination with others. I recommend these are done in this order:
Brake Caliper Painting (If you plan on it):https://www.rx8club.com/rx-8-discussion-3/brake-caliper-painting-205503/
Performance Break Pads
Stainless Steel Clutch Line:https://www.rx8club.com/series-i-do-yourself-forum-73/diy-stainless-steel-clutch-line-clutch-bleeding-210174/
Stainless Steel Brake Lines
If you have painted calipers never allow brake fluid to touch the paint. It will destroy your paint.
The photo album for these images can be found here:http://s151.photobucket.com/albums/s...Brake%20Lines/
This is an image of the old vs new front lines(simpler is better right):
Step 1: As always you will need to make sure you have the correct parts. You can use any brake line kit, but for warranty reasons and fitment reasons I recommend you use the Mazda Speed Kit # 0000-03-8201:
Step 2: Make sure you have all the proper tools. The tools you need will be:
This job should only be completed using line wrenches. Do not substitute an open end wrench for a line wrench.
1. 4 way with a 21mm end.
2. 10mm and 12mm Line wrench
3. 8mm/10mm brake bleeding wrench. Either a combo like I have or individuals
4. Ratchet with 12mm and 14mm sockets
5. Vice Grips
6. 3/16th vacuum or fuel line for bleeding
7. Portable Drill
8. 17/64th 19/64th and 5/16th drill bits
9. Dot 4 Brake fluid 32 oz bottle.
10. Torque wrench with 21mm socket.
Step 3: Make sure you have all the proper parts. Two long, and two short stainless brake lines. Also 8 washers, 4 bolts, and 2 brackets. The two short lines are for the rear, the two long lines are from the front.
This is the order the washers go on the new lines:
This is a photo of the old and new lines side by side:
On the end of the brake lines you will see that they are specifically shaped to fit into the holding bracket. Here is a photo of that shape. They will only fit in one way so make sure you have the left and right sides properly separated. This is important to make sure you don't twist the lines to hard:
Step 4: You will remove the brake lines in this order. Right Rear, Left Rear, Right Front, Left Front. First thing you will do is top off the brake fluid. Its ok to over fill it at this point since you will be bleeding the system. Go ahead and replace the cap, its not necessary to block it off the cap has a rubber diaphragm in it to prevent fluid loss.
Rear Brakes:
Locate the Brake Lines before starting the project
This is a photo of before you start:
Step 5: Jack the vehicle up and remove the tire. Once the tire is out of place remove the bleeder valve rubber cap. You will need this later on.
Step 6: With the 10mm Line Wrench go ahead and remove the end connected to steel hose.
Step 7: With the vice grip go ahead and remove the steel spring clip. Once the clip is off remove the rubber hose and place the valve bleeder cap over the end of the metal line. The point of the vice grip is to keep the spring clip from flying off under tension.
Step 8: With the 12mm socket on the ratchet go ahead and remove the end of the brake line that is attached to the caliper. Make sure you account for both copper washers when removing the old line.
Step 9: Once the brake line has been fully removed go ahead and fit the new brake line through the bracket that is by the steel hose.
Step 10: Once the line is fit into the bracket but before replacing the spring clip fit the steel hose into the new stainless line. Once you have threaded the steel hose place the spring clip back on. You can go ahead and tighten all of these parts together to complete the line at this end. It will look like this when done:
Step 11: Bleed the new SS Brake Line. You can gravity bleed this line, just make sure you remove the cap from the brake reservoir:
Before moving on make sure you account for both washers off the old line. The copper washers are actually gaskets and cannot be double stacked. Do not proceed without accounting for both washers they commonly get stuck to the caliper!
Step 12: Route the brake line properly and then assemble the end of the brake line to the caliper. Its assembled with a washer on each side of the banjo like so:
Photo properly routed:
Step 13: Using a 14mm socket on the ratchet you want to clamp the washers, they are actually copper gaskets.
Step 14: Now that this is assembled go ahead and bleed the system. On the rear calipers it takes a 10mm bleeder wrench. Make sure you watch the fluid level. Each time you do this it should take about half your brake fluid down. Don't just bleed the air out, bleed the old fluid out as well. It will be clear when your to fresh new clean fluid.
These are photos of what bleeding looks like. If you don't know how to bleed find someone that does. You will need a small cup, 10mm bleeding wrench, and a 3/16ths hose:
Step 15: The clean up step. With soap and water wash all parts to include the caliper. Rinse vey well. The tires can sling the brake fluid onto the cars paint and you do not want this. Here is a photo of what it looks like completed:
Repeat these steps for the left rear brake system.
Front Brakes:
Make sure the brake reservoir is full before starting a new line!
It helps to turn the wheels to make the job easier if you so wish.
Locate all parts to the front brake system. You will have two hoses, a center bracket, and two washers per line.
Photo1:
Photo2:
Step 1: With the vice grips your going to drill the brake line holding bracket stepping up in drill bit sizes. Very carefully (the metal is extremely soft) you will use the drill bits starting with the smallest and drill the hold on both mounting brackets like so:
Step 2: Remove the bolt holding the center of the hose. Keep this bolt for later on. Its the only piece of the old system that you keep. It will look like this once removed:
Step 3: With the valve bleeder cap from the brake caliper close by go ahead and remove the steel hose from the rubber hose with the 10mm line wrench. Then remove the spring clip with the vice grips and cap the steel line:
Step 4: Remove the caliper end of the old line with the 12mm ratchet and socket. You can go ahead and throw the old line away. Make sure you account for both copper washers and the center bolt!
Step 5: This is where it gets different from the rears. Your going to attach the caliper side first. So place the pieces together in the order of this photo with the angle facing the correct way:
Step 6: Go ahead and with the 14mm socket on the ratchet tighten down the fitting to the caliper.
Step 7: Route the steel line the proper way. Make sure the steel line stays below the level of the control arm. This prevents suspension interference. It will look like this:
Step 8: Once you have fit the steel hose into the bracket, you will finger tighten the hose to the brake line. Once they are attached just barely go ahead and replace the spring clip. After thats replaced properly tighten the entire assembly. This way you know you put the right line on the right side.
Step 9: Mount the center piece allowing for the proper amount of line before and after the center bracket. It will look like so when completed: http://s151.photobucket.com/albums/s...t=DSC_0072.jpg
Step 10: Bleed the system. The front will take longer but do the same thing. Bleed out all the old discolored fluid you can get out of the system. Bleeding will look like so:
The completed front lines will look like this:
Repeat this on the driver side.
After project completion:
Once you have all 4 lines back on and the tires are torqued to 102lbs its time to test the system. Go out for a drive, braking for about 20 mins. Off and on at different speeds. Park the vehicle, check for leaks and check the fluid level in the reserve. If all things check out then you are complete.
Last edited by DocBeech; 01-17-2011 at 07:39 PM.

The following users liked this post:
PR_Smoke (04-26-2021)
 01-17-2011, 06:26 PM
#3
Thanks I think it took me longer to write this than to do the project lol. It should however show you how to bleed the brakes. BTW you do not need two people to bleed brakes. I worked on cars as a front end/suspension/brakes mechanic for GMC and used to do it by myself all the time. The reservoir is higher than the caliper. So if you just use 3/16th fuel line, a cup, DOT 4 fluid, and a bleeder wrench it will bleed. All you have to do is gravity bleed the system. It will be much slower but I have done it hundreds of times.
 01-17-2011, 06:50 PM
#6
They are much longer. Stainless steel does not flex. Rubber does. In order to have them flex without breaking when the suspension travels they made them longer. This prevents them from damaging or breaking under strenuous driving conditions.

Thread
Thread Starter
Forum
Replies
Last Post
BigMikeATL
RX-8's For Sale/Wanted
12
05-26-2016 12:31 AM
badinfluence
Series II Aftermarket Performance Modifications
6
08-31-2015 11:51 AM

