DIY: Side-marker "Clear Corner Lights" Installation

 03-28-2004, 11:08 PM
#101
Registered

Join Date: Mar 2004
Posts: 170
Likes: 0
Received 0 Likes
on
0 Posts
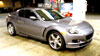
I put in the clear sidemarkers on my Titanium 8 this past weekend(only 6 days after purchasing the car). The clear side markers are a definite must for the titanium Rx8 (IMHO). Right now I just have the amber 194's in there, but I think I'll pick up a set of the stealth bulbs in a few days and compare to see which one I like better.
Many thanks to msrecant for your DIY posts on this.
Many thanks to msrecant for your DIY posts on this.
 04-02-2004, 01:20 AM
#102
No Freaking Pistons

I just finished pulling the reflectors out of my clear markers....most def a pain-in-the-a*s....but it'll be worth it,I just oredered the chromed,stealth-look bulbs for the markers and f/r blinkers to complete the package.
 04-04-2004, 11:14 AM
#104
Back in Black

Join Date: Mar 2004
Location: Tampa, FL
Posts: 338
Likes: 0
Received 0 Likes
on
0 Posts
agreed.....got them in sat moring...checked this out to double check how-to...bam....7 minutes later....all done!!
and what an EASY improvement. i left the bulbs the same....i doubt ill get pulled over for it....
and what an EASY improvement. i left the bulbs the same....i doubt ill get pulled over for it....

 05-07-2004, 03:17 PM
#107
Rotary only since 1980
Join Date: May 2003
Location: Southeast of Seattle
Posts: 587
Likes: 0
Received 0 Likes
on
0 Posts
Law in Washington State
For those in Washington State:
RCW 46.37.100
Color of clearance lamps, side marker lamps, back-up lamps, and reflectors.
(1) Front clearance lamps and those marker lamps and reflectors mounted on the front or on the side near the front of a vehicle shall display or reflect an amber color.
So you need you need amber or stealth lamps that illuminate amber.
This is a great DIY thread. Many thanks. I think this is going to be my first mod.

 05-16-2004, 03:38 PM
#110
North County Boi
Join Date: Sep 2003
Location: The OC
Posts: 232
Likes: 0
Received 0 Likes
on
0 Posts
Just installed my clear corners from JapanParts. I read the DIY, removed the reflectors and installed the lights in under 15 minutes...Such a simple mod. I LOVE IT!
Pics:
http://photos.yahoo.com/stangmatt66
Pics:
http://photos.yahoo.com/stangmatt66
Last edited by stangmatt66; 05-17-2004 at 11:33 AM.
 05-20-2004, 06:11 PM
#112
Registered

Join Date: May 2004
Location: BHM, AL
Posts: 1,071
Likes: 0
Received 0 Likes
on
0 Posts
Reflector Removal
Here is a little more info on the reflector removal process.
If you look through the hole for the bulb on the clear side markers, you'll see a piece of metal. This metal reflects light backwards, giving the reflector an awkward appearance. It's pretty easy to take out, though.
Get a pair of needle nose pliers and something with a ridged surface that will grip the edge of the piece of metal w/o clamping (I have a pair of "surgical" clamps I procured from somewhere that served this purpose well).
Use your needle nose pliers to push the piece backwards towards the inside. Then use the ridged surface to pull it forward. Do this several times until the metal tab will bend down enough that you can grab the edge of the metal with the pliers.
Once you get it with the pliers, rotate it left then right. Basically, there are two tabs holding the metal piece in place. You want to loosen those up. Eventually, you'll be able to turn the piece almost a full turn. It should "fall out" of the slots inside.
Then you want to deform the metal enough that you can pull it out of the hole. Fin.
You have to put some muscle into it, but it isn't difficult. I attached a picture of how the piece looked after I got it out.
05-20-2004, 06:12 PM
#113
Registered
Join Date: May 2004
Location: BHM, AL
Posts: 1,071
Likes: 0
Received 0 Likes
on
0 Posts
Reflector Removal
Here is a little more info on the reflector removal process.
If you look through the hole for the bulb on the clear side markers, you'll see a piece of metal. This metal reflects light backwards, giving the reflector an awkward appearance. It's pretty easy to take out, though.
Get a pair of needle nose pliers and something with a ridged surface that will grip the edge of the piece of metal w/o clamping (I have a pair of "surgical" clamps I procured from somewhere that served this purpose well).
Use your needle nose pliers to push the piece backwards towards the inside. Then use the ridged surface to pull it forward. Do this several times until the metal tab will bend down enough that you can grab the edge of the metal with the pliers.
Once you get it with the pliers, rotate it left then right. Basically, there are two tabs holding the metal piece in place. You want to loosen those up. Eventually, you'll be able to turn the piece almost a full turn. It should "fall out" of the slots inside.
Then you want to deform the metal enough that you can pull it out of the hole. Fin.
You have to put some muscle into it, but it isn't difficult. I attached a picture of how the piece looked after I got it out.
If you look through the hole for the bulb on the clear side markers, you'll see a piece of metal. This metal reflects light backwards, giving the reflector an awkward appearance. It's pretty easy to take out, though.
Get a pair of needle nose pliers and something with a ridged surface that will grip the edge of the piece of metal w/o clamping (I have a pair of "surgical" clamps I procured from somewhere that served this purpose well).
Use your needle nose pliers to push the piece backwards towards the inside. Then use the ridged surface to pull it forward. Do this several times until the metal tab will bend down enough that you can grab the edge of the metal with the pliers.
Once you get it with the pliers, rotate it left then right. Basically, there are two tabs holding the metal piece in place. You want to loosen those up. Eventually, you'll be able to turn the piece almost a full turn. It should "fall out" of the slots inside.
Then you want to deform the metal enough that you can pull it out of the hole. Fin.
You have to put some muscle into it, but it isn't difficult. I attached a picture of how the piece looked after I got it out.
05-21-2004, 08:31 PM
#114
Registered User

Join Date: Apr 2004
Location: Miami
Posts: 514
Likes: 0
Received 0 Likes
on
0 Posts
I got it
I just finished putting in my clear side markers from japanparts that I got on ebay. I went ahead and removed the reflectors... at first it took a little long to figure out how to knock it loose but then believe it or not my wife figure it out, just wedge a screwdriver underneath the reflector, (there is a small gap), then just push it off...
It comes right off:D , than to take it out I just grabbed a pair of craftsman wire stripper (Small) and knock the tab right to the edge of the hole, so that I can grab it with the wire stripper, then I just bent one side enough to pull it out, the first one took a while but once I figure out how, the second took less than 5 minutes, installation was quick 10 mins tops....
will post pics later...
05-28-2004, 04:45 PM
#115
Registered User

Join Date: Mar 2004
Location: Austin Texas
Posts: 186
Likes: 0
Received 0 Likes
on
0 Posts
Texas Statue for those interested:
� 547.324. TURN SIGNAL LAMPS REQUIRED. (a) Except as
provided by Subsection (b), a motor vehicle, trailer, semitrailer,
or pole trailer shall be equipped with electric turn signal lamps
that indicate the operator's intent to turn by displaying flashing
lights to the front and rear of a vehicle or combination of vehicles
and on that side of the vehicle or combination toward which the turn
is to be made.
(b) Subsection (a) does not apply to a passenger car or
truck less than 80 inches wide manufactured or assembled before the
model year 1960.
(c) Turn signal lamps:
(1) shall be mounted at the same level and spaced as
widely apart as practicable on the front and on the rear of the
vehicle; and
(2) may be included as a part of another lamp on the
vehicle.
(d) A turn signal lamp shall emit:
(1) a white or amber light, or a color between white
and amber, if the lamp is mounted on the front of the vehicle; or
(2) a red or amber light, or a color between red and
amber, if the lamp is mounted on the rear of the vehicle.
(e) A turn signal lamp must be visible in normal sunlight at
a distance of:
(1) at least 500 feet from the front and rear of the
vehicle if the vehicle is at least 80 inches wide; and
(2) at least 300 feet from the front and rear of the
vehicle if the vehicle is less than 80 inches wide.
Acts 1995, 74th Leg., ch. 165, � 1, eff. Sept. 1, 1995.
05-30-2004, 09:37 AM
#117
WWFSMD?
Join Date: Jul 2003
Location: Massachusetts, USA
Posts: 597
Likes: 0
Received 0 Likes
on
0 Posts
Thanks for the instructions; the install took only 10 min. These match the silver RX8 nicely and look a lot better than the amber markers. Some additional tips:
1) Inner screw can also be removed with a 5/16" ratchet.
2) You don't need to turn the wheels if you use a short driver/ratchet.
3) If bulb doesn't work, check to see if its metal contacts need to be straightened.
4) JT-Imports has markers for $55 shipped (arrived in 8 days).
5) Autolumination has stealth bulbs (bulb 194, Silver Vision, Amber) for $3 each and shipping is cheap.
EDIT (3 years later):
FYI, their cheap incandescent stealth bulbs melted the nearby plastic so that the clear corners and bulb sockets fused together (meaning I can't replace the burnt out bulbs). Now I gotta install new sockets and either my original amber markers or another set of clear corners.
Last edited by Deslock; 05-07-2007 at 05:01 PM.
06-01-2004, 12:22 PM
#118
Registered User
Join Date: May 2004
Location: Marin County
Posts: 89
Likes: 0
Received 0 Likes
on
0 Posts
Just got mine today from:
this guy
Took longer to get the reflector out than it did to install them. Probably 15 minutes to get the first reflector out, then 5 for the second one.
Then about 5 - 10 minutes a side for the install.
I don't like the look of the amber bulbs, so I just ordered the clear bulbs that glow amber.
All in all, a very easy mod thanks to this DIY.
Thanks!
06-01-2004, 01:28 PM
#119
Registered
Join Date: May 2004
Location: BHM, AL
Posts: 1,071
Likes: 0
Received 0 Likes
on
0 Posts
For all you Alabama residents, the 1975 code of Alabama has this to say about side markers (from 32-5-242)
(g) Color of clearance lamps, side marker lamps and reflectors.
(1) Front clearance lamps and those marker lamps and reflectors mounted on the front or on the side near the front of a vehicle shall display or reflect an amber color.
(2) Rear clearance lamps and those marker lamps and reflectors mounted on the rear or on the sides near the rear of a vehicle shall display or reflect a red color.
(3) All lighting devices and reflectors mounted on the rear of any vehicle shall display or reflect a red color, except the stop light or other signal device, which may be red, amber or yellow, and except that the light illuminating the license plate or the light emitted by a back-up lamp shall be white.
06-02-2004, 07:28 AM
#120
Registered User

Join Date: Apr 2004
Posts: 78
Likes: 0
Received 0 Likes
on
0 Posts
installed my clear corners last night... very easy thanks to this DIY.... took about 15 minutes and only ran into 2 slight problems... on one corner, the bulb didn't wanna go back in and i had to force it a little bit..... one of the fastners didn't wanna snap back into that car, cause the screw was already in the fastner... i pulled the screw back out, push the fastner in, push the screw in, then turn the screw.... i did not take the reflectors out, but after looking at how it looks, i might go back and remove them... if i'm not too lazy.... thanks for the DIY
06-06-2004, 04:20 AM
#121
Registered User

Join Date: Jul 2003
Posts: 6
Likes: 0
Received 0 Likes
on
0 Posts
Installed my clear corners this morning. Took me 15mins, simple thanks to the fellow rx8 peeps.. Thanks!! I ordered them from JTimports and I received the corners in a few days from Japan.. props to them.. One thing though, you don't need to order the harness, (I think that is what it is called), I just put my orange bulbs into the existing harness and just popped the corner on..
Thanks again DIY!!
Thanks again DIY!!
06-10-2004, 01:39 PM
#122
Registered User

Join Date: Jun 2004
Location: Fort Worth, TX
Posts: 56
Likes: 0
Received 0 Likes
on
0 Posts
Just a quick thanks for this thread! The reflectors were easy to get out. Like someone else figured out, I just used a flat head screwdriver, lightly pushed up, and the reflectors detatched. Used a good pair of needle nose pliers and bent the ends so they'd slide through the hole, and wha-lah! Took less than 2 minutes to get them both out.
Another 10 minutes they were installed on the car, and they look great on the winning blue
Thanks again!
Another 10 minutes they were installed on the car, and they look great on the winning blue
Thanks again!
06-17-2004, 07:00 PM
#124
Respect the Yellow Line!

Join Date: Jun 2004
Location: Charlotte, NC
Posts: 140
Likes: 0
Received 0 Likes
on
0 Posts
Awesome Thread, got my clear markers today, took me about 10 minutes to do both, probably would have been 30 without it, thank you for the DIY. I agree the reflectors kind of ruin it however I am hesitant to take them out as I often have to park on the street at work and it kind of freaks me out to have zero reflectors on the side of my car plus my main goal was to get rid of them ugly orange things, mission accomplished.
This mod is easy simple and very rewarding if you are considering doing it, there is no reason to wait.
Cheers
This mod is easy simple and very rewarding if you are considering doing it, there is no reason to wait.
Cheers
06-17-2004, 08:26 PM
#125
Hubble has been saved!
Thread Starter

Join Date: Aug 2003
Location: Richmond, VA
Posts: 1,221
Likes: 0
Received 0 Likes
on
0 Posts
Originally posted by Silver04RX8
I agree the reflectors kind of ruin it however I am hesitant to take them out as I often have to park on the street at work and it kind of freaks me out to have zero reflectors on the side of my car
I agree the reflectors kind of ruin it however I am hesitant to take them out as I often have to park on the street at work and it kind of freaks me out to have zero reflectors on the side of my car
With or without the internal reflector, the side marker is still designed to reflect exterior light back out.