DIY: Racing Beat Air Duct
 06-13-2008, 10:11 PM
#1
Registered User
Thread Starter

Join Date: Jun 2006
Location: Peabody, MA
Posts: 55
Likes: 0
Received 0 Likes
on
0 Posts
DIY: Racing Beat Air Duct
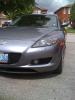
All along I've always been following instructions and taken others ideas from this site. Well, it's time I make a small contribution back. A few weeks ago, I flew out to Orange County and visited Racing Beat in Anaheim. I purchased the air dam and took it back with me as a check in on the plane.
They gave me a print out of the installation instructions but left it Huntington Beach where my girlfriend lives. I was dying to install it, and I searched all over this forum but didn't have much luck. She ended up mailing it to me and well, here it is! Straight from Racing Beat.
I installed it last week and also took the baffles and screens out of the airbox. I also sawed off the end of the VFAD to seal the gap from the air dam and intake box. The drive is much more responsive and can feel the difference in low end torque. The sound is louder than what it was before but am loving it. I almost forgot, I also have a K&N drop in filter.
 06-14-2008, 12:51 PM
#2

This was a great idea. The instructions are perfect and once you save them theyre easy to blow up while keeping the resolution high. Ive been looking at possible getting the ram intake but idn how much thatd help for the 120$ it would cost me.
Either way great post! Thanks and keep em comming.
Either way great post! Thanks and keep em comming.
 06-20-2008, 05:10 AM
#4

All along I've always been following instructions and taken others ideas from this site. Well, it's time I make a small contribution back. A few weeks ago, I flew out to Orange County and visited Racing Beat in Anaheim. I purchased the air dam and took it back with me as a check in on the plane.
They gave me a print out of the installation instructions but left it Huntington Beach where my girlfriend lives. I was dying to install it, and I searched all over this forum but didn't have much luck. She ended up mailing it to me and well, here it is! Straight from Racing Beat.
I installed it last week and also took the baffles and screens out of the airbox. I also sawed off the end of the VFAD to seal the gap from the air dam and intake box. The drive is much more responsive and can feel the difference in low end torque. The sound is louder than what it was before but am loving it. I almost forgot, I also have a K&N drop in filter.
They gave me a print out of the installation instructions but left it Huntington Beach where my girlfriend lives. I was dying to install it, and I searched all over this forum but didn't have much luck. She ended up mailing it to me and well, here it is! Straight from Racing Beat.
I installed it last week and also took the baffles and screens out of the airbox. I also sawed off the end of the VFAD to seal the gap from the air dam and intake box. The drive is much more responsive and can feel the difference in low end torque. The sound is louder than what it was before but am loving it. I almost forgot, I also have a K&N drop in filter.
06-20-2008, 04:12 PM
#5
i didnt mess with my vfad (though i plan on doin it soon)
but i did remove both screens and both baffles then reset both ecus
my car doesnt stall out and actually get 10-20 miles more per tank in gas mileage
performance hasnt felt any better or worse and it cant hurt so i dont see the harm in doing this completely free mod
but i did remove both screens and both baffles then reset both ecus
my car doesnt stall out and actually get 10-20 miles more per tank in gas mileage
performance hasnt felt any better or worse and it cant hurt so i dont see the harm in doing this completely free mod
06-25-2008, 03:59 PM
#7
1st ecu: with the keys in the ignition but in the OFF position, press and hold the odometer reset button. turn the keys to the on position but do NOT start the car. continue holding the odometer reset button until the odometer says "TEST"
2nd ecu: with the keys in the ignition in the ON position with the car NOT running, tap the break pedal 20 times as fast as you can. if done correctly the oil meter will drop all the way to L then back to its previous position
2nd ecu: with the keys in the ignition in the ON position with the car NOT running, tap the break pedal 20 times as fast as you can. if done correctly the oil meter will drop all the way to L then back to its previous position
07-21-2008, 11:04 AM
#8
It's Not Easy Being Green
iTrader: (1)

Join Date: Apr 2008
Location: Akron, OH
Posts: 1,846
Likes: 0
Received 0 Likes
on
0 Posts
Installed my intake & duct this weekend. Just a quick addition since the RB instructions are seperate for the two items but lots of people end up getting both. I screwed up a little by putting my duct on before I should have so if anyone is wondering there's only one thing you should do from the RB intake install that should be done prior to the RB Duct install. FWIW you're always safe to do the Intake first and then the duct. But here are the specific intake steps that need to be done before the duct can be installed.
There is a foam padding with adhesive backing meant to go in the opening where the duct will connect from the front bumper to your engine bay. Make sure you put that on after you've removed the VFAD but prior to installing the duct. Once you have the duct in there it's too tight to be able to manipulate the foam pad around the engine latch release wire.
In addition make sure you don't re-attach the large styrofoam piece on the front of the car (which the duct links up to with the L brackets) until you've replaced the plastic part behind the styrofoam piece. There is a single pin that is behind the styrofoam and once you've replaced the pins on the foam it's difficult to get off.
Last edited by RK; 07-21-2008 at 11:08 AM.
07-22-2008, 08:57 AM
#9

^^Wow Ryan... talking like you know something about cars! 
Sorry, gotta pick on my local buddy! Glad to hear you got it installed (and did it yourself)
Good advise, I really hated that foam piece for the engine bay opening.
It kept on "untwisting" itself so that the foam's edge (or its u-channel opening) was on the inside instead of the outside and it couldn't form around the opening and stay in that shape.
Next time I take my intake off, I'm going to replace that foam with some neoprene rubber edging I have at work. I'm sure it'll create a better seal.
Last edited by Jon316G; 07-22-2008 at 09:04 AM.
07-22-2008, 09:43 AM
#10
It's Not Easy Being Green
iTrader: (1)
Join Date: Apr 2008
Location: Akron, OH
Posts: 1,846
Likes: 0
Received 0 Likes
on
0 Posts
Took me entirely too long. Probably close ~4 hours but I was taking it slow and listening to the Tribe game but it was my first time taking the front bumper off or messing with the intake. Probably cut that in half if I had to do it again.
Good advise, I really hated that foam piece for the engine bay opening.
It kept on "untwisting" itself so that the foam's edge (or its u-channel opening) was on the inside instead of the outside and it couldn't form around the opening and stay in that shape.
Next time I take my intake off, I'm going to replace that foam with some neoprene rubber edging I have at work. I'm sure it'll create a better seal.
If you get neoprene rubber edging that fits better and provides a better seal feel free to get plenty of extra. That was definitely the one part that felt cheap.
05-15-2009, 11:15 AM
#11

Just got around to sawing off the piece of the VFAD I needed to bridge and seal the gap between the RB Duct and the stock intake (well, actually a member was kind enough to sell me his VFAD, so I can go back to full stock if I need to). I also added a K&N flat filter to the stock air box. Breaths much better and no VFAD damper hesitation.
08-21-2011, 06:58 PM
#12
Free alternative
So after putting the RB duct on my wife's old RX8 a few years back, I figured there was a simple workaround that would avoid the need for purchasing the RB Revi Duct, cost nothing more than the purchase of a K&N drop-in and not block the radiator. Of course in the air-box I have removed the baffles and the protruding snorkle. VFAD is disabled as well. The beauty of using the existing tube is that it seals into the front of the air-box. See pix. Oh, and the shiny rectangular shaped item to the right of the front plastic curved piece to which the ducting is attached is just duct-tape sealing off the VFAD entrance to the air-box. Cheers!
http://slideadams.com/RamDuct1.JPG
http://slideadams.com/RamDuct2.JPG
http://slideadams.com/RamDuct1.JPG
http://slideadams.com/RamDuct2.JPG
Last edited by slideadams; 08-21-2011 at 07:01 PM. Reason: forgot to list one item.
08-21-2011, 07:44 PM
#13
Surf Hard, Drive Hard

Join Date: Feb 2007
Location: Indialantic, Florida
Posts: 7,840
Likes: 0
Received 11 Likes
on
9 Posts
Didn't search hard enough. I have posted the instructions via pdf a couple of times.
Let me know if you want them in one single pdf file.
Ah.....screw it! I'll attach three right here!
Let me know if you want them in one single pdf file.
Ah.....screw it! I'll attach three right here!

 10-17-2011, 11:01 AM
#16

http://www.racingbeat.com/manuals/18...i%20Intake.pdf
http://www.racingbeat.com/manuals/18...RX8%20Duct.pdf
The intake instructions also contain the cleaning instructions.
 02-28-2012, 08:44 AM
#19
First you SEARCH! Not only discussed above in this very thread but Brettus' excellent tutorial has been around since 2006.
https://www.rx8club.com/showthread.p...cing+Beat+Duct
https://www.rx8club.com/showthread.p...cing+Beat+Duct
Last edited by Huey52; 02-28-2012 at 08:48 AM.
02-28-2012, 01:03 PM
#20
First you SEARCH! Not only discussed above in this very thread but Brettus' excellent tutorial has been around since 2006.
https://www.rx8club.com/showthread.p...cing+Beat+Duct
https://www.rx8club.com/showthread.p...cing+Beat+Duct
02-28-2012, 02:08 PM
#21
"Just did this today(install air duct to stock intake with the modified/chopped VFAD). Definitely feel it."
What part of "modified/chopped VFAD" was confusing?
Yes, as shown in the Brettus linked pictures, you do retain a small portion of the VFAD to bridge the gap between the RB Duct and the stock intake.
It's unfortunate that RB never offered their own transition piece.
What part of "modified/chopped VFAD" was confusing?
Yes, as shown in the Brettus linked pictures, you do retain a small portion of the VFAD to bridge the gap between the RB Duct and the stock intake.
It's unfortunate that RB never offered their own transition piece.

Thread
Thread Starter
Forum
Replies
Last Post