
DIY: Intake box cone.


Thread Starter
Registered
Joined: Apr 2006
Posts: 674
Likes: 0
From: Cali
DIY: Intake box cone.
So guys... I have been looking at the intake mod threads etc.. and have been doing some thinking on them... I have done all the mods for the stock intake box.
K&N drop in.
RB Duct
Carbon Fiber Flex tube replacement mod.
Both walls removed
one screen removed..
Ive seen people taking off the inside horn and both screens but that did not seem to be a good idea... I got to thinking after I saw one guy use duct tape to make deflectors for air to go into the horn. I thought he may be onto something. I feel that stock horn is too small... on the outsides of the horn in the air box, there is too much space for air turbulence and I thought a BIGGER horn may work... SO with the help of one of the screens and some Polyester Cloth and fiberglass. I got to work. I first I did not think of doing a DIY so I did not take pictures of the first part... But what I did was get the cloth and stretch it over the opening of the top half of the exhaust box... I used a screen to push down the cloth to the hole in the back to create the vortex i was looking for... When this is done you end up with a bunch of extra cloth material at the bottom. So I had to cut it and stretch to over lay it some to get out all the wrinkles. I used the screen to keep it in the hole and used staples around the edges to keep it in place.. Slapped on some fiberglass resin and let it dry and popped it out then it looked like this..
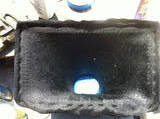


ok so I popped it out and sanded it a little.
[IMGhttp://i96.photobucket.com/albums/l1...E/872b7871.jpg[/IMG]
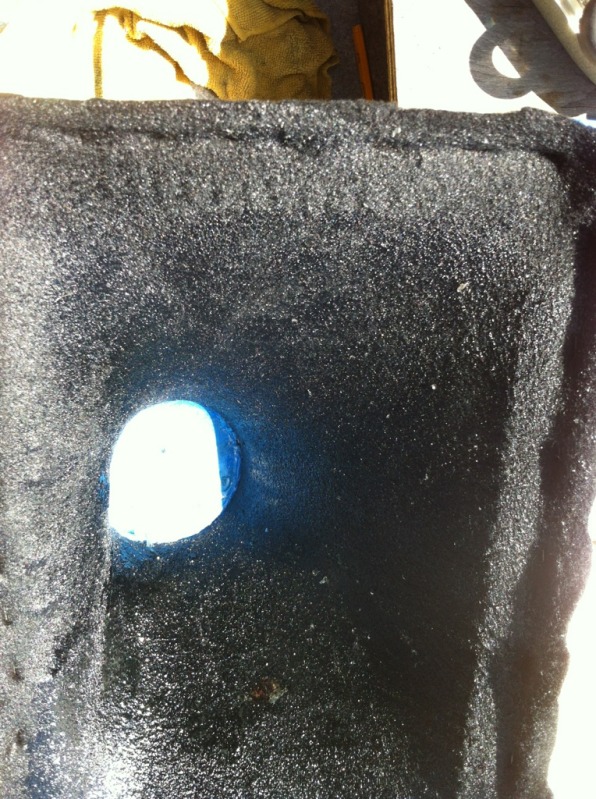
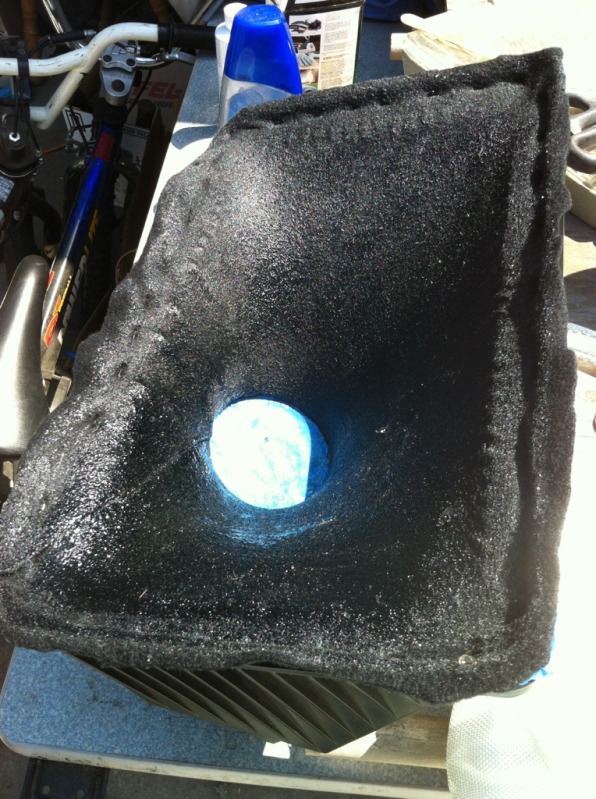
cut the bottom out too.. (made sure i didnt cut too much.)
[IMG http://i96.photobucket.com/albums/l1...E/f9d0d03c.jpg[/IMG]
Fiber glassed the back side.
[IMG http://i96.photobucket.com/albums/l1...E/de91b41e.jpg[/IMG]
I used bondo to fill in the pits and stuff.. probably shoulda used filler instead.. Sanding was a PITA.
[IMGhttp://i96.photobucket.com/albums/l1...E/ba998519.jpg[/IMG]
[IMGhttp://i96.photobucket.com/albums/l1...E/5ae0d802.jpg[/IMG]
[IMGhttp://i96.photobucket.com/albums/l1...E/ff965909.jpg[/IMG]
Prime Time.
[IMGhttp://i96.photobucket.com/albums/l1...E/96c72312.jpg[/IMG]
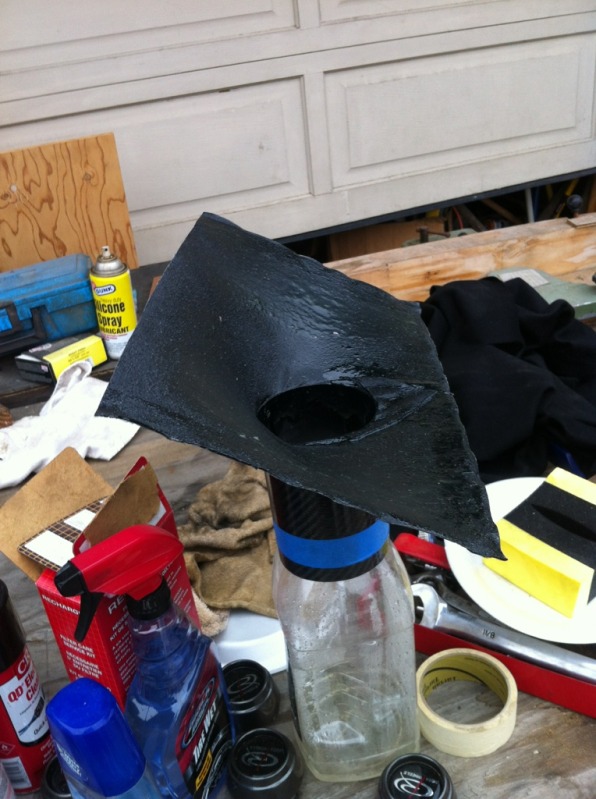
Then I used Satin Black (semi Gloss) finish..
[IMGhttp://i96.photobucket.com/albums/l1...E/ca7116fa.jpg[/IMG]
[IMGhttp://i96.photobucket.com/albums/l1...E/ad614ec0.jpg[/IMG]
[IMGhttp://i96.photobucket.com/albums/l1...E/bff439f5.jpg[/IMG]
[IMGhttp://i96.photobucket.com/albums/l1...E/2a790395.jpg[/IMG]
[IMGhttp://i96.photobucket.com/albums/l1...E/ed63e858.jpg[/IMG]
[IMGhttp://i96.photobucket.com/albums/l1...E/2cc88692.jpg[/IMG]
installed back in the stock box. Also I kept one screen. I will try it without the screen too.
[IMGhttp://i96.photobucket.com/albums/l1...E/2c300775.jpg[/IMG]
[IMGhttp://i96.photobucket.com/albums/l1...E/ed4a4e49.jpg[/IMG]
After installing this i noticed what seem to be better low end on the butt dyno.. and more responsiveness to throttle input. High end is the same, but the main thing is the responsiveness to the throttle. There are some tweaks i want to do but for the most part it was a fun little project.. And if anything.. I can sleep better knowing that the air flows better in my little mind.. haha..
K&N drop in.
RB Duct
Carbon Fiber Flex tube replacement mod.
Both walls removed
one screen removed..
Ive seen people taking off the inside horn and both screens but that did not seem to be a good idea... I got to thinking after I saw one guy use duct tape to make deflectors for air to go into the horn. I thought he may be onto something. I feel that stock horn is too small... on the outsides of the horn in the air box, there is too much space for air turbulence and I thought a BIGGER horn may work... SO with the help of one of the screens and some Polyester Cloth and fiberglass. I got to work. I first I did not think of doing a DIY so I did not take pictures of the first part... But what I did was get the cloth and stretch it over the opening of the top half of the exhaust box... I used a screen to push down the cloth to the hole in the back to create the vortex i was looking for... When this is done you end up with a bunch of extra cloth material at the bottom. So I had to cut it and stretch to over lay it some to get out all the wrinkles. I used the screen to keep it in the hole and used staples around the edges to keep it in place.. Slapped on some fiberglass resin and let it dry and popped it out then it looked like this..
ok so I popped it out and sanded it a little.
[IMGhttp://i96.photobucket.com/albums/l1...E/872b7871.jpg[/IMG]
cut the bottom out too.. (made sure i didnt cut too much.)
[IMG http://i96.photobucket.com/albums/l1...E/f9d0d03c.jpg[/IMG]
Fiber glassed the back side.
[IMG http://i96.photobucket.com/albums/l1...E/de91b41e.jpg[/IMG]
I used bondo to fill in the pits and stuff.. probably shoulda used filler instead.. Sanding was a PITA.
[IMGhttp://i96.photobucket.com/albums/l1...E/ba998519.jpg[/IMG]
[IMGhttp://i96.photobucket.com/albums/l1...E/5ae0d802.jpg[/IMG]
[IMGhttp://i96.photobucket.com/albums/l1...E/ff965909.jpg[/IMG]
Prime Time.
[IMGhttp://i96.photobucket.com/albums/l1...E/96c72312.jpg[/IMG]
Then I used Satin Black (semi Gloss) finish..
[IMGhttp://i96.photobucket.com/albums/l1...E/ca7116fa.jpg[/IMG]
[IMGhttp://i96.photobucket.com/albums/l1...E/ad614ec0.jpg[/IMG]
[IMGhttp://i96.photobucket.com/albums/l1...E/bff439f5.jpg[/IMG]
[IMGhttp://i96.photobucket.com/albums/l1...E/2a790395.jpg[/IMG]
[IMGhttp://i96.photobucket.com/albums/l1...E/ed63e858.jpg[/IMG]
[IMGhttp://i96.photobucket.com/albums/l1...E/2cc88692.jpg[/IMG]
installed back in the stock box. Also I kept one screen. I will try it without the screen too.
[IMGhttp://i96.photobucket.com/albums/l1...E/2c300775.jpg[/IMG]
[IMGhttp://i96.photobucket.com/albums/l1...E/ed4a4e49.jpg[/IMG]
After installing this i noticed what seem to be better low end on the butt dyno.. and more responsiveness to throttle input. High end is the same, but the main thing is the responsiveness to the throttle. There are some tweaks i want to do but for the most part it was a fun little project.. And if anything.. I can sleep better knowing that the air flows better in my little mind.. haha..
Last edited by WreakLoosE; Jun 4, 2012 at 06:15 PM.

1. Go to your first post
2. Click "Edit"
3. Click "Go Advanced"
4. At the Bottom, Click "Manage Attachments"
5. Browse for each file you want to add (max of 5 per post)
6. Click "Upload"
Now your pics are attached, once that is done, you can shoot a message to TeamRX8 to clean up this thread and remove all replies so that you can make subsequent replies with the pics without having all of this banter in the way

Where do the intake screen(s) go? Your method also changes the airbox volume. It is what it is for a reason:
https://www.rx8club.com/showthread.p...ight=helmholtz
https://www.rx8club.com/showthread.p...ight=helmholtz
Thread Starter
Registered
Joined: Apr 2006
Posts: 674
Likes: 0
From: Cali
Yea HiFlite999 that's a good point and I thought about that and tried to keep it in mind.... I was kinda thinking the (Big Picture) I took off the VFad deal and used the RB duct.. So I was hoping that the horn I made gets the total volume closer to stock? I don't know for sure but I thought about that... My thoughts are to get the available air in the box faster into the intake run.. I wanted to keep the same horn idea because I understand it enough to know it is functional.. My thought was however to improve on that idea.. I went for it because I think I have more total volume with the RB duct to sort of offset the volume of the horn I made. I think its a little over. :/

Yea HiFlite999 that's a good point and I thought about that and tried to keep it in mind.... I was kinda thinking the (Big Picture) I took off the VFad deal and used the RB duct.. So I was hoping that the horn I made gets the total volume closer to stock? I don't know for sure but I thought about that... My thoughts are to get the available air in the box faster into the intake run.. I wanted to keep the same horn idea because I understand it enough to know it is functional.. My thought was however to improve on that idea.. I went for it because I think I have more total volume with the RB duct to sort of offset the volume of the horn I made. I think its a little over. :/
I'm more than willing to be proven wrong, but have doubts that this mod will improve anything, though acknowledge it's a clever idea. Dyno it!

Thread Starter
Registered
Joined: Apr 2006
Posts: 674
Likes: 0
From: Cali
Yea I hope to get it dynoed soon to see what it does. It feels very good when driving and the throttle response feels a lot better, but honestly I have no Idea if it is doing anything at all... at this point, Dyno is the only thing left. lol..
Good. Btw, the stock airbox has a drain hole in the bottom to allow H2O that may have made it in, a graceful way of leaving. You might consider a small hole or two in the horn down low to serve the same function.
Thread Starter
Registered
Joined: Apr 2006
Posts: 674
Likes: 0
From: Cali
Aww Man.. Now I got to take it out again and look for that.. I remember seeing one in the lower half of the filter box. on the front side of the filter i think. I don't remember seeing after the filter? now I got to double check..lol.

Thread Starter
Registered
Joined: Apr 2006
Posts: 674
Likes: 0
From: Cali
Ok guys... I've been thinking again...lol.. So in my thinking... I wanted to keep the intake cone / horn thing i made to be a little better than the oem intake horn in bringing in air but i wanted to try to stay close to the same basic principle of how it works. So, I did the Carbon Fiber intake mod. thanks to nlsolja123 here--> https://www.rx8club.com/showthread.p...n+fiber+intake and so I have extra carbon fiber 3.5" tubing. What I found out to my surprise is that the carbon fiber tube fits PERFECTLY in the hole for the maf sensor. So, I'm going to cut a piece of tube the same length as the OEM tube/horn thing and then build up the "intake duct" to the edges of the stock intake box. My idea is to keep the same basic function of the stock box but increase its area and flow... My first model is still installed and feels very good.. but lets see if I get any better feeling results from my second version... stay tuned....


9K All Day
Joined: Jul 2011
Posts: 309
Likes: 1
From: Houston, Texas
if they say you cant embed you must not be able to, but it wouldnt be working anyways because you did not close off your [IMG] in the front. you left it [IMG...
thats my HTML lesson for the day, sorry for the unrelated post
thats my HTML lesson for the day, sorry for the unrelated post
Thread Starter
Registered
Joined: Apr 2006
Posts: 674
Likes: 0
From: Cali
yea that may be... but nothing to it but to do it... who knows... Not too much time and effort to give it a try.
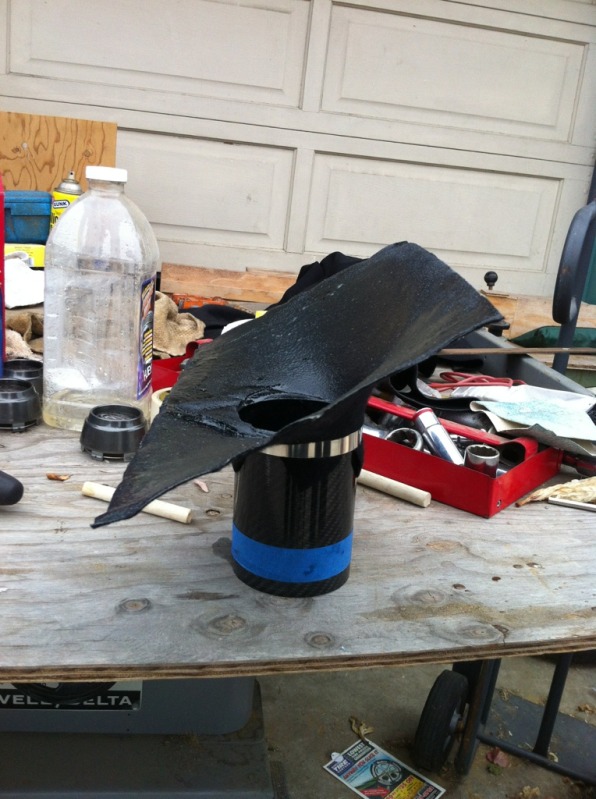
anyway... here is what i had in mind. I whipped this up last night. still got to do some quick sanding and finishing.
Last edited by WreakLoosE; Jun 15, 2012 at 04:38 PM.
Thread Starter
Registered
Joined: Apr 2006
Posts: 674
Likes: 0
From: Cali
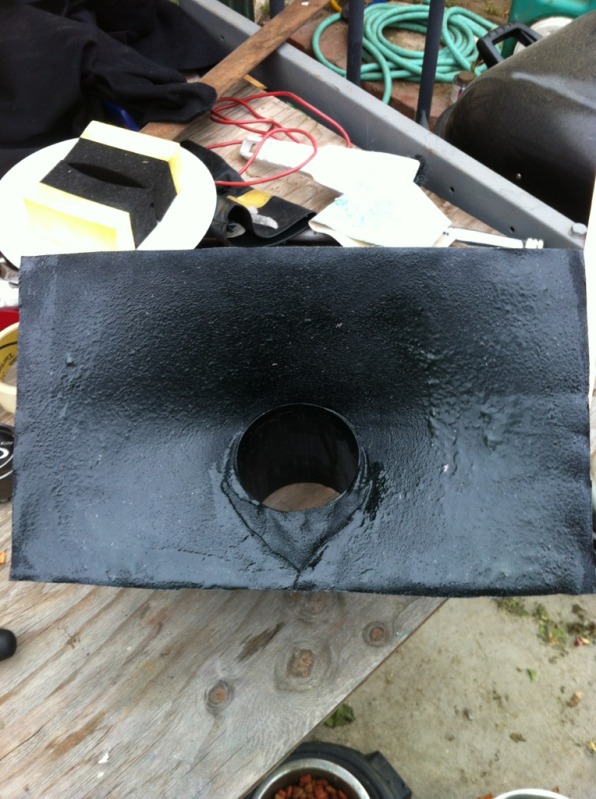
Here is some pics of my second version on my intake cone/horn thingy..
OK... So I got done with the second version of the intake horn I was working on.. I did some testing on the butt dyno and It went like this... I realize this is not truly accurate testing just a subjective though by me, the driver, and a friend the passenger.. so here goes.
I tested the oe config first..
drove on the 91 freeway between Valley View and Beach. Average Speed 85mph.
temp 80 degrees.
ECU reset on each run. (not sure how long ECU needed to learn each set up.)
OE box
K&N Filter
OE horn in (one screen) and no screens or OE horn.
RB duct
flex tube delete mod.
I also at a buddy with me he did not know what config I had in and we compared our butt dyno notes and came up with similar findings.. He wasn't driving so he can only say so much.. (no throttle feelings etc.. )
So what its worth.. here are my thoughts..
OEM set up with the Horn thing out and no screens wasn't good at all. Idle was very rough at first then smoothed out. power band felt kinda all over the place it smoothed out in higher speeds and 6k+ RPMs.
With screen and horn it was much more smoother in lower rpm ranges felt nice as it should.
With second model in it felt a lot like the stock setup with the horn in. Throttle seemed and more responsive and smoother throughout RPM range over stock but overall power did not feel anything over the stock set up.
And the first model was tested last. It felt much more responsive over stock in lower rpm range and speeds.. But around 4k rpms it feels very responsive. It seems like it pulls the hardest above 4-5k. Again.. I don't know for sure what its making in power if anything but but it sure feels good enough to get it on a dyno as soon as I can to see what its doing.. And if anything it feels way better than stock...
Last edited by WreakLoosE; Jun 18, 2012 at 01:38 PM.