DIY: Rebuild Your Air Pump (Noisy Bearings)
 04-17-2013, 10:43 AM
#1
05 RX8 Sold///05 Evo VIII
Thread Starter
iTrader: (5)
Join Date: Feb 2009
Location: New Berlin, WI
Posts: 457
Likes: 0
Received 0 Likes
on
0 Posts
DIY: Rebuild Your Air Pump (Noisy Bearings)
Is your air pump noisy? It's quite easy to rebuild with some simple tools.
I apologize for the links ahead of time.
When I get time to upload pictures I will do so.
You'll need:
A Bench vise. Made it significantly easier.
Small and large flat head screw drivers.
Soft rubber mallet/hammer.
Sockets for bearing removal/install.
An electric impact helps.
T20 TORX socket/ driver.
Two 8x22x7 bearings found on amazon.com
S608-2RS Sealed Stainless Steel Bearing 8x22x7 Miniature Ball: Amazon.com: Industrial & Scientific
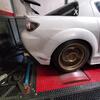
First start by removing your air pump.
Once you have it out you'll see the only thing holding the case together are steel clips that can easily be pried off. There is 6 if i remember correctly.
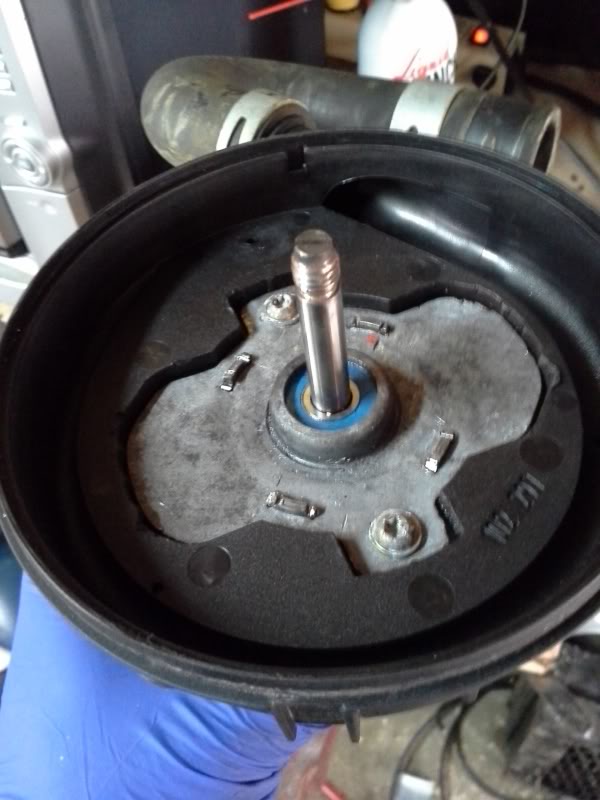
Once all the clips are off the housing will separate and you will see large round silver plates that are actually spinning and moving air.
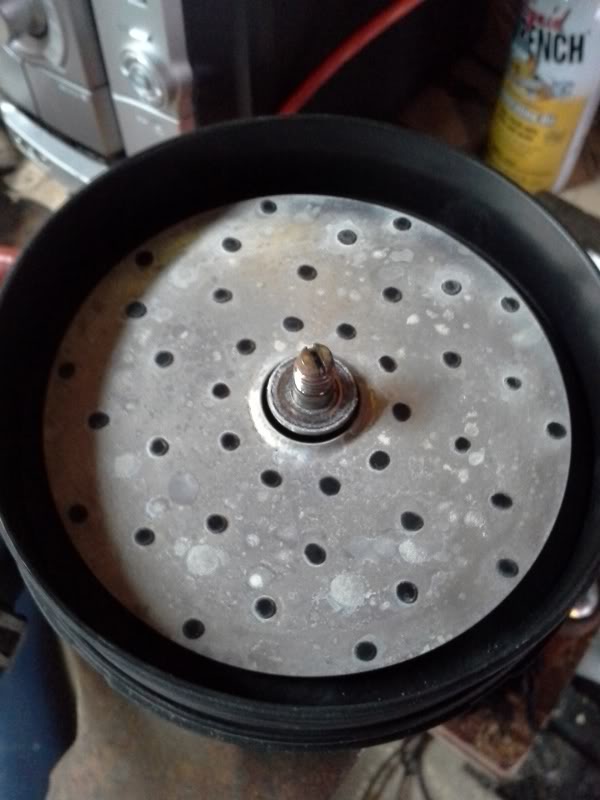
In the center you have a 12mm nut with a washer and clip ring.
Remove the nut only!

Remove the nut, and the washer and the top plate.
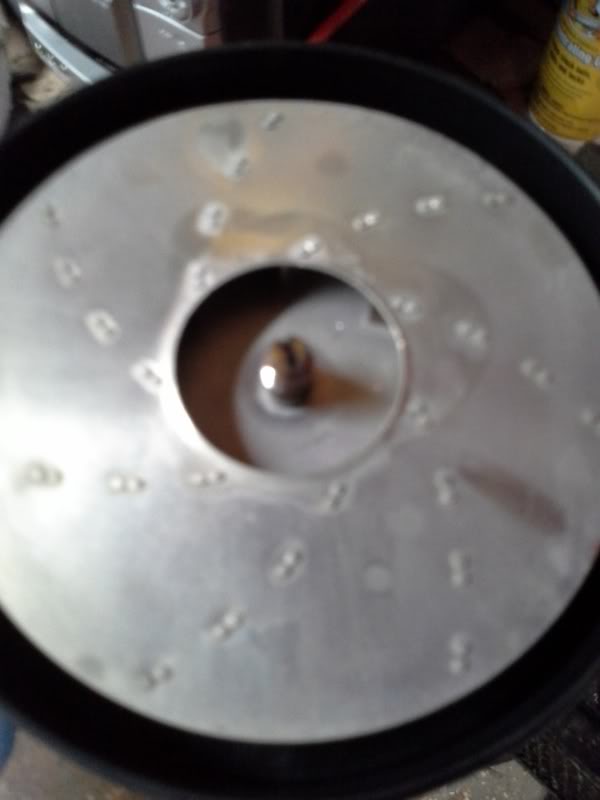
Remove the spacer and plate.
You'll eventually get all the plates out, and there is one final washer sitting on top of the bearing. Pictured is the washer removed.
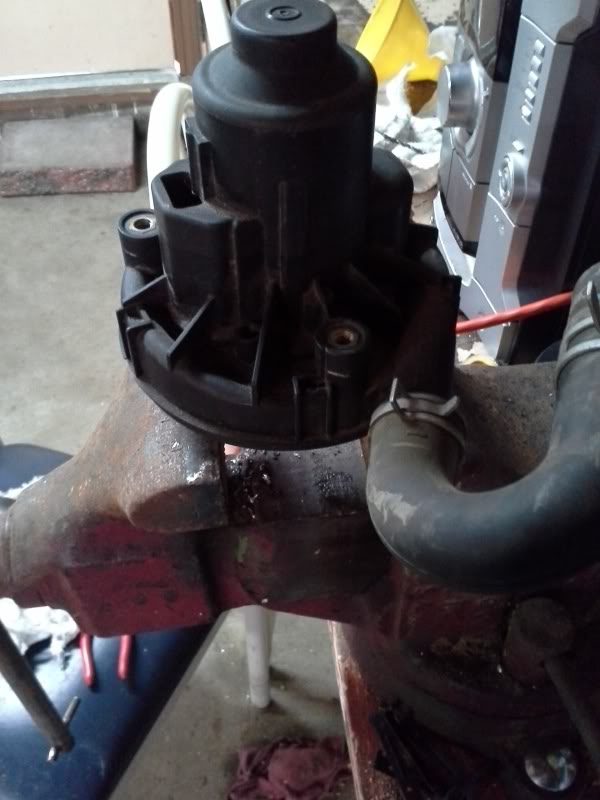
Remove the two T20 screws and flip the plastic assembly over.
Place it over the top of the bench vise and give some assertive taps to the backside of the plastic housing while pulling on the rotor shaft till the whole assembly pops out the plastic case.
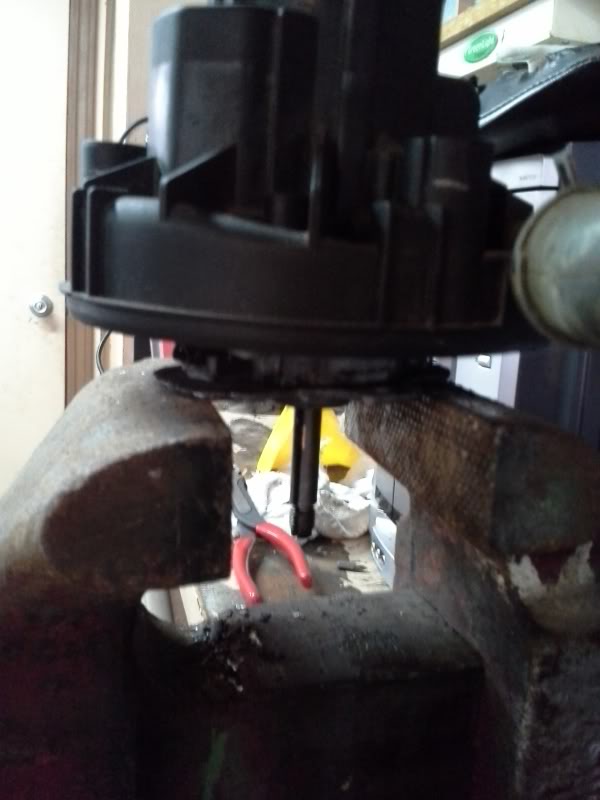
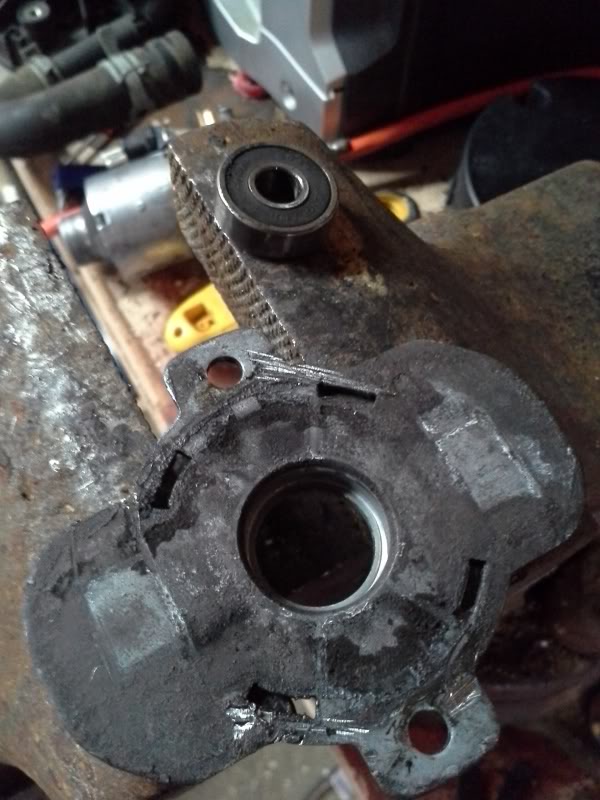
Now you there are four tabs that hold the top bearing plate in place. Take a sharp edge chisel or good flat head to pound the tabs in and seperate the bearing plate.
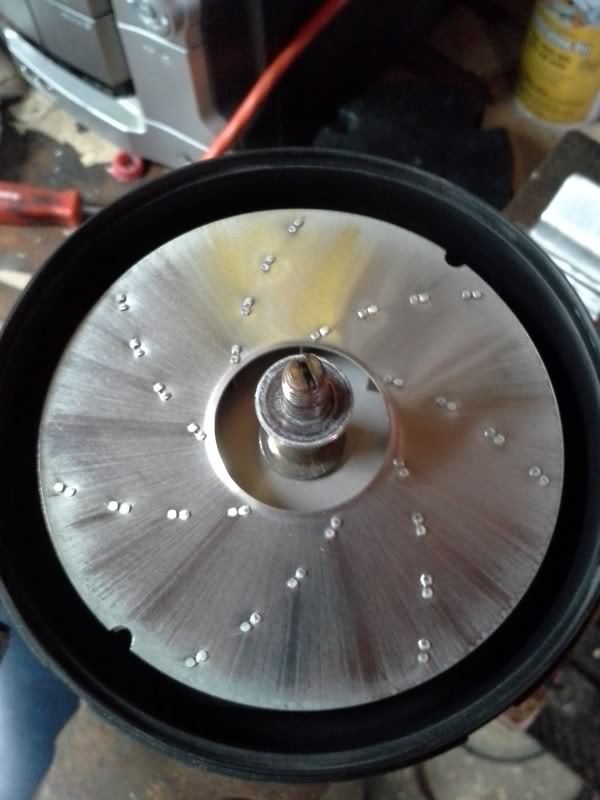
A few light taps from the bottom side assists in removing the plate from the motor housing/armature.
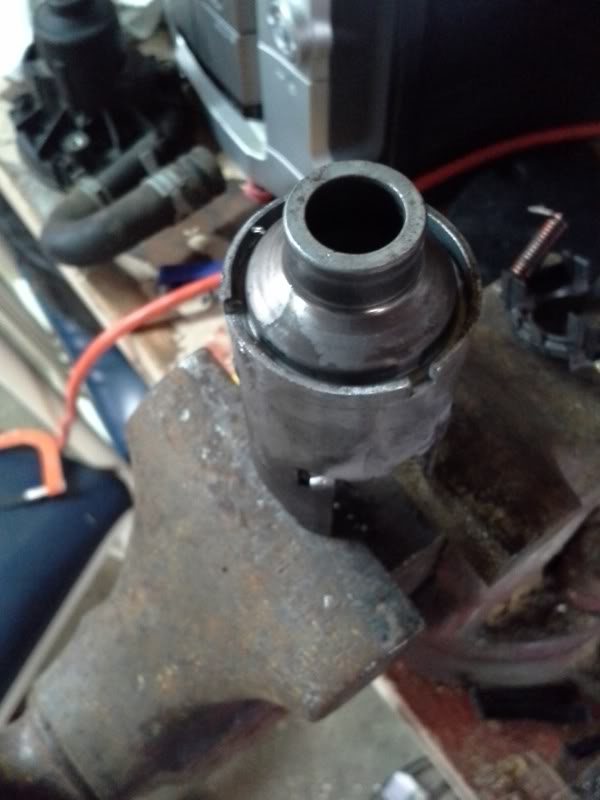
Eventually you'll end up with this.
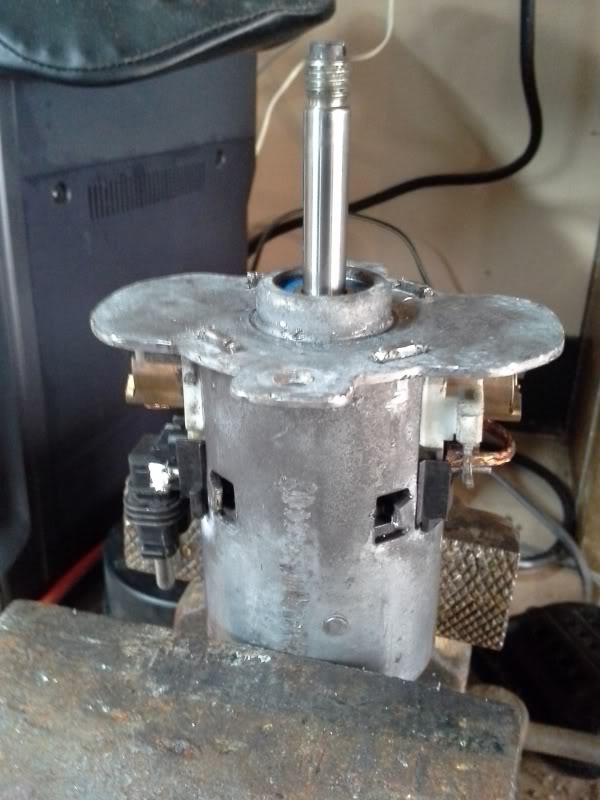
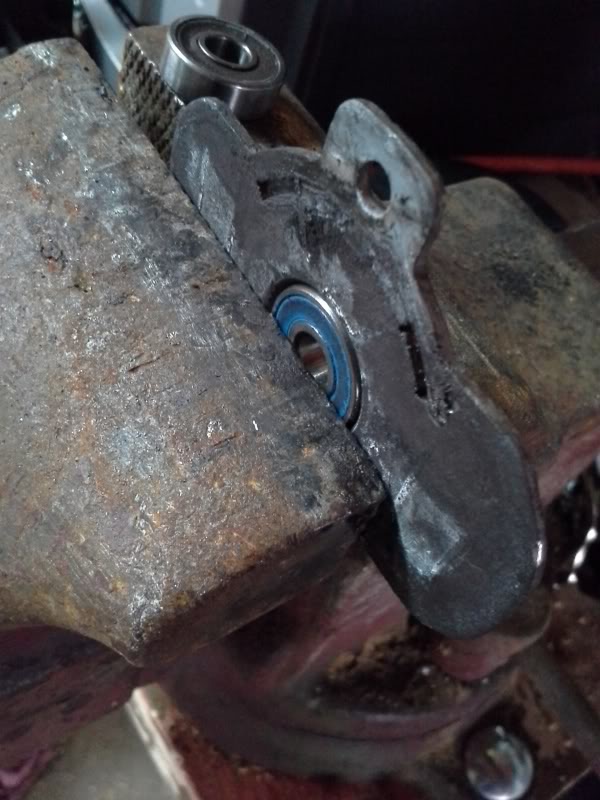
Now take the top plate bearing assembly and position it over the bench vise, leaving room for the bearing to fall out.
Take a socket and pound out the existing bearing.
Position bearing in plate and use vise to press bearing in.
AT THIS POINT YOU CAN REASSEMBLE IF YOUR BOTTOM BEARING IS GOOD!!! OTHERWISE CONTINUE.
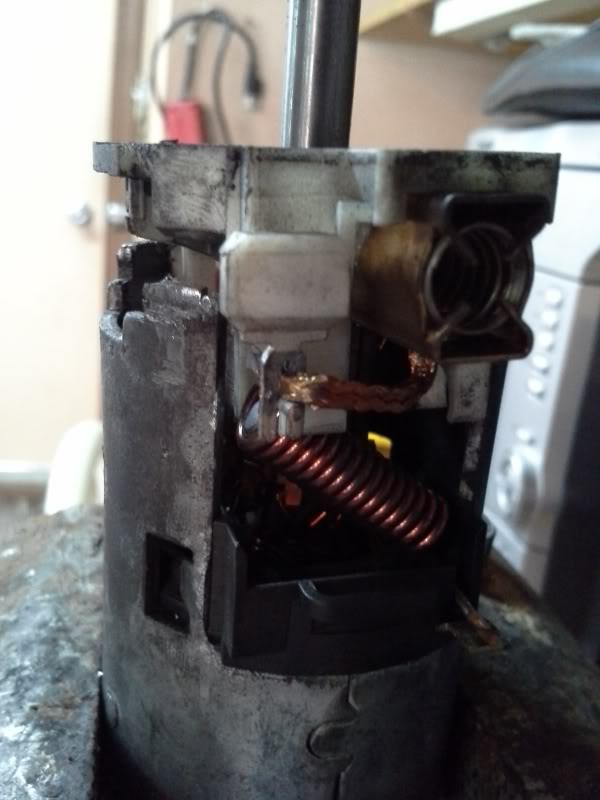
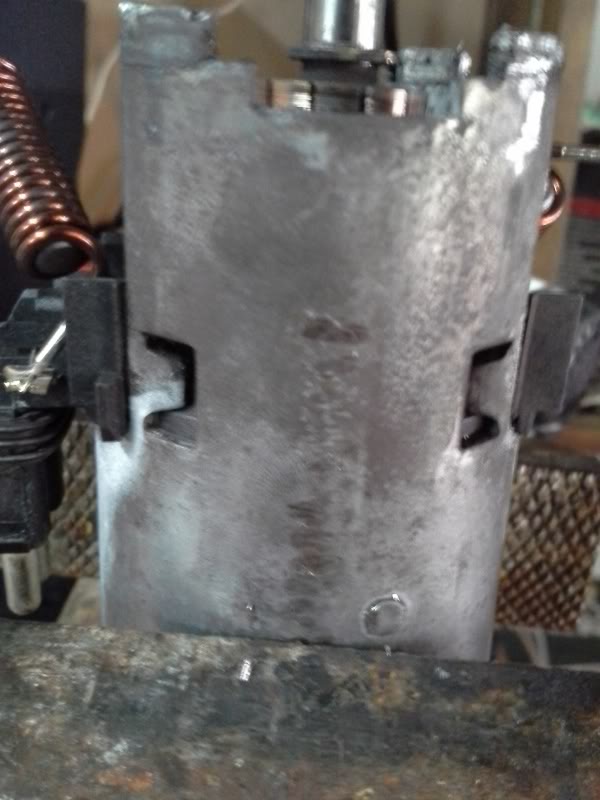
The motor bushings are a tight fit into the armature housing. Take a flat blade screw driver and pry apart the "fingers/clips" that hold each spring(x2) in place and push the springs loose.
BE GENTLE THESE ARE SOLDERED AND BREAK EASY. THEY ARE SUPER EASY TO RESOLDER THOUGH! SEE SECOND PIC FOR A BETTER SHOT OF THE SPRING CLIP.

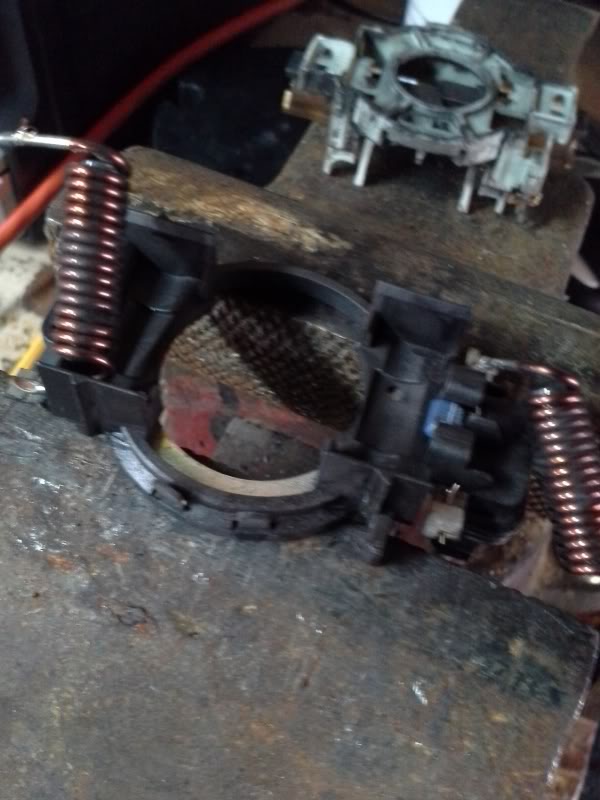
Remove the bushings assembly (white).
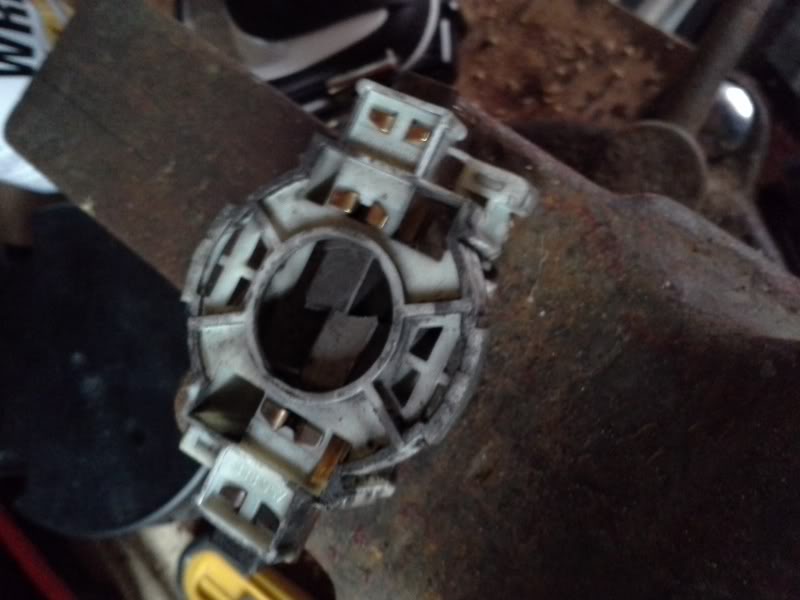
To remove the bottom spring holder assembly you need to pry four tabs on each side of the armature. Pry them back so the black spring holder assembly can be gently pryed out of the armature housing.
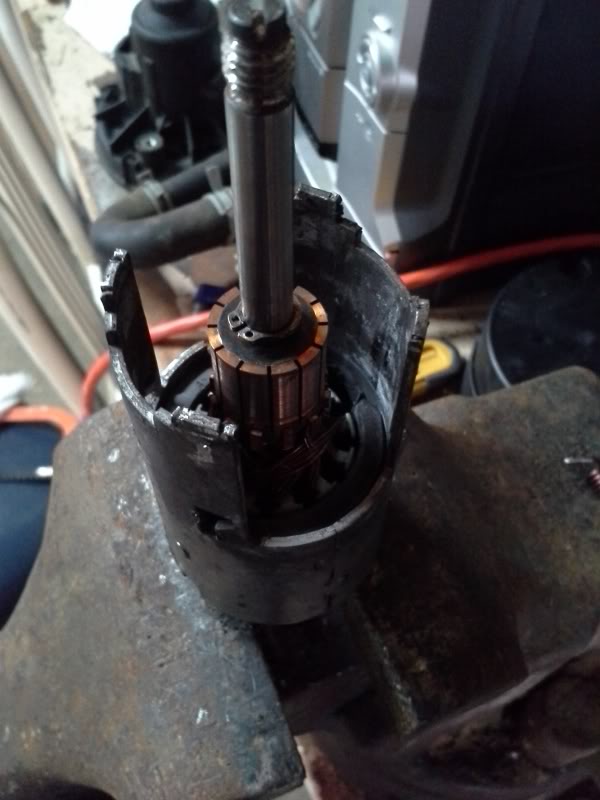
You will now be left with the rotor in the armature housing. Mine just slid right out, otherwise gently tap it out using a socket to push the bearing out with it. Note you will damage the bearing doing this socket method.

Pressing in your new bearing can be kind of tricky. There are magnets in the armature(Duh!) So you need a steady hand and the perfect size socket positioned perfect over the bearing as to now damage pressing it back in.
alternatively a piece of wood works great too.
A light dab of penetrating oil in the bearing "bore" significantly helps press the bearing back into the armature housing.
Before reassembly clean everything with electrical contact cleaner.
By now it should be pretty self explanatory to reassemble it. Be careful with the brushes and springs!!!
When you get to the top bearing plate tap it back on, and gently pound the tabs back over.
I apologize for the links ahead of time.
When I get time to upload pictures I will do so.
You'll need:
A Bench vise. Made it significantly easier.
Small and large flat head screw drivers.
Soft rubber mallet/hammer.
Sockets for bearing removal/install.
An electric impact helps.
T20 TORX socket/ driver.
Two 8x22x7 bearings found on amazon.com
S608-2RS Sealed Stainless Steel Bearing 8x22x7 Miniature Ball: Amazon.com: Industrial & Scientific
First start by removing your air pump.
Once you have it out you'll see the only thing holding the case together are steel clips that can easily be pried off. There is 6 if i remember correctly.
Once all the clips are off the housing will separate and you will see large round silver plates that are actually spinning and moving air.
In the center you have a 12mm nut with a washer and clip ring.
Remove the nut only!

Remove the nut, and the washer and the top plate.

Remove the spacer and plate.


You'll eventually get all the plates out, and there is one final washer sitting on top of the bearing. Pictured is the washer removed.

Remove the two T20 screws and flip the plastic assembly over.
Place it over the top of the bench vise and give some assertive taps to the backside of the plastic housing while pulling on the rotor shaft till the whole assembly pops out the plastic case.


Now you there are four tabs that hold the top bearing plate in place. Take a sharp edge chisel or good flat head to pound the tabs in and seperate the bearing plate.
A few light taps from the bottom side assists in removing the plate from the motor housing/armature.
Eventually you'll end up with this.

Now take the top plate bearing assembly and position it over the bench vise, leaving room for the bearing to fall out.
Take a socket and pound out the existing bearing.

Position bearing in plate and use vise to press bearing in.

AT THIS POINT YOU CAN REASSEMBLE IF YOUR BOTTOM BEARING IS GOOD!!! OTHERWISE CONTINUE.
The motor bushings are a tight fit into the armature housing. Take a flat blade screw driver and pry apart the "fingers/clips" that hold each spring(x2) in place and push the springs loose.
BE GENTLE THESE ARE SOLDERED AND BREAK EASY. THEY ARE SUPER EASY TO RESOLDER THOUGH! SEE SECOND PIC FOR A BETTER SHOT OF THE SPRING CLIP.


Remove the bushings assembly (white).

To remove the bottom spring holder assembly you need to pry four tabs on each side of the armature. Pry them back so the black spring holder assembly can be gently pryed out of the armature housing.


You will now be left with the rotor in the armature housing. Mine just slid right out, otherwise gently tap it out using a socket to push the bearing out with it. Note you will damage the bearing doing this socket method.


Pressing in your new bearing can be kind of tricky. There are magnets in the armature(Duh!) So you need a steady hand and the perfect size socket positioned perfect over the bearing as to now damage pressing it back in.
alternatively a piece of wood works great too.
A light dab of penetrating oil in the bearing "bore" significantly helps press the bearing back into the armature housing.
Before reassembly clean everything with electrical contact cleaner.
By now it should be pretty self explanatory to reassemble it. Be careful with the brushes and springs!!!
When you get to the top bearing plate tap it back on, and gently pound the tabs back over.


 03-04-2014, 12:45 AM
#4

Nice post, my air pump is pretty damn loud during cold starts... I guess it's time to rebuild it. I'm not running a cat so the air pump currently has no purpose, but I'm the type who likes everything to be in working order. 
Posted From RX8Club.com Android App
Posted From RX8Club.com Android App


 03-12-2014, 01:07 PM
#8
Rotary Evolution

the motor will whine, perhaps your idea of acceptable levels may exceed that of the part design. it is a large electric motor after all, not much smaller than that of the starter and you hear how noisy that is.
water intrusion is usually what kills the motor/bearings, so if the old bearings didn't have signs of corrosion then it likely was never failing.
water intrusion is usually what kills the motor/bearings, so if the old bearings didn't have signs of corrosion then it likely was never failing.
Last edited by Karack; 03-12-2014 at 01:10 PM.
04-01-2014, 01:23 PM
#9
Registered

For those who have tried the bearing swap and failed, or would rather install a new part, try Bosch Part No. 078906601H. Although this may be found listed as "Audi Air Pump Bosch 078906601H Allroad A6 Quattro S4", it is a direct fit in my 6-speed 2004 RX8. I did the install last night. No more whine, and no code, though there was no code with the old whining pump either. The best price ($253.43) I found for a new part is at the following link:
Your Parts Search Returned 1 Part(s)
Enjoy the silence!
Your Parts Search Returned 1 Part(s)
Enjoy the silence!
 04-20-2015, 09:10 AM
#11
New Member

Join Date: May 2005
Posts: 6
Likes: 0
Received 0 Likes
on
0 Posts
For those who have tried the bearing swap and failed, or would rather install a new part, try Bosch Part No. 078906601H. Although this may be found listed as "Audi Air Pump Bosch 078906601H Allroad A6 Quattro S4", it is a direct fit in my 6-speed 2004 RX8. I did the install last night. No more whine, and no code, though there was no code with the old whining pump either. The best price ($253.43) I found for a new part is at the following link:
Your Parts Search Returned 1 Part(s)
Enjoy the silence!
Your Parts Search Returned 1 Part(s)
Enjoy the silence!
10-20-2016, 04:12 PM
#12
Registered
G's RX-8, sorry about the extremely late reply, but for what it is worth, no mods at all. It fits just like OEM. Still working fine!
FYI - The air pump is also identified as Bosch W0133-1597546.
FYI - The air pump is also identified as Bosch W0133-1597546.
Last edited by B-K; 10-20-2016 at 04:19 PM. Reason: Add Part No. Reference
05-19-2017, 02:11 PM
#13
New Member

Join Date: Apr 2014
Posts: 1
Likes: 0
Received 0 Likes
on
0 Posts
Thanks for the great writeup and pics, viprez586! Just replaced both bearings in mine for the cost of $7 for a sleeve of 10 bearings, way less than the $125 for a used pump I've seen online. Here are some notes that might help other members:
- The nut on the top of the shaft is 13mm, not 12mm. You can use a flat head screwdriver to hold the shaft stationary while you loosen the nut with a wrench. This is especially handy if you don't have an impact driver.
- I couldn't get the armateur assembly to come out of the plastic housing by tapping on the back.
To get it out, I used a block of wood with a hole drilled in it for the shaft and just slammed the housing and block (as one) down on a hard surface. The armateur came out with one hit.
- My top bearing (the one in the plate bearing assembly) wasn't just bad; it had violently disassembled. Metal fragments and ball bearings were all over the place. Because the bearing had exploded, all I had left was the outer rim, and I couldn't tell which direction I had to pound it out from. After trial and error, I found that a 14mm socket will grip the inside of the outer bearing rim, and pounding it out from the top (if the plate is on a level surface, the bearing will be raised above the plate) worked.
- Because the heat had melted the plastic holding the bushings in place, and the shaft was free to precess around, the bushing guides had melted into the side of the bushing assembly and the bushings had gotten torn up by the motor and were unusable. I ended up having to make new bushings, contour them, shim the guides to fit, and melt the plastic bushing assembly with a heat gun in order to re-seat them. If anyone else has this problem, drop me a PM and I can give more guidance.
- Pressing in the bottom bearing is almost impossible with metal tools. A wooden dowel will work, if you've got one. I found a few washers the same outer diameter of the bearing, put two on the inside, two on the outside with a nut, ran a long bolt through them, and torqued it down until the bearing seated. Then I unbolted the nut and removed the bolt, nut, and washers. Presto.
- I bought a sleeve of 10 bearings on Amazon for $7. As of the date and time of this post, I've got 8 left. If anyone else is doing this repair, PM me, and I'll mail you two of them for the cost of postage (probably around $1).
That's all I've got to add. Thanks again for the great initial writeup, and I hope this helps someone!
07-08-2017, 02:36 PM
#15
silverx8 04MT

Join Date: Dec 2007
Location: Lompoc, ca
Posts: 27
Likes: 0
Received 0 Likes
on
0 Posts
Gut swap
I started thinking about a motor repair. But the bearing at the front was seized and the brushes worn. Since the motor seized, the armature fried. So not salvageable. The Mercedes logo was on the wiring harness of the old unit so I used the pump from a W211. reassembly was pretty easy and the whole disassemble and reassemble was a patient hour or less.
But using a "Cheaper" Mercedes part in my Mazda "Priceless".
But using a "Cheaper" Mercedes part in my Mazda "Priceless".

Thread
Thread Starter
Forum
Replies
Last Post

