DIY: Emblem painting
 01-15-2008, 02:14 AM
#1
PWNZ0R
Thread Starter

Join Date: Oct 2006
Location: DAGO,CA 1904
Posts: 57
Likes: 0
Received 0 Likes
on
0 Posts
DIY: Emblem painting
i dont know if this is in the DIY section but i did it and this is how i did it
tools.....
1) fishing string (the thinner the better)
2) 3m double sided weather proof tape ( thin but not scotch tape thin)
3) sand paper
4) spray paint( krylon is the best)
5) news paper
6) goof off (or some type of stickey remover)
7) razor blade
process....
1) A) take the fishing string and remove the emblem...use it like dental floss between the emblem and the paint...
1)B) be careful on the front emblem cuz the bumper is made out of plastic the friction from the fishing string will cut the paint
1)C) the front emblem has 2 posts coming out to make sure its on straight...the back middle emblem has 2 as well... the "mazda" emblem has i think 3 or 4.... and the rx-8 emblem has 0....dont break those it is harder to make sure the emblems are on straight
2) sand as much of the chrome parts of the emblems as you can making the whole thing look like brushed metal
3) remove the left over stickey from the back of the emblem...do this b4 you paint em cuz you wanna avoid touching the paint as long as possible after your done painting
4) lay down news paper
5) paint the emblems 3-4 light coats to make sure they are completely covered
6) let em dry
7) while they are drying after the final coat go to your car and remove all the stickey from the paint with the goof off
8) then when they are TOTALLY DRY get your 3m tape cut it into thin inch to half inch pieces and put it on the back of the emblems making sure no tape will show from the front side
9) and this is where the posts will help.... put em back on
the rx-8 emblem should still have an outline on the paint where it used to be.... but it will be the hardest part to line up
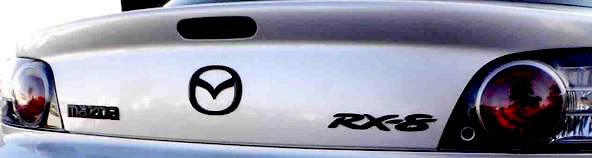
and some pix of how it turned out
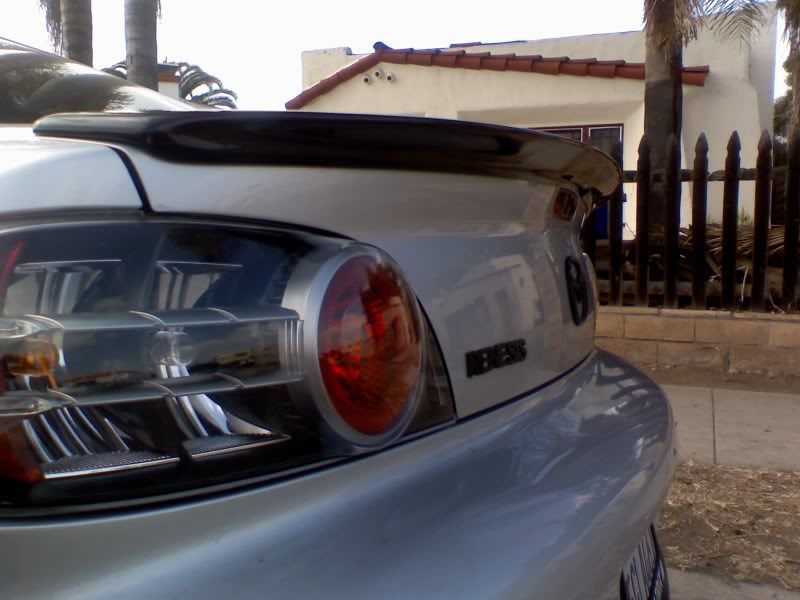

i know its photoshopped but it was the only pict of the back i could find
tools.....
1) fishing string (the thinner the better)
2) 3m double sided weather proof tape ( thin but not scotch tape thin)
3) sand paper
4) spray paint( krylon is the best)
5) news paper
6) goof off (or some type of stickey remover)
7) razor blade
process....
1) A) take the fishing string and remove the emblem...use it like dental floss between the emblem and the paint...
1)B) be careful on the front emblem cuz the bumper is made out of plastic the friction from the fishing string will cut the paint
1)C) the front emblem has 2 posts coming out to make sure its on straight...the back middle emblem has 2 as well... the "mazda" emblem has i think 3 or 4.... and the rx-8 emblem has 0....dont break those it is harder to make sure the emblems are on straight
2) sand as much of the chrome parts of the emblems as you can making the whole thing look like brushed metal
3) remove the left over stickey from the back of the emblem...do this b4 you paint em cuz you wanna avoid touching the paint as long as possible after your done painting
4) lay down news paper
5) paint the emblems 3-4 light coats to make sure they are completely covered
6) let em dry
7) while they are drying after the final coat go to your car and remove all the stickey from the paint with the goof off
8) then when they are TOTALLY DRY get your 3m tape cut it into thin inch to half inch pieces and put it on the back of the emblems making sure no tape will show from the front side
9) and this is where the posts will help.... put em back on
the rx-8 emblem should still have an outline on the paint where it used to be.... but it will be the hardest part to line up
and some pix of how it turned out
i know its photoshopped but it was the only pict of the back i could find


 11-09-2009, 11:33 PM
#6

Heh im bringing this post back... But list the exact type of Krylon you used... you see me and my friends tried a experiment with DIY painting a crappy dealer emblem. We sanded it up a little with like 220 grit, then we primed it twice, shot it with rustoleum black paint for plastic (which btw the black wasnt black enough for me and it seemed somewhat gray) and after 2 shots of that we then put 2 coats of clear on it and the last coat of clear somewhat bubbled... Wasnt very satisfying 2 hours to see the project go to ****.
Did you put primer on before? If so how many coats?
Did you put a clearcoat on? and if so how many coats of that?
Any help would be appreciated...
Did you put primer on before? If so how many coats?
Did you put a clearcoat on? and if so how many coats of that?
Any help would be appreciated...

 07-10-2011, 04:29 AM
#9
Registered

How durable is that plasti dip though? I know you can just peel off a thin coating of it easily, so you may end up spraying them multiple times in the cars life rather than painting once.
07-19-2011, 02:38 AM
#12
Auto to manual swapped

Tacky? It's spray on plastic, it's ingenious

Permenent? Nope an sometimes thats a good thing

Idk you be the judge on how it came out for my wheels
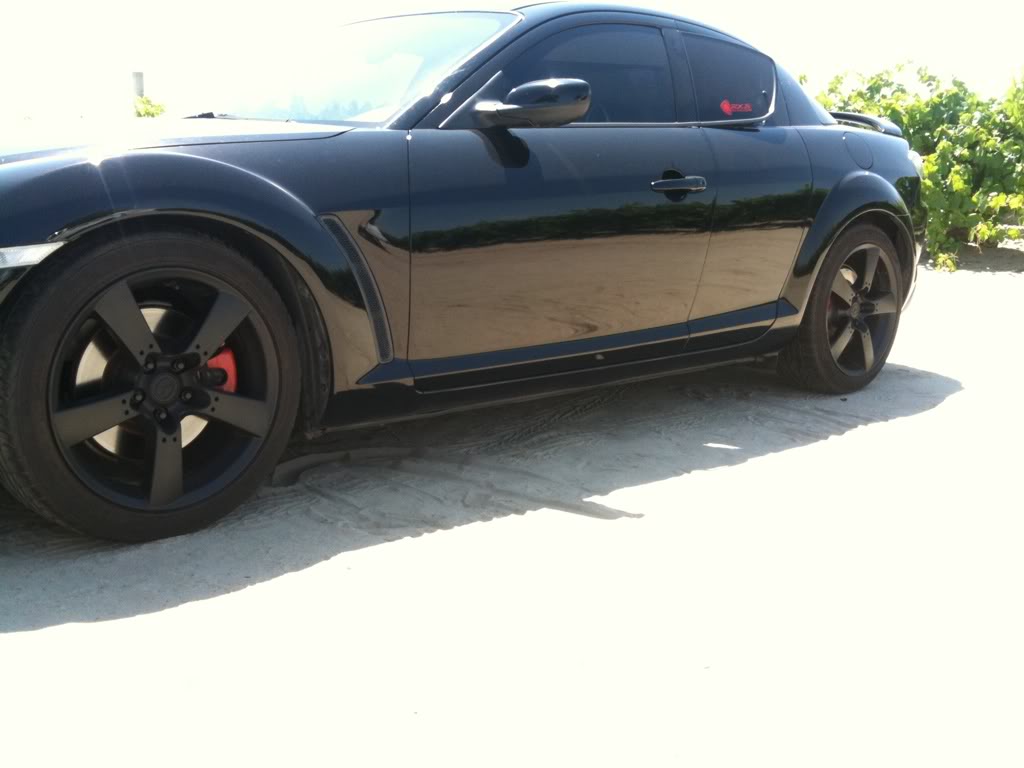
Also noticed 3 year bump lol
Last edited by Figs; 07-19-2011 at 02:41 AM.
07-22-2011, 02:43 AM
#13
Registered User
iTrader: (3)

Join Date: Jan 2010
Location: Columbia, SC
Posts: 52
Likes: 0
Received 0 Likes
on
0 Posts
i wouldn't diss it if i didn't try it. I did both my wheels and my emblems...i absolutely hated the look, and the wheels took forever for it to "peel" off. after i removed the dip from the emblems, i just took them off, and sprayed them the right way...gloss black > flat black :D
mine is a BB too, with red calipers...just sayin
mine is a BB too, with red calipers...just sayin
 07-30-2011, 06:36 PM
#15
150 !L4>/CR

Join Date: Jan 2011
Location: Toronto, ON
Posts: 7
Likes: 0
Received 0 Likes
on
0 Posts
I have an addition to this tip, from the car modelling world:
After scuffing the existing chrome with a scotchbrite pad, you can immerse the plated parts in a bath of 50% bleach and 50% water. The bleach will peel the chrome plating from the plastic without damaging the plastic. Once the bleach softens the chrome plating, you can use a firm toothbrush or a scrubber to help lift the chrome away. As a bonus, the bleach immersion will also do an excellent job of prepping the surface for paint. (it's very good at removing mold-release agents that are often left under the chrome during the manufacturing process...this is why chrome plated parts eventually bubble and peel). Lastly, it will help remove the remaining residue of the bonding tape used to adhere the badge to the body. As a warning, don't leave the part in the bleach immersion too long...I've left parts overnight and they tend to be okay, but it will soften the plastic as well.
Alternately, if you're very, very careful, you can use oven cleaner to strip the chrome, but the oven cleaner can damage the plastic. The trick is to quickly neutralize the oven cleaner with water once the chrome lifts, but before it has a chance to begin chemically dissolving the plastic.
The Bleach trick is safe, but you're looking at a couple of hours worth of soaking to break up the chrome. The oven-cleaner trick works in minutes if not seconds, but is riskier.
For best paint results, plastics should be wiped down with alcohol, fully dried, and primed. Remember, several types of automotive finishes react badly to bare plastic. My best results are with using Tamiya's Fine Lacquer primer, which can be followed up with automotive-grade lacquer and clear of your choice.
Been contemplating this, because I'm thinking gloss black emblems and badges will look great on my silver RX-8, especially because I have very deep tints. The "tuxedo look," if you will. Maybe even a slight airbrushed or hand-painted red accent too!
EDIT - To the OP: Didn't see the pics until after I had posted. 100% convinced now that yours looks exactly like I want mine to...looks awesome. Badges coming off tomorrow!
-Adam
Last edited by RallyGuy; 07-30-2011 at 06:44 PM.
 09-02-2011, 09:23 PM
#17
X08

soaked in oven cleaner for 2 hours and nothing, tried the bleach but after the same amount of time could barely tell a difference...just scuffed and painted eff all that waiting.


 10-12-2011, 06:42 AM
#21
Registered User

 11-02-2011, 12:09 AM
#23
Mazda emblem delete...
Moved the Rx8 over to cover up the 3 holes left from the Mazda emblem. Had to place it a little closer to the edge than I would have liked however I am pleased with the results.

Thread
Thread Starter
Forum
Replies
Last Post