DIY: Cobb mount for $15
 03-20-2012, 11:12 PM
#1
Registered
Thread Starter
iTrader: (1)

Join Date: Nov 2008
Posts: 122
Likes: 0
Received 0 Likes
on
0 Posts
DIY: Cobb mount for $15
Alright, well I searched for a way to mount my cobb in a good location and saw some mounts you can buy, but none that were home made, so I decided to make one.
IF this is already posted somewhere mods feel free to delete this.
Also, this is my first attempt at a DIY so please bear with me.
Materials:
Plastic Weld Epoxy $4 Autozone
Cell phone mount $10 Autozone
PVC 45 degree 3/4 inch elbow $0.50
PVC 3/4 inch connector $0.50
Scrap piece of carbon fiber vinyl 3-4 inch square is plenty.
Scrap piece of flat black hard plastic.
1 1/4 hole saw.
First step is to remove the glove box. Pinch the sides and let it drop down. Then pop off the little arm that is holding it on the Right side and it will drop the rest of the way out.
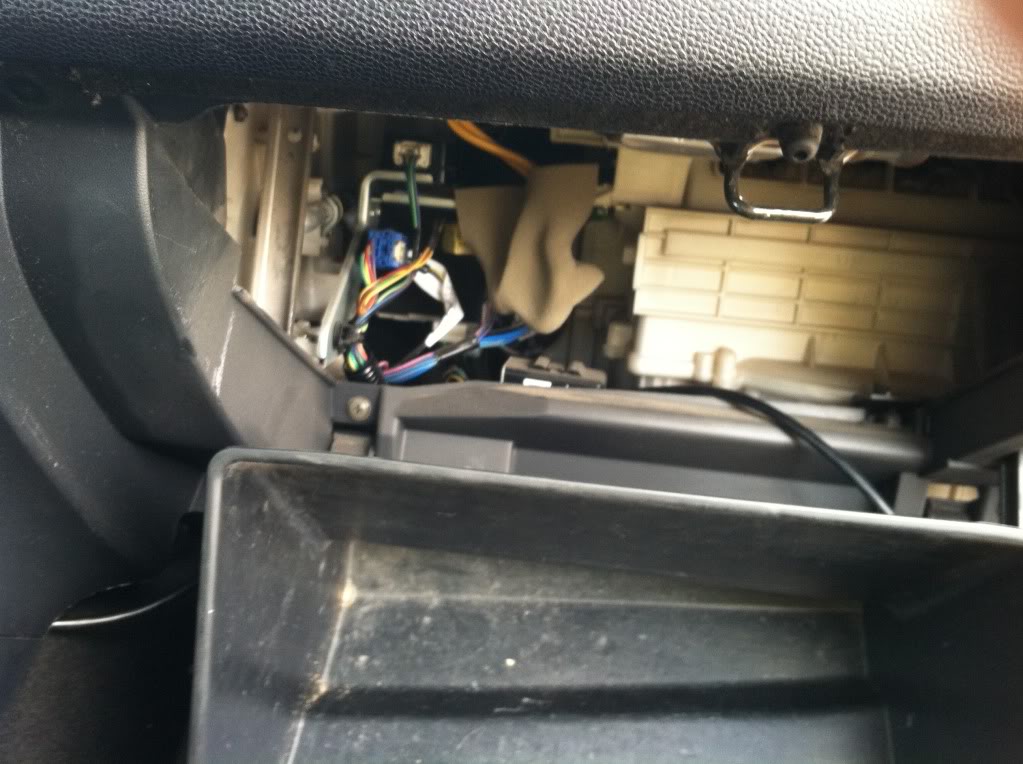
With this out of the way, it is easy to get behind the dash and pop out the little dash cover.
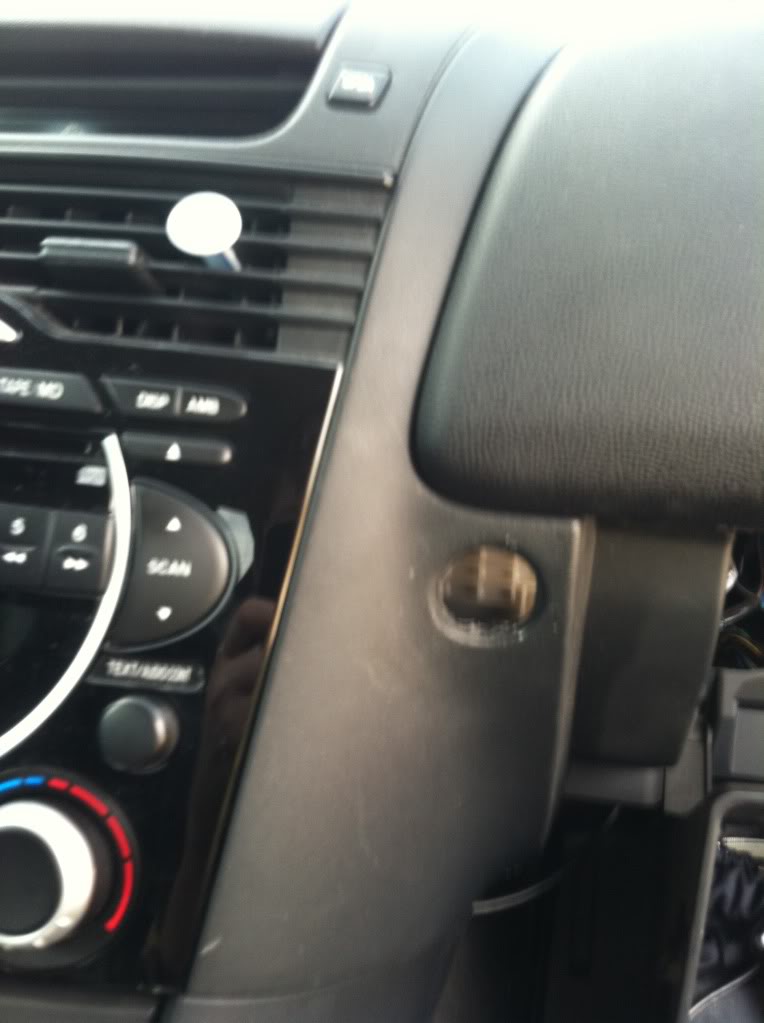
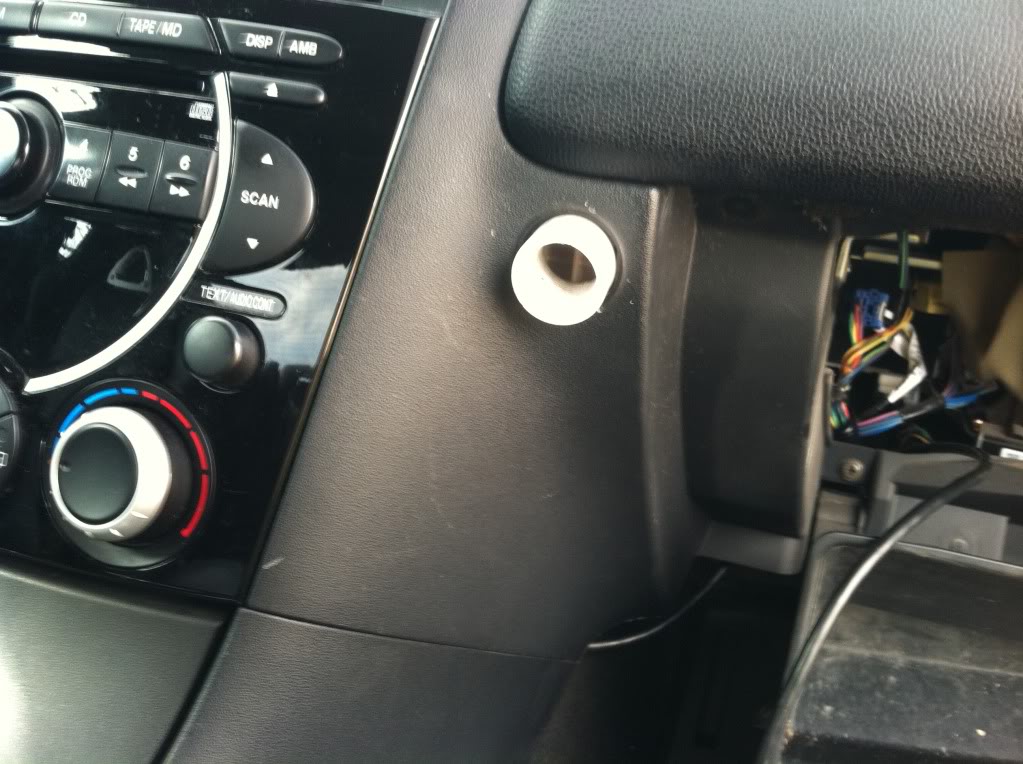
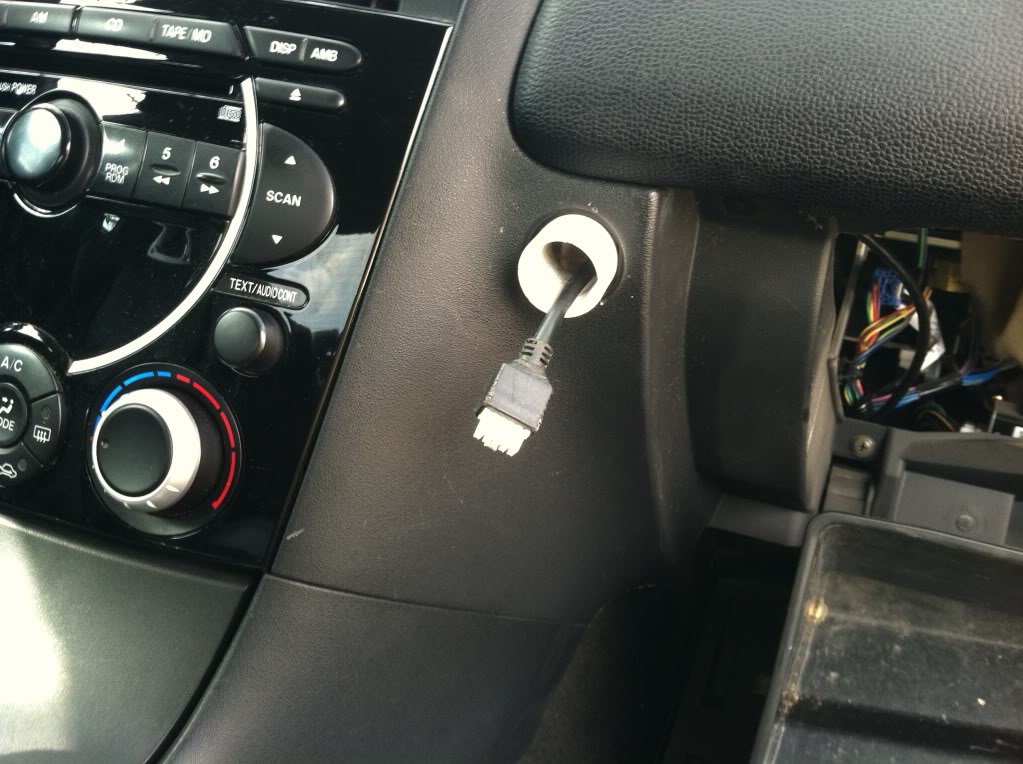
Next, take the pvc connector, I bought one that was about 2 inches long, and had a nut molded on one end. From the back, push it through the dash so that the nut is against the back side of the dash. this way, it can't come the rest of the way through.
Also, I found it was a tighter better fit if you vinyl wrapped this piece as well, although I didn't get a picture of it wrapped.
Next, I routed the Cobb cord from the OBD II port behind the dash and through the connector. I found it was a tight fit, and used a drill and drill bit to mill out the connector a little bit so I would slide through easier.
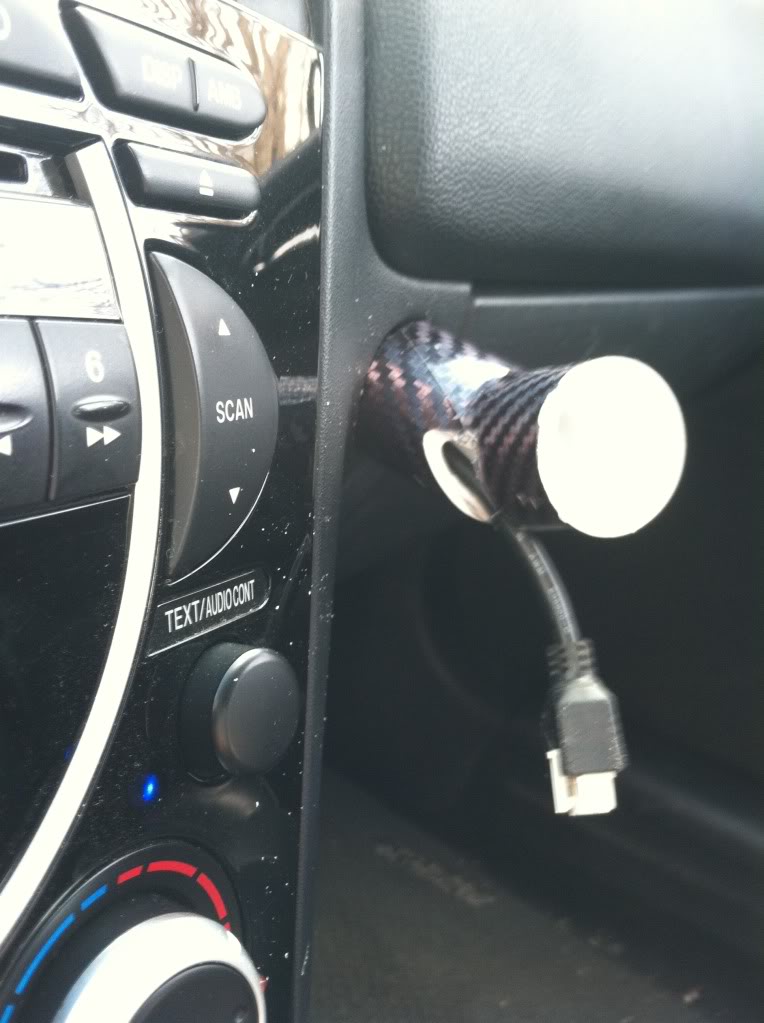
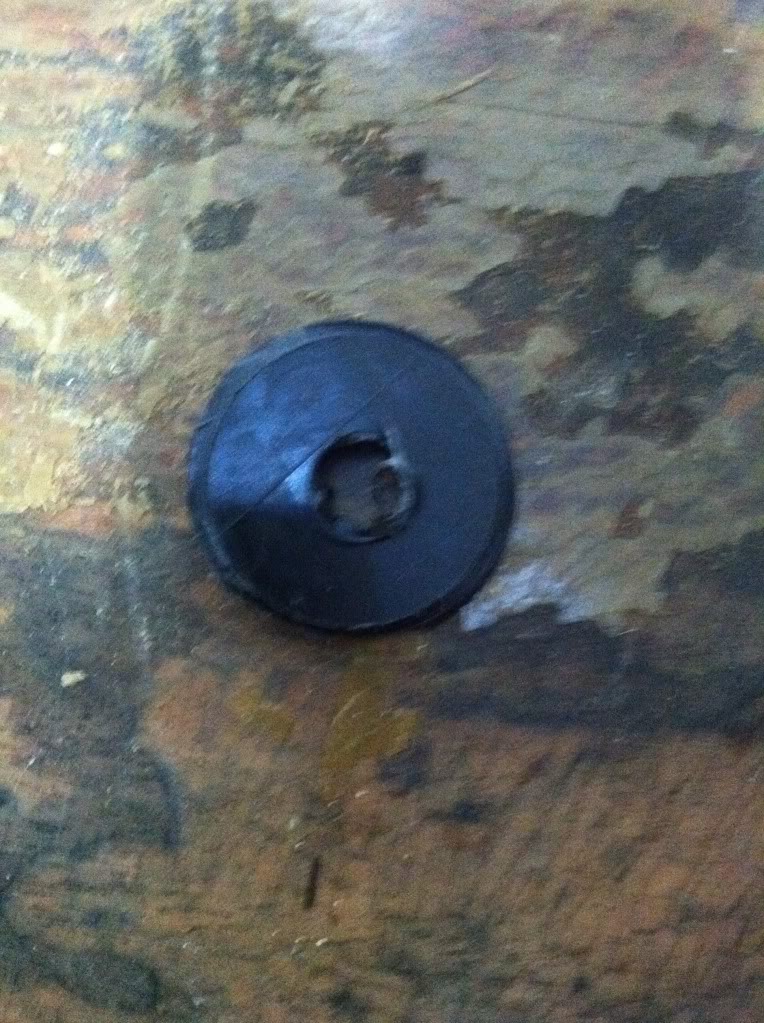
Next, I took the 45 degree elbow, and wrapped it in the carbon fiber. I also decided to cut a slot in the bottom of it where it wouldn't be seen with the cobb mounted and slid the wire out of it as well. Should look like this when its done.
Now it's time to get the cell phone mount ready. This one seemed to work the best of all the ones that Autozone had.
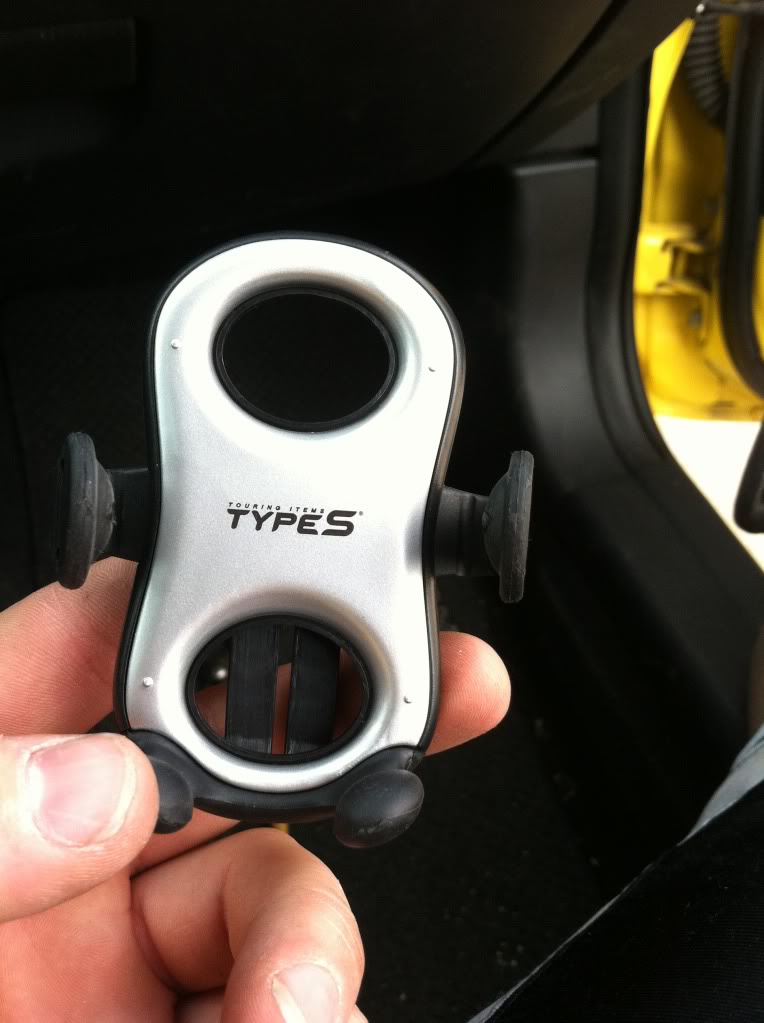
I started by removing the clip on the back by taking out the little screw.

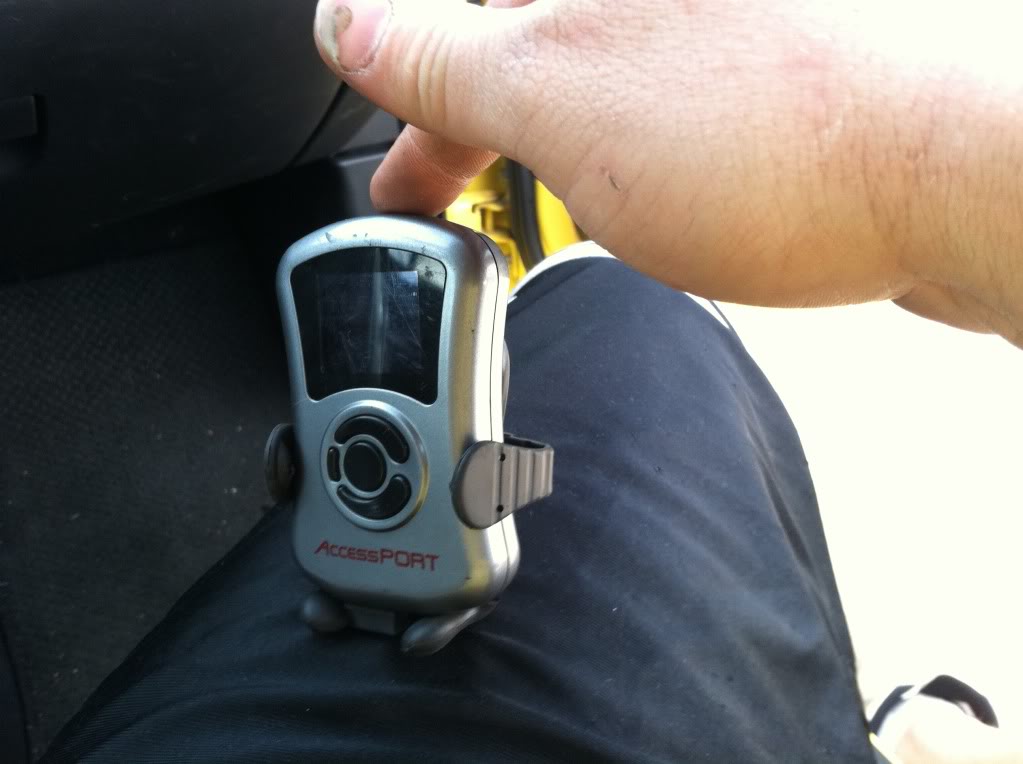
Cobb fits Perfectly in it too!!
Now its time for the hole saw and the spare hard plastic. I used a plastic crate that I didn't need.
Turned out like this.
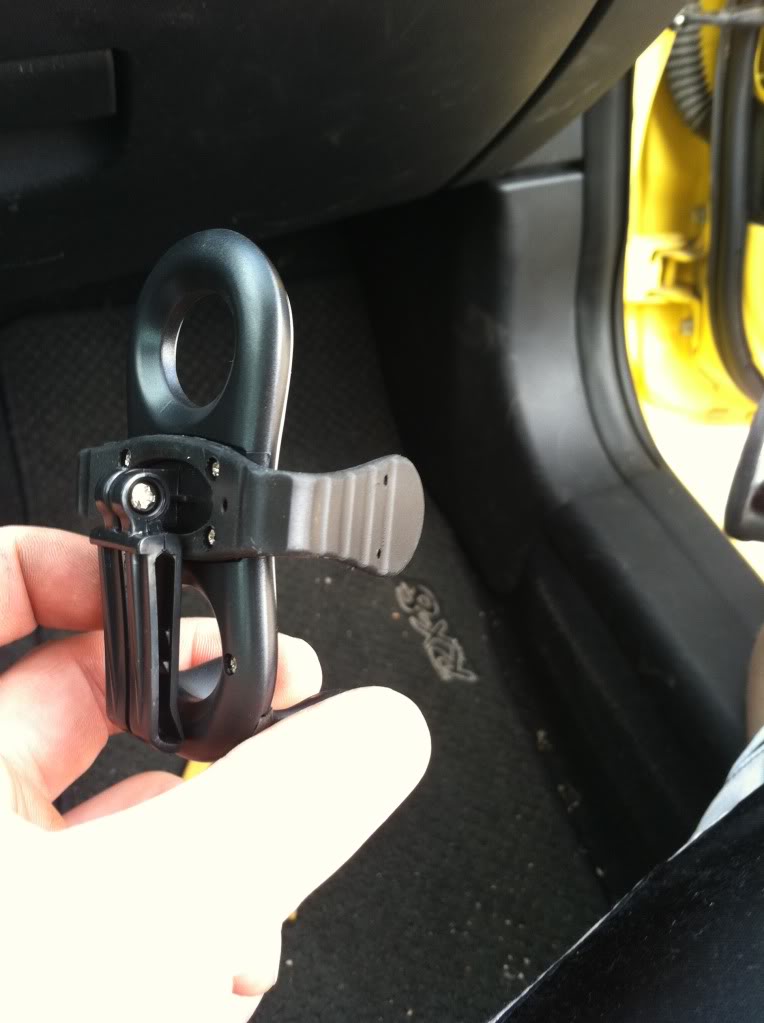
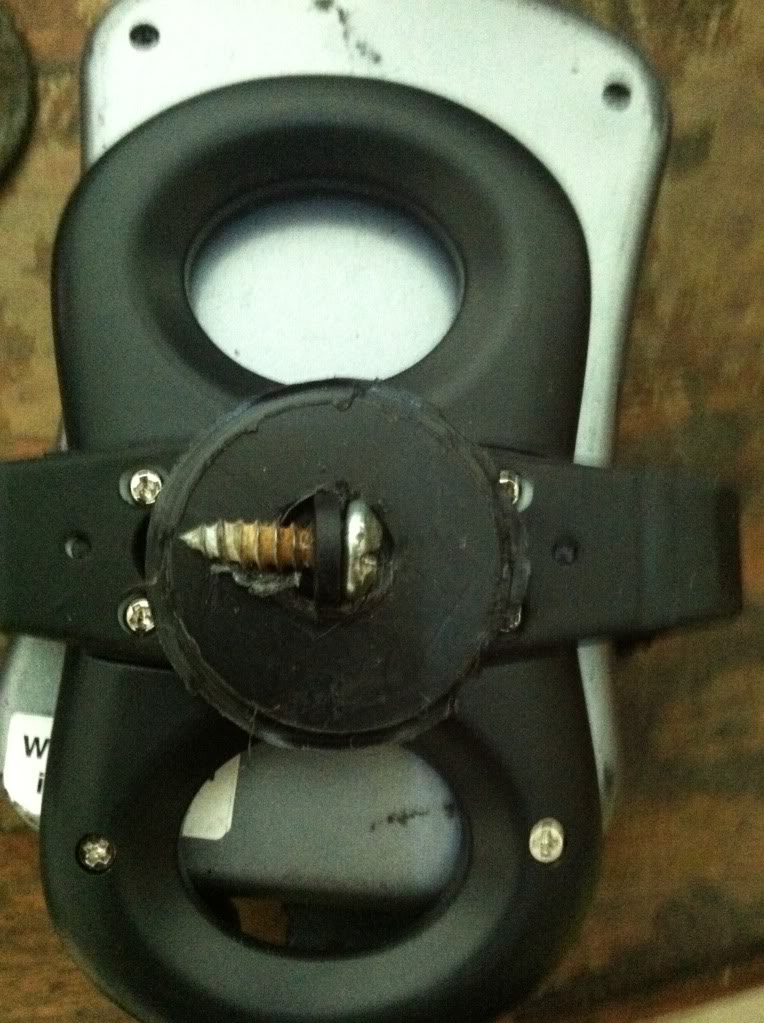
Next, I fitted that piece over the nipple on the back off the cell phone holder and put a screw through it to hold it on. The one that held that clip on would be perfect...but I didn't save mine.
Finally, all that is left is take out the epoxy and an applicator...I used a q tip and it worked great. Cover the edge of the elbow with epoxy, I also put some around the lip of the black plastic piece.
Hold the cobb mount to the elbow for 5 minutes or so and let it dry. Then let it cure overnight so you don't know it off.
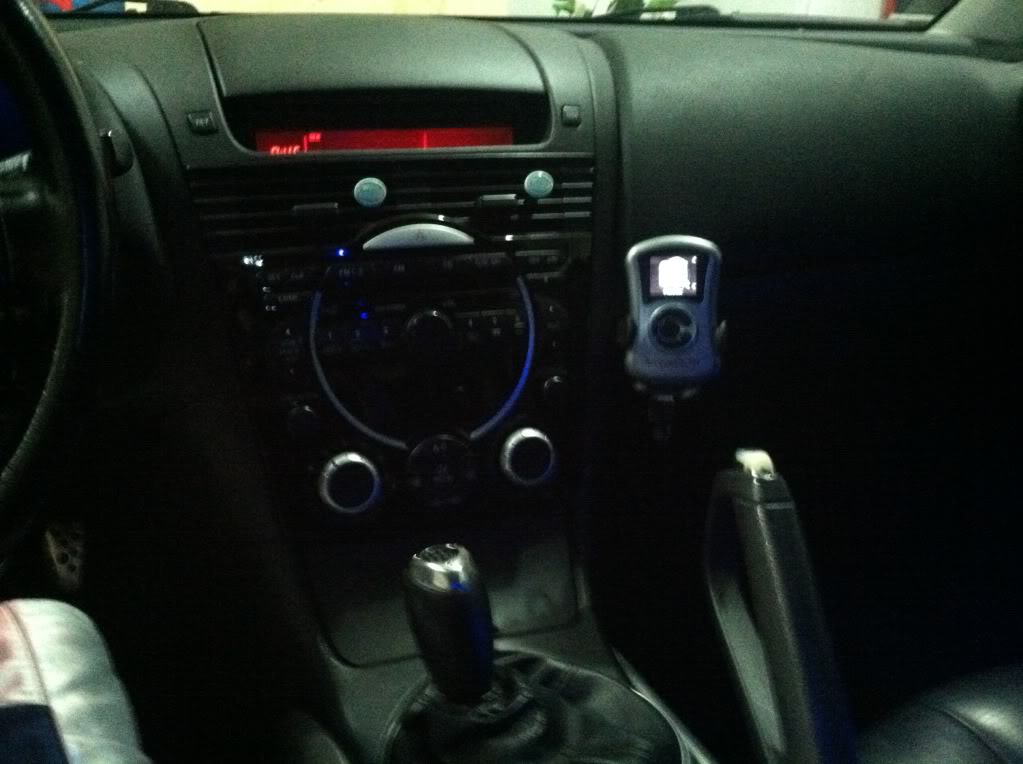
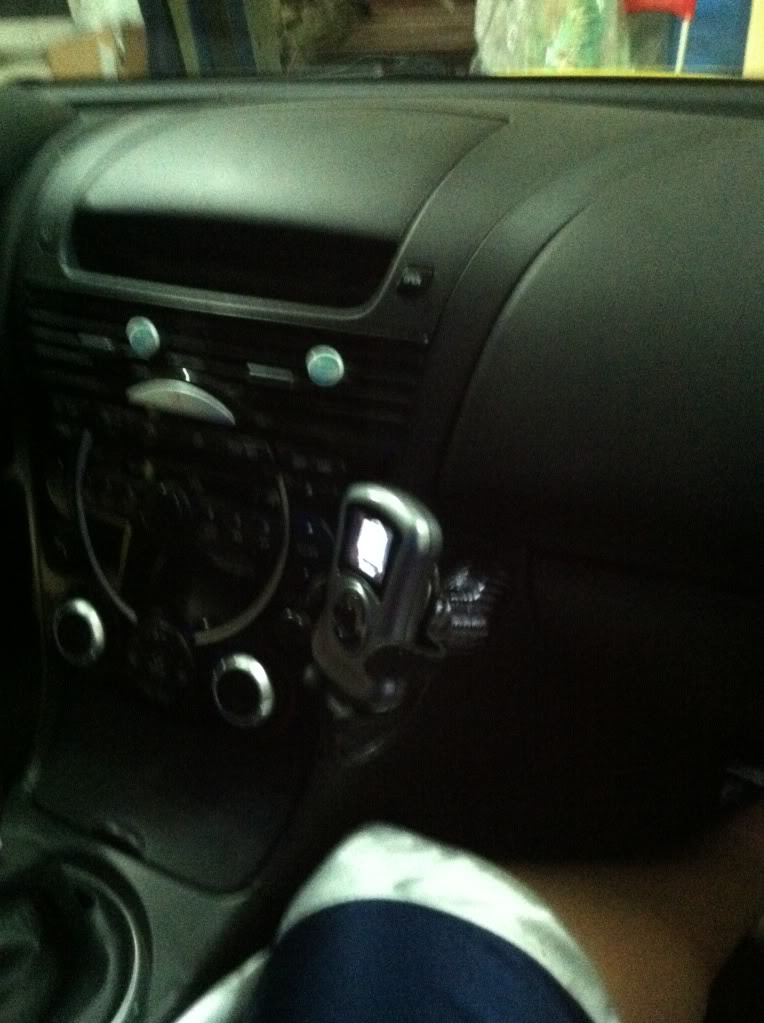
Last step, mount your cobb and enjoy your cheap mount that looks good!
IF this is already posted somewhere mods feel free to delete this.
Also, this is my first attempt at a DIY so please bear with me.
Materials:
Plastic Weld Epoxy $4 Autozone
Cell phone mount $10 Autozone
PVC 45 degree 3/4 inch elbow $0.50
PVC 3/4 inch connector $0.50
Scrap piece of carbon fiber vinyl 3-4 inch square is plenty.
Scrap piece of flat black hard plastic.
1 1/4 hole saw.
First step is to remove the glove box. Pinch the sides and let it drop down. Then pop off the little arm that is holding it on the Right side and it will drop the rest of the way out.
With this out of the way, it is easy to get behind the dash and pop out the little dash cover.
Next, take the pvc connector, I bought one that was about 2 inches long, and had a nut molded on one end. From the back, push it through the dash so that the nut is against the back side of the dash. this way, it can't come the rest of the way through.
Also, I found it was a tighter better fit if you vinyl wrapped this piece as well, although I didn't get a picture of it wrapped.
Next, I routed the Cobb cord from the OBD II port behind the dash and through the connector. I found it was a tight fit, and used a drill and drill bit to mill out the connector a little bit so I would slide through easier.
Next, I took the 45 degree elbow, and wrapped it in the carbon fiber. I also decided to cut a slot in the bottom of it where it wouldn't be seen with the cobb mounted and slid the wire out of it as well. Should look like this when its done.
Now it's time to get the cell phone mount ready. This one seemed to work the best of all the ones that Autozone had.
I started by removing the clip on the back by taking out the little screw.
Cobb fits Perfectly in it too!!
Now its time for the hole saw and the spare hard plastic. I used a plastic crate that I didn't need.
Turned out like this.
Next, I fitted that piece over the nipple on the back off the cell phone holder and put a screw through it to hold it on. The one that held that clip on would be perfect...but I didn't save mine.
Finally, all that is left is take out the epoxy and an applicator...I used a q tip and it worked great. Cover the edge of the elbow with epoxy, I also put some around the lip of the black plastic piece.
Hold the cobb mount to the elbow for 5 minutes or so and let it dry. Then let it cure overnight so you don't know it off.
Last step, mount your cobb and enjoy your cheap mount that looks good!


 03-20-2012, 11:33 PM
#4
Registered
Thread Starter
iTrader: (1)
Join Date: Nov 2008
Posts: 122
Likes: 0
Received 0 Likes
on
0 Posts
How do I attach a pic? that is the only way I've ever known to add pics...
figured it out...I'll upload them in the morning. All the pictures are too large to upload so I will have to resize them.
figured it out...I'll upload them in the morning. All the pictures are too large to upload so I will have to resize them.
Last edited by SEANMAC777; 03-20-2012 at 11:42 PM.
 03-20-2012, 11:52 PM
#6
https://www.rx8club.com/series-i-interior-audio-electronics-24/diy-alternative-phone-mount-project-185624/
I know it says phone mount, but that's just a technicality
I know it says phone mount, but that's just a technicality
03-21-2012, 12:16 AM
#7
great utility for this: http://www.irfanview.com/main_download_engl.htm
use the resample mode rather than resize

Thread
Thread Starter
Forum
Replies
Last Post
ShellDude
RX-8 Parts For Sale/Wanted
5
10-01-2015 09:55 PM