DIY: Better Flowing Intake Box (Similar to RB Intake Box)
 11-05-2007, 12:04 AM
#1

DIY: Better Flowing Intake Box (Similar to RB Intake Box)
Now, people are buying the Racing Beat REVi Intake for an astonishing $336 dollars! You can create your own high flow air intake box with just a simple tool: A Philips screwdriver. Now, there's a lot more discussion on the Air Intake Box itself in this thread: https://www.rx8club.com/series-i-tech-garage-22/inside-air-box-129827/
How to remove the airbox you ask? GO HERE
https://www.rx8club.com/showthread.php?t=144789
EDIT: REMEMBER TO RESET YOUR ECU! Some people claim that the idle somehow dropped or is rough. It will go away after about a hundred miles because the ECU needs to adjust to it. If you don't want to drive around like that for a hundred miles, do the ECU reset. This is recommended if you remove both the screens (what most people do).
Resetting procedure can be found HERE
https://www.rx8club.com/showpost.php...32&postcount=3
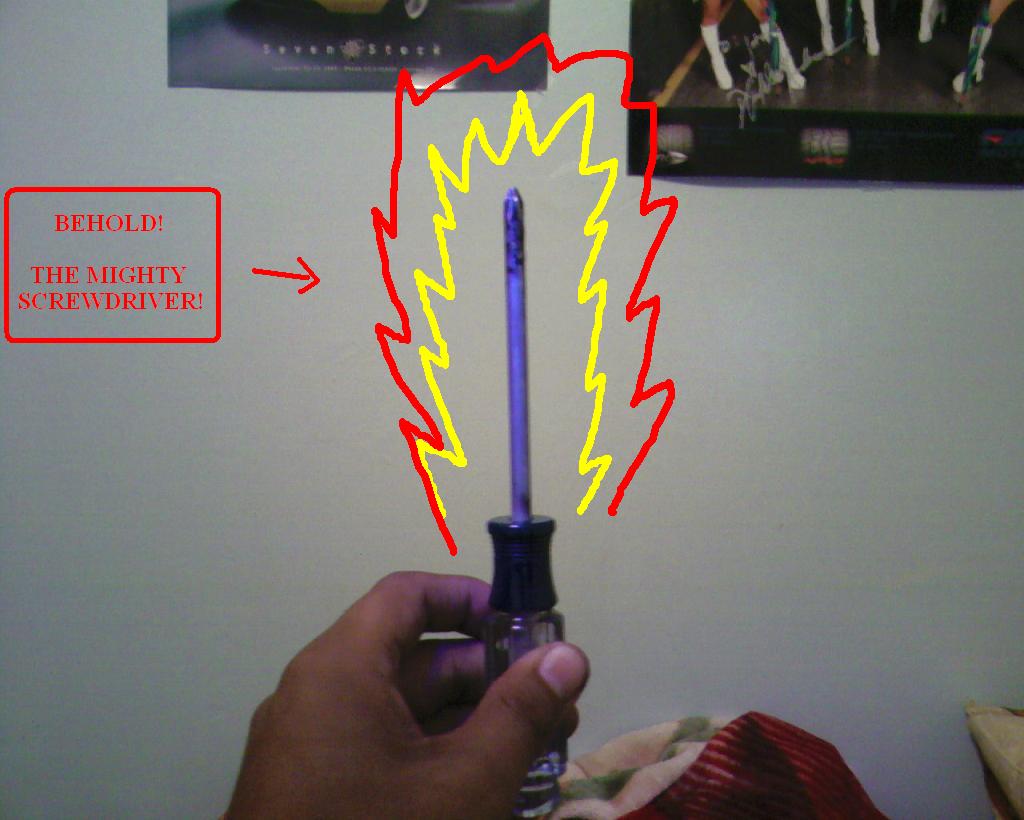
Tools:
A Phillips Screw Driver
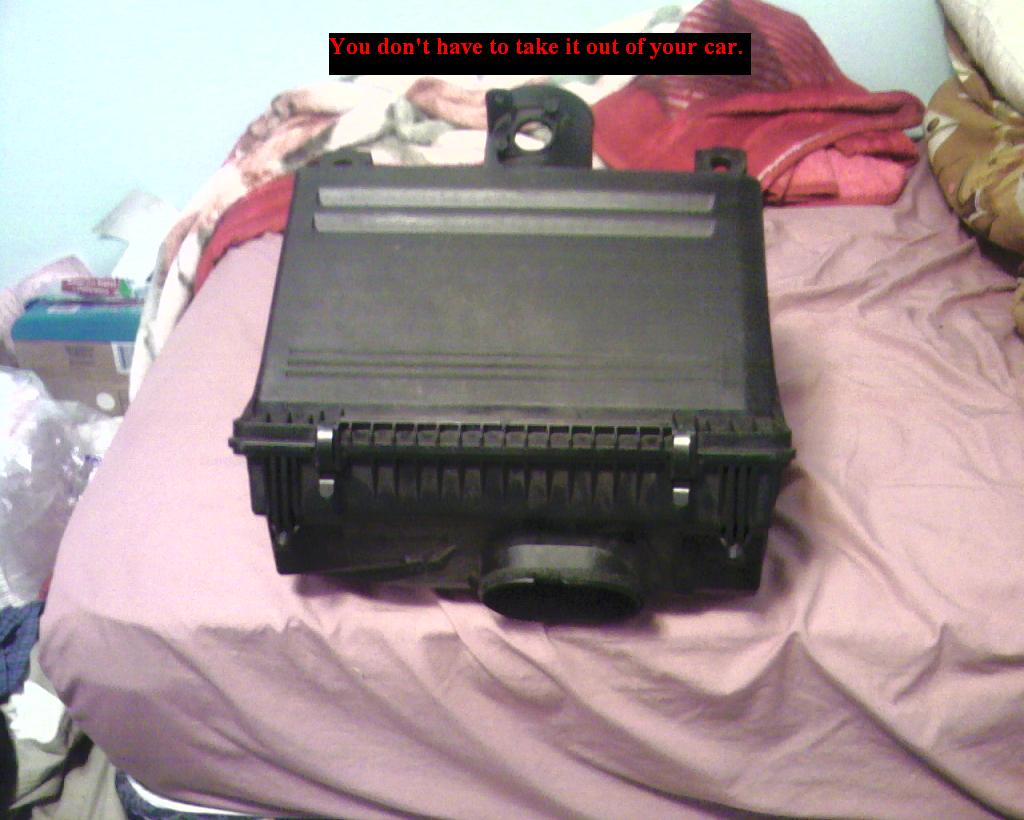
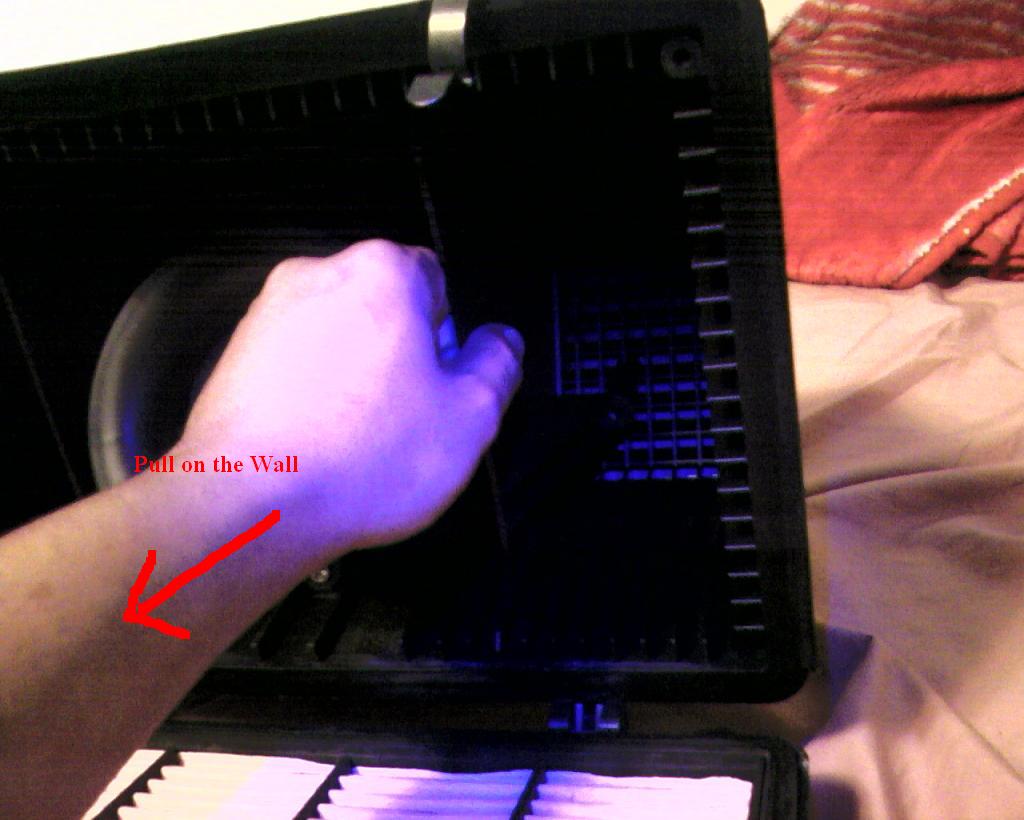
Well, the first step is to pull up the airbox (does not have to be detached from all the intake hoses, clamps, and wires).
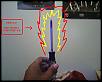
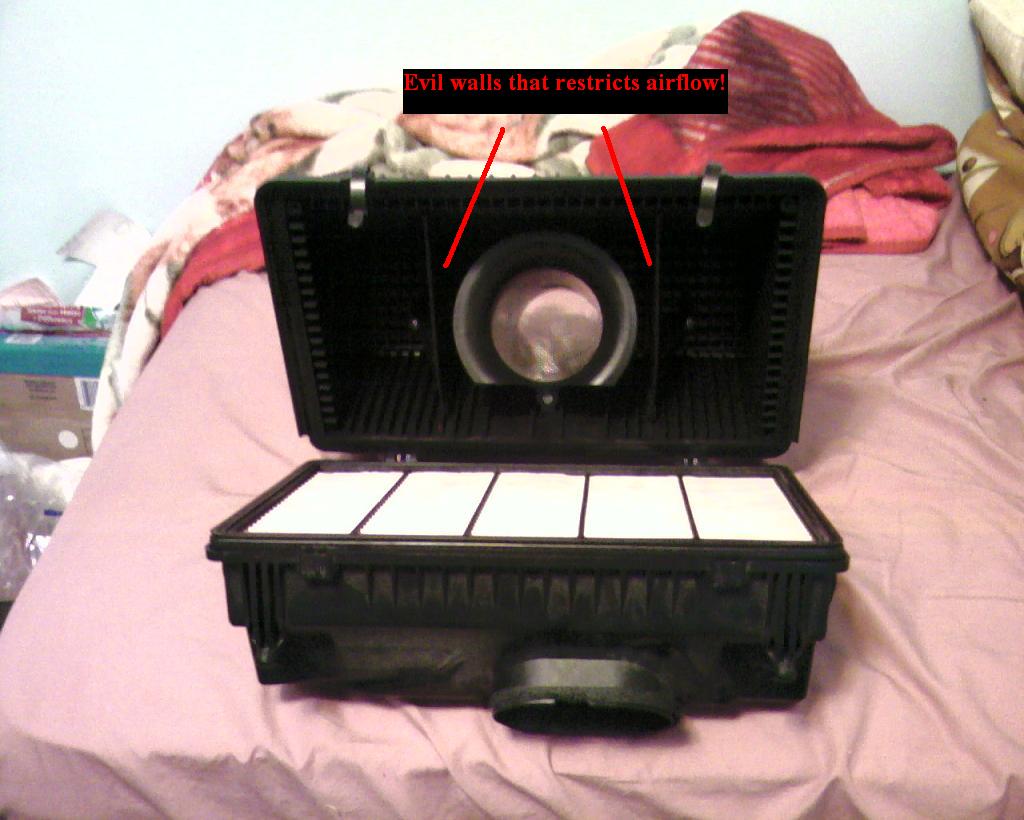
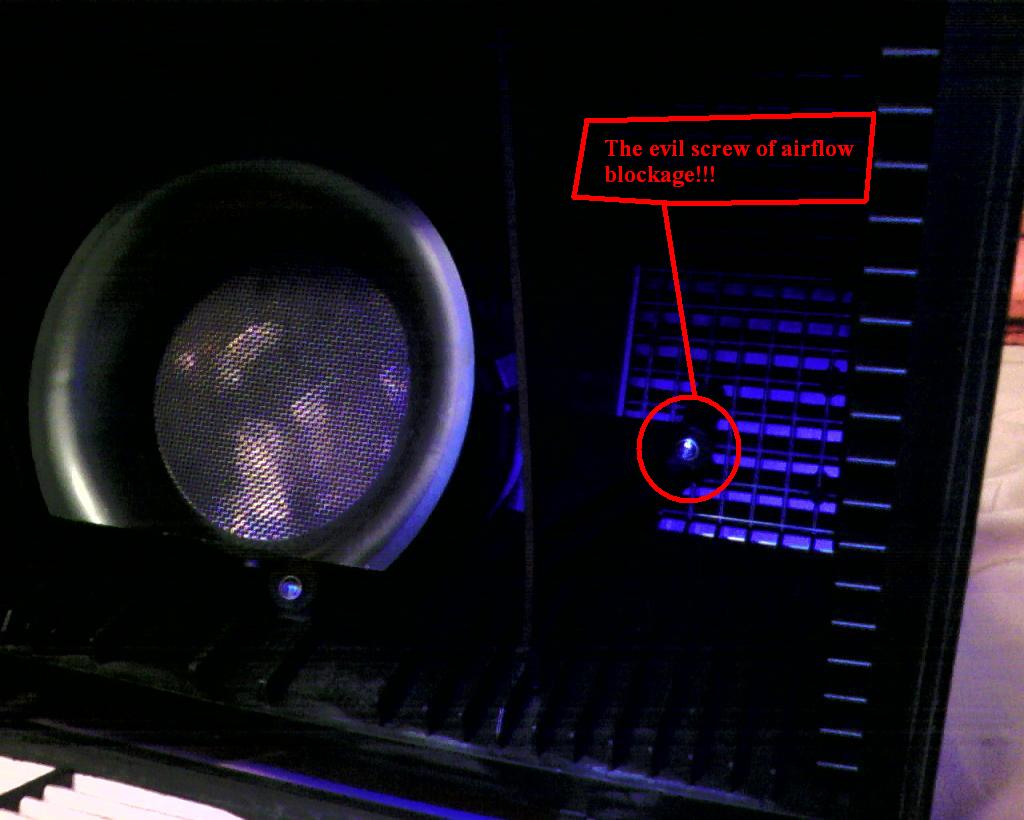
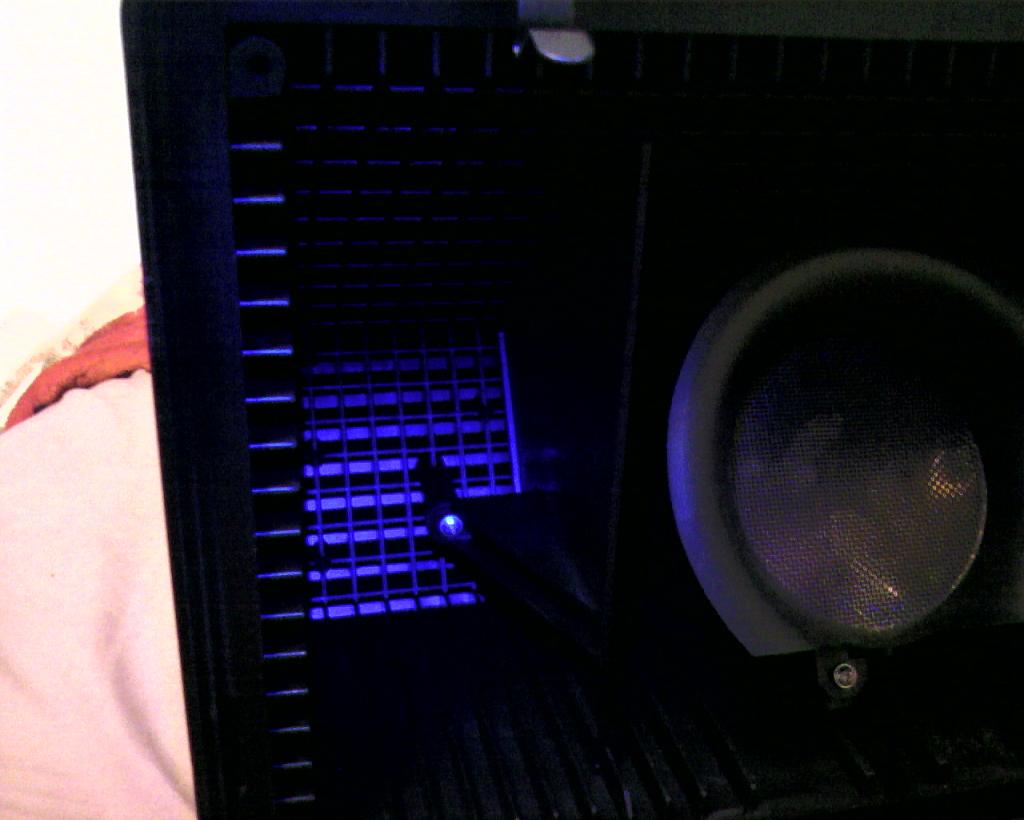
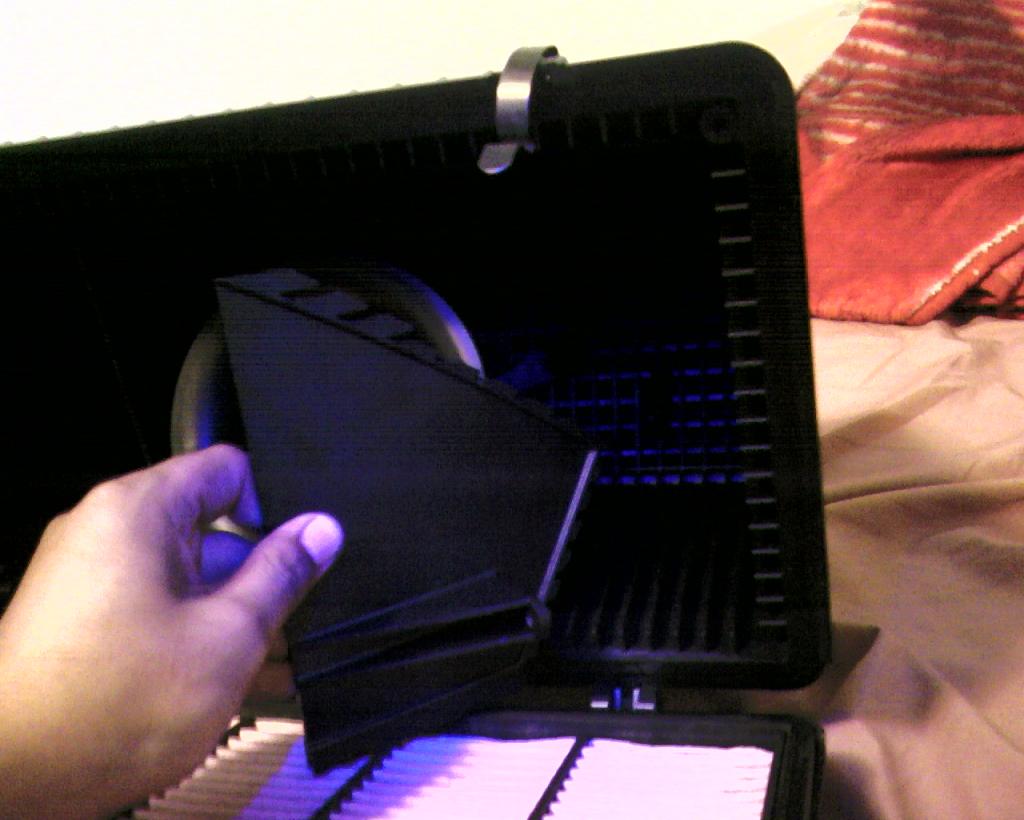
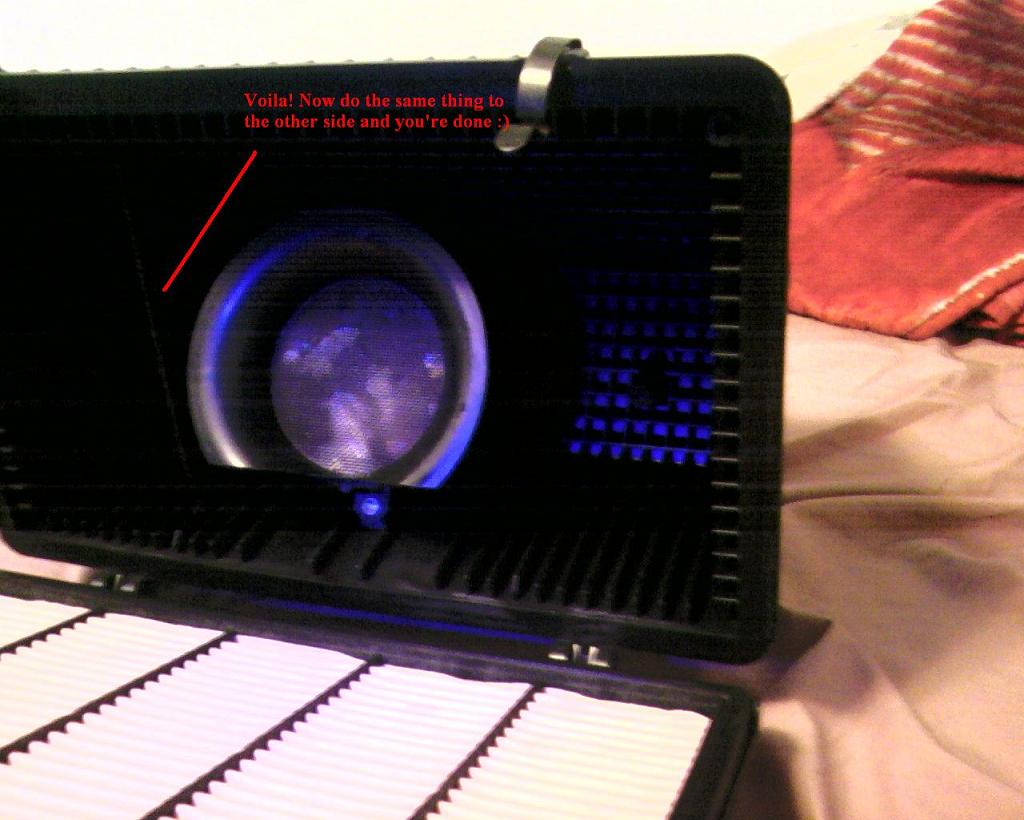
Then you open it, if you look towards the end of the air intake box, you'll notice two flaps. They look like this:
You'll notice 2 screws holding in 2 walls:
How to remove the airbox you ask? GO HERE
https://www.rx8club.com/showthread.php?t=144789
EDIT: REMEMBER TO RESET YOUR ECU! Some people claim that the idle somehow dropped or is rough. It will go away after about a hundred miles because the ECU needs to adjust to it. If you don't want to drive around like that for a hundred miles, do the ECU reset. This is recommended if you remove both the screens (what most people do).
Resetting procedure can be found HERE
https://www.rx8club.com/showpost.php...32&postcount=3
Tools:
A Phillips Screw Driver
Well, the first step is to pull up the airbox (does not have to be detached from all the intake hoses, clamps, and wires).
Then you open it, if you look towards the end of the air intake box, you'll notice two flaps. They look like this:
You'll notice 2 screws holding in 2 walls:
Last edited by Spinning Sushi; 05-16-2008 at 12:24 AM.

 11-05-2007, 12:53 AM
#4
Hummmmm...
Join Date: Jan 2006
Location: Brooklyn, NY
Posts: 979
Likes: 0
Received 0 Likes
on
0 Posts
Thanks for putting this up! I was following the other thread and now I want to have a go at removing the two walls.
I've never opened my intake box yet but I would have wondered the same thing if I did as brought up by the OP in the other thread about the presence of walls concentrating airflow just in the middle of the OEM filter.
I also thought you'd have to destroy or at least damage a component of the air box to get the 2 walls out.
11-05-2007, 01:02 AM
#5
Thanks for putting this up! I was following the other thread and now I want to have a go at removing the two walls.
I've never opened my intake box yet but I would have wondered the same thing if I did as brought up by the OP in the other thread about the presence of walls concentrating airflow just in the middle of the OEM filter.
I also thought you'd have to destroy or at least damage a component of the air box to get the 2 walls out.
I've never opened my intake box yet but I would have wondered the same thing if I did as brought up by the OP in the other thread about the presence of walls concentrating airflow just in the middle of the OEM filter.
I also thought you'd have to destroy or at least damage a component of the air box to get the 2 walls out.
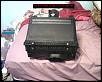
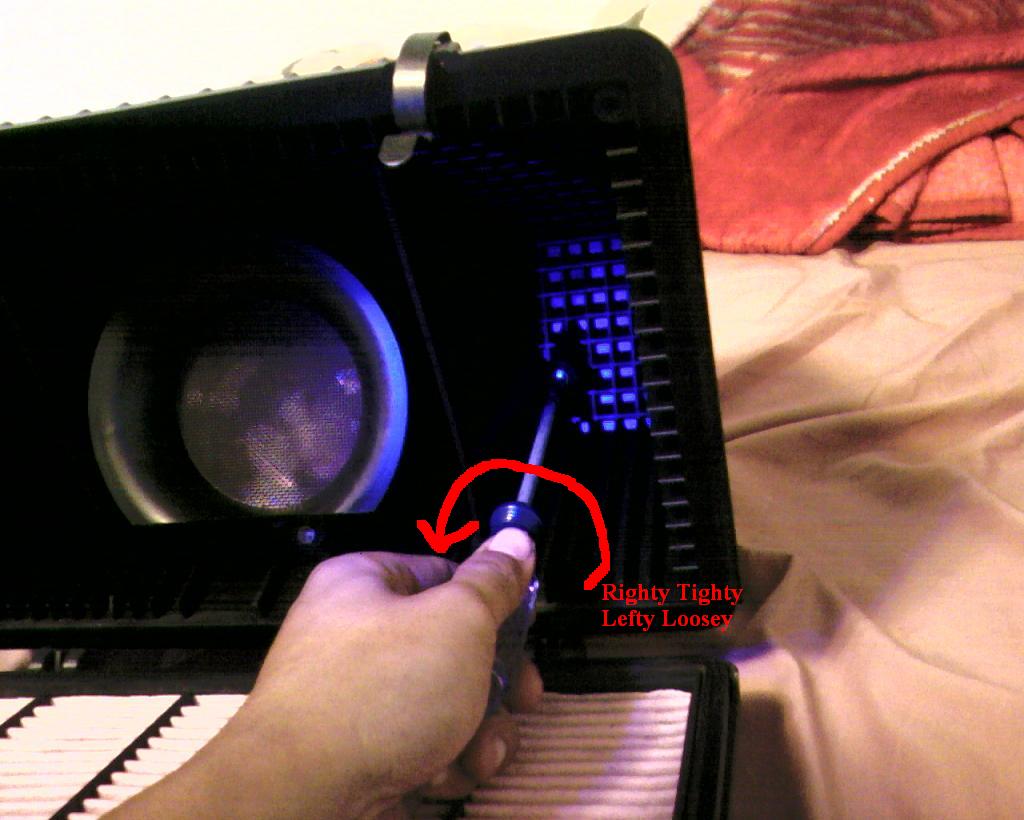
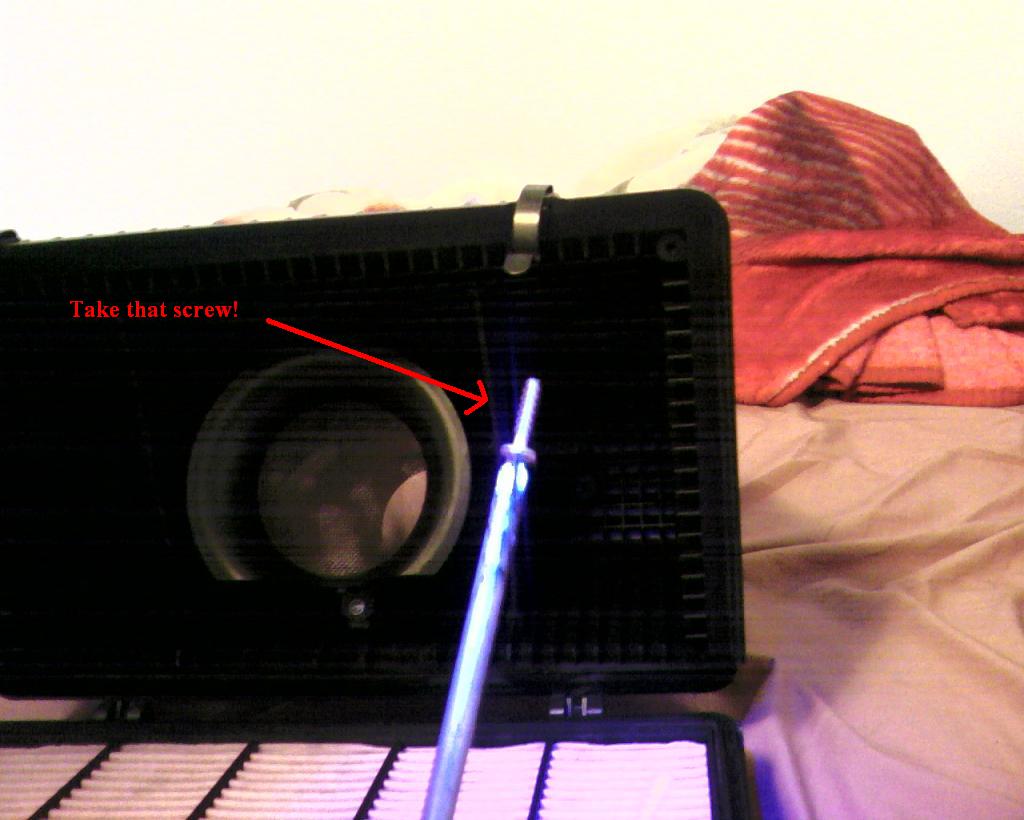
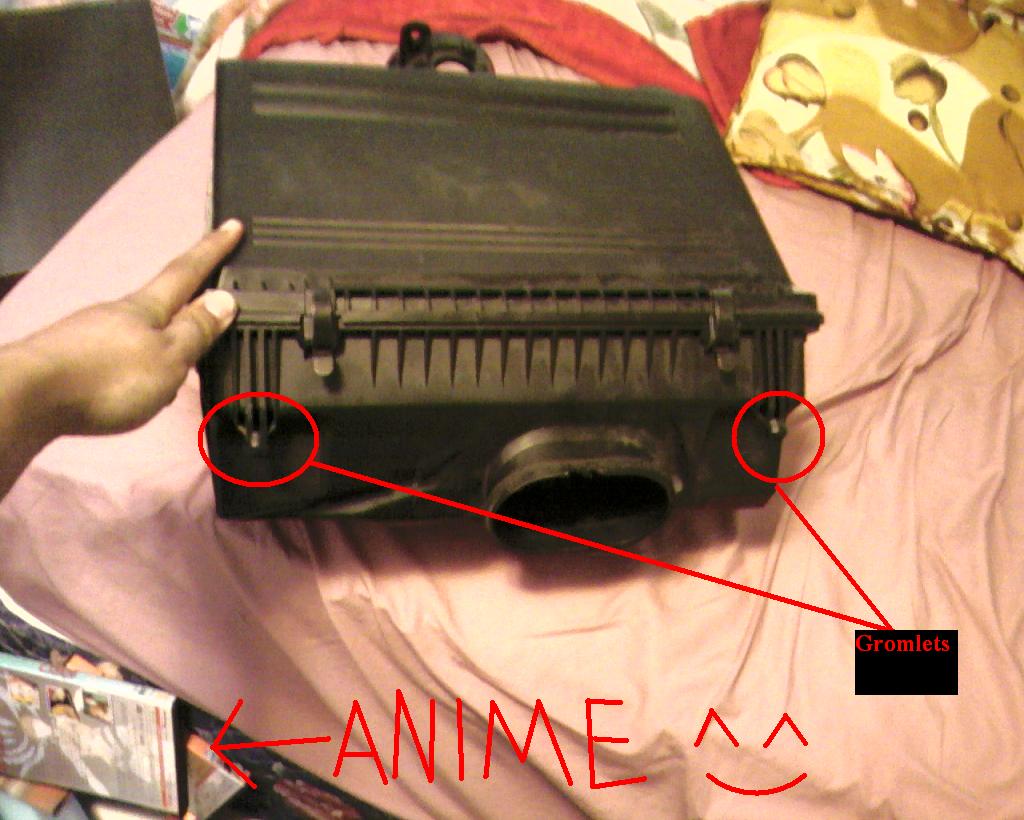
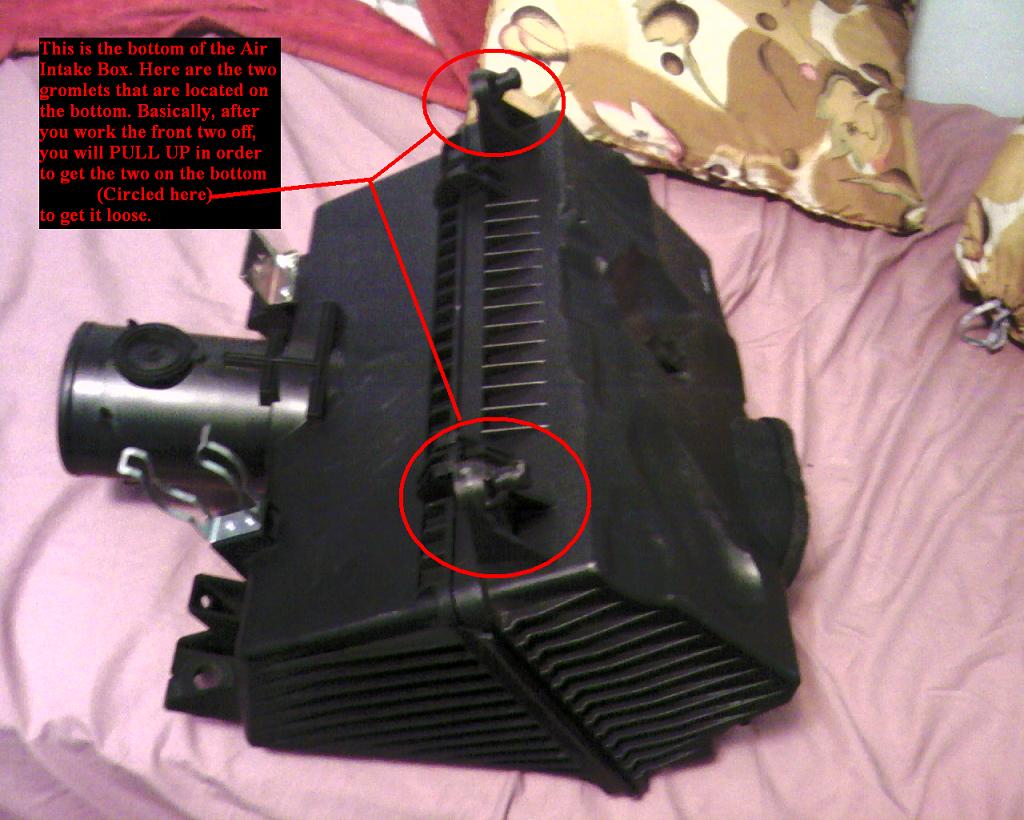
There's no damaging of the box at all, it's just two simple screws. Have you ever changed your air filter? If you have, you'll know how to get the box out. There are a total of four gromlets, two on the side and two on the bottom. You basically push and pull to get it loose, it takes some muscle
 Let me take a picture of it so you'll know what I'm talking about...
Last edited by Spinning Sushi; 11-05-2007 at 01:15 AM. Reason: Typo
 11-05-2007, 01:35 AM
#7
Hummmmm...
Join Date: Jan 2006
Location: Brooklyn, NY
Posts: 979
Likes: 0
Received 0 Likes
on
0 Posts
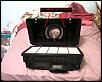
^ LOL at the anime disc. Thanks again for going into taking out the air box. My car just has 2,200 miles on the odo. so I haven't ventured into cleaning my filter yet.. plus it does look like some work to get it out.
Anyway, I've got Tuesday (Election Day) off work so that's my DIY day
I love how this is possible with the stock air box.. now I don't have to force myself into getting the RB Revi that removes:
1) the VFAD- hondas have VTEC, evos have active diff, AYC, etc.. I want this feature to stay (although arguably not important) LOL
2) one air screen (our engines, when new are already idling rougher than other gasoline engines)
3) my personal preference here- replaces the OEM air box cover which blends in well with a stock engine compartment with that of the RB.. I mean the rubber texture isn't even the same!
11-05-2007, 10:36 AM
#9
Registered User

Join Date: May 2007
Location: Arizona
Posts: 266
Likes: 0
Received 0 Likes
on
0 Posts
ima do this on tuesday thanks se3p for the very detailed instructions...how much louder is it with the walls removed? can you get a recording of itif you have a chance..if not its all good thnx
11-05-2007, 11:10 AM
#10
Banned

Join Date: Sep 2007
Location: Waukesha Wisconsin
Posts: 2,643
Likes: 0
Received 0 Likes
on
0 Posts
i will try to get a sound file on my phone of the inside, and then revving, but i suggest you take out both screens, my idle is more consistent now and is stable. Racing beat says you get 1-2 hp for every screen you take out. go ahead and try it, if it makes your idle bad, just put it back in. it only takes 5 mins.
 11-05-2007, 11:31 AM
#12
Banned
Join Date: Sep 2007
Location: Waukesha Wisconsin
Posts: 2,643
Likes: 0
Received 0 Likes
on
0 Posts
do it, it takes 10 mins, just pop out the air box, unsnap the clips, replace the air filter (if needed), take out the walls, take off the horn, remove the screens, put back together, and re-install
 11-05-2007, 11:54 AM
#14
Clemson, NOT Auburn

Join Date: Jun 2004
Location: Greenville, SC
Posts: 565
Likes: 0
Received 0 Likes
on
0 Posts
Please forgive my ignorance, but what screens are you talking about? and are they easy to remove?
11-05-2007, 11:57 AM
#15
Banned
Join Date: Sep 2007
Location: Waukesha Wisconsin
Posts: 2,643
Likes: 0
Received 0 Likes
on
0 Posts
when you open the box up, look down the horn and you will see two screens. They are farily easy to take out, first, you unscrew the three screws around the horn, then pop the horn off the tube while trying not to break the little tabs that hold it on, then take that screen off, then while the tube is off, take a screwdriver and and pop off the other one. if this confuses you, when you take it apart, you will see, its really easy.

 11-05-2007, 01:23 PM
#19
Registered

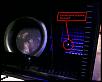
I must point out that this does not make the stock intake perform like the RB intake since it doesn't deal with the single biggest problem in the stock box. That would be the bell mouth inlet on the air intake tube behind the filter. You'll notice that the bottom is cut off. This is because it hits the air filter. However this isn't good for flow either. RB's intake has a full bell mouth. It's just inside the filter.
Now saying all that, no intake gives much of a power gain so whether or not an aftermarket intake is money well spent is a subjective matter that each person has to make on their own. If keeping the stock airbox is your preferred method then I see no reason not to take the walls out of it. At least it's free!
Now saying all that, no intake gives much of a power gain so whether or not an aftermarket intake is money well spent is a subjective matter that each person has to make on their own. If keeping the stock airbox is your preferred method then I see no reason not to take the walls out of it. At least it's free!
11-05-2007, 01:39 PM
#20

Anyway - now what you need to do is get the racing beat duct and remove your VFAD . If any intake out there gives a better result after doing all 6 mods below I'd be very surprised.
1 - remove baffles
2 - remove screens
3 - fit K&N drop in
4 - Remove VFAD
5 - Modify the VFAD to fit the duct - see link below
6 - Fit RB ram air duct
I've been running this setup for over a year now - apart from the 2nd screen which I took out about 3 months ago.
https://www.rx8club.com/series-i-aftermarket-performance-modifications-23/racing-beat-duct-factory-airbox-97962/
Last edited by Brettus; 11-05-2007 at 01:55 PM.
11-05-2007, 01:45 PM
#21
Power!!

I thought it was smart to keep at least 1 screen to help straighten the airflow over the MAF sensor so it gets a more accurate reading. Any thoughts on keeping 1 vs. removing them all? I'm thinking you should keep at least 1 to perform it's intended job. I don't think Mazda put these in just to make the car slower.
The following users liked this post:
rob babicki (12-09-2020)
11-05-2007, 01:53 PM
#22
I ran with one screen only for a year and one day found it was torn so took it out as well . Car runs flawlessly . There is a very slight stumble at idle every 10-15 seconds which I'm pretty sure was there before I did any mods .
I think Mazda put those screens in there to stabilise the airflow and give a more accurate reading for the Maf . Maybe it does that but I have not had any issues .
I think Mazda put those screens in there to stabilise the airflow and give a more accurate reading for the Maf . Maybe it does that but I have not had any issues .
11-05-2007, 02:17 PM
#23

I thought it was smart to keep at least 1 screen to help straighten the airflow over the MAF sensor so it gets a more accurate reading. Any thoughts on keeping 1 vs. removing them all? I'm thinking you should keep at least 1 to perform it's intended job. I don't think Mazda put these in just to make the car slower.
I removed both along with the lower portion of the air box and replaced it with a cone filter. The car is much louder and run very smooth, especially on these cooler days we are having in miami (not the coldest but mid 70's to mid 60's is very nice for the car.)
Ive had the car this way for more than a year now and its still goes strong.
11-05-2007, 02:32 PM
#24
Clemson, NOT Auburn
Join Date: Jun 2004
Location: Greenville, SC
Posts: 565
Likes: 0
Received 0 Likes
on
0 Posts
I removed both along with the lower portion of the air box and replaced it with a cone filter. The car is much louder and run very smooth, especially on these cooler days we are having in miami (not the coldest but mid 70's to mid 60's is very nice for the car.)
Ive had the car this way for more than a year now and its still goes strong.
Ive had the car this way for more than a year now and its still goes strong.
11-05-2007, 03:36 PM
#25
Basically what I did was, I removed the lower portion of the box, removed the mouth inlet and screens and put a cone filter where the inlet is, now that its just the tube. I used a filter called power adder since they give you 3 different size adjustments (which the 2nd one will fit on the tube). So now I dont have to worry about the VFAD, I only spent 30 bucks for the filter, and 10 minutes of my time, and the engine sounds a hell of alot louder that it makes people think I have heavily modded the car.
I also track the car at autocrosses and it runs the car cooler than the airbox does in my opinion. (I've touched the intake tube after the runs just for the hell of it and my set up made it feel cooler.)
I will snap a pic for you either tonight or tomorrow.